blog
How to Deploy Percona XtraDB Cluster

Percona XtraDB Cluster is a cluster solution based on the synchronous replication handled by Galera library. It is one of the most common high availability solutions for MySQL. It supports multiple writers and the conflict resolution, making failovers a breeze – no need to check the node’s position, promote a master, reslave remaining slaves. With PXC, just like with other Galera-based solutions, you just connect to another node and continue sending traffic. All of it makes it a very popular solution in MySQL world. Let’s take a look at how you can deploy Percona XtraDB Cluster.
Before we start talking about the deployment, let’s focus first on the requirements regarding high availability. The way the clustering works implies that you should have an odd number of nodes and a three-node cluster is a minimum that allows you to automatically handle a failure of a single node. We will not go into the details here, we have blogs that cover the topic of high availability in Galera in detail, but we should assume three nodes as a minimal deployment.
How to Deploy Percona XtraDB Cluster?
Manual Deployment
There are several ways in which we can deploy a PXC. For starters, manual deployment – you want to start with a single node, bootstrap the cluster off that node and then add additional nodes to the cluster through proper configuration. This is a perfectly valid deployment method yet it requires some knowledge of the process and, the most important bit, time to perform it. Percona, of course, has everything covered in the documentation, but when you look at it, you will find that it is not the easiest process, especially when you are not familiar with Percona XtraDB Cluster or Galera in general. Sure, all steps are nicely explained but there is still a room for human error and all different troubles and, most importantly, delays may be a result of it.
Using Docker
If you use a Docker in your environment, you may consider using PXC as Docker containers. Sure, databases as all stateful services are not that easy to use within containers but it becomes more and more popular. Percona provides us with Docker images and instructions on how to use them – all can be found in the documentation. Another alternative is to use Percona Kubernetes Operator for PXC – if you use Kubernetes to orchestrate your Docker environment, utilizing the operator will help you to manage the cluster. One of my colleagues has written a blog that explains how you can use Percona Kubernetes Operator for PXC in a Google Cloud kubernetes environment. Using the operator reduces the burden of managing everything by hand as well as introducing a solution that you can depend on instead of configuring the whole environment by hand (even if in Docker).
Using Infrastructure Orchestration Tools
As you see, this leaves us with two main ways of setting up PXC – automated for Docker and manual for other types of deployments. Of course, one may argue that there are ansible playbooks or chef cookbooks available out there but, let’s be honest, this, most likely, won’t work from the get-go. First of all, you’ll waste a lot of time to find something that resembles a complete solution and then, most likely, you will have to introduce changes to customize the playbook to your liking and to your environment. This alone requires knowledge not only of PXC or Galera but also of the infrastructure orchestration tool that’s going to be used to deploy PXC. For some people it is a viable option, for others, not so much.
ClusterControl
Here comes ClusterControl. It allows you to deploy, among others, Percona XtraDB Cluster. ClusterControl does not discriminate – all environments have been created equal and as long as CC can log into them using SSH and install software using package manager, it will work just fine with bare metal, virtual machines or containers. The deployment requires some input from the user but after all data is collected, the deployment itself is fully automated. Let’s take a look at how it works.
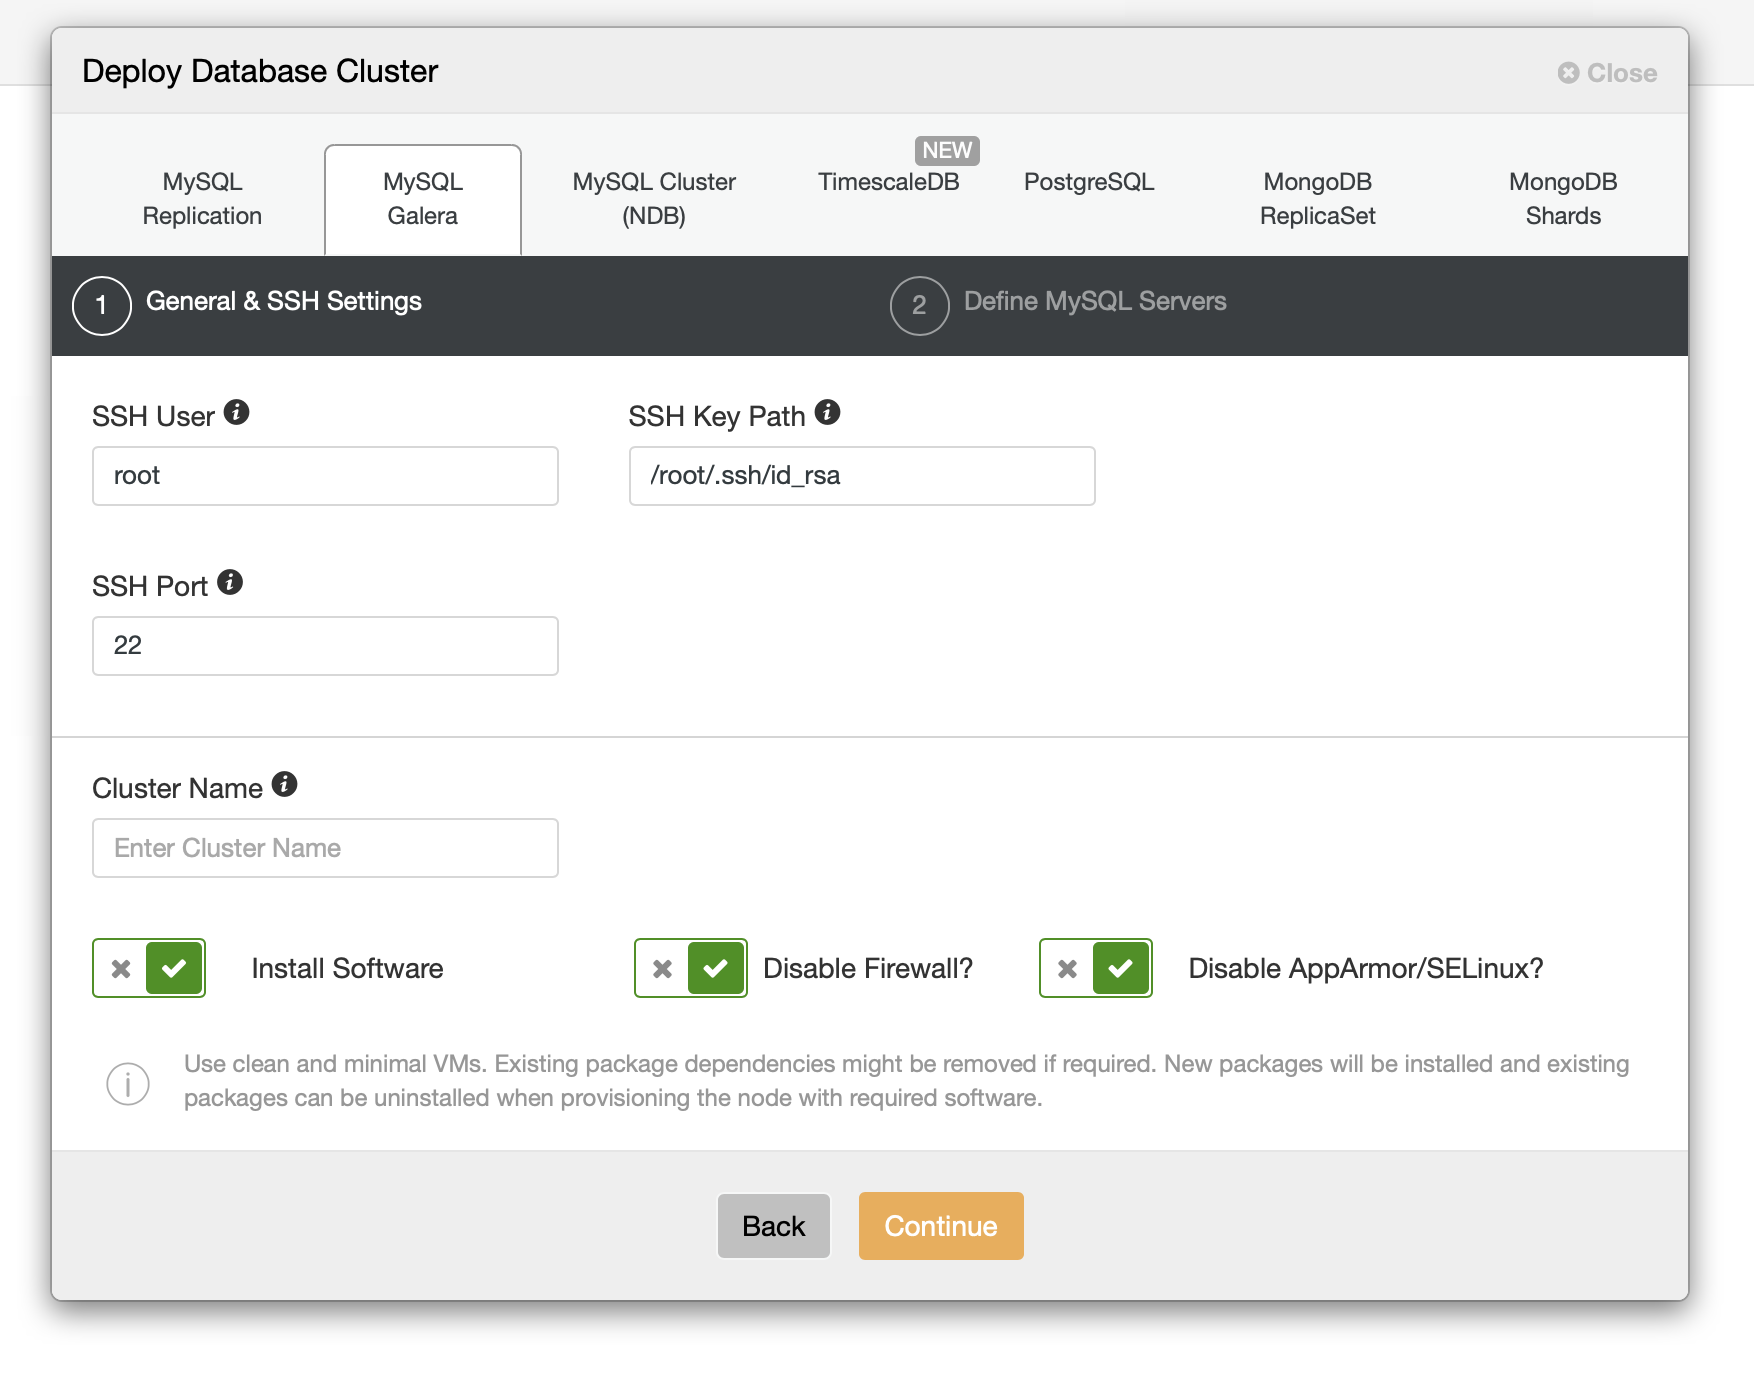
At the beginning, as mentioned above, you have to define SSH connectivity. It has to be a passwordless key-based SSH using either root user or a sudo user (with or without sudo password).
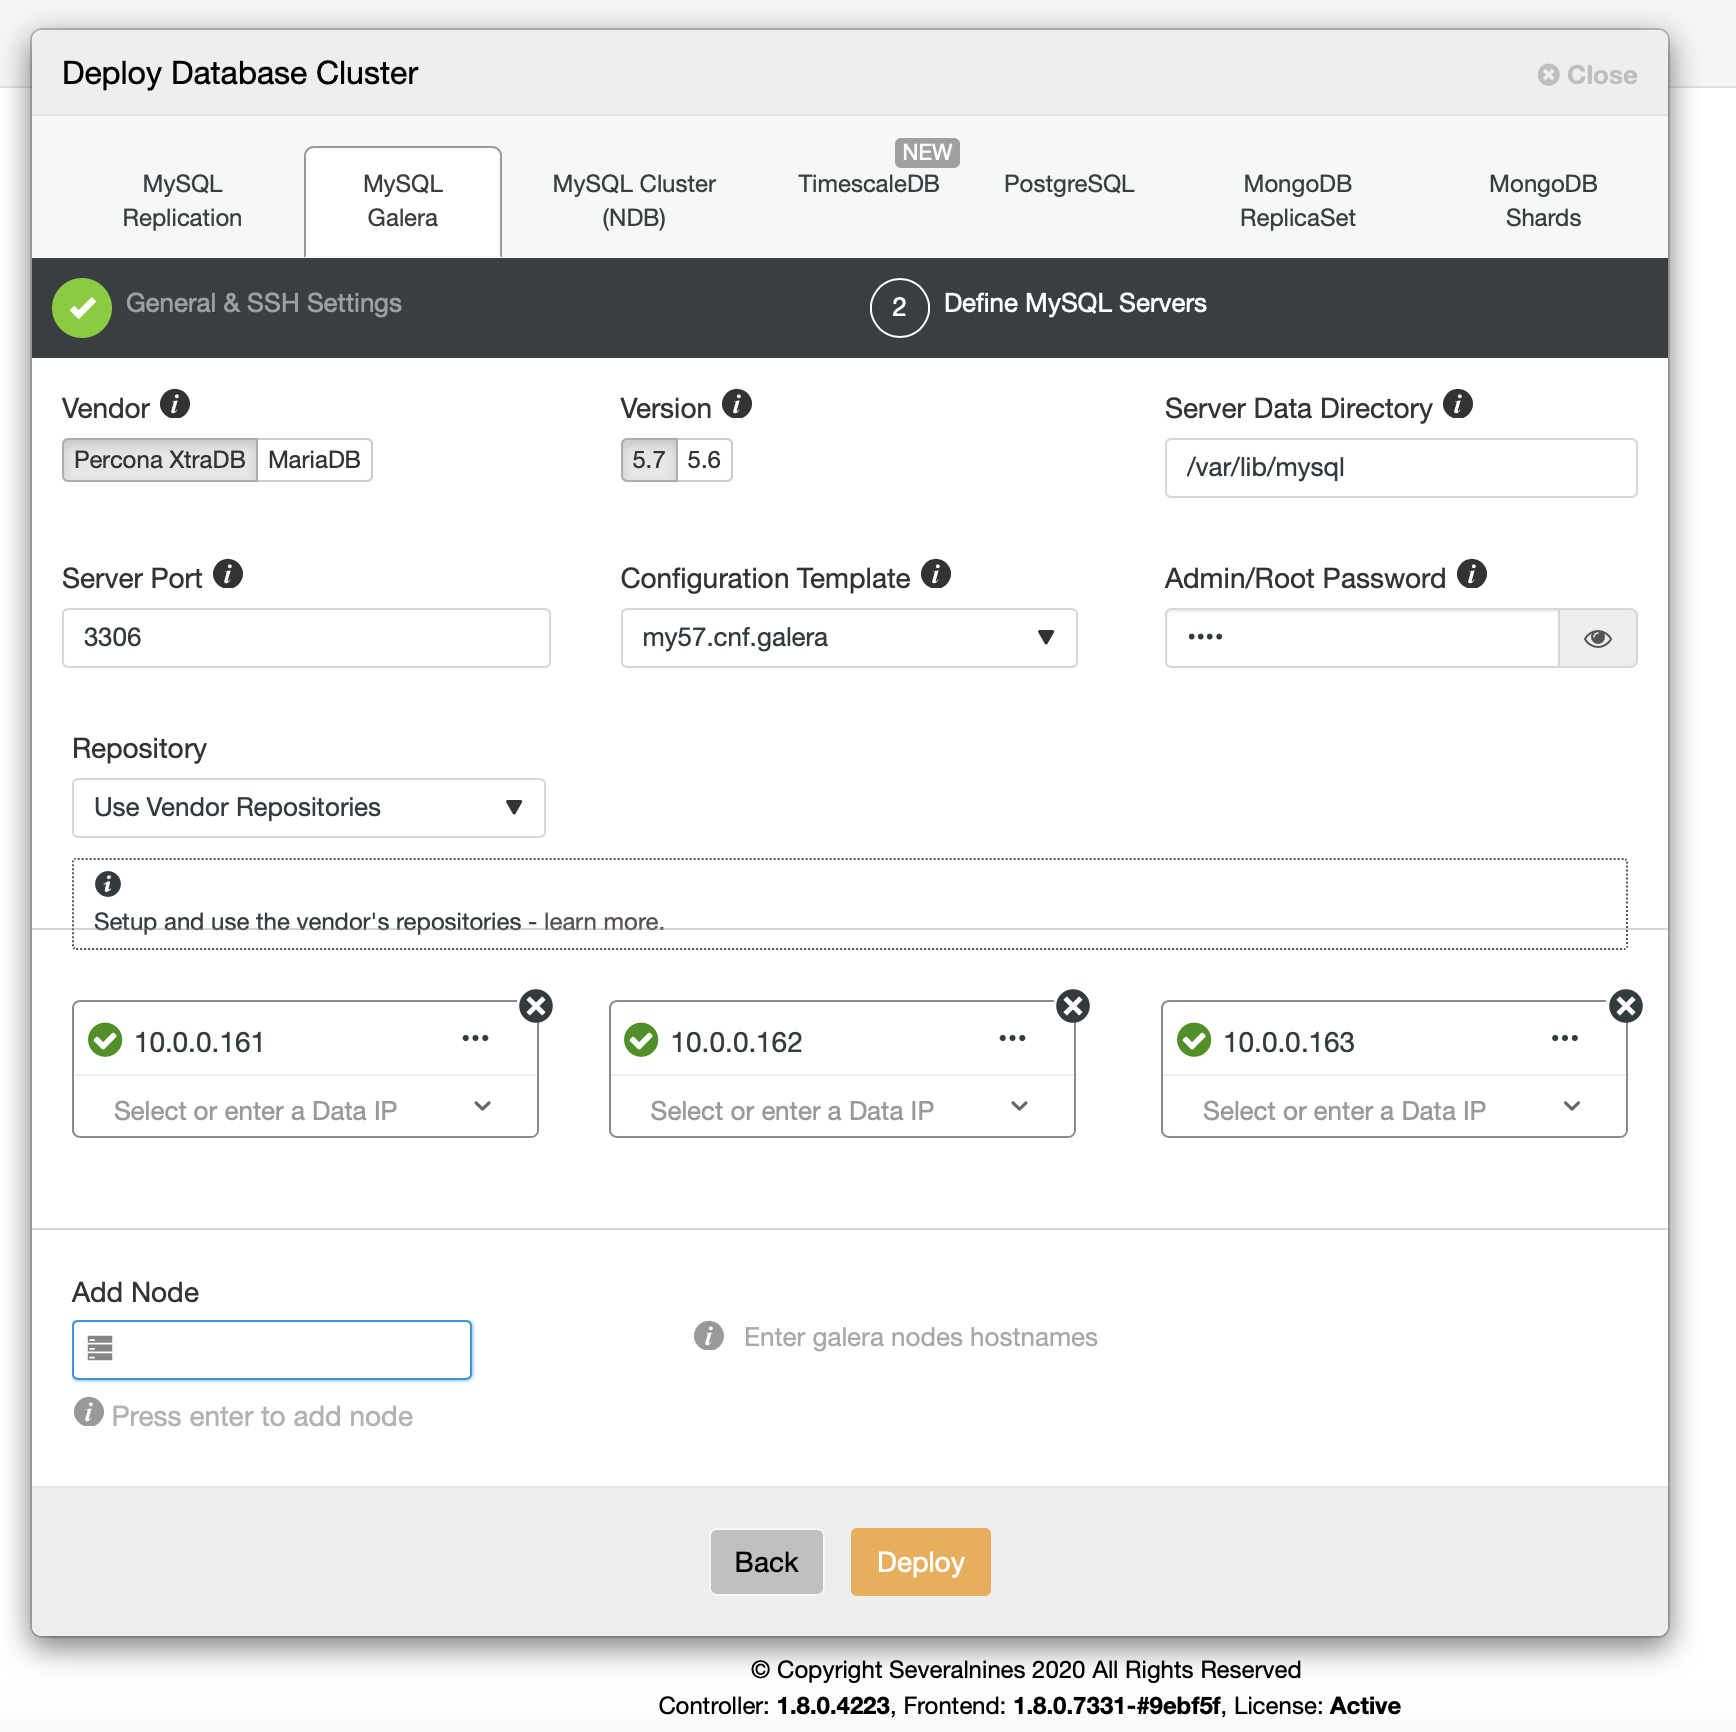
As the next step you have to pick the vendor and version, define password for PXC root user and pick the hosts to install the cluster on. As of now, ClusterControl supports PXC 5.6 and PXC 5.7 with PXC 8.0 coming in the next release of ClusterControl (1.8.1). As you can see, the nodes are tested for SSH connectivity and if any issue shows up, it will be mentioned at this step. Once you are done with completing this form, you can click “Deploy” and enjoy your time as ClusterControl will set up the cluster for you.
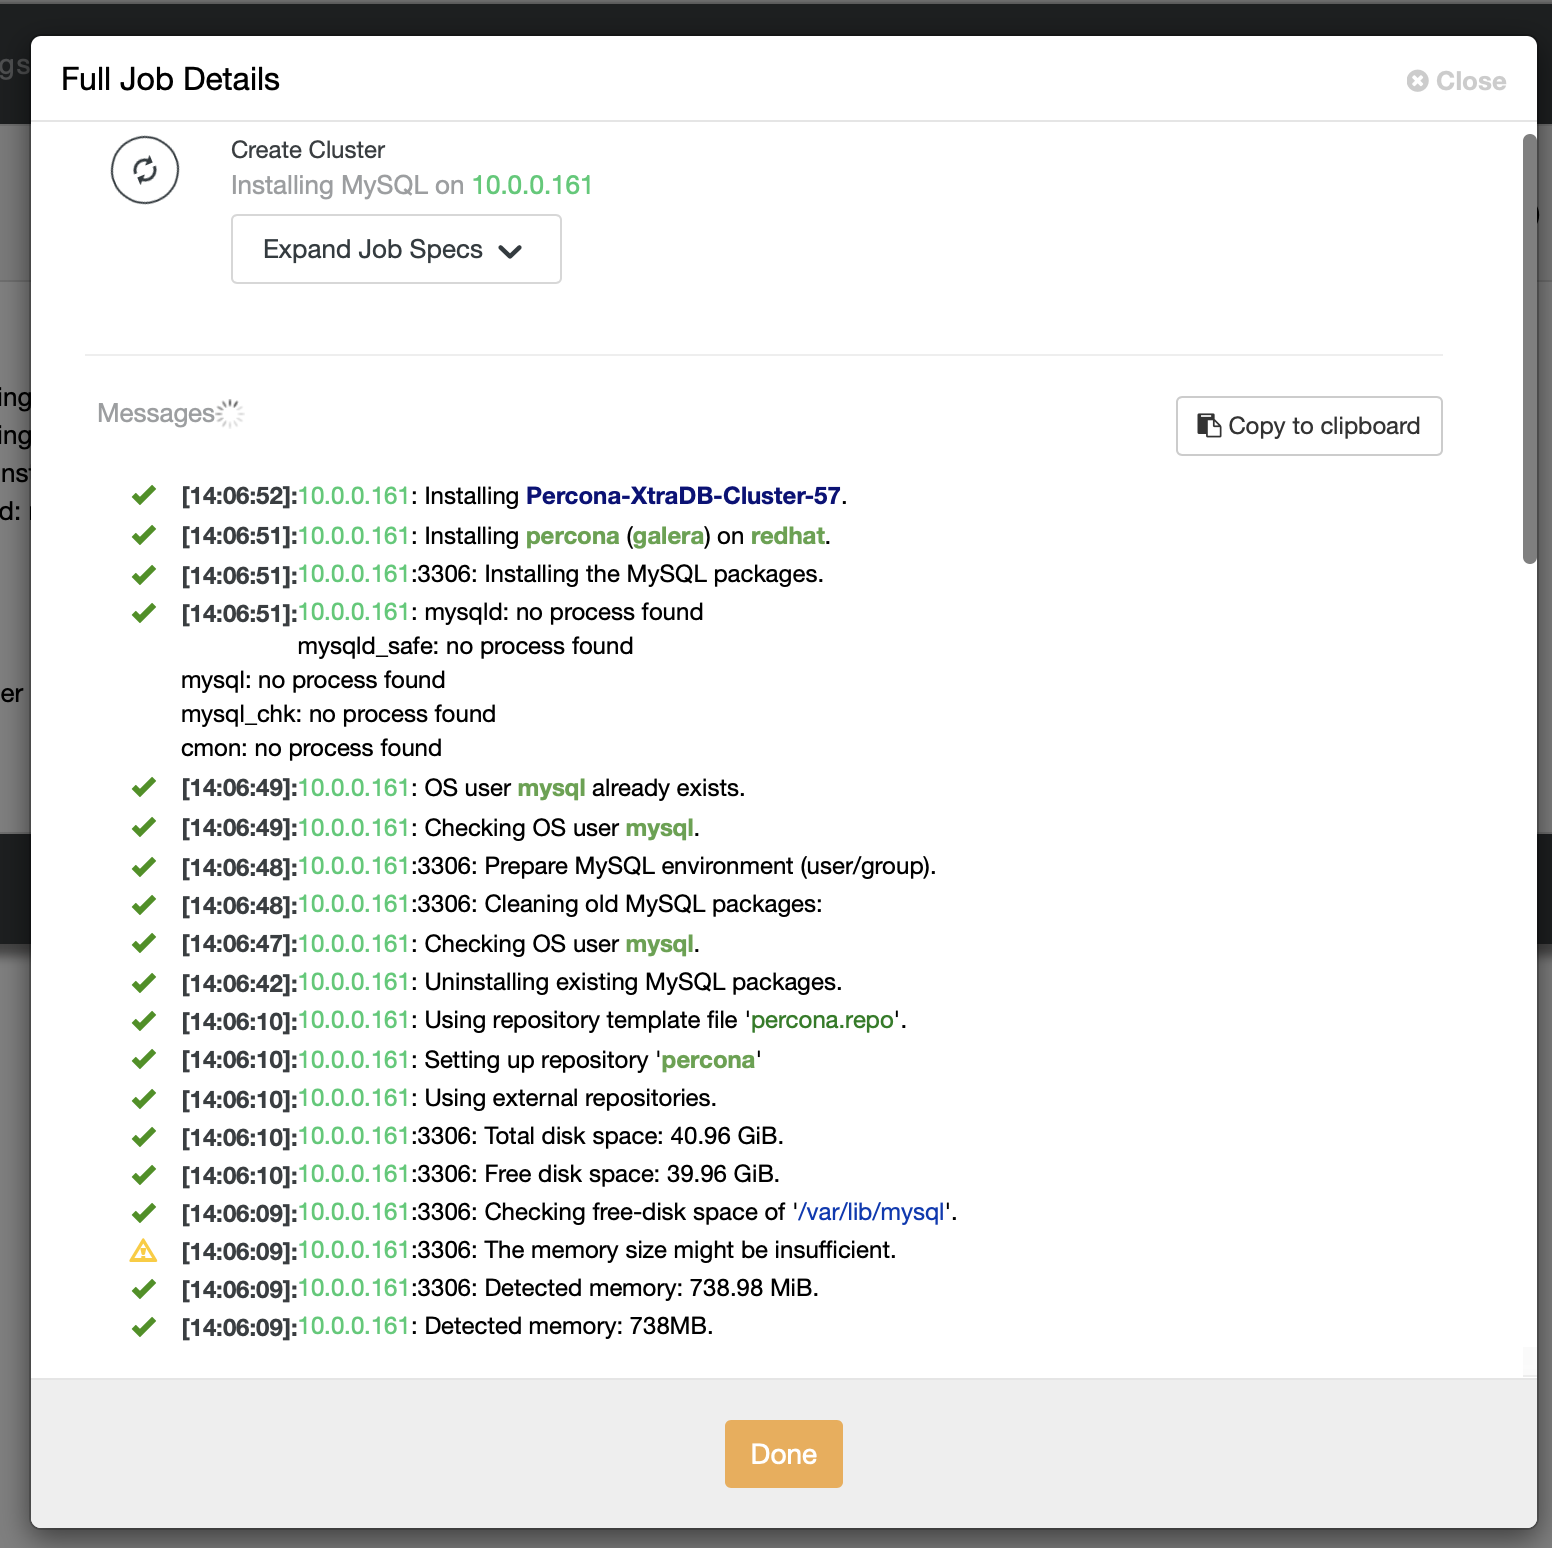
If you want, you can track the progress of your deployment, following the steps ClusterControl is performing to set up your Percona XtraDB Cluster.
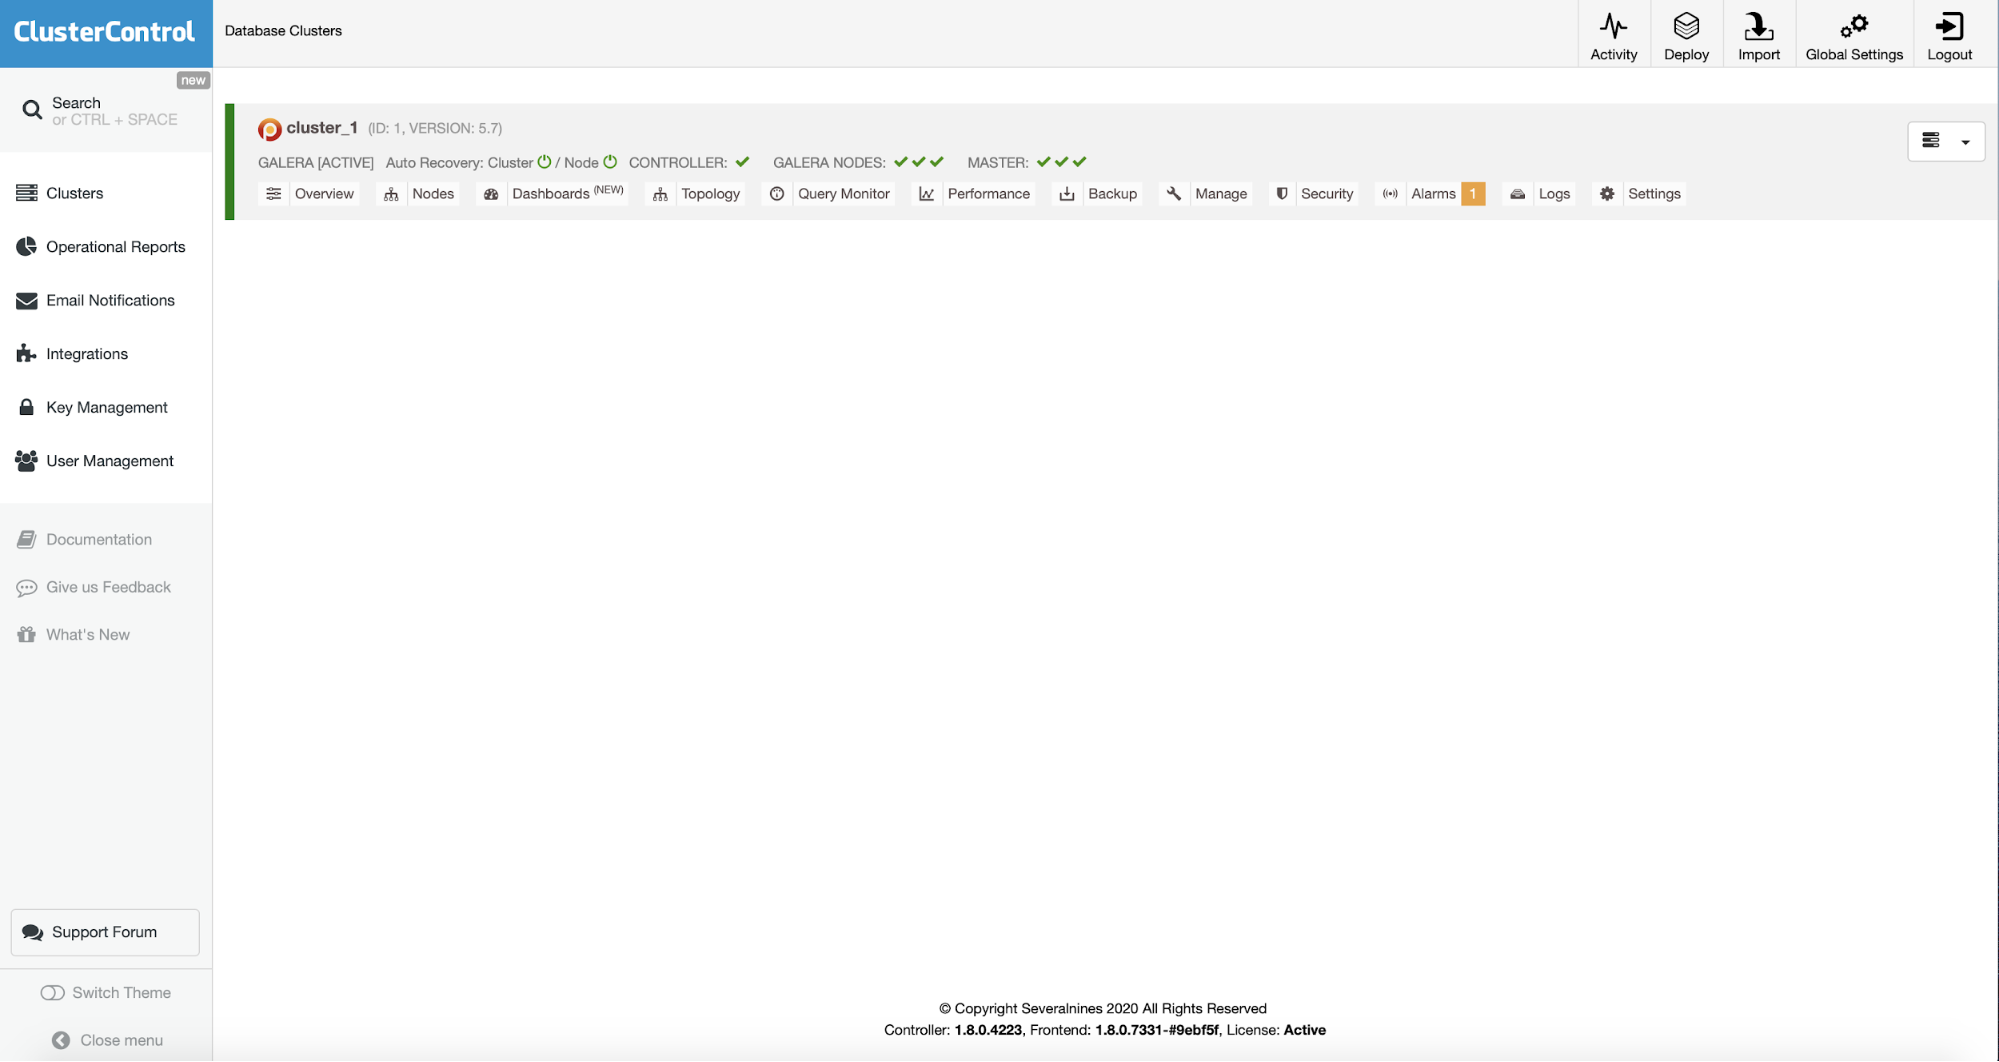
When everything is completed, you shall see the new cluster on the cluster list in ClusterControl, making it available for managing from within the ClusterControl platform.
If you prefer to use command line rather than the UI or if you want to integrate ClusterControl into your existing deployment scripts, you can deploy PXC using ClusterControl CLI. The CLI equivalent of the deployment that we initiated via UI would be to run following command:
s9s cluster

--create

--cluster-type=galera

--nodes="10.0.0.161,10.0.0.162,10.0.0.163"

--vendor=percona

--provider-version=5.7

--db-admin=root

--db-admin-passwd=pass

--os-user=root

--os-key-file=/root/.ssh/id_rsa

--verbose

--wait
Conclusion
As you can see, ClusterControl provides you with multiple ways to deploy Percona XtraDB Cluster, we hope you’ll find it an useful tool to spin up new PXC instances in an efficient and easy way. You can check it for yourself by downloading ClusterControl.


