blog
Creating a Cold Standby for PostgreSQL Using Amazon AWS

The need to achieve database High Availability is a pretty common task, and often a must. If your company has a limited budget, then maintaining a replication slave (or more than one) that is running on the same cloud provider (just waiting if it’s needed someday) can be expensive. Depending on the type of application, there are some cases where a replication slave is necessary to improve the RTO (Recovery Time Objective).
There is another option, however, if your company can accept a short delay to get your systems back online.
Cold Standby, is a redundancy method where you have a standby node (as a backup) for the primary one. This node is only used during a master failure. The rest of the time the cold standby node is shut down and only used to load a backup when needed.
To use this method, it’s necessary to have a predefined backup policy (with redundancy) according to an acceptable RPO (Recovery Point Objective) for the company. It may be that losing 12 hours of data is acceptable for the business or losing just one hour could be a big problem. Every company and application must determine their own standard.
In this blog, you’ll learn you how to create a backup policy and how to restore it to a Cold Standby Server using ClusterControl and its integration with Amazon AWS.
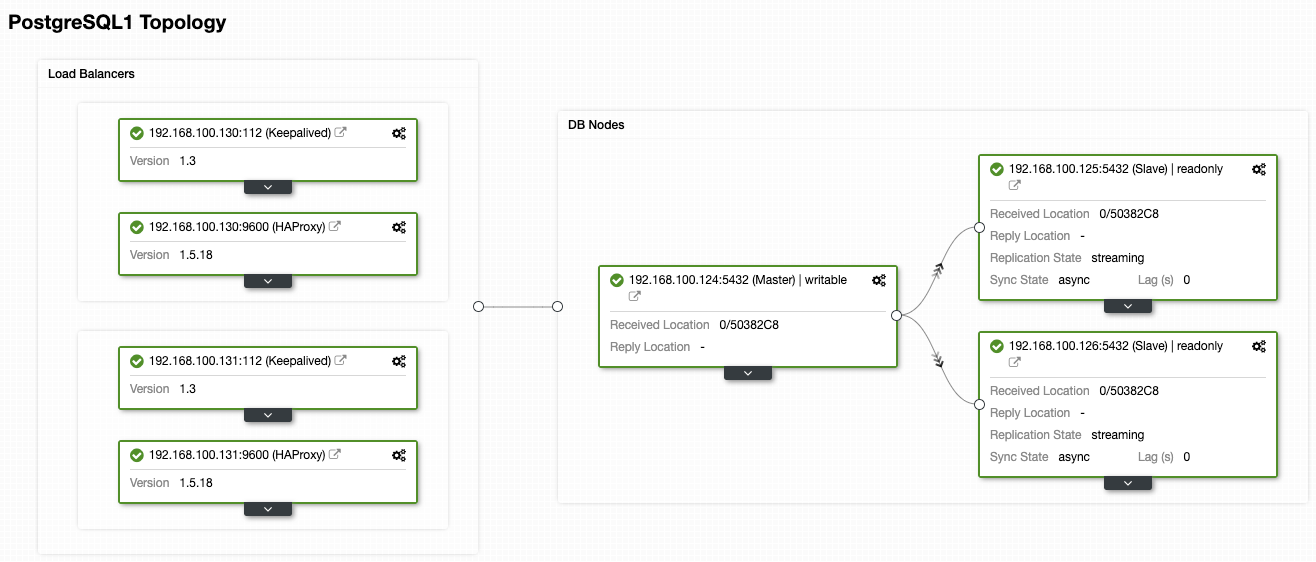
For this blog, we’ll assume that you already have an AWS account and ClusterControl installed. While we’re going to use AWS as the cloud provider in this example, you can use a different one. We’ll use the following PostgreSQL topology deployed using ClusterControl:
- 1 PostgreSQL Primary Node
- 2 PostgreSQL Hot-Standby Nodes
- 2 Load Balancers (HAProxy + Keepalived)
Creating an Acceptable Backup Policy
The best practice for creating this type of policy is to store the backup files in three different places, one stored locally on the database server (for faster recovery), another one in a centralized backup server, and the last one in the cloud.
You can improve on this by also using full, incremental and differential backups. With ClusterControl you can perform all the above best practices, all from the same system, with a friendly and easy to use UI. Let’s start by creating the AWS integration in ClusterControl.
Configuring the ClusterControl AWS Integration
Go to ClusterControl -> Integrations -> Cloud Providers -> Add Cloud Credentials.
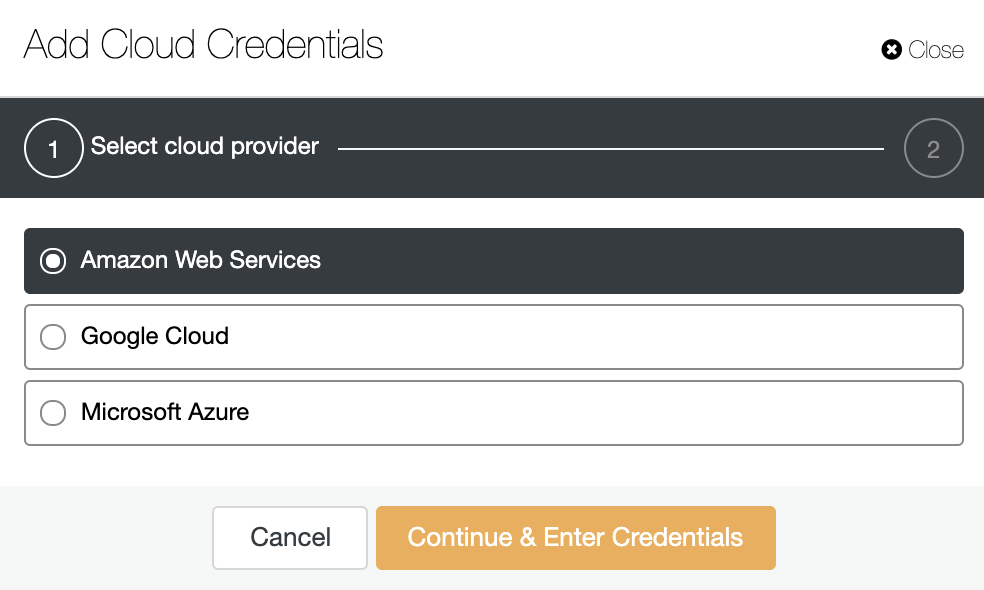
Choose a cloud provider. We support AWS, Google Cloud or Azure. In this case, chose AWS and continue.
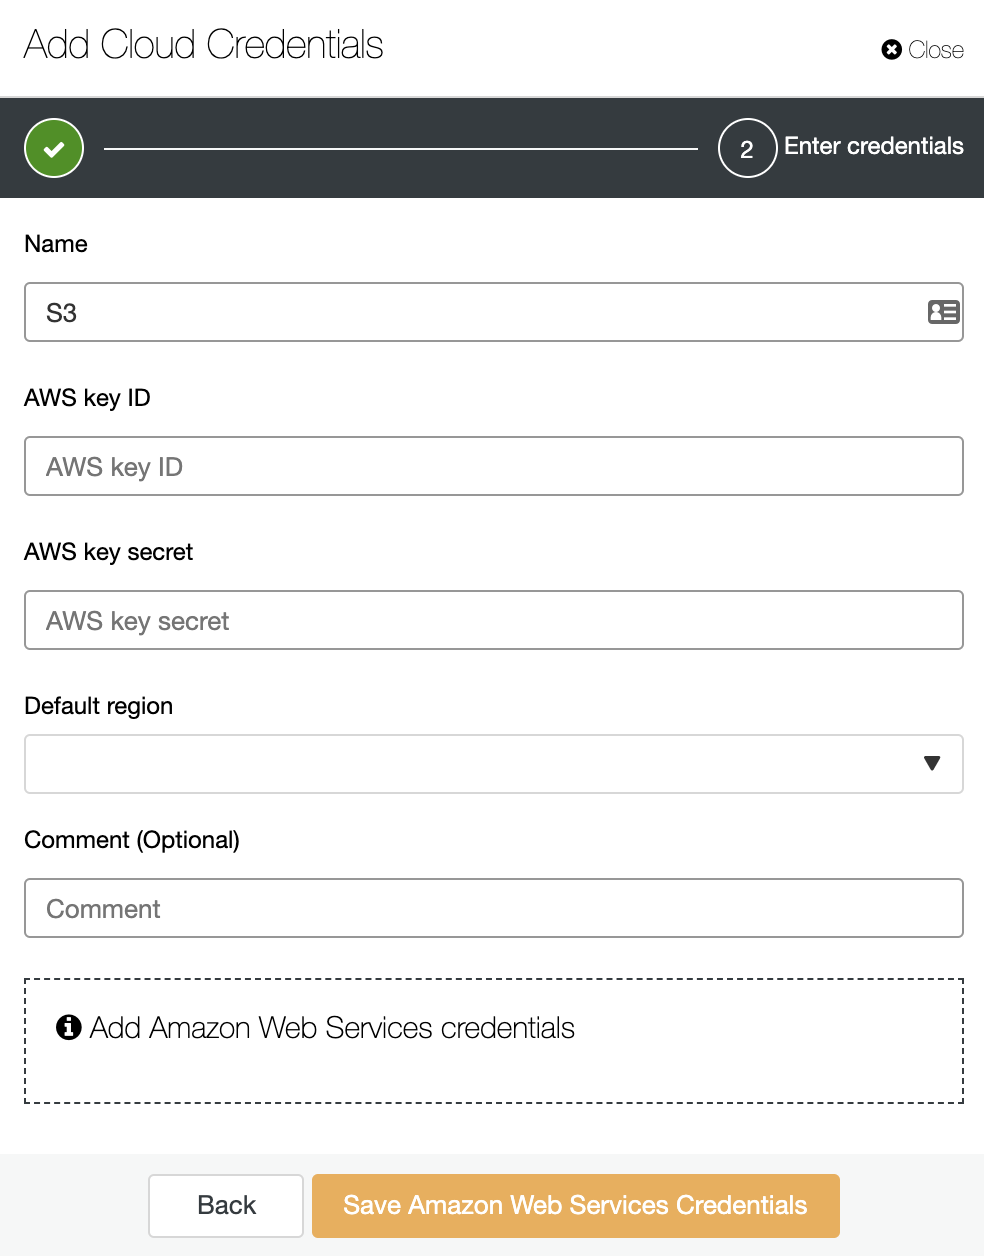
Here you need to add a Name, a Default region, and an AWS key ID and key secret. To get or create these last ones, you should go to the IAM (Identity and Access Management) section on the AWS management console. For more information, you can refer to our documentation or AWS documentation.
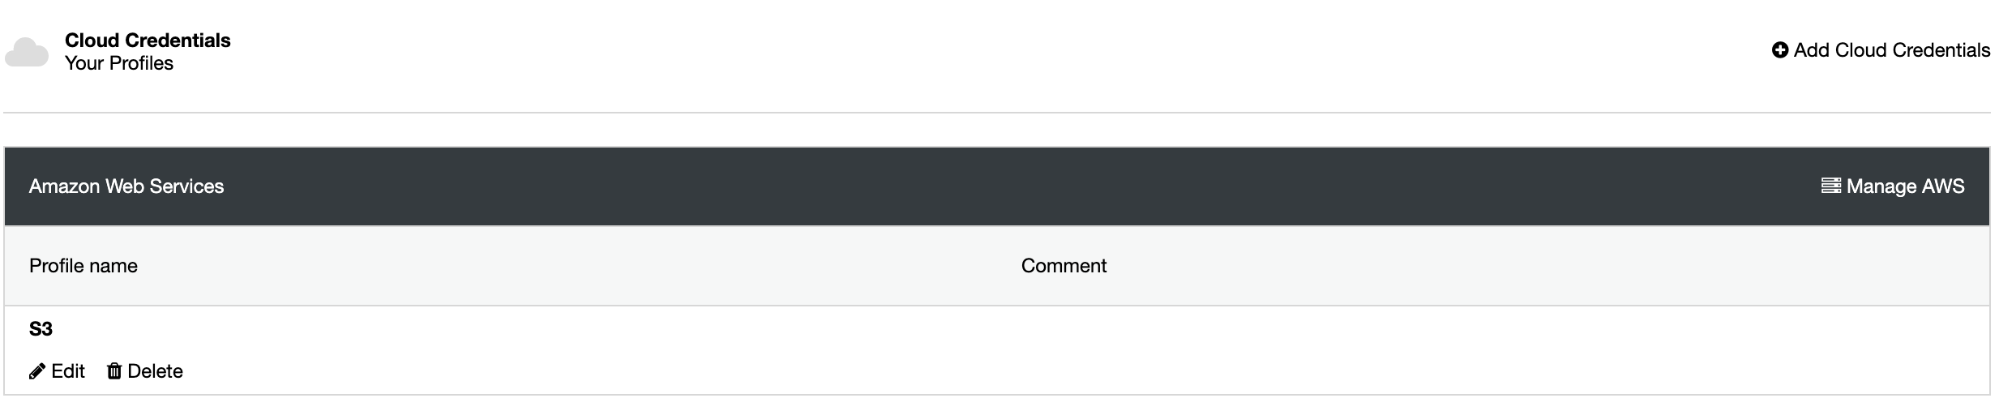
Now you have the integration created, let’s go to schedule the first backup using ClusterControl.
Scheduling a Backup with ClusterControl
Go to ClusterControl -> Select the PostgreSQL Cluster -> Backup -> Create Backup.
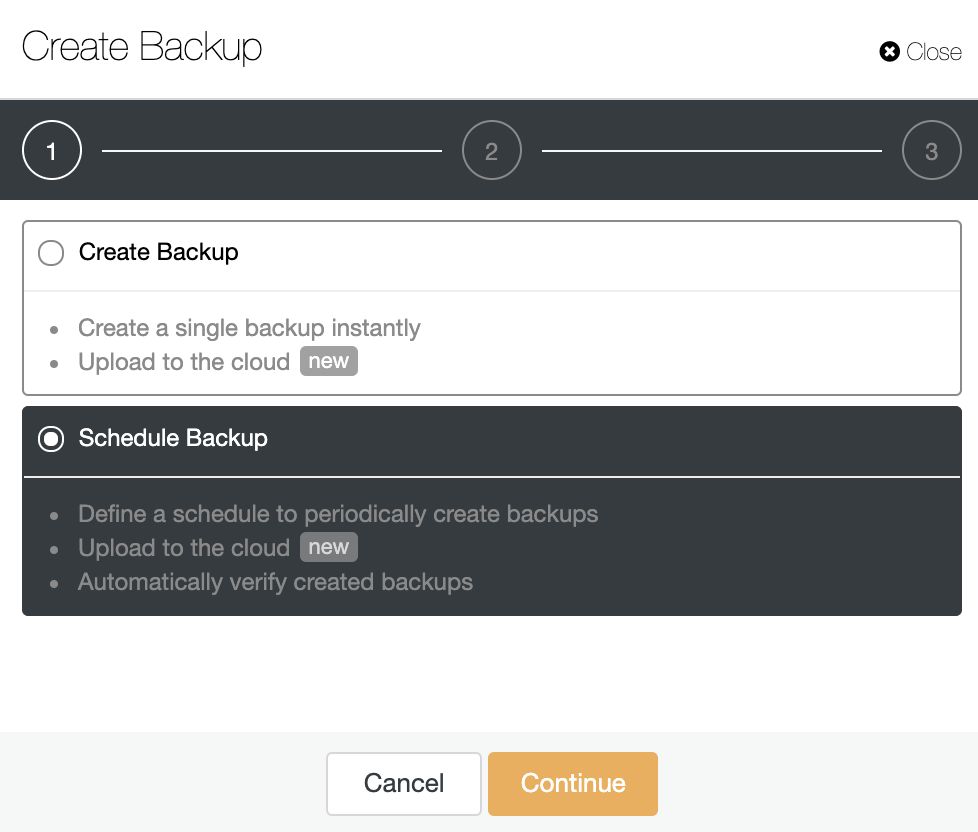
You can choose if you want to create a single backup instantly or schedule a new backup. So, let’s choose the second option and continue.
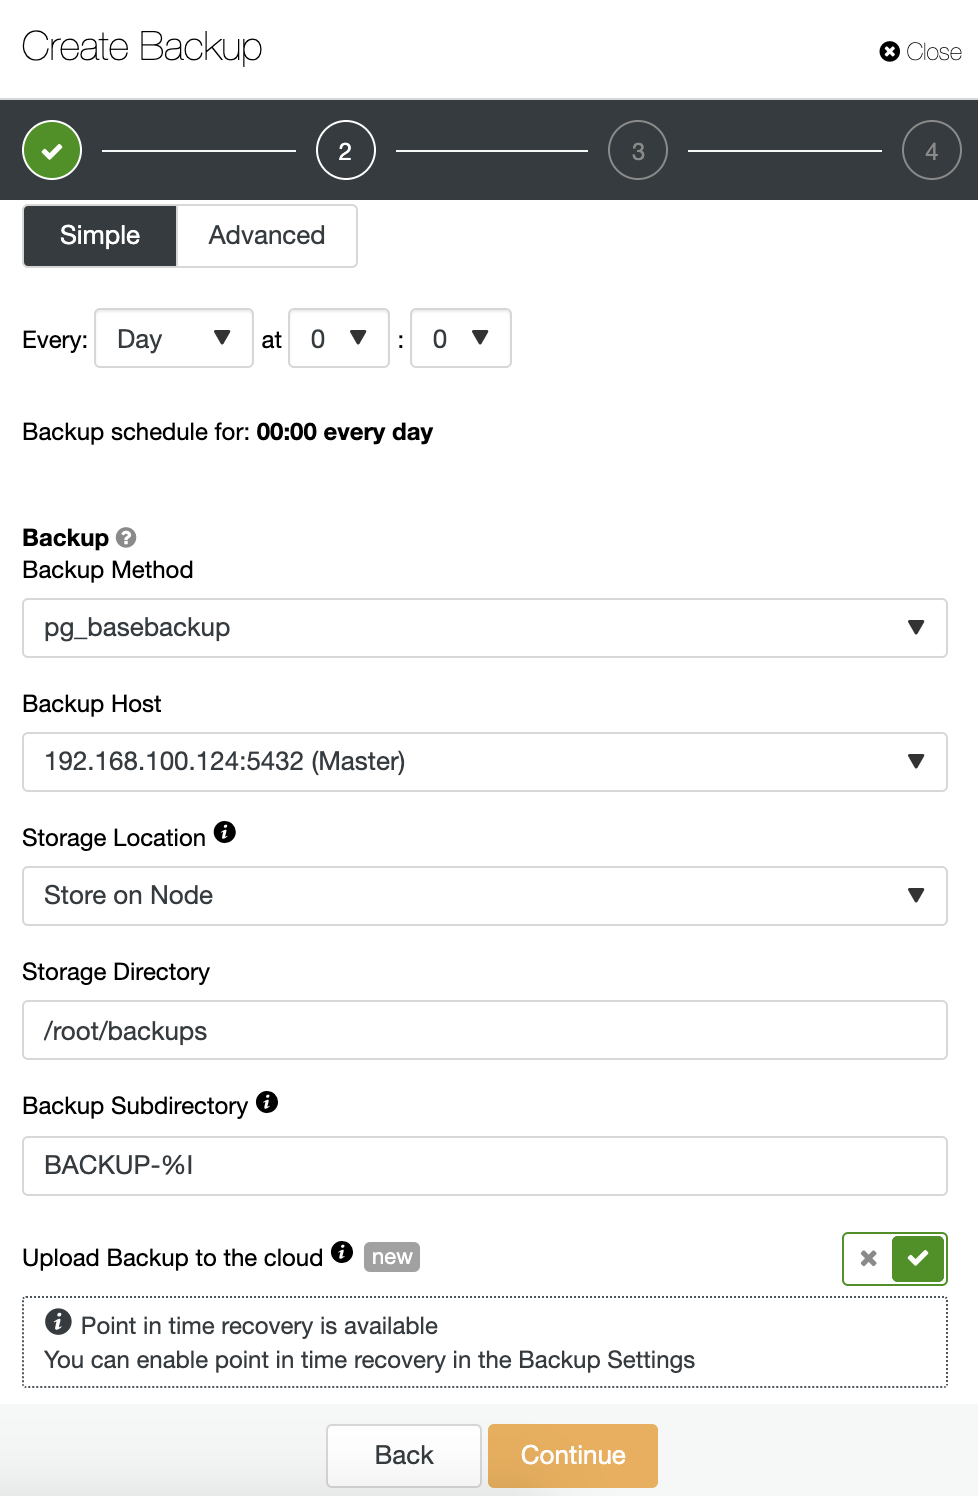
When you’re scheduling a backup, first, you need to specify schedule/frequency. Then, you must choose a backup method (pg_dumpall, pg_basebackup, pgBackRest), the server from which the backup will be taken, and where you want to store the backup. You can also upload our backup to the cloud (AWS, Google or Azure) by enabling the corresponding button.
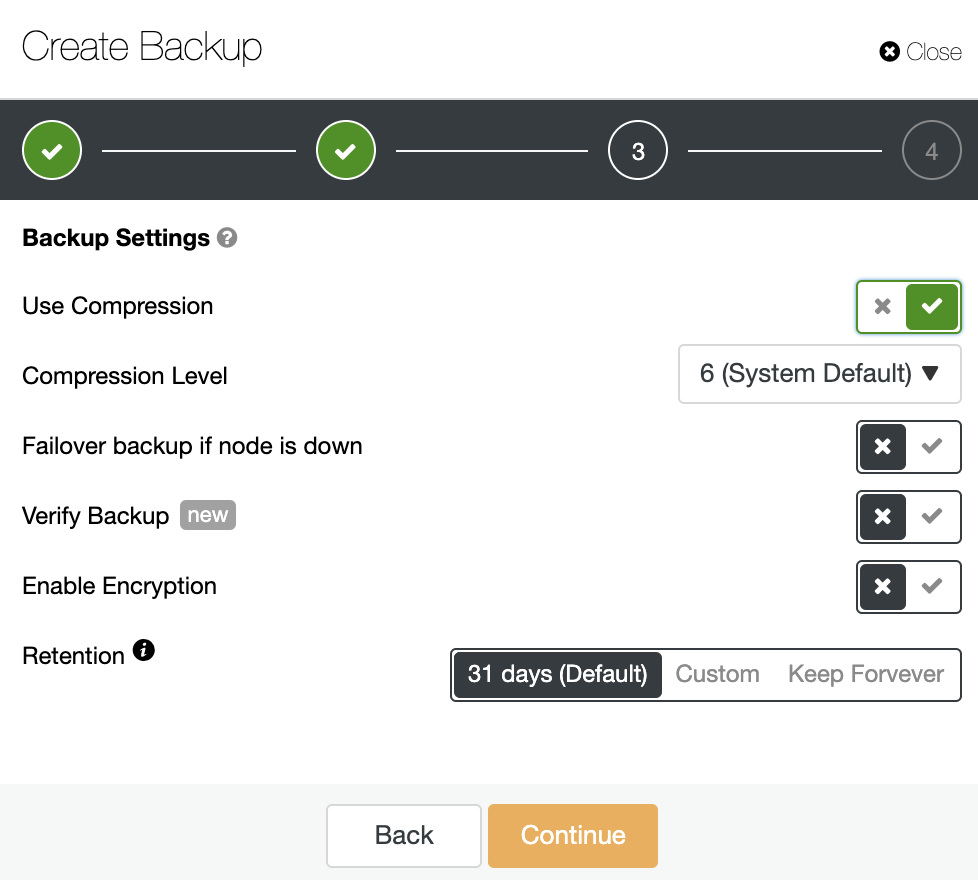
Then specify the use of compression, the compression level, encryption and retention period for your backup. There is another feature called “Verify Backup” that you’ll see more in detail soon in this blog post.
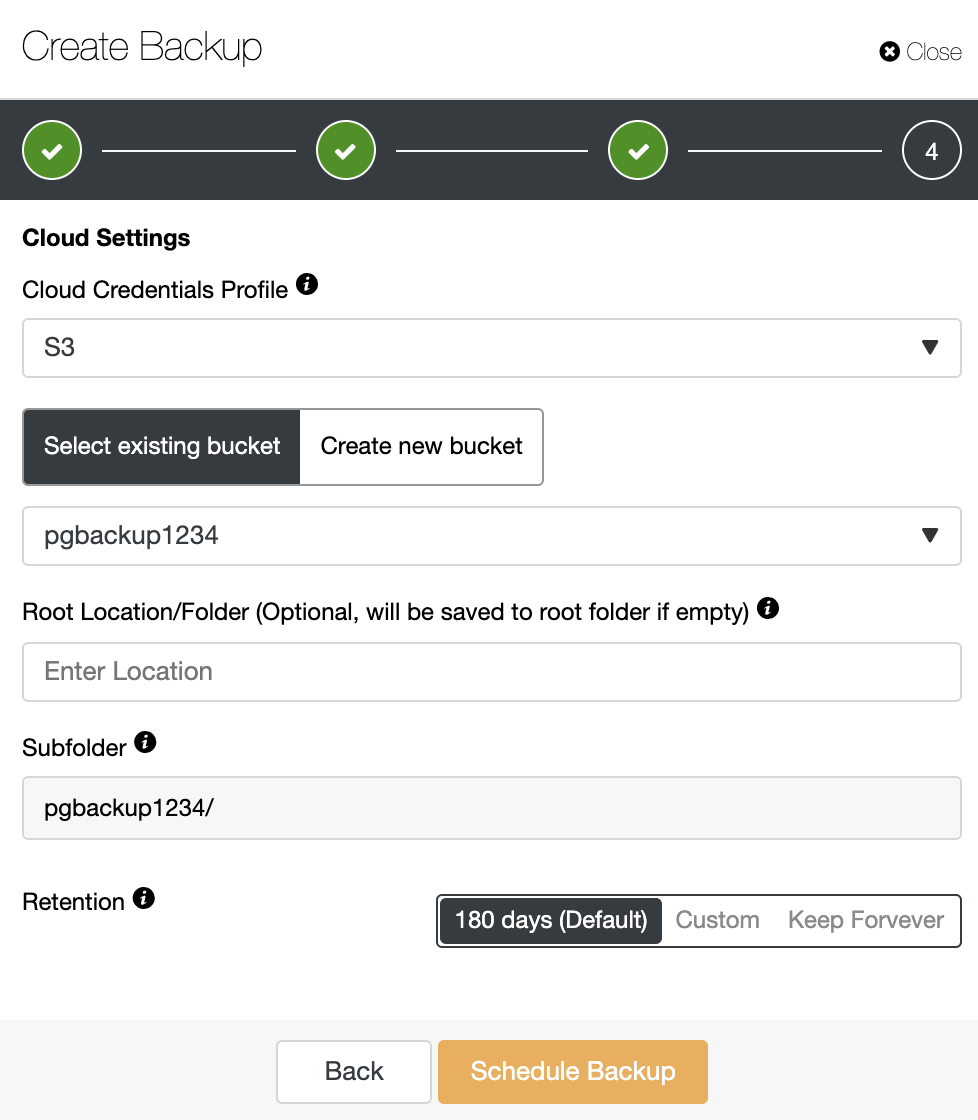
If the “Upload Backup to the cloud” option was enabled, you’ll see this step where you must select the cloud credentials, and create or select an S3 bucket where to store the backup. You must also specify the retention period.
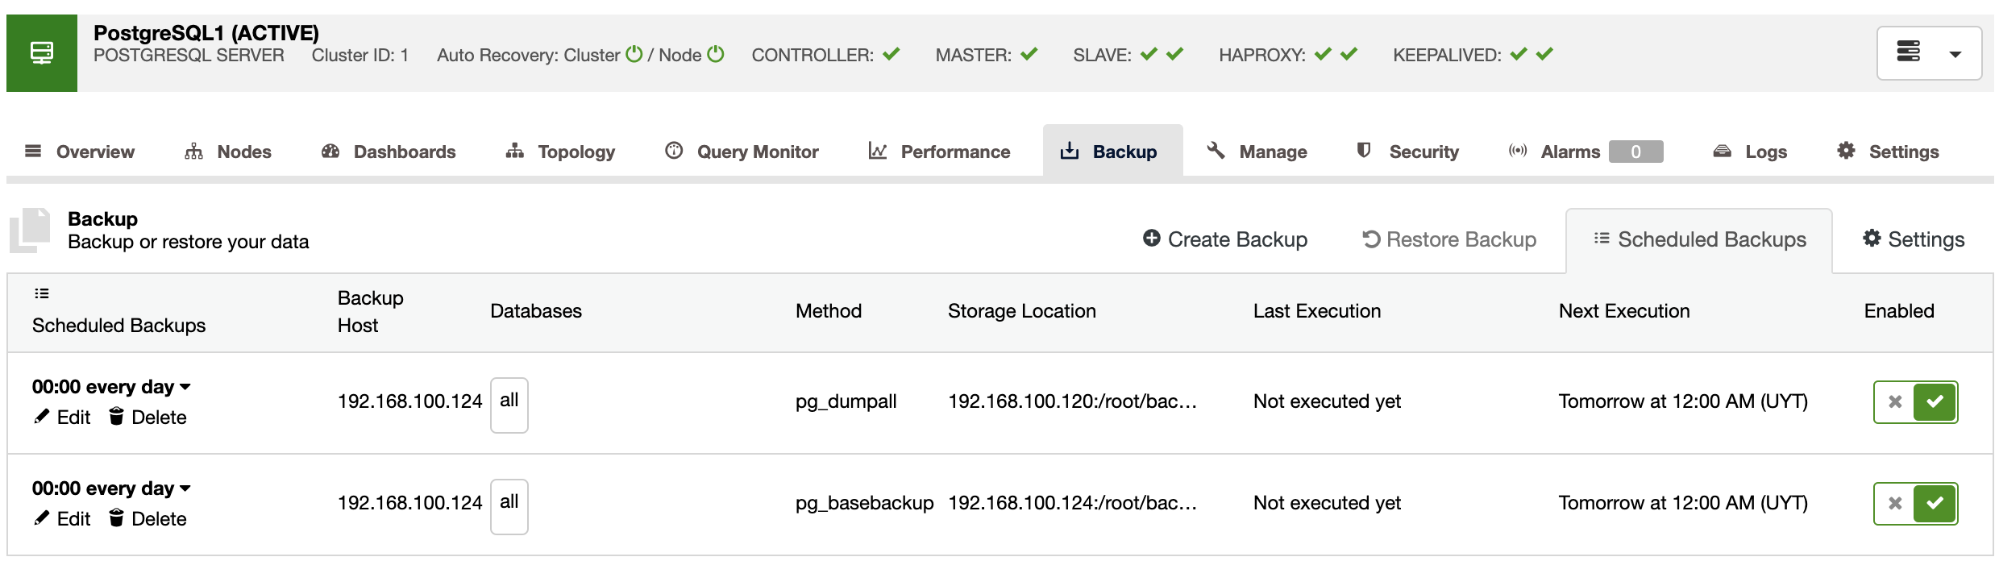
Now you’ll have the scheduled backup in the ClusterControl Schedule Backups section. To cover the best practices mentioned earlier, you can schedule a backup to store it into an external server (ClusterControl server) and in the cloud, and then schedule another backup to store it locally in the database node for a faster recovery.
Restoring a Backup on Amazon EC2
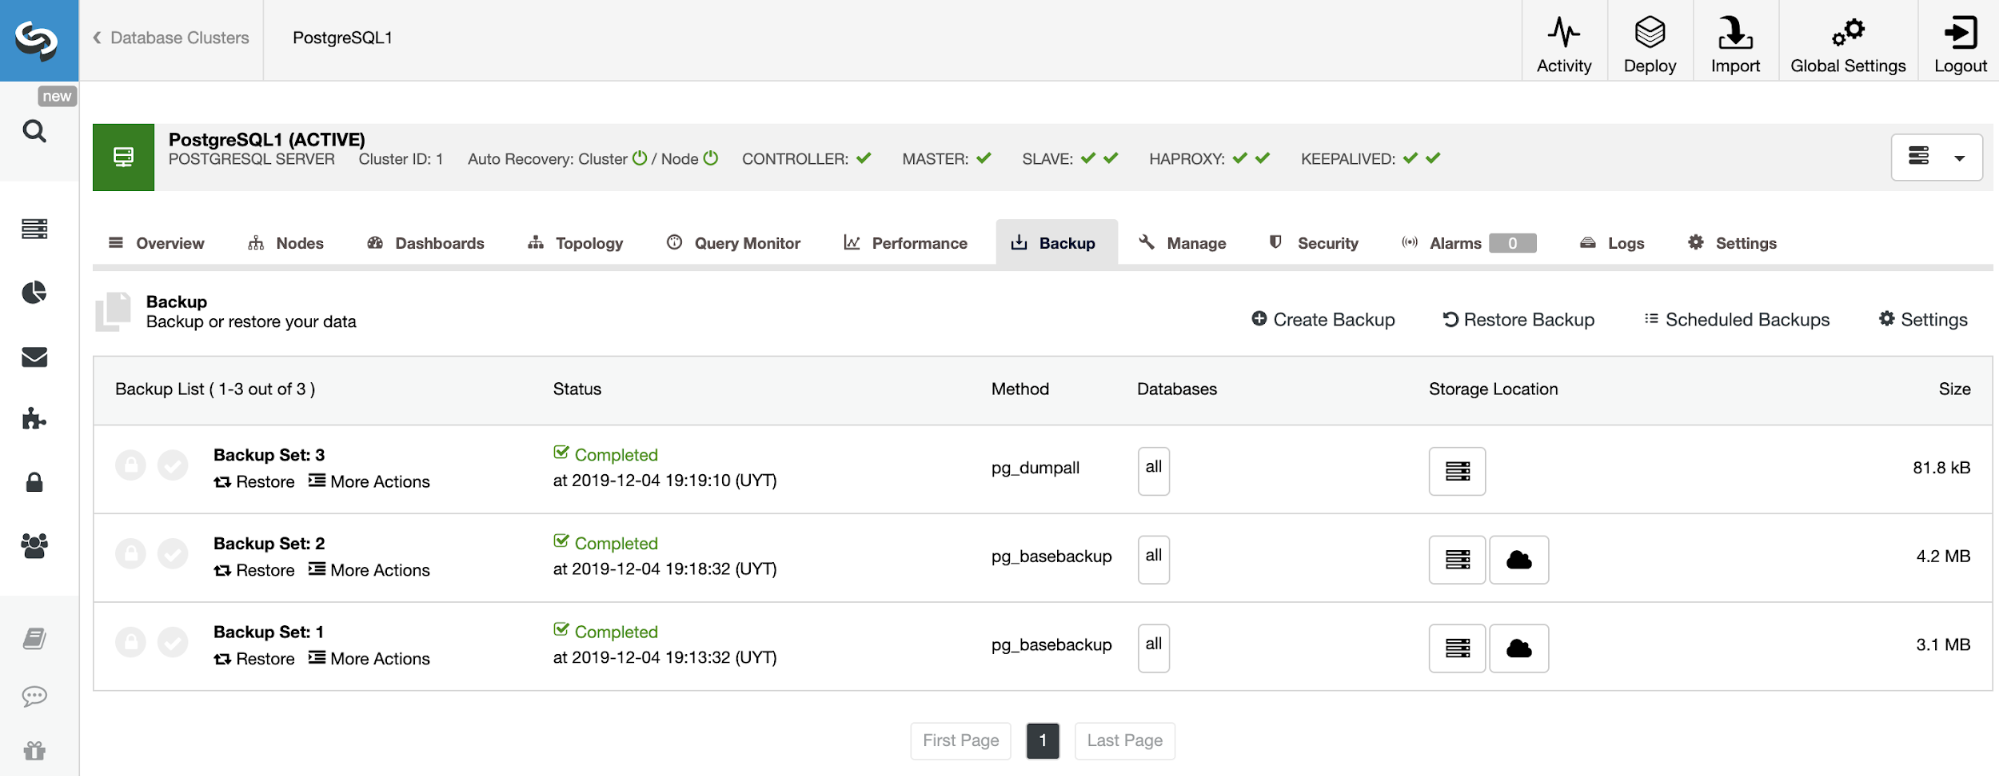
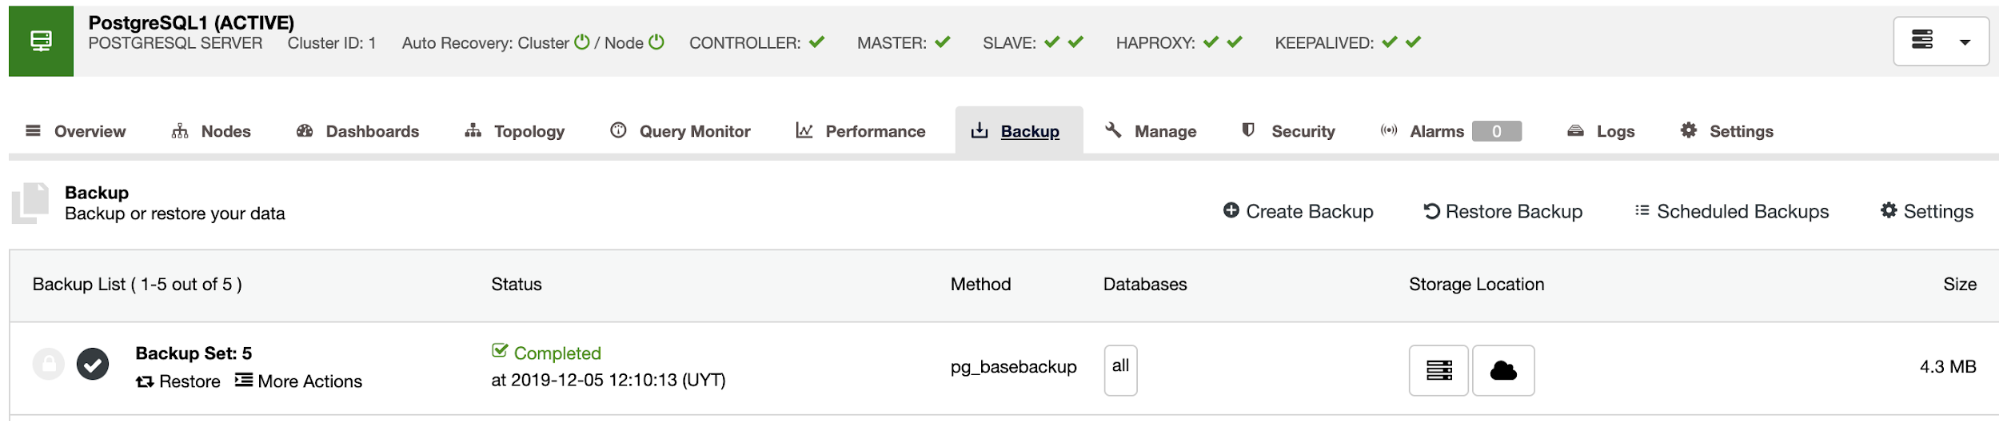
Once the backup is finished, you can restore it by using ClusterControl in the Backup section.
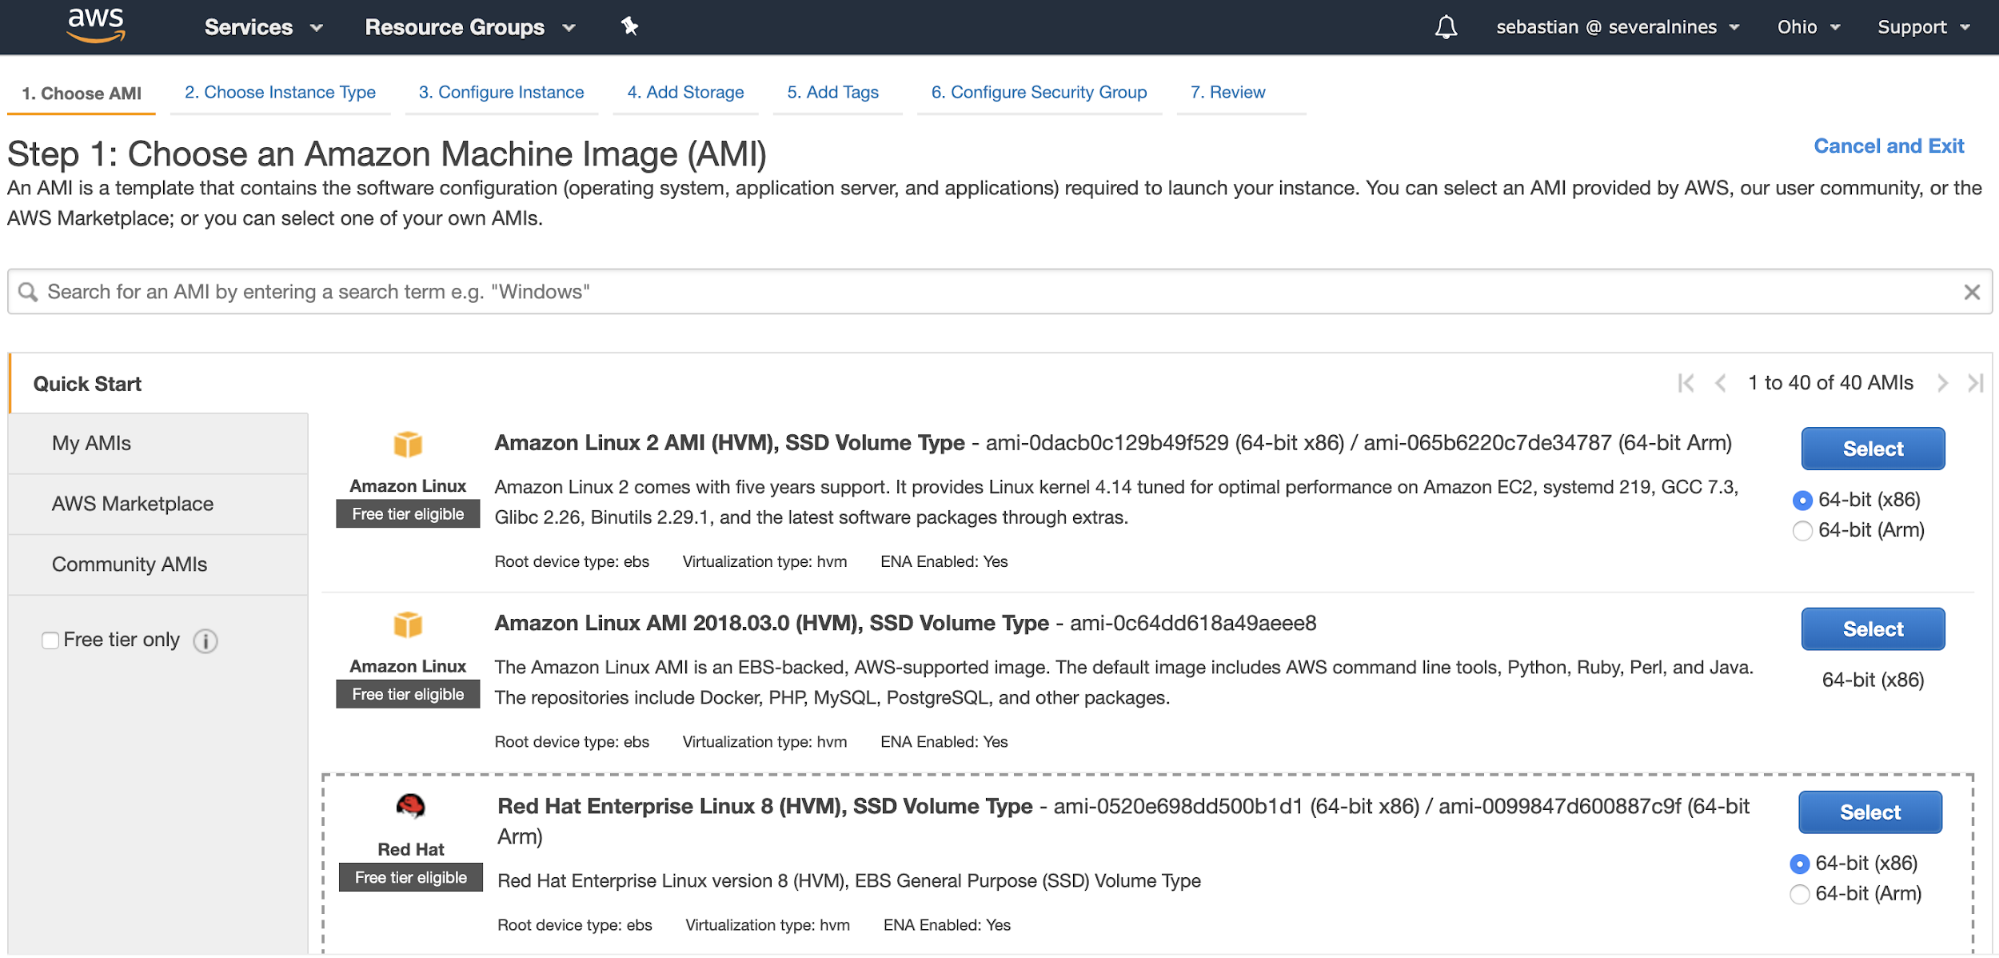
Creating the Amazon EC2 Instance
First of all, to restore it, you’ll need somewhere to do it, so let’s create a basic Amazon EC2 instance. Go to” Launch Instance” in the AWS management console in the EC2 section, and configure your instance.
When your instance is created, you’ll need to copy the SSH public key from the ClusterControl server.
Restoring the Backup Using ClusterControl
Now you have the new EC2 instance, let’s use it to restore the backup there. For this, in your ClusterControl go to the backup section (ClusterControl -> Select Cluster -> Backup), and there you can select “Restore Backup”, or directly “Restore” on the backup that you want to restore.
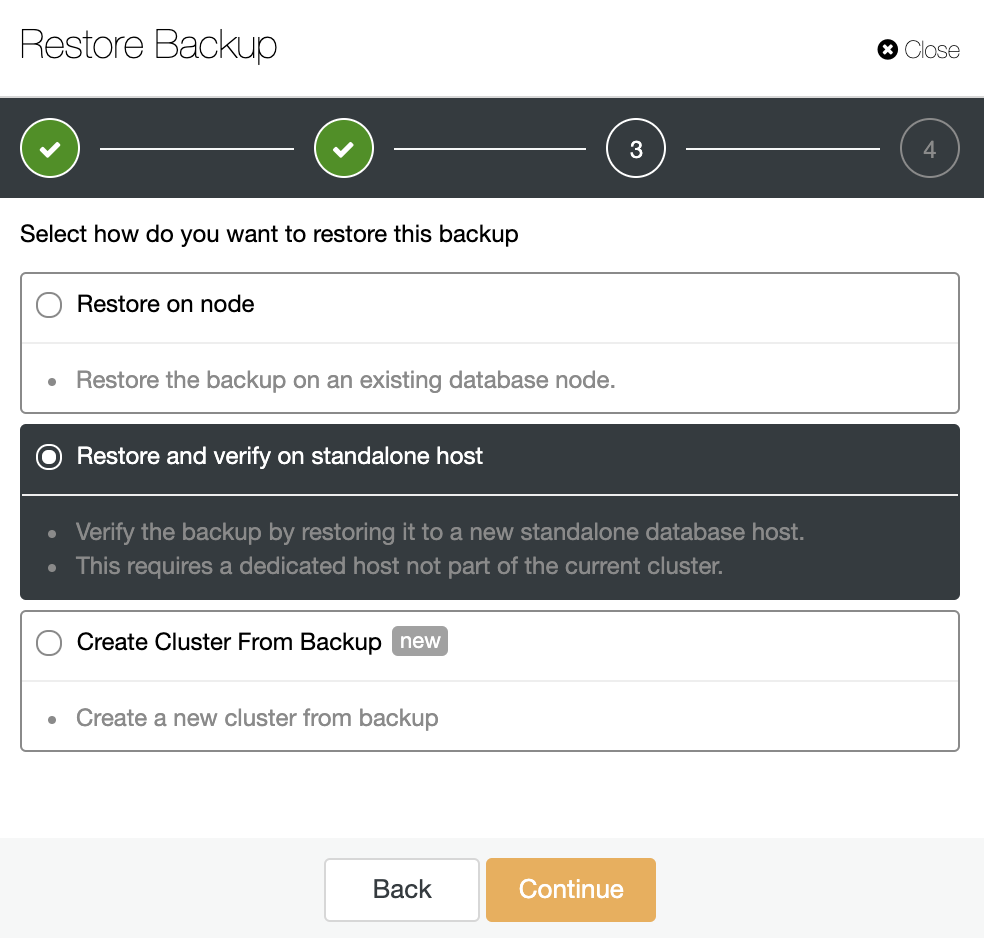
You have three options to restore the backup. You can restore the backup in an existing database node, restore and verify the backup on a standalone host or create a new cluster from the backup. As you want to create a cold standby node, let’s use the second option “Restore and Verify on standalone host”.
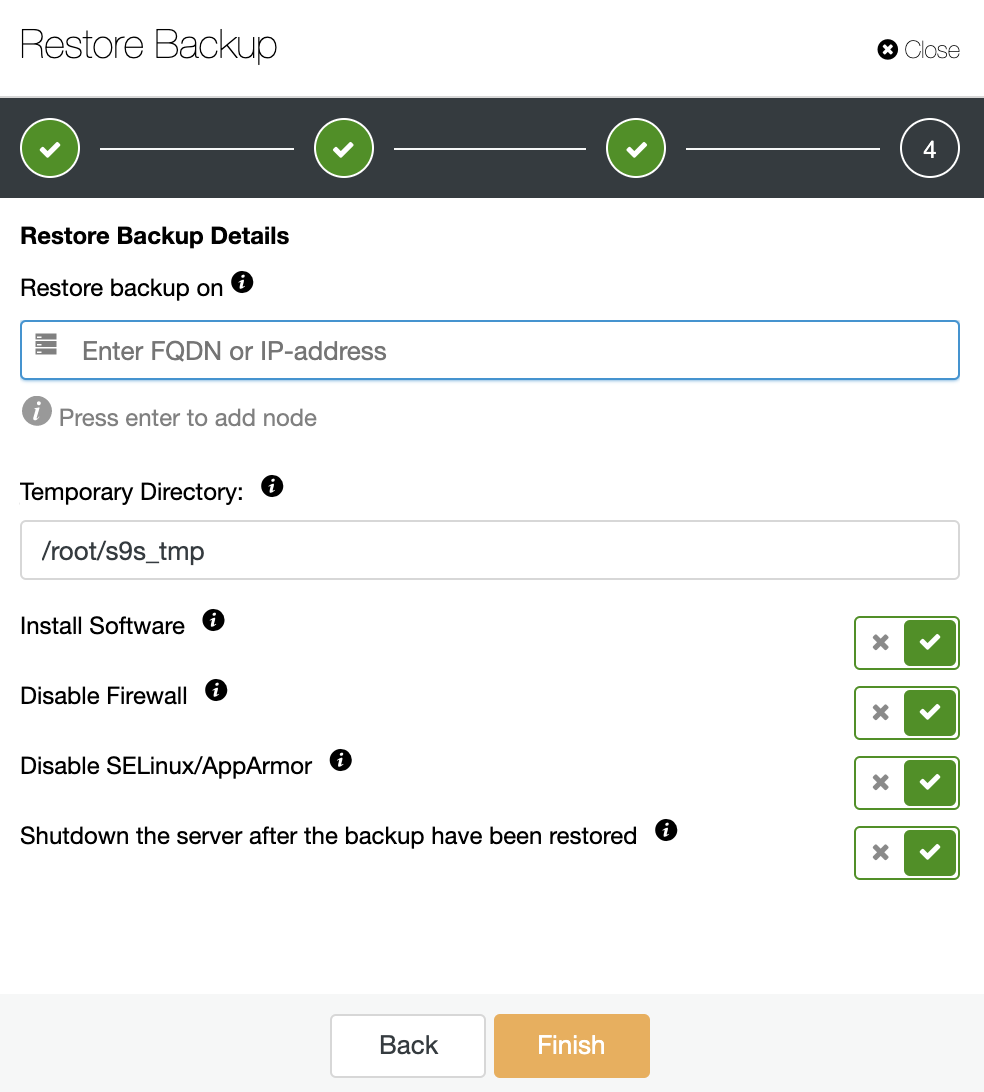
You’ll need a dedicated host (or VM) that is not part of the cluster to restore the backup, so let’s use the EC2 instance created for this job. ClusterControl will install the software and it’ll restore the backup in this host.
If the option “Shutdown the server after the backup has been restored” is enabled, ClusterControl will stop the database node after finishing the restore job, and that is exactly what we need for this cold standby creation.
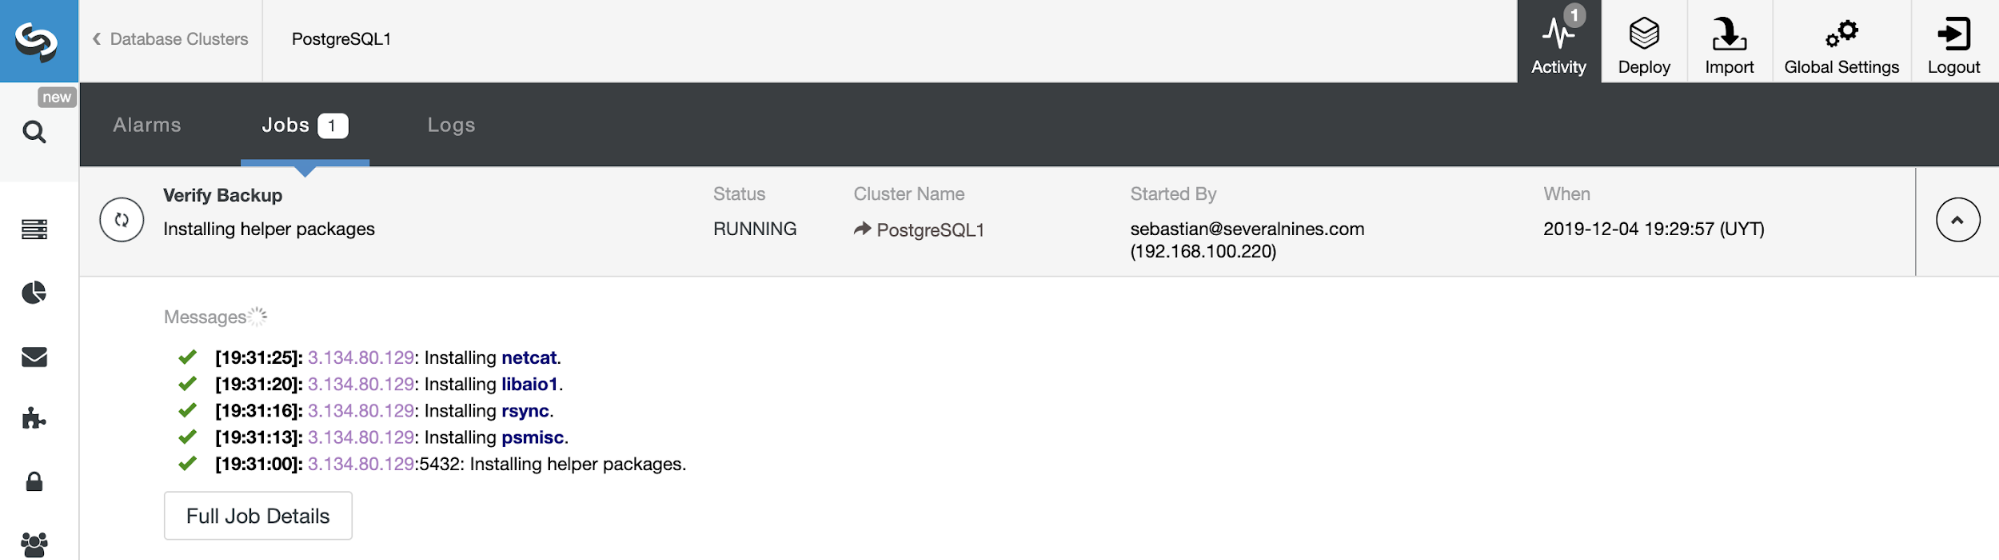
You can monitor the backup progress in the ClusterControl Activity section.
Using the ClusterControl Verify Backup Feature
A backup is not a backup if it’s not restorable. So, you should make sure that the backup is working and restore it in the cold standby node frequently.
This ClusterControl Verify Backup backup feature is a way to automate the maintenance of a cold standby node restoring a recent backup to keep this as up-to-date as possible avoiding the manual restore backup job. Let’s see how it works.
As the “Restore and Verify on standalone host” task, it’ll require a dedicated host (or VM) that is not part of the cluster to restore the backup, so let’s use the same EC2 instance here.
The automatic verify backup feature is available for the scheduled backups. So, go to ClusterControl -> Select the PostgreSQL Cluster -> Backup -> Create Backup and repeat the steps that you saw earlier to schedule a new backup.
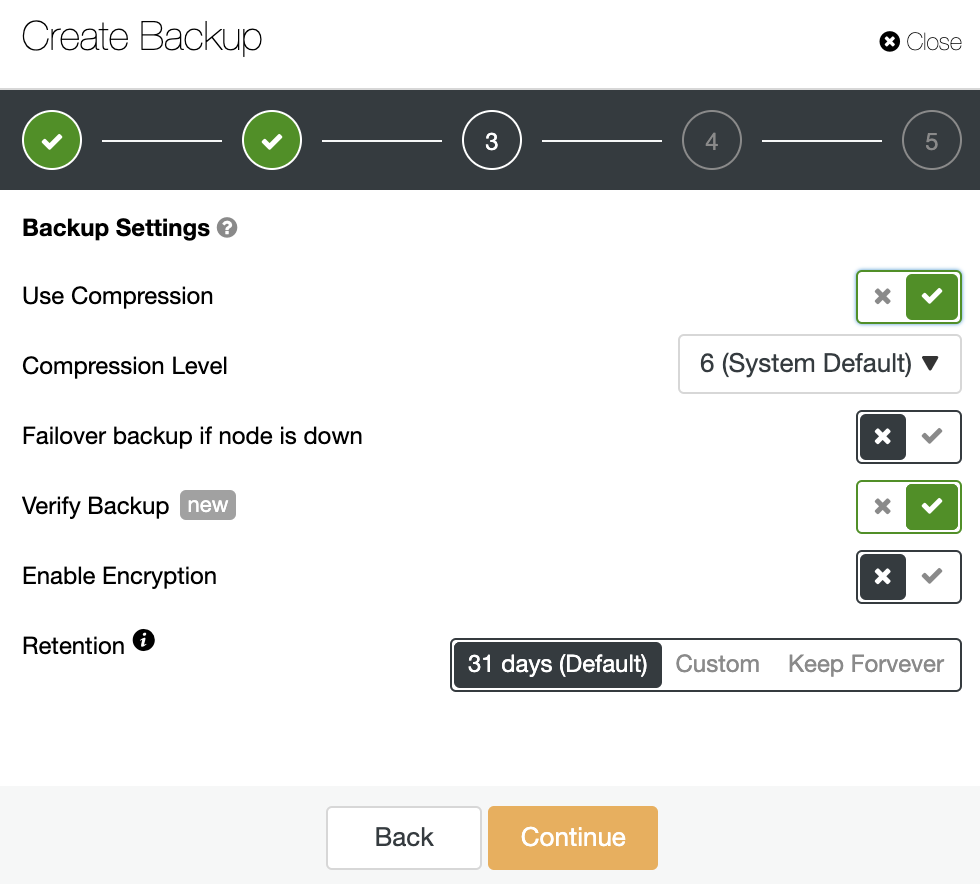
In the second step, you will have the “Verify Backup” feature available to enable it.
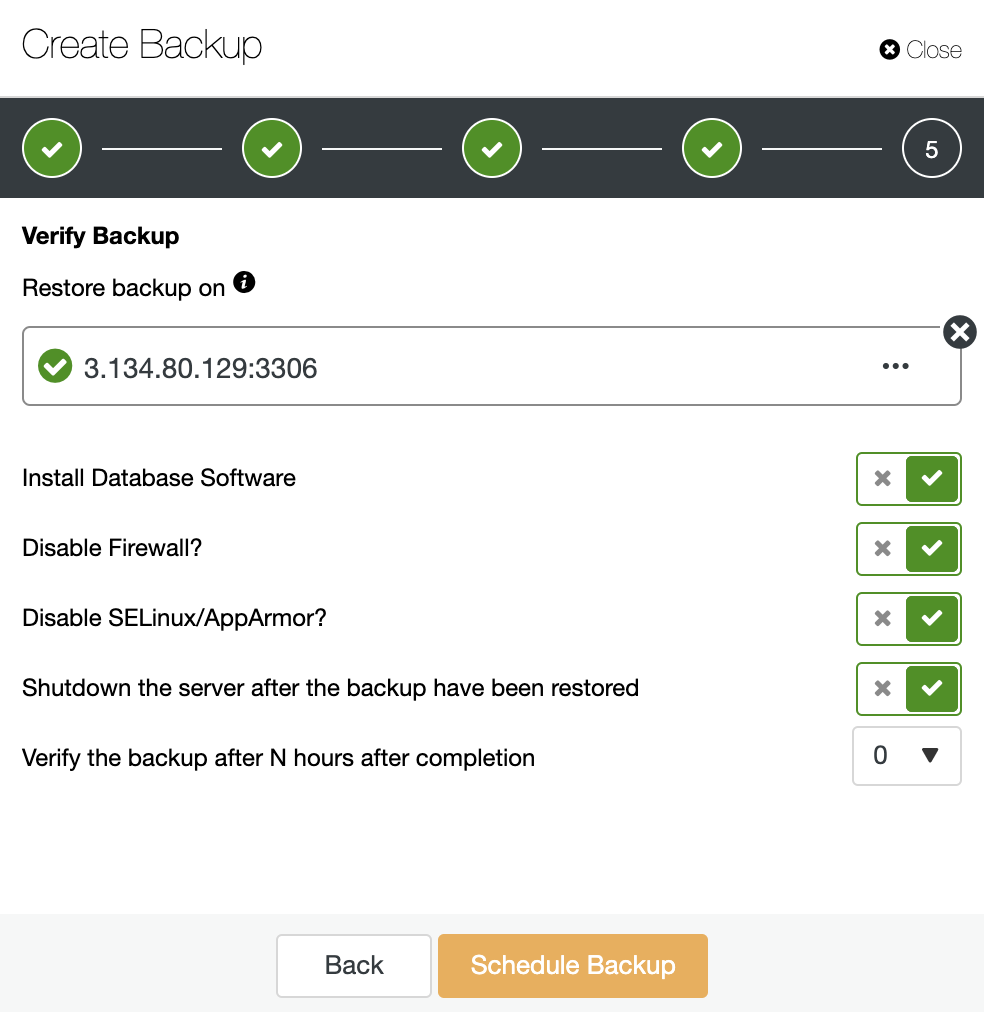
Using the above options, ClusterControl will install the software and restore the backup on the host. After restoring it, if everything went fine, you will see the verification icon in the ClusterControl Backup section.
Conclusion
If you have a limited budget, but require High Availability, you can use a cold standby PostgreSQL node that could be valid or not depending on the RTO and RPO of the company. In this blog, we showed you how to schedule a backup (according to your business policy) and how to restore it manually. We also showed how to restore the backup automatically in a Cold Standby Server using ClusterControl, Amazon S3, and Amazon EC2.