blog
Building a Highly Available Database for Moodle Using MySQL Replication

Moodle is an open source learning management system, widely used by schools and universities around the world. The project started in 2002 by Martin Dougiamas, with the aim to provide learners, teachers, educators a secure, robust, open and free platform for learning environments.
The software itself is written in PHP, and supports various RDBMS, such as: Oracle, MySQL, PostgreSQL, MariaDB, etc.
In this blog, we will discuss how to make the Moodle database resilient using MySQL Replication, which is needed to support a High Availability Moodle deployment. We will deploy through ClusterControl a database setup consisting of master/slave MySQL Replication fronted by redundant database load balancers.
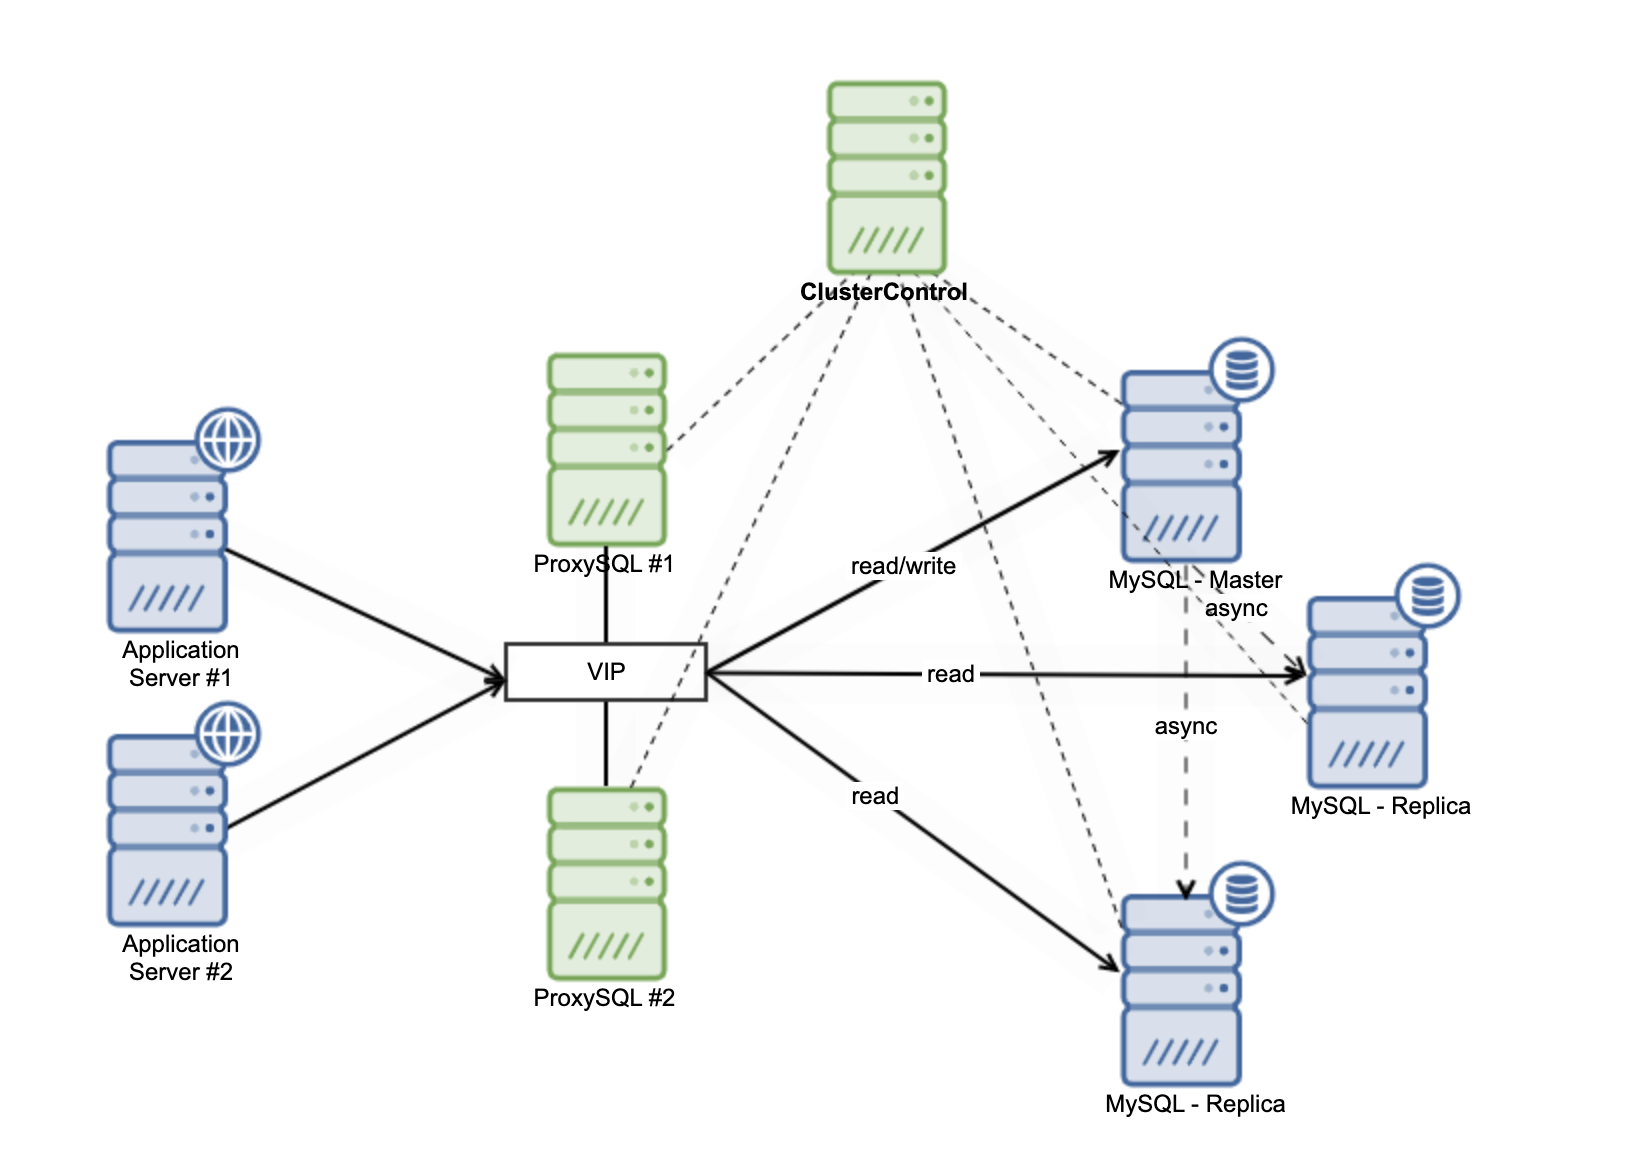
Architecture
MySQL replication is a popular way of achieving redundancy for the database. It is important to ensure that all writes are sent to the master, while reads can be load balanced between the slaves. In order to do that, we shall use ProxySQL which is a database-aware load balancer that takes care of splitting the write traffic and sending it to the master. Since the master role can move to another server, for instance in case of a database crash, ProxySQL can keep track of the new master and make sure write traffic is routed accordingly. A VirtualIP is managed by Keepalived to ensure one resilient database endpoint for all Moodle application servers.
Monitoring and Failover Management
In the diagram above, we suggest two replicas slaving off the master database. In case of master crash, one of the replicas will be promoted to new master. There will still be a replica left to handle things like reads, backups, reporting, etc.
The application connection makes use of a VIP (Virtual IP address) in the database connection string, so if something happens on database side, it will minimize the impact from your application and you do not need to reconfigure anything. ClusterControl is the component that keeps an eye on the databases and automates failover, for instance promoting one of the replicas to new master and recovering the failed database server.
Database Setup
We shall make use of ClusterControl to deploy our database setup.
First, you need to have a dedicated server for ClusterControl setup. The installation is very easy, you just need to download install-cc from severalnines repository, give execute permission on the file, and run it. As shown in below:
$ wget https://severalnines.com/downloads/cmon/install-cc

$ chmod +x install-cc

$ sudo ./install-cc   # omit sudo if you run as root
You can run above script in any kind of Linux variant. It will deploy anything that is required by ClusterControl.
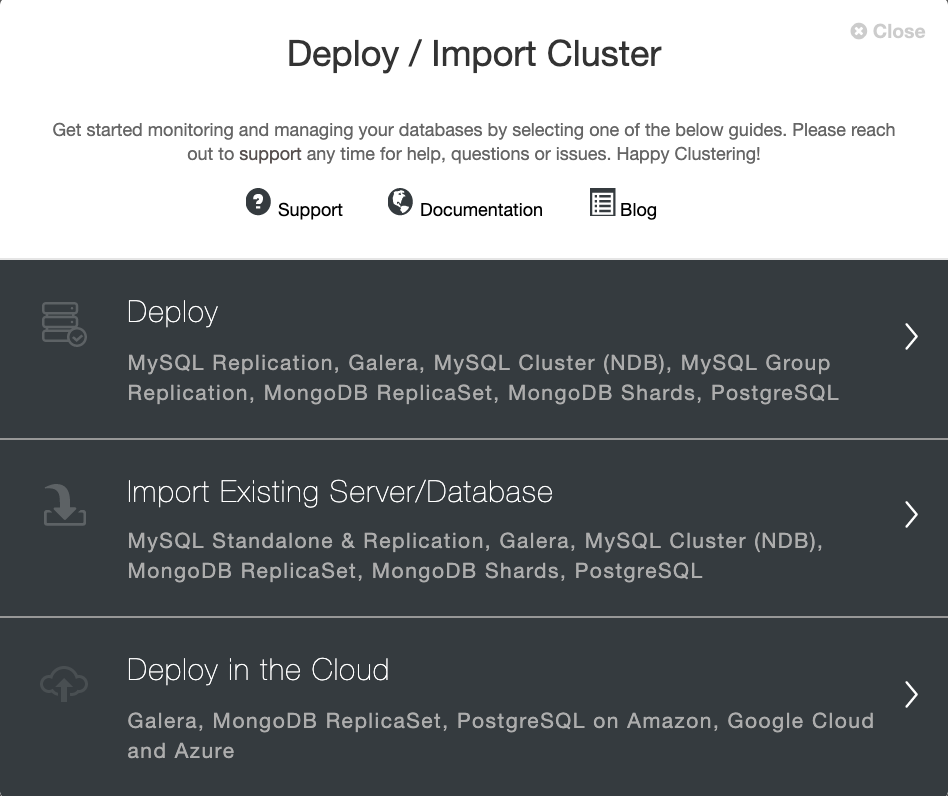
Once you have ClusterControl up and running, choose the Deploy button from the ClusterControl Dashboard.

It will display a new page that shows some options. We’ll pick the first Deploy option for our MySQL Replication setup.
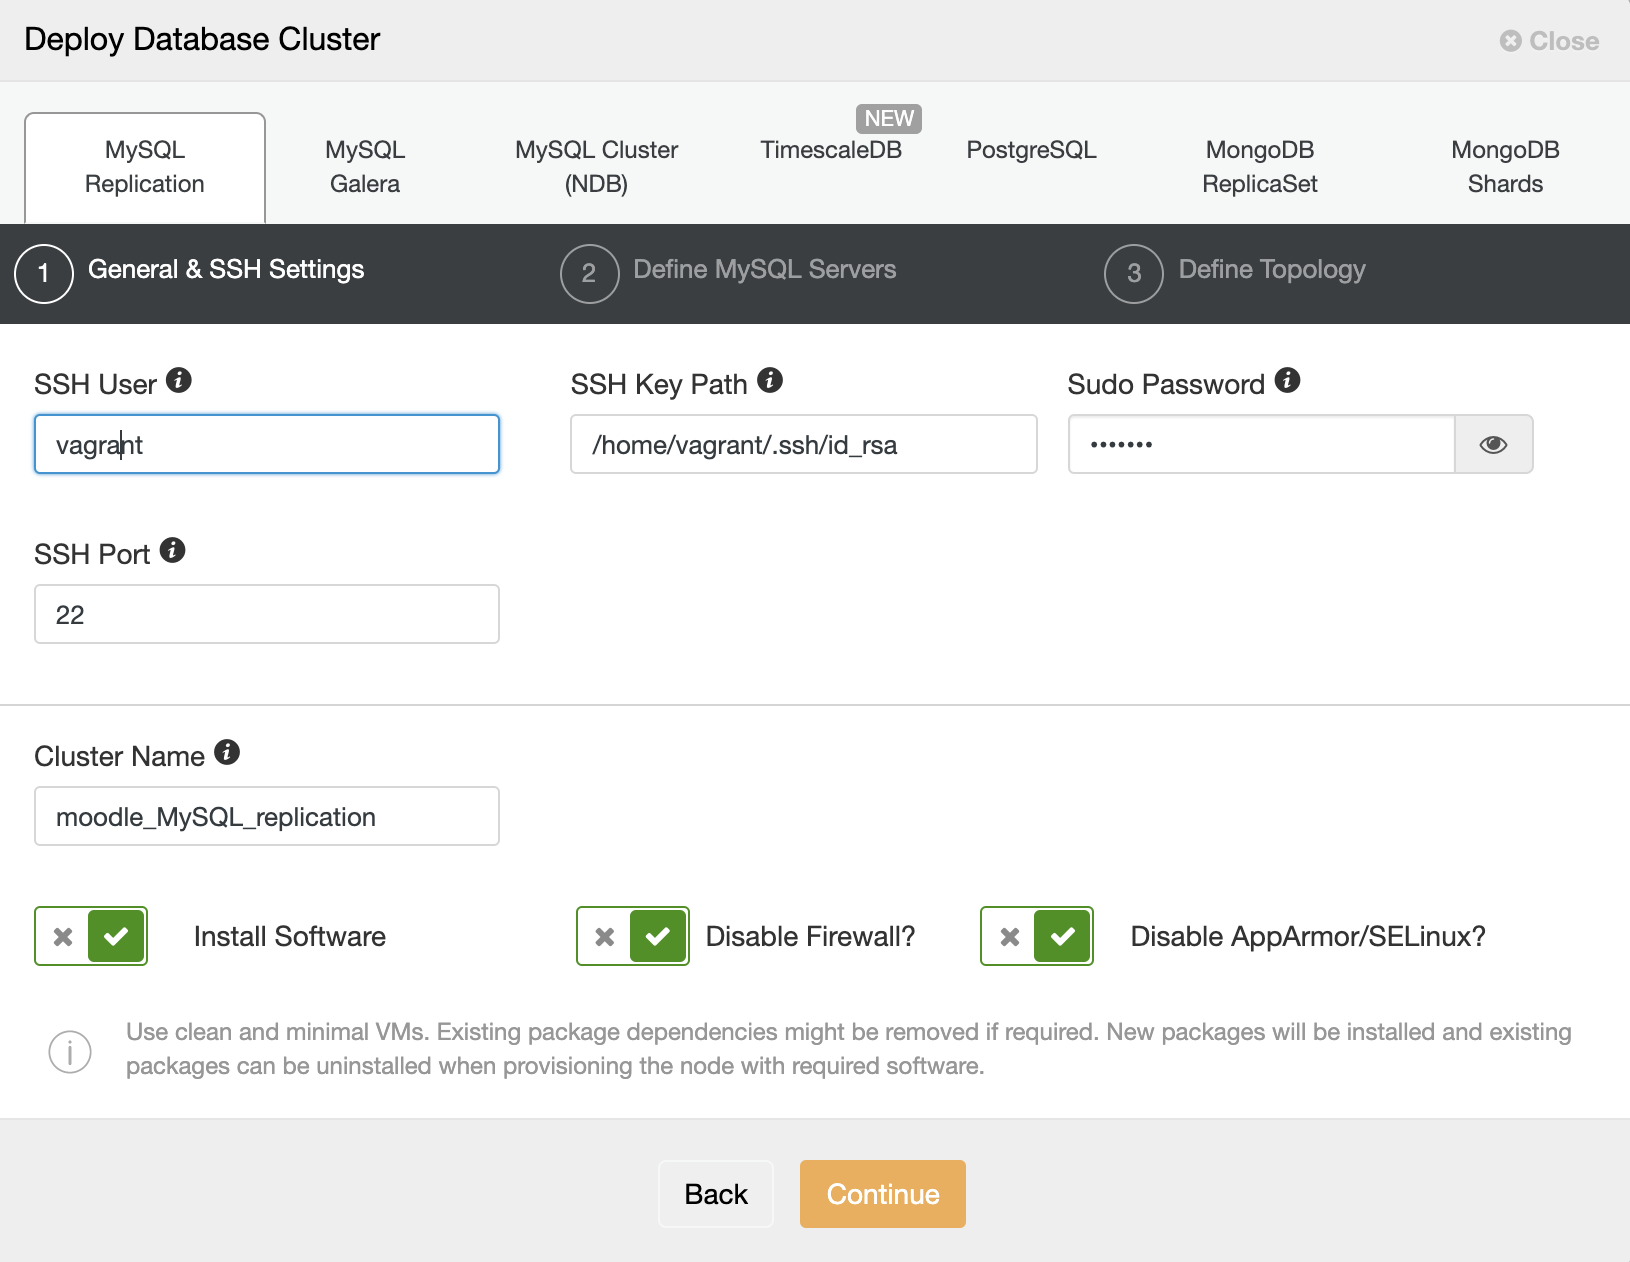
You need to have access to the target database server through SSH. Do not forget to enable passwordless SSH and give sudo access to the user. Define the cluster name and click Continue as shown below:
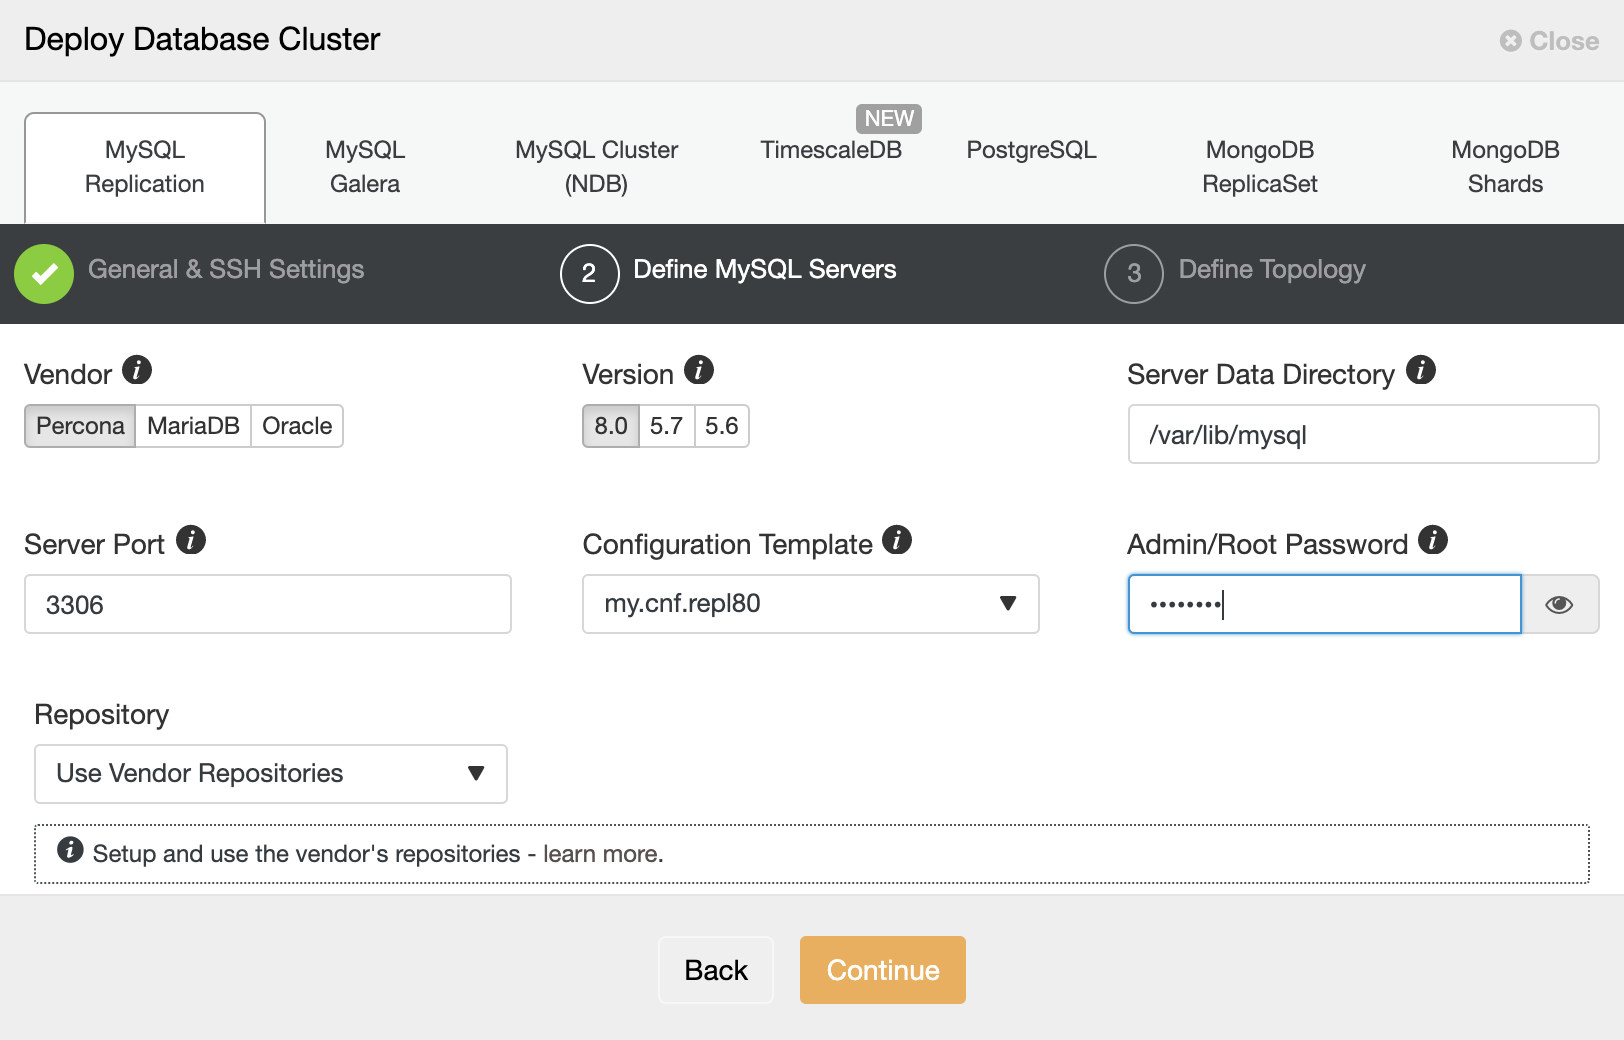
On the next page, you are required to choose the vendor of database, version of database you want to install, the root password, server port if you want to have custom or specific ports, and MySQL data directory.
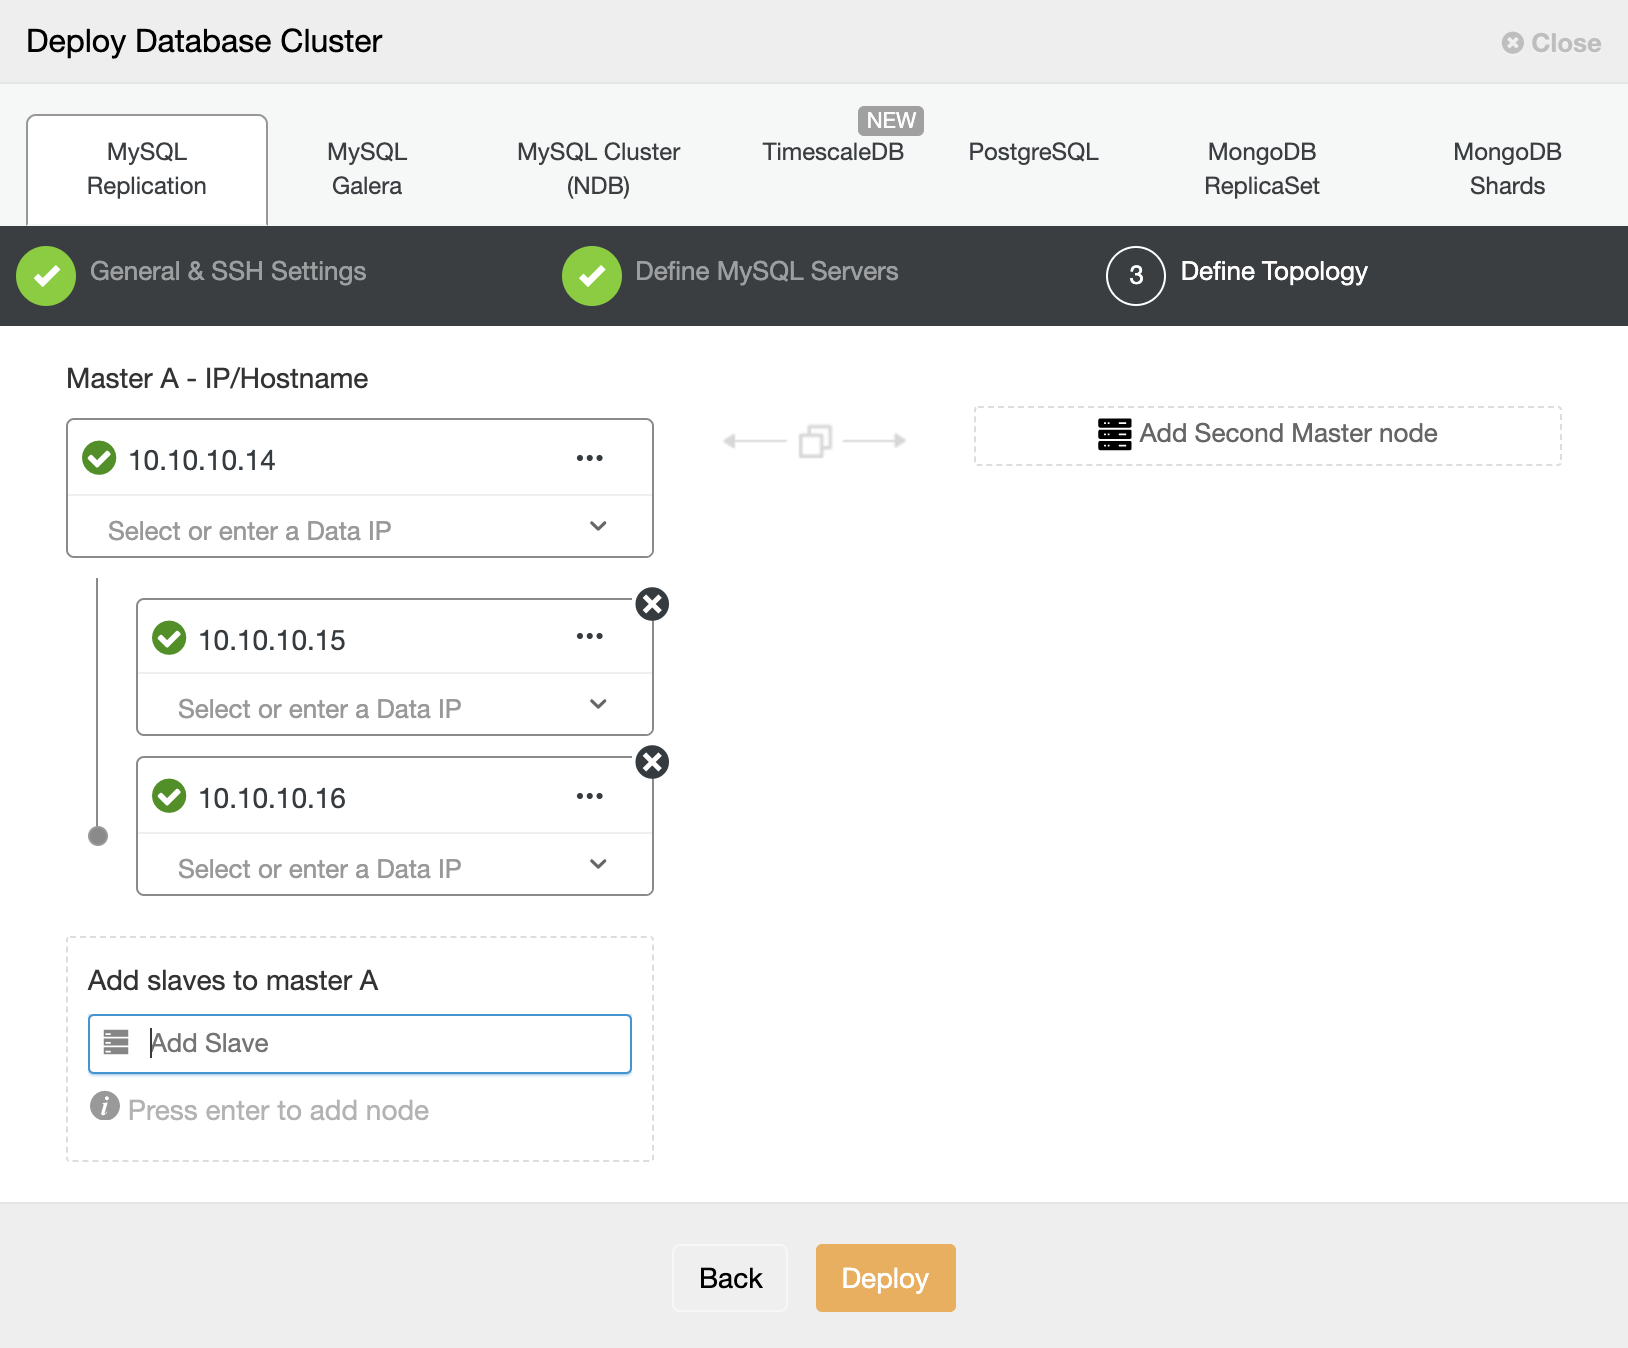
After all information is filled in, you can go to the next step, which is Define the Topology page. Please fill the ip address of the database server, in this case as we set up the MyQL Replication with 1 Master and 2 Replicas.
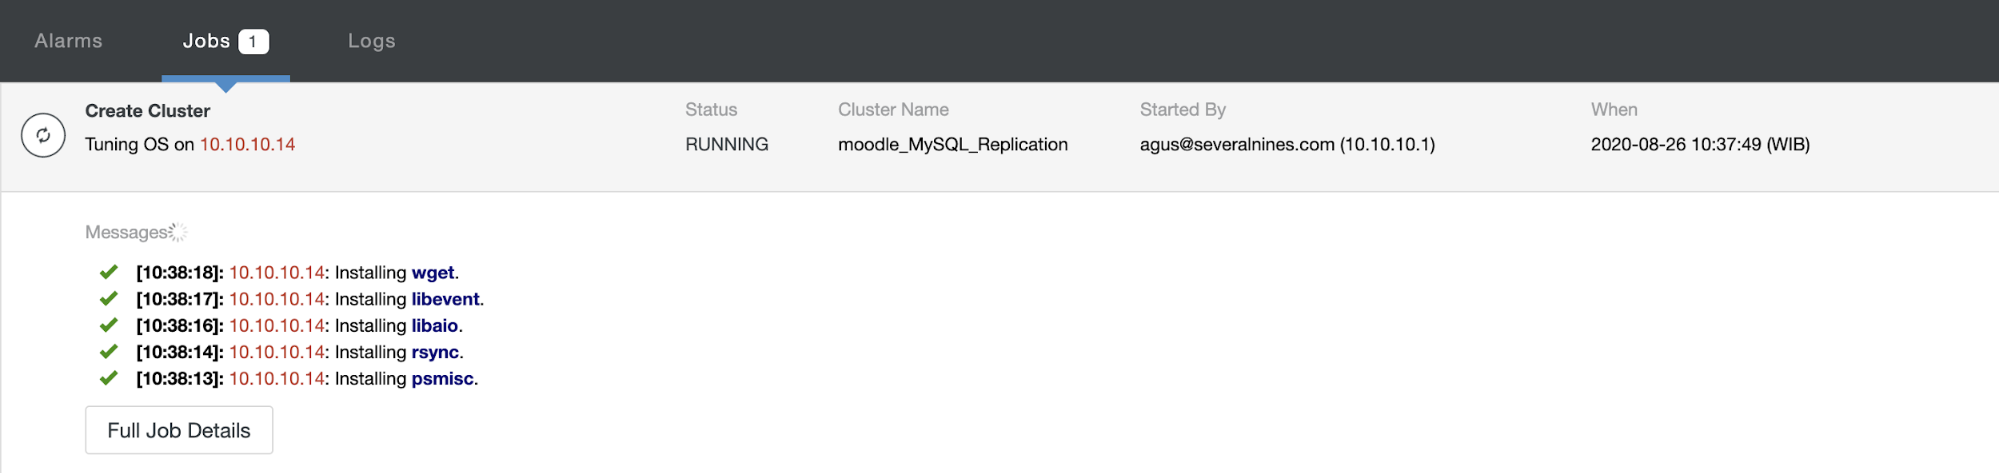
Deploy will now trigger a job that will “Create Cluster”, you just need to wait until the job is finished.
ProxySQL Setup
After the database is deployed, you can go through the Load Balancer from your cluster menu. Please go to Manage -> Load Balancer. It will shown as below:

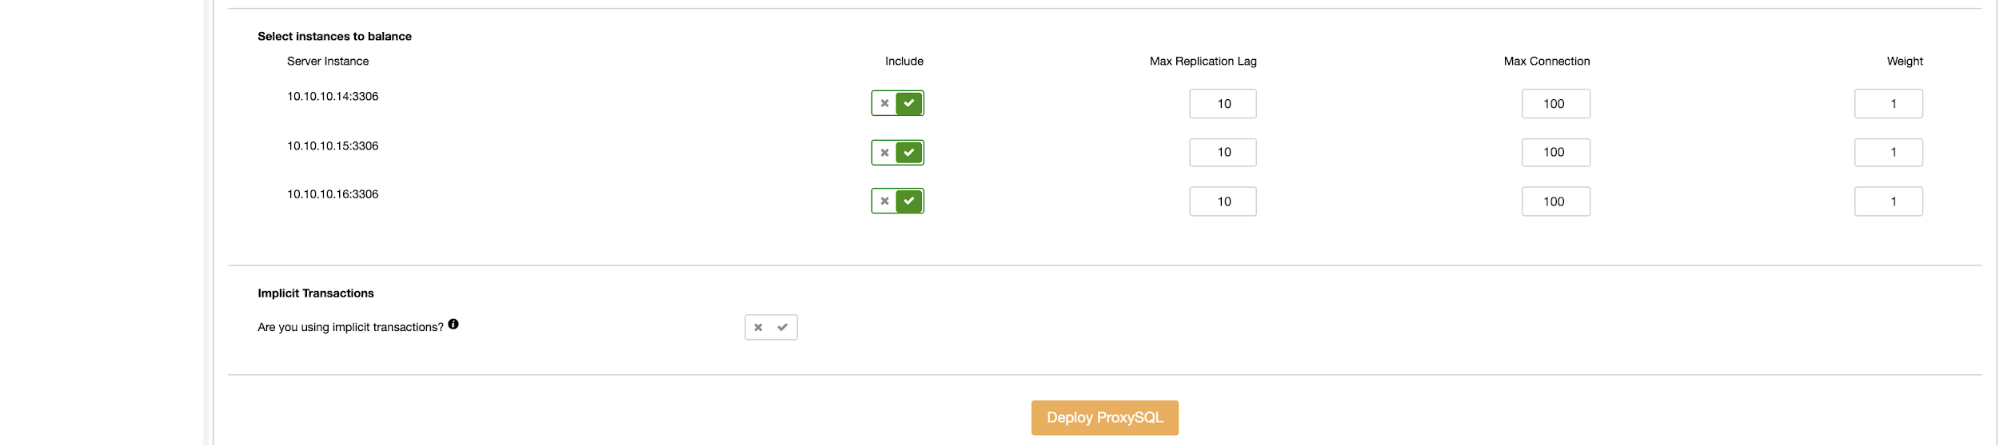
Deploying ProxySQL requires you to fill in some information such as the IP address where you want to install ProxySQL, password for administration and monitoring users, and enable the instance to load balance. After that, just click Deploy. For high availability, you need at least 2 load balancers installed in front of the database.
Keepalived Setup
Keepalived service is used to make your load balancer highly available. The setup is really straightforward, still on the Load Balancer page, there is a tab for Keepalived as shown below:
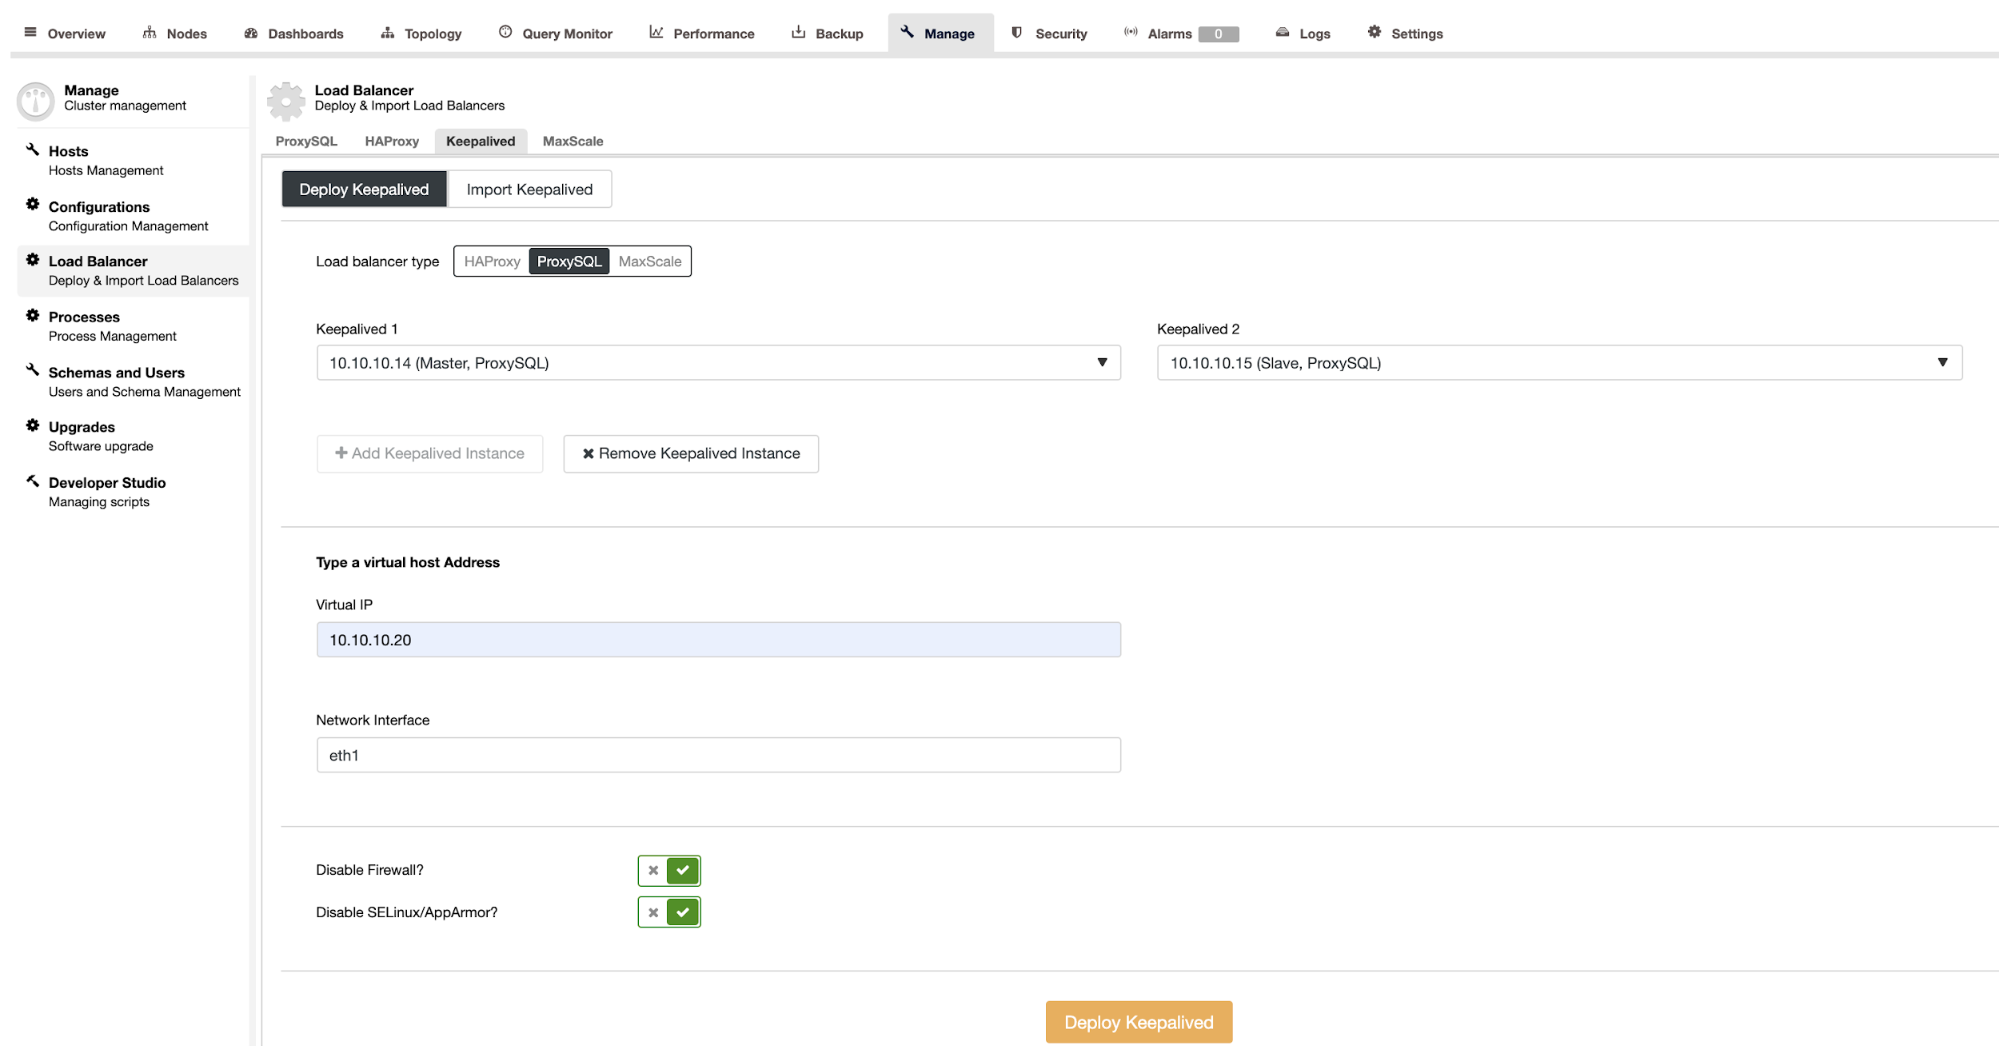
Choose the type of load balancer deployment, in this case we use ProxySQL, select the ProxySQL service for keepalived. Fill in the Virtual IP address and the Network Interface. After that just click Deploy Keepalived, it will automatically trigger a new job to set up the service.
Application Setup
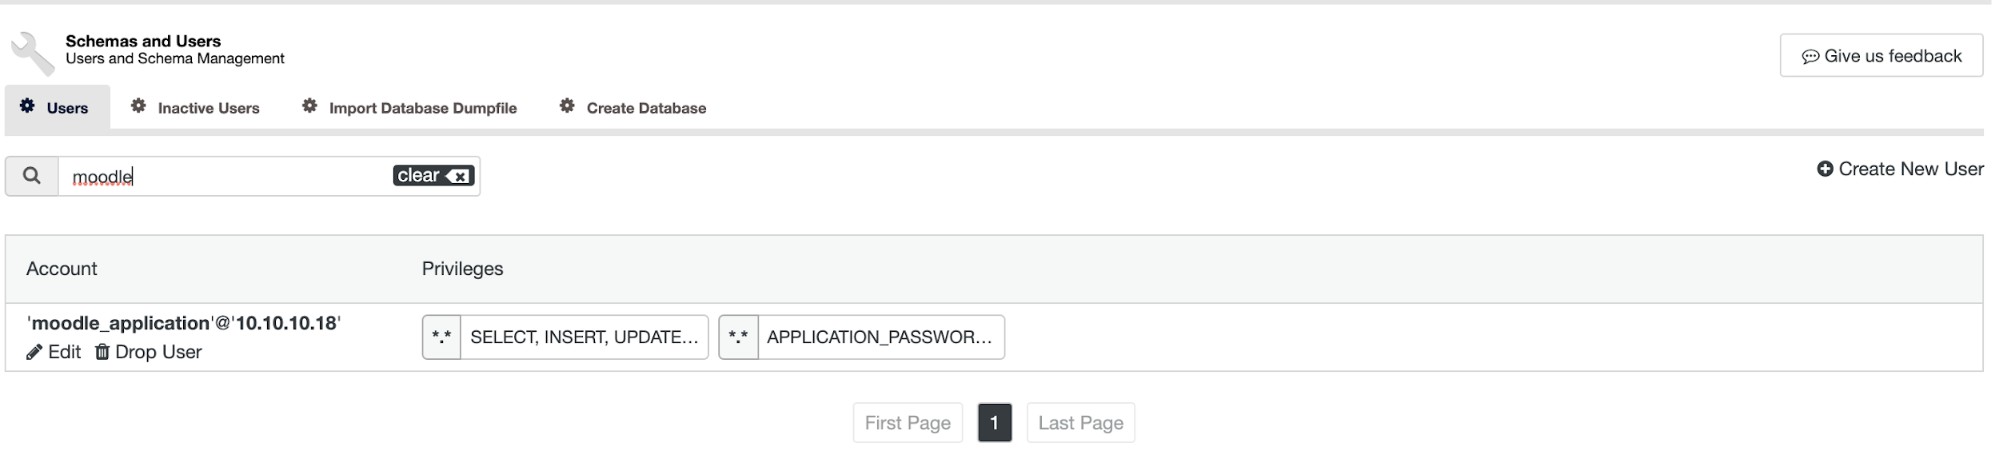
Before you setup the moodle application, you need to prepare the user credentials and the database itself. For the credentials, you can go to : Manage -> Schemas and Users.
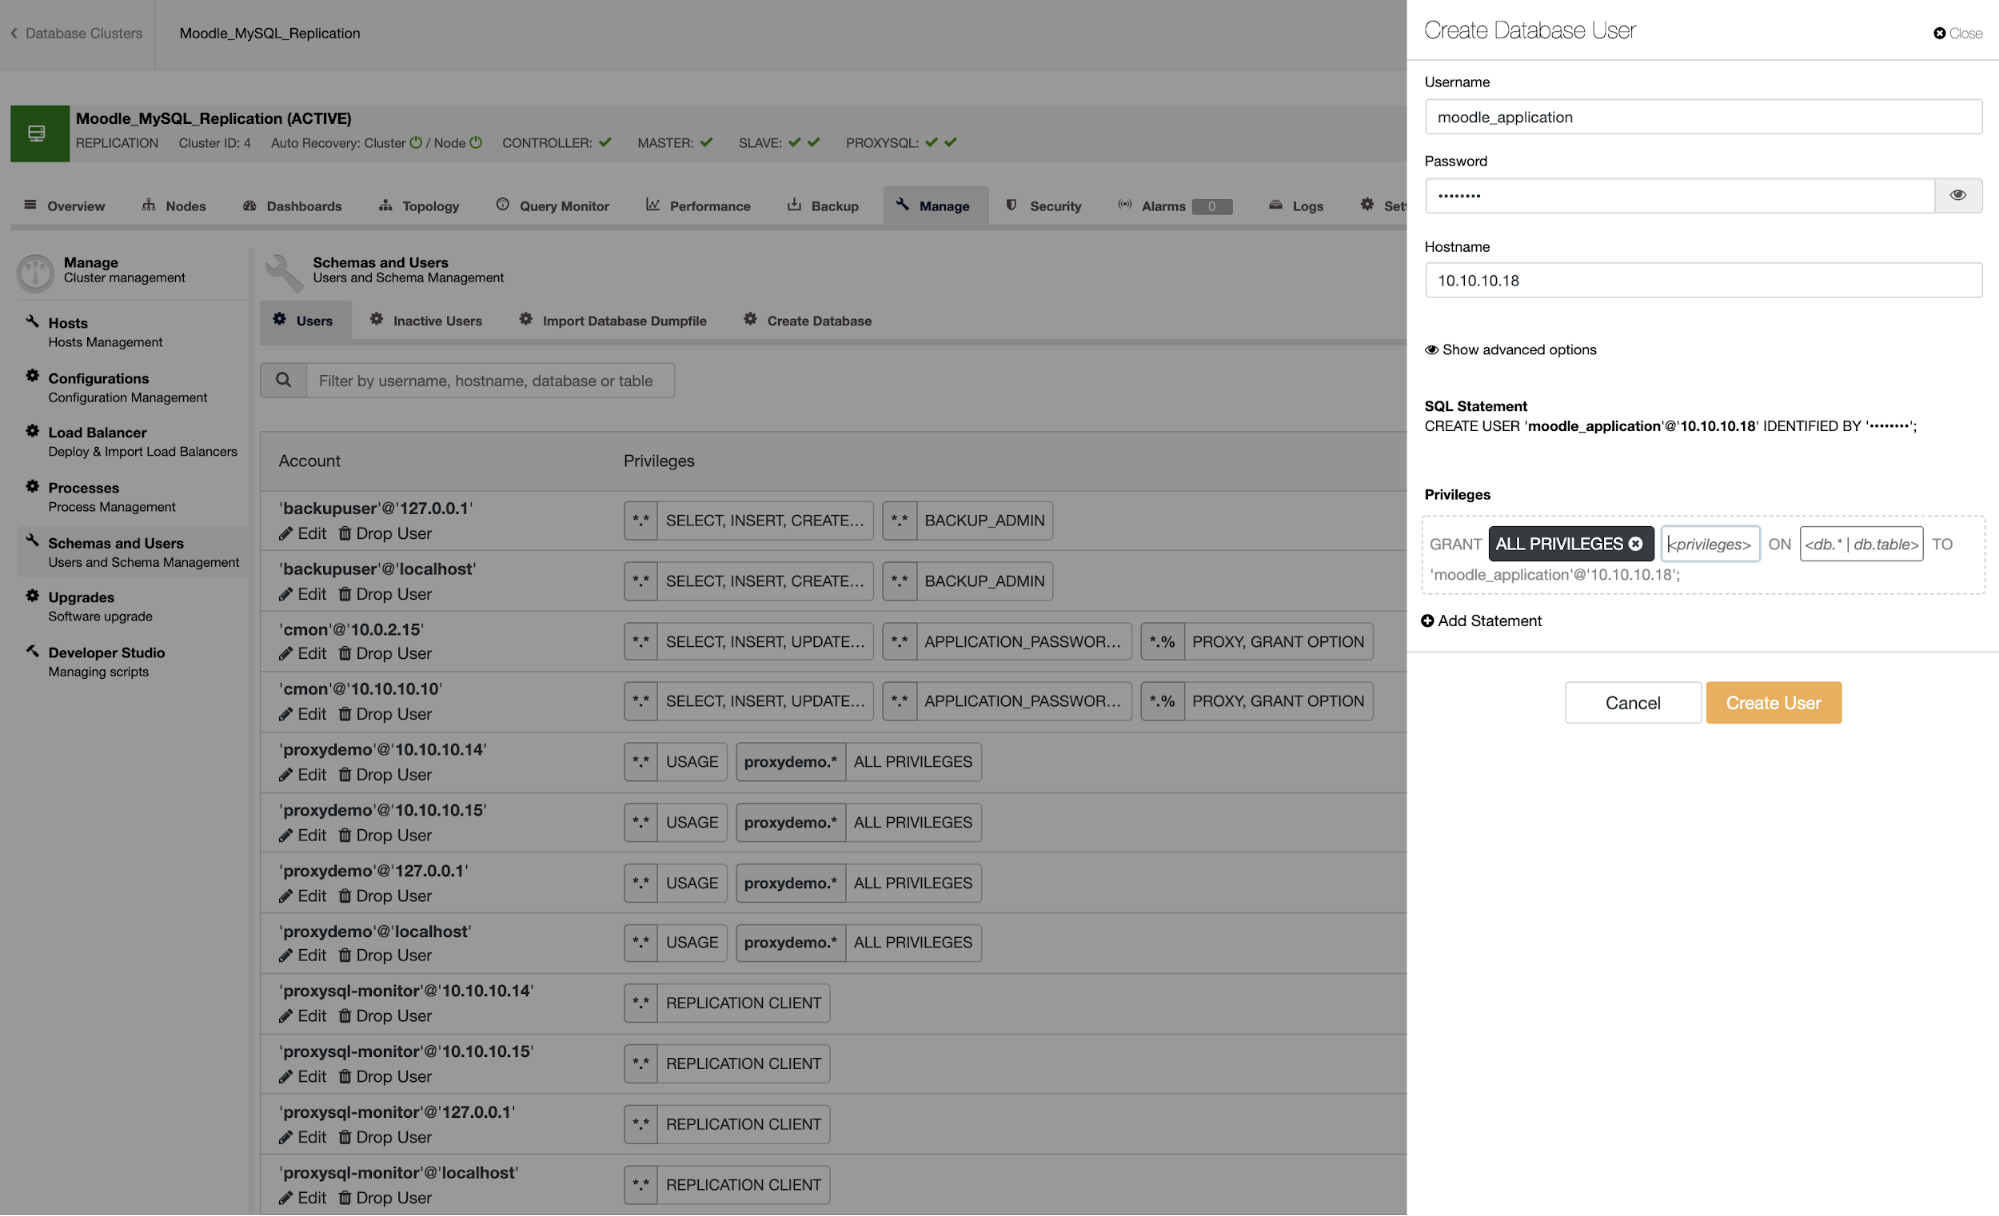
You need to fill some information, eg: username, password, hostname and privilege. After that, just click Create User. This allows you to create a user for the moodle application:
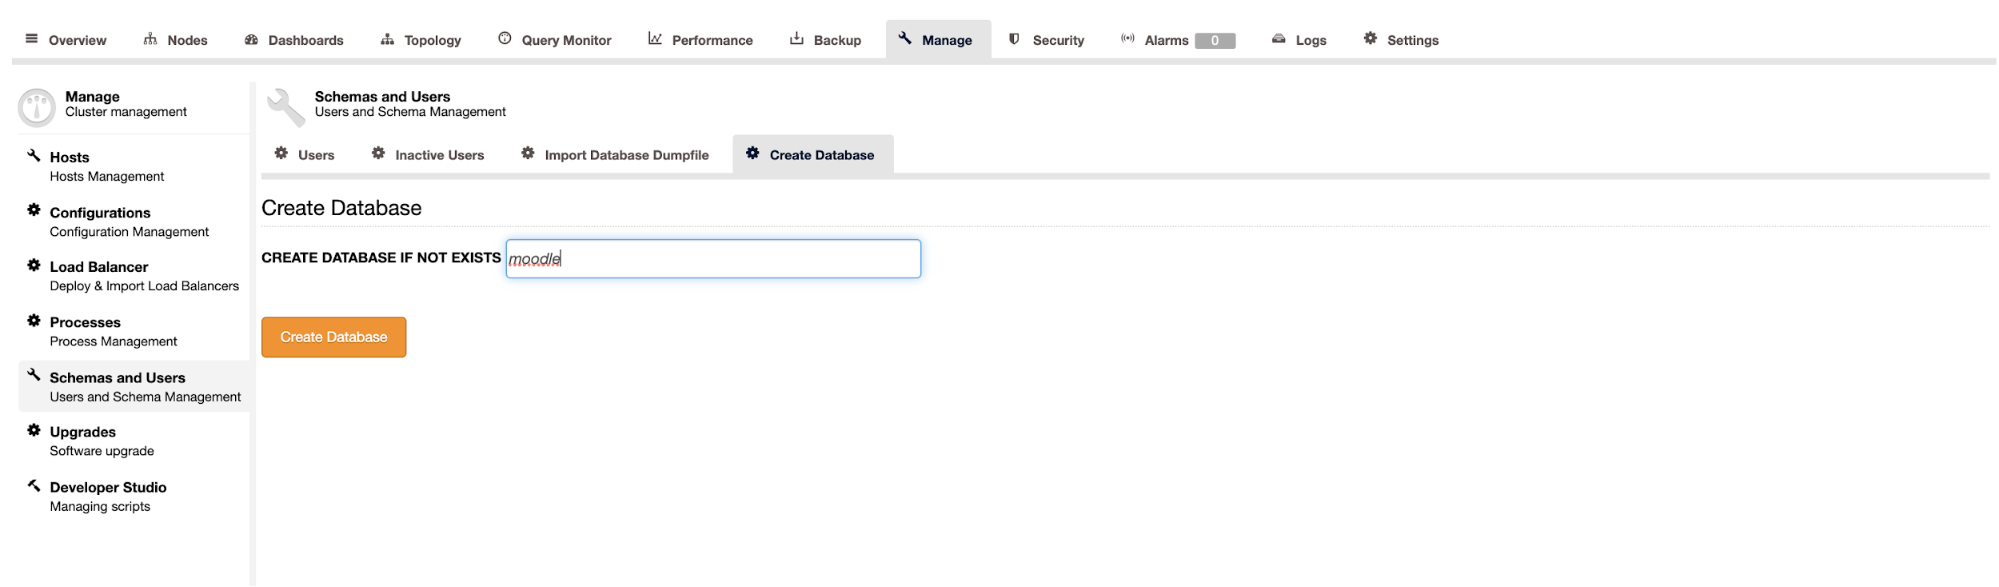
For creating the database, you can choose the Create Database tab on the same page as Users.
The next step is configure the credentials on ProxySQL side, you can import the credentials that you had created in ProxySQL. You can go to the ProxySQL node, choose the Users tab, there is an Import User button on the right side.
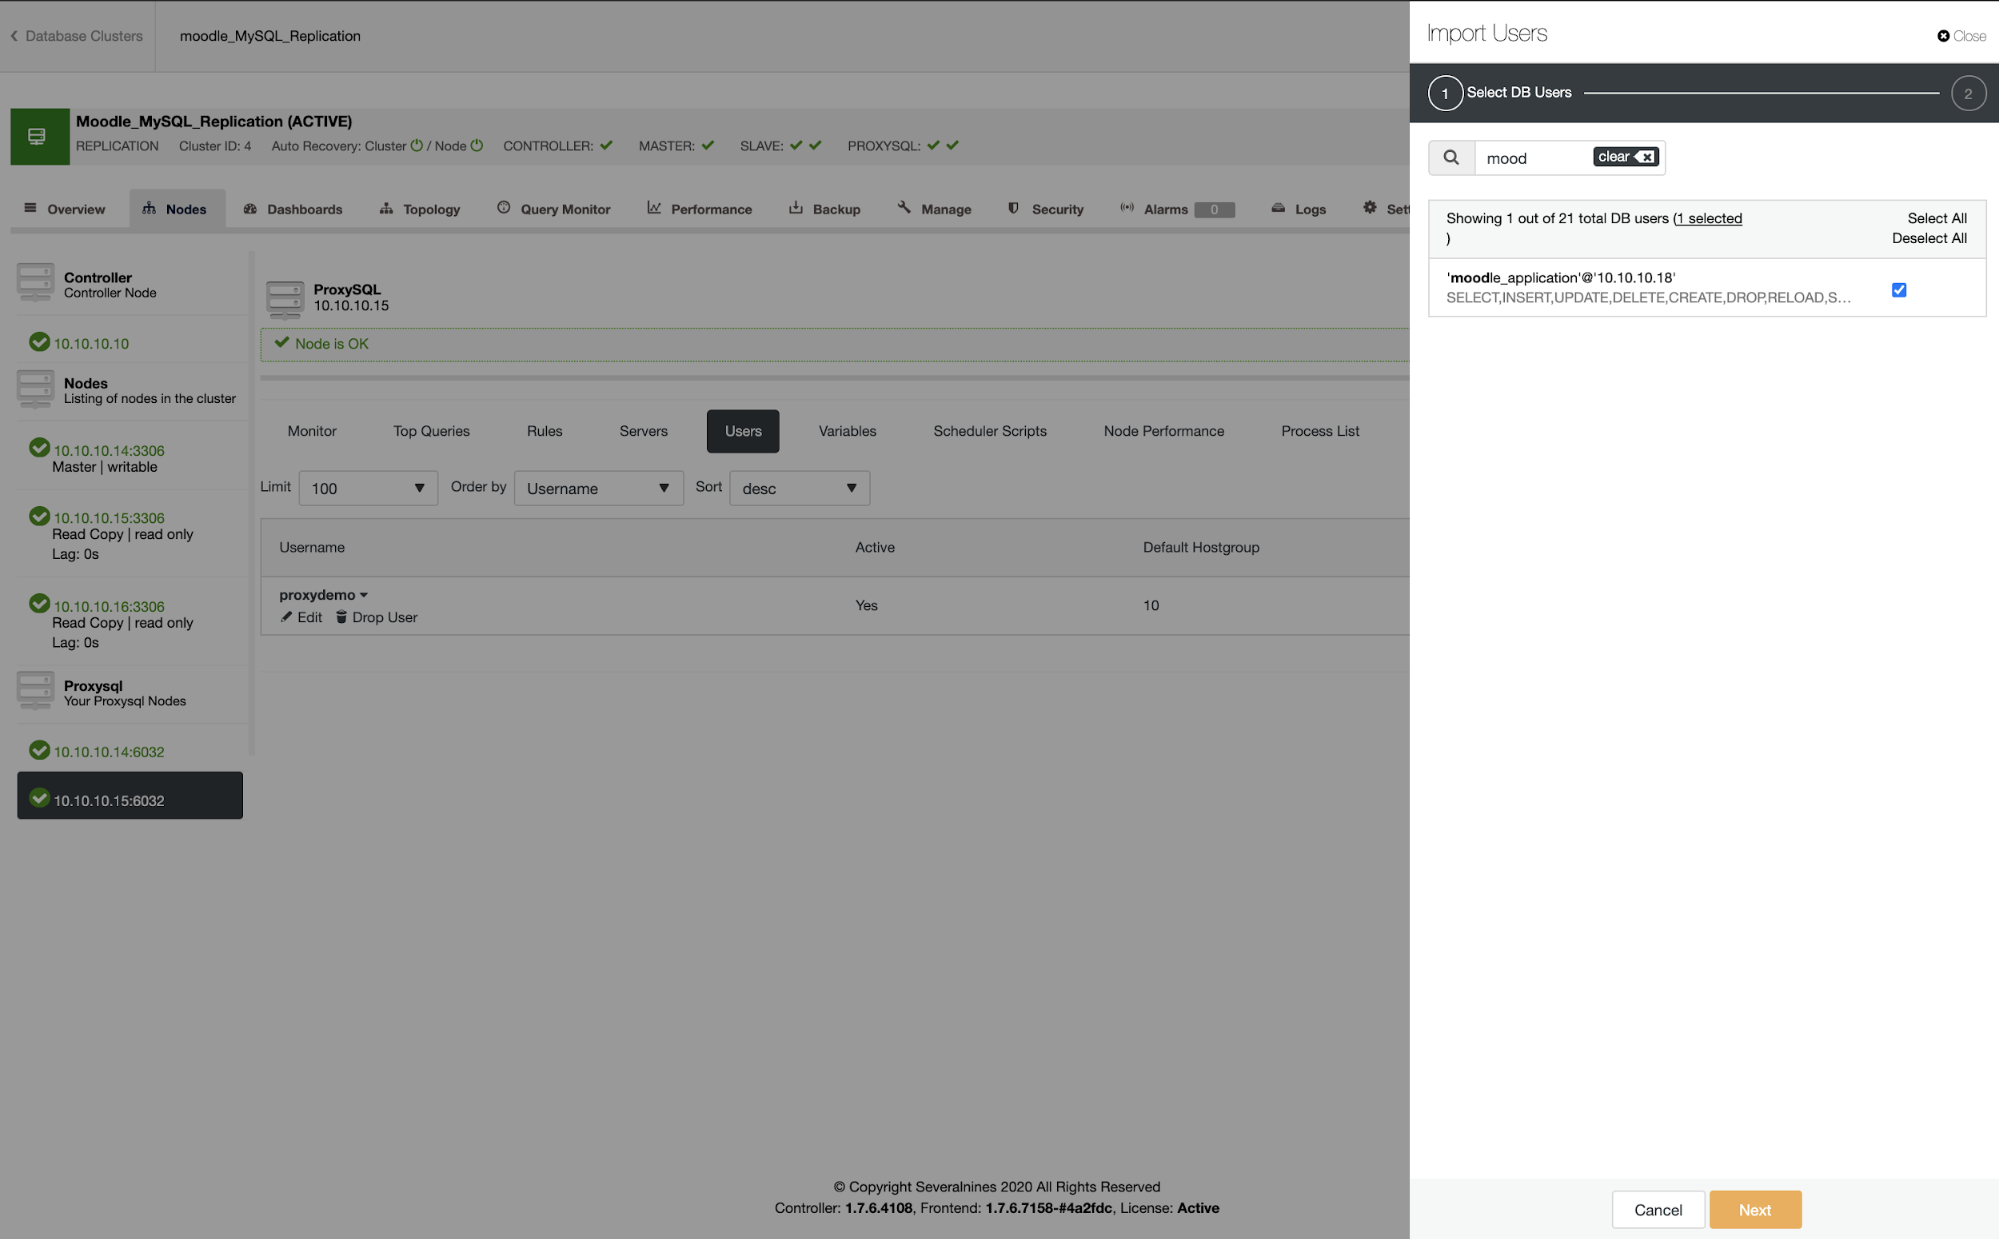
Search the moodle_application user, and then select the user. On the next page, you need to define the default Hostgroup for the user and then Import Users.
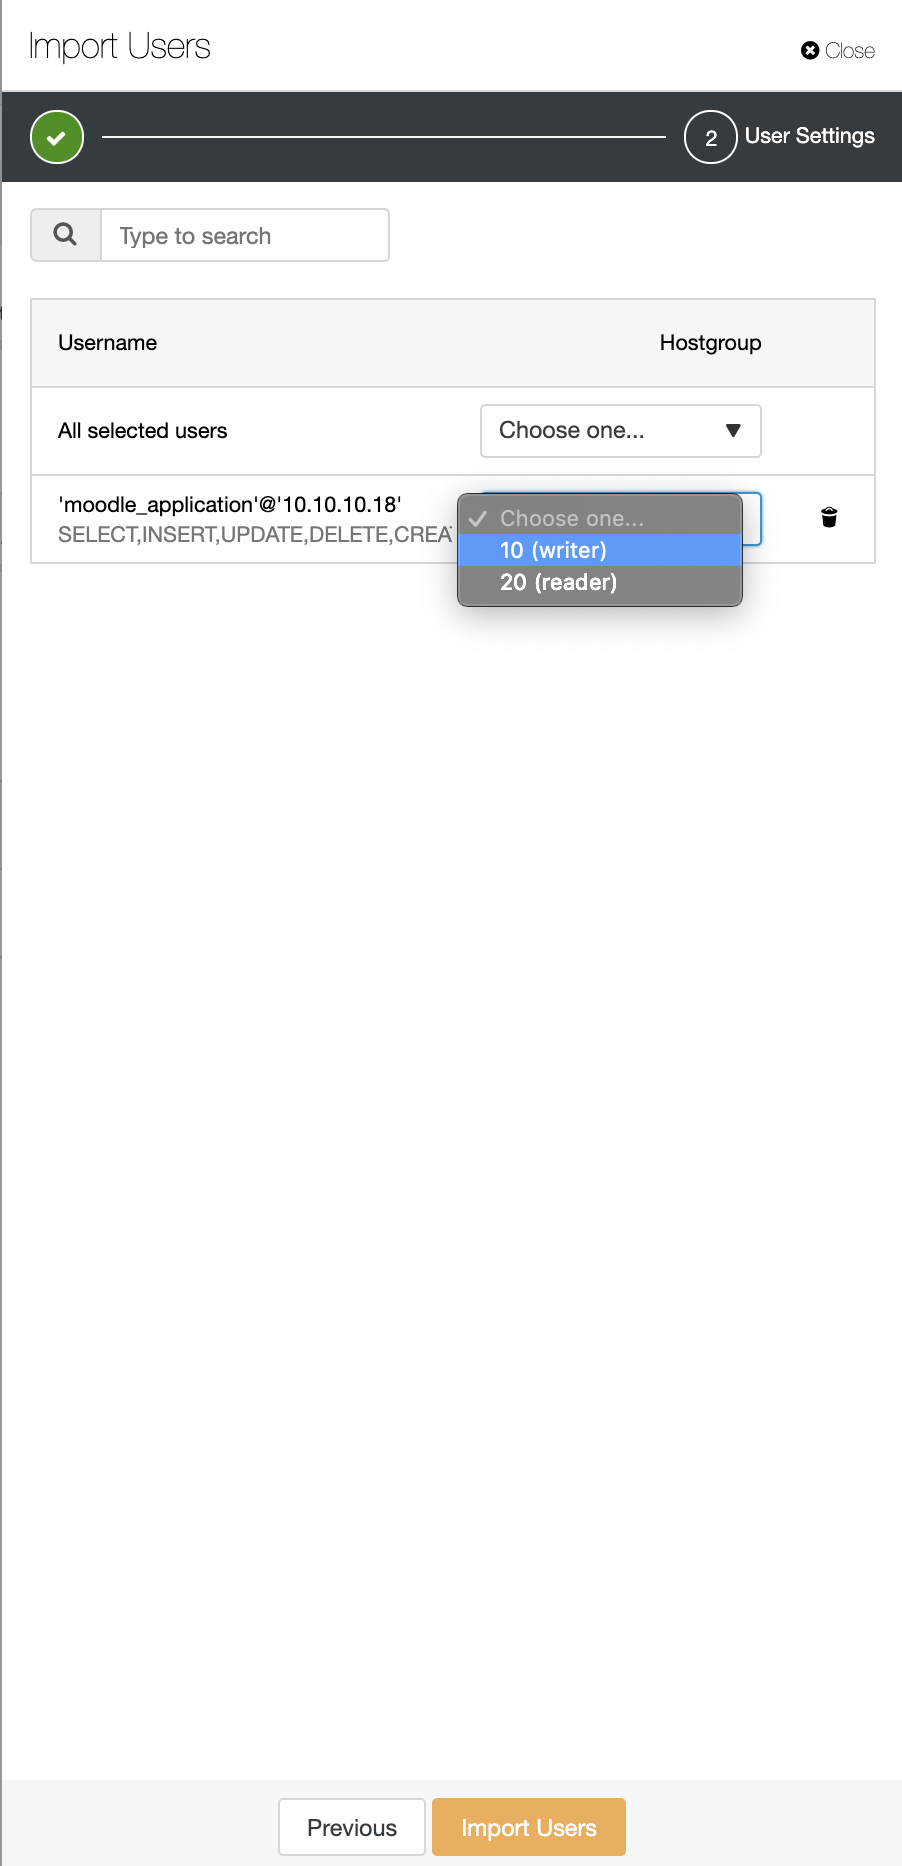
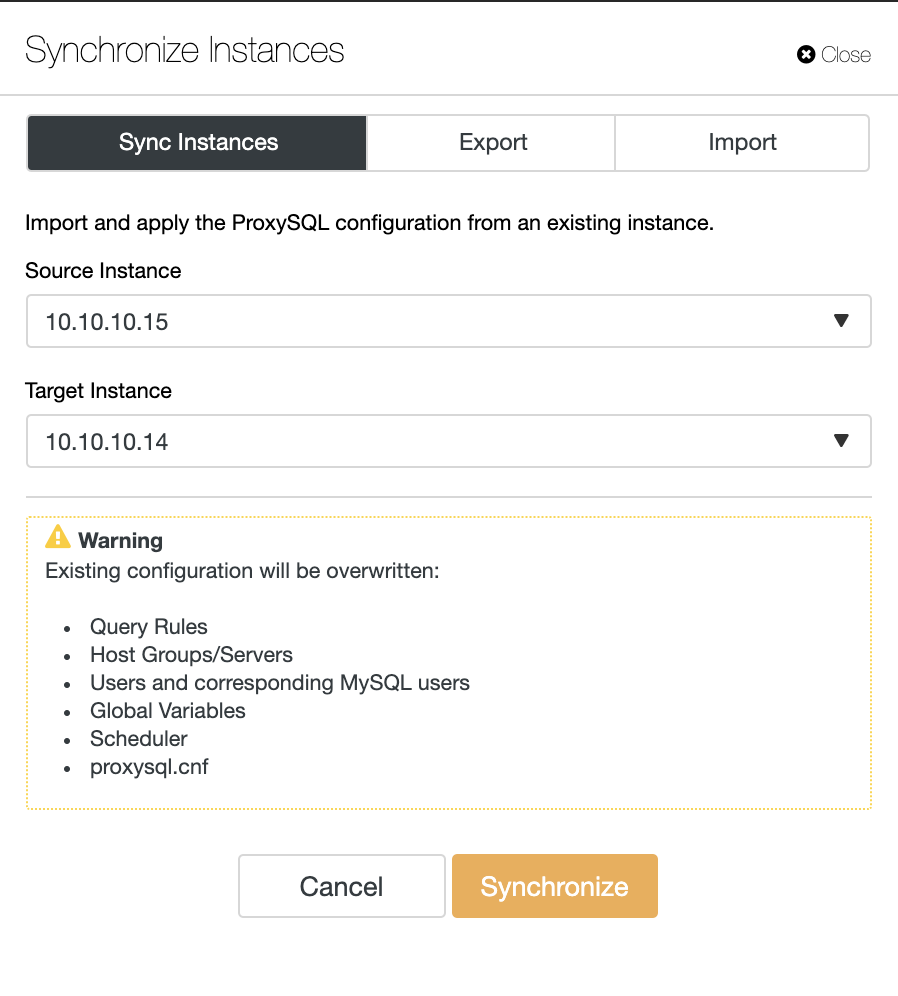
Please repeat the steps to import the Users on the other ProxySQL node, or you can use the Sync Instances in ProxySQL Menu.
You need to download the moodle application from moodle official website (re. https://download.moodle.org/), the latest version when this blog is written is 3.9.1. They provide two types of compressed files, the zip compressed and the tar zip. Download the zip file and put the file in your application servers. Check out the requirements for moodle software, ie: Web Server, PHP library.
Extract the zip files into temp directory, create the /var/www/html/moodle directory, copy the extracted directory to the folder. Don’t forget to give permission 0755 for the directory. After that, you can access the web browser for the next setup. Choose the language as shown below:

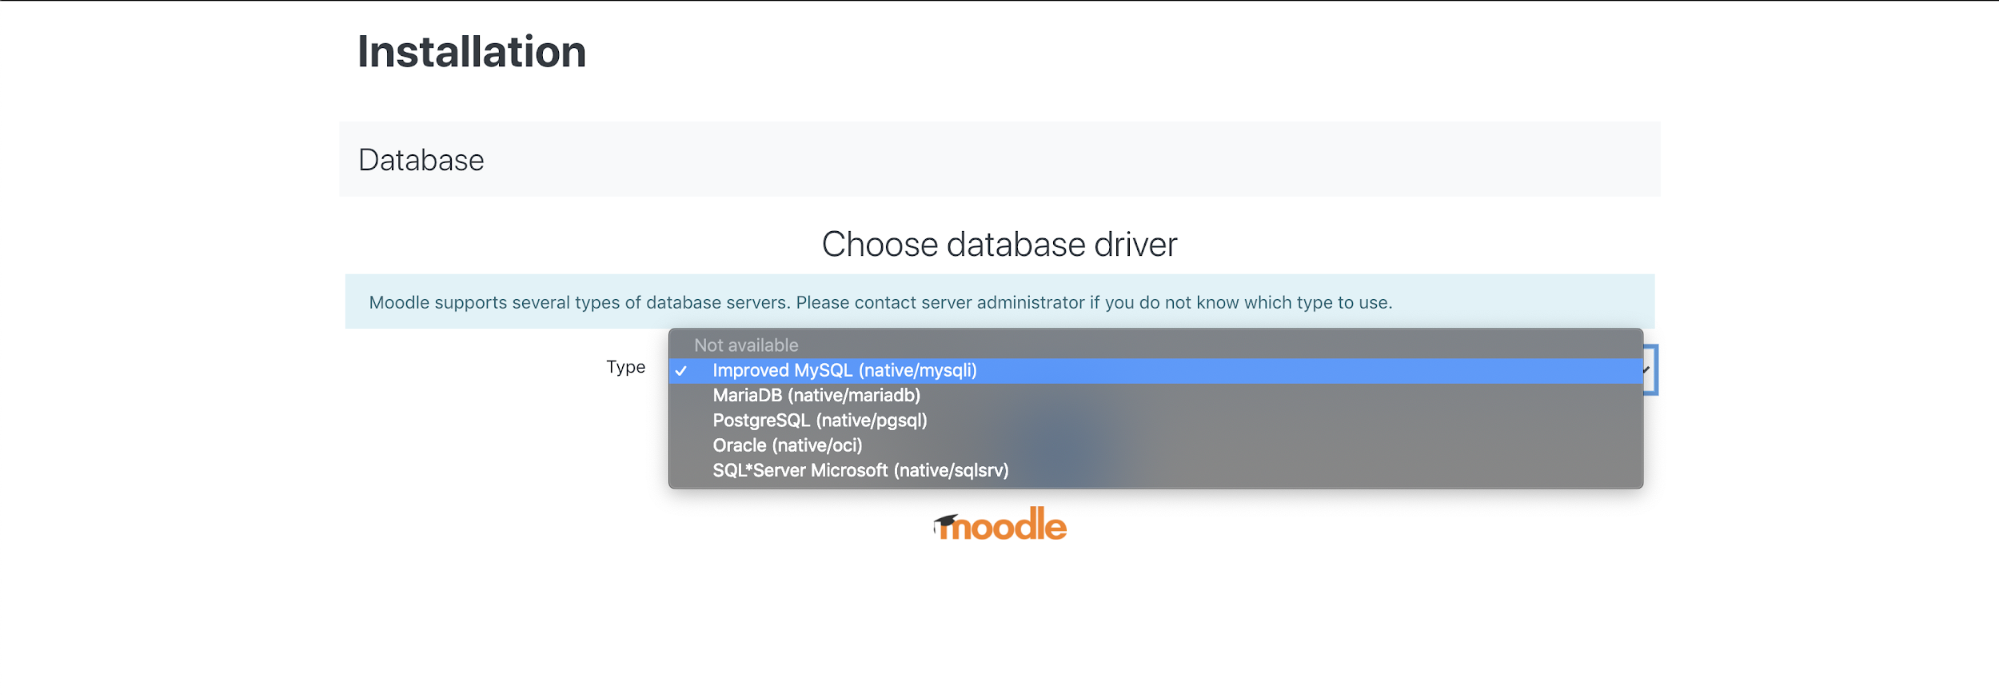
Select the database driver for your MySQL setup as below:
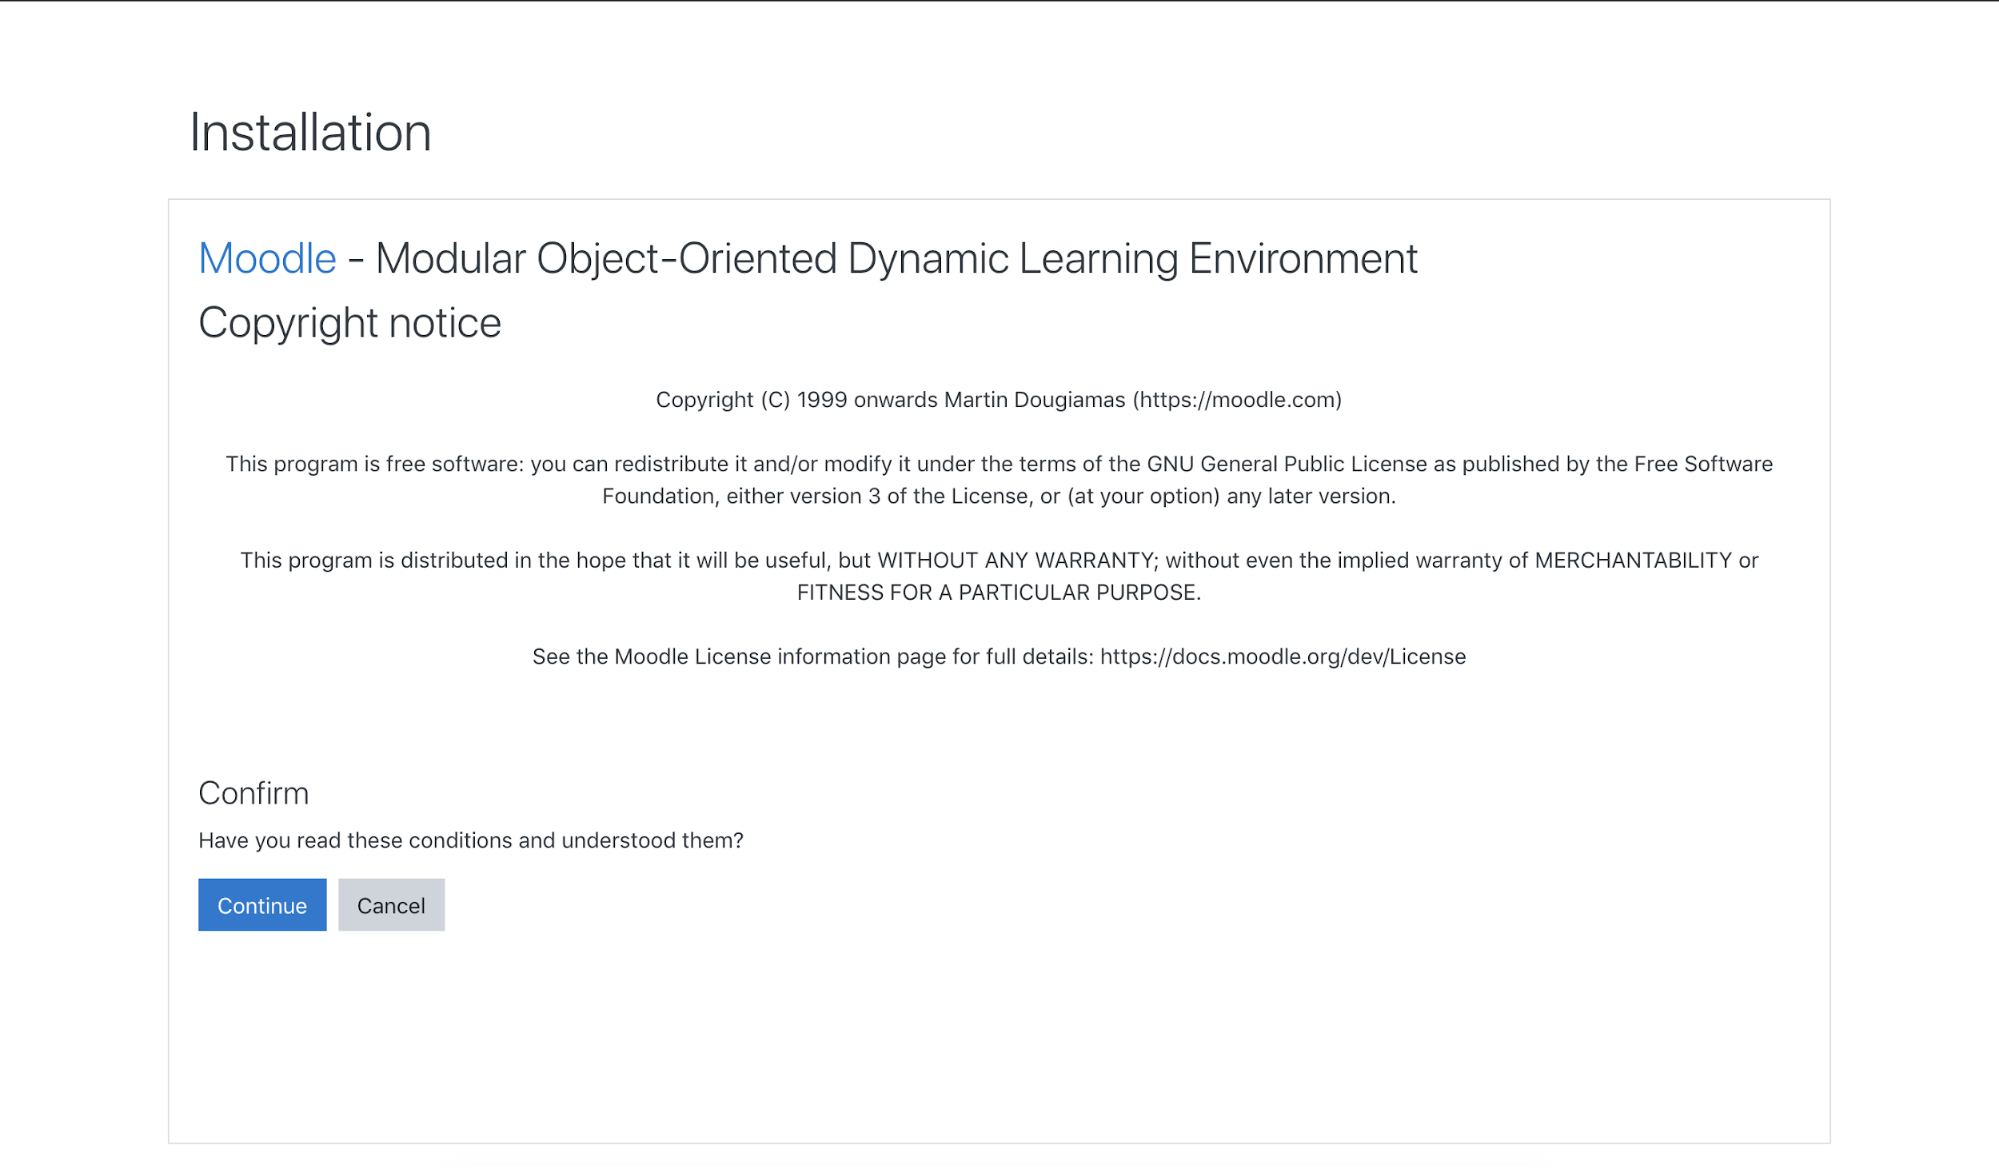
You need to fill some database credentials info that you had made previously, for example: username, password, host, database, port. The hostname should be your Virtual IP Address and the port is ProxySQL port, which is 6032.
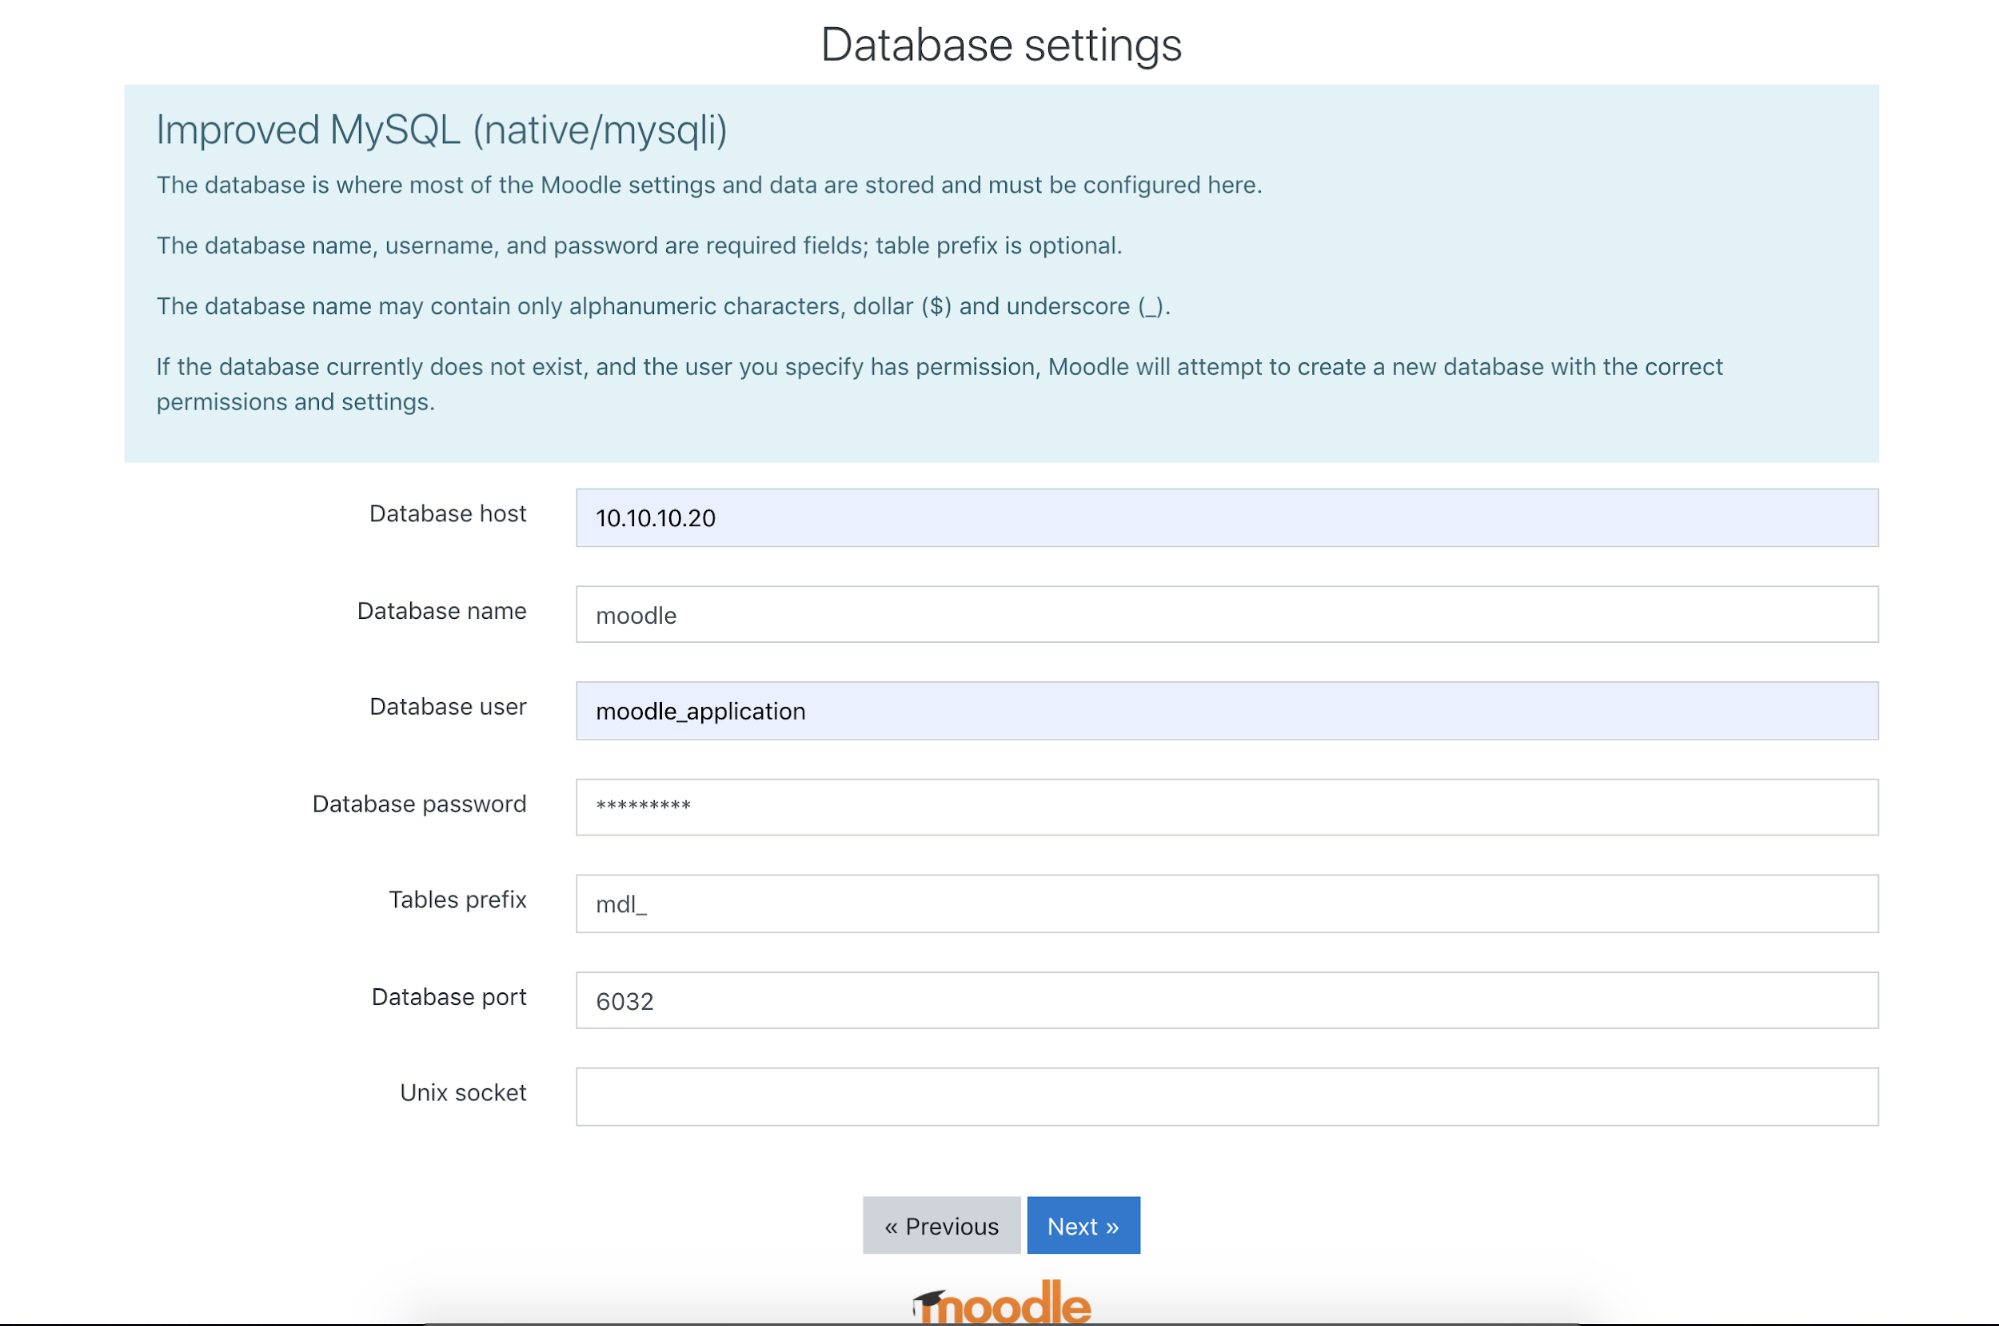
The database host would be your Virtual IP Address. Once you have filled in the fields, click Next and then you are done.
Building a highly available database for Moodle using ClusterControl is very easy and straightforward, you can build your own database that will support your 99,99% service uptime.


