blog
Using Automation to Speed up Release Tests on PostgreSQL

Having a test environment is a must in all companies. It could be necessary for testing changes or new releases of the application, or even for testing your existing application with a new PostgreSQL version. The hard part of this is, first, how to deploy a test environment as similar as possible to the production one, and how to maintain that environment without recreating everything from scratch.
In this blog, we will see how to deploy a test environment in different ways using ClusterControl, which will help you to automate the process and avoid manual time-consuming tasks.
Cluster-to-Cluster Replication
Since ClusterControl 1.7.4 there is a feature called Cluster-to-Cluster Replication. It allows you to have a replication running between two autonomous clusters.
We will take a look at how to use this feature for an existing PostgreSQL cluster. For this task, we will assume you have ClusterControl installed and the Primary Cluster was deployed using it.
Creating a Cluster-to-Cluster Replication
To create a new Cluster-to-Cluster Replication from the ClusterControl UI, go to ClusterControl -> Select PostgreSQL Cluster -> Cluster Actions -> Create Slave Cluster.
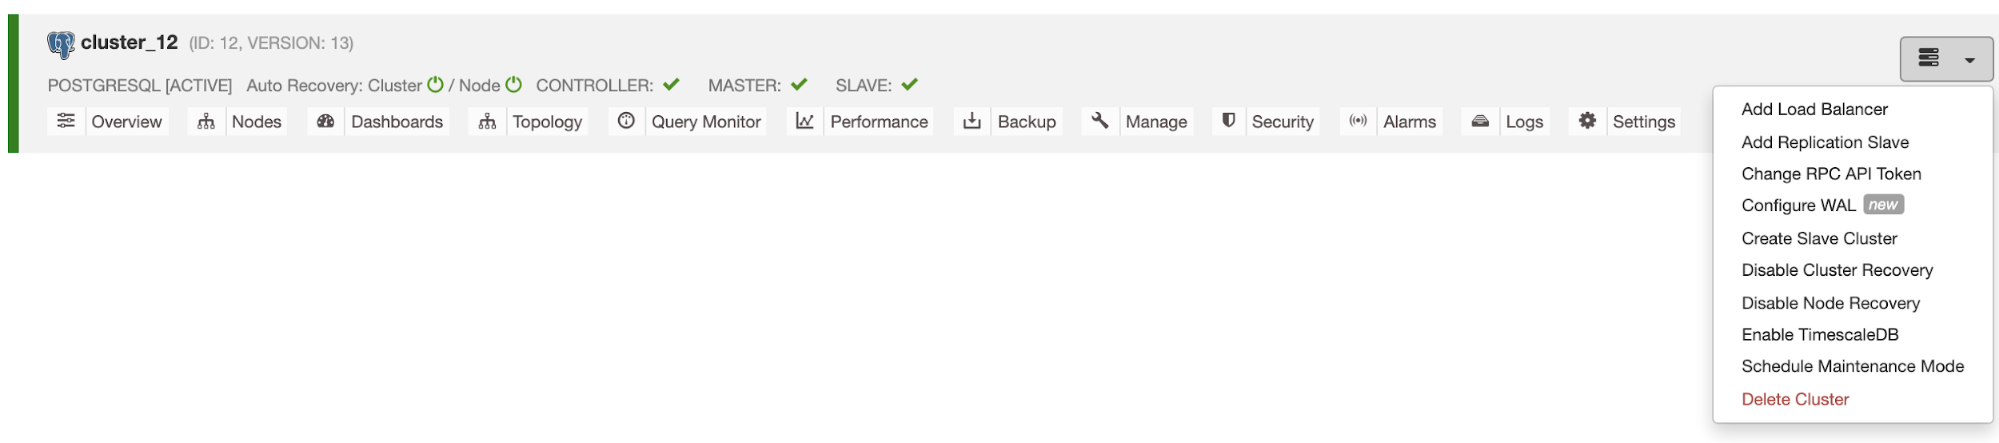
The Slave Cluster will be created by streaming data from the current Primary Cluster.
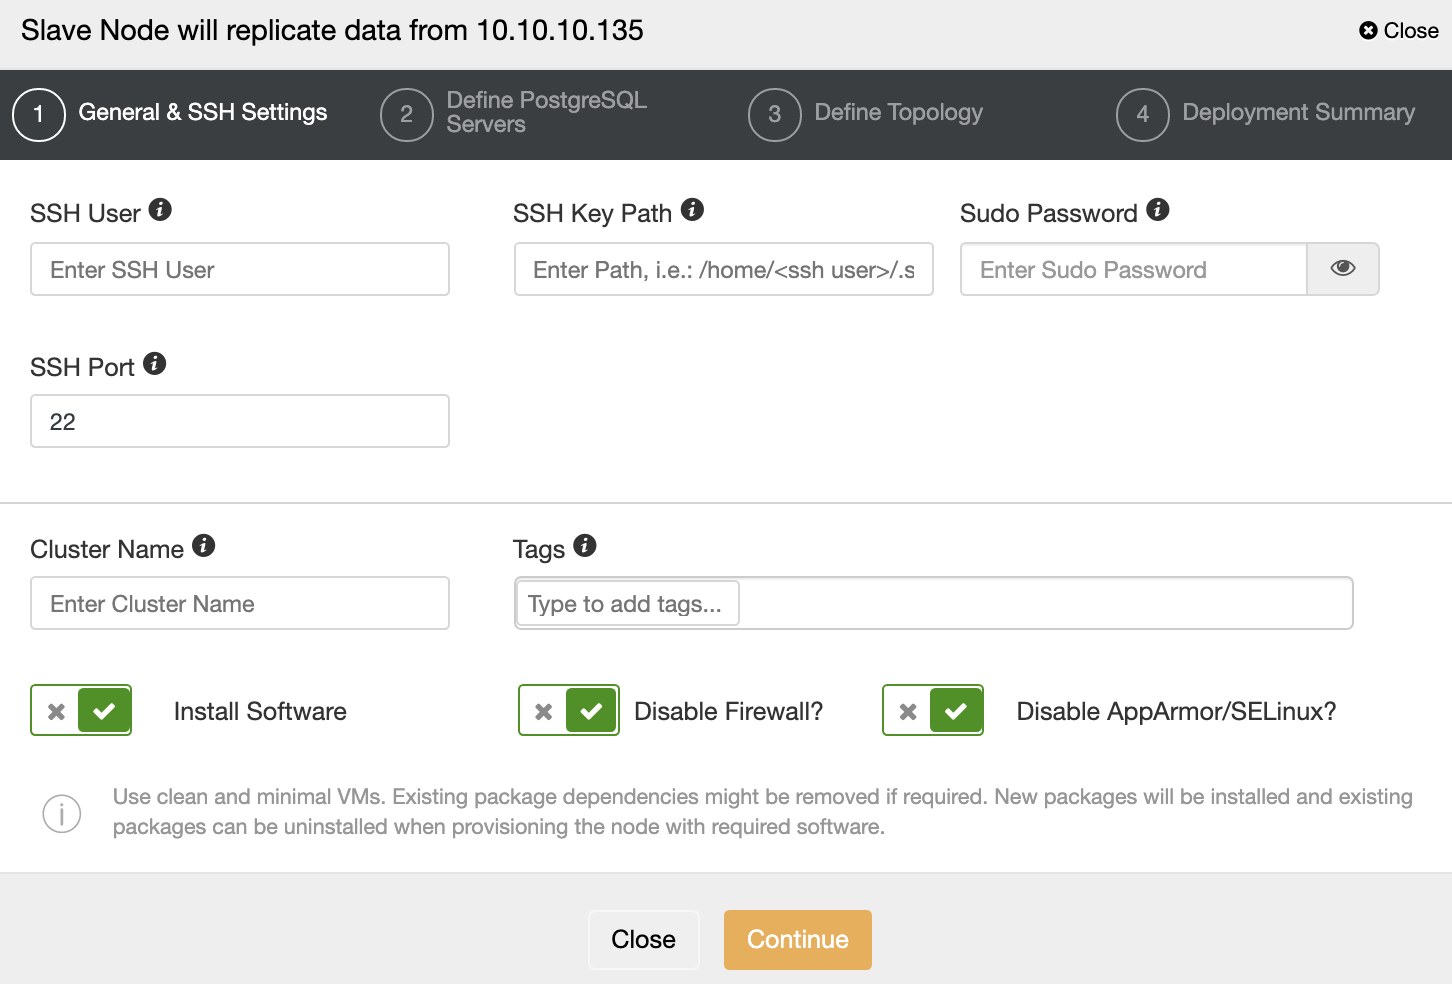
You must specify SSH credentials and port, a name for your Slave Cluster, and if you want ClusterControl to install the corresponding software and configurations for you.
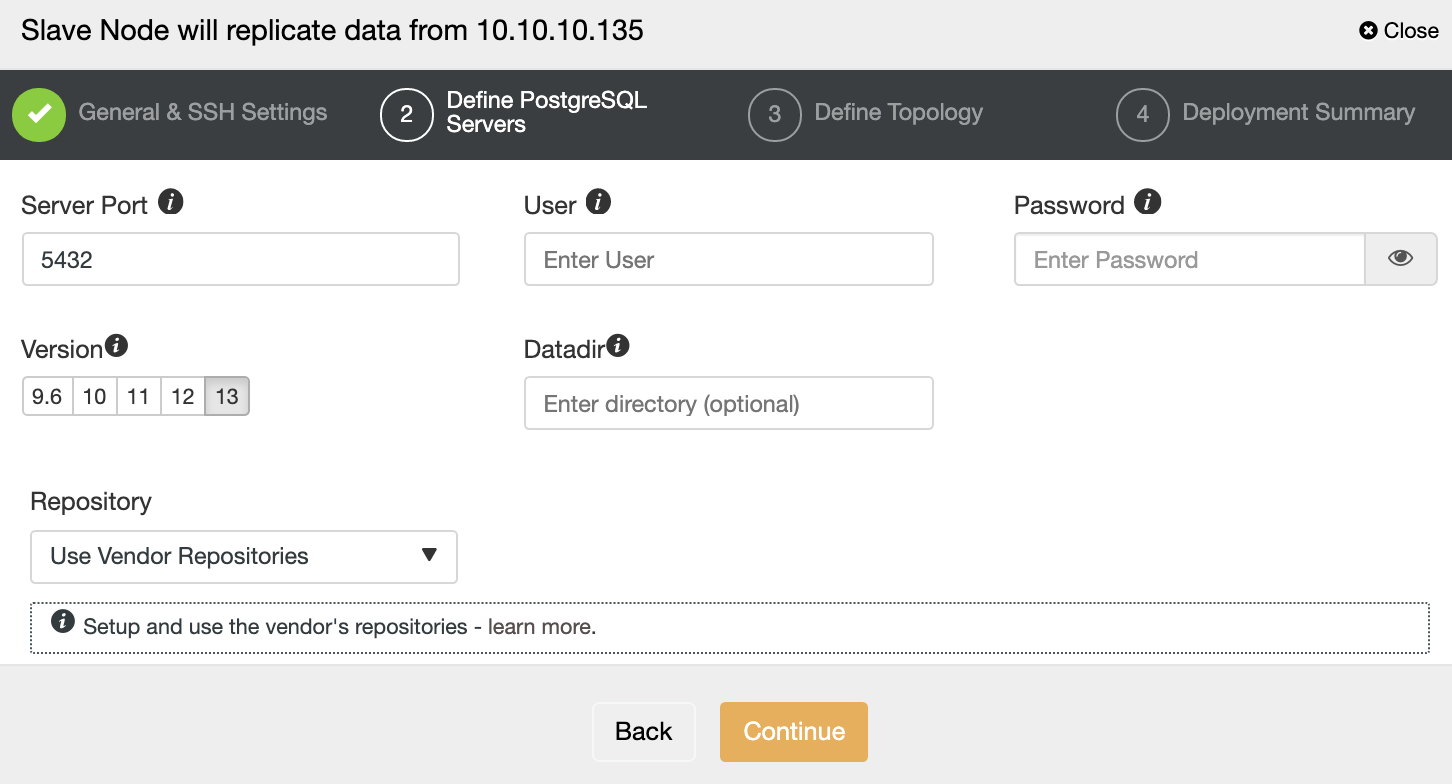
After setting up the SSH access information, you must define the database version, datadir, port, and admin credentials. As it will use streaming replication, make sure you use the same database version, and the credentials must be the same used by the Primary Cluster.
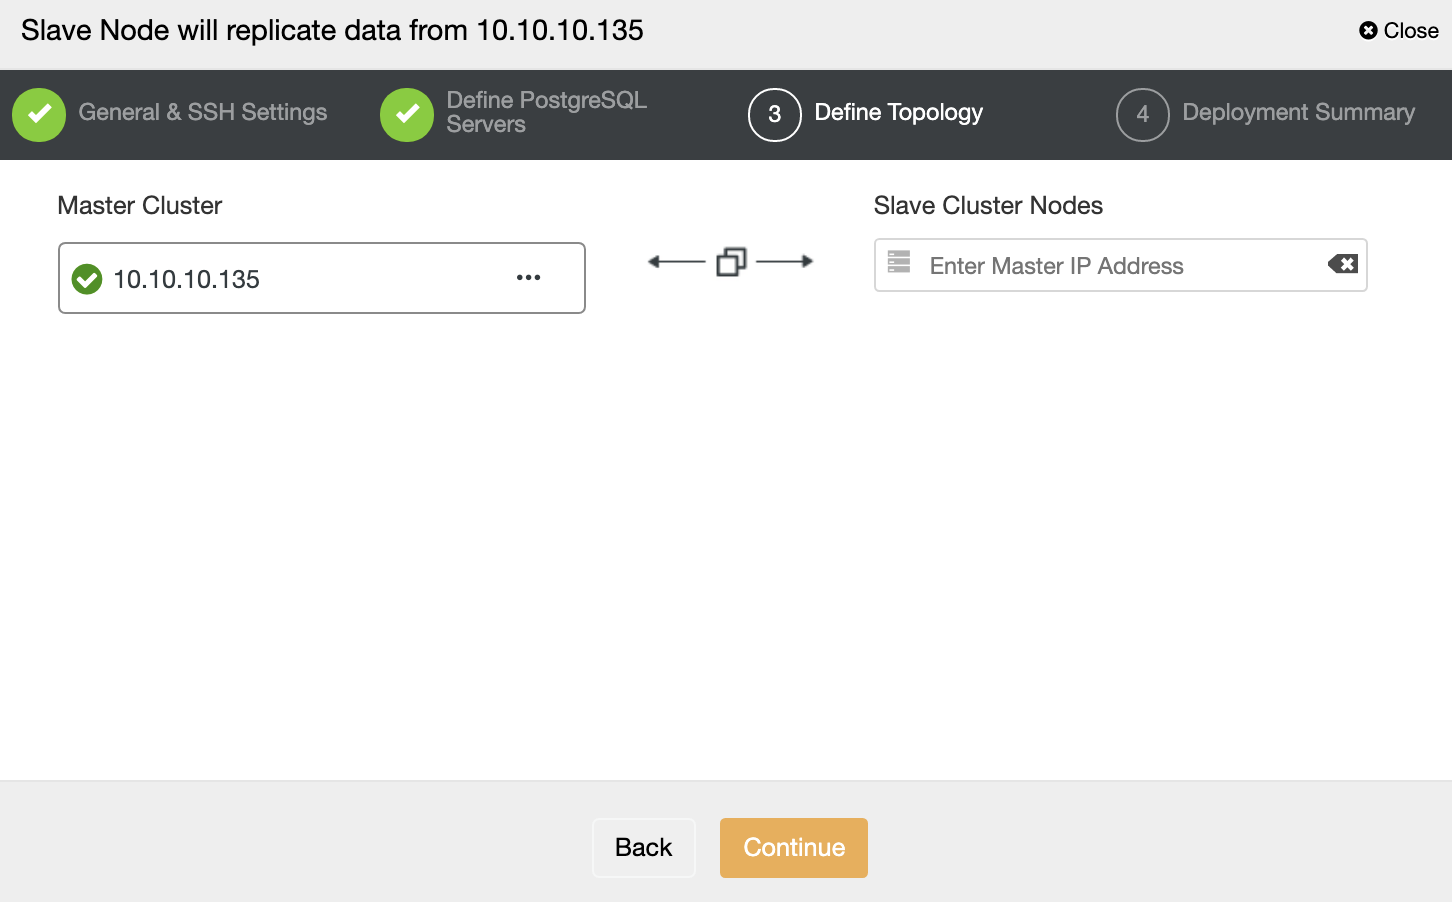
In this step, you need to add the server to the new Slave Cluster. For this task, you can enter both IP Address or Hostname of the database node.
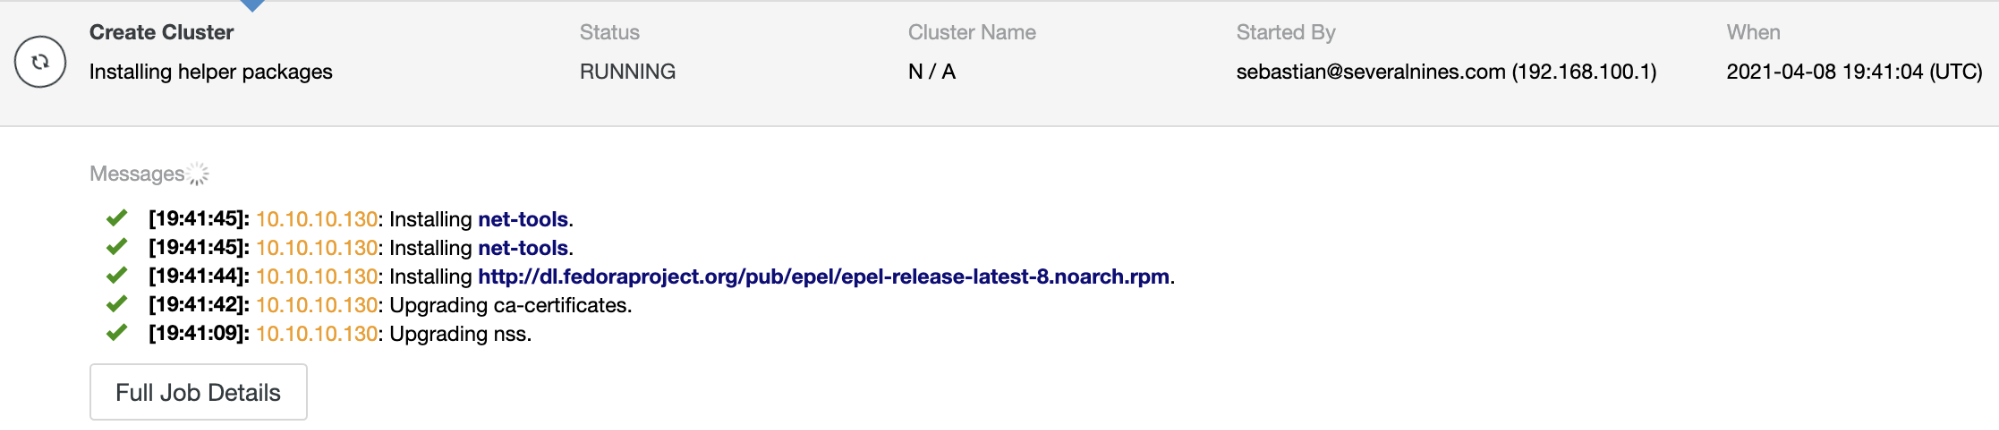
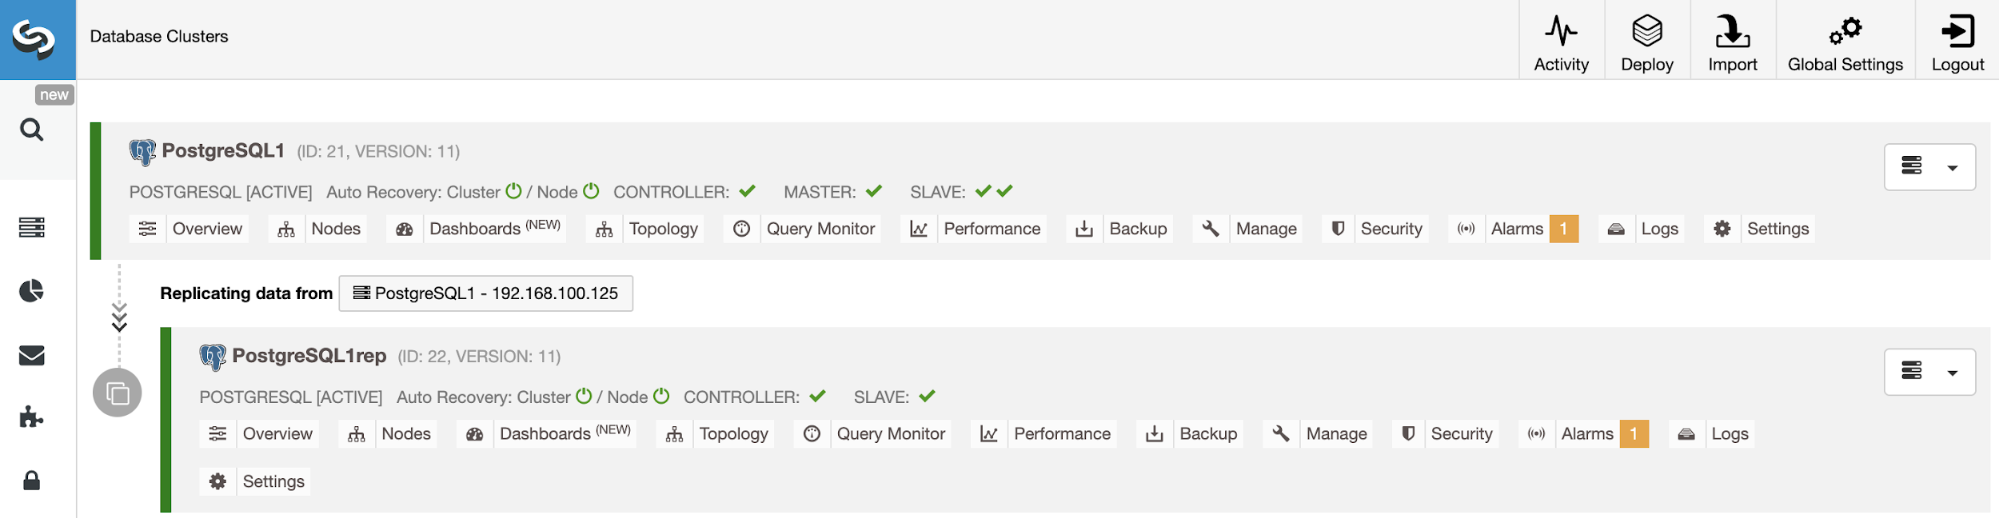
You can monitor the job status in the ClusterControl activity monitor. Once the task is finished, you can see the cluster in the main ClusterControl screen.
ClusterControl CLI
ClusterControl CLI, also known as s9s, is a command-line tool introduced in ClusterControl version 1.4.1 to interact, control, and manage database clusters using the ClusterControl system. ClusterControl CLI opens a new door for cluster automation where you can easily integrate it with existing deployment automation tools like Ansible, Puppet, Chef, etc. You can also use this ClusterControl tool to create a Slave Cluster. Let’s see an example:
$ s9s cluster --create --cluster-name=PostgreSQL1rep --cluster-type=postgresql --provider-version=13 --nodes="192.168.100.133" --os-user=root --os-key-file=/root/.ssh/id_rsa --db-admin=admin --db-admin-passwd=********* --vendor=postgres --remote-cluster-id=14 --logNow, let’s see the used parameter more in details:
-
Cluster: To list and manipulate clusters.
-
Create: Create and install a new cluster.
-
Cluster-name: The name of the new Slave Cluster.
-
Cluster-type: The type of cluster to install.
-
Provider-version: The software version.
-
Nodes: List of the new nodes in the Slave Cluster.
-
Os-user: The user name for the SSH commands.
-
Os-key-file: The key file to use for SSH connection.
-
Db-admin: The database admin user name.
-
Db-admin-passwd: The password for the database admin.
-
Remote-cluster-id: Master Cluster ID for the Cluster-to-Cluster Replication.
-
Log: Wait and monitor job messages.
Managing Cluster-to-Cluster Replication
Now you have your Cluster-to-Cluster Replication up and running, there are different actions to perform on this topology using ClusterControl from both UI and CLI.
Rebuilding a Slave Cluster
To rebuild a Slave Cluster, go to ClusterControl -> Select Slave Cluster -> Nodes -> Choose the Node -> Node Actions -> Rebuild Replication Slave.
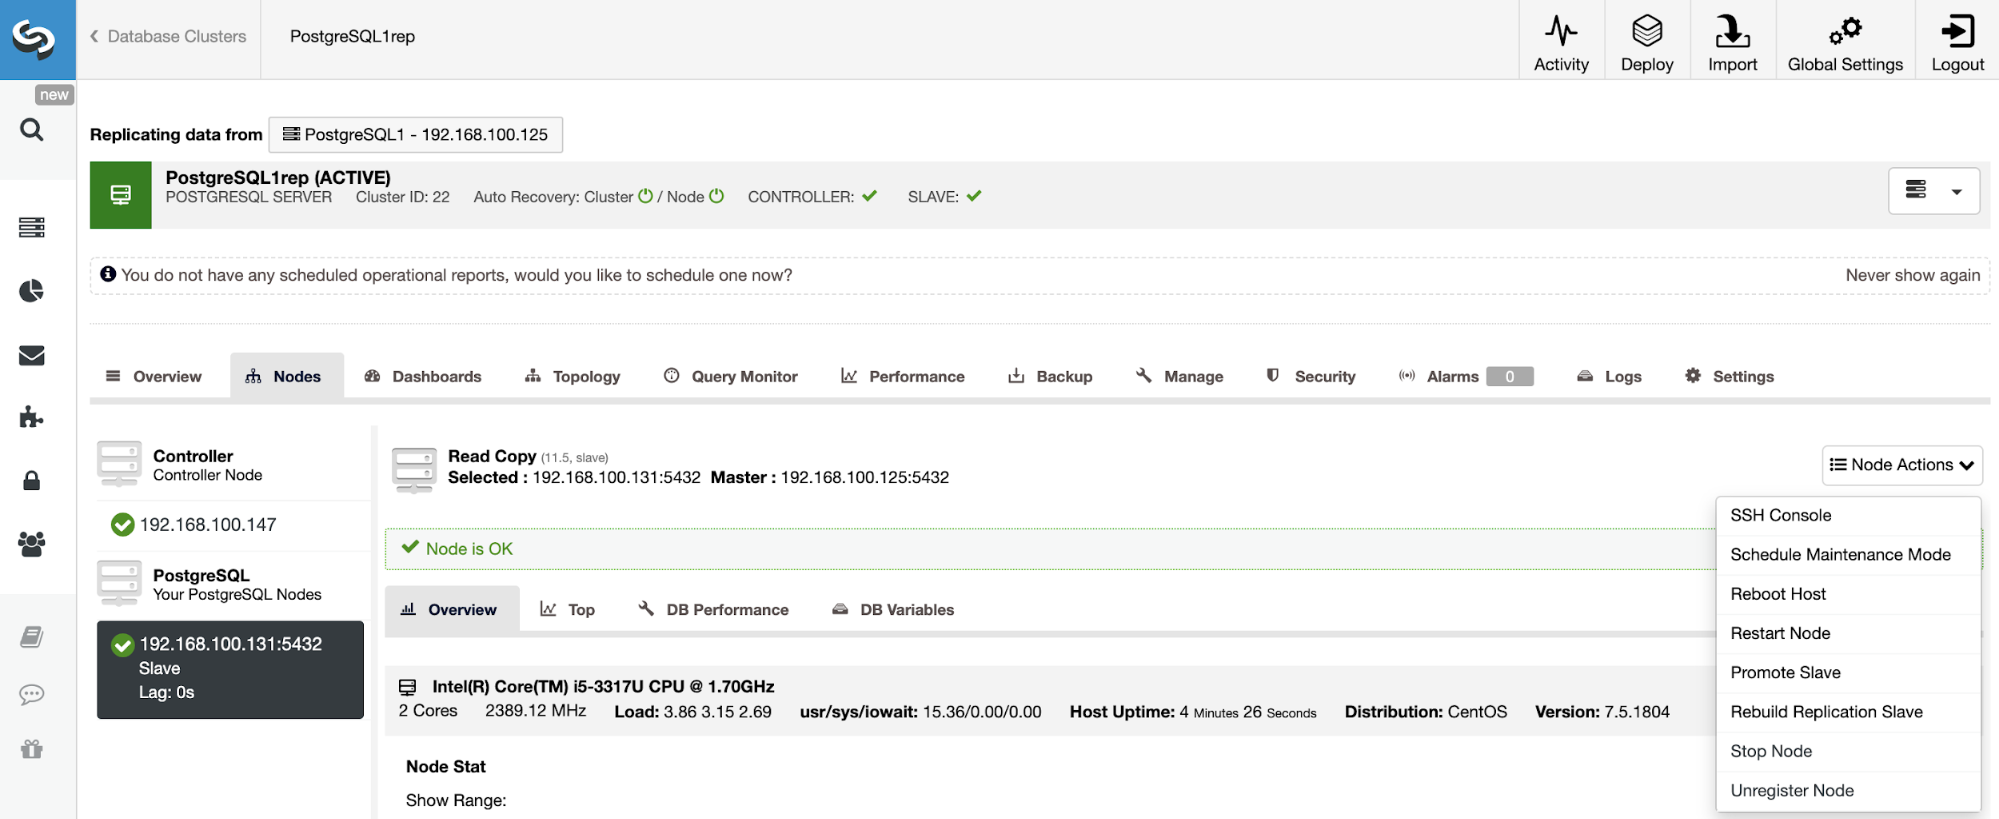
ClusterControl will perform the following steps:
-
Stop PostgreSQL Server
-
Remove content from its datadir
-
Stream a backup from the Master to the Slave using pg_basebackup
-
Start the Slave
You can also rebuild a Slave Cluster using the following command from the ClusterControl server:
$ s9s replication --stage --master="192.168.100.125" --slave="192.168.100.133" --cluster-id=15 --remote-cluster-id=14 --logThe parameters are:
-
Replication: To monitor and control data replication.
-
Stage: Stage/Rebuild a Replication Slave.
-
Master: The replication master in the master cluster.
-
Slave: The replication slave in the slave cluster.
-
Cluster-id: The Slave Cluster ID.
-
Remote-cluster-id: The Master Cluster ID.
-
Log: Wait and monitor job messages.
Create Cluster from Backup
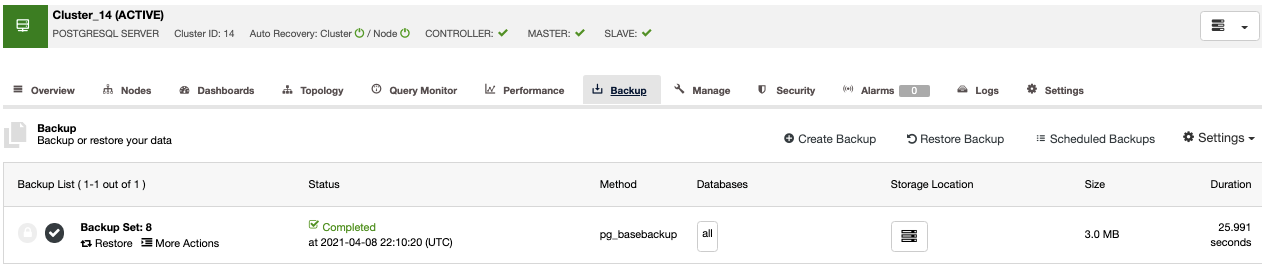
Another way to create a test environment is by creating a new cluster from a backup of your Primary Cluster. For this, go to ClusterControl -> Select your PostgreSQL cluster -> Backup. There, choose the backup to be restored from the list.

Now, you can restore this backup in your current database, in a separate node, or create a new cluster from this backup.
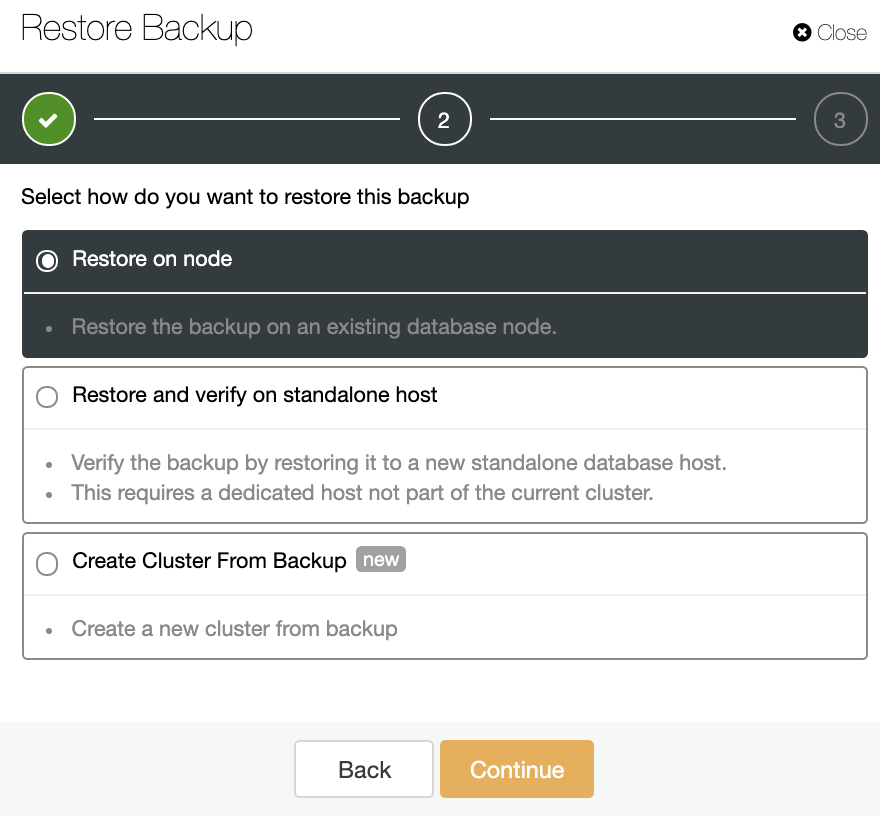
The “Create Cluster From Backup” option will create a new PostgreSQL Cluster from the selected backup.
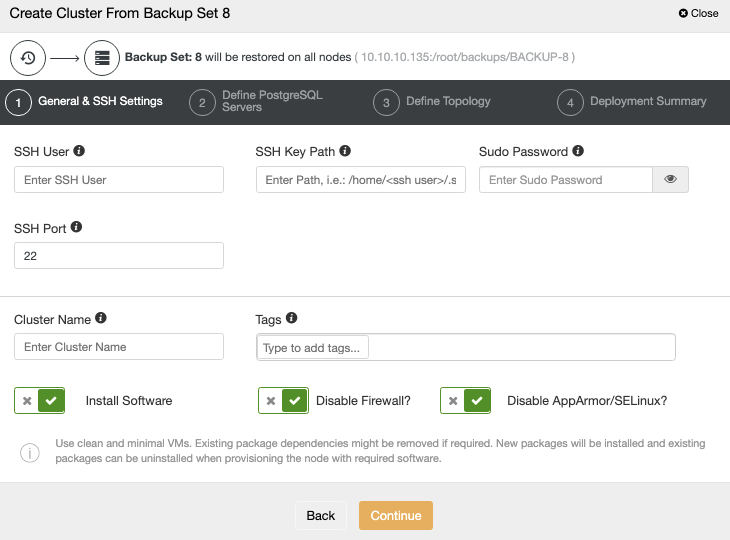
You need to add the OS and database credentials and the information to deploy the new cluster. When this job finishes, you will see the new cluster in the ClusterControl UI.

Restore Backup on Standalone Host
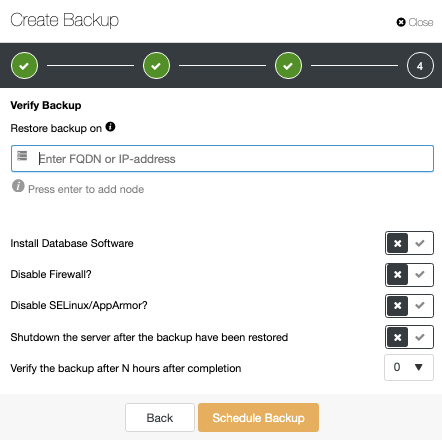
In the same Backup section, you can choose the option “Restore and verify on standalone host” to restore a backup in a separate node.
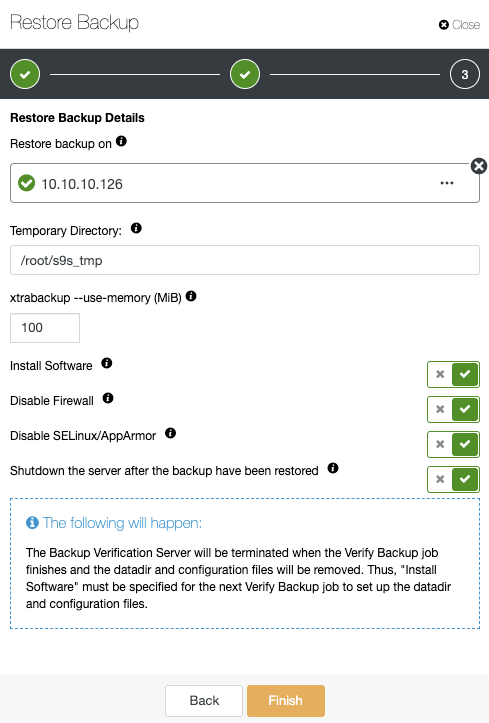
Here you can specify if you want ClusterControl to install the software in the new node, and disable the firewall or AppArmor/SELinux (depending on the OS). You can keep the node up and running, or ClusterControl can shutdown the database service until the next restore job. When it finishes, you will see the restored/verified backup in the backup list marked with a tick.
If you don’t want to do this task manually, you can schedule this process using the Verify Backup Feature, to repeat this job periodically in a Backup Job.
Automatic ClusterControl Backup Verification
In ClusterControl -> Select your PostgreSQL Cluster -> Backup -> Create Backup.
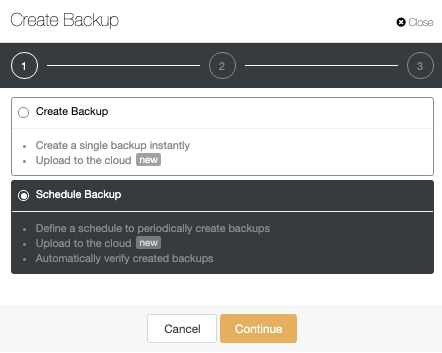
The automatic verify backup feature is available for the scheduled backups. When scheduling a backup, in addition to selecting the common options like method or storage, you also need to specify schedule/frequency.
Using ClusterControl, you can choose different backup methods, depending on the database technology, and, in the same section, you can choose the server from which to take the backup, where you want to store the backup, and if you want to upload the backup to the cloud (AWS, Azure, or Google Cloud). You can also compress and encrypt your backup, and specify the retention period.
To use the Verify Backup Feature, you need a dedicated host (or VM) that is not part of the cluster. ClusterControl will install the software and will restore the backup in this host every time the job runs.
After restoring, you can see the verification icon in the ClusterControl Backup section, the same that you will have by doing the verification in the manual ClusterControl way, with the difference that you don’t need to worry about the restoration task. ClusterControl will restore the backup every time automatically.
Conclusion
Deploying a test environment every time you need could be a time-consuming task, and it is hard to maintain this up-to-date. The result of this is sometimes companies don’t test new releases or the test is not correct, for example, using a different environment than the production one.
As you could see, ClusterControl allows you to deploy the same environment that you are using in production with just a few clicks, or even automate the process to avoid any manual task.


