blog
How to Deploy the Chamilo MySQL Database for High Availability

Chamilo is, just like Open edX or Moodle, a platform that allows educational institutions to transfer their educational activities to the internet. Given that the majority of the educational activity has moved online in the last year, it is not surprising that we see more and more people struggling to scale out their educational platforms and ensure better availability.
Chamilo is a platform built on the *AMP stack, which consists of Apache, MySQL and PHP. As usual, the database is the hardest element to migrate into a highly available environment. In this short blog we would like to discuss how you can improve the high availability of the Chamilo database.
As you can imagine, the single MySQL database is a single point of failure and, as such, it should be avoided in the production deployments. Luckily, there are a couple of ways in which you can improve the availability of MySQL database.
One of the ways you can approach the problem would be to use a Galera Cluster. The minimal deployment should consist of three nodes – such clusters can automatically handle the failure of a single node. The remaining two nodes will continue to work and be responsive for queries coming from the application.
This setup would require some sort of a load balancer in front of the Galera cluster. Its job would be to handle the traffic and redirect it to a proper destination.
Let’s see how ClusterControl can help you to deploy a Galera Cluster with a set of load balancers that you can use for your Chamilo platform.
Deploying MariaDB Cluster
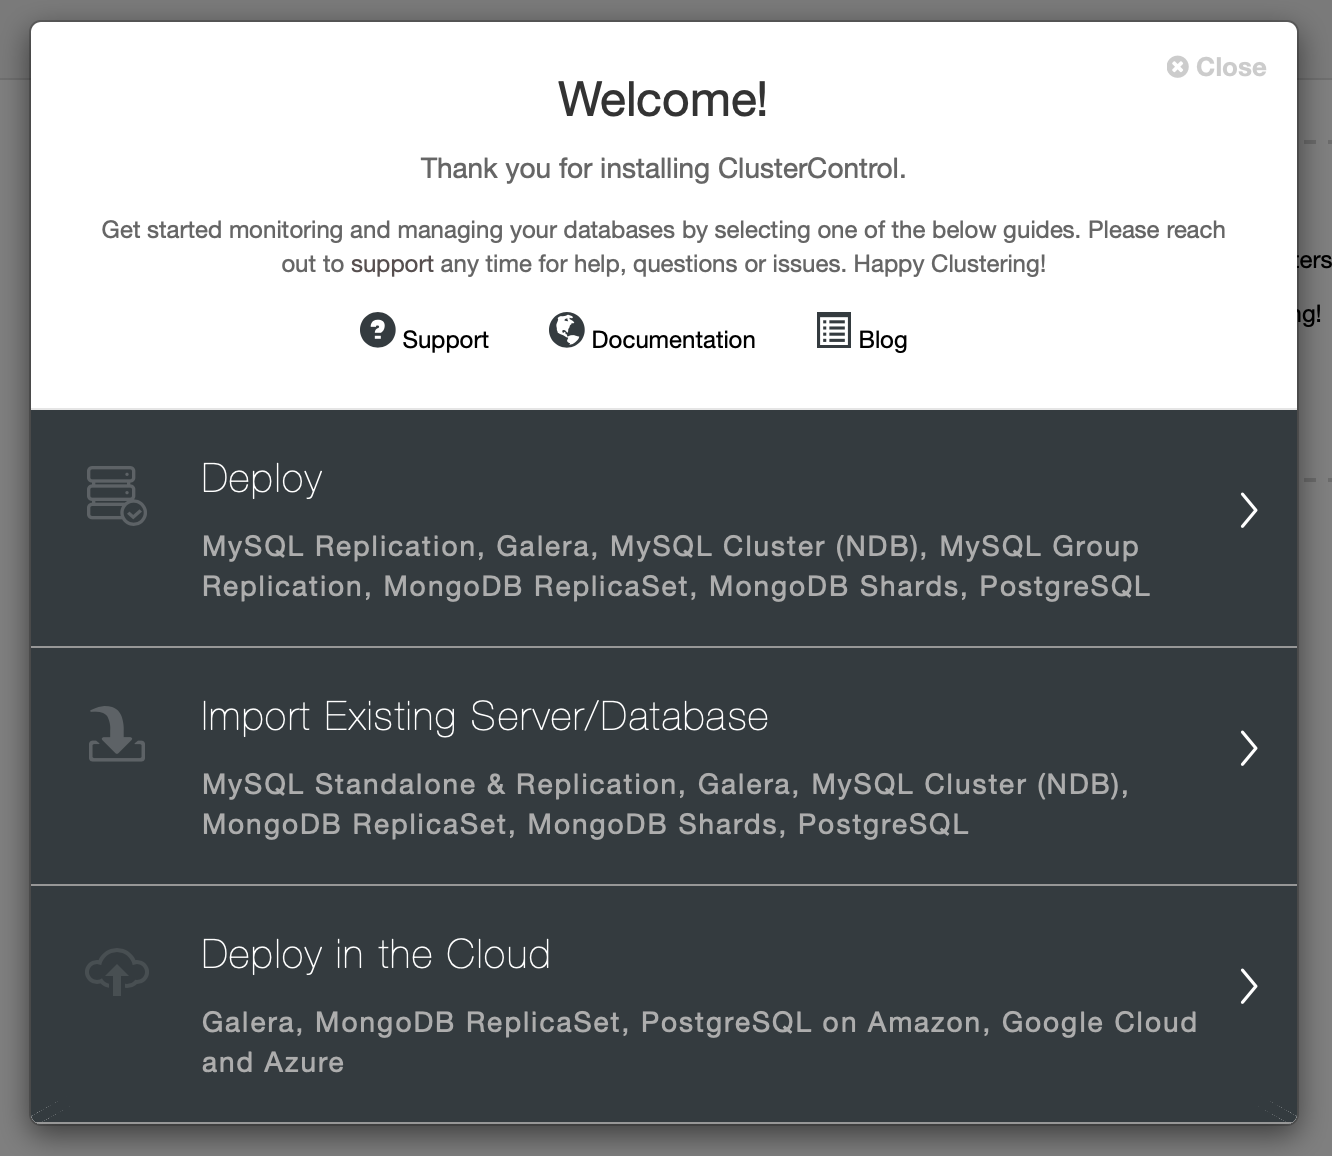
This time we’ll try to use MariaDB Cluster as our backend. Chamilo supports MySQL 5.6 and newer or MariaDB 5.5 and more recent. As the first step we need to pick “Deploy” from the wizard:
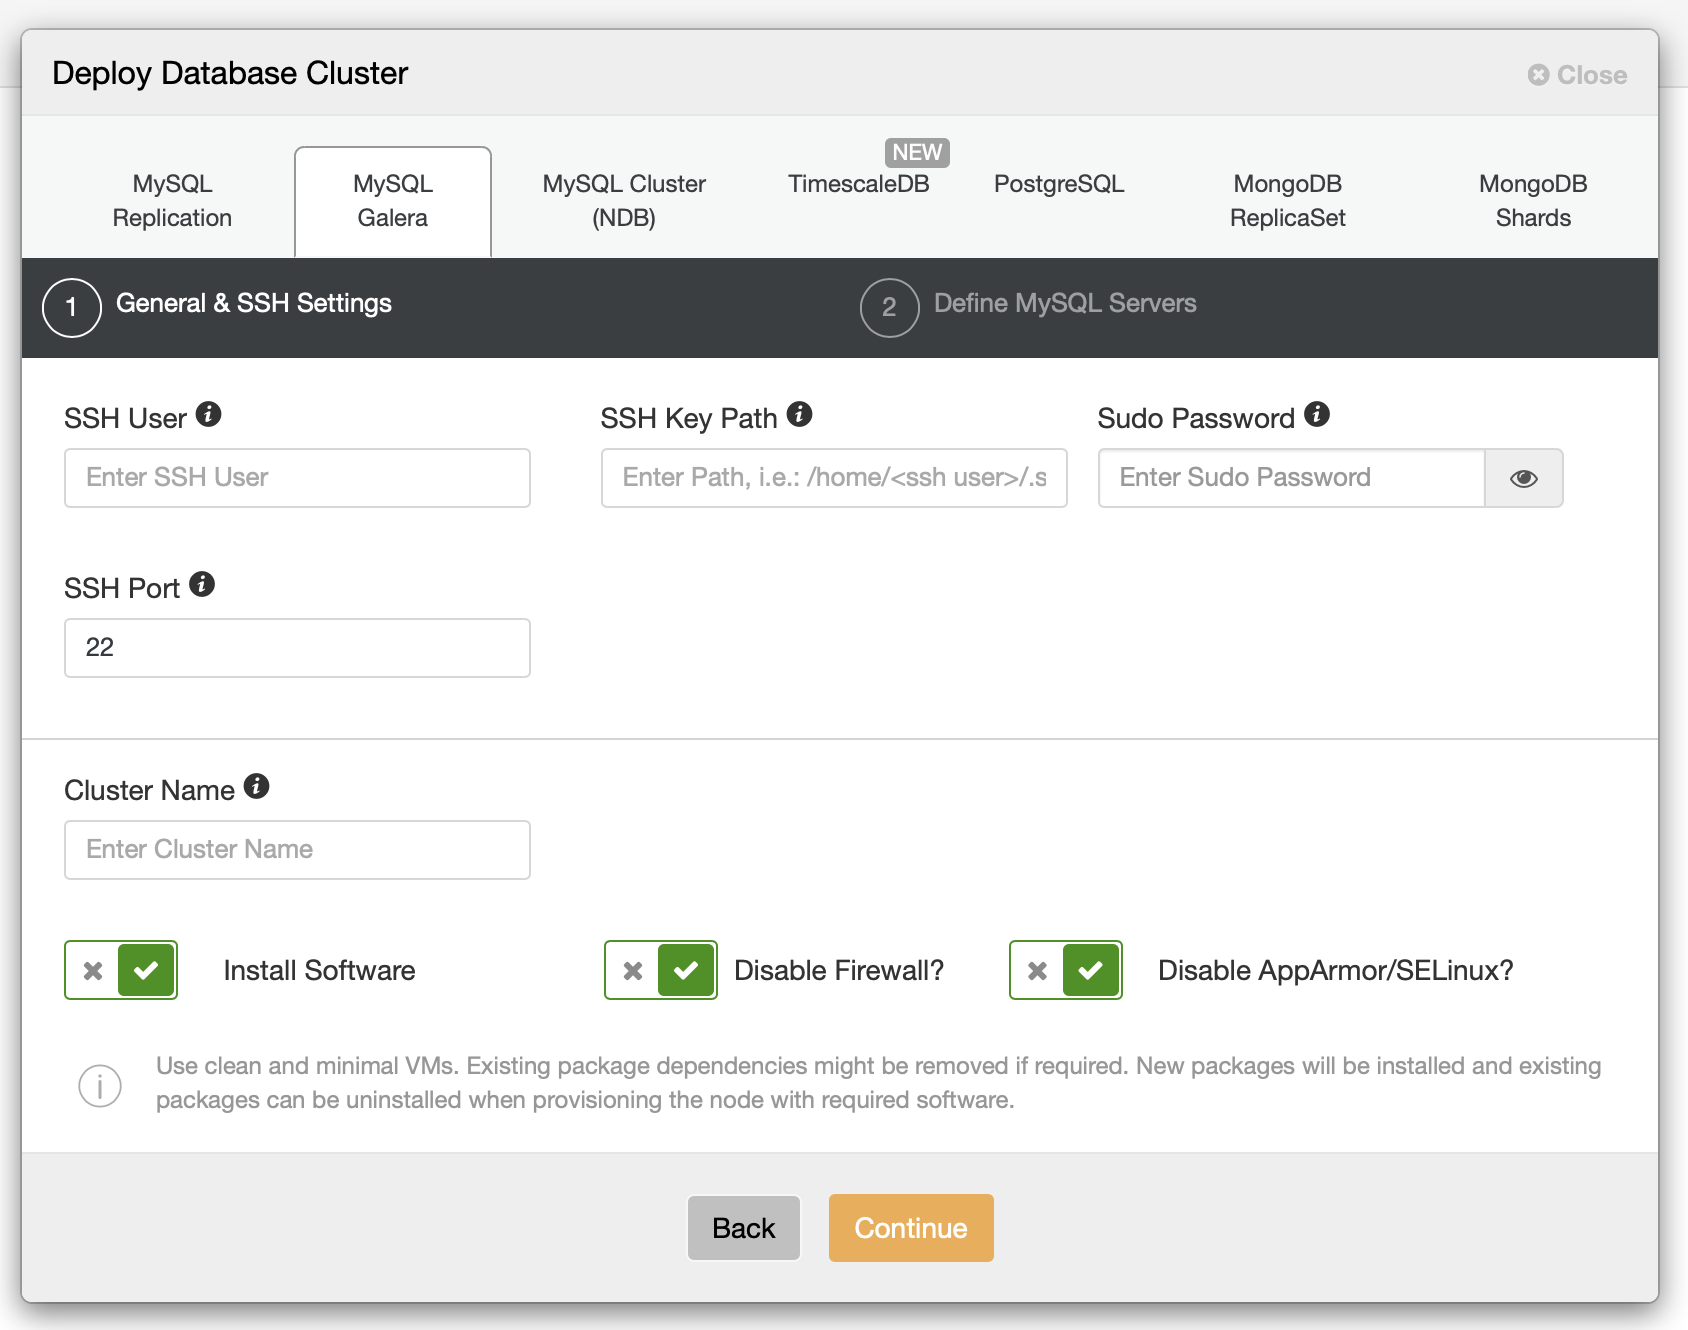
Once we do that, we have to define SSH connectivity, passwordless, key-based SSH access is a requirement for ClusterControl, otherwise it won’t be able to manage database infrastructure: it rely on SSH connectivity to execute commands to start or stop services, install software and so on.
Then we should decide on the vendor, version, password, hosts and some additional settings:
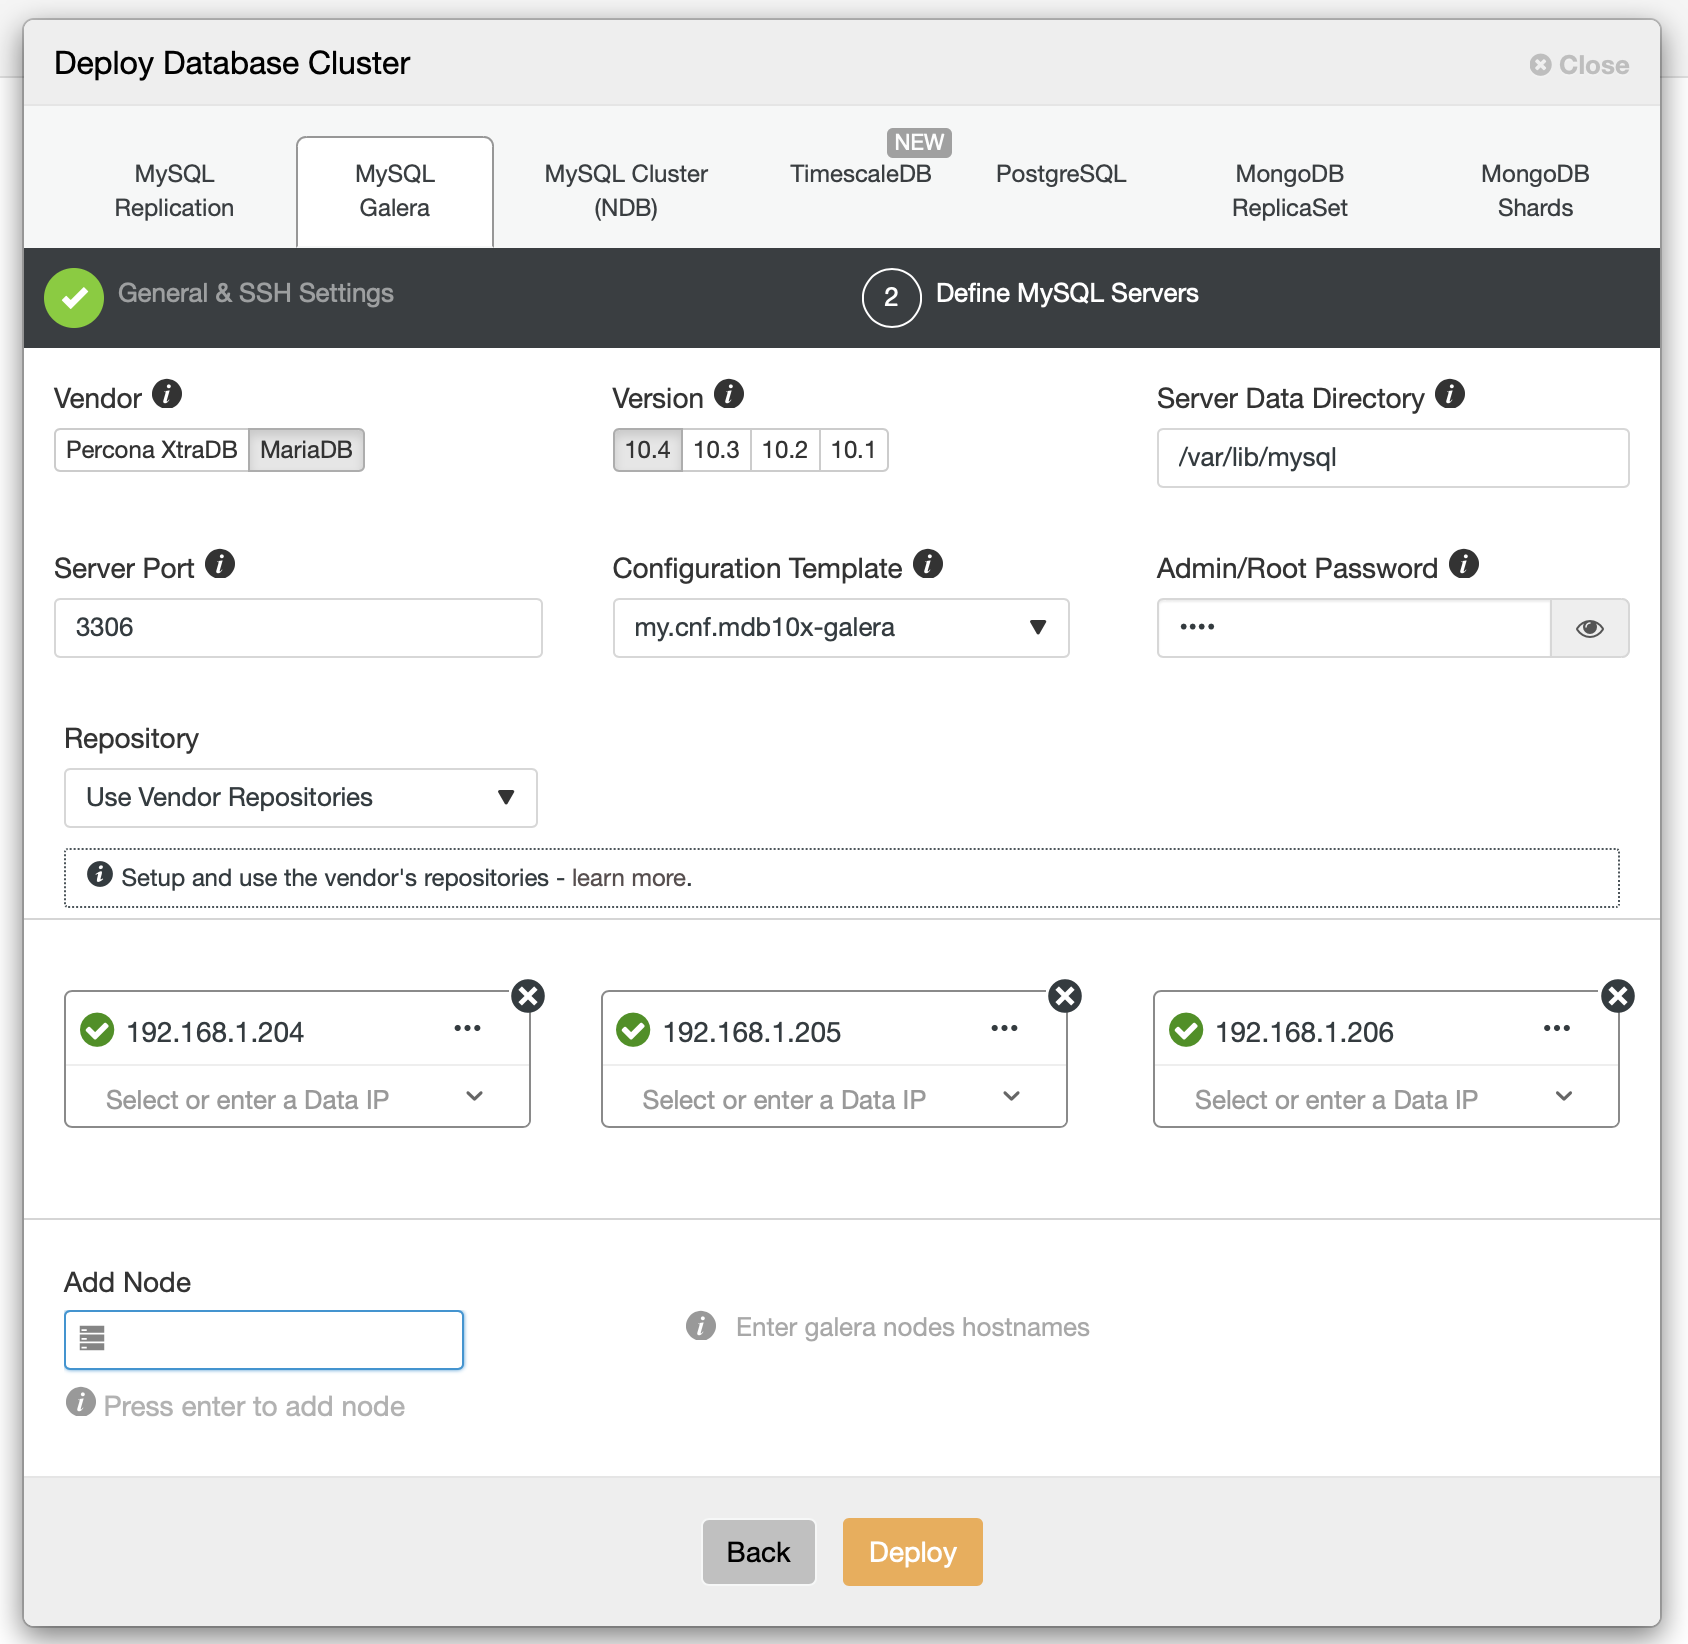
With all those details filled we are good to proceed with deployment.
Deploying ProxySQL
As we mentioned earlier, the database itself is not the only element that we want to deploy. We could use a load balancer which we will use to move the traffic around if one of the nodes would fail. We will also use it to provide read/write split, directing all of the writes to a single MariaDB Galera node and splitting reads across remaining MariaDB Galera nodes.. This will help us avoid conflicts between writes executed on different Galera nodes.
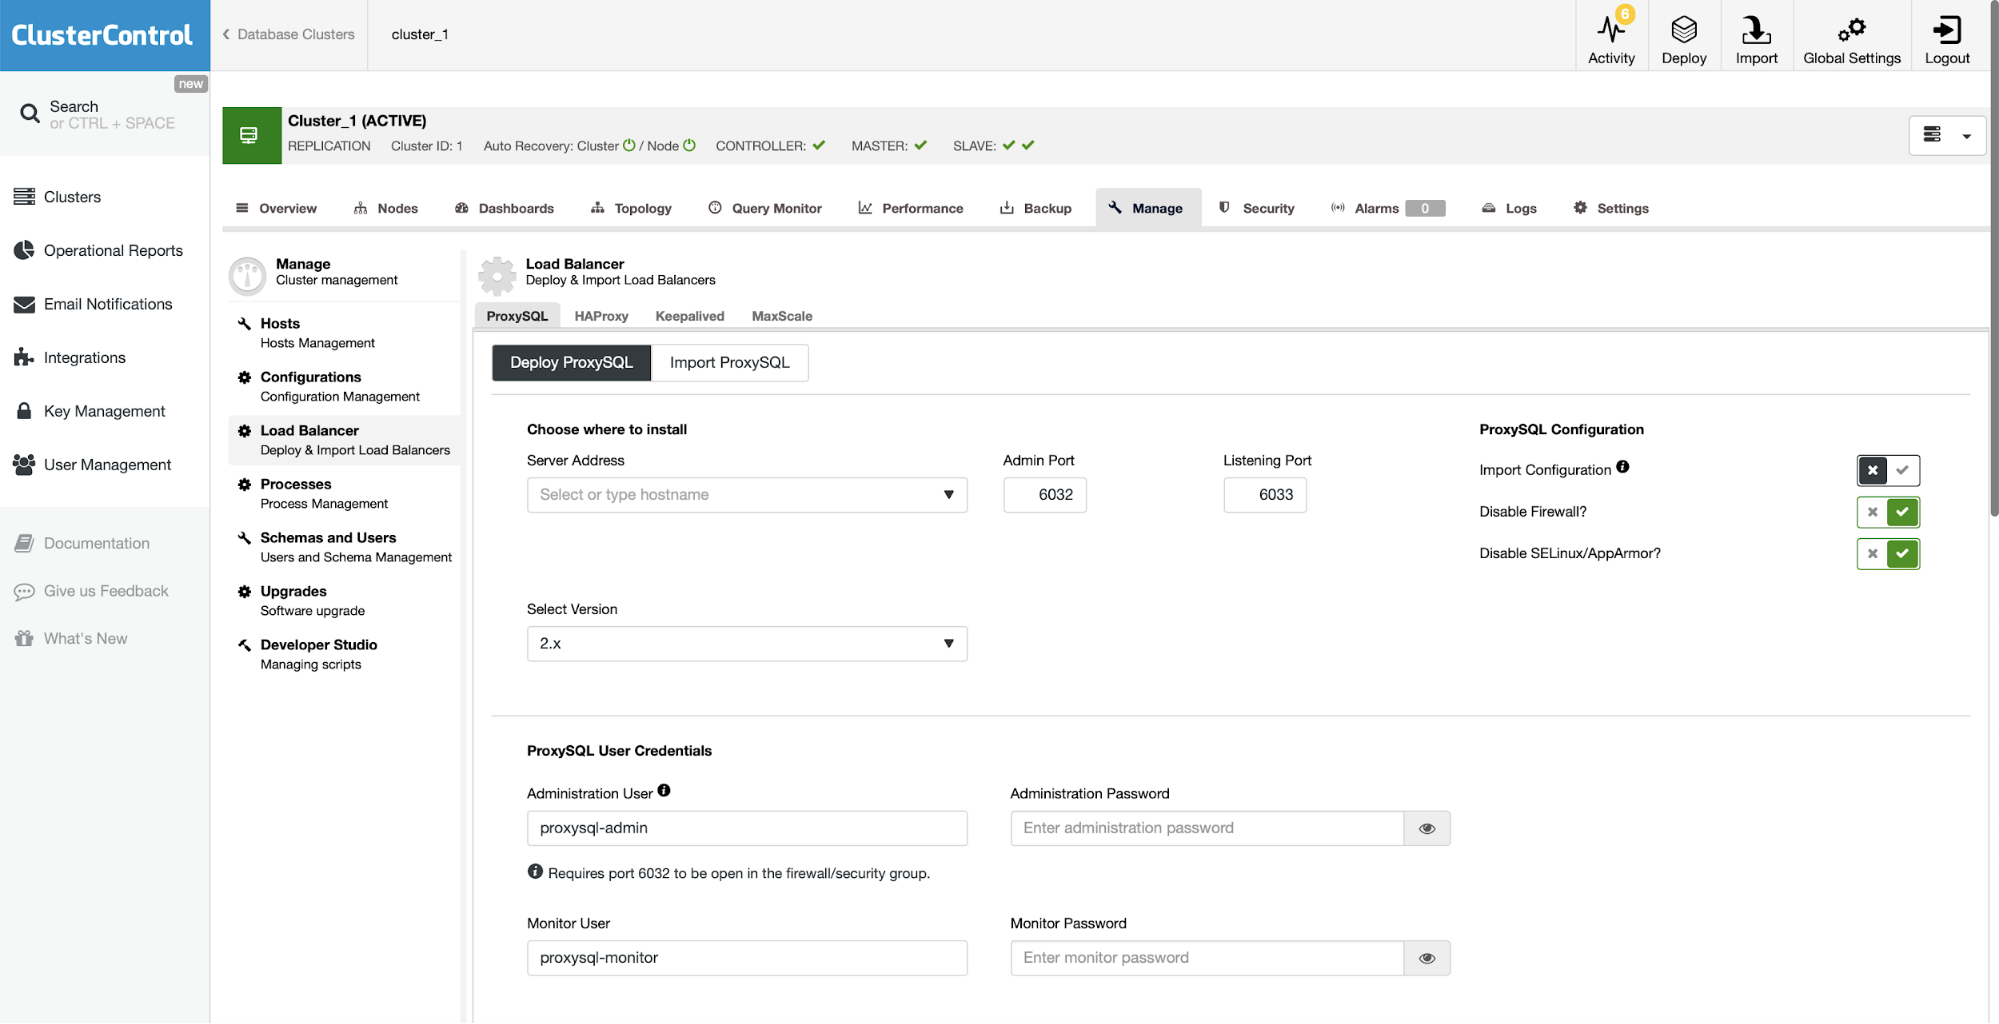
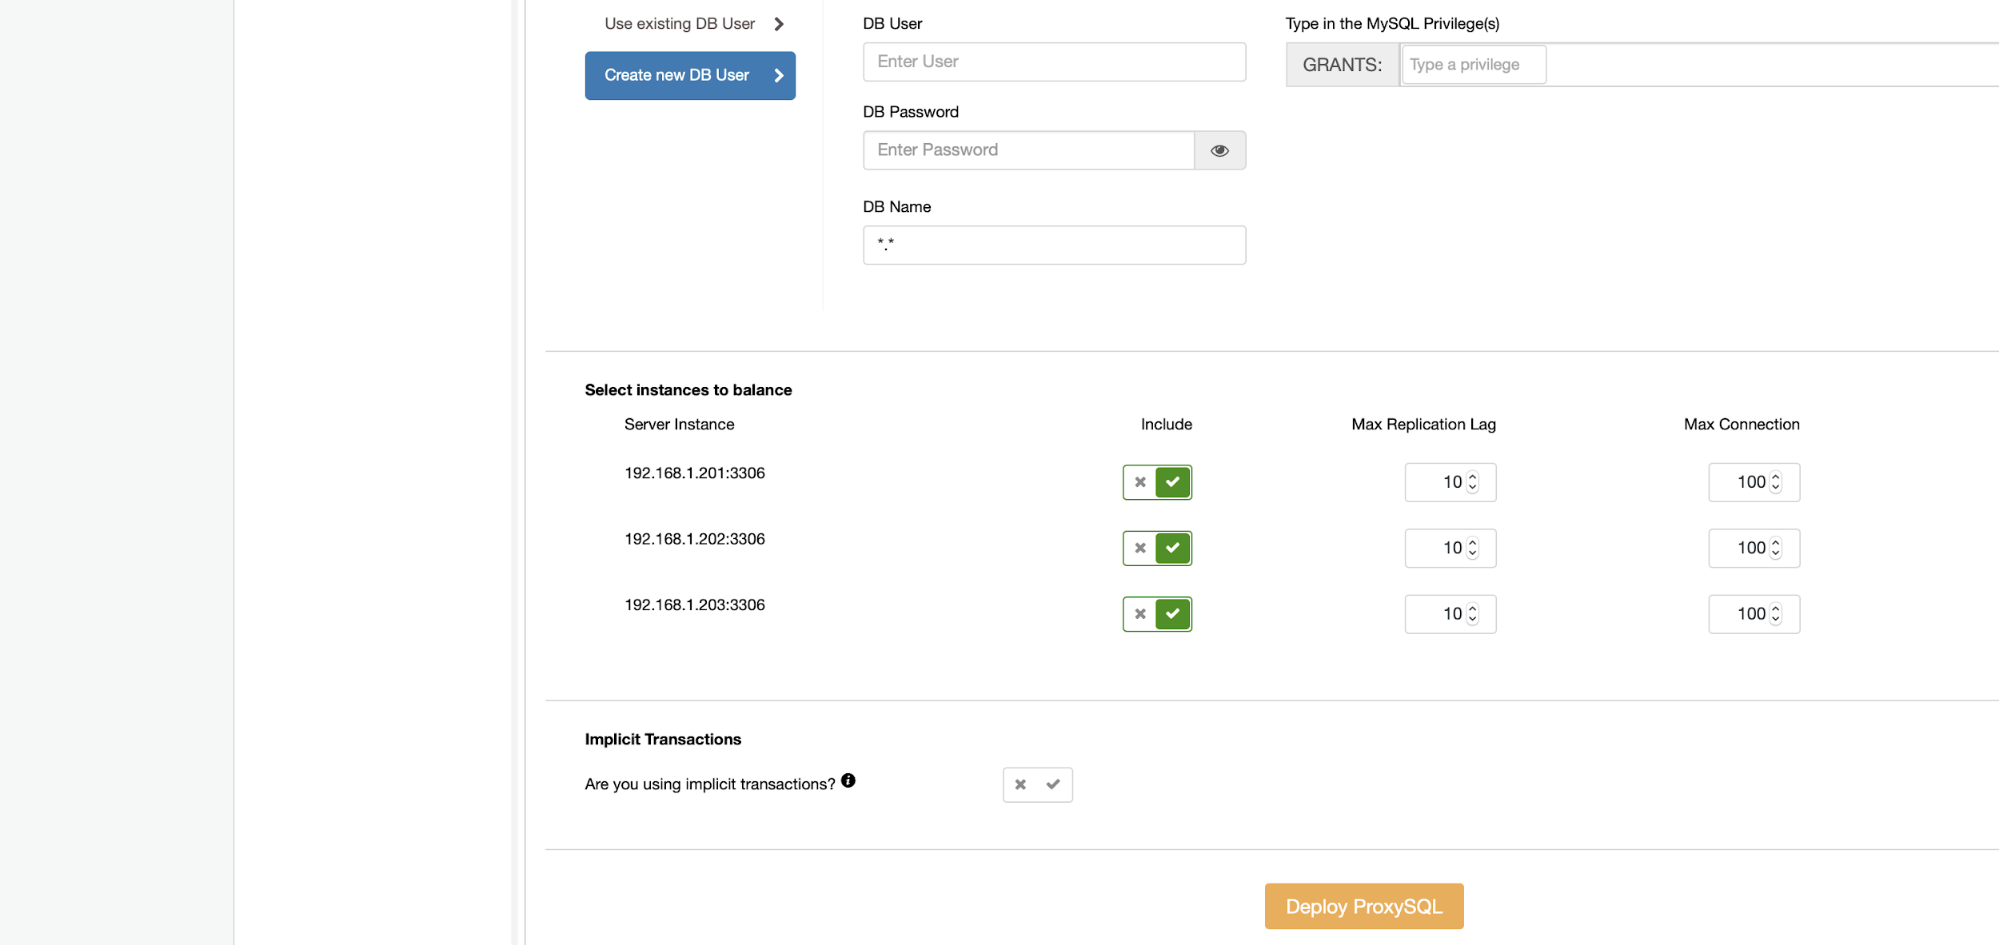
For ProxySQL ClusterControl also requires filling in some information – you have to pick the host to install it on, decide on ProxySQL version, credentials for the administrative and monitoring users. Those users will be used to manage ProxySQL and monitor the state of your Galera cluster. You should also import existing database users or create a new one for your application. Finally, it is up to you to decide which database nodes you want to use with ProxySQL and decide if you use implicit transactions.
Deploying Keepalived
The ProxySQL will work great distributing our traffic across the cluster nodes. On the other hand, a single ProxySQL node will act as a single point of failure. Therefore we want to deploy at least two of them. Then, the question is how to detect the failure of ProxySQL node and how to move the traffic to a healthy ProxySQL. Here comes Keepalived. The idea here is to have a virtual IP that will point to the working ProxySQL instance. Such VIP can then be used in the application as the endpoint for the MySQL database connectivity, ensuring that the application will always hit healthy ProxySQL which, in turn, will ensure that the traffic will hit the healthy cluster node.
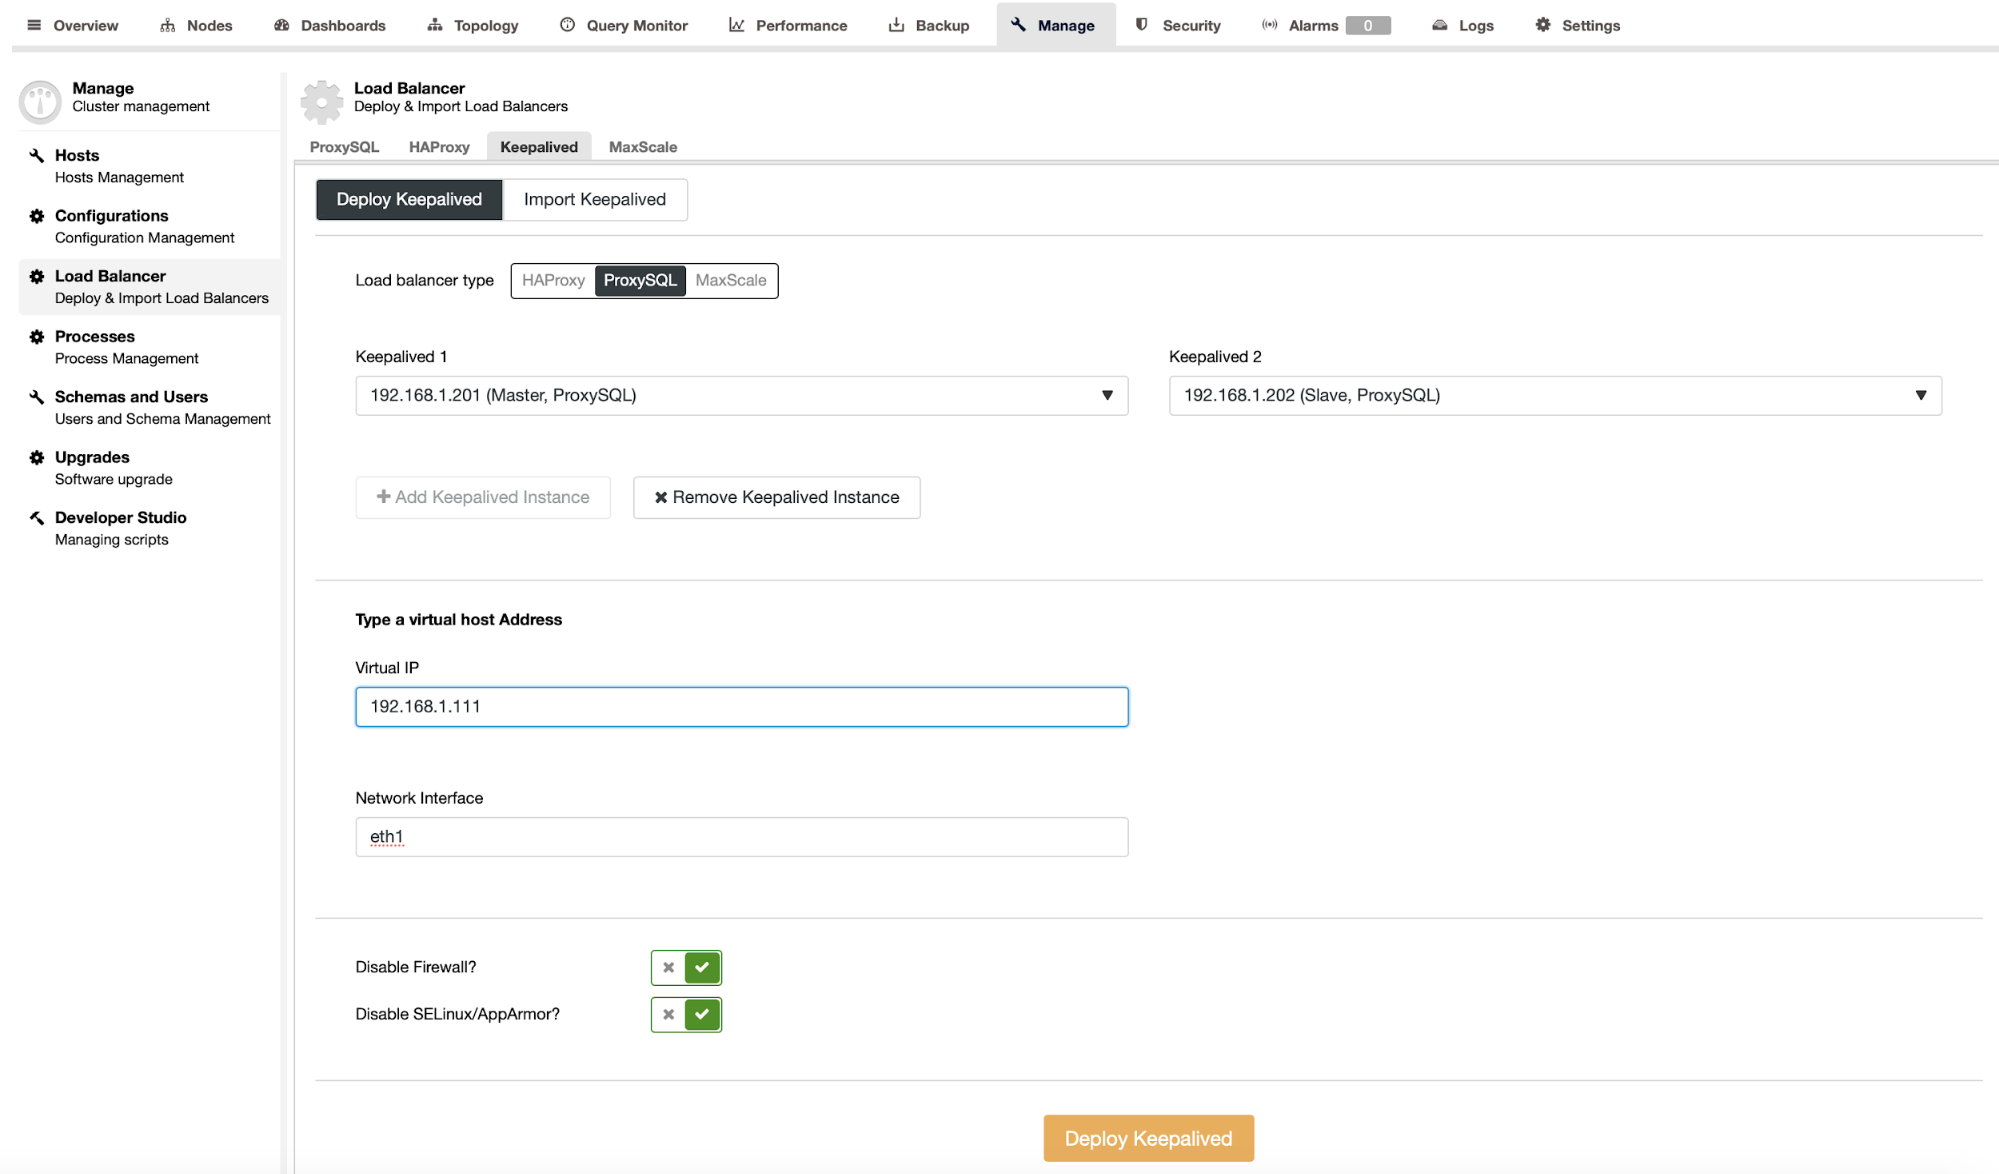
After passing details like ProxySQL instances that should be monitored, Virtual IP and the interface VIP should bind to we are ready to deploy. After couple of minutes everything should be ready and the topology should look like below:

That’s it when it comes to the environment that we were building. You can point your Chamilo towards the VIP and port 6033, this should be enough to get the connectivity to your backend database. If you run into any problems related to stale reads (when write hits one node and then Chamilo attempts to read from another node, you can look into enabling causality checks on the Galera cluster. There is a wsrep_sync_wait variable that can enable tests on several access patterns: reads, updates, inserts, deletes, replaces and SHOW commands. If we are interested only in the SELECT queries, we will set this variable to ‘1’ using ClusterControl configuration management.
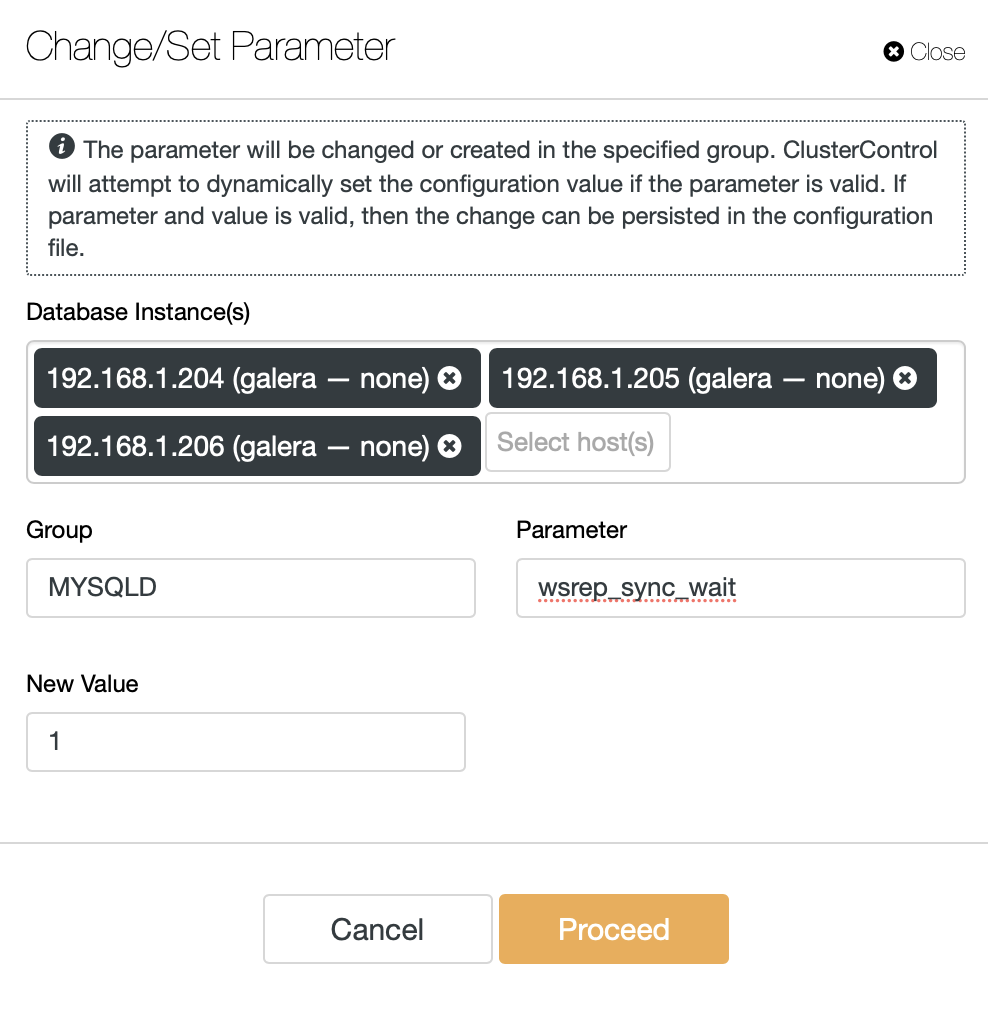
This will perform this change on all of the MariaDB Cluster nodes.
That’s pretty much it. If you would like to share some of your experience with Chamilo, you are welcome to leave us a comment.


