blog
Building a Highly Available Database for Moodle Using MariaDB (Replication & MariaDB Cluster)

Face-to-face meetings, nowadays, are limited to the bare minimum, online activities have taken over as the main way for teacher – student interaction. It increased the stress on the existing online “meeting” platforms (is there anyone who does not know what Zoom is nowadays?) but also on online learning platforms. The high availability of the online tools is more important than ever and the operation teams rush to build durable, highly available architectures for their environments.
Most likely at least some of you have used Moodle – it is a standalone online learning platform that you can deploy on premises and use it to deliver online training for your organization. As we mentioned, it is as important as ever to make it work in a durable, highly available fashion. We would like to propose a highly available solution that involves MariaDB as a backend database – both asynchronous replication and Galera Cluster.
Environment Design Process
We would like to start with a process where we would explain the thought process behind designing the environment for Moodle. We want high availability therefore a single database node does not work for us. We want multiple nodes and this leads us to the first design decision. Should we use asynchronous replication or Galera Cluster? Second question is: how will we distribute the workload across the nodes? Let’s start with the second one.
The latest Moodle version at the time when this blog has been written (3.9) introduced a nice feature called safe reads. The problem to solve here is read after write. When you use one node, the world is a simple place. You write and then you read. Whatever you wrote is there already. When you add nodes, though, things change. In asynchronous replication slaves may be lagging behind even tens of seconds or more. Whatever you write on the master may take even minutes (if not more in the more extreme cases) to be applied to the slave. If you execute a write and then immediately attempt to read the same data from one of the slaves, you may be up to a nasty surprise – data will not be there. Galera cluster uses a “virtually” synchronous replication and in this particular case “virtually” makes a huge difference – Galera is not immune to the read-after-write problems. There’s always delay between write execution on the local node and writeset being applied to remaining nodes of the cluster. Sure, it’s most likely measured in milliseconds rather than seconds but it still may break the assumption that you can immediately read what you wrote. The only place where you can safely read after writing is the node on which you wrote the data.
As Moodle relies on the read-after-write quite a lot, we cannot easily scale reads only by adding more nodes to read from. For Galera Cluster we could attempt to mitigate the issue by using wsrep-sync-wait configuration setting to force Galera to ensure that the reads are safe to execute. This creates the performance impact on the system as all reads have to wait for writes to be applied before they can be executed. This is also a solution for MariaDB Cluster (and other Galera-based solutions), not for asynchronous replication. Luckily, the solution from Moodle solves this issue. You can define a list of nodes that may possibly be lagging and Moodle will use them only for reads that do not require to be up to date with the writes. All remaining reads that require data to be always up to date would be directed to the writer node.So, Moodle’s scalability is sort of limited as only the “safe” reads can be scaled out. We will definitely want to use the 3.9’s feature given that this is the only safe method to determine which select should go where. Given that everything is written in a Moodle’s configuration file, we would most likely want to use a load balancer, preferably ProxySQL, to create logic that would handle our read distribution.
Should we use MariaDB Cluster or asynchronous replication? We will actually show you how to use both. In both cases the configuration for the Moodle will be pretty much the same. In both cases we will utilize ProxySQL as the loadbalancer. The main difference between those solutions is the failover. MariaDB Cluster is way easier to deal with – if one node is down, ProxySQL will simply move the write traffic to one of the remaining nodes. With asynchronous replication things are slightly different though. If the master goes down, failover has to happen. This does not happen automatically, you either have to perform it by hand or you can rely on some software to accomplish that. In our case we will use ClusterControl to manage the environment and perform the failover therefore, from the user standpoint, there’s not much of a difference between asynchronous replication and the MariaDB Cluster – in both cases writer failure will be automatically handled and cluster will automatically recover.
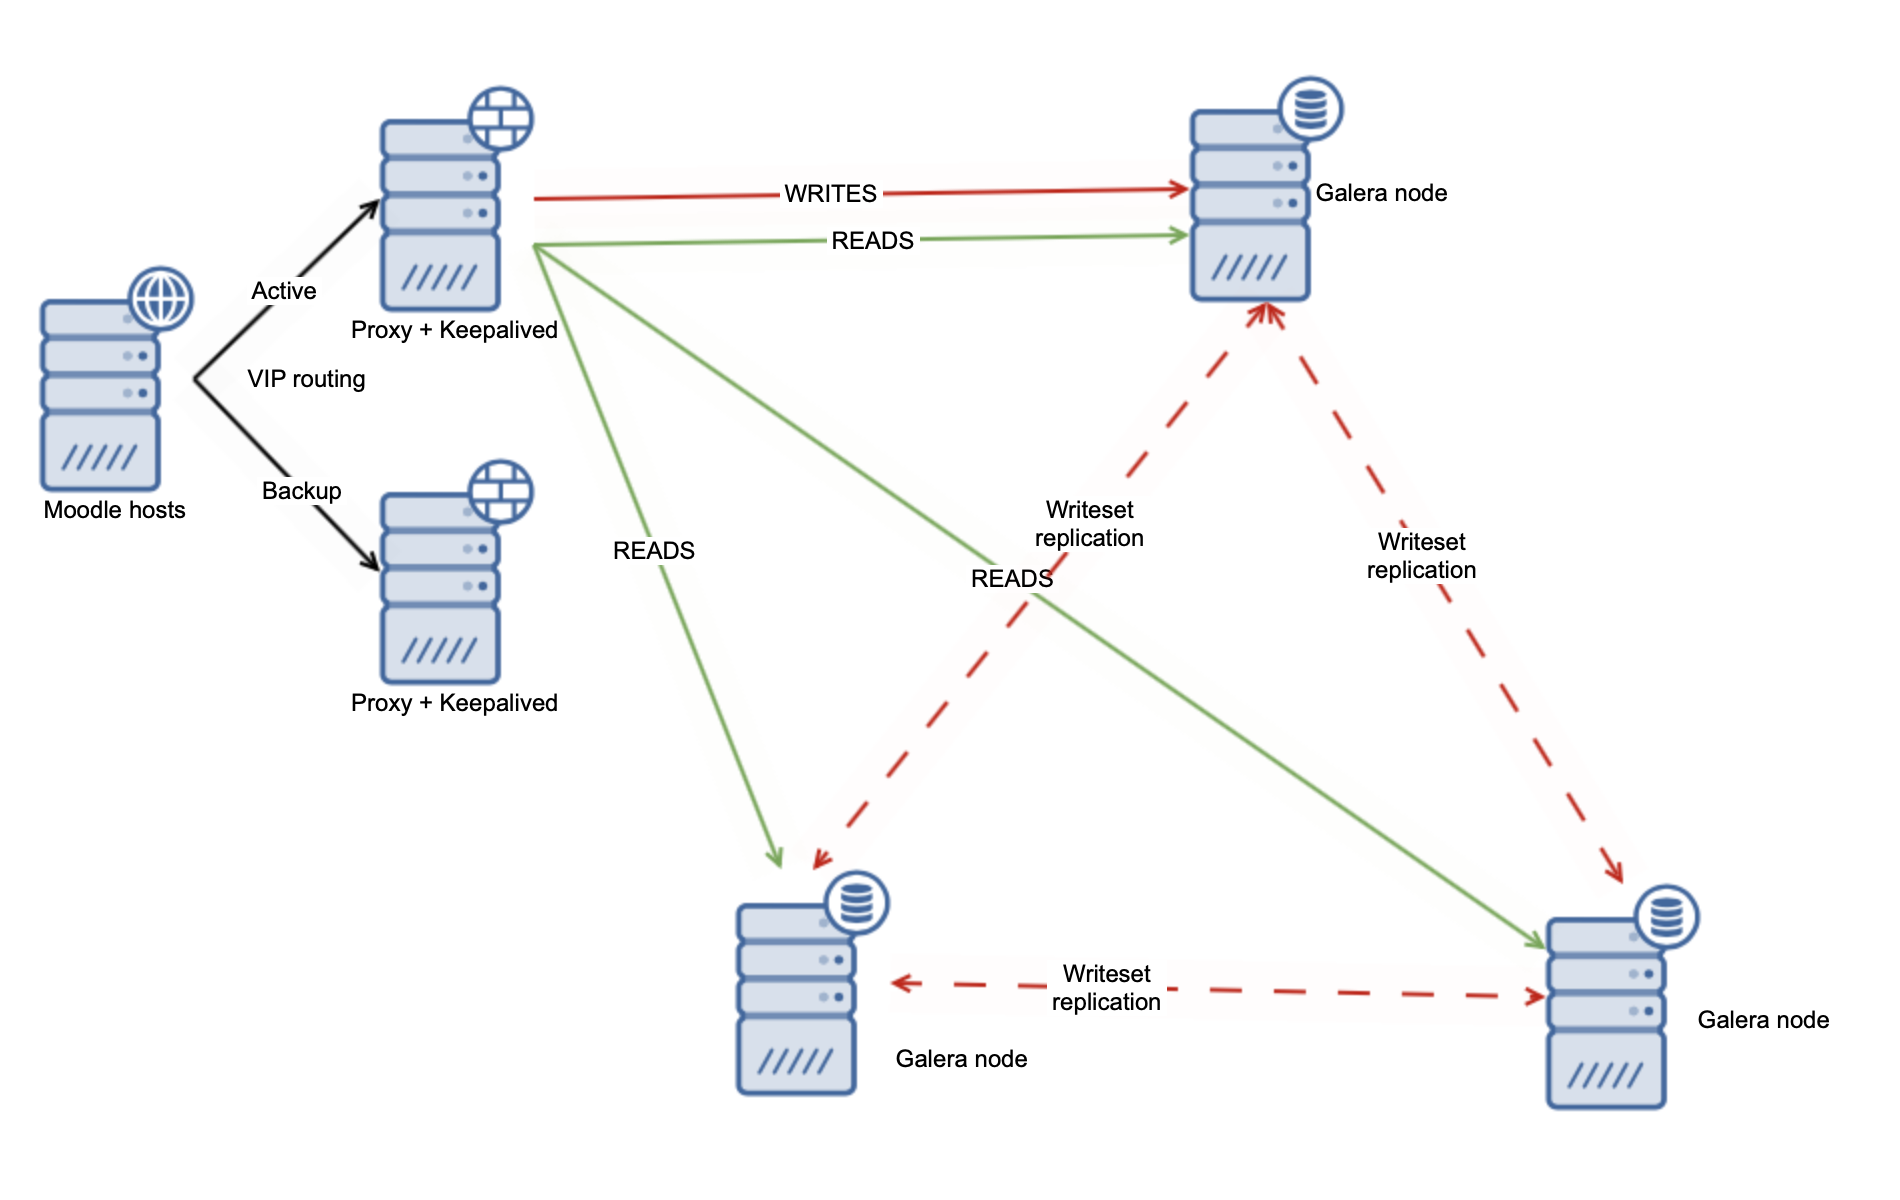
What we have established is that we will showcase both asynchronous and virtually synchronous replication. We will use the safe writes feature from Moodle 3.9 and we will use ProxySQL as the loadbalancer. To ensure high availability we will need more than one ProxySQL instance therefore we will go with two of them and to create a single point of entry into the database layer we will use Keepalived to create a Virtual IP and point it to one of the available ProxySQL nodes. Here’s how our database cluster may look like:
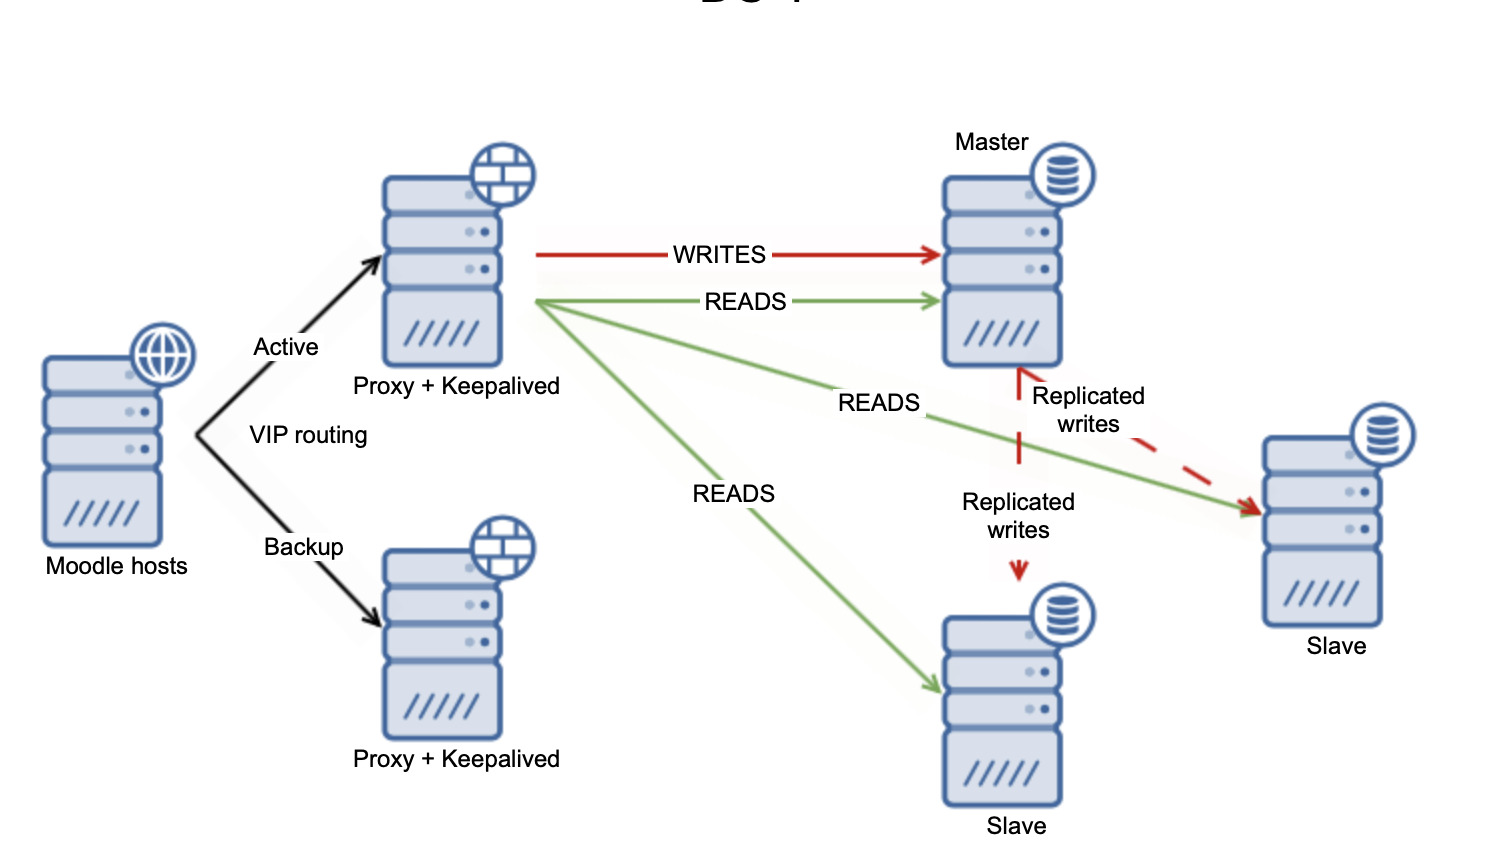
For asynchronous replication this could look something like this:
Deploying a Highly Available Database Backend for Moodle Using MariaDB Replication
Let’s start with the MariaDB Replication. We are going to use ClusterControl to deploy the whole database backend including load balancers.
Deploying MariaDB Replication Cluster
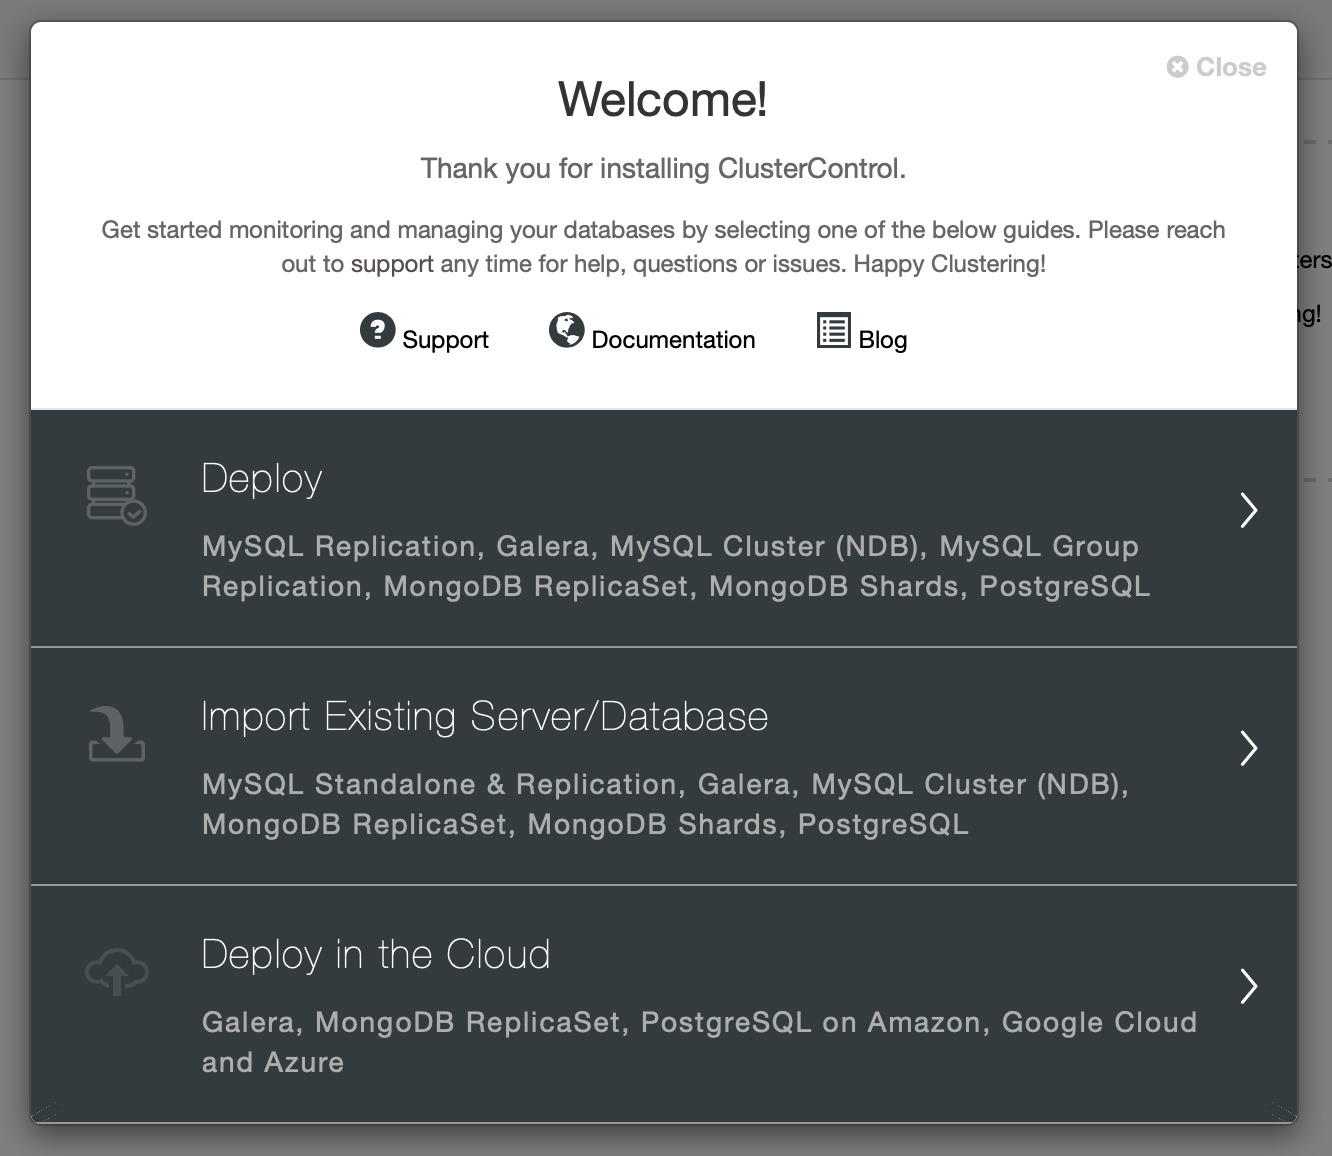
At first, we need to pick “Deploy” from the wizard:
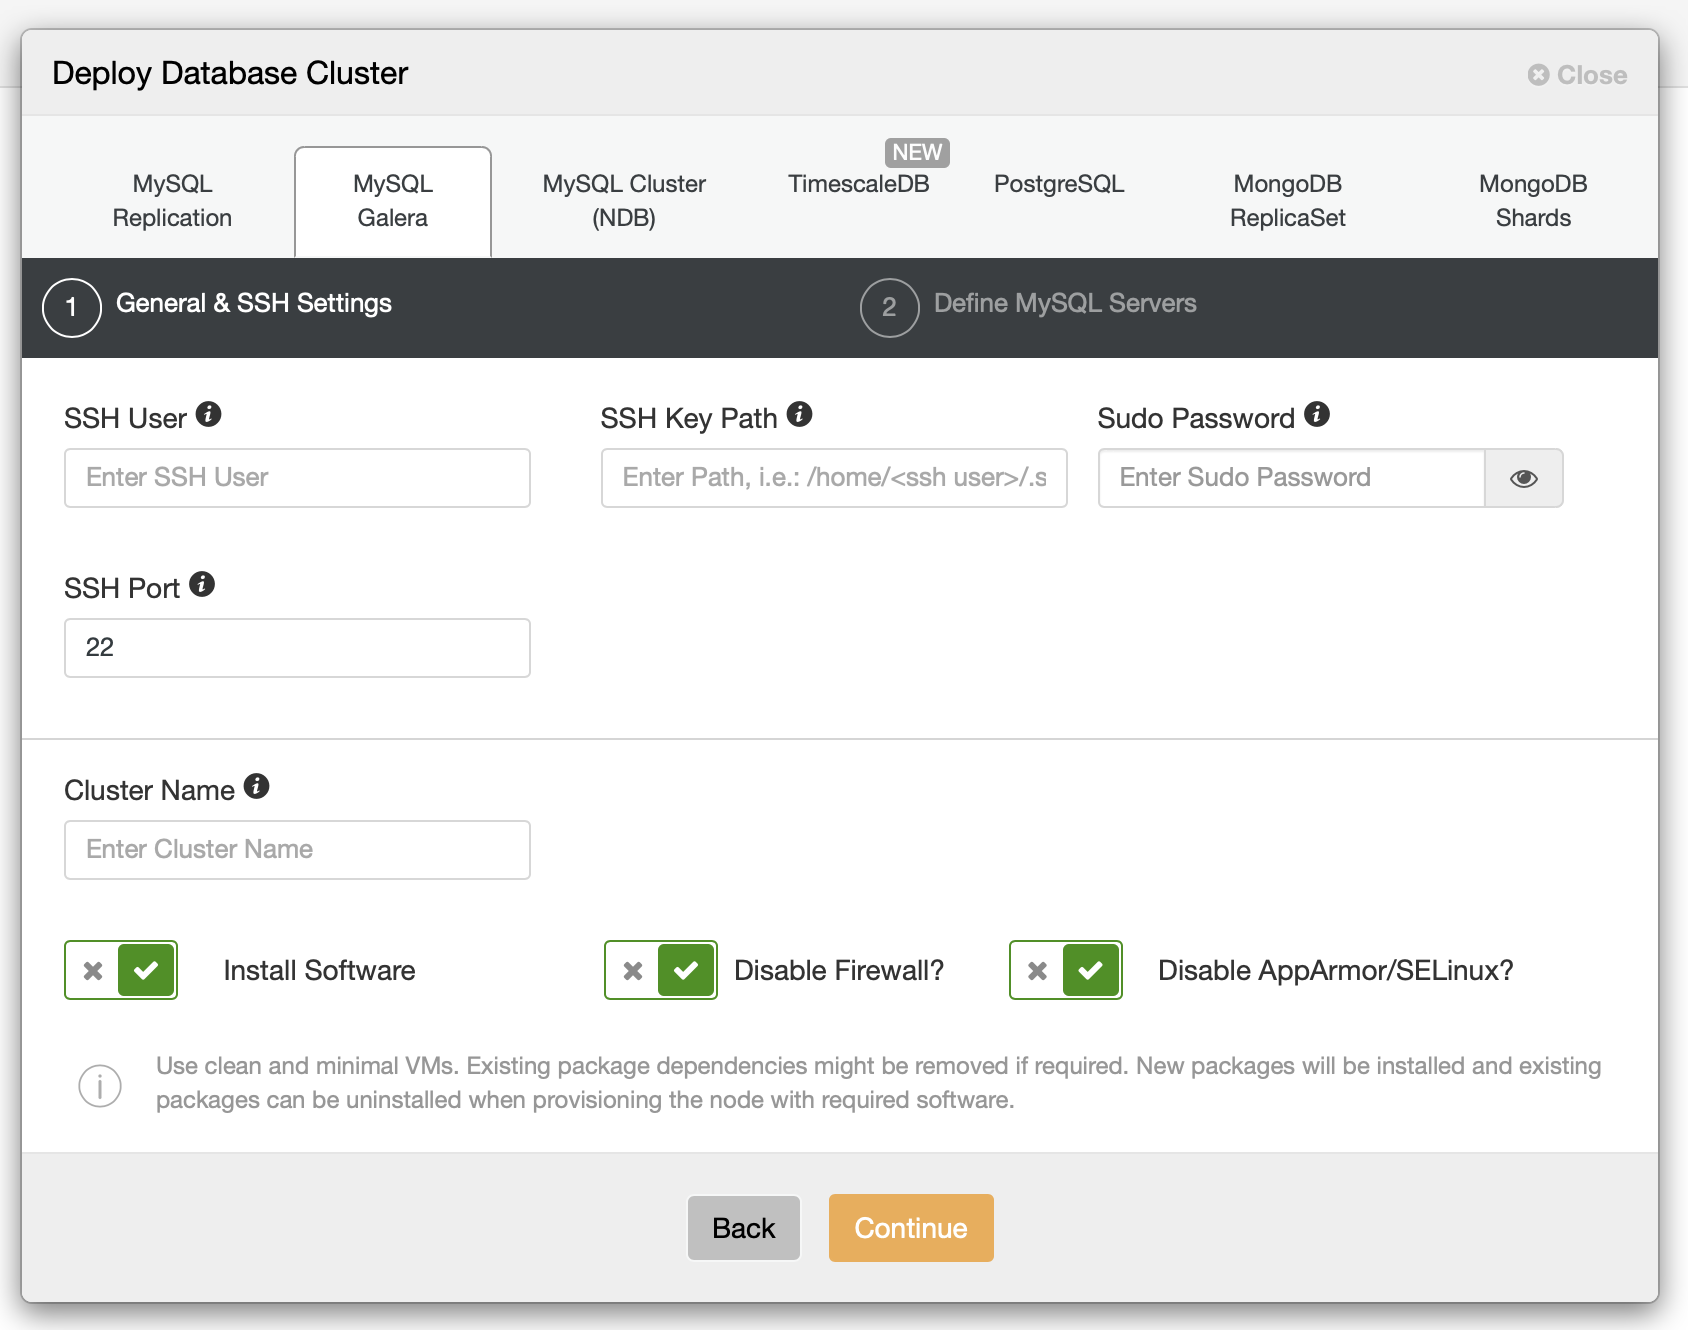
Then we should define SSH connectivity, passwordless, key-based SSH access is a requirement for ClusterControl to manage database infrastructure.
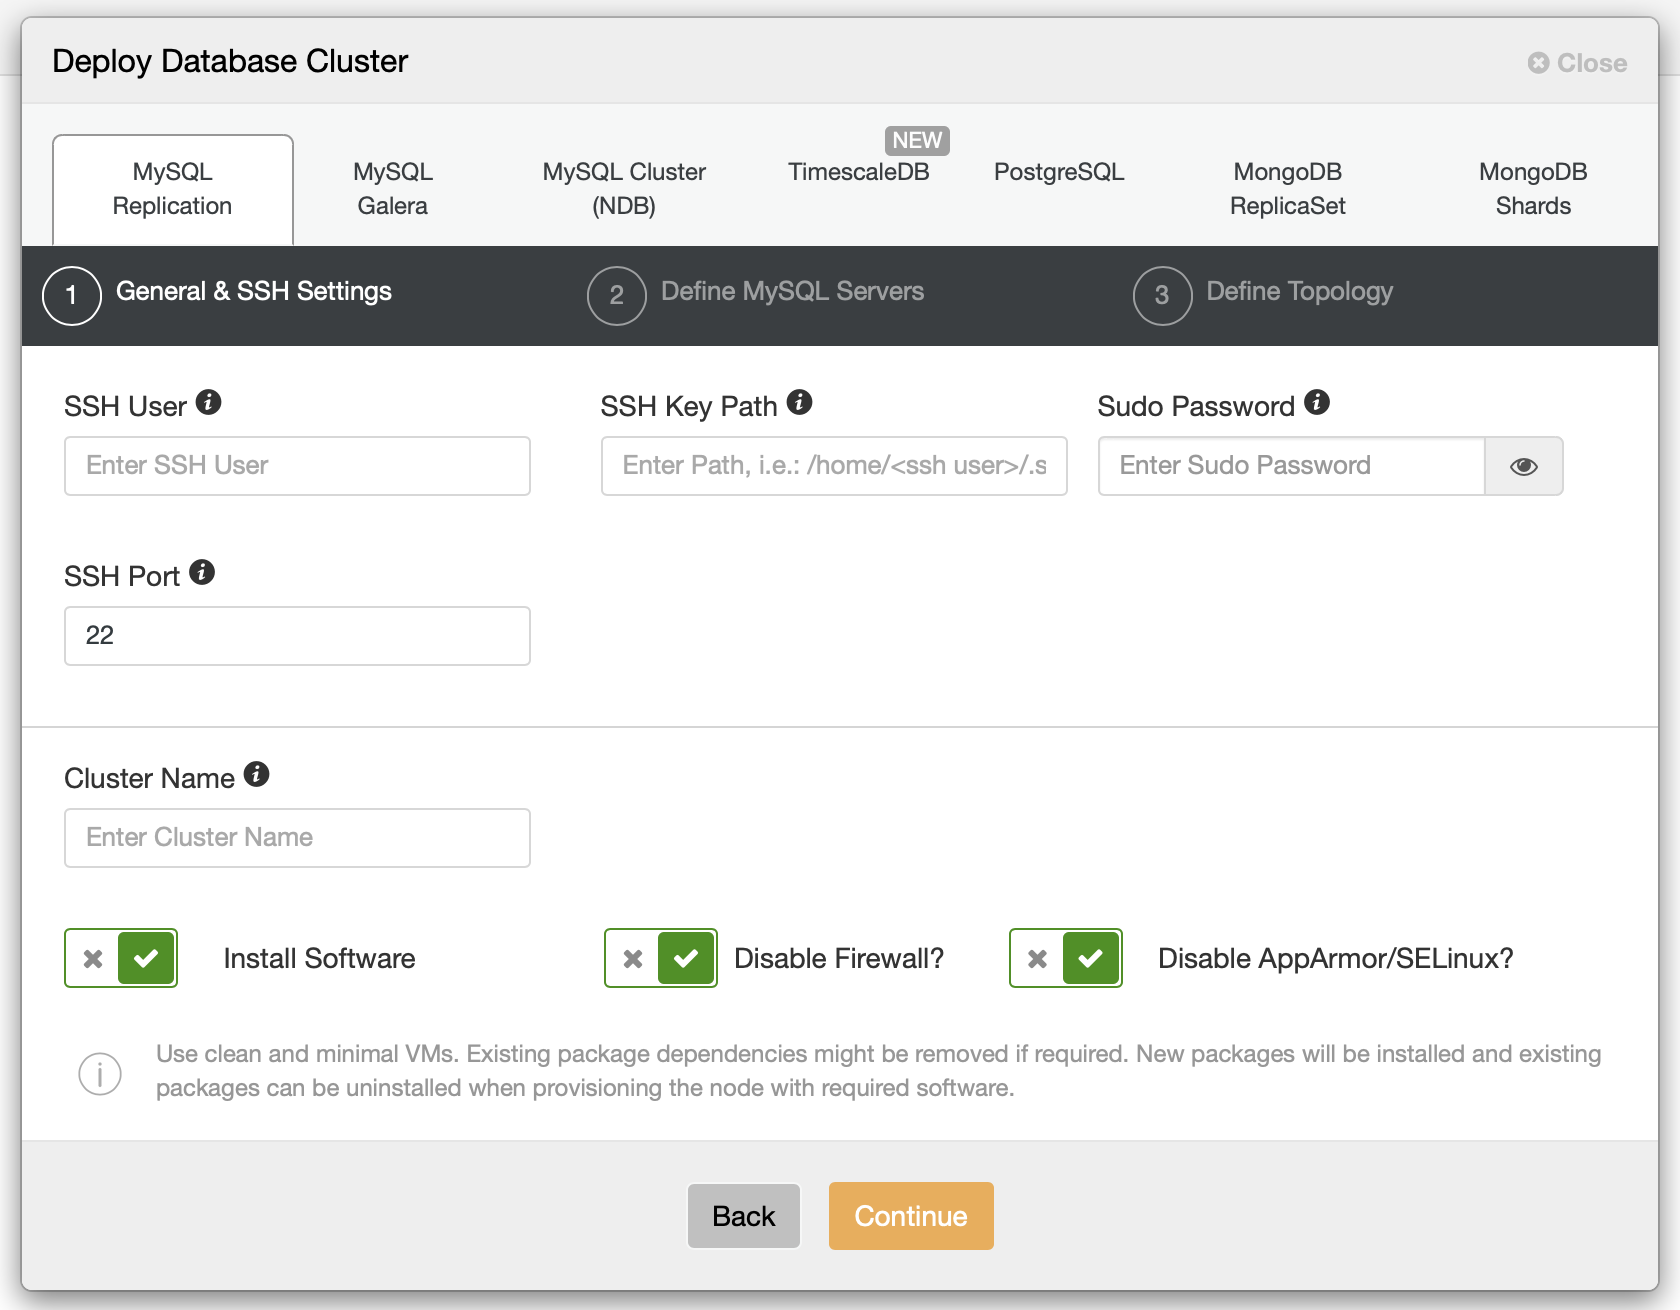
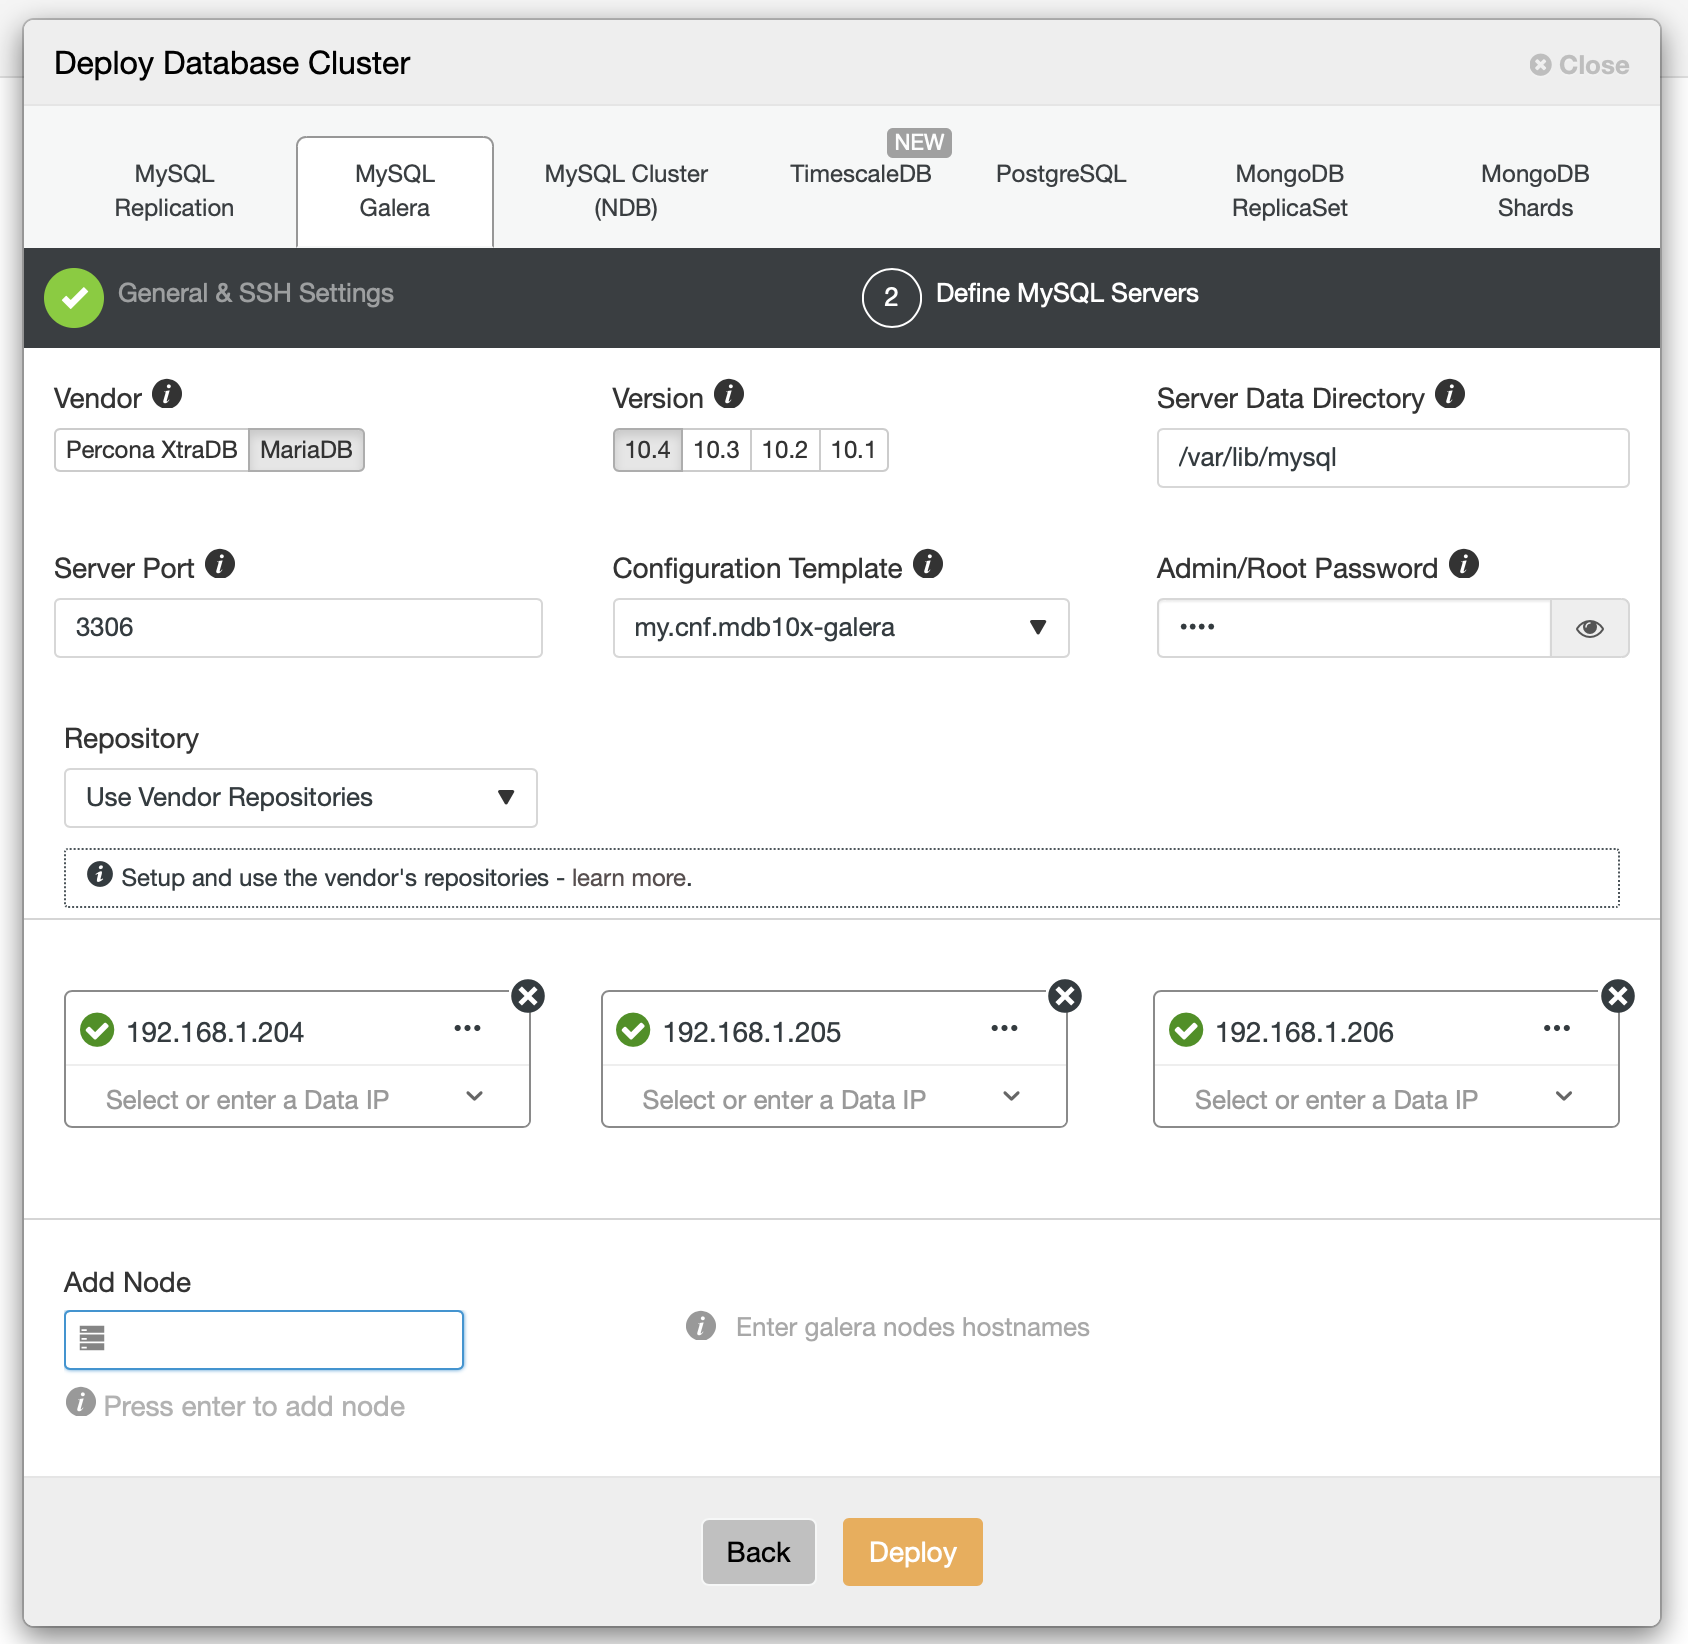
When you fill those details, it’s time to pick a vendor and a version, define superuser’s password and decide on some other details.
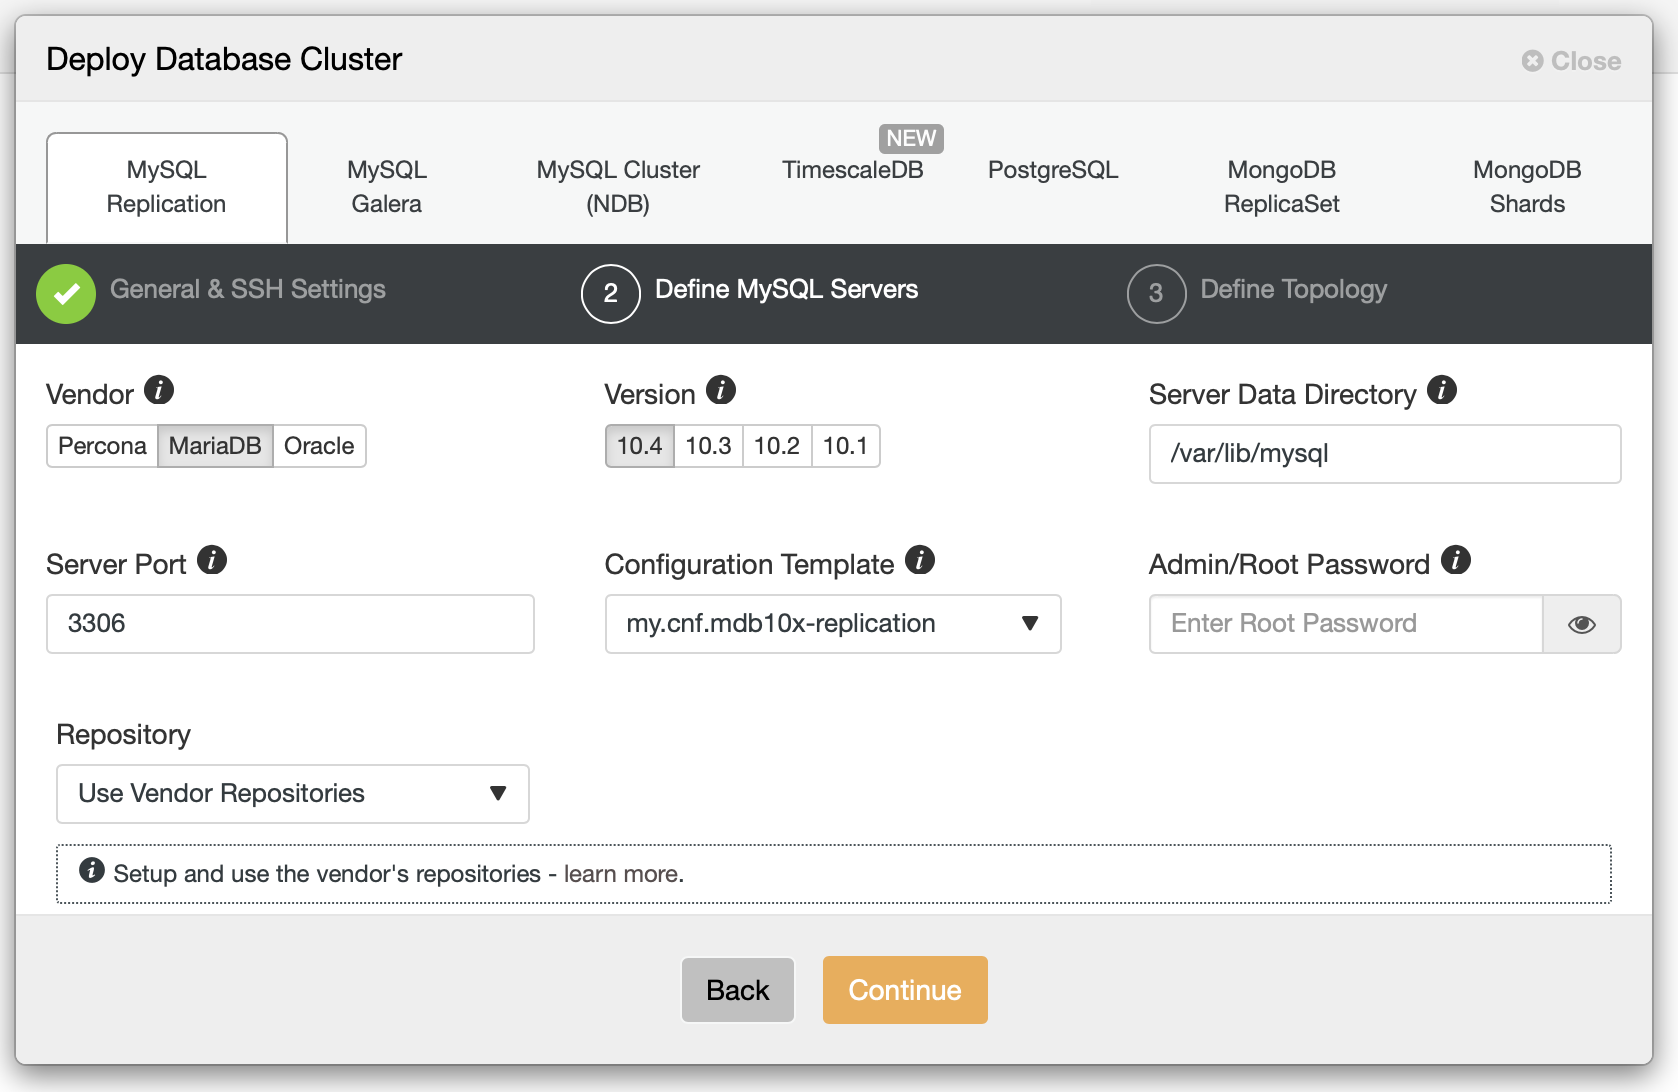
We are going to use MariaDB 10.4 for now. As a next step we have to define the replication topology:
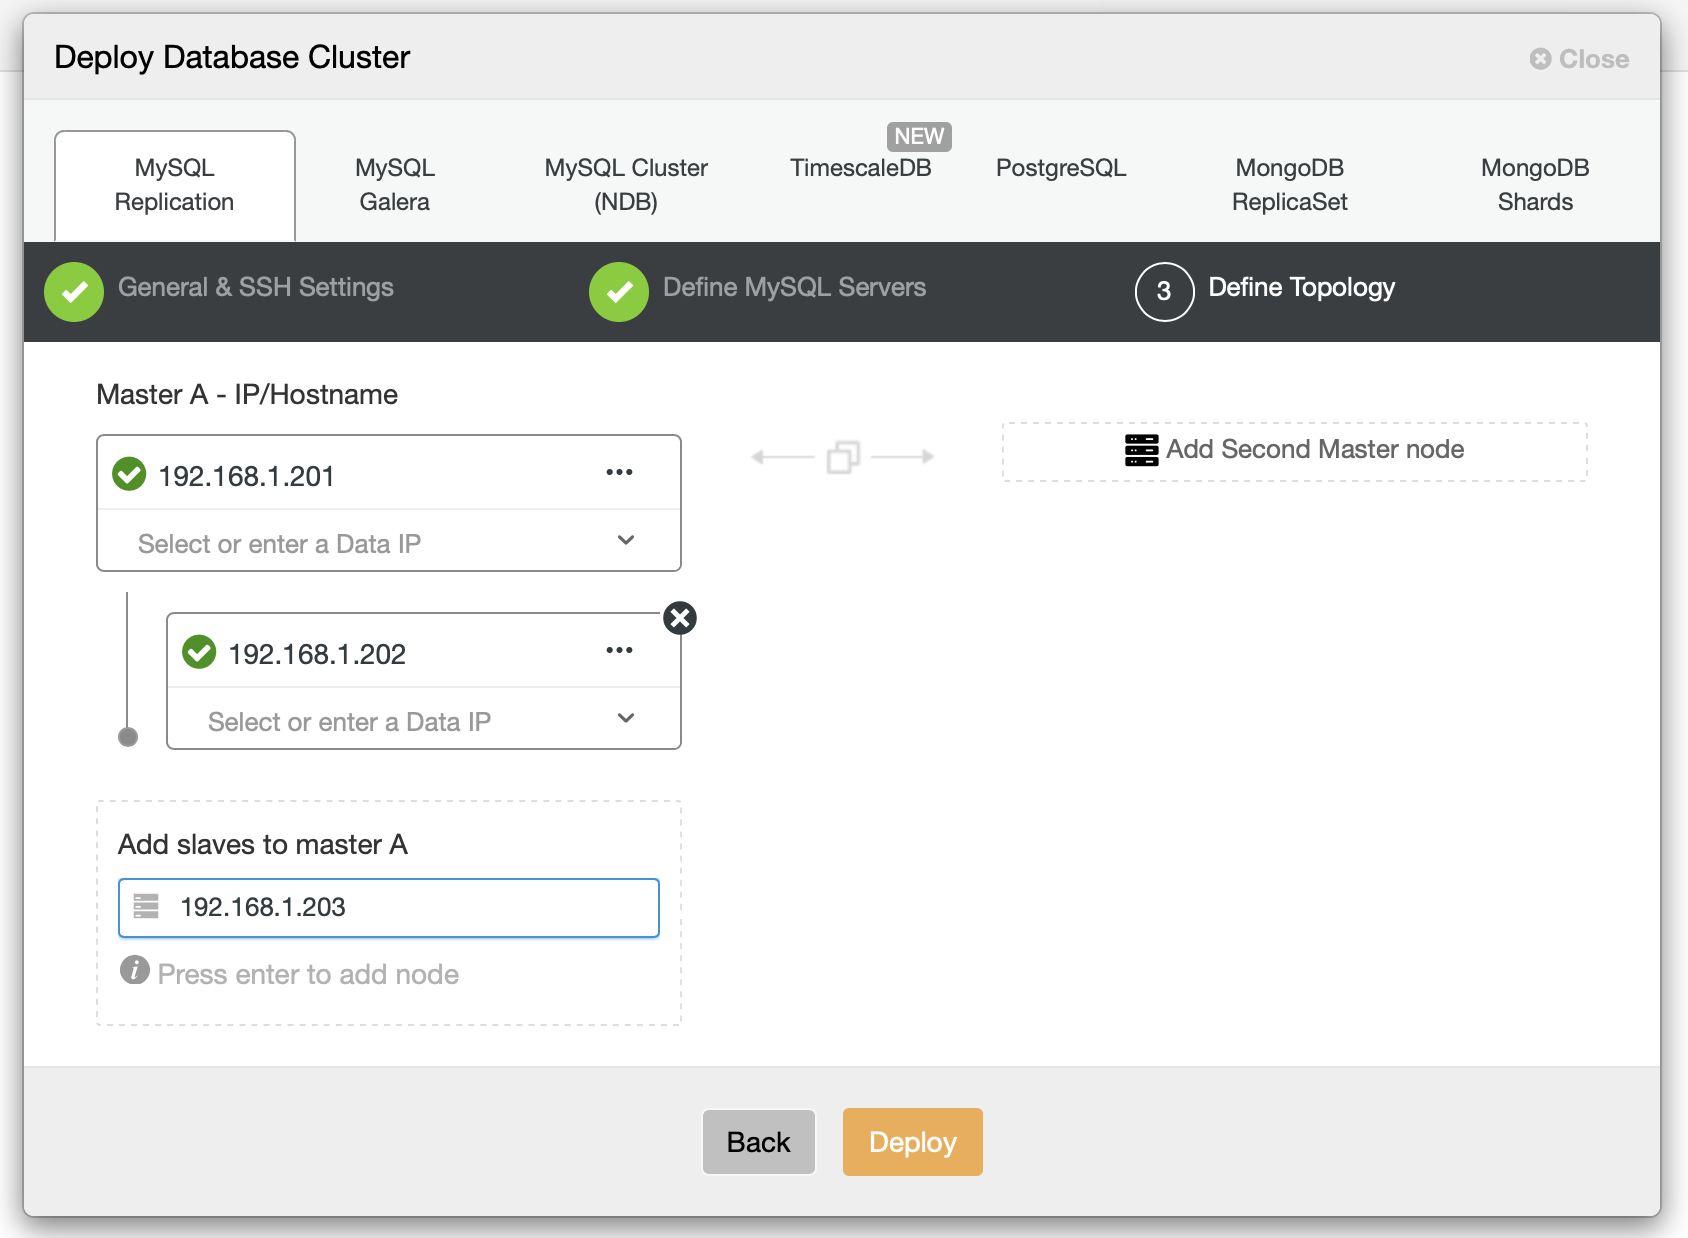
We should pass the hostnames of the nodes and how they should relate to each other. Once we are happy with the topology, we can deploy. For the purpose of this blog we will use master and two slaves as our backend.

We have our first cluster up and ready. Now, let’s deploy ProxySQL and Keepalived.
Deploying ProxySQL
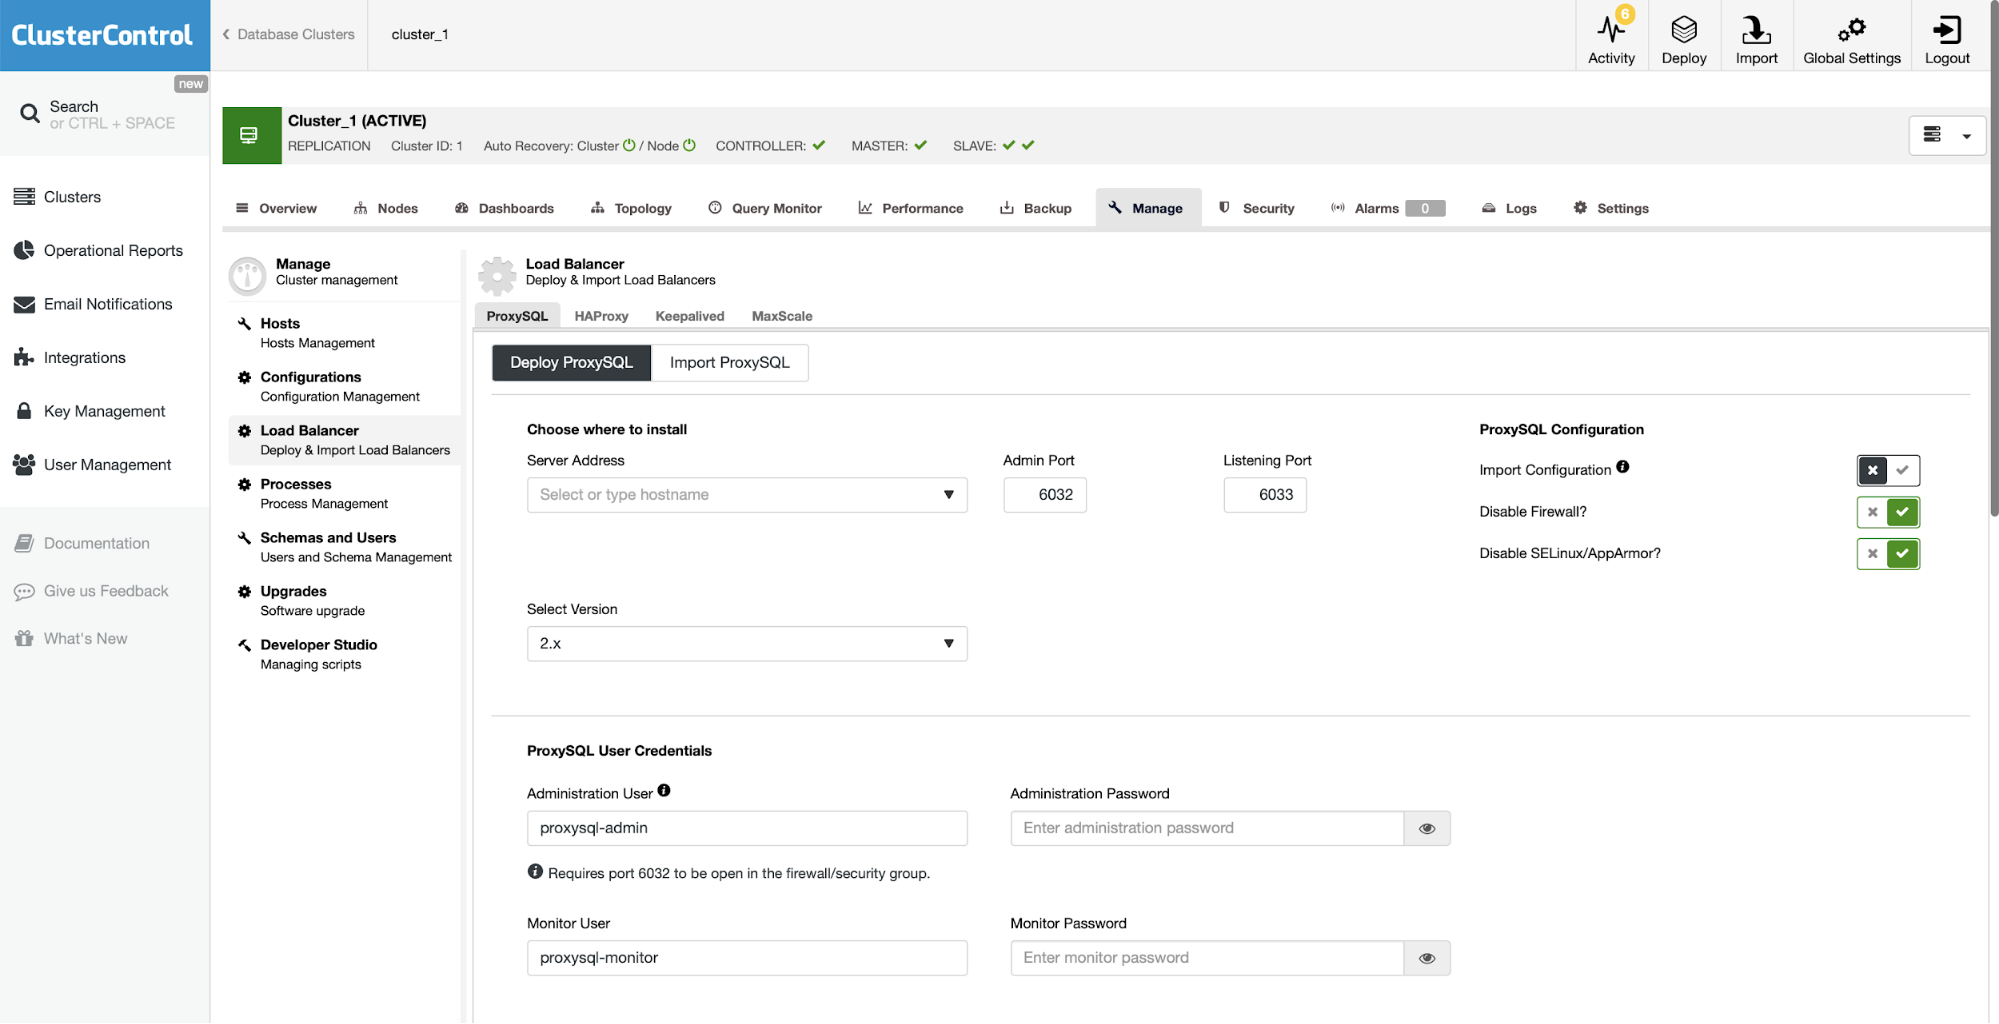
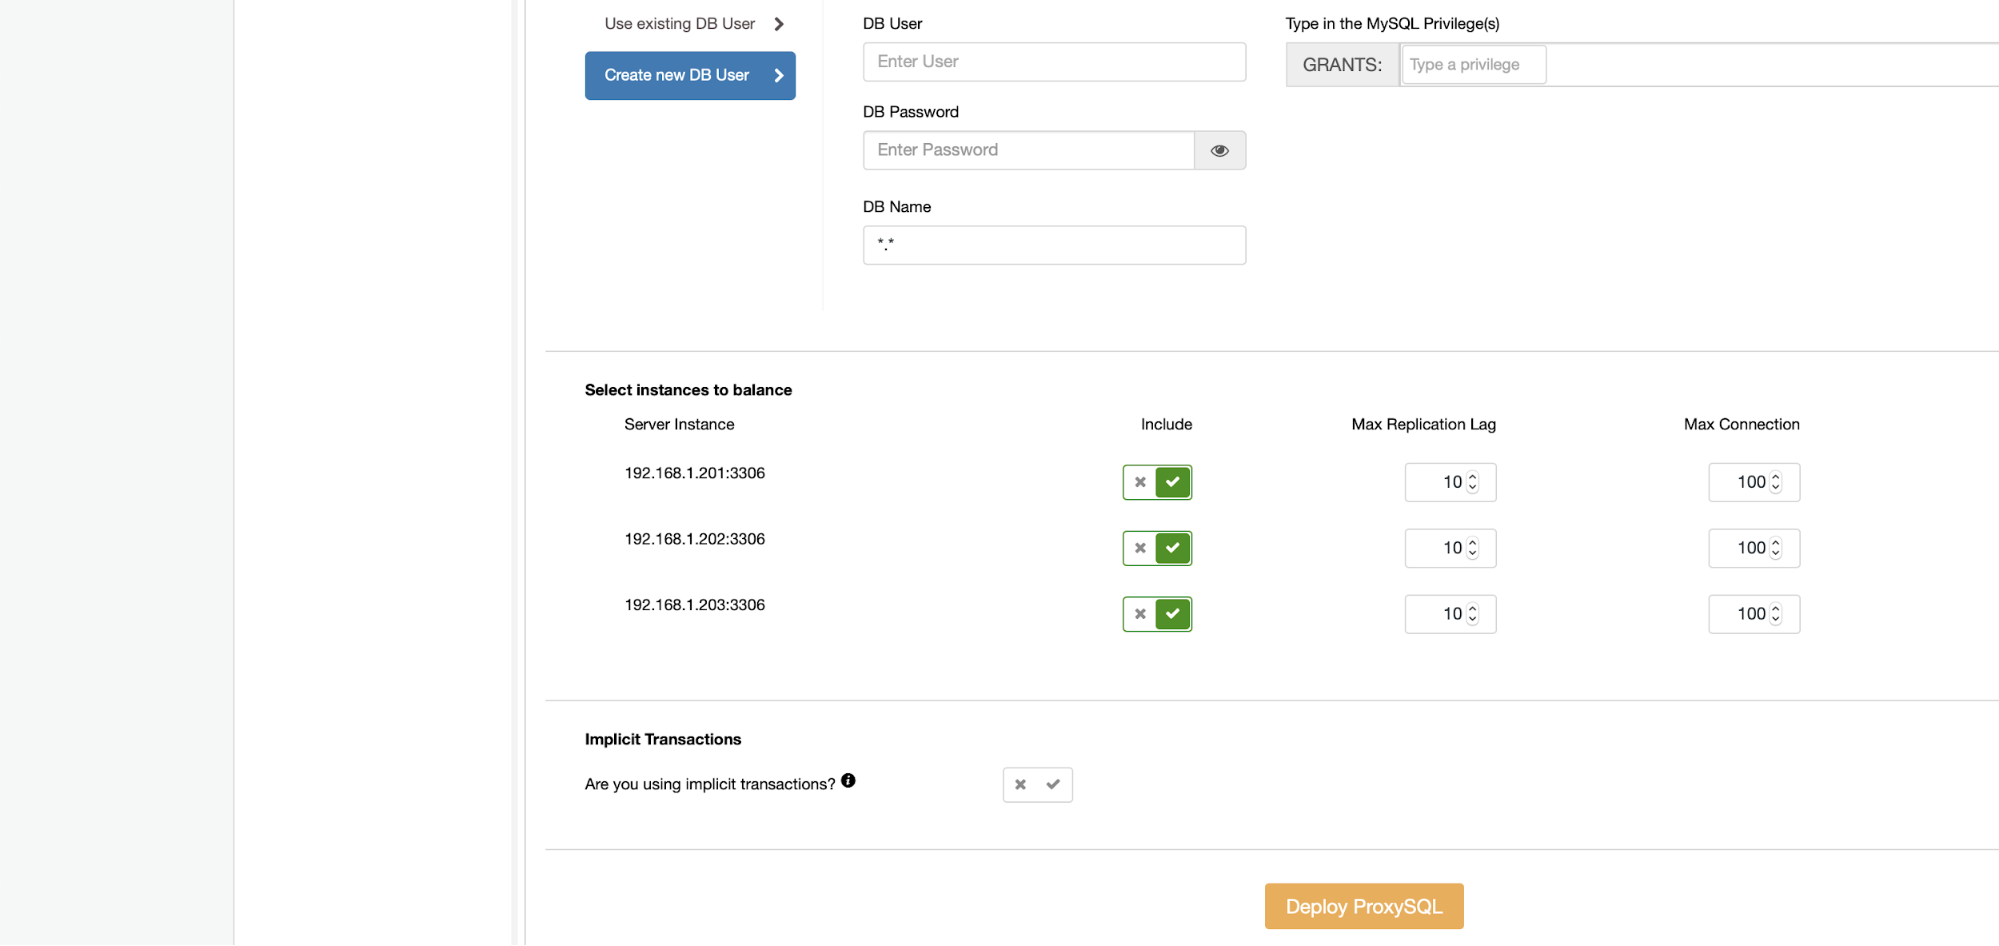
For ProxySQL it’s required to fill in some details – pick the host to install it on, decide on ProxySQL version, credentials for the administrative and monitoring users. You should also import existing database users or create a new one for your application. Finally, decide which database nodes you want to use with ProxySQL and decide if you use implicit transactions. In the case of Moodle this is not true.
Deploying Keepalived
As the next step we will deploy Keepalived.
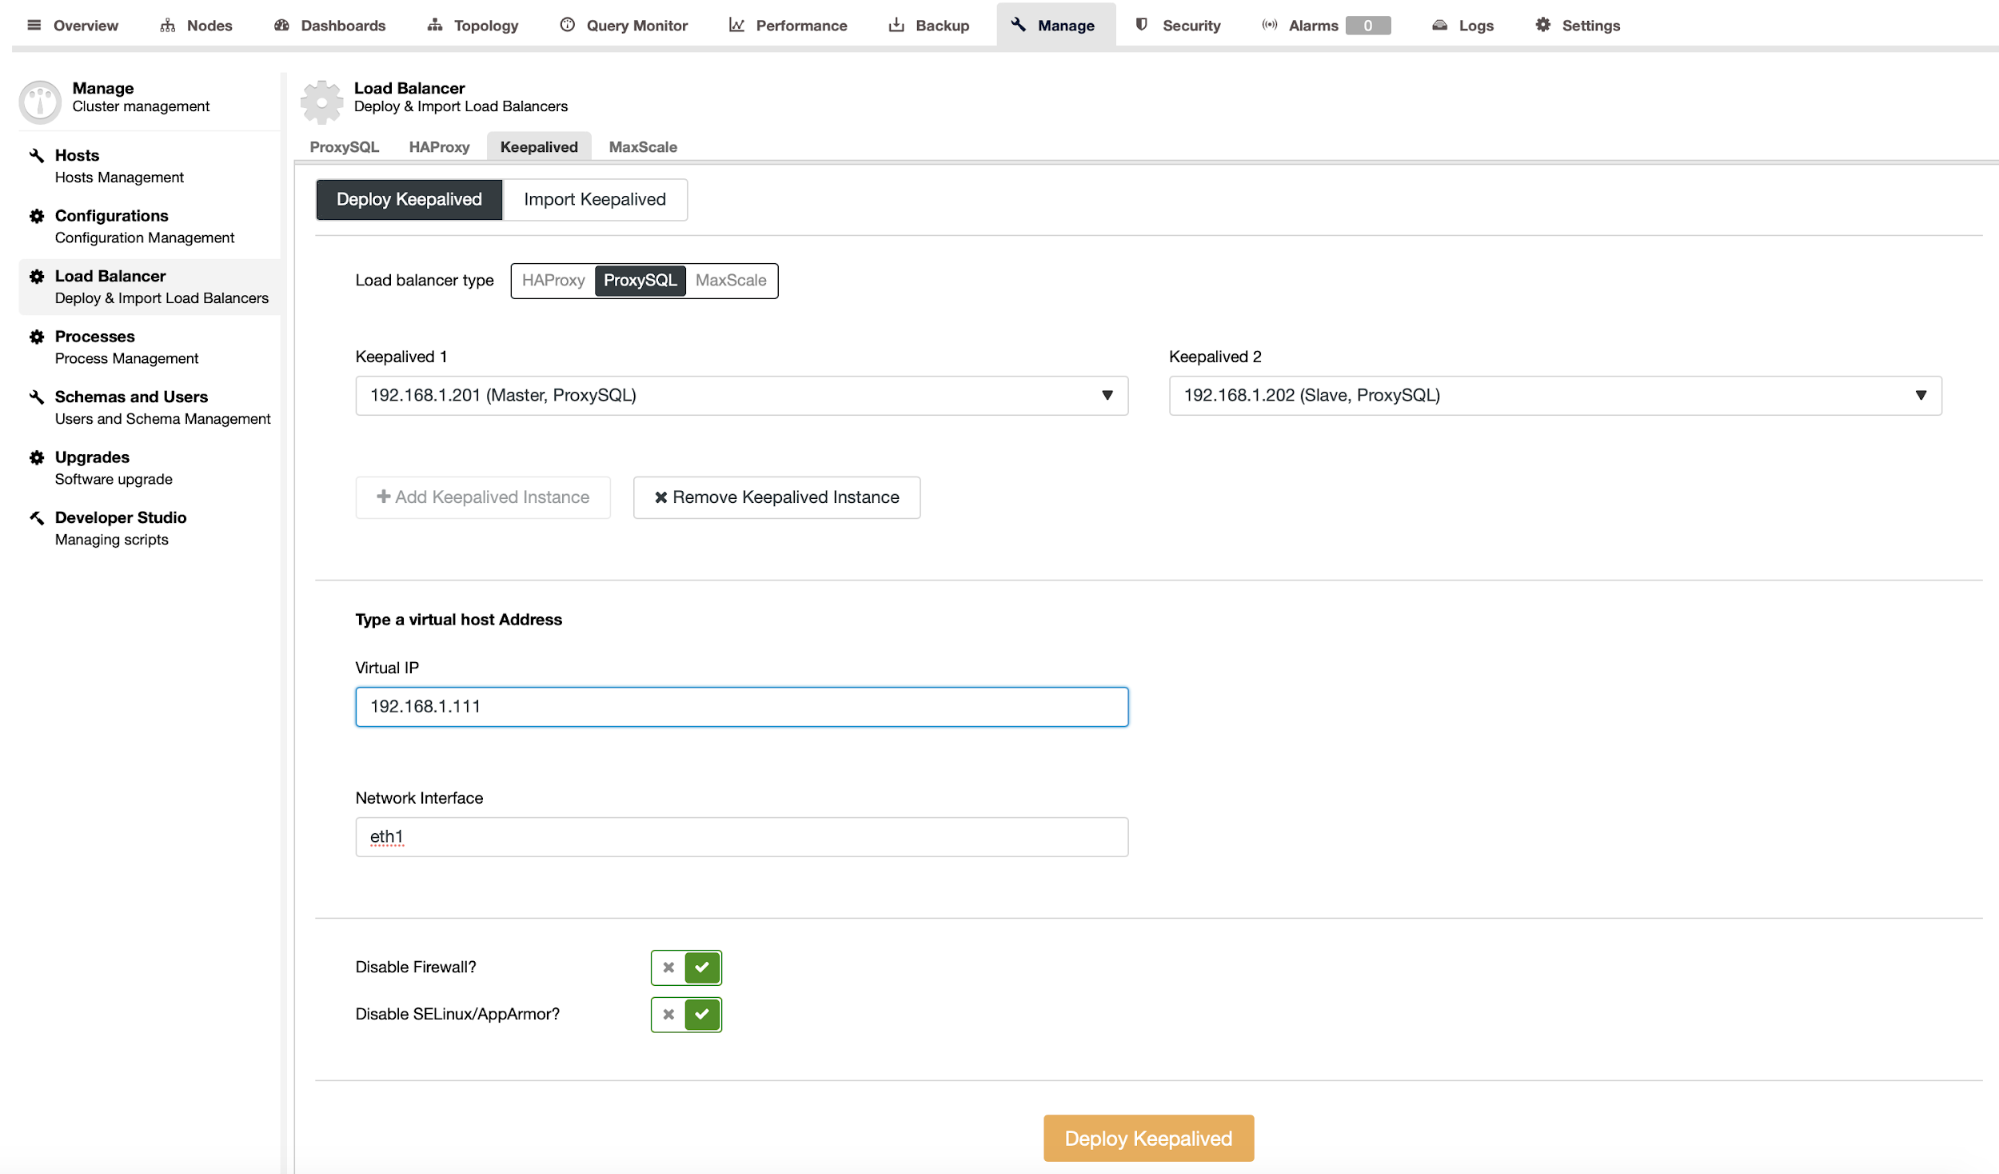
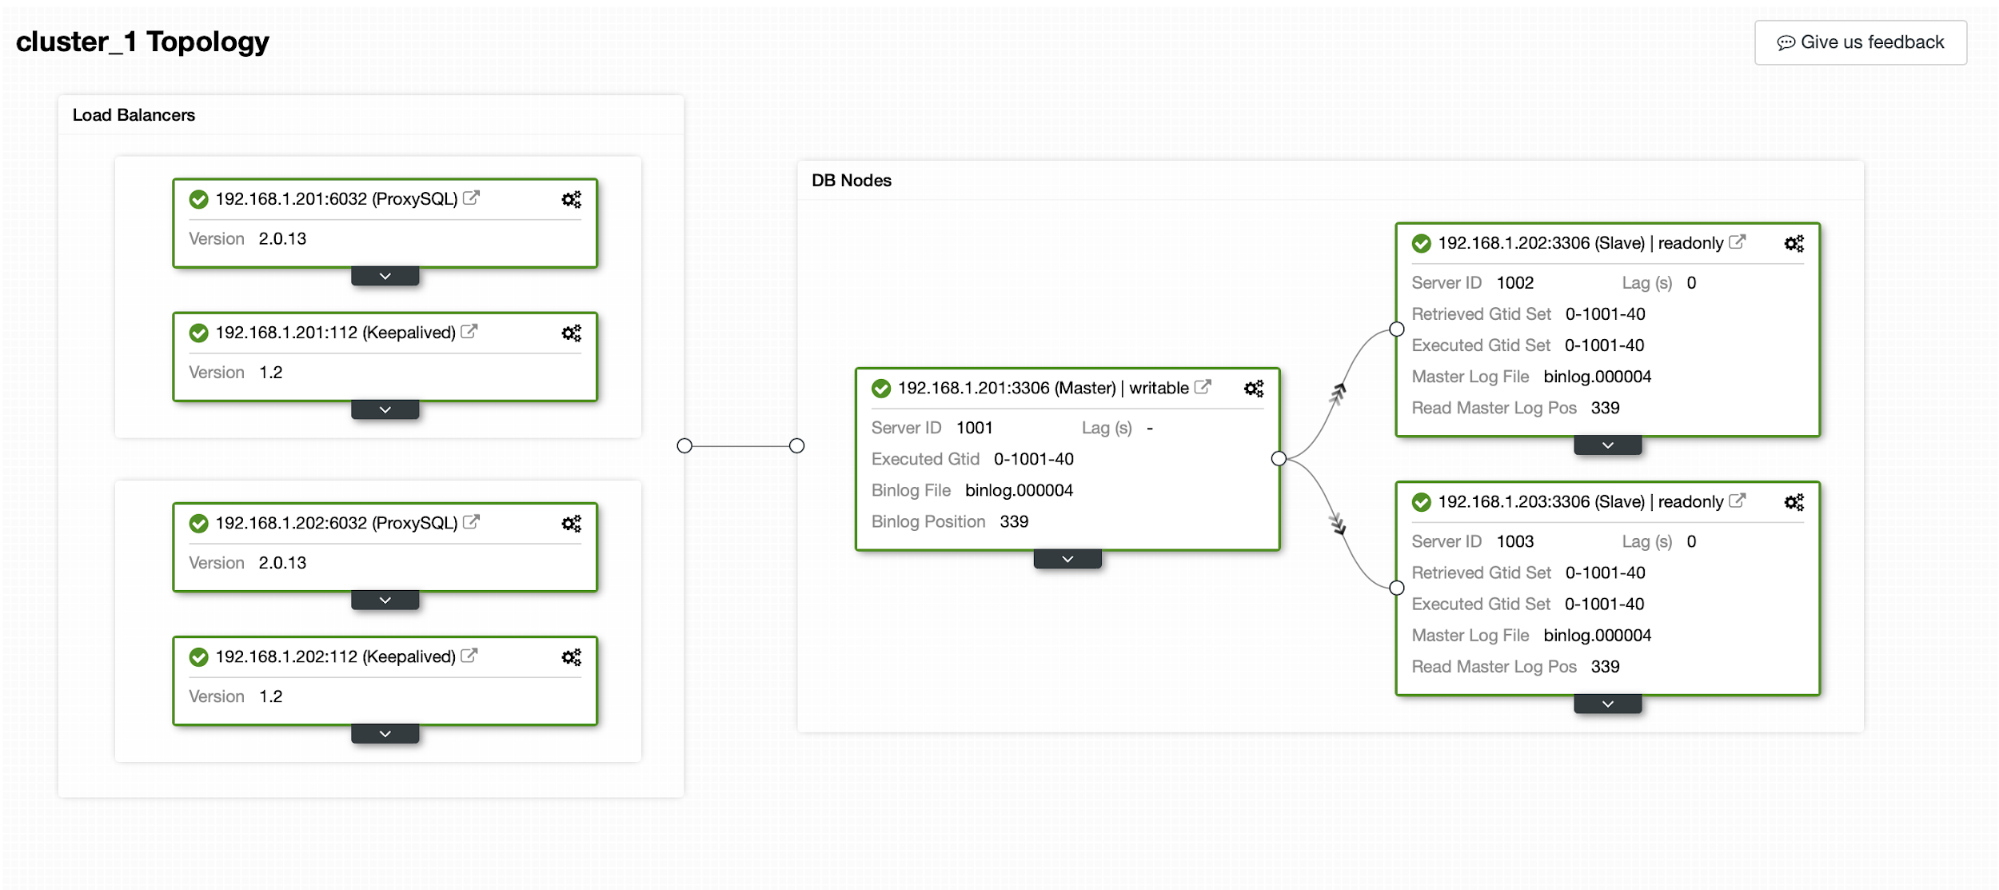
After passing details like ProxySQL instances that should be monitored, Virtual IP and the interface VIP should bind to we are ready to deploy. After couple of minutes everything should be ready and the topology should look like below:
Configure Moodle and ProxySQL for Safe Writes Scale-Out
The final step will be to configure Moodle and ProxySQL to use safe writes. While it is possible to hardcode database nodes in the Moodle configuration, it would be much better to rely on ProxySQL to handle the topology changes. What we can do is to create an additional user in the database. That user will be configured in Moodle to execute safe reads. ProxySQL will be configured to send all traffic executed from that user to the available slave nodes.
First, let’s create a user that we’ll use for read-only access.

We are granting all privileges here but it should be possible to limit that list.
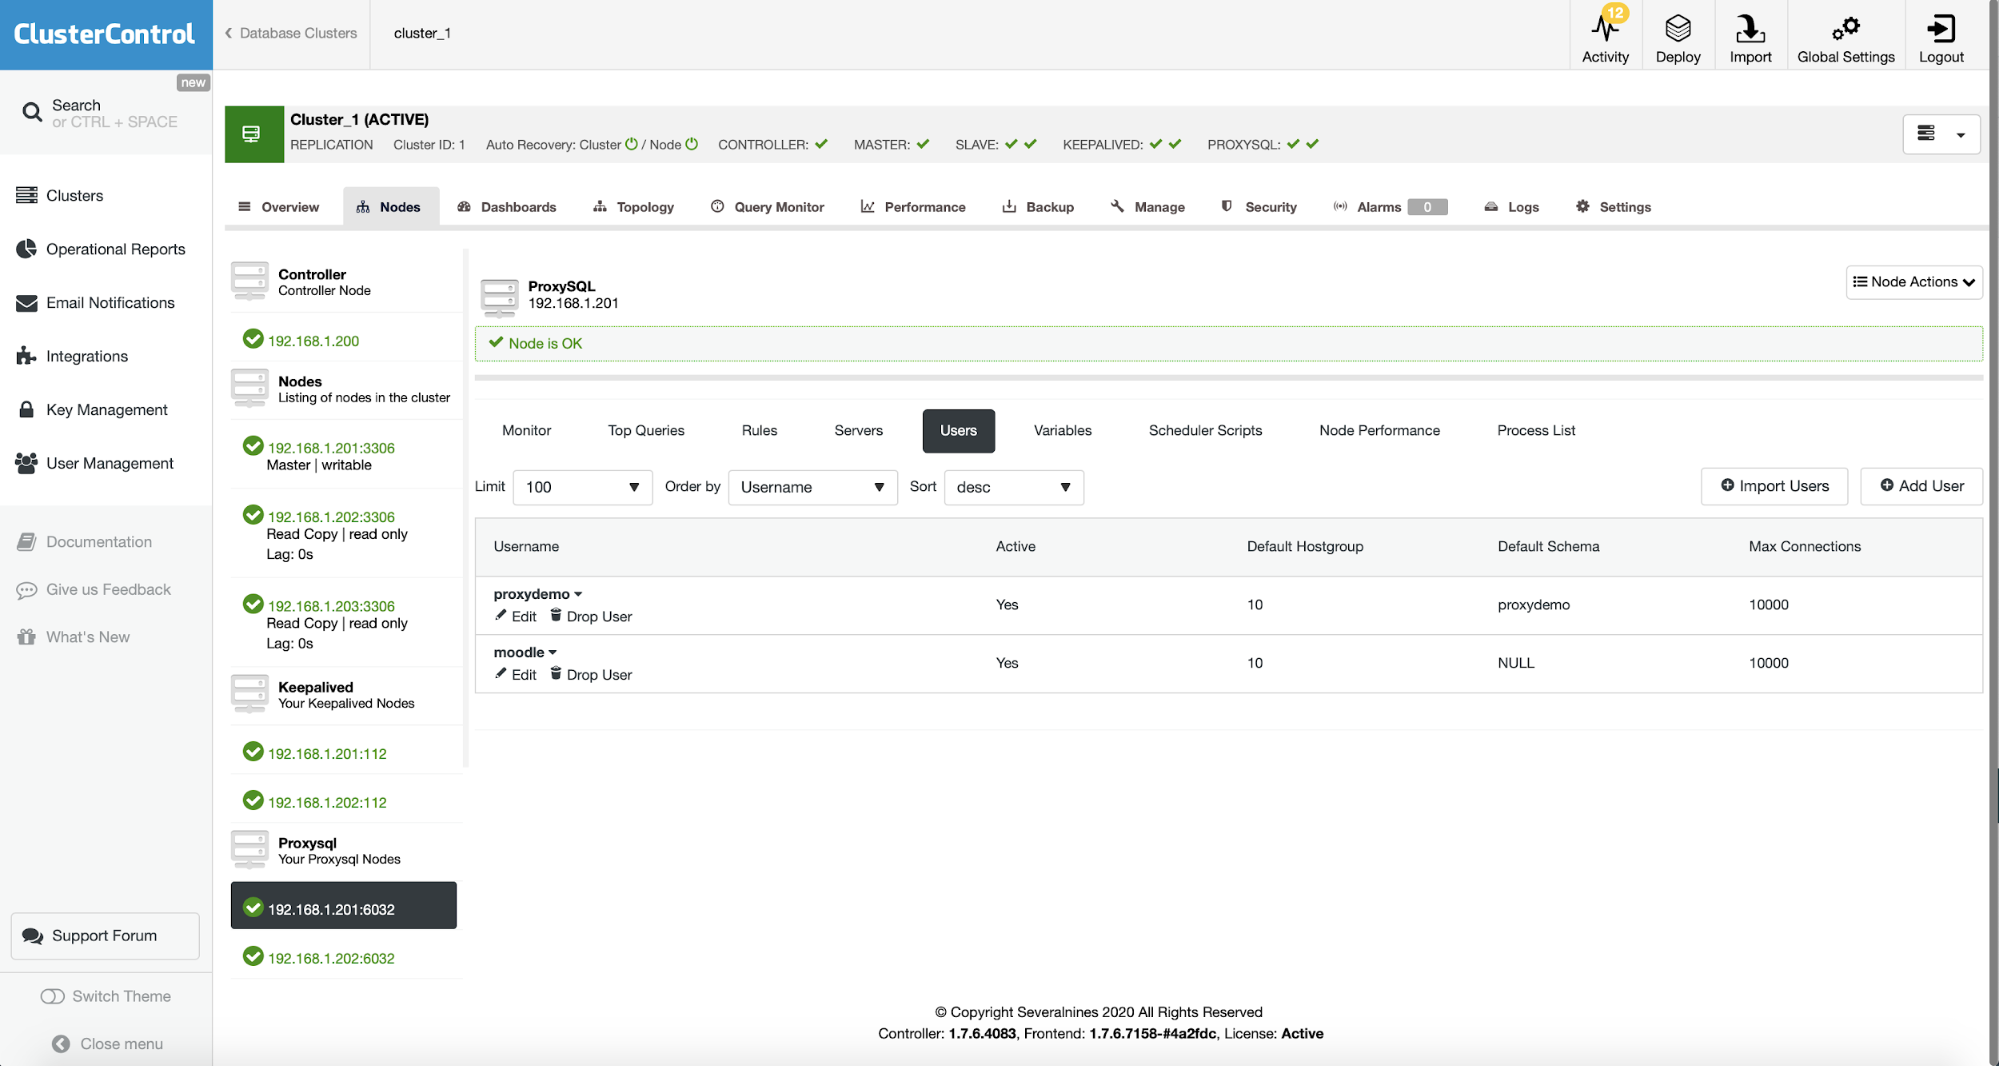
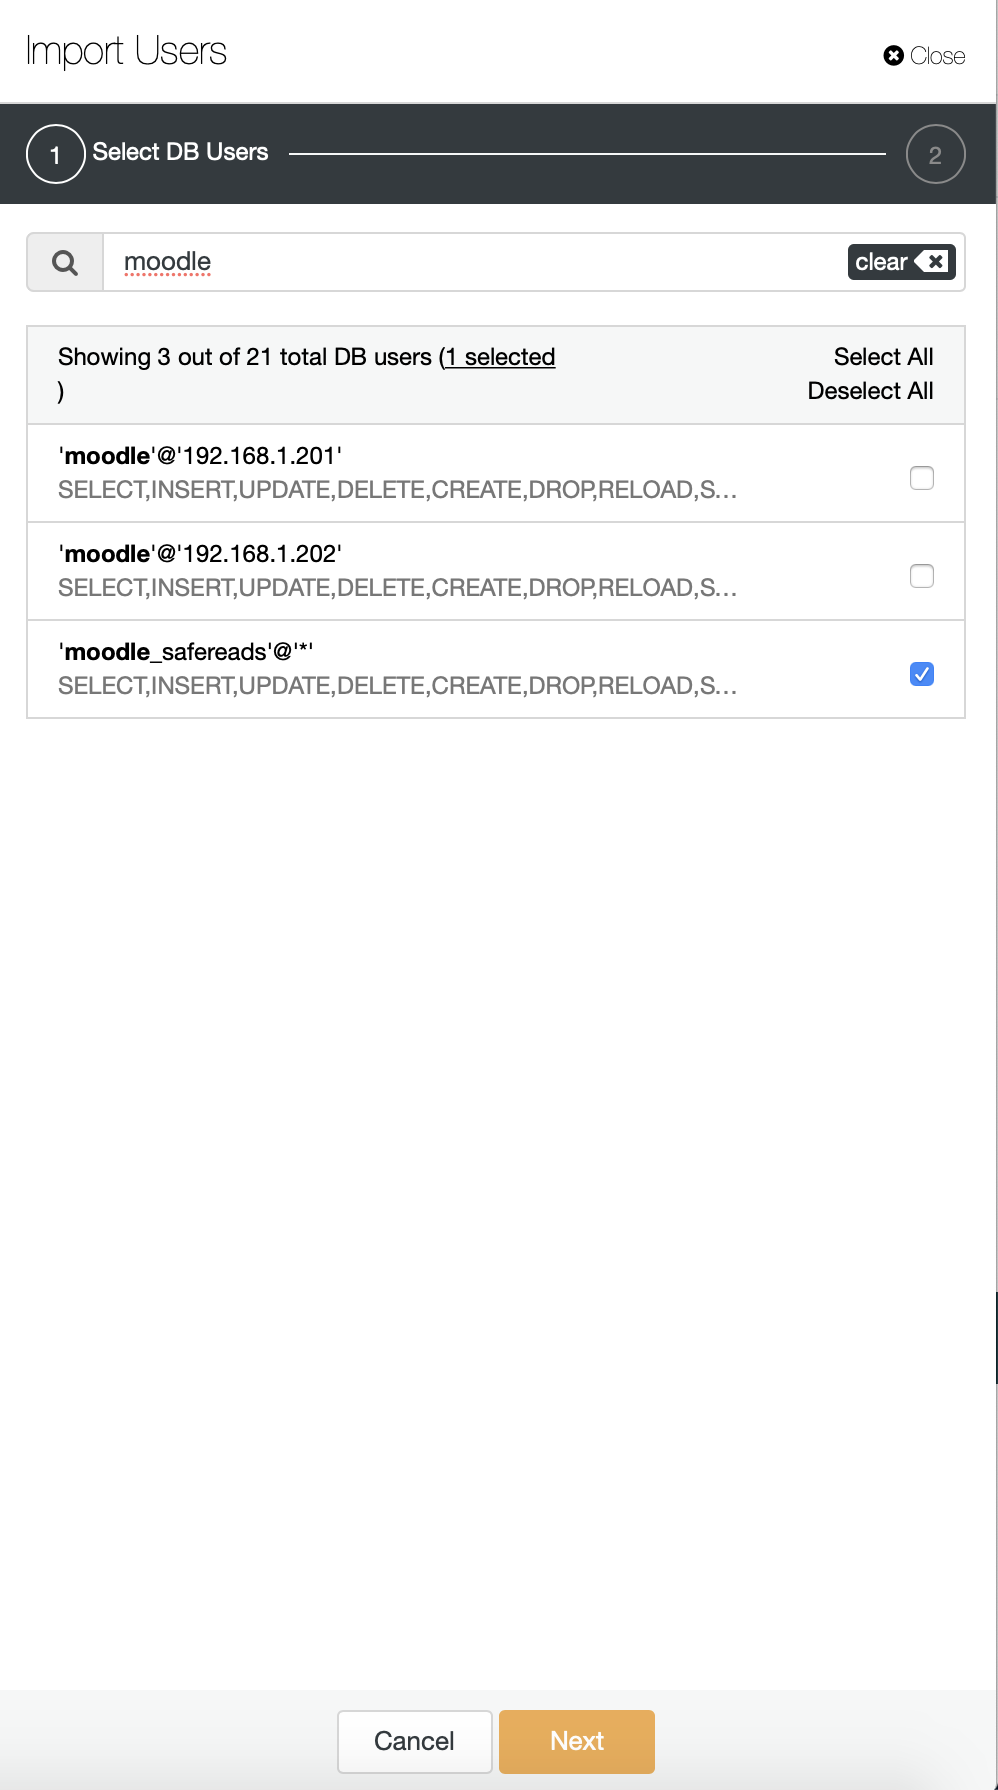
User that we just created has to be added to both ProxySQL instances that we have in the cluster in order to allow ProxySQL to authenticate as that user. In the ClusterControl UI you can use the “Import User” action.
We can search for the user that we just created:
ProxySQL uses a concept of hostgroups – groups of hosts that serve the same purpose. In our default configuration there are two hostgroups – hostgroup 10 which always point to current master and hostgroup 20 which points towards slave nodes. We want this user to send the traffic to slave nodes therefore we will assign HG 20 as the default one.
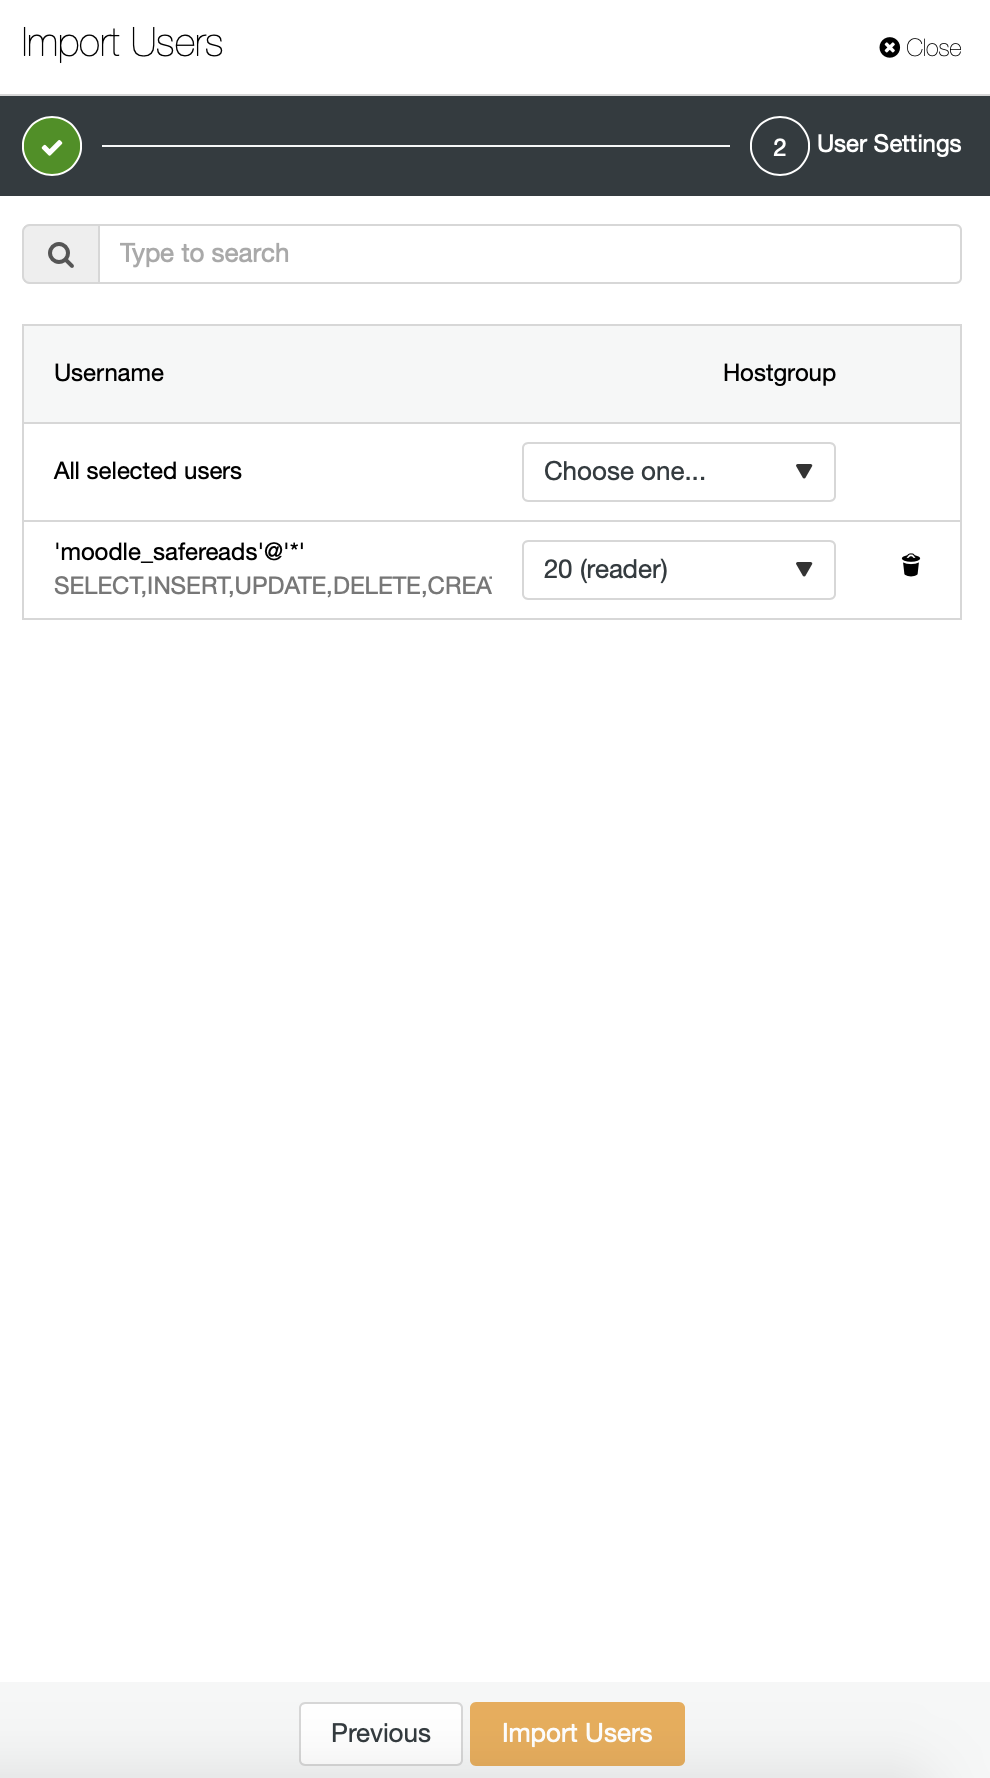
That’s it, the user will be shown on the list of the users:
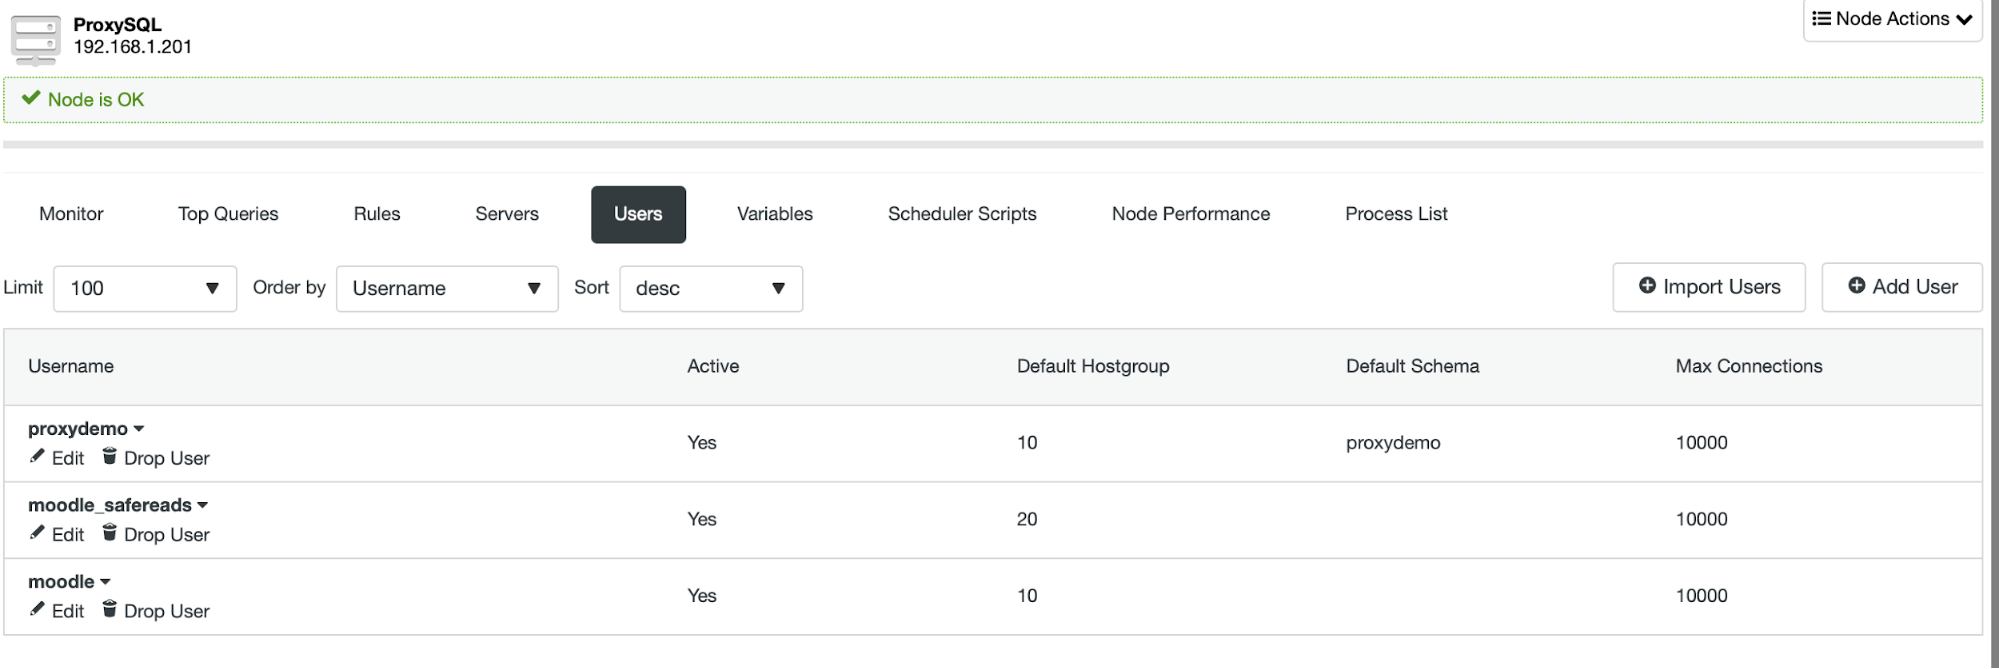
Now we should repeat the same process on the other ProxySQL node or use the “Sync Instances” option. One way or the other, both ProxySQL nodes should have the moodle_safereads user added.
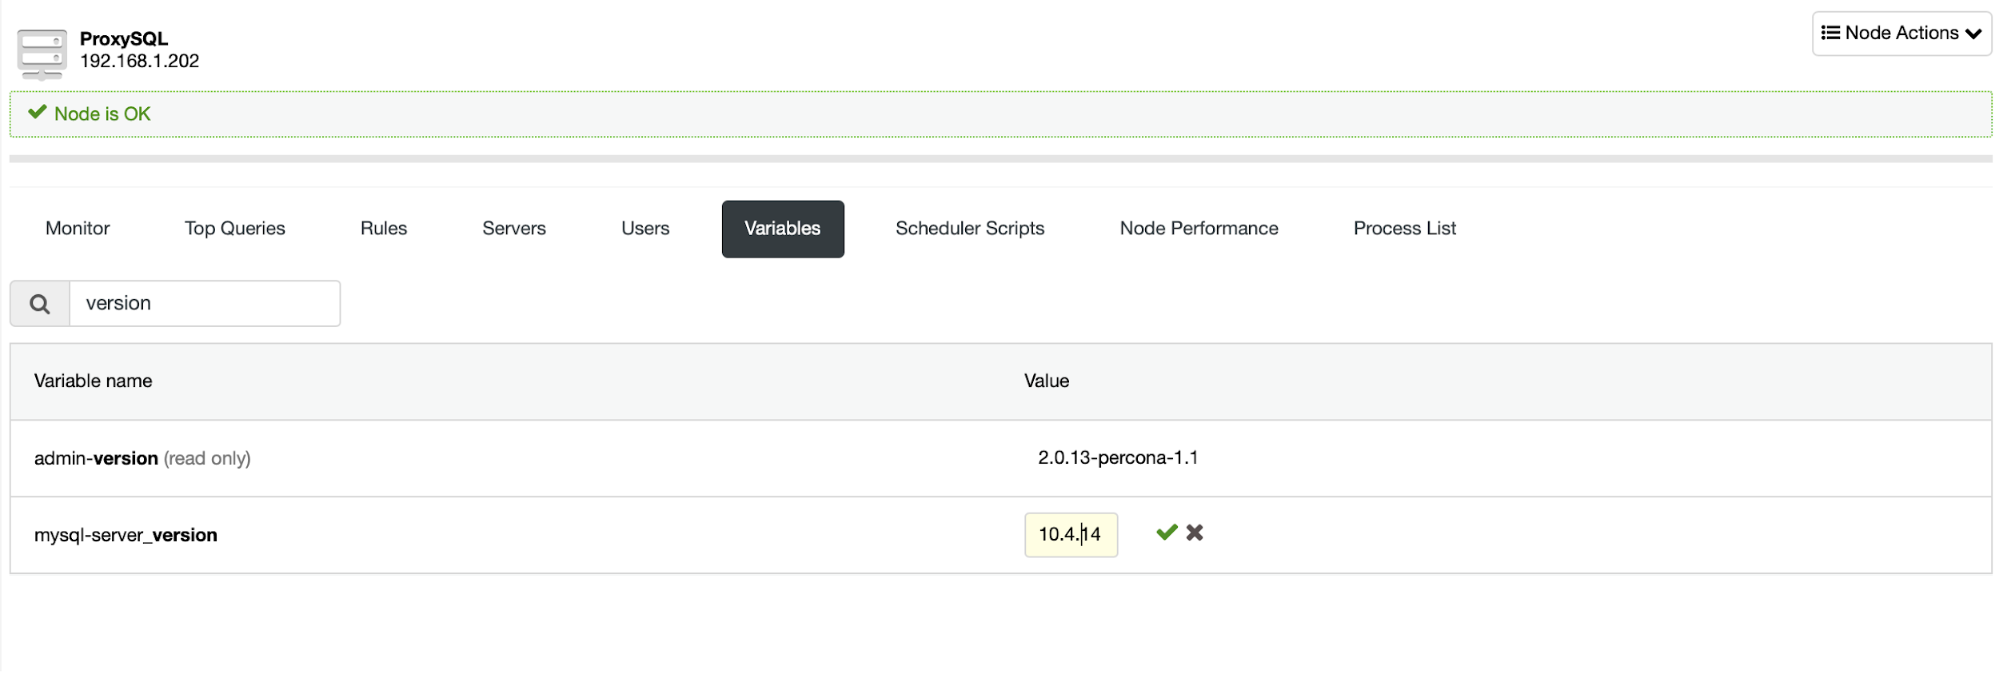
The last step will be to deploy Moodle. We won’t go here through the whole process, but there’s one issue we have to address. ProxySQL presents itself as 5.5.30 and Moodle complains it is too old. We can edit it easily to whatever version we want:
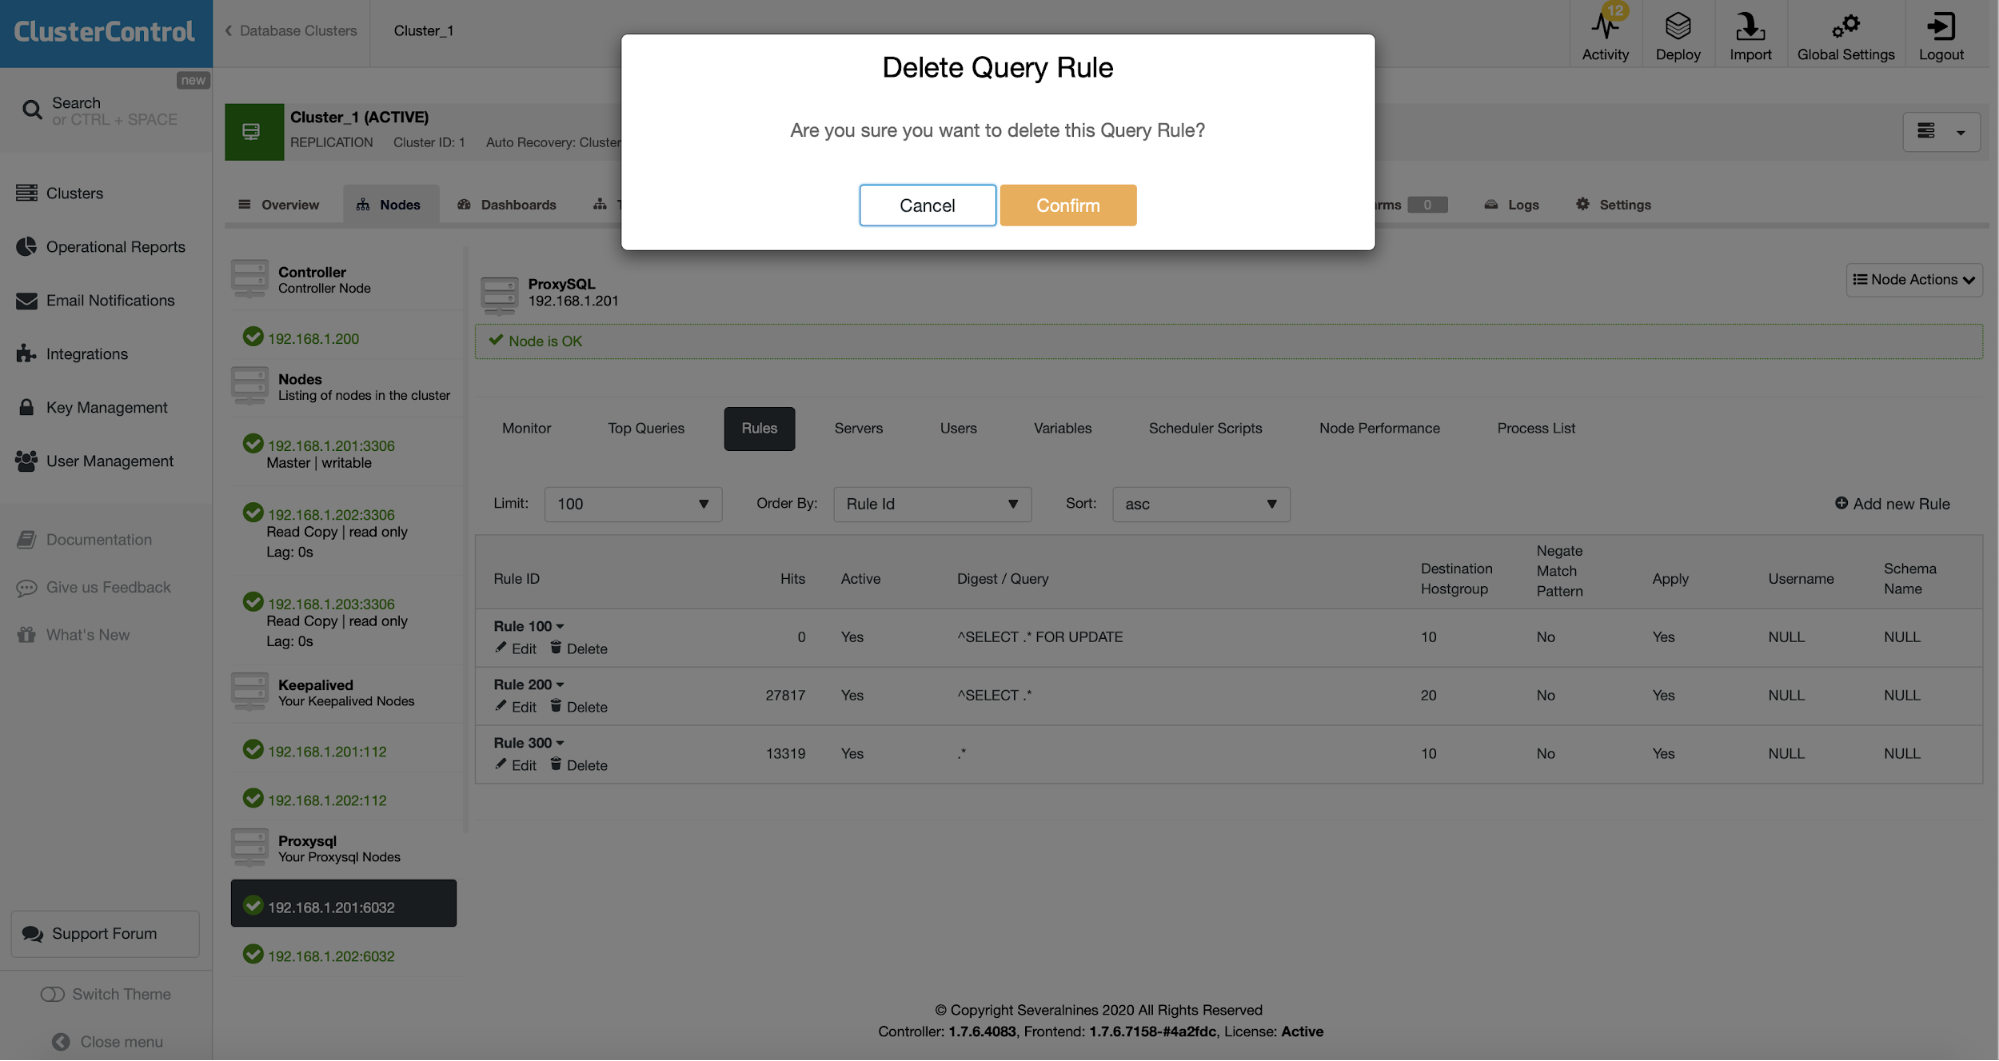
Once this is done, we have to temporarily send all of the traffic to the master. This can be accomplished by deleting all of the query rules in ProxySQL. The ‘moodle’ user has HG10 as the default hostgroup which means that with no query rules all traffic from that user will be directed to the master. The second, safe reads, user has the default hostgroup 20 which is pretty much all the configuration we want to have in place.
Once this is done, we should edit Moodle’s configuration file and enable the safe reads feature:
dbtype    = 'mysqli';

$CFG->dblibrary = 'native';

$CFG->dbhost    = '192.168.1.111';

$CFG->dbname    = 'moodle';

$CFG->dbuser    = 'moodle';

$CFG->dbpass    = 'pass';

$CFG->prefix    = 'mdl_';

$CFG->dboptions = array (

  'dbpersist' => 0,

  'dbport' => 6033,

  'dbsocket' => '',

  'dbcollation' => 'utf8mb4_general_ci',

  'readonly' => [

    'instance' => [

      'dbhost' => '192.168.1.111',

      'dbport' => 6033,

      'dbuser' => 'moodle_safereads',

      'dbpass' => 'pass'

    ]

  ]


);


$CFG->wwwroot   = 'http://192.168.1.200/moodle';

$CFG->dataroot  = '/var/www/moodledata';

$CFG->admin     = 'admin';


$CFG->directorypermissions = 0777;


require_once(__DIR__ . '/lib/setup.php');


// There is no php closing tag in this file,

// it is intentional because it prevents trailing whitespace problems!
What happened here is that we added the read only connection to ProxySQL which will use moodle_safereads user. This user will always point towards slaves. This concludes our setup of Moodle for MariaDB replication.
Deploying a Highly Available Database Backend for Moodle Using MariaDB Cluster
This time we’ll try to use MariaDB Cluster as our backend. Again, the first step is the same, we need to pick “Deploy” from the wizard:
Once you do that, we should define SSH connectivity, passwordless, key-based SSH access is a requirement for ClusterControl to manage database infrastructure.
Then we should decide on the vendor, version, password hosts and couple more settings:
Once we fill all the details, we are good to deploy.
We could continue here further but given all further steps are basically the same as with MariaDB replication, we would just ask you to scroll up and check the “Deploying ProxySQL” section and everything that follows it. You have to deploy ProxySQL, Keepalived, reconfigure it, change Moodle’s configuration file and this is pretty much it. We hope that this blog will help you to build highly available environments for Moodle backed by MariaDB Cluster or replication.