blog
PostgreSQL Replication Best Practices – Part 2

In the first part of this blog, we mentioned some important concepts related to a good PostgreSQL replication environment. Now, let’s see how to combine all these things together in an easy way using ClusterControl. For this, we will assume you have ClusterControl installed, but if not, you can go to the official site, or refer to the official documentation to install it.
Deploying PostgreSQL Streaming Replication
To perform a deployment of a PostgreSQL Cluster from ClusterControl, select the option Deploy and follow the instructions that appear.
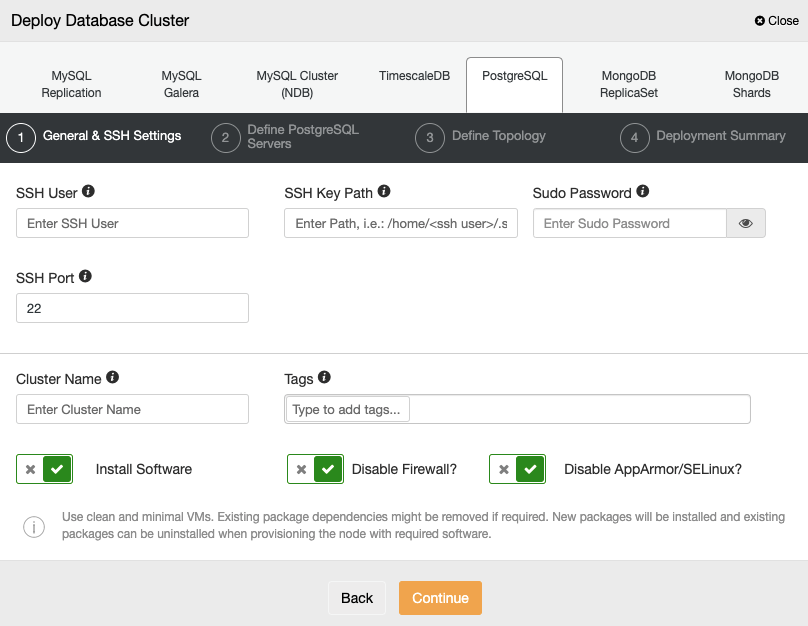
When selecting PostgreSQL, you must specify the User, Key or Password, and Port to connect by SSH to your servers. You can also add a name for your new cluster and specify whether you want ClusterControl to install the corresponding software and configurations for you.
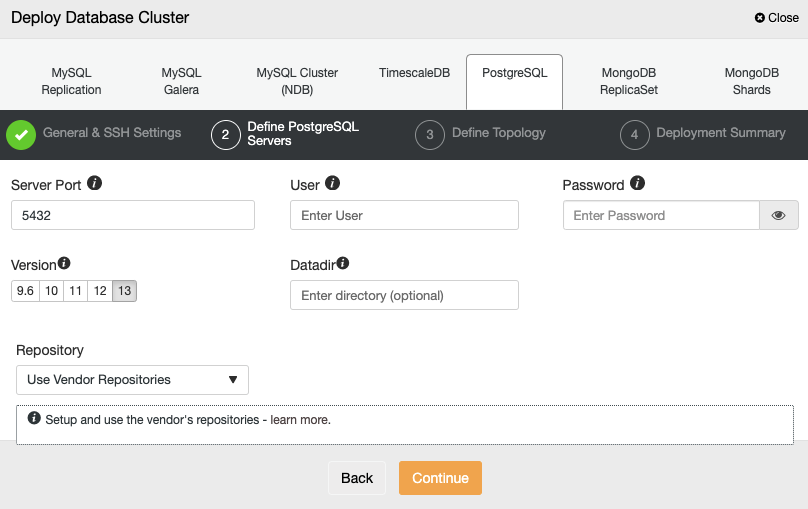
After setting up the SSH access information, you need to define the database credentials, version, and datadir (optional). You can also specify which repository to use.
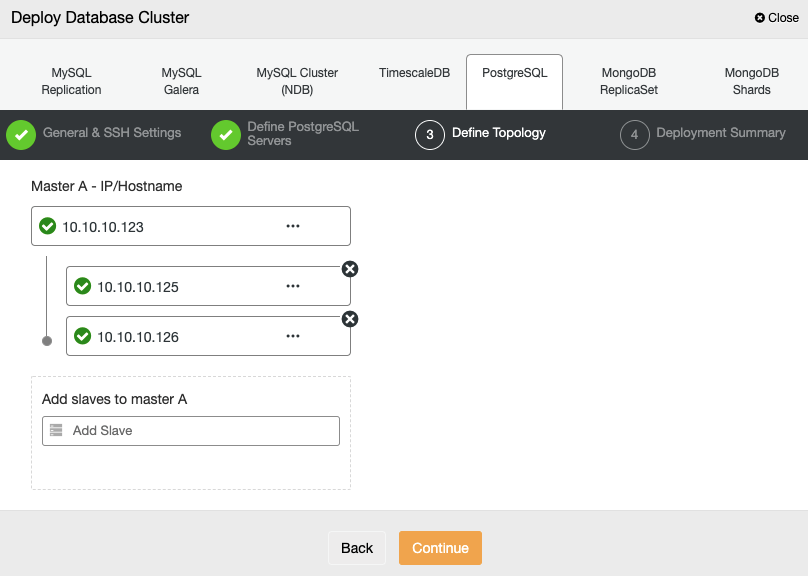
In the next step, you need to add your servers to the cluster that you are going to create using the IP Address or Hostname.
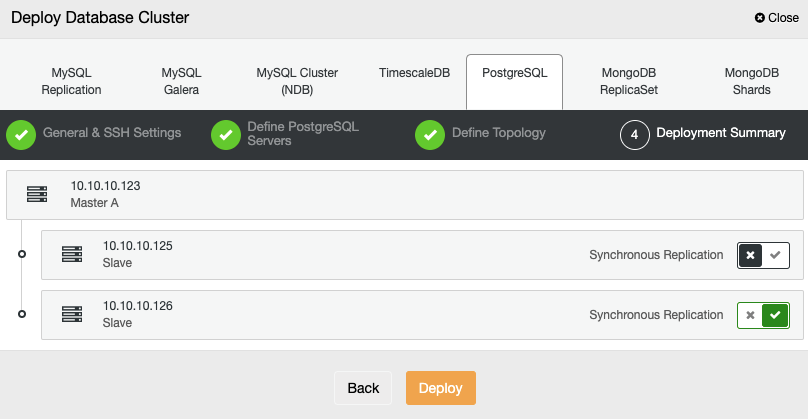
In the last step, you can choose if your replication will be Synchronous or Asynchronous, and then just press on Deploy.
Once the task is finished, you can see your new PostgreSQL Cluster in the main ClusterControl screen.

Now you have your cluster created, you can perform several tasks on it, like adding a load balancer (HAProxy), connection pooler (PgBouncer), or a new synchronous or asynchronous replication slave.
Adding Synchronous and Asynchronous Replication Slaves
Go to ClusterControl -> Cluster Actions -> Add Replication Slave.
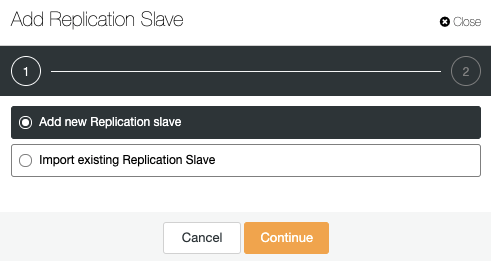
You can add a new replication slave, or even import an existing one. Let’s choose the first option and continue.
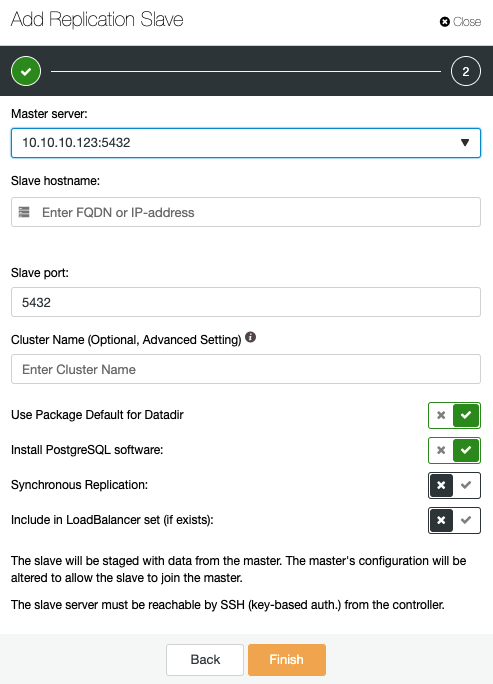
Here, you need to specify the master server, IP address or Hostname of the new replication slave, port, and if you want ClusterControl install the software, or include this node in an existing load balancer. You can also configure the replication to be synchronous or asynchronous.
Now you have your PostgreSQL cluster in place with the corresponding replicas, let’s see how to improve performance by adding a connection pooler.
PgBouncer Deployment
Go to ClusterControl -> Select PostgreSQL Cluster -> Cluster Actions -> Add Load Balancer -> PgBouncer. Here, you can deploy a new PgBouncer node that will be deployed in the selected database node, or even import an existing PgBouncer.

You will need to specify an IP Address or Hostname, the Listen Port and PgBouncer credentials. When you press on Deploy PgBouncer, ClusterControl will access the node, install and configure everything without any manual intervention.
You can monitor the progress in the ClusterControl Activity Section. When it finishes, you need to create the new Pool. For this, go to ClusterControl -> Select the PostgreSQL Cluster -> Nodes -> PgBouncer node.
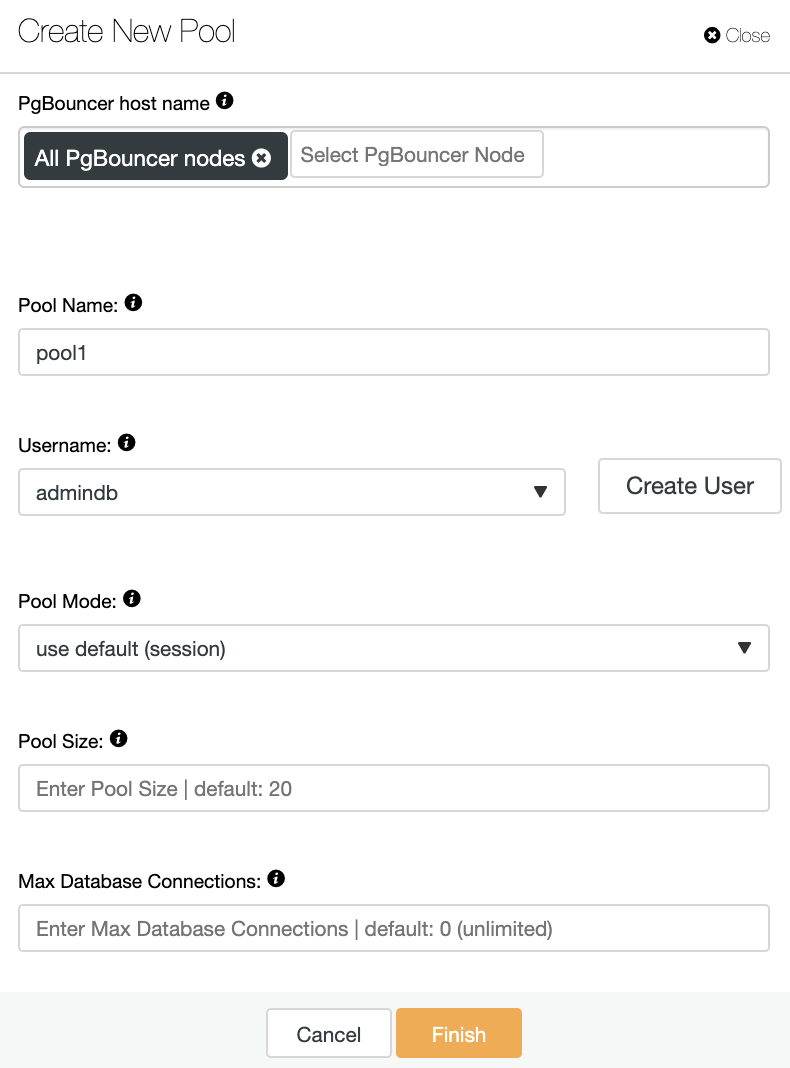
You will need to add the following information:
-
PgBouncer hostname: Select the node hosts to create the connection pool.
-
Pool Name: Pool and database names must be the same.
-
Username: Select a user from the PostgreSQL primary node or create a new one.
-
Pool Mode: It can be: session (default), transaction, or statement pooling.
-
Pool Size: Maximum size of pools for this database. The default value is 20.
-
Max Database Connections: Configure a database-wide maximum. The default value is 0, which means unlimited.
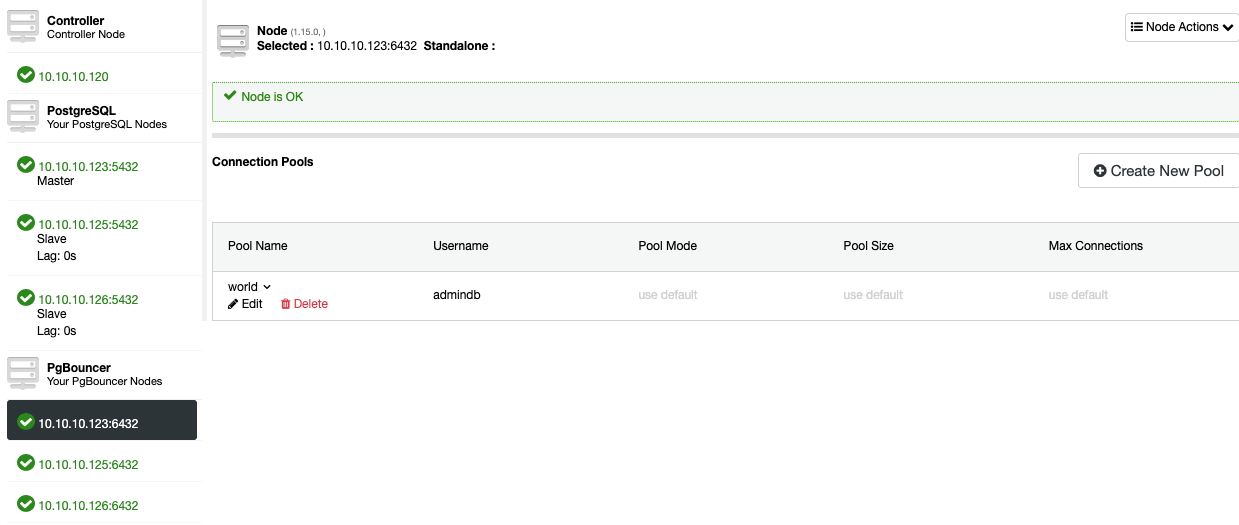
Now, you should be able to see the Pool in the Node section.
To add High Availability to your PostgreSQL database, let’s see how to deploy a load balancer.
Load Balancer Deployment
To perform a load balancer deployment, select the option Add Load Balancer in the Cluster Actions menu, and complete the asked information.

You need to add IP or Hostname, Port, Policy, and the nodes you are going to use. If you are using PgBouncer, you can choose it in the instance type combo box.
To avoid a single point of failure, you should deploy at least two HAProxy nodes, and use Keepalived which allows you to use a virtual IP address in your application that is assigned to the active HAProxy node. If this node fails, the virtual IP address will be migrated to the secondary load balancer, so your application can still work as usual.
Keepalived Deployment
To perform a Keepalived deployment, select the option Add Load Balancer in the Cluster Actions menu and then, go to the Keepalived Tab.
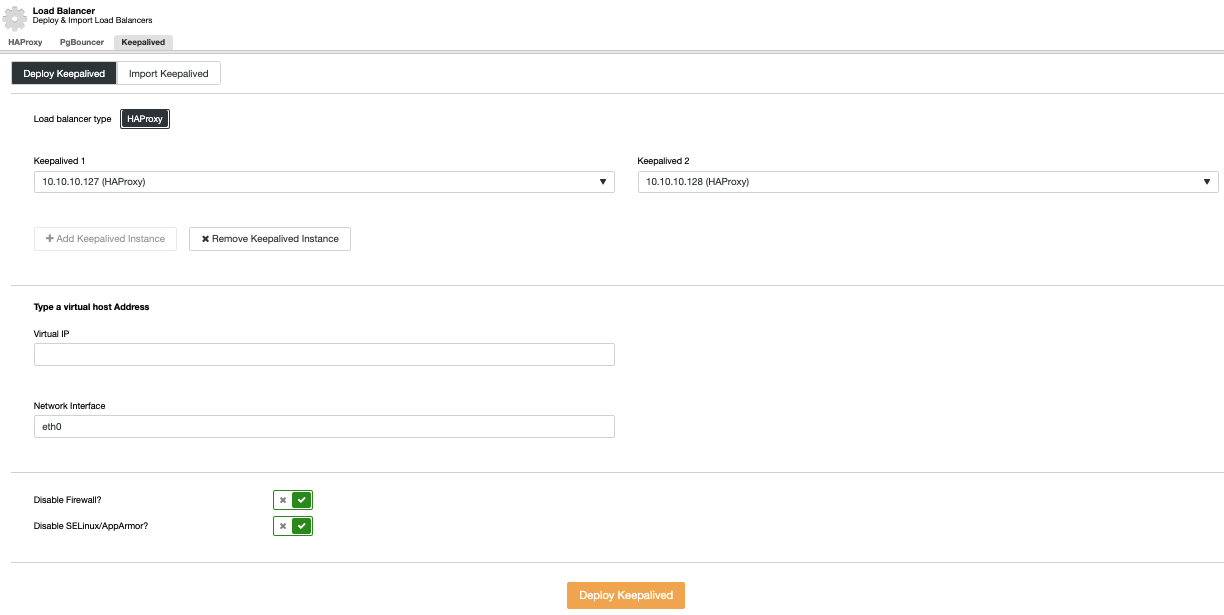
Here, select the HAProxy nodes, and specify the virtual IP address that will be used to access the database (or connection pooler).
At this moment, you should have the following topology:
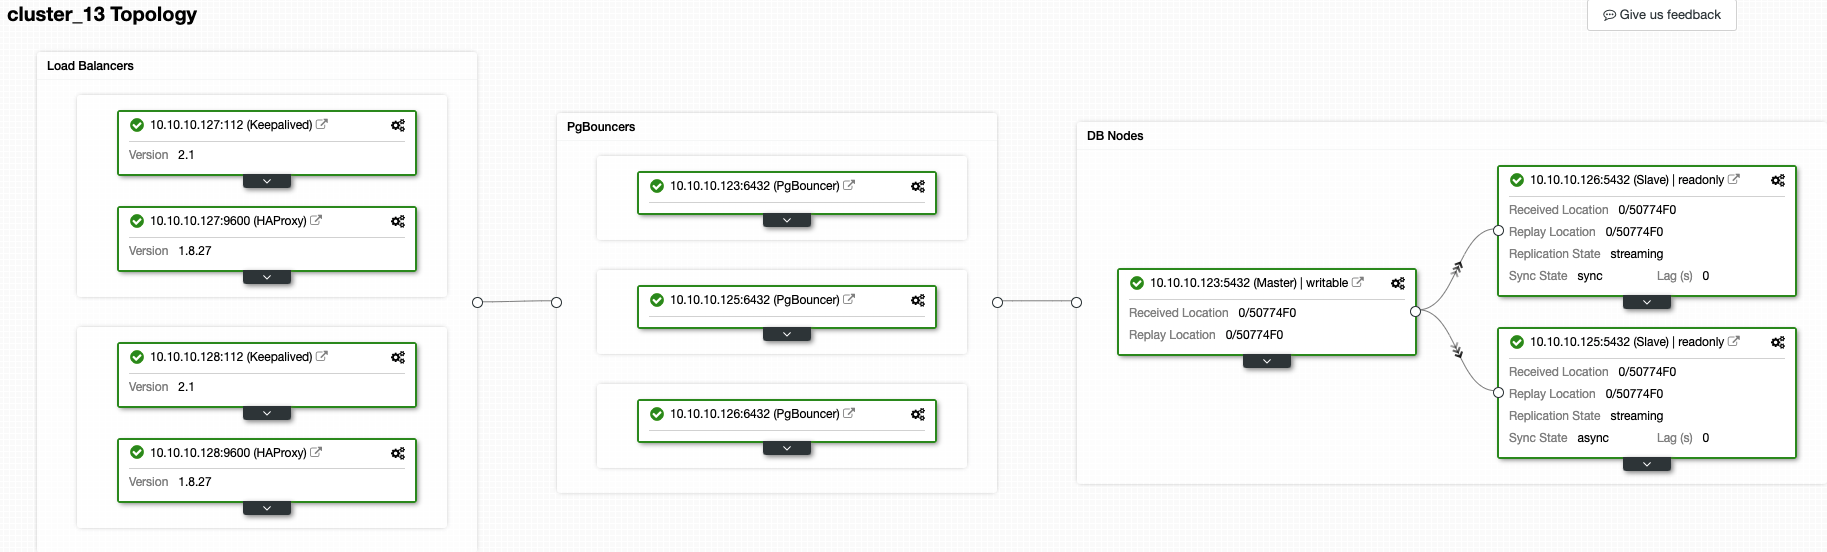
And this means: HAProxy + Keepalived -> PgBouncer -> PostgreSQL Database nodes, that is a good topology for your PostgreSQL Cluster.
ClusterControl Autorecovery Feature
In case of failure, ClusterControl will promote the most advanced standby node to primary as well as notify you of the problem. It also fails over the rest of the standby node to replicate from the new primary server.
By default, HAProxy is configured with two different ports: read-write and read-only. In the read-write port, you have your primary database (or PgBouncer) node as online and the rest of the nodes as offline, and in the read-only port, you have both the primary and the standby nodes online.
When HAProxy detects that one of your nodes is not accessible, it automatically marks it as offline and does not take it into account for sending traffic to it. Detection is done by health check scripts that are configured by ClusterControl at the time of deployment. These check whether the instances are up, whether they are undergoing recovery, or are read-only.
When ClusterControl promotes a standby node, HAProxy marks the old primary as offline for both ports and puts the promoted node online in the read-write port.
If your active HAProxy, which is assigned a virtual IP address to which your systems connect, fails, Keepalived migrates this IP Address to your passive HAProxy automatically. This means that your systems are then able to continue to function normally.
Conclusion
As you can see, having a good PostgreSQL topology is easy if you use ClusterControl and if you are following the basic best practice concepts for PostgreSQL replication. Of course, the best environment depends on the workload, hardware, application, etc, but you can use it as an example and move the pieces as you need.


