blog
PostgreSQL Multi-Cloud Cluster Deployment

A multi-cloud environment is a good option for a Disaster Recovery Plan (DRP), but it can be a time-consuming task as you need to configure the connectivity between the different cloud providers and you will then need to deploy and manage your database cluster in two different places.
In this blog, we will show how to perform a multi-cloud deployment for PostgreSQL in two of the most popular cloud providers at the moment, AWS and Google Cloud. For this task, we will use some of the features that ClusterControl can offer you, like Scaling, and Cluster-to-Cluster Replication.
We will assume you have a ClusterControl installation running and have already created two different cloud provider accounts.
Preparing Your Cloud Environment
First, you need to create your environment in your main Cloud Provider. In this case, we will use AWS with 2 PostgreSQL nodes:

Make sure you have the SSH and PostgreSQL traffic allowed from your ClusterControl server by editing your Security Group:

Then, go to the secondary Cloud Provider and create at least one virtual machine that will be the slave node. We will use the Google Cloud Platform with 1 PostgreSQL node.

And again, make sure you are allowing SSH and PostgreSQL traffic from your ClusterControl server:

In this case, we are allowing the traffic without any restriction on the source, but it is just an example and it is not recommended in real life.
Deploy a PostgreSQL Cluster in the Cloud
We will use ClusterControl for this task, so we are assuming you have it installed.
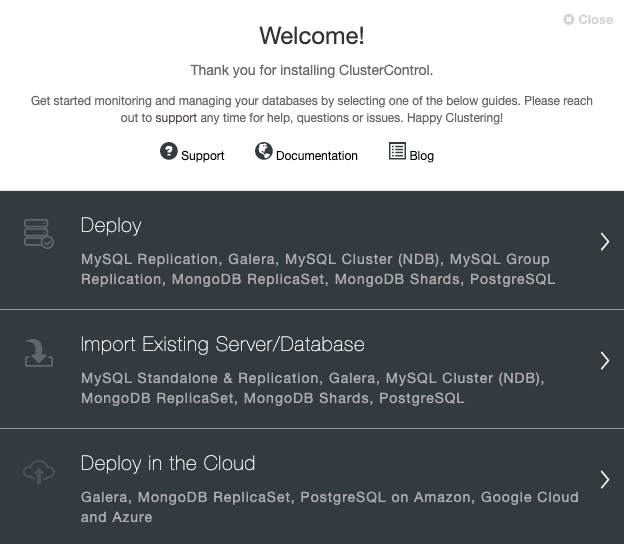
Go to your ClusterControl server, and select the option “Deploy”. If you already have a PostgreSQL instance running, then you need to select the “Import Existing Server/Database” instead.
When selecting PostgreSQL, you must specify User, Key or Password, and port to connect by SSH to your PostgreSQL nodes. You also need the name for your new cluster and if you want ClusterControl to install the corresponding software and configurations for you.
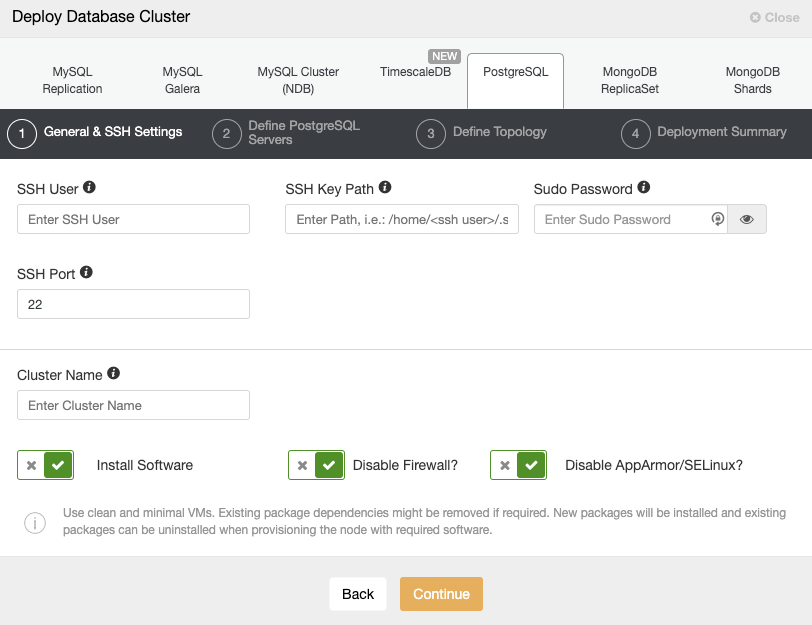
Please check the ClusterControl user requirements for more information about this step.
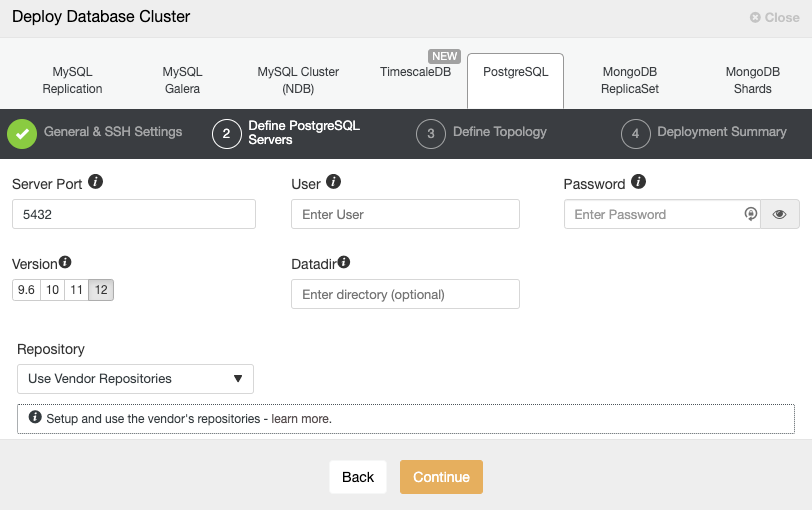
After setting up the SSH access information, you must define the database user, version, and datadir (optional). You can also specify which repository to use. In the next step, you need to add your servers to the cluster you are going to create.
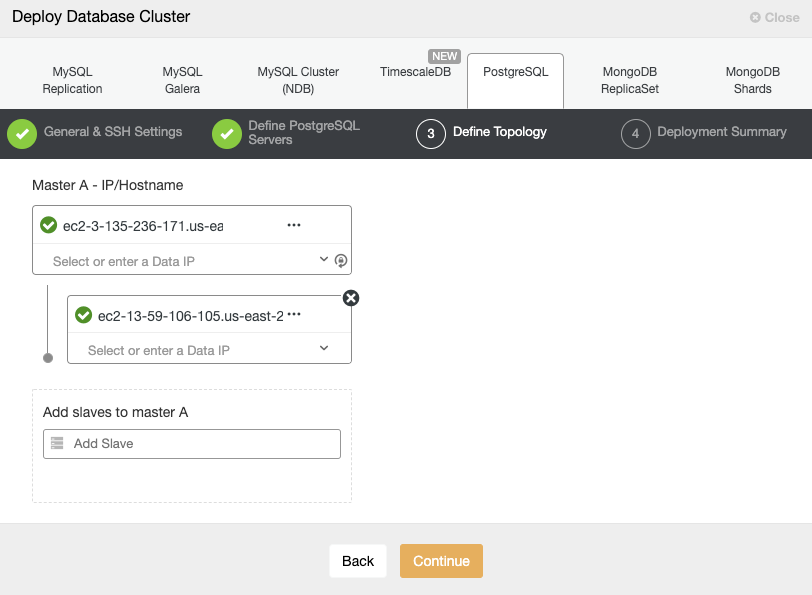
When adding your servers, you can enter IP or hostname. In this step, you could also add the node placed in the secondary Cloud Provider, as ClusterControl doesn’t have any limitations about the network to be used, but to make it more clear, we will add it in the next section. The only requirement here is to have SSH access to the node.
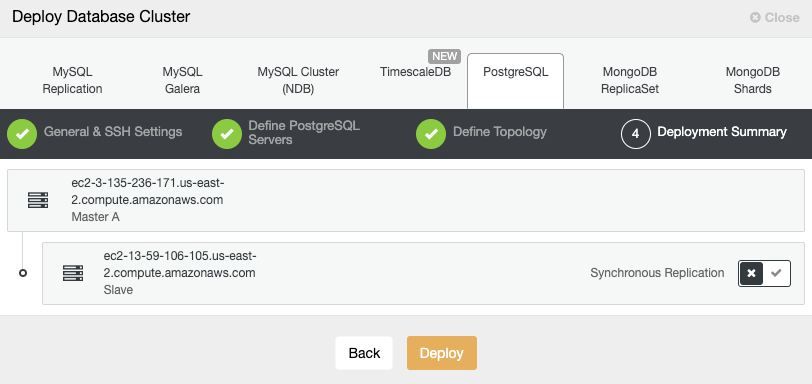
In the last step, you can choose if your replication will be Synchronous or Asynchronous.
In case you are adding your remote node here, it is important to use Asynchronous replication, if not, your cluster could be affected by the latency or network issues.
You can monitor the creation status in the ClusterControl activity monitor.
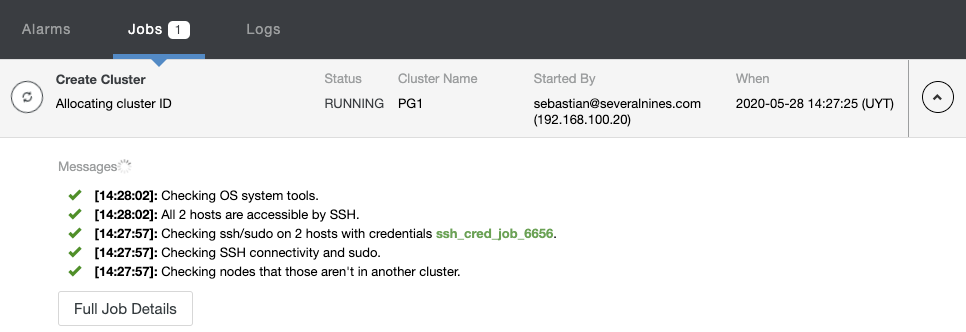
Once the task is finished, you can see your new PostgreSQL cluster in the main ClusterControl screen.

Adding a Remote Slave Node in the Cloud
Once you have your cluster created, you can perform several tasks on it, like deploy/import a load balancer or a replication slave node.
Go to cluster actions and select “Add Replication Slave”:
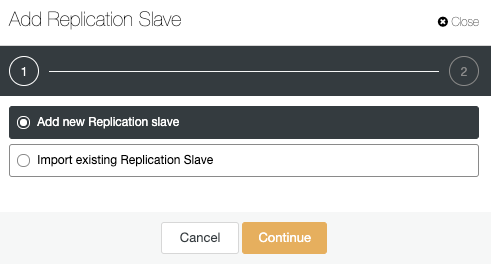
Let’s use the “Add new Replication slave” option as we are assuming that the remote node is a fresh installation, if not, you can use the “Import existing Replication Slave” option instead.
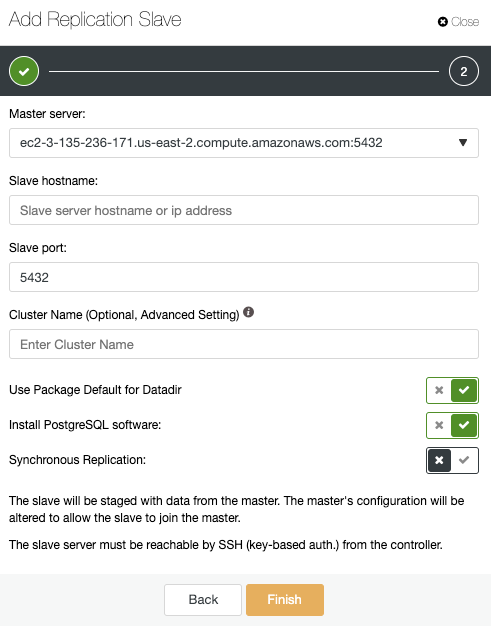
Here, you only need to choose your Master server, enter the IP address for your new slave server, and the database port. Then, you can choose if you want ClusterControl to install the software and if the replication slave should be Synchronous or Asynchronous. Again, if you are adding a node in a different datacenter you should use Asynchronous replication to avoid issues related to the network performance.
In this way, you can add as many replicas as you want and spread read traffic between them using a load balancer, which you can also implement with ClusterControl.
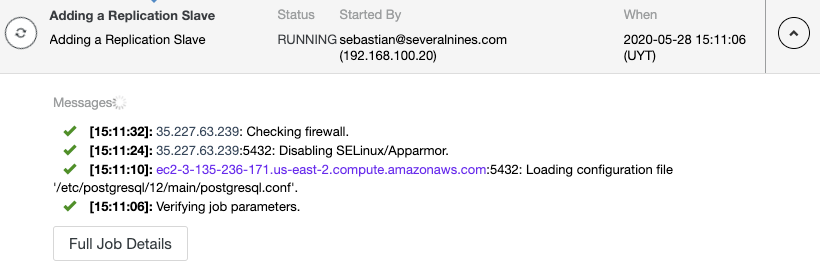
You can monitor the replication slave creation in the ClusterControl activity monitor.
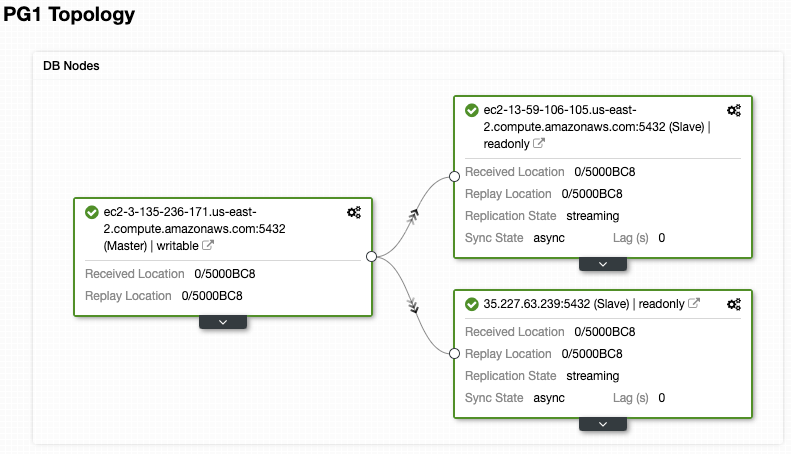
And check your final topology in the Topology View Section.
Cluster-to-Cluster Replication in the Cloud
Instead of using the “Add Replication Slave” option to have a Multi-Cloud environment, you can use the ClusterControl Cluster-to-Cluster Replication feature to add a remote cluster. At the moment, this feature has a limitation for PostgreSQL that allows you to have only one remote node, so it is pretty similar to the previous way, but we are working to remove that limitation soon in a future release.
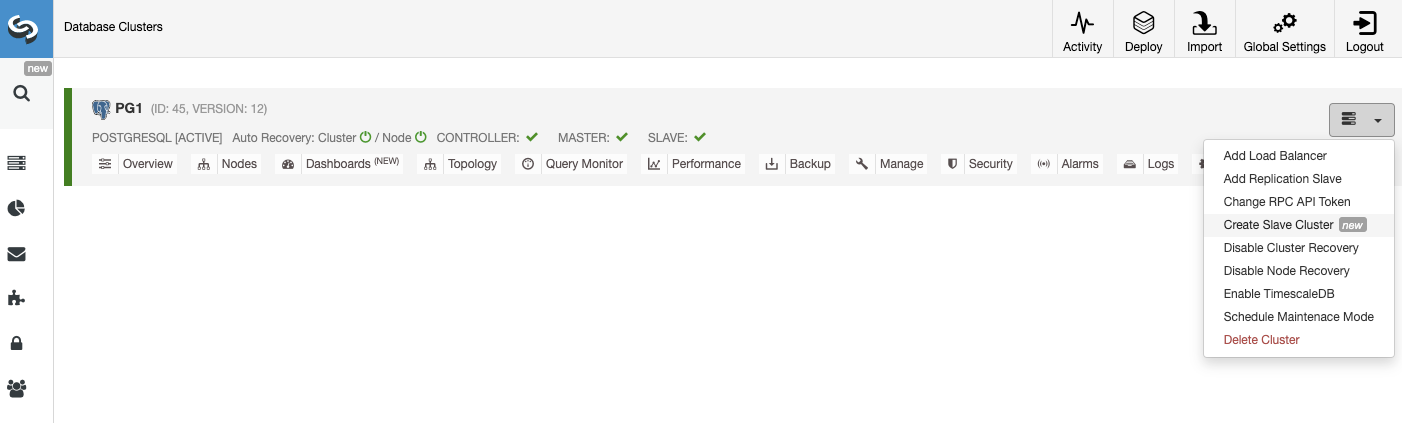
To create a new Slave Cluster, go to ClusterControl -> Select Cluster -> Cluster Actions -> Create Slave Cluster.
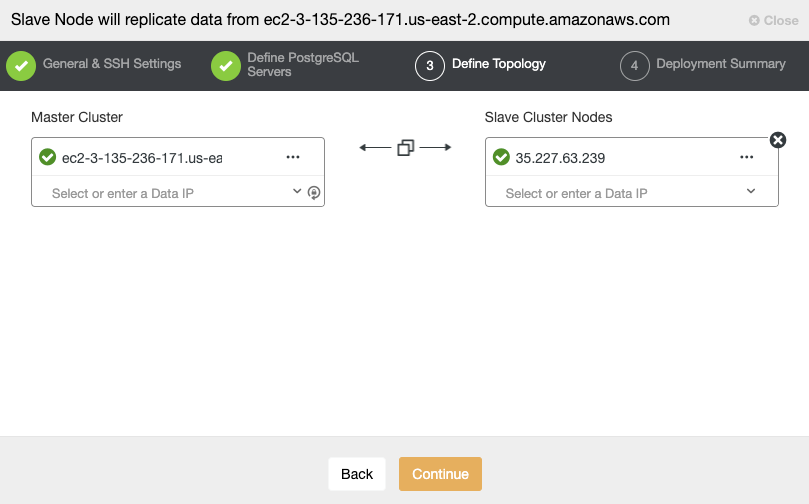
The Slave Cluster will be created by streaming data from the current Master Cluster.

In this section, you must choose the master node of the current cluster from which the data will be replicated.
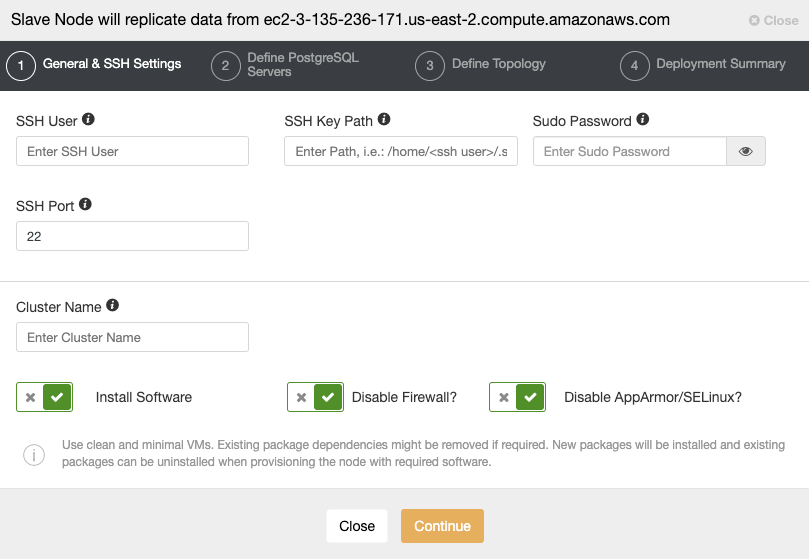
When you go to the next step, you must specify User, Key or Password, and port to connect by SSH to your servers. You also need a name for your Slave Cluster and if you want ClusterControl to install the corresponding software and configurations for you.
After setting up the SSH access information, you must define the database version, datadir, port, and admin credentials. As it will use streaming replication, make sure you use the same database version and credentials used in the Master Cluster. You can also specify which repository to use.
In this step, you need to add the server for the new Slave Cluster. For this task, you can enter both the IP Address or Hostname of the database node.
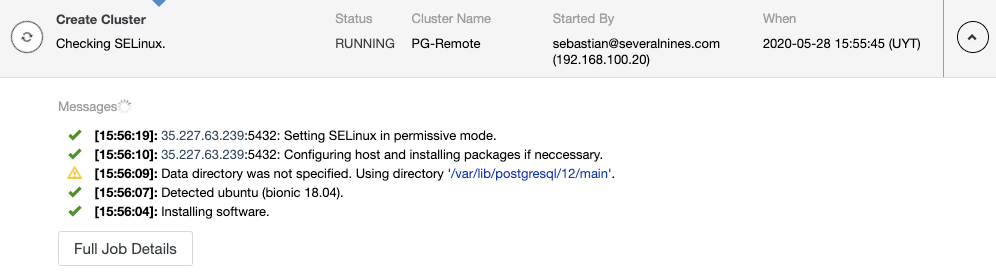
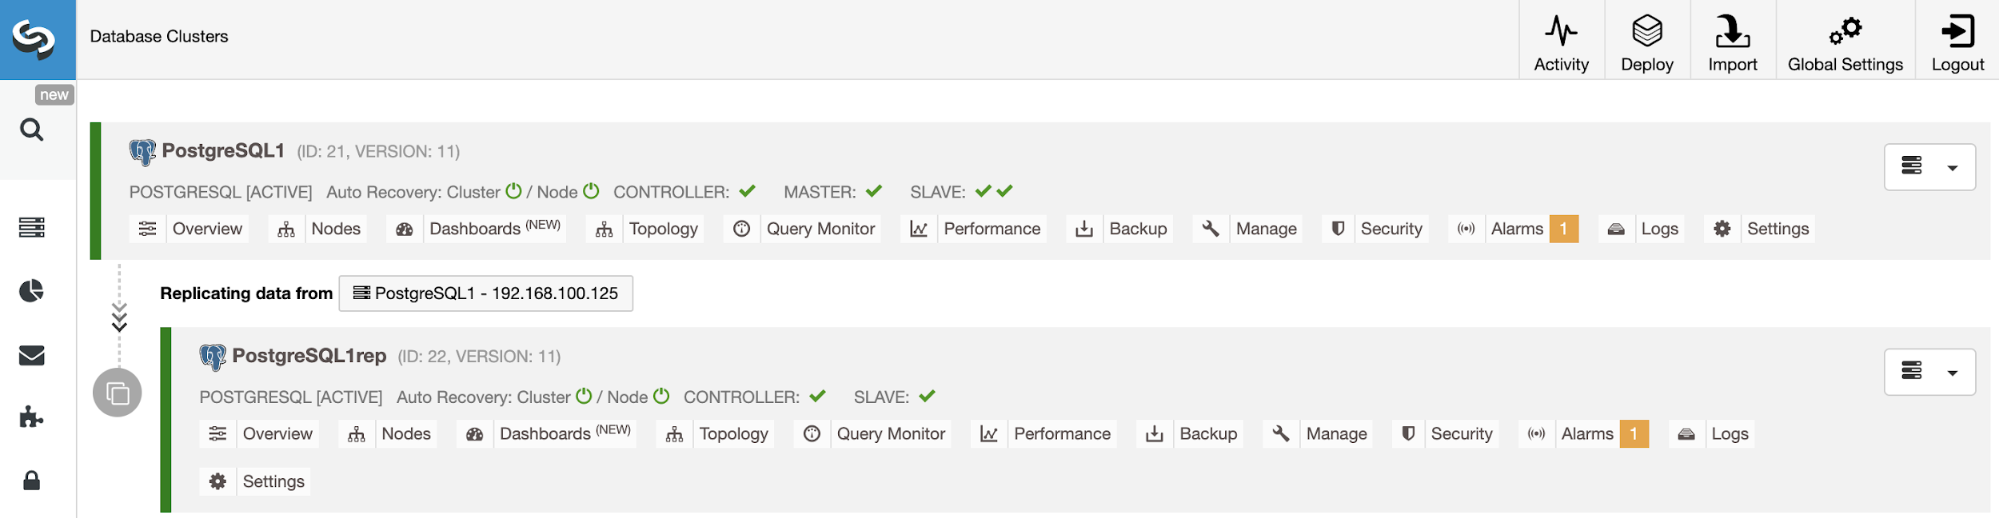
You can monitor the Slave Cluster creation in the ClusterControl activity monitor. Once the task is finished, you can see the cluster in the main ClusterControl screen.
Conclusion
These ClusterControl features will allow you to quickly set up replication between different Cloud Providers for a PostgreSQL database (and different technologies), and manage the setup in an easy and friendly way. About the communication between the Cloud Providers, for security reasons, you must restrict the traffic only from known sources, so only from Cloud Provider 1 to Cloud Provider 2 and vice versa.


