blog
How to Verify Your MySQL Backups with ClusterControl

Backups are a basic point in all Disaster Recovery Plans, but only having a backup is not enough to guarantee correct data recovery. You must need to make sure that the backup is usable, and unfortunately, many people avoid this important part of the backup process, most probably because it is a time-consuming task if you don’t perform this in an automated way.
In this blog, we will see how to verify if your MySQL Backup is good to use by using ClusterControl for this task.
ClusterControl Backup Verification
We will assume you are using ClusterControl to manage your databases and backups.
So let’s see how ClusterControl can help you to verify a specific MySQL backup and avoid problems in case you need to restore it.
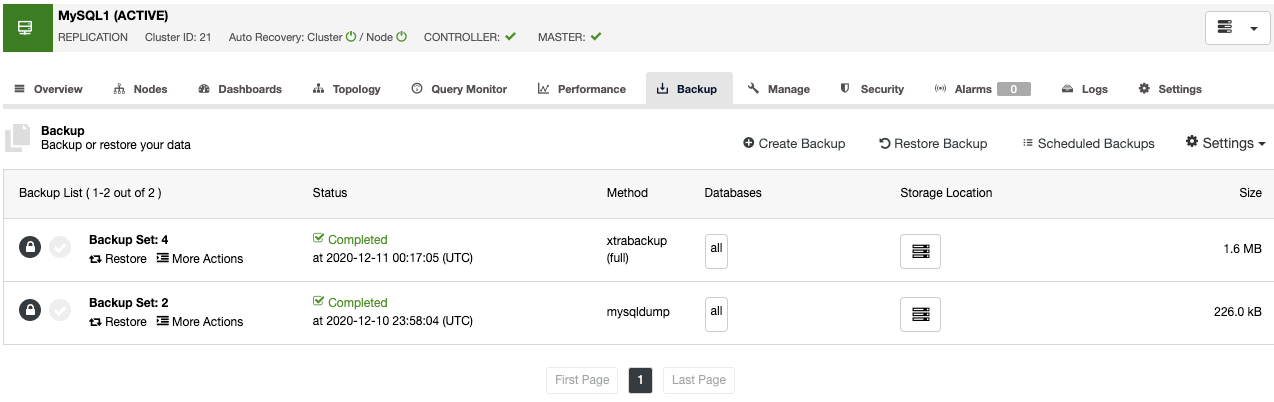
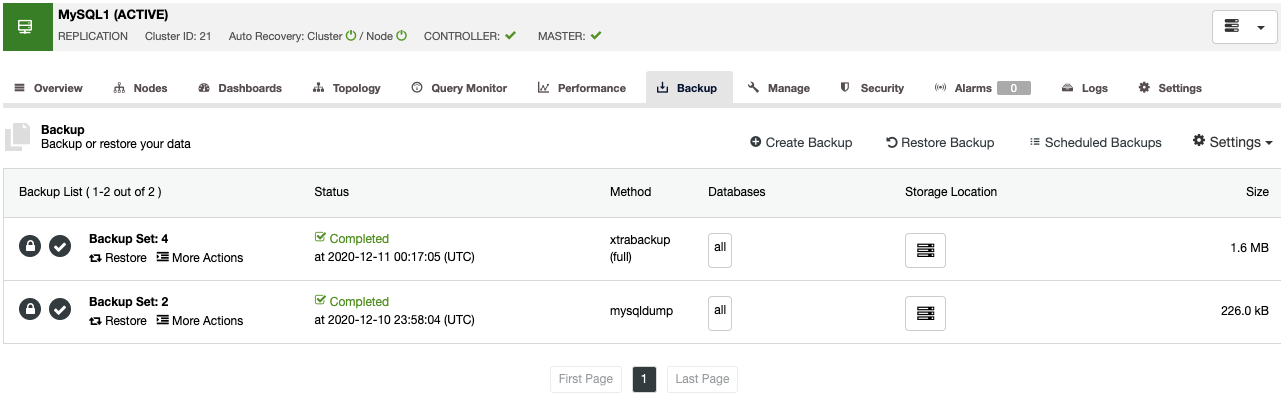
Go to ClusterControl, select your MySQL cluster, and go to the “Backup” section. Here, choose the backup to be restored from the list.
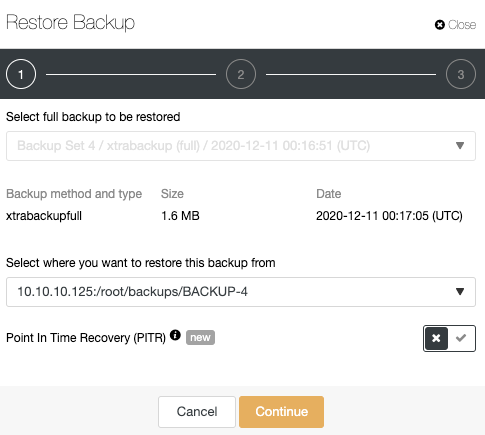
In the next step, you can enable PITR if needed.
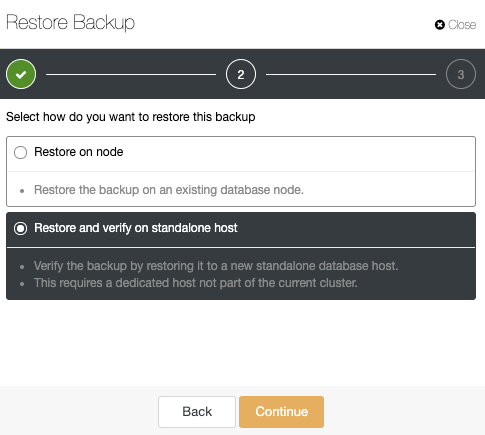
Now, you can restore this backup in your current database, or you can restore it in a separate node, and this last one is exactly what we want to do here. So, choose the “Restore and verify on standalone host” option.
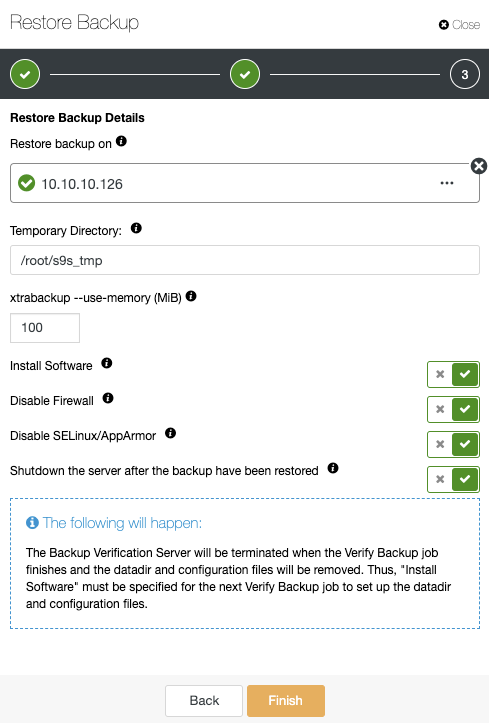
Here you can specify the temporary directory, if you want ClusterControl to install the software in the new node, and disable the firewall or AppArmor/SELinux (depending on the OS). You can also keep the node up and running, for example for testing purposes, or ClusterControl can shutdown the database service until the next restore job.
When it finishes, you will see the verified backup in the backup list marked with a tick.
It was easy, wasn’t it? But most probably you want to avoid doing this manually every time. That is why ClusterControl has another feature called “Verify Backup”, and we are going to see how it works in the next section.
Automatic ClusterControl Backup Verification
Now you know how to verify a backup using ClusterControl, let’s see how to automate this task and avoid the manual work.
In ClusterControl, select your MySQL cluster, and go to the “Backup” section, then, select “Create Backup”.
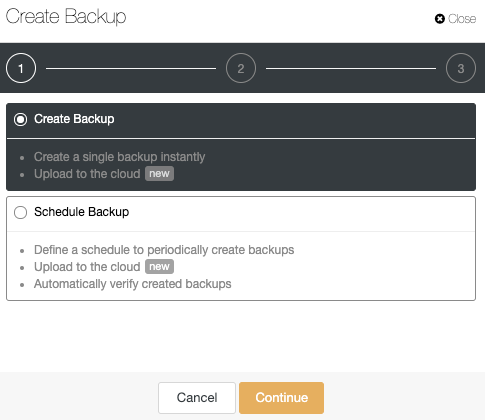
The automatic verify backup feature is available for the scheduled backups. So, let’s choose the “Schedule Backup” option. When scheduling a backup, in addition to selecting the common options like method or storage, you also need to specify schedule/frequency.
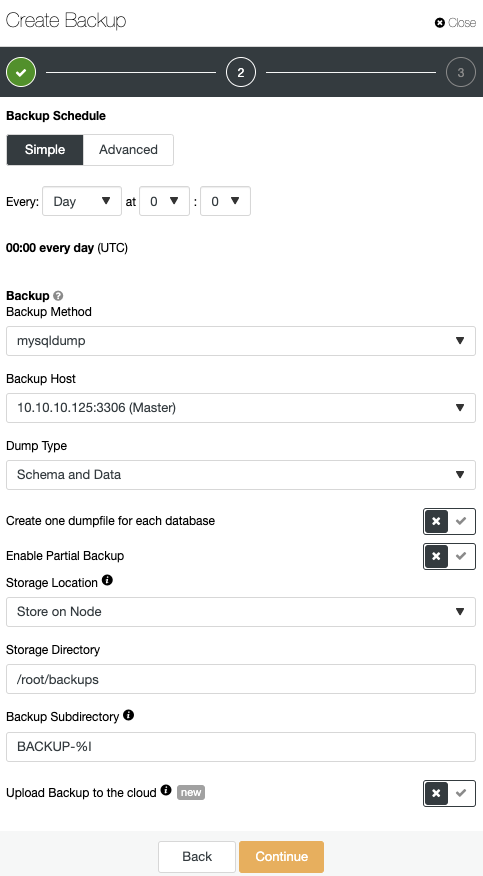
You can choose different backup methods, depending on the database technology, and, in the same section, you can choose the server from which to take the backup, enable partial backup, choose where you want to store the backup, and if you want to upload the backup to the cloud (AWS, Azure, or Google Cloud).
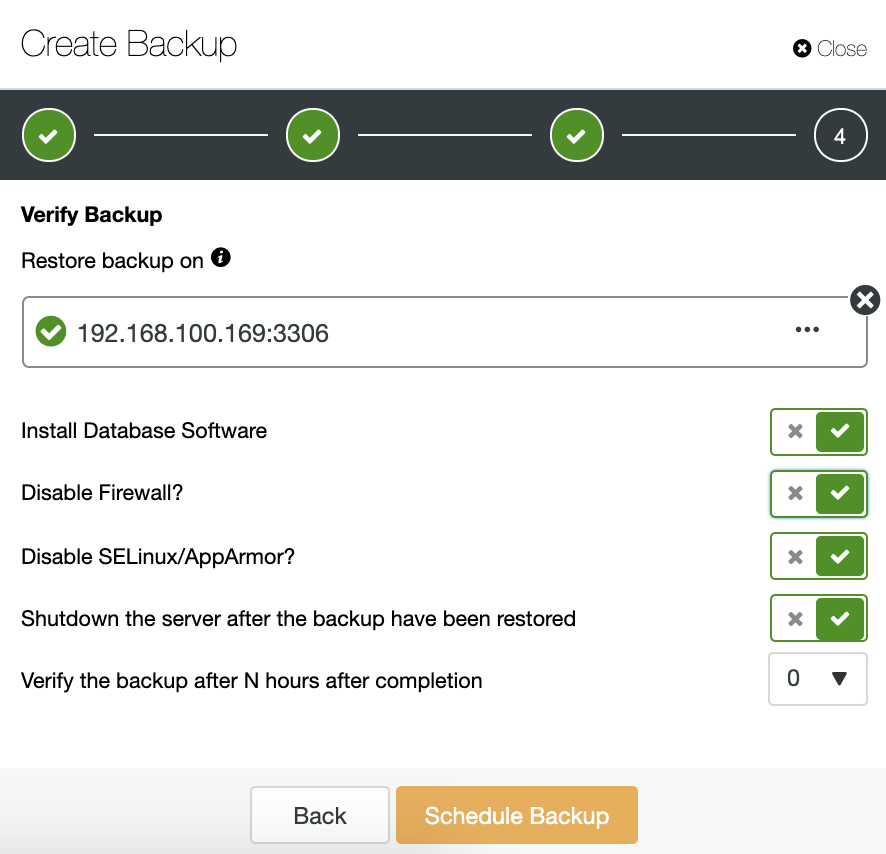
In the next step, you can compress and encrypt your backup, and specify the retention period. Here, you also have the “Verify Backup” feature.
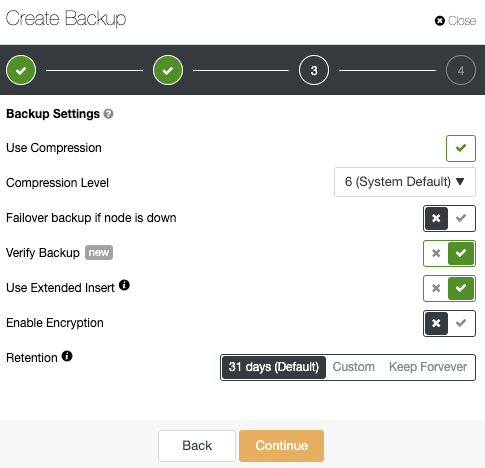
As you could see in the manual way, to use this feature, you need a dedicated host (or VM) that is not part of the cluster. ClusterControl will install the software and will restore the backup in this host every time the job runs.
After restoring, you can see the verification icon in the ClusterControl Backup section, the same that you will have by doing the verification in the manual ClusterControl way, with the difference that you don’t need to worry about the verification task. ClusterControl will verify the backup every time automatically.
Conclusion
Of course, backups are important, but it is also important to know that the backup is usable, otherwise, you could have a big problem if, in case of failure, you can’t restore it. At the same time, it could be a bit tedious to do the verification manually every time a backup is completed. That is why ClusterControl has a backup verification feature allowing you to confirm that the backup is healthy using both the manual (with just a few clicks) and the automatic way (adding the backup verification in the backup job).