blog
How to Recover MySQL Galera Cluster From an Asynchronous Slave

Introduction
When running Galera Cluster, it is a common practice to add one or more asynchronous slaves in the same or in a different datacenter. This provides us with a contingency plan with low RTO, and with a low operating cost. In the case of an unrecoverable problem in our cluster, we can quickly failover to it so applications can continue to have access to data.
When using this type of setup, we cannot just then rebuild our cluster from a previous backup. Since the async slave is now the new source of truth, we need to rebuild the cluster from it.
This does not mean that we only have one way to do it, maybe there is even a better way! Feel free to give us your suggestions in the comments section at the end of this post.
Topology
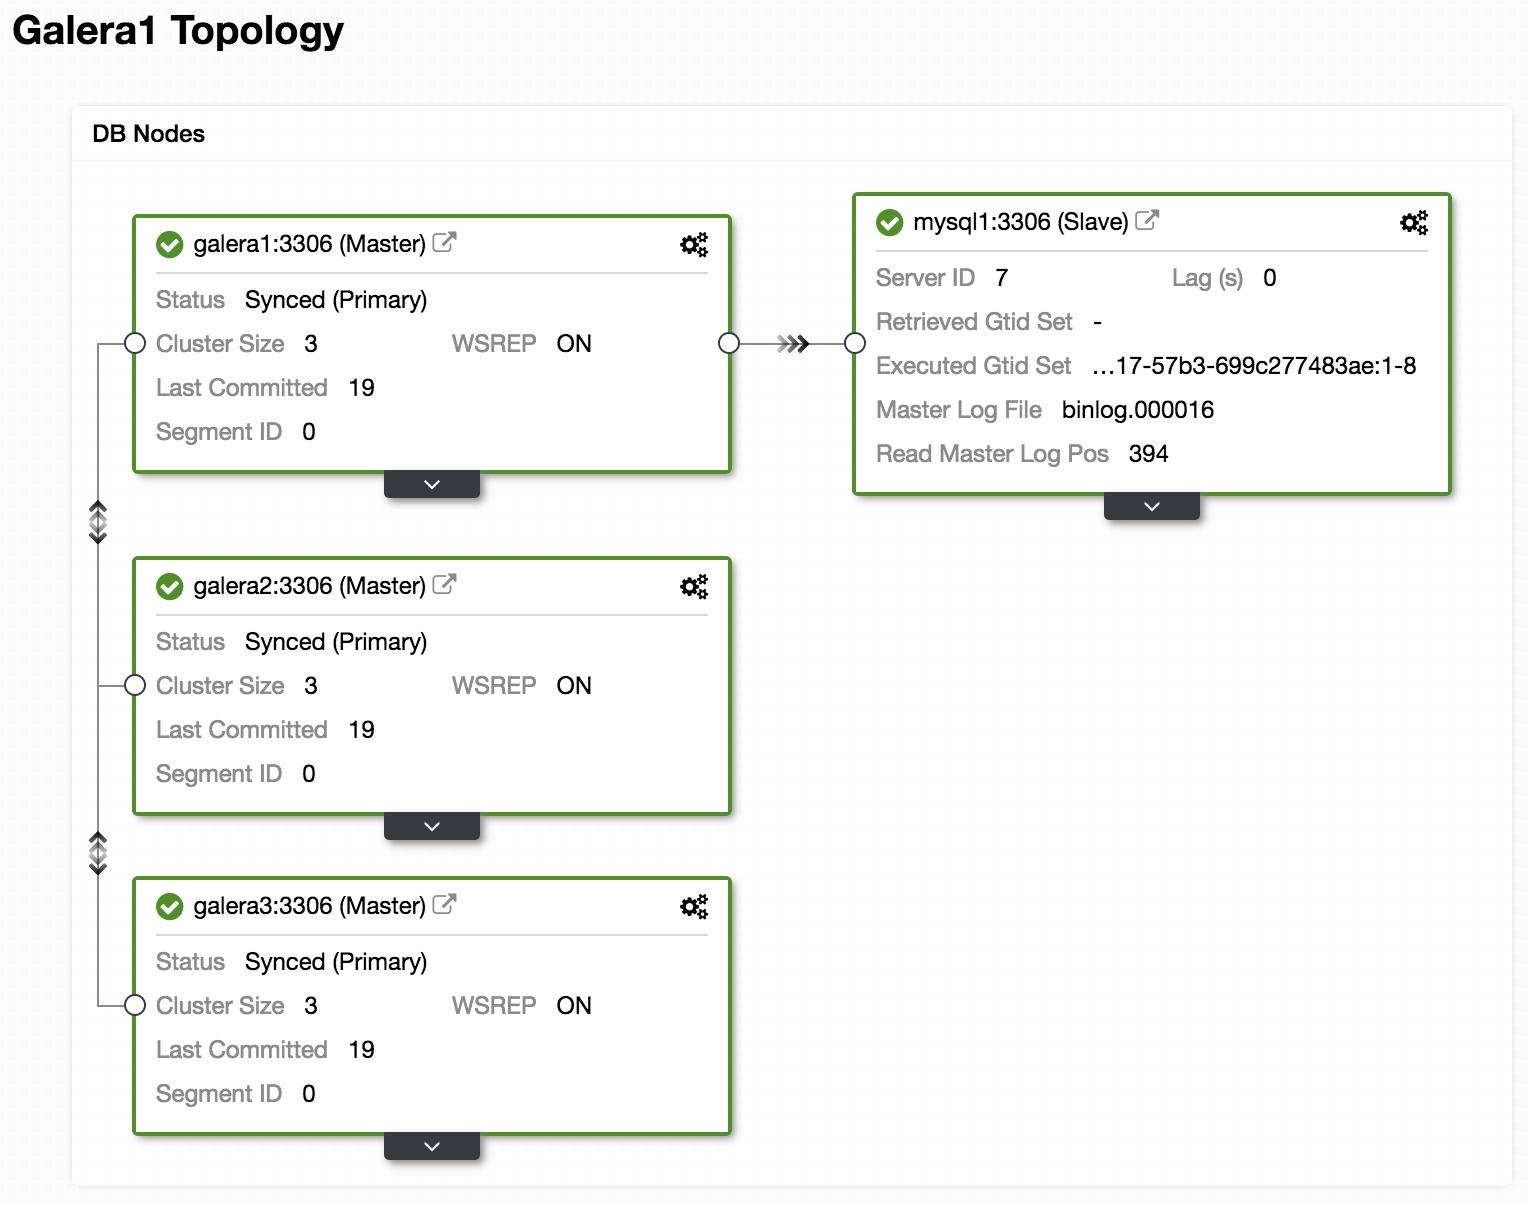
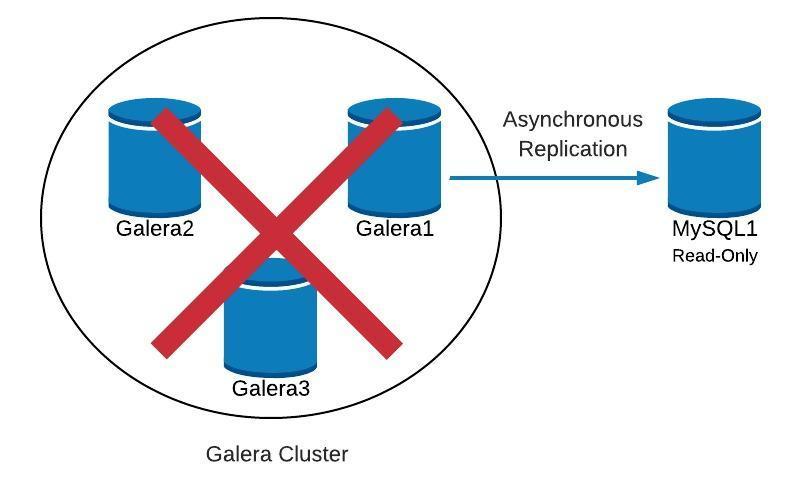
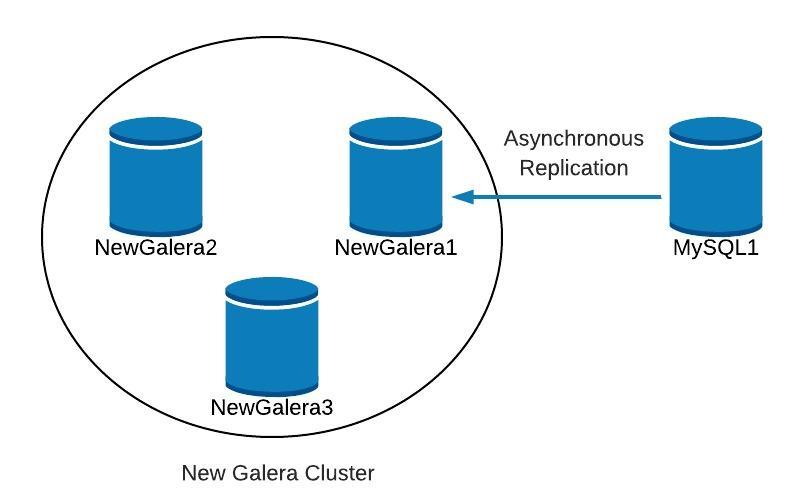
Above, we can see a sample topology with Galera Cluster and an asynchronous replica/slave.

Next we will see how we can recreate our cluster, starting from the slave, in the case of finding something like this:
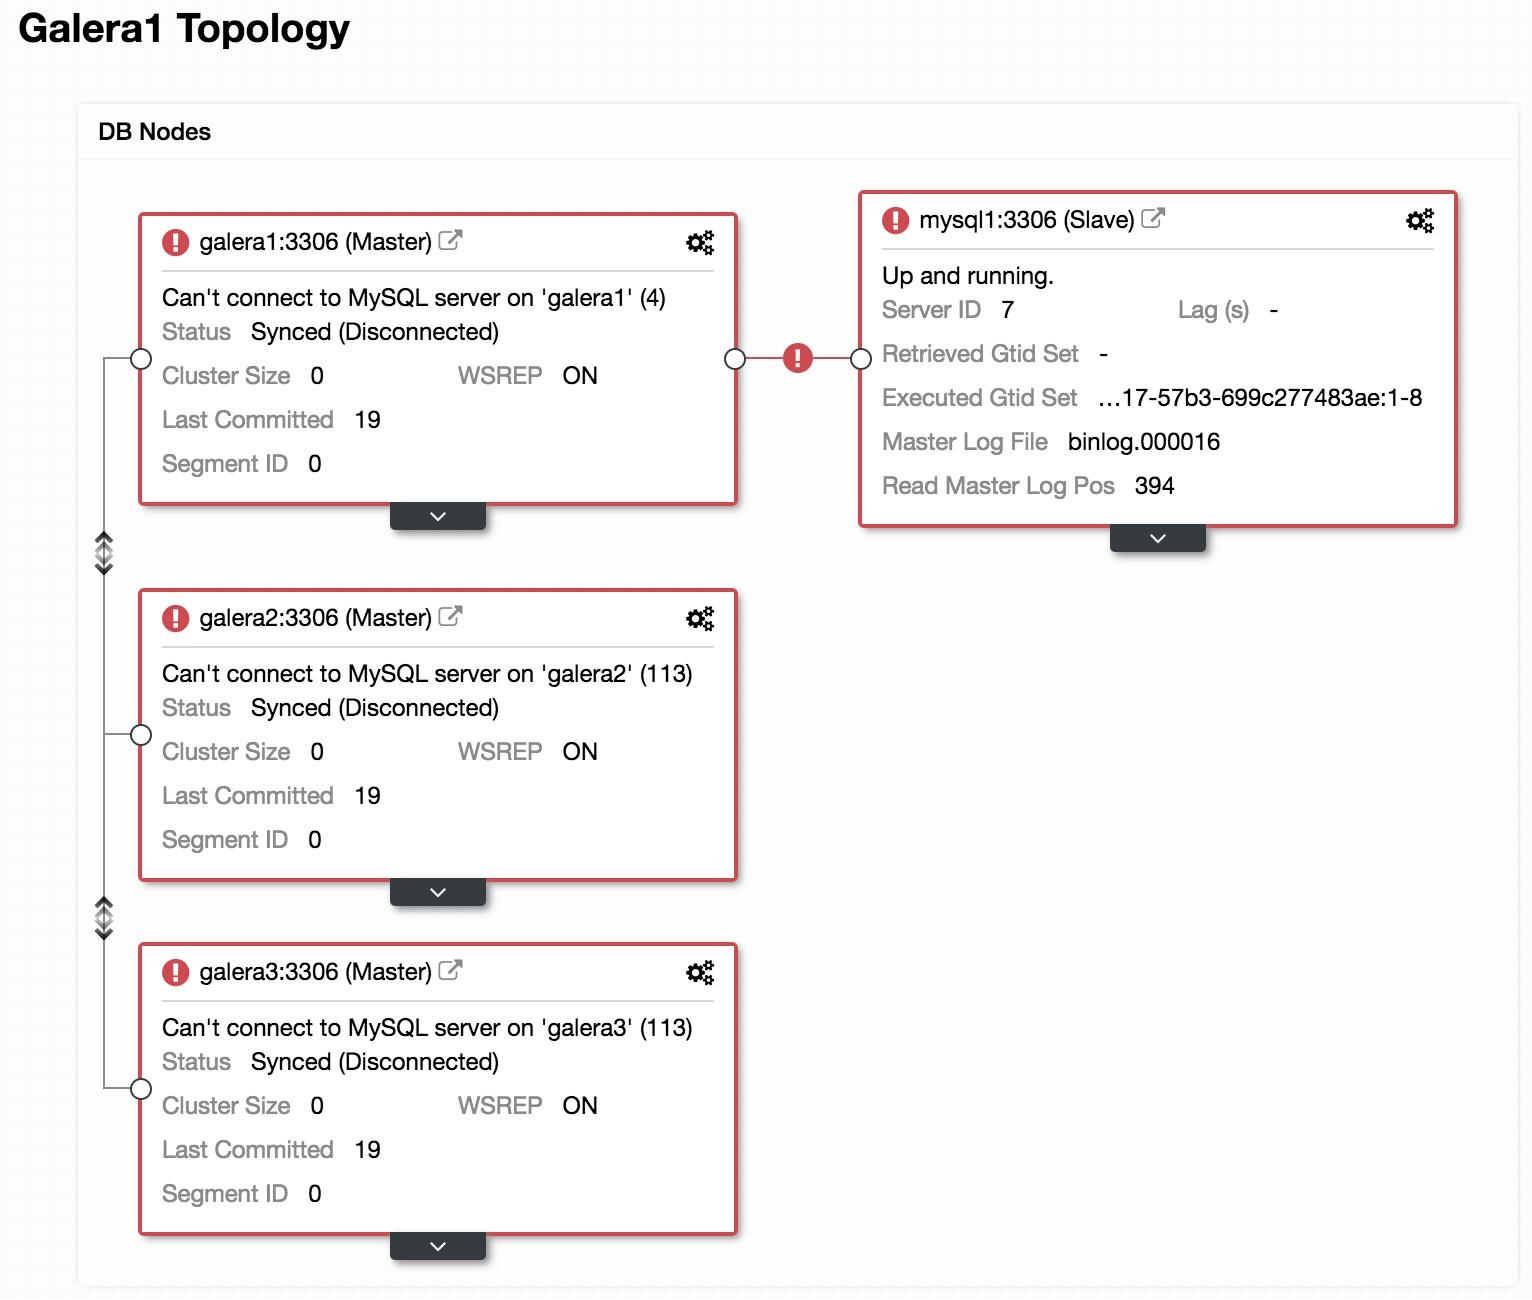
If we look at the previous image, we can see our 3 Galera nodes are down. Our slave is not able to connect to the Galera master, but it is in an “Up and running” state.
Promote Slave
As our slave is working properly, we can promote it to master and point our applications to it. For this, we must disable the read-only parameter in our slave and reset the slave configuration.
In our slave (mysql1):
mysql> SET GLOBAL read_only=0;
Query OK, 0 rows affected (0.00 sec)
mysql> STOP SLAVE;
Query OK, 0 rows affected (0.00 sec)
mysql> RESET SLAVE;
Query OK, 0 rows affected (0.18 sec)
Create new Cluster
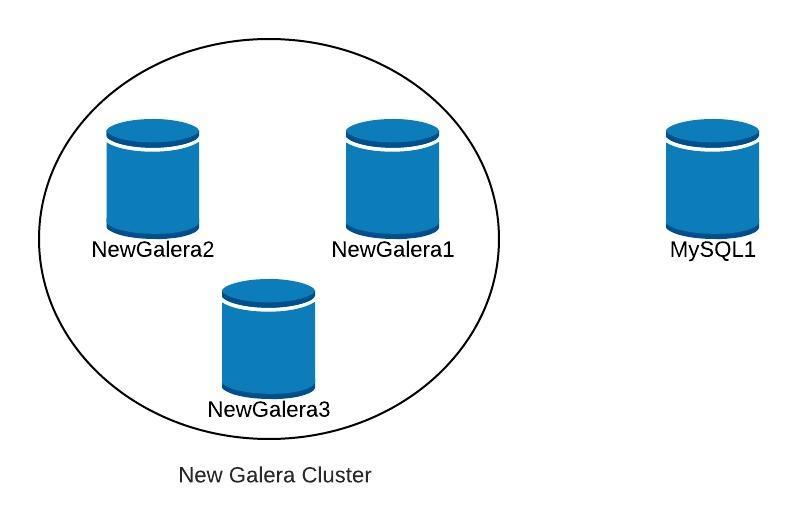
Next, to start recovery of our failed cluster, we will create a new Galera Cluster. This can be easily done through ClusterControl ClusterControl, please scroll further down in this blog to see how.
Once we have deployed our new Galera cluster, we would have something like the following:
Replication
We must ensure that we have the replication parameters configured.
For Galera nodes (galera1, galera2, galera3):
server_id=         # Different value in each node
binlog_format=ROW
log_bin = /var/lib/mysql-binlog/binlog
log_slave_updates = ON
gtid_mode = ON
enforce_gtid_consistency = true
relay_log = relay-bin
expire_logs_days = 7
For Master node (mysql1):
server_id=         # Different value in each node
binlog_format=ROW
log_bin=binlog
log_slave_updates=1
gtid_mode=ON
enforce_gtid_consistency=1
relay_log=relay-bin
expire_logs_days=7
read_only=ON
sync_binlog=1
report_host=    # Local server
In order for our new slave (galera1) to connect with our new master (mysql1), we must create a user with replication permissions in our master.
In our new master (mysql1):
mysql> GRANT REPLICATION SLAVE ON *.* TO 'slave_user'@'%' IDENTIFIED BY 'slave_password';Note: We can replace the “%” with the IP of the Galera Cluster node that will be our slave, in our example, galera1.
Backup
If we do not have it, we must create a consistent backup of our master (mysql1) and load it in our new Galera Cluster. For this, we can use XtraBackup tool or mysqldump. Let’s see both options.
In our example we use the sakila database available for testing.
XtraBackup tool
We generate the backup in the new master (mysql1). In our case we send it to the local directory /root/backup:
$ innobackupex /root/backup/We must get the message:
180705 22:08:14 completed OK!We compress the backup and send it to the node that will be our slave (galera1):
$ cd /root/backup
$ tar zcvf 2018-07-05_22-08-07.tar.gz 2018-07-05_22-08-07
$ scp /root/backup/2018-07-05_22-08-07.tar.gz galera1:/root/backup/
In galera1, extract the backup:
$ tar zxvf /root/backup/2018-07-05_22-08-07.tar.gzWe stop the cluster (if it is started). For this we stop the mysql services of the 3 nodes:
$ service mysql stopIn galera1, we rename the data directory of mysql and load the backup:
$ mv /var/lib/mysql /var/lib/mysql.bak
$ innobackupex --copy-back /root/backup/2018-07-05_22-08-07
We must get the message:
180705 23:00:01 completed OK!We assign the correct permissions on the data directory:
$ chown -R mysql.mysql /var/lib/mysqlThen we must initialize the cluster.
Once the first node is initialized, we must start the MySQL service for the remaining nodes, eliminating any previous copy of the file grastate.dat, and then verify that our data is updated.
$ rm /var/lib/mysql/grastate.dat
$ service mysql start
Note: Verify that the user used by XtraBackup is created in our initialized node, and is the same in each node.
mysqldump
In general, we do not recommend doing it with mysqldump, because it can be quite slow with a large volume of data. But it is an alternative to perform the task.
We generate the backup in the new master (mysql1):
$ mysqldump -uroot -p --single-transaction --skip-add-locks --triggers --routines --events --databases sakila > /root/backup/sakila_dump.sqlWe compress it and send it to our slave node (galera1):
$ gzip /root/backup/sakila_dump.sql
$ scp /root/backup/sakila_dump.sql.gz galera1:/root/backup/
We load the dump into galera1.
$ gunzip /root/backup/sakila_dump.sql.gz
$ mysql -p < /root/backup/sakila_dump.sql
When the dump is loaded in galera1, we must restart the MySQL service on the remaining nodes, removing the file grastate.dat, and verify that we have our data updated.
$ rm /var/lib/mysql/grastate.dat
$ service mysql start
Start Replication Slave
Regardless of which option we choose, XtraBackup or mysqldump, if everything went well, in this step we can already turn on replication in the node that will be our slave (galera1).
$ mysql> CHANGE MASTER TO MASTER_HOST = 'mysql1', MASTER_PORT = 3306, MASTER_USER = 'slave_user', MASTER_PASSWORD = 'slave_password', MASTER_AUTO_POSITION = 1;
$ mysql> START SLAVE;
We verify that the slave is working:
mysql> SHOW SLAVE STATUSG
       Slave_IO_Running: Yes
       Slave_SQL_Running: Yes
At this point, we have something like the following:
After NewGalera1 is up to date, we can re-point the application to our new galera cluster, and reconfigure the asynchronous replication.
ClusterControl
As we mentioned earlier, with ClusterControl we can do several of the tasks mentioned above in a few simple clicks. It also has automatic recovery options, for both the nodes and the cluster. Let's see some tasks that it can assist with.
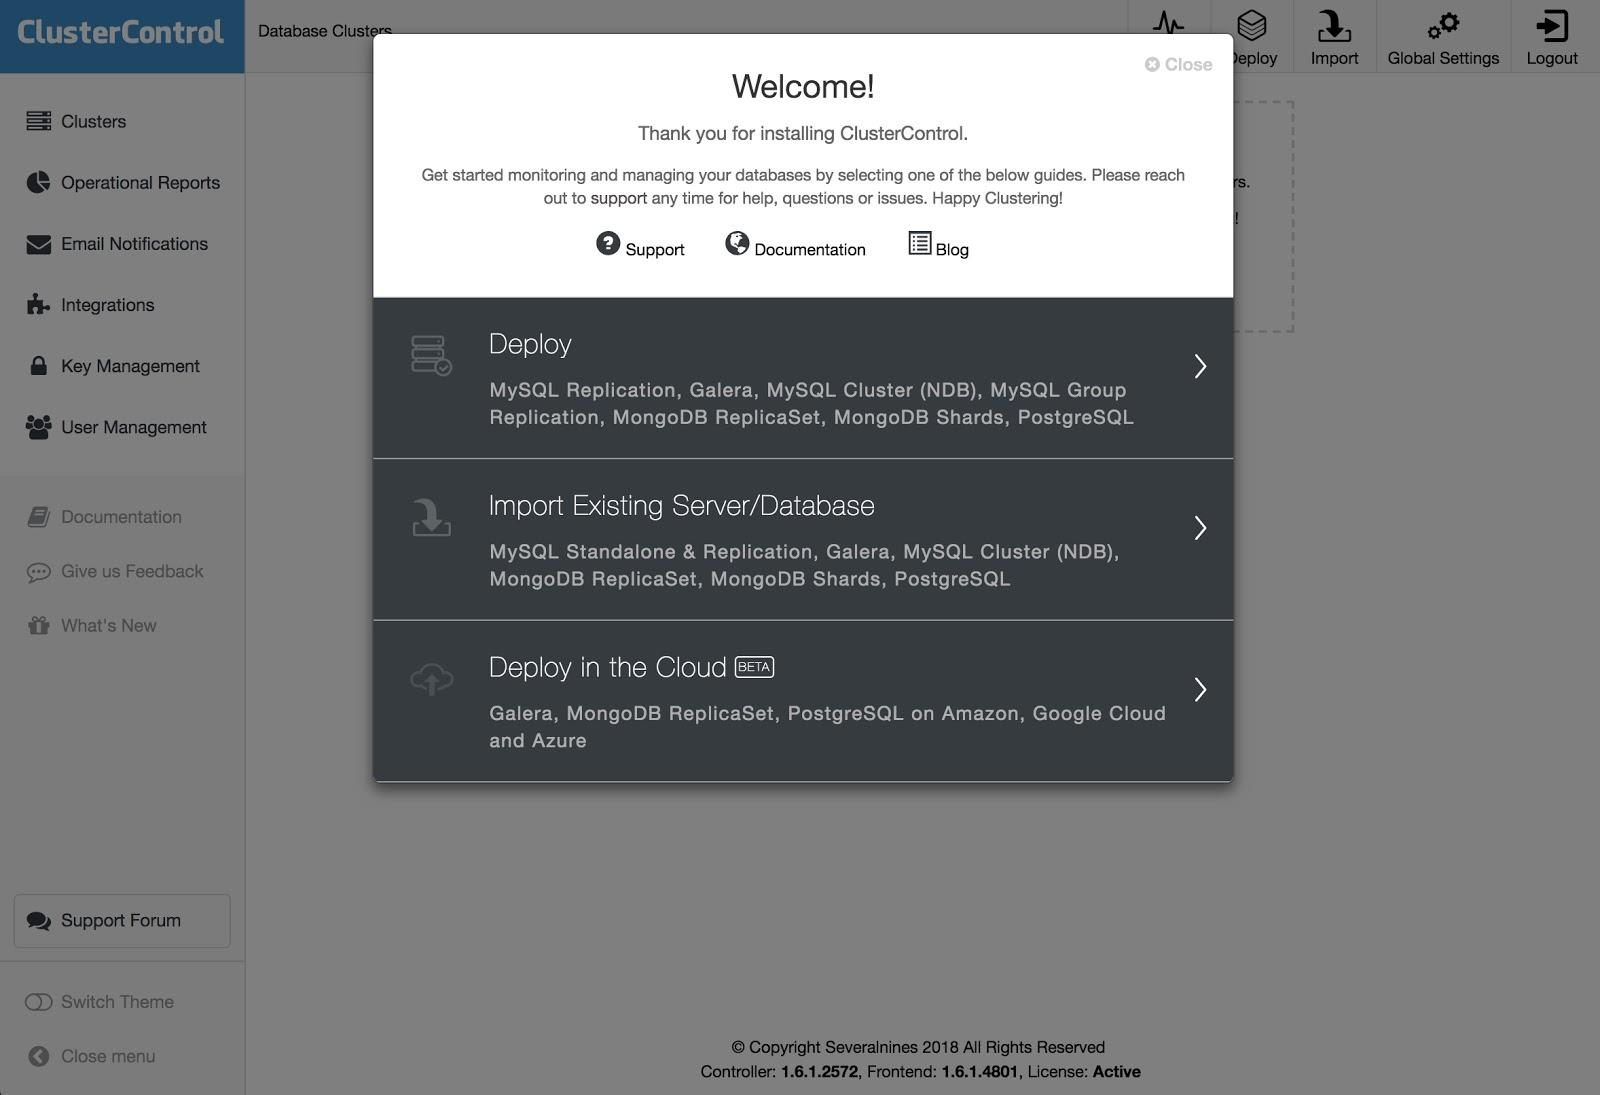
To perform a deployment, simply select the option “Deploy Database Cluster” and follow the instructions that appear.
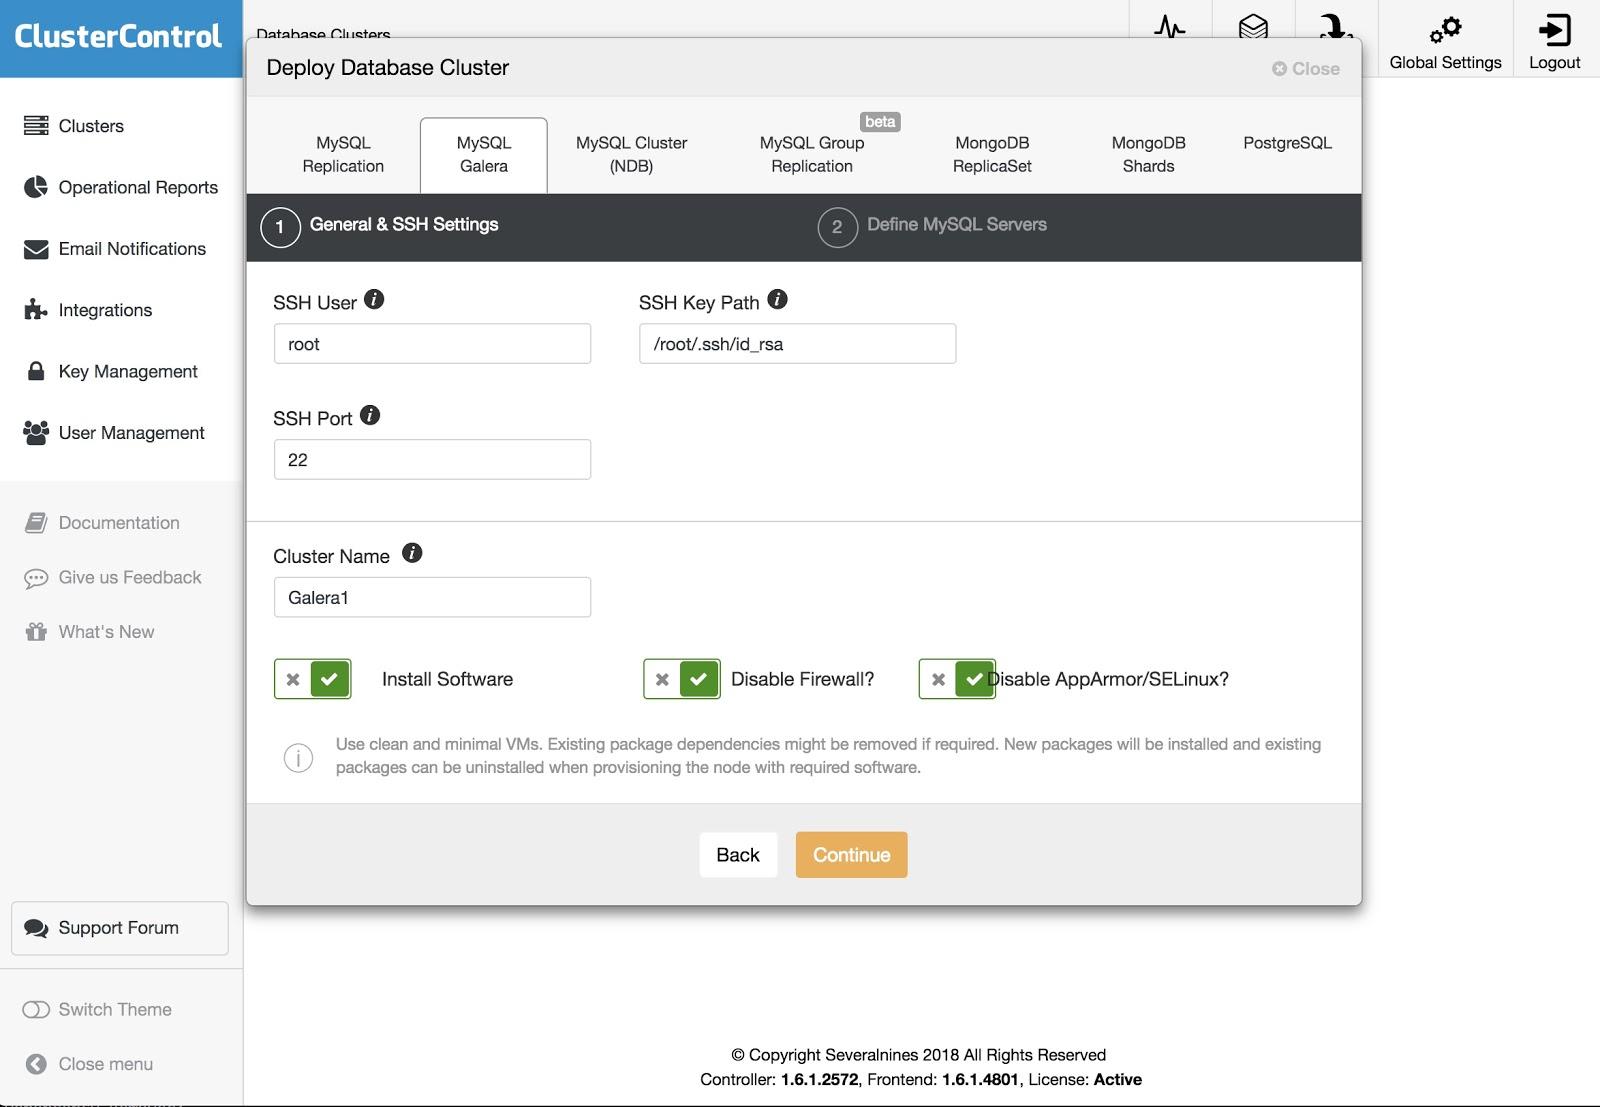
We can choose between different kinds of technologies and vendors. We must specify User, Key or Password and port to connect by SSH to our servers. We also need the name for our new cluster and if we want ClusterControl to install the corresponding software and configurations for us.
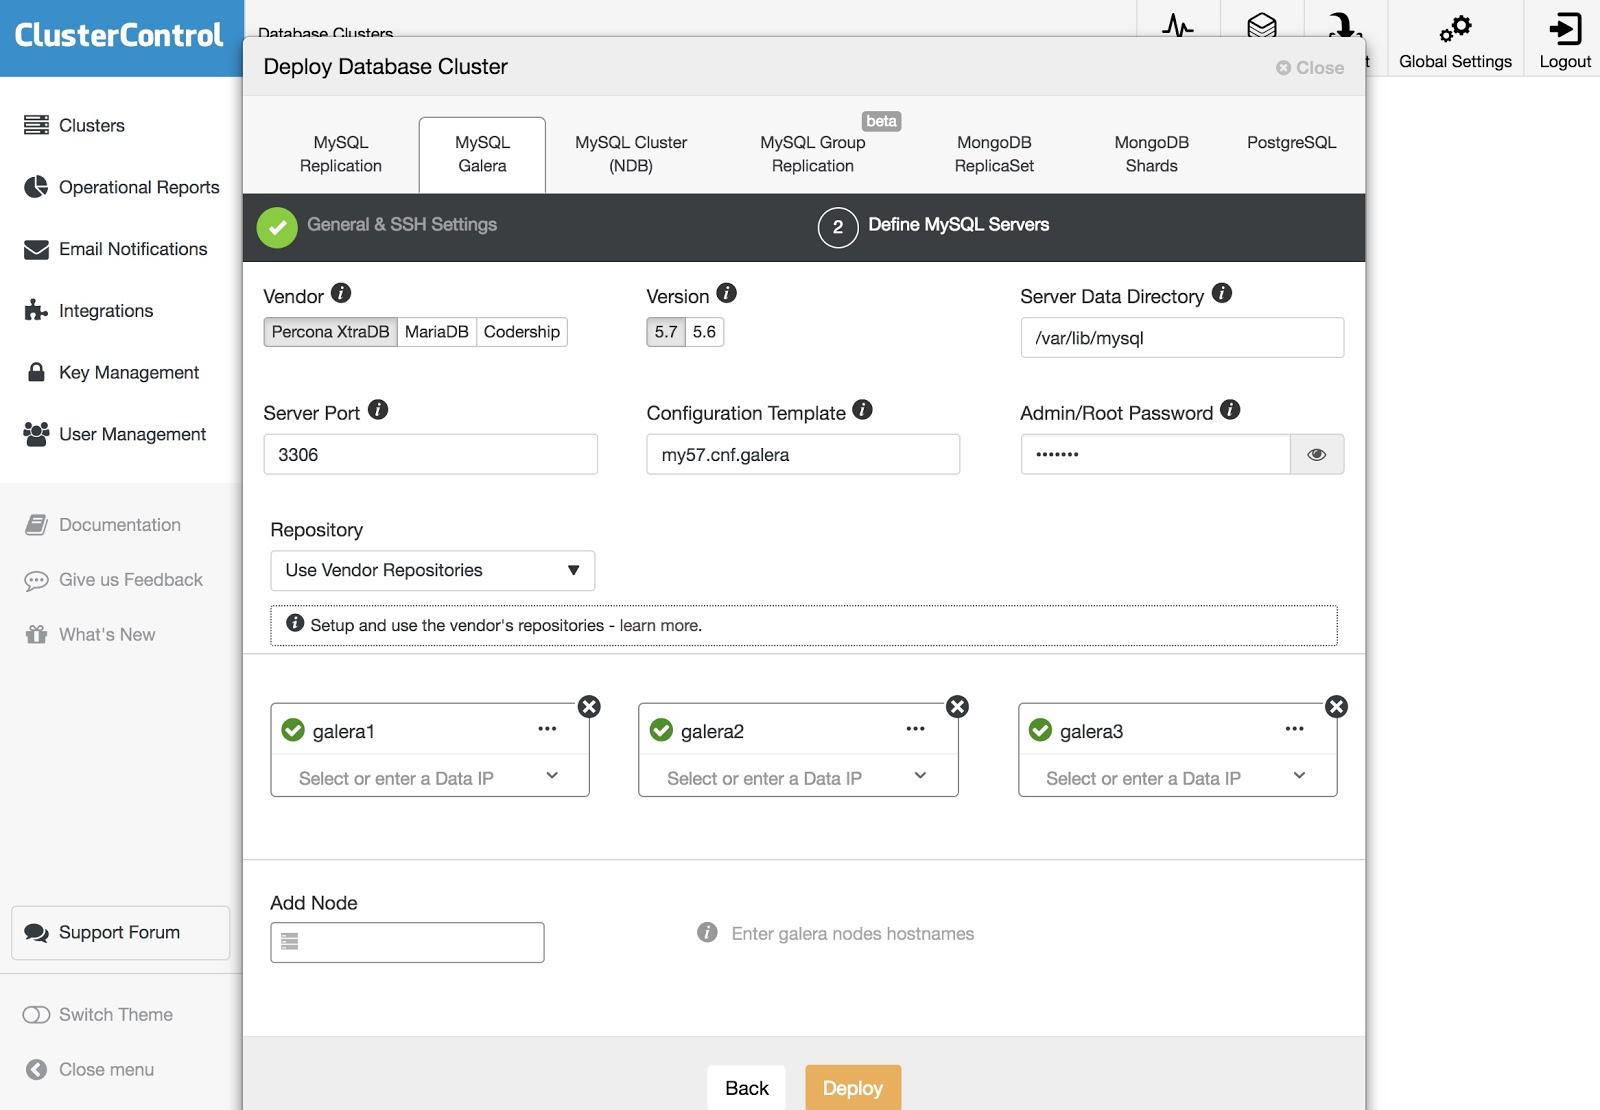
After setting up the SSH access information, we must define the nodes in our cluster. We can also specify which repository to use. We need to add our servers to the cluster that we are going to create.
We can monitor the status of the creation of our new cluster from the ClusterControl activity monitor.
Also, we can do an import of our current cluster or database following the same steps. In this case, ClusterControl won’t install the database software, because there is already a database running.
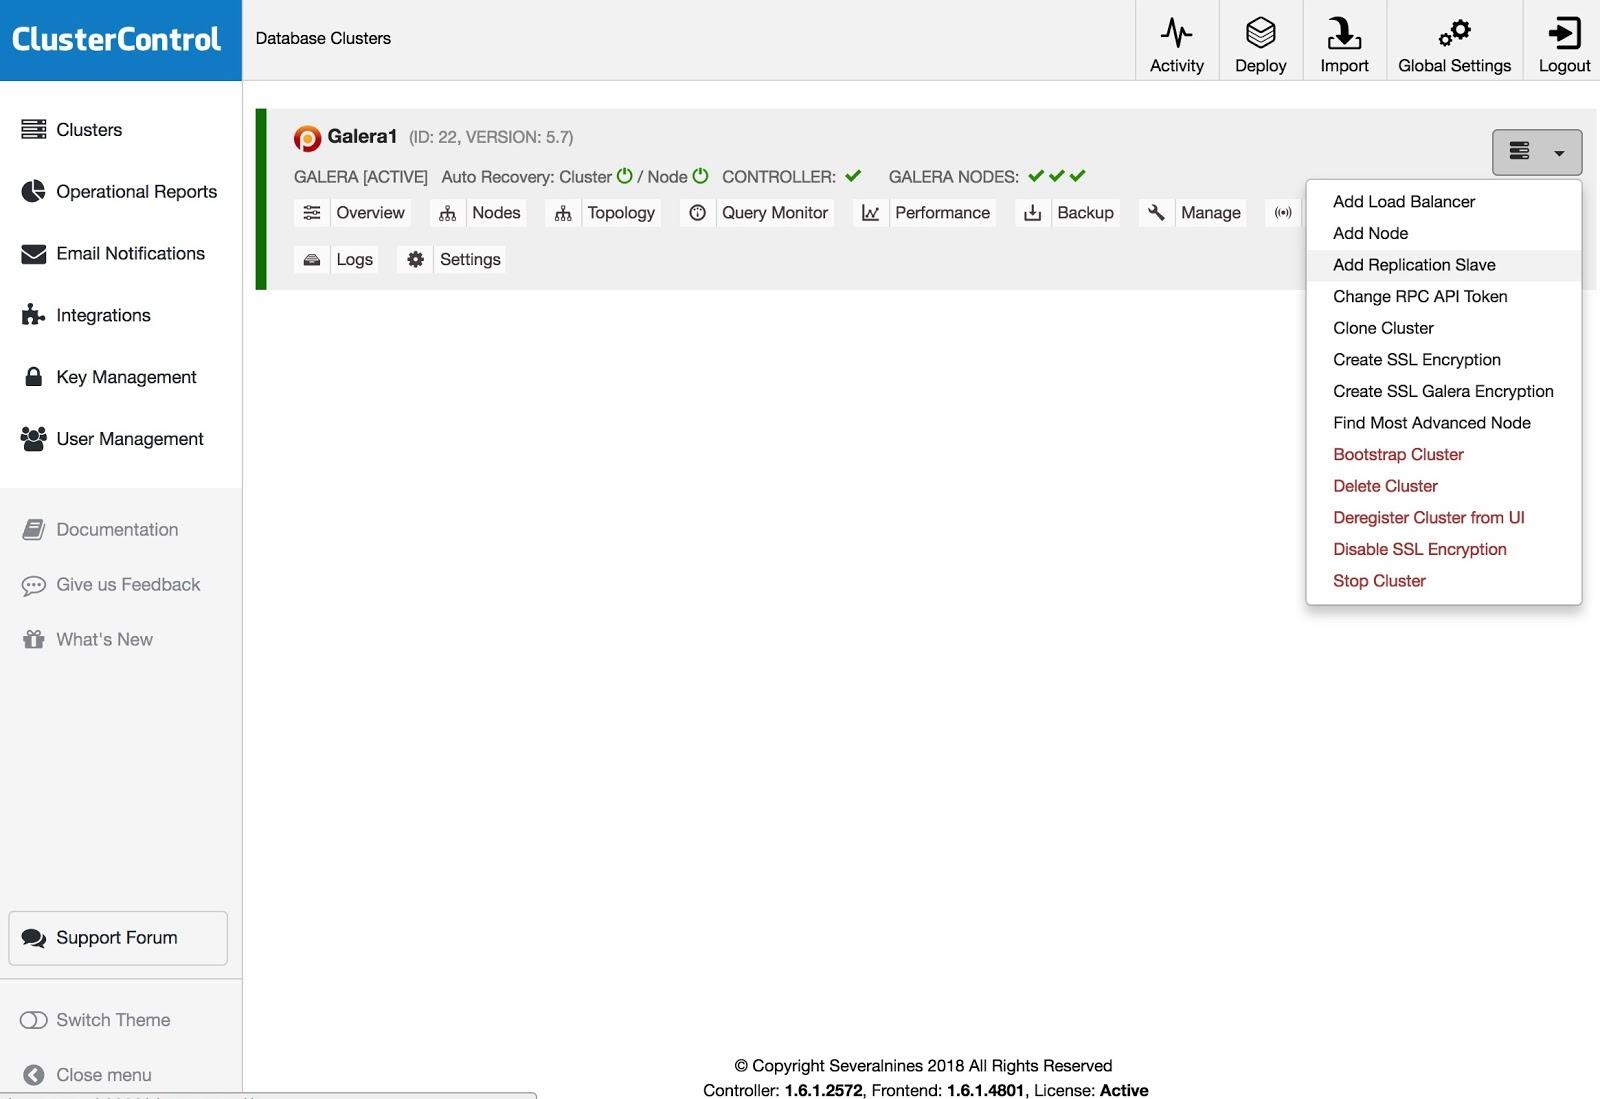
To add a replication slave, you need to click on Cluster Actions, select Add Replication Slave, and add the SSH access information of the new server. ClusterControl will connect to the server to make the necessary configurations for this action.
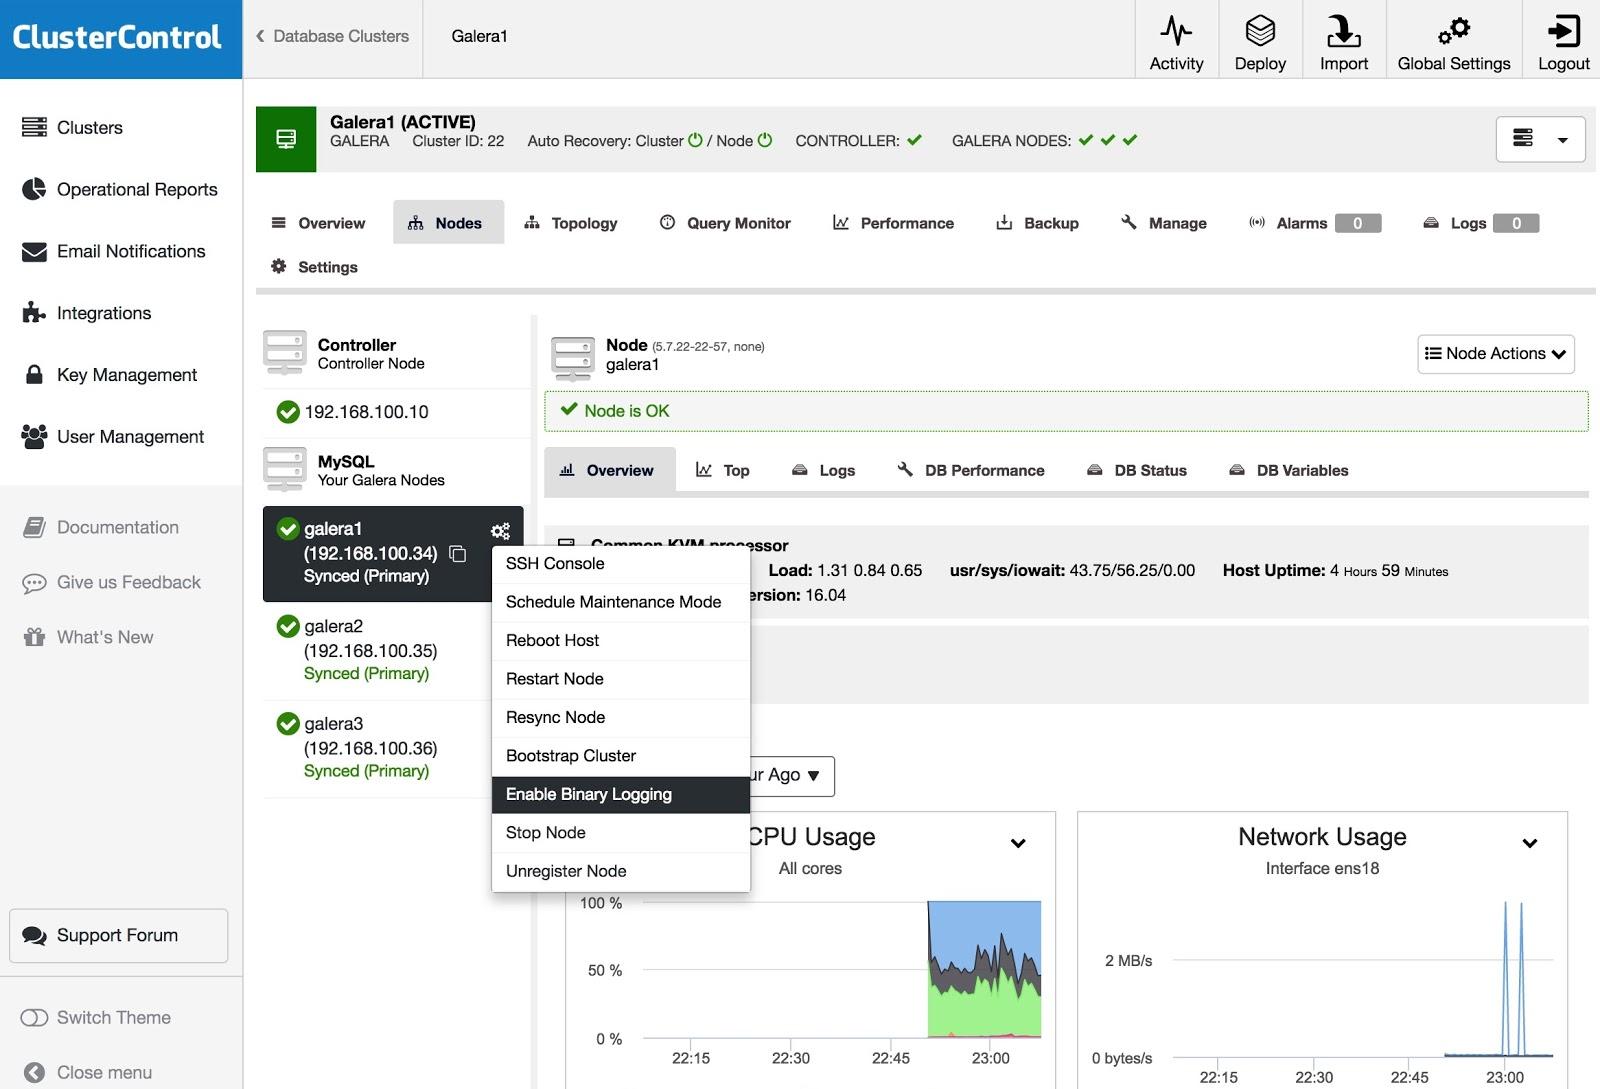
To turn one or more Galera nodes into master servers (as in the sense of producing binlogs), you can go to Node Actions and select Enable Binary Logging.
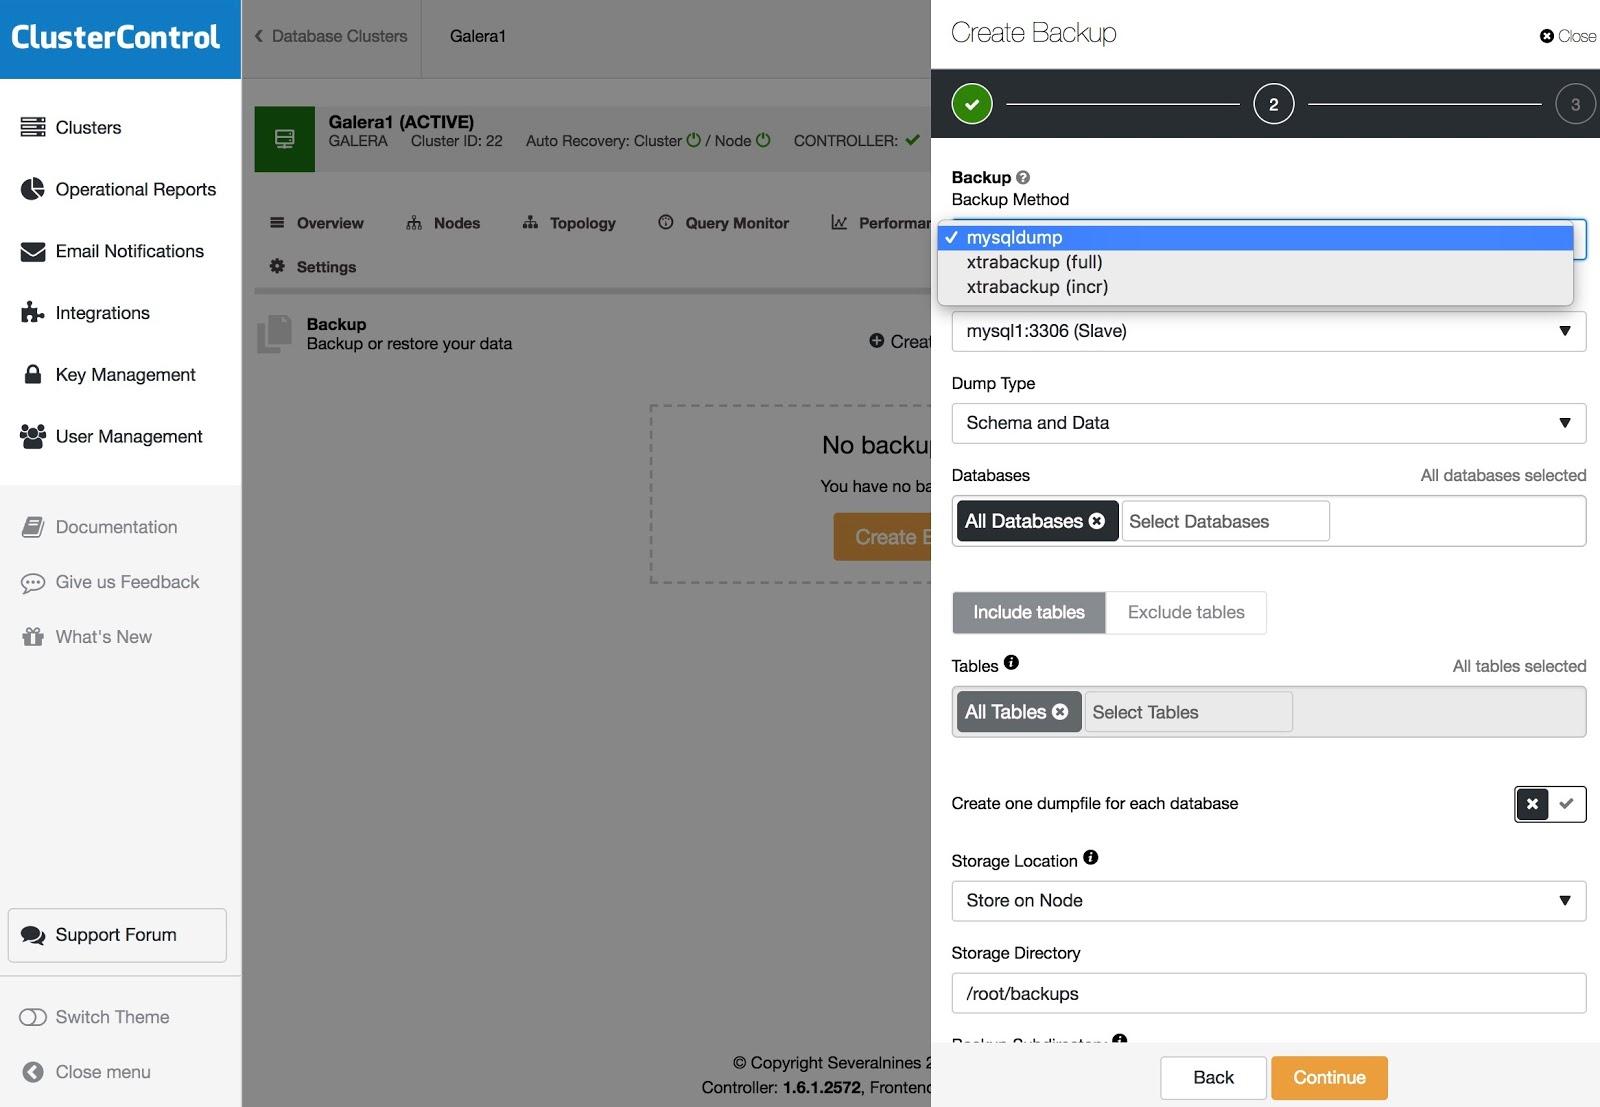
Backups can be configured with XtraBackup (full or incremental) and mysqldump, and you have other options like upload the backup to the cloud, encryption, compression, schedule and more.
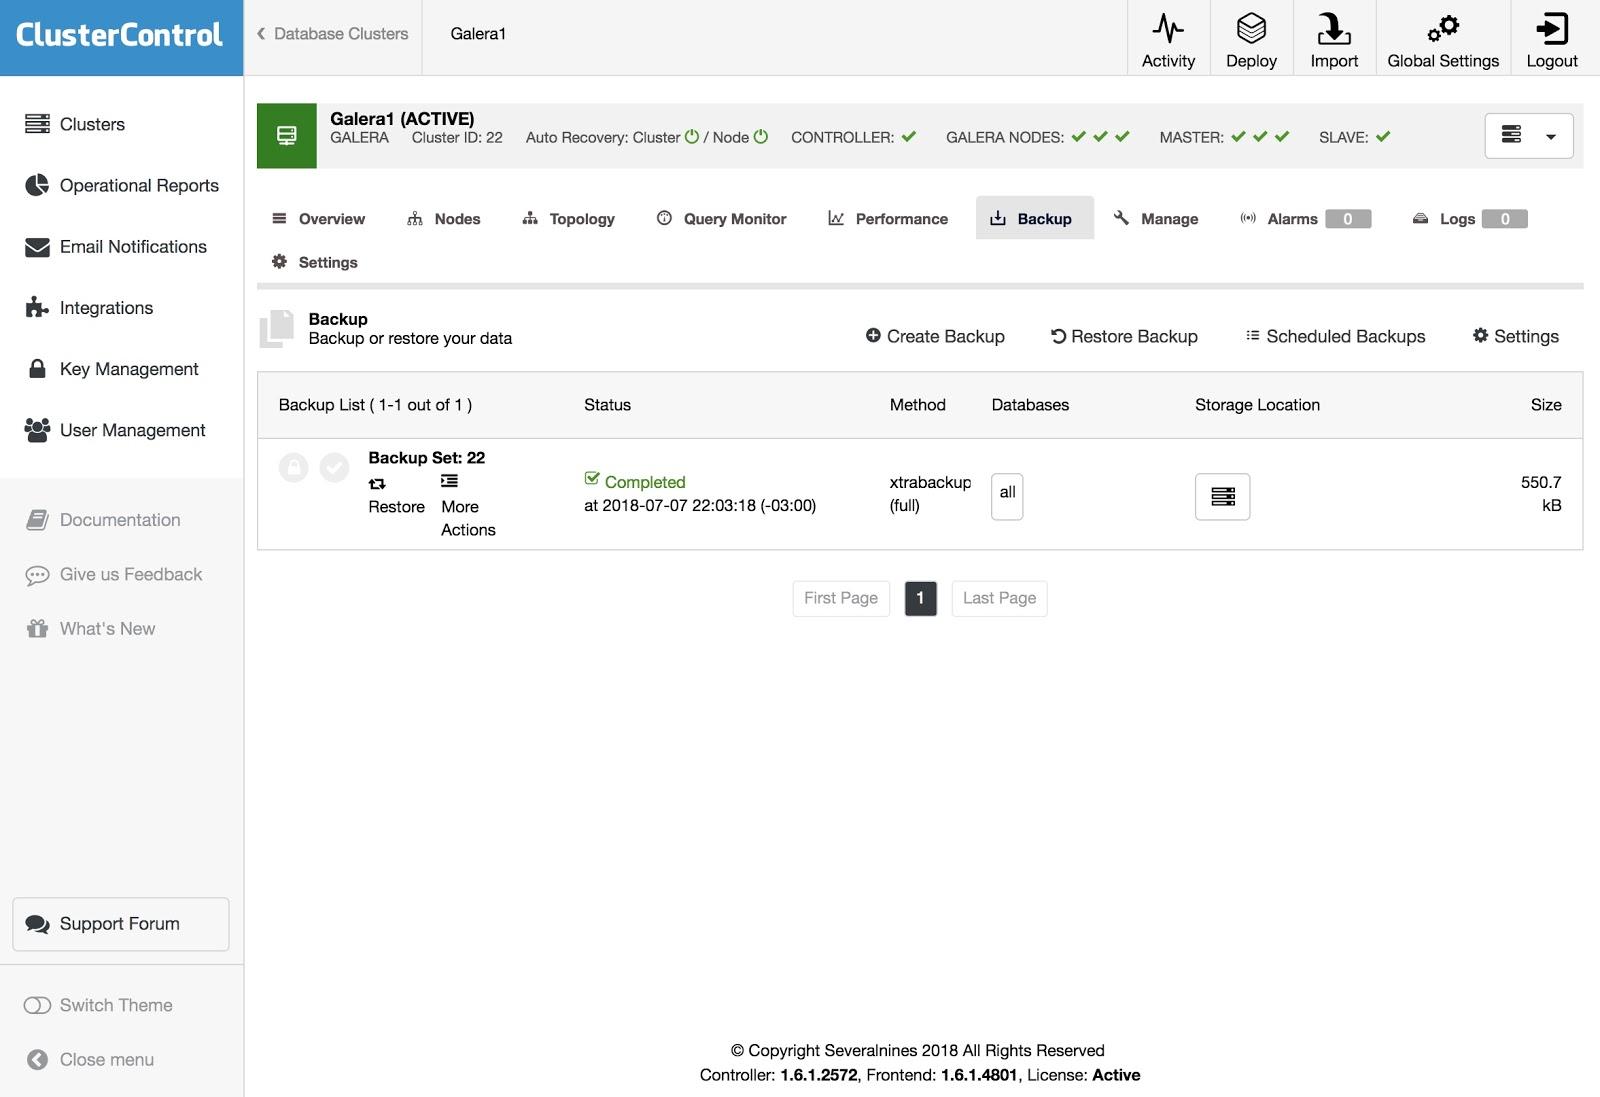
To restore the backup, go to Backup tab and choose Restore option, then you select in what server you want to restore.
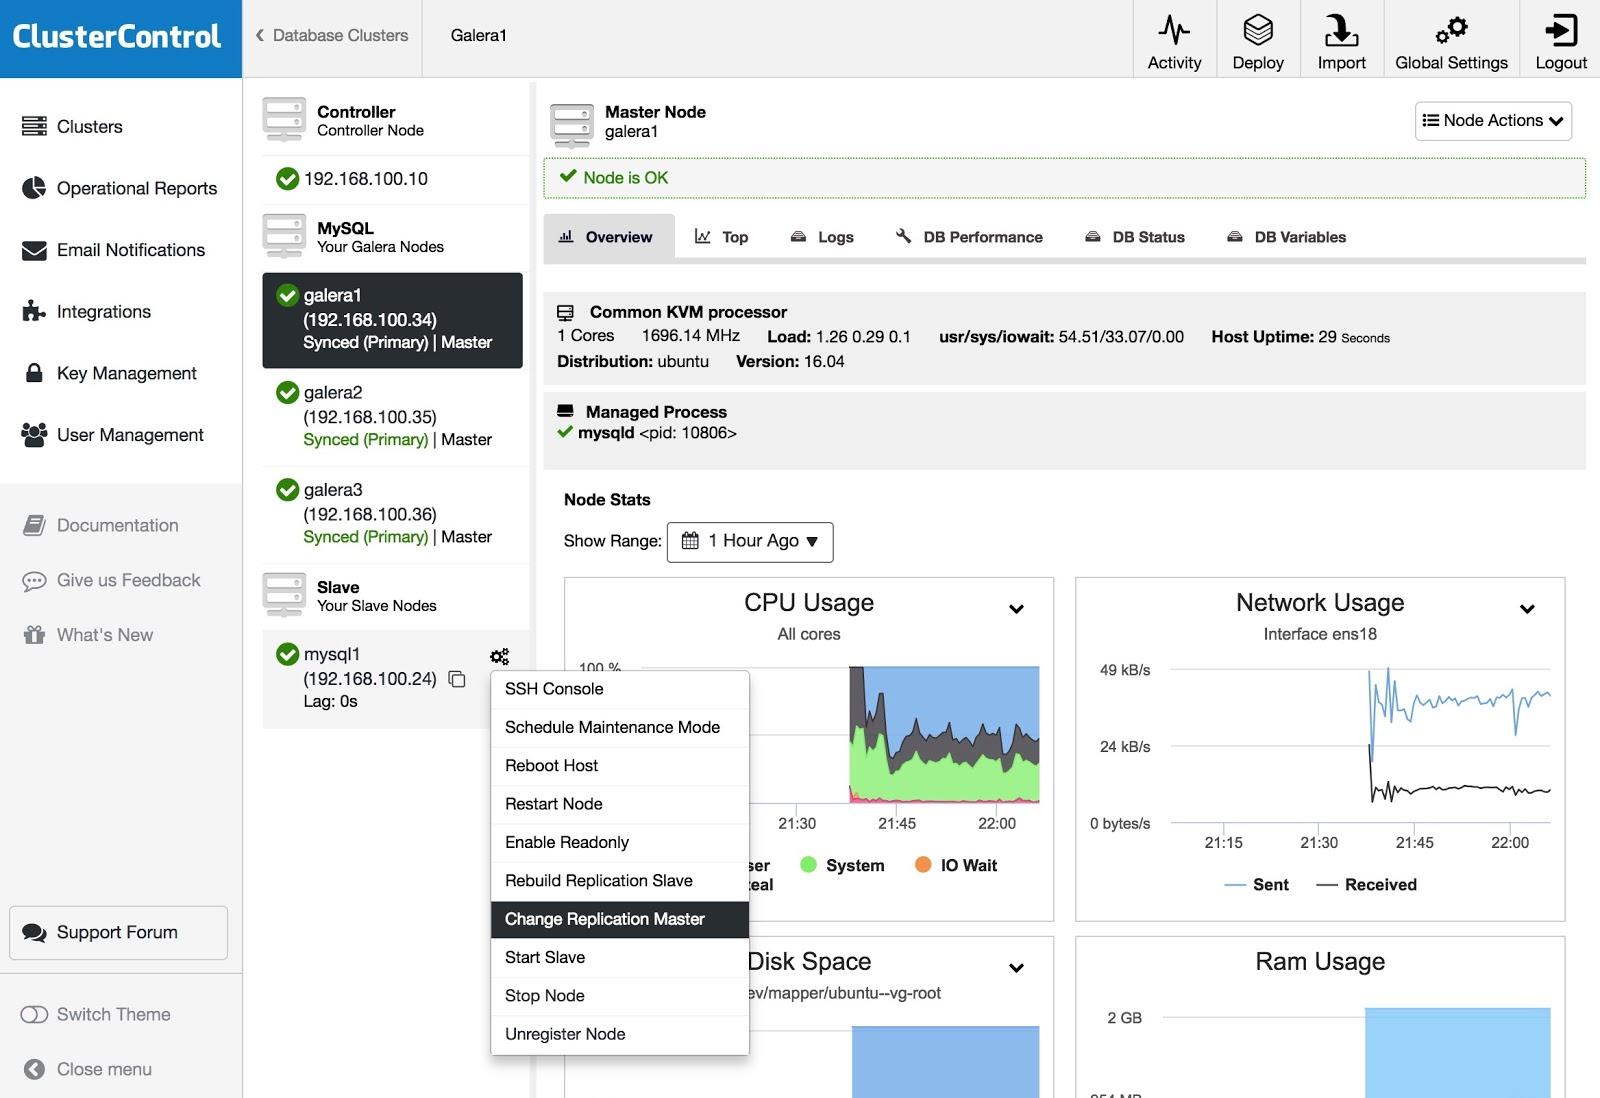
If you have a slave and you want to change the master, or rebuild the replication, you can go to Node Actions and select the option.
Conclusion
As we could see, we have several ways to achieve our goal, some more complex, others more user friendly, but with any of them you can recreate a cluster from an asynchronous slave. Xtrabackup would restore faster for larger data volumes. To guard against operator error (e.g., an erroneous DROP TABLE), you could also use a delayed slave so you hopefully have time to stop the statement from propagating.
We hope that this information is useful, and that you never have to use it in production 😉