blog
A Guide to MongoDB Deployment & Maintenance Using Puppet: Part 2

In the previous blog, we showed you how to set up our machine with the Puppet and then install and configure MongoDB. Since we are going to configure a number of nodes or rather machines we need a puppet master. In our case though, we will create a git repository where we will push our manifests and apply them to our machines.
To create a local git repository first select the path you want to use i.e. /opt/. Then create git repository by running $sudo mkdir repository. Get root user permission to change the contents of this directory by issuing the command $sudo chown vagrant:vagrant repository. To initialize this directory as a git repository after issuing the command $ cd repository, run $ git init –bare –shared if you navigate to this directory you should now see something like
vagrant@puppet:/vagrant/repository$ ls -l

total 12

-rw-rw-r-- 1 vagrant vagrant  23 Jul 15 07:46 HEAD

drwxr-xr-x 1 vagrant vagrant  64 Jul 15 07:46 branches

-rw-rw-r-- 1 vagrant vagrant 145 Jul 15 07:46 config

-rw-rw-r-- 1 vagrant vagrant  73 Jul 15 07:46 description

drwxr-xr-x 1 vagrant vagrant 352 Jul 15 07:46 hooks

drwxr-xr-x 1 vagrant vagrant  96 Jul 15 07:46 info

drwxr-xr-x 1 vagrant vagrant 128 Jul 15 07:46 objects

drwxr-xr-x 1 vagrant vagrant 128 Jul 15 07:46 refs

-rw-r--r-- 1 vagrant vagrant   0 Jul 1 15:58 test.pp
This is the basic structure of a git repository and the options –bare and –share will enable us to push and pull files from the directory.
We need to set up a system that will enable communication between the involved machines and this remote master server. The system in this case will be referred to as a daemon. The daemon will be accepting requests from remote hosts to either pull or push files to this repository. To do so, issue the command $git daemon –reuseaddr –base-path=/opt/ –export-all –enable=receive-pack
However the good practice will be to create a file from which we can run this in the background.We therefore need to set the service by issuing the command sudo vim /etc/systemd/system/gitd.service. In the new file populate it with these contents
[Unit]

Description=Git Repo Server Daemon

[Service]

ExecStart=/usr/bin/git daemon --reuseaddr --base-path=/opt/ --export-all --enable=receive-pack

[Install]

WantedBy=getty.target

DefaultInstance=ttyl
Save the file and exit by pressing <Esc> then type 😡 and the press
vagrant@puppet:/opt/repository$ systemctl start gitd

==== AUTHENTICATING FOR org.freedesktop.systemd1.manage-units ===

Authentication is required to start 'gitd.service'.

Authenticating as: vagrant,,, (vagrant)

Password:

==== AUTHENTICATION COMPLETE ===

To check if the service is running $ ps -ef | grep git and you will get:

vagrant@puppet:/opt/repository$ ps -ef | grep git

root      1726 1  0 07:48 ?     00:00:00 /usr/bin/git daemon --reuseaddr --base-path=/opt/ --export-all --enable=receive-pack

root      1728 1726  0 07:48 ?     00:00:00 git-daemon --reuseaddr --base-path=/opt/ --export-all --enable=receive-pack

vagrant   1731 1700  0 07:48 pts/0    00:00:00 grep --color=auto git
Now if we run $ git clone git://198.168.1.100/repository (remember to change the IP address with your machine’s network IP) in the root directory, you will get a newly created repository folder. Remember to configure your credentials by uncommenting the email and password in the config file. Run $ git config –global –edit to access this file.
This repository will act as our central server for all the manifests and variables.
Setting Up the Environment
We now need to set up the environment from which we will configure the nodes. First, switch to the vagrant directory and clone the repository we just created with the same command as above.
Remove the manifest directory in the vagrant folder by running $rm -r manifest/.
Make a new production folder with $ mkdir production and clone the same repository we created above with $ git clone git://198.168.1.100/repository . (don’t forget the dot at the end)
Copy and paste the contents of puppetlabs production environment into this production folder by issuing cp -pr /etc/puppetlabs/code/environments/production/* . Your production directory should now look like this
vagrant@puppet:/vagrant/production$ ls -l

total 8

drwxr-xr-x 1 vagrant vagrant  64 Apr 26 18:50 data

-rw-r--r-- 1 vagrant vagrant 865 Apr 26 18:50 environment.conf

-rw-r--r-- 1 vagrant vagrant 518 Apr 26 18:50 hiera.yaml

drwxr-xr-x 1 vagrant vagrant  96 Jul 2 10:45 manifests

drwxr-xr-x 1 vagrant vagrant  64 Apr 26 18:50 modules

-rw-r--r-- 1 vagrant vagrant   0 Jul 1 16:13 test.pp
We need to push these changes to the root repository so we run
$ git add * && git commit -m "adding production default files" && git pushTo test if the git configuration is working, we can delete the contents in the directory /etc/puppetlabs/code/environments/production/ by running $ sudo rm -r * in this directory and then pull the files from the master repository as root user i.e. $ git clone git://198.168.1.100/repository . (don’t forget the dot at the end). Only directories with contents are pulled in this case so you might miss the manifests and modules folders. These operations can be carried out in all machines involved either master puppet or client machine. So our tasks will be pulling the changes from the main server and applying the changes using the manifests.
Execution Manifest
This is the script we are going to write for helping us pull changes and apply them automatically to our other nodes. Not only do you have to use the production environment, you can add as many environments as possible then dictate puppet from which one to search. In the root production/manifests directory we will create the execution manifest as puppet_exec.pp and populate it with the following contents
 file { "This script will be pulling and applying the puppet manifests":

path => '/usr/local/bin/exec-puppet',

content => 'cd /etc/puppetlabs/code/environments/production/ && git pull; /opt/puppetlabs/bin/puppet apply manifests/'

mode => "0755"

}

cron {'exec-puppet':

command => '/usr/local/bin/exec-puppet',

hour => '*',

minute => '*/15'

}
File is a resource which has been described to execute the puppet manifests. Add an appropriate path for the file we are creating and populate it with the commands that are to be issued when it will be executed.
The commands are executed systematically that is, we first navigate to the production environment, pull the repository changes and then apply them to the machine.
We supply the manifests directory to each node from which it can select the manifest directed to it for application.
A duration over which the execution file is to be run is also set. In this case for every hour, execute the file 4 times.
To apply this to our current machine, $ cd /vagrant/production. Add everything to git by running $ git add * then $ git commit -m “add the cron configurations” and lastly $ git push. Now navigate to $ cd /etc/puppetlabs/code/environments/production/ and $ sudo git pull
Now if we check the manifests folder in this directory, you should see the puppet_exec.pp created as we had just defined.
Now if we run $ sudo puppet apply manifests/ and check if the files exec-puppet has been created $ cat /usr/local/bin/exec-puppet
The contents of this file should be
cd /etc/puppetlabs/code/environments/production/ && git pull; /opt/puppetlabs/bin/puppet apply manifests/At this point we have seen how we can pull and push changes to our master machine which should be applied to all the other nodes. If we run $ sudo crontab -l, some important warnings are highlighted on the exec-puppet file created.
# HEADER: This file was autogenerated at 2019-07-02 11:50:56 +0000 by puppet.

# HEADER: While it can still be managed manually, it is definitely not recommended.

# HEADER: Note particularly that the comments starting with 'Puppet Name' should

# HEADER: not be deleted, as doing so could cause duplicate cron jobs.

# Puppet Name: exec-puppet

*/15 * * * * /usr/local/bin/exec-puppet
Configuring the Machines
Let’s say our vagrant file looks like
Vagrant.configure("2") do |config|

  config.vm.define "puppet" do |puppet|

   puppet.vm.box = "bento/ubuntu-16.04"

   #puppet.vm.hostname = "puppet"

   #puppet.vm.network "private_network", ip: "192.168.1.10"

  end

  config.vm.define "db" do |db|

    db.vm.box = "bento/ubuntu-16.04"

  end

end
In this case we have the puppet machine where we have been doing our configurations and then the db machine. Now we to automate the machine such that whenever the db machine is started, it has puppet already installed and the cron file already available to pull the manifests and apply them accordingly. You will need to restructure the contents of the db machine to be as follows
config.vm.define "db" do |db|

    db.vm.box = "bento/ubuntu-16.04"

    vm.provision "shell", inline: <<-SHELL

      cd /temp

      wget  https://apt.puppetlabs.com/puppet5-release-xenial.deb

      dpkg -i puppet5-release-xenial.deb

      apt-get update

      apt-get install -y puppet-agent

      apt-get install -y git

      rm -rf /etc/puppetlabs/code/environments/production/*

      cd /etc/puppetlabs/code/environments/production/

      git clone git://198.168.1.100/repository .

      /opt/puppetlabs/bin/puppet apply /etc/puppetlabs/code/environments/production/manifests/puppet_exec.pp

    SHELL

  End
Up to this stage, the structure of your puppet directory should be something like this
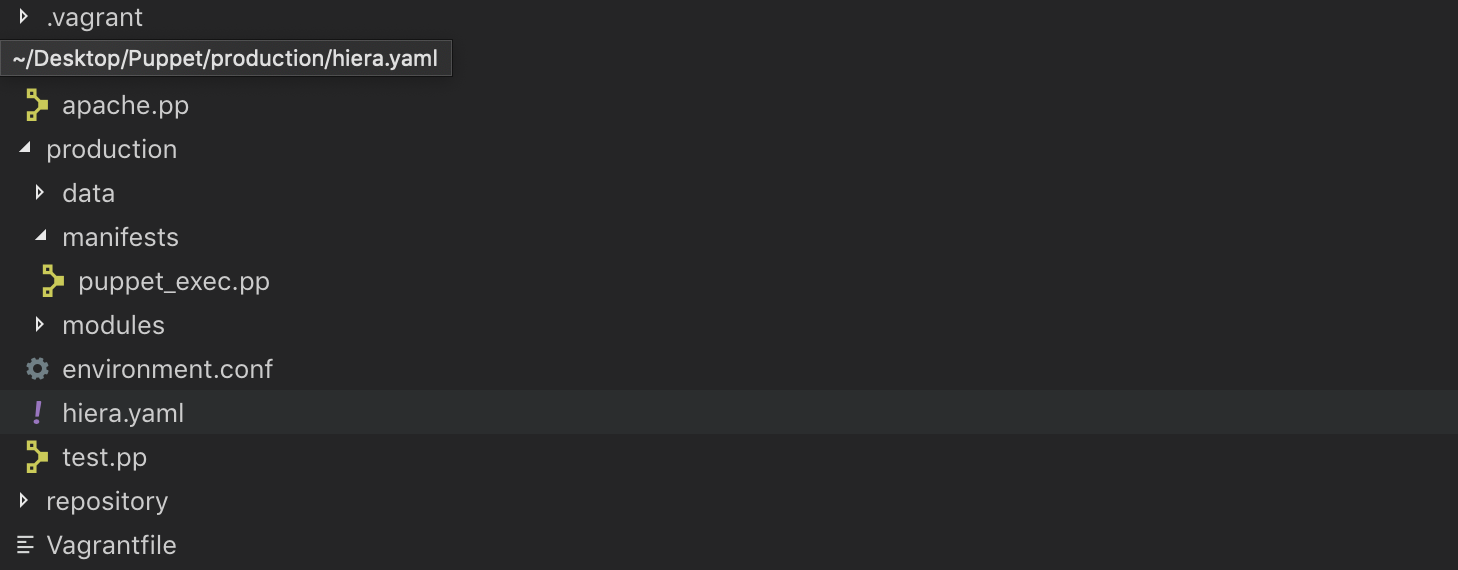 If now you run the db machine with command $ vagrant up db, some of the resources will be installed and the script we just defined can be found in the production/manifests directory. However, it is advisable to use the puppet master which is constrained to only 10 nodes for the free version otherwise you will need to subscribe to a plan. Puppet master offers more features and distributing manifests to multiple nodes, reporting logs and more control on the nodes.
Mongodb Puppet Module
This module is used in the installation of MongoDB, managing mongod server installation, configuration of the mongod daemon and management of Ops Manager setup besides the MongoDB-mms daemon.
Conclusion
In the next blog we will show you how to deploy a MongoDB Replica Set and Shards using Puppet.


