blog
A Guide to MongoDB Deployment & Maintenance Using Puppet: Part 1

Database clustering often involves configuring and maintaining a number of servers and instances, all with a collective purpose. By this we mean you can have different database servers at different hosts which are serving the same data.
For example, let’s say you have servers A, B, C, and D, you decide to install MongoDB on each but then later realize there is a new version you should have used. When you have a large number of servers and you need to update the MongoDB version, configuring them manually (one-by-one) has a lot of setbacks. These setbacks can include; taking too long to reconfigure (hence your site will have a long downtime) or making your DB prone to some configuration errors.
Besides, there are always repetitive tasks you would like to be executed automatically, instead of undergoing the same steps over-and-over, every time you want to do similar changes. At some point we also need to learn new modules as far as technology advancement is concerned that can help us boost the cluster performance
In simple terms, we need an automation systems which can easen all the mentioned undertakings. Puppet is one of the most preferred software systems for achieving this since:
- It is easy and faster to configure and deploy MongoDB cluster.
- Repetitive tasks can be easily automated such that they are executed automatically later.
- The whole cluster infrastructure can be collectively managed from a single platform.
- Easy provisioning for new nodes in cloud, hybrid or physical environment.
- Orchestrate changes and events across a cluster of nodes.
- Discover resources within minutes that can help you perform different tasks easily.
- Scales well from 1 to 200k nodes.
- Supported by a number of platforms
What is Puppet?
Puppet is a language that is used to get a machine to a desired state or rather is an engine that is used to interpret and apply some defined instructions to a serving system. Like Ansible, Puppet is also a configuration management tool used to automate and execute database cluster tasks. However, it is more advanced and well established considering that it is the oldest hence plenty of newly integrated features that would make it more sophisticated than the others. One of the major reasons I prefer Puppet personally is the capability it gives me to configure a large number of nodes connected together with load balancers, network devices or firewalls. Puppet is often used in large enterprises with complex environments.
How Puppet Works
Puppet uses the idempotency technique that helps it manage a certain machine from the time of creation and throughout its lifecycle even with configuration changes. The core advantage with this is, the machine is updated over a number of years rather than being built multiple times from scratch. In case of an update, Puppet checks the current target machine status and changes will be applied only when there is a specific change in the configuration.
Idempotency
The idempotency workflow is shown below:
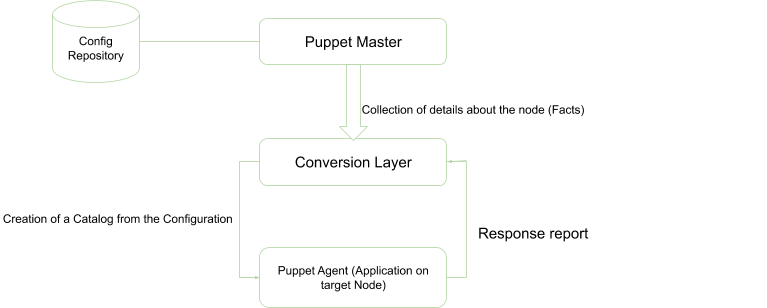
The Puppet master collects details regarding the current state of the target machine and compares it to the machine level configuration details and then returns the details which are sent to the conversion layer.
The conversion layer compares the retrieved configuration with the newly defined configuration details and then creates a catalog which is sent to the target Puppet agents, in this case, the target nodes for which the changes are to be applied.
The configuration changes are then applied to the system to transform it to a desired state. After the changes have been implemented, the Puppet agent sends a report back to the Puppet master which is documented to define the new state of the system as the supplied catalog.
Puppet Basic Components
-
Puppet Resources
These are the key modelling components of a particular machine whose descriptions will get the machine to a desired state.
-
Providers
Providers are particular resources used to add packages to the system e.g. yum and apt-get. There are default providers but one can add more when in need of some packages.
-
Manifest
This is a collection of resources that are defined either in a function or a class coupled together to configure a target system.
The structure should be
resource:{‘module’:
	attribute => value
}
For example installing mongodb we can have a manifest file called Mongodb.pp with the following contents:
package {‘mongodb’: ensure => installed } -
Modules
This is the key building block of Puppet which is basically a collection of resources, templates and files. They can be distributed in any operating system hence can be used multiple times with the same configuration.
-
Templates
Templates are used to define customized content and variable input. They use the Ruby syntax, i.e. if you want to define a port to listen to:
Listen <% =@Port_number %>Port_number variable in this case is defined in the manifest that references this template.
-
Static Files
These are general files that may be required to perform specific tasks. They are located in the files directory of any module.
Puppet Installation
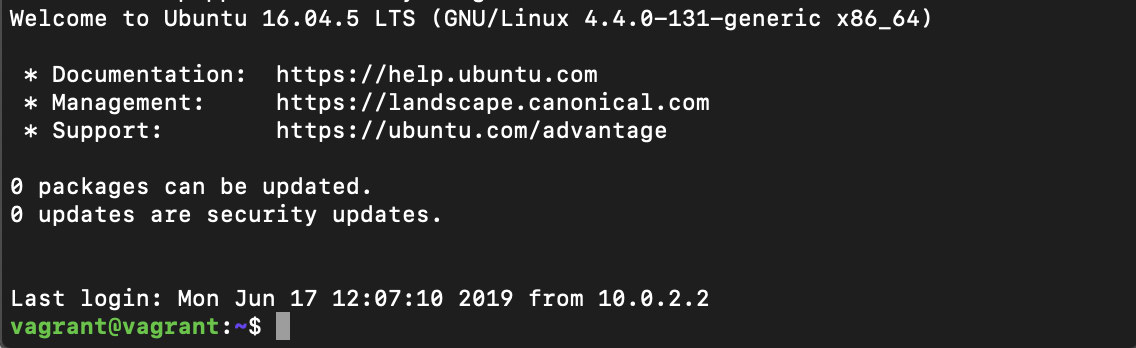
For the purpose of learning, we are going to install and configure puppet in a virtual machine which we will create in our local machine. First of all you will need to install virtualbox and vagrant. After installing, open a new terminal and create a Puppet directory probably on your desktop and run the command $ vagrant init. This will create a virtual machine and label it vagrant. Then we can log into this machine with the command $ vagrant ssh.
If you get a screen like the one below then your machine is up and running.
Otherwise if you are on a server machine you can ignore this step and proceed from adding the puppet package like below.
Add the puppet package with the command
$ wget https://apt.puppetlabs.com/puppet5-release-xenial.debAnd then unpack the package and install with
$ sudo dpkg -i puppet5-release-xenial.debWe need to update our repositories so we run
$ sudo apt-get updateInstall the puppet-agent by running
$ sudo apt-get install puppet-agentAfter the installation is complete we can confirm by checking the version. You might need to log out of your virtual machine in order for Puppet path to be added to the environment then run $ puppet –version or if you have not logged out run $ /opt/puppetlabs/bin/puppet –version. If you get a version number like 5.5.14 then the installation was successful.
After installing MongoDB using the Mongodb.pp we created above, we can simply write some task to setup a database products and also add a user to this db.
‘Mongodb_database’ is used to create and manage databases within MongoDB
mongodb_database{‘products’:
	ensure => present,
            tries => 10
}
‘Mongodb_user can be used to create and manage users within a MongoDB database.’
To add a user to the ‘products’ database
mongodb_user {userprod:
  username => ‘prodUser’,
  ensure => present,
  password_hash => mongodb_password(‘prodUser’, ‘passProdser’),
  database => prodUser,
  roles => [‘readWrite’, ‘dbAdmin’],
  tries  => 10
}
Conclusion
In this blog we have learned what Puppet is, the merits associated with it, and its working architecture. Puppet is a bit more complex from the other management tools (such as Chef and Ansible) but it has a lot of modules that can be used to resolve issues around database management. In the next part, we are going to discuss how to connect remote machines so that they can be reconfigured using the defined manifest files.


