blog
Database Load Balancing in the Cloud – MySQL Master Failover with ProxySQL 2.0: Part One (Deployment)

The cloud provides very flexible environments to work with. You can easily scale it up and down by adding or removing nodes. If there’s a need, you can easily create a clone of your environment. This can be used for processes like upgrades, load tests, disaster recovery. The main problem you have to deal with is that applications have to connect to the databases in some way, and flexible setups can be tricky for databases – especially with master-slave setups. Luckily, there are some options to make this process easier.
One way is to utilize a database proxy. There are several proxies to pick from, but in this blog post we will use ProxySQL, a well known proxy available for MySQL and MariaDB. We are going to show how you can use it to efficiently move traffic between MySQL nodes without visible impact for the application. We are also going to explain some limitations and drawbacks of this approach.
Initial Cloud Setup
At first, let’s discuss the setup. We will use AWS EC2 instances for our environment. As we are only testing, we don’t really care about high availability other than what we want to prove to be possible – seamless master changes. Therefore we will use a single application node and a single ProxySQL node. As per good practices, we will collocate ProxySQL on the application node and the application will be configured to connect to ProxySQL through Unix socket. This will reduce overhead related to TCP connections and increase security – traffic from the application to the proxy will not leave the local instance, leaving only ProxySQL – > MySQL connection to encrypt. Again, as this is a simple test, we will not setup SSL. In production environments you want to do that, even if you use VPC.
The environment will look like in the diagram below:
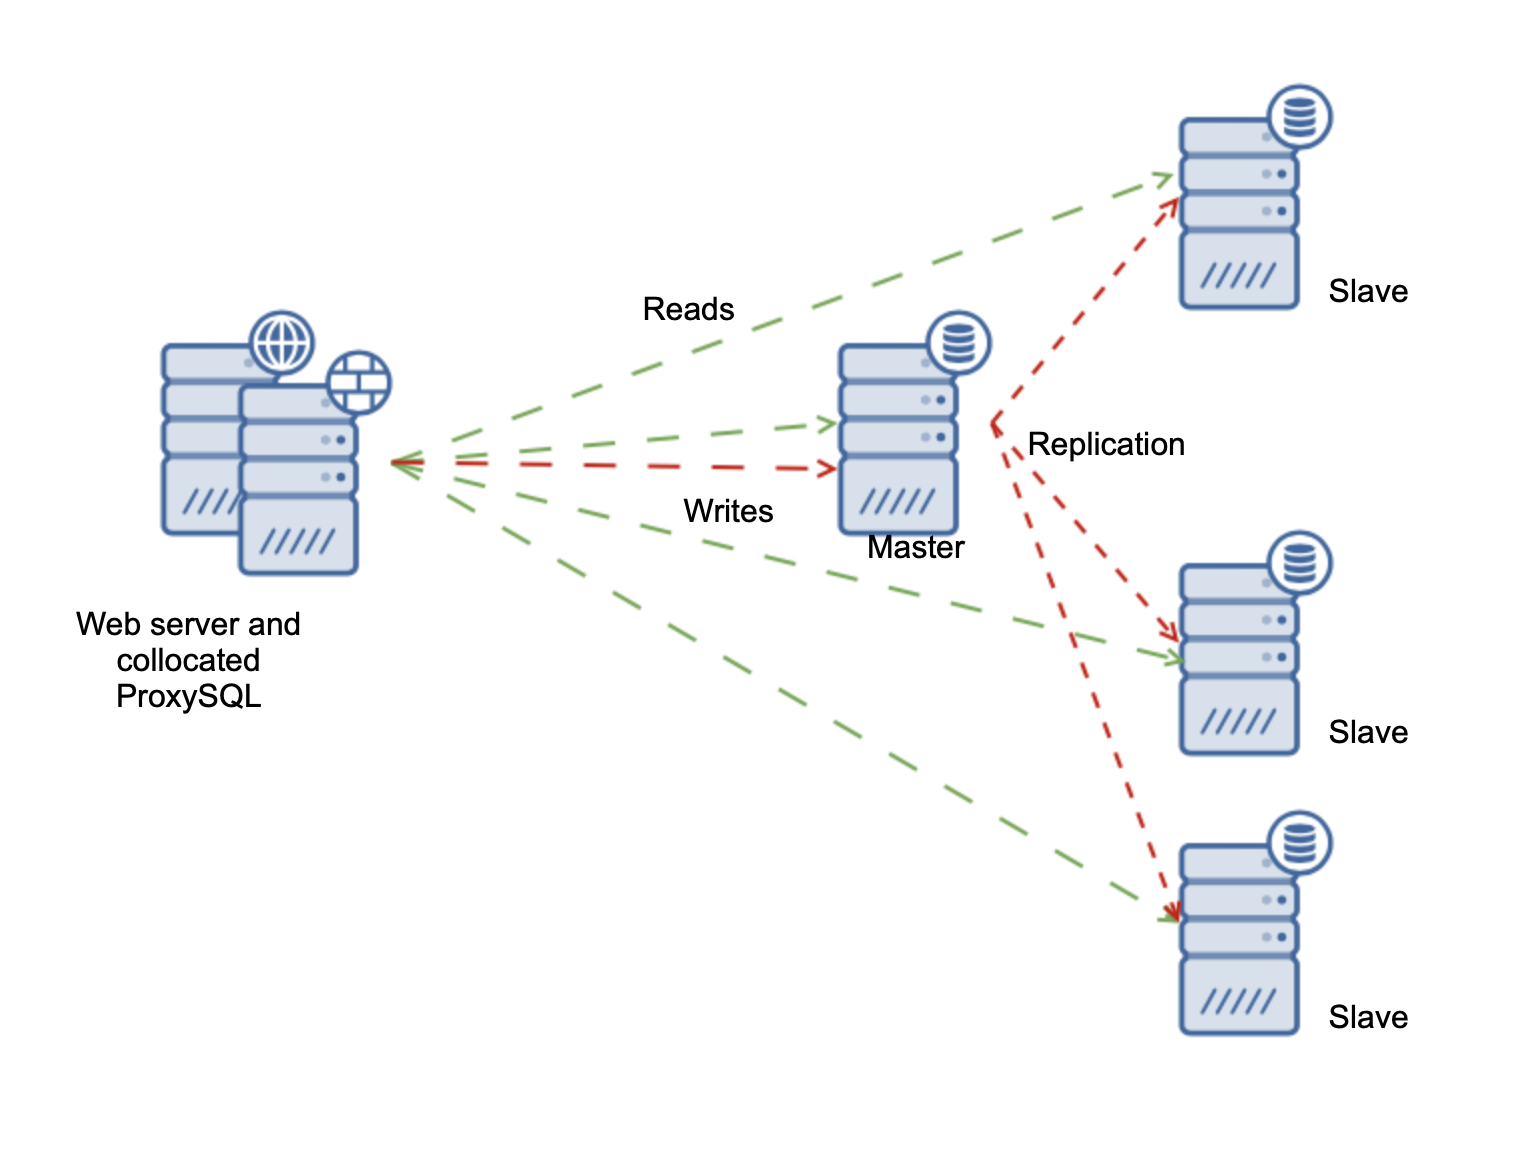
As the application, we will use Sysbench – a synthetic benchmark program for MySQL. It has an option to disable and enable the use of transactions, which we will use to demonstrate how ProxySQL handles them.
Installing a MySQL Replication Cluster Using ClusterControl
To make the deployment fast and efficient, we are going to use ClusterControl to deploy the MySQL replication setup for us. The installation of ClusterControl requires just a couple of steps. We won’t go into details here but you should open our website, register and installation of ClusterControl should be pretty much straightforward. Please keep in mind that you need to setup passwordless SSH between ClusterControl instance and all nodes that we will be managing with it.
Once ClusterControl has been installed, you can log in. You will be presented with a deployment wizard:
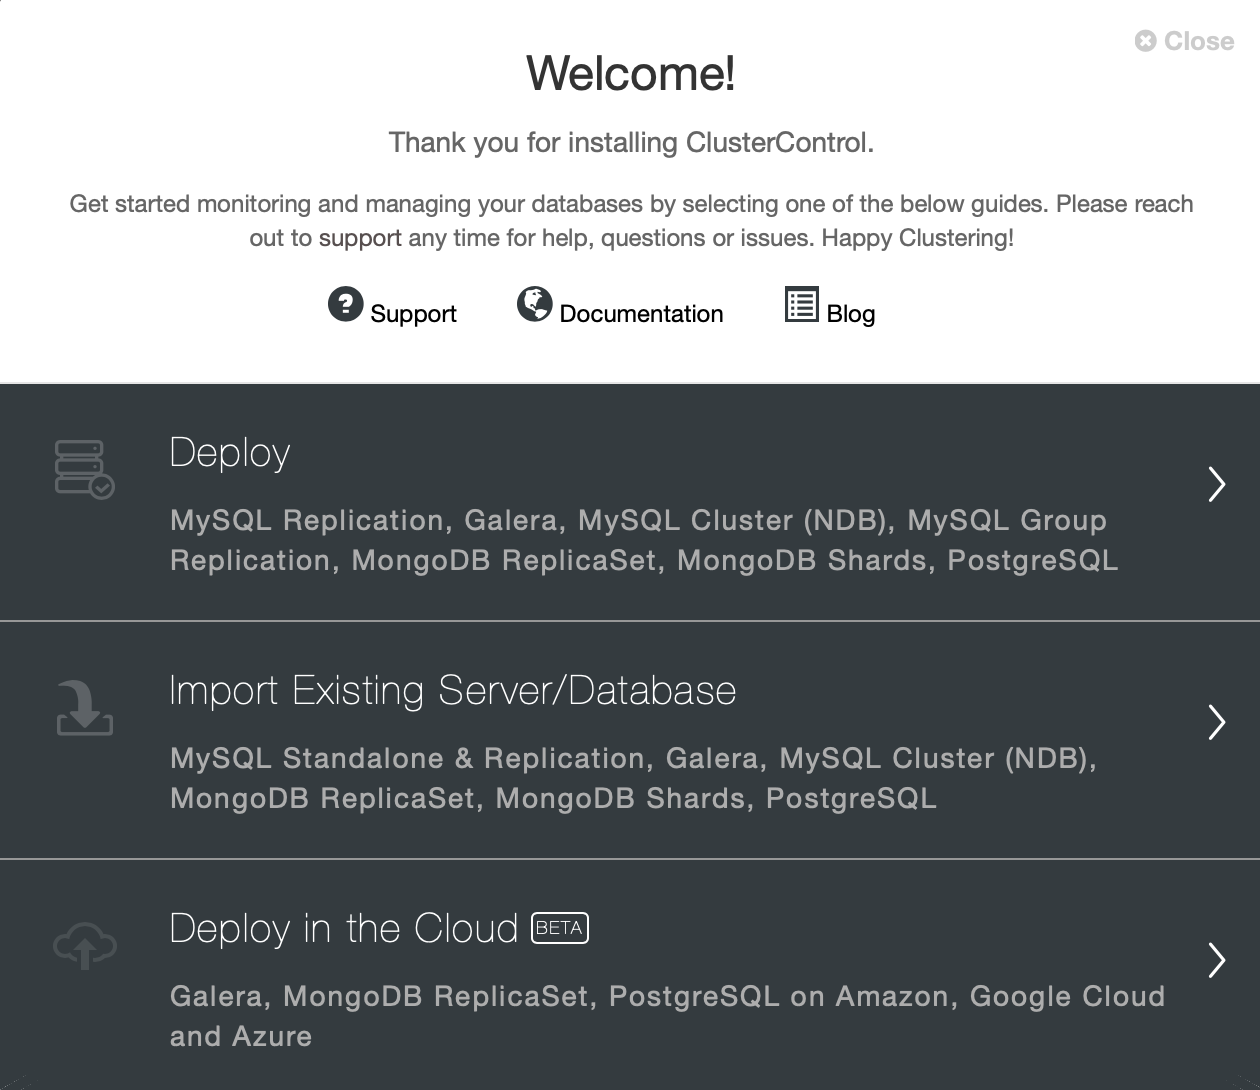
As we already have instances running in cloud, therefore we will just go with “Deploy” option. We will be presented with the following screen:
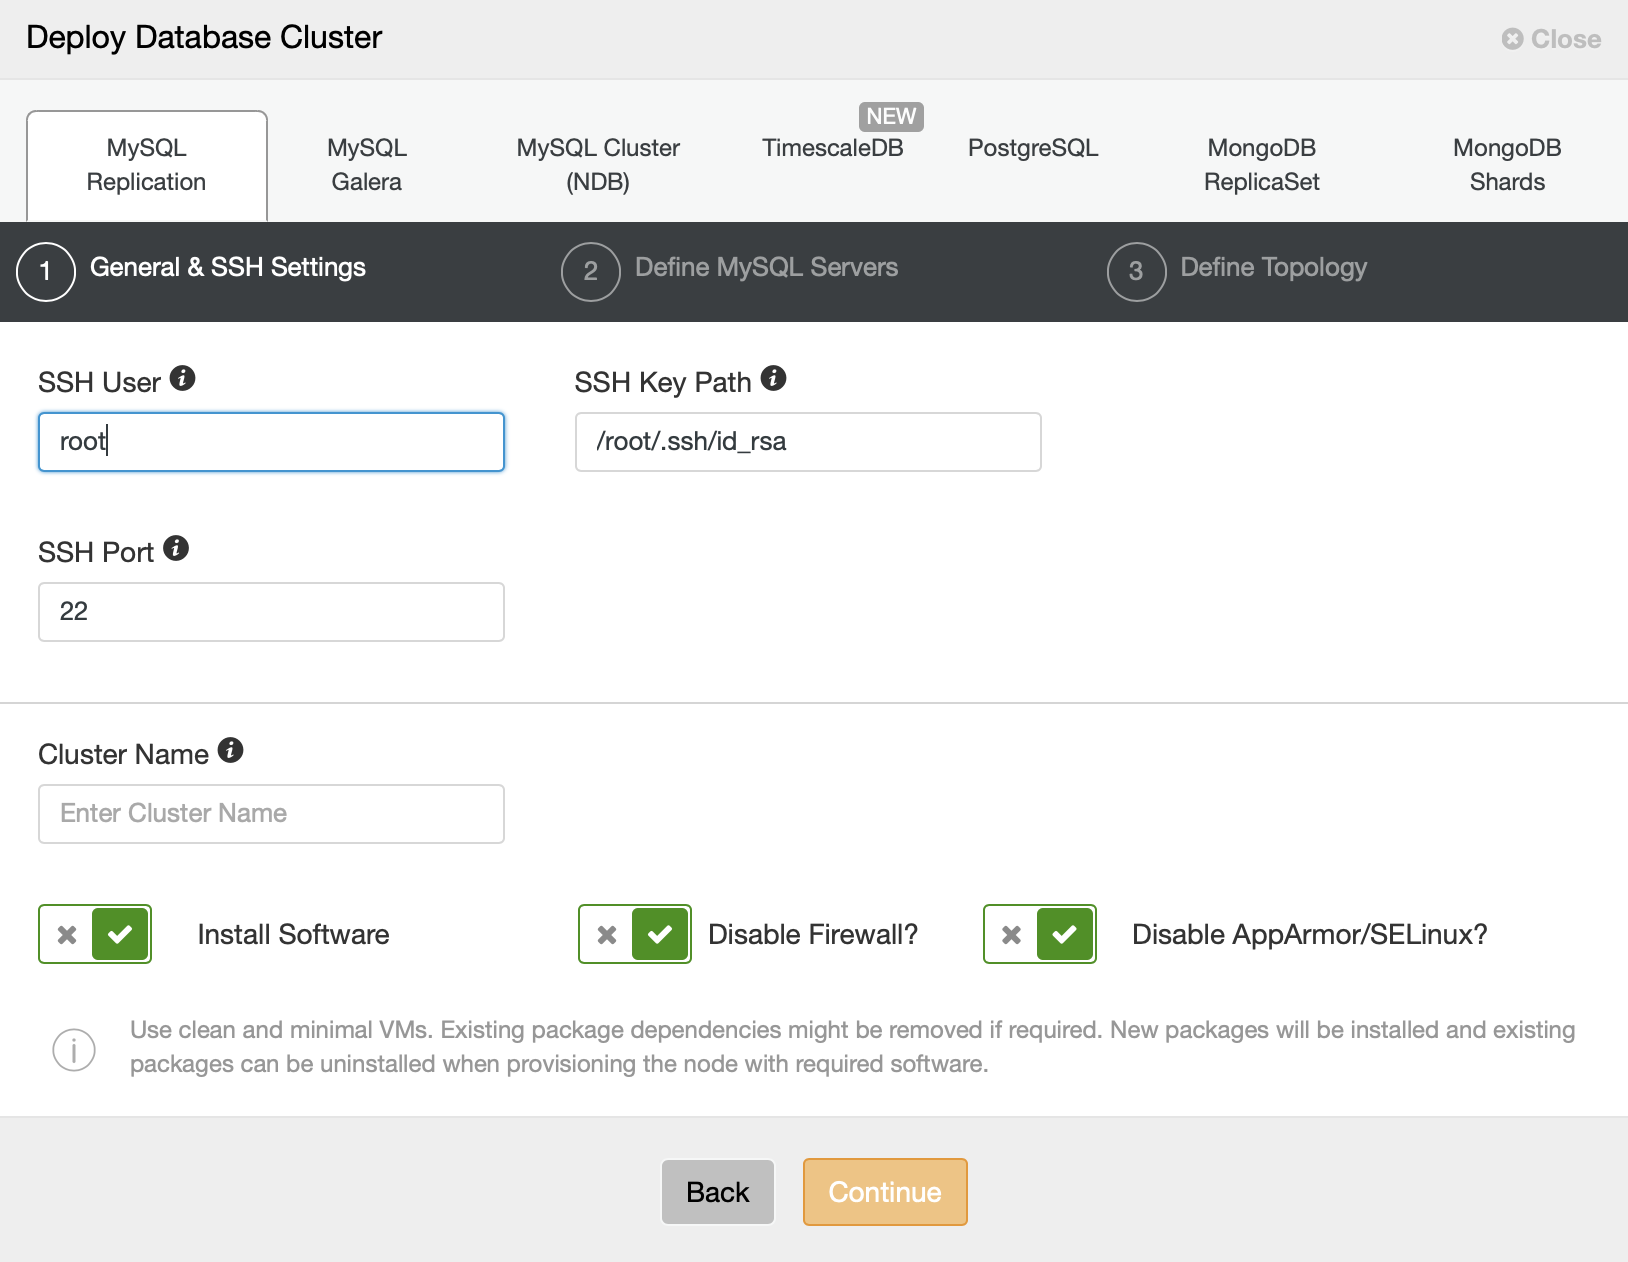
We will pick MySQL Replication as the cluster type and we need to provide connectivity details. It can be connection using root user or it can as well be a sudo user with or without a password.
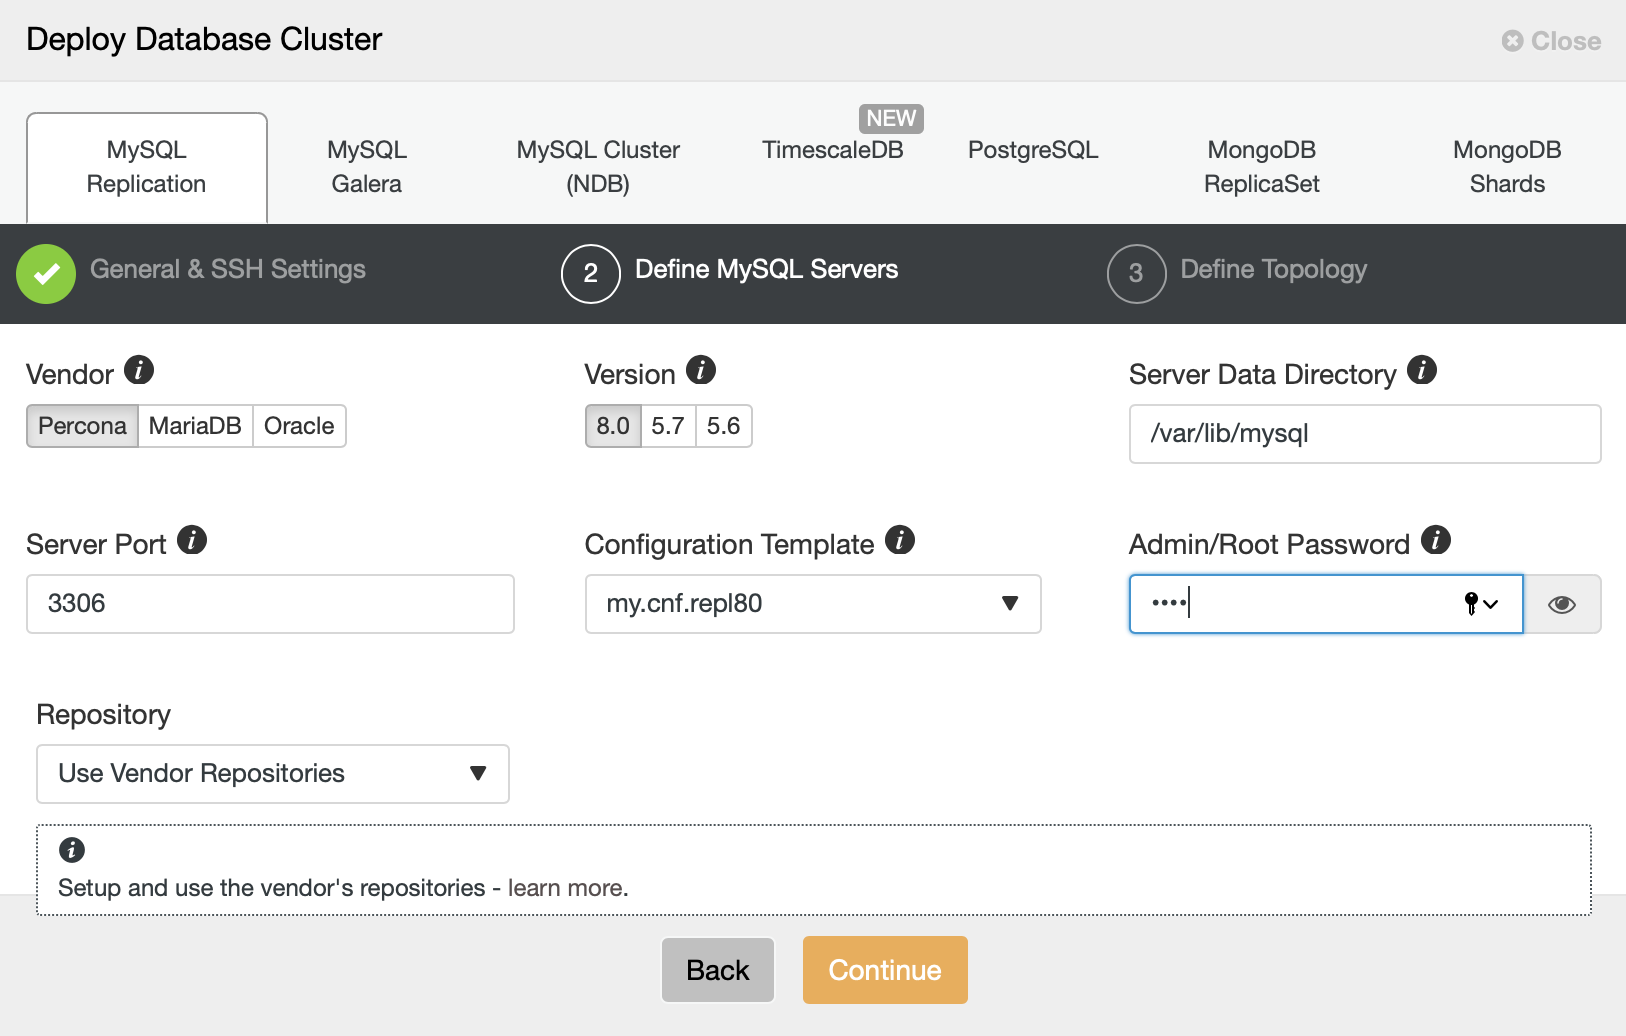
In the next step, we have to make some decisions. We will use Percona Server for MySQL in its latest version. We also have to define a password for the root user on the nodes we will deploy.
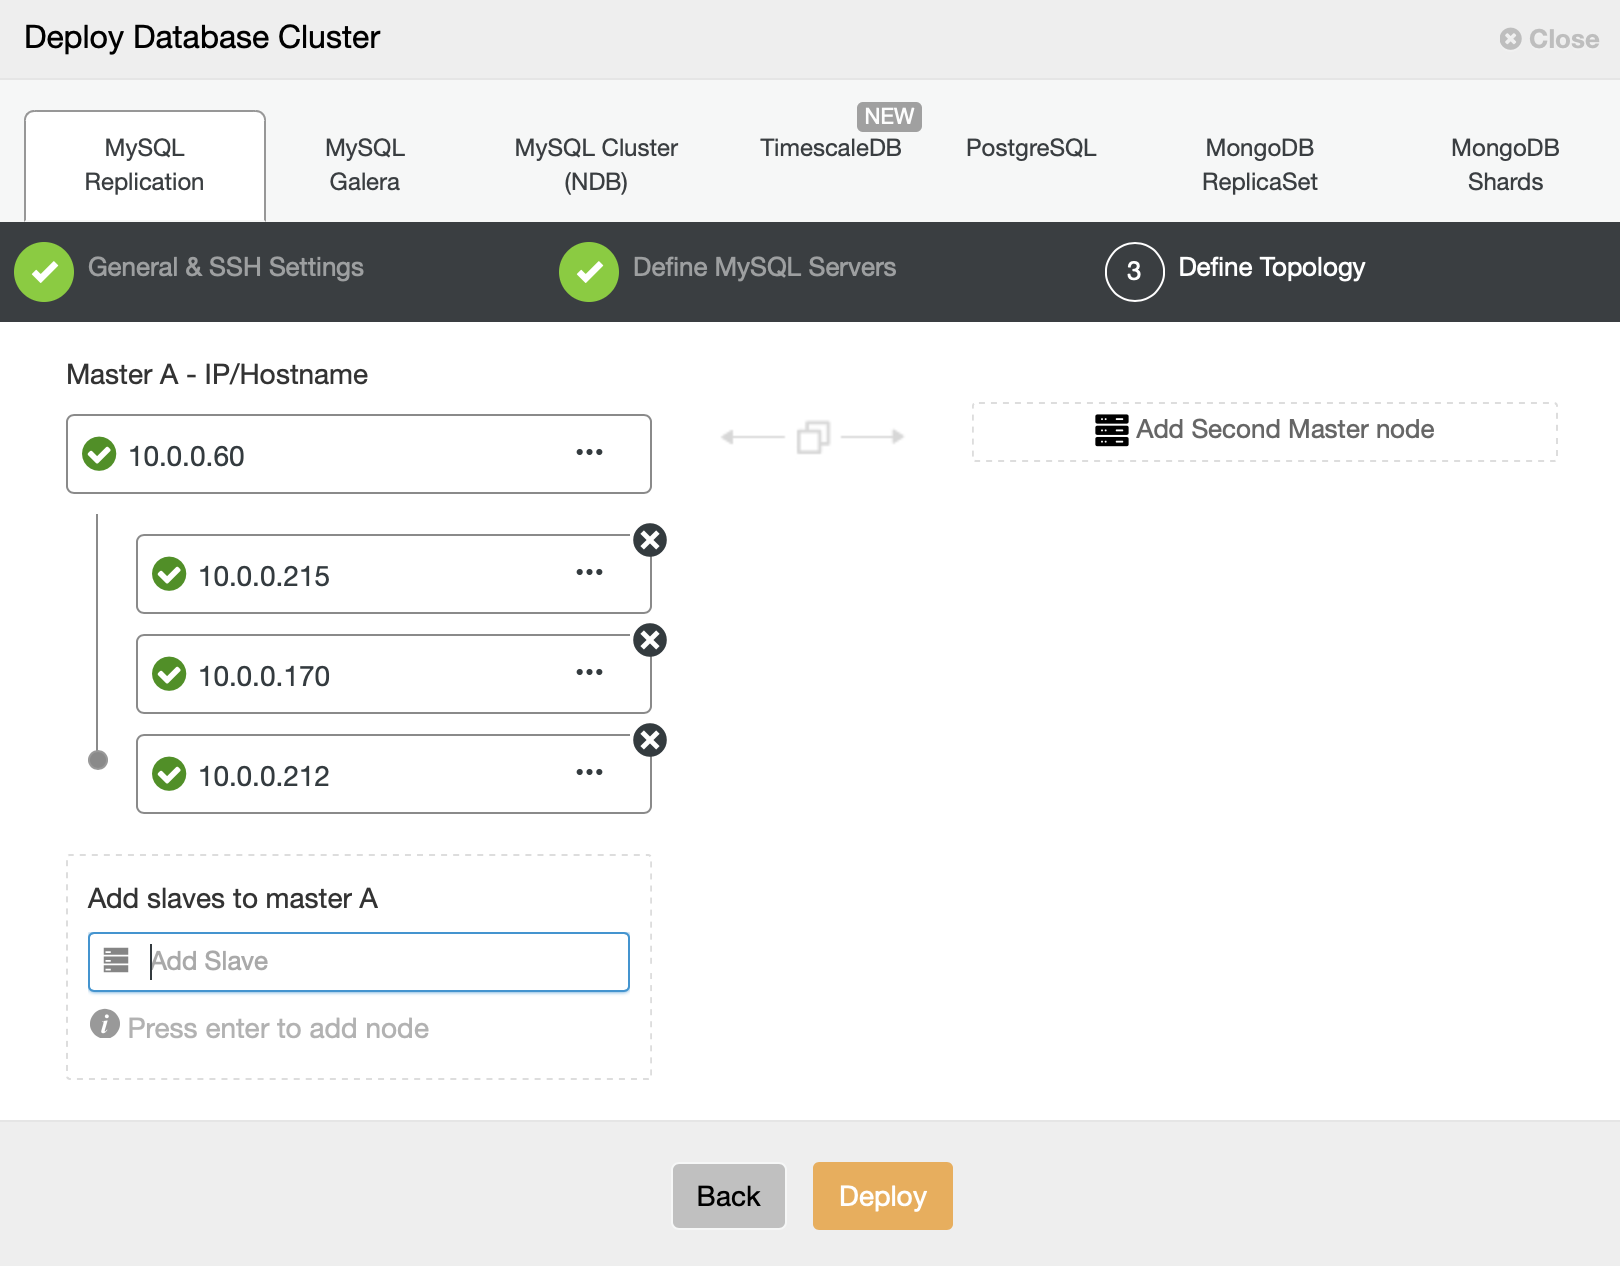
In the final step we have to define a topology – we will go with what we proposed at the beginning – a master and three slaves.
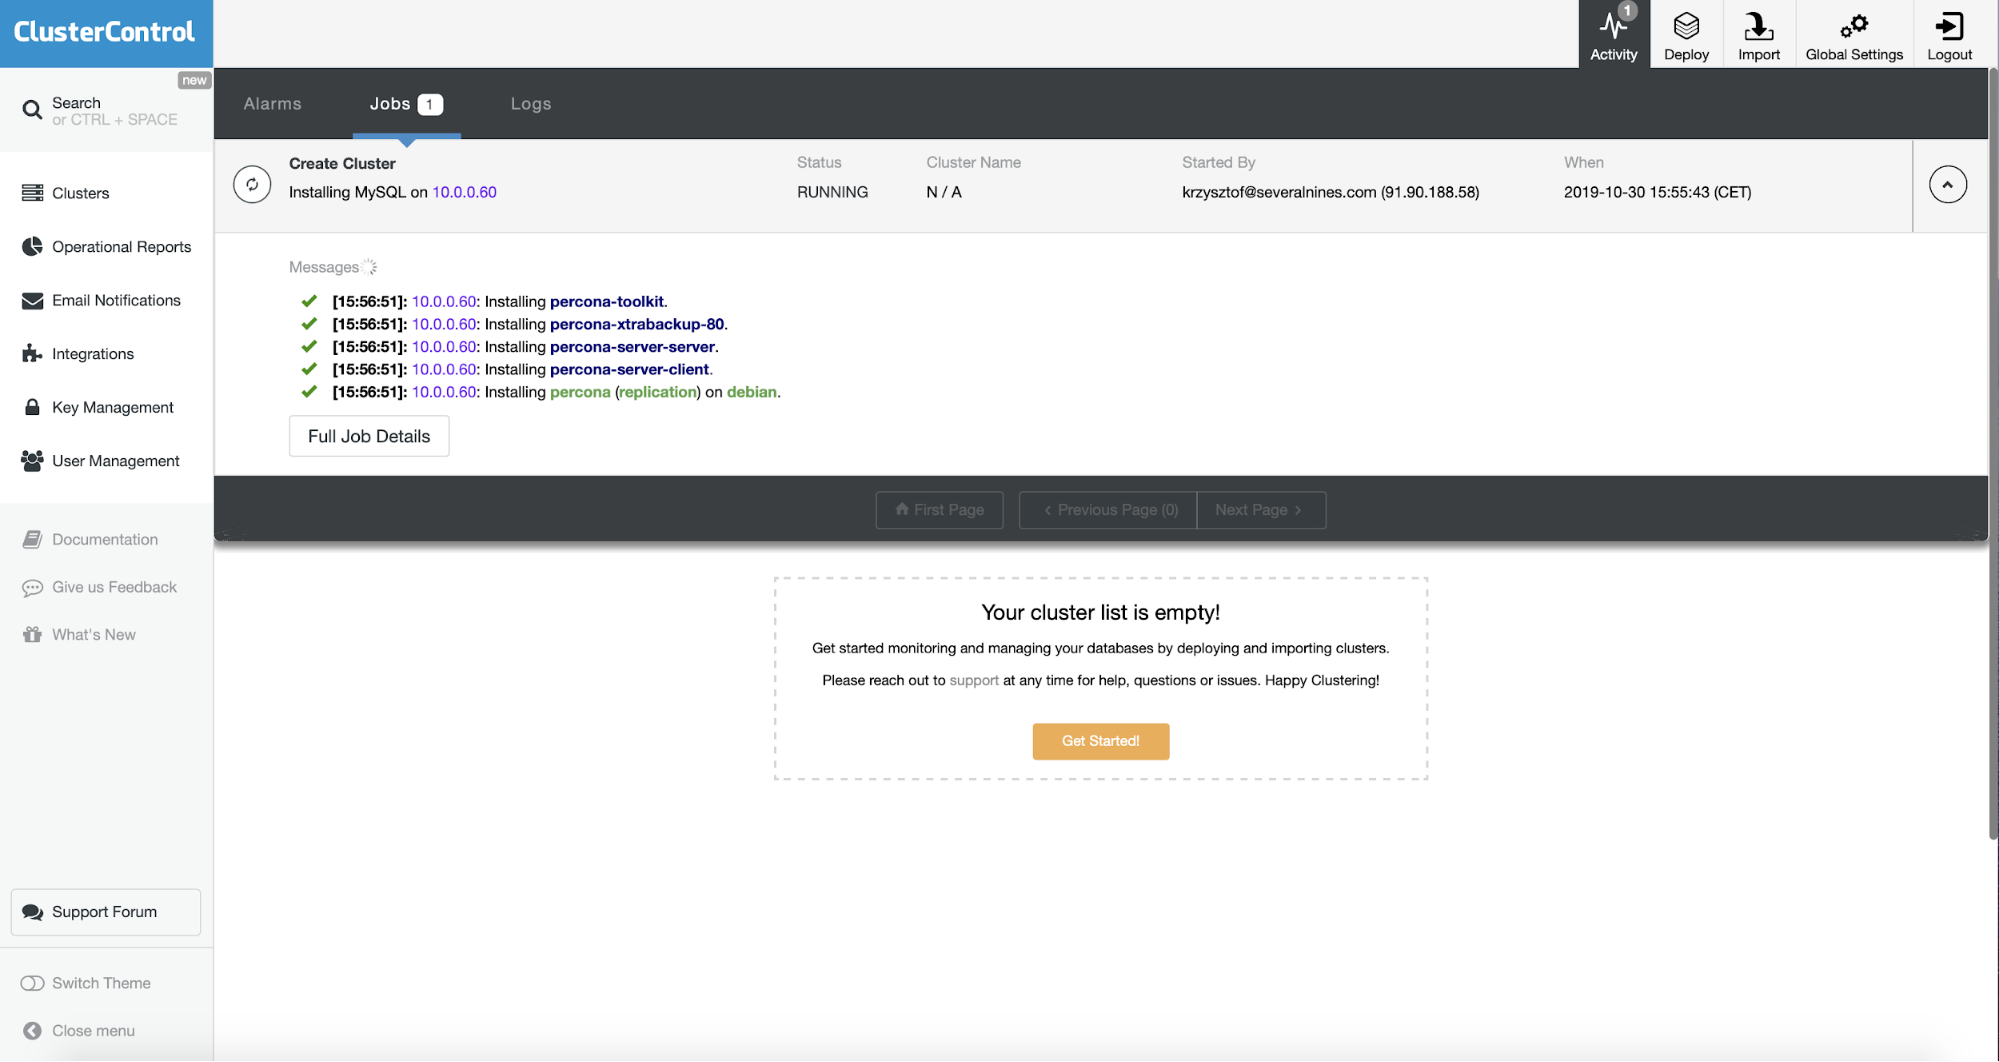
ClusterControl will start the deployment – we can track it in the Activity tab, as shown on the screenshot above.
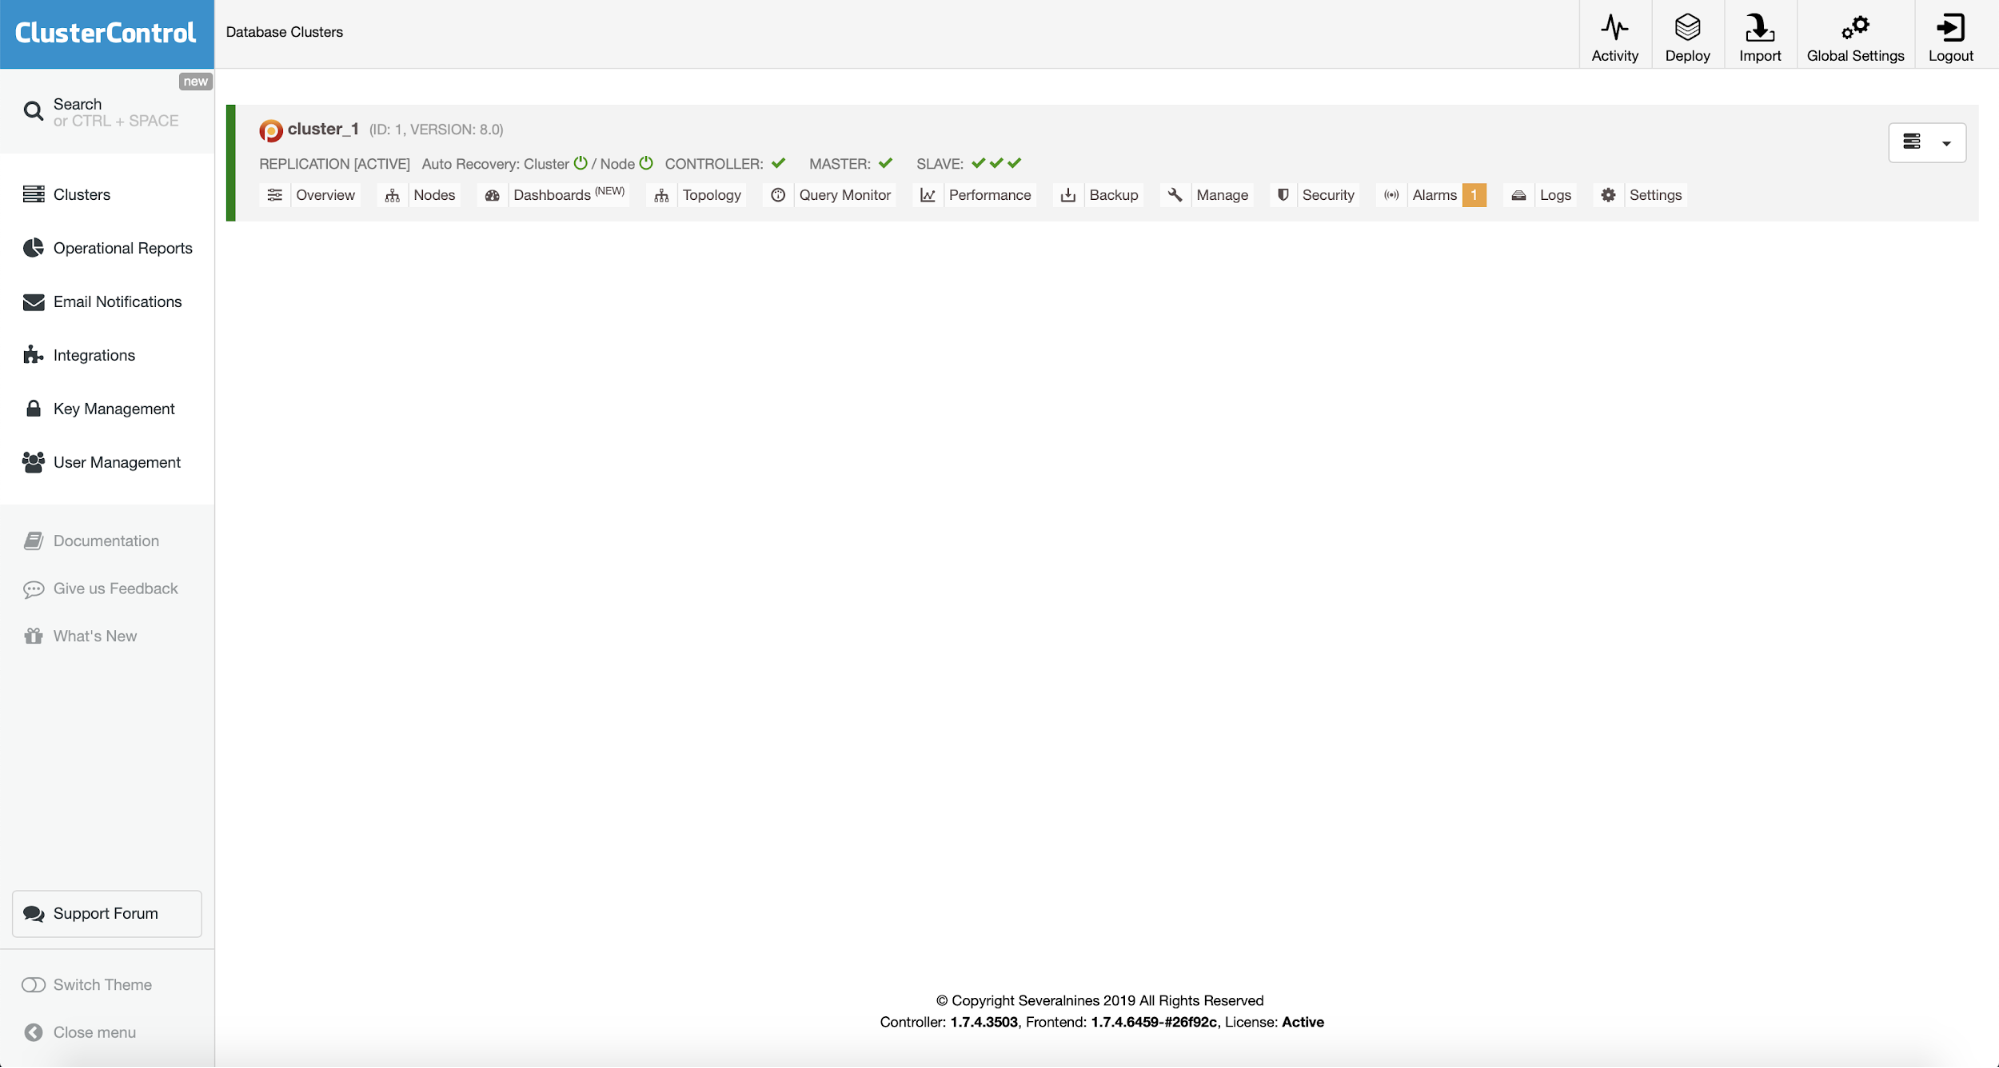
Once the deployment has completed, we can see the cluster in the cluster list:
Installing ProxySQL 2.0 Using ClusterControl
The next step will be to deploy ProxySQL. ClusterControl can do this for us.

We can do this in Manage -> Load Balancer.
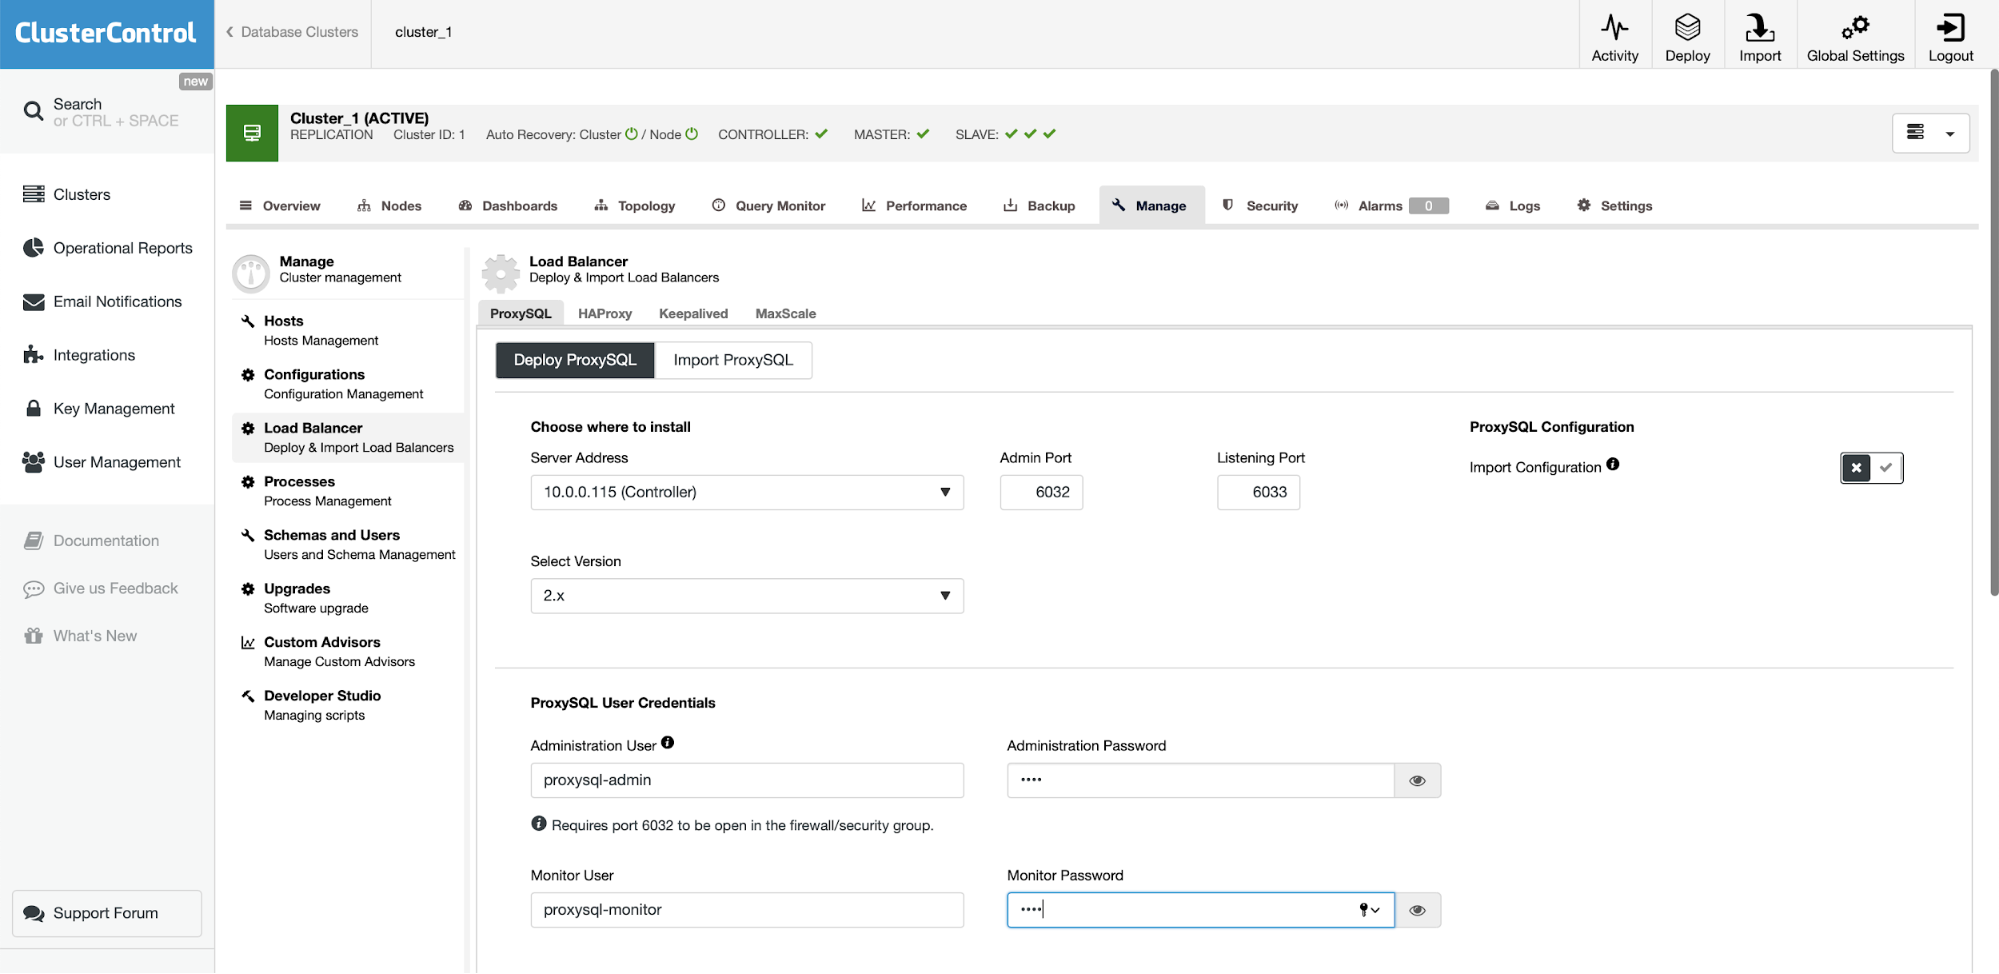
As we are just testing things, we are going to reuse the ClusterControl instance for ProxySQL and Sysbench. In real life you would probably want to use your “real” application server. If you can’t find it in the drop down, you can always write the server address (IP or hostname) by hand.
We also want to define credentials for monitoring and administrative user. We also double-checked that ProxySQL 2.0 will be deployed (you can always change it to 1.4.x if you need).
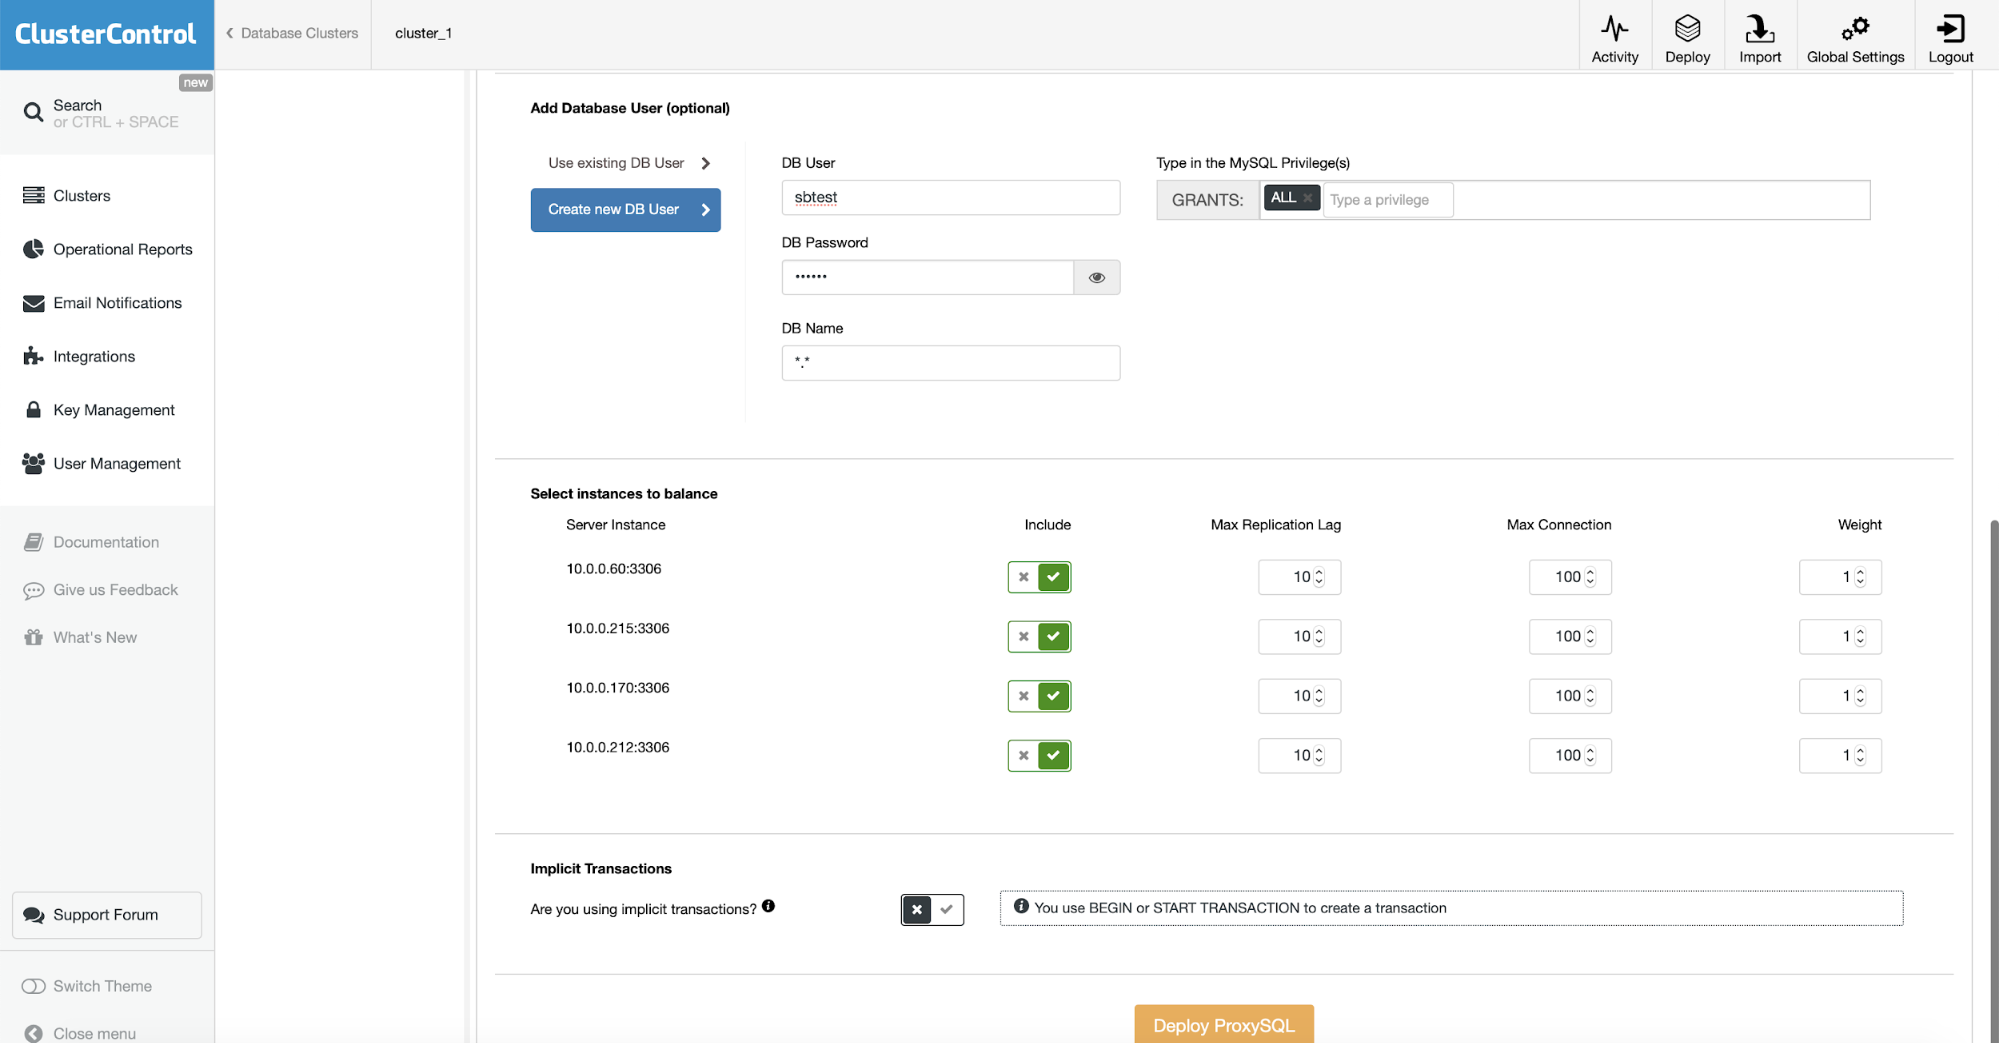
On the bottom part of the wizard we will define the user which will be created in both MySQL and ProxySQL. If you have an existing application, you probably want to use an existing user. If you use numerous users for your application you can always import the rest of them later, after ProxySQL will be deployed.
We want to ensure that all the MySQL instances will be configured in ProxySQL. We will use explicit transactions so we set the switch accordingly. This is all we needed to do – the rest is to click on the “Deploy ProxySQL” button and let ClusterControl does its thing.
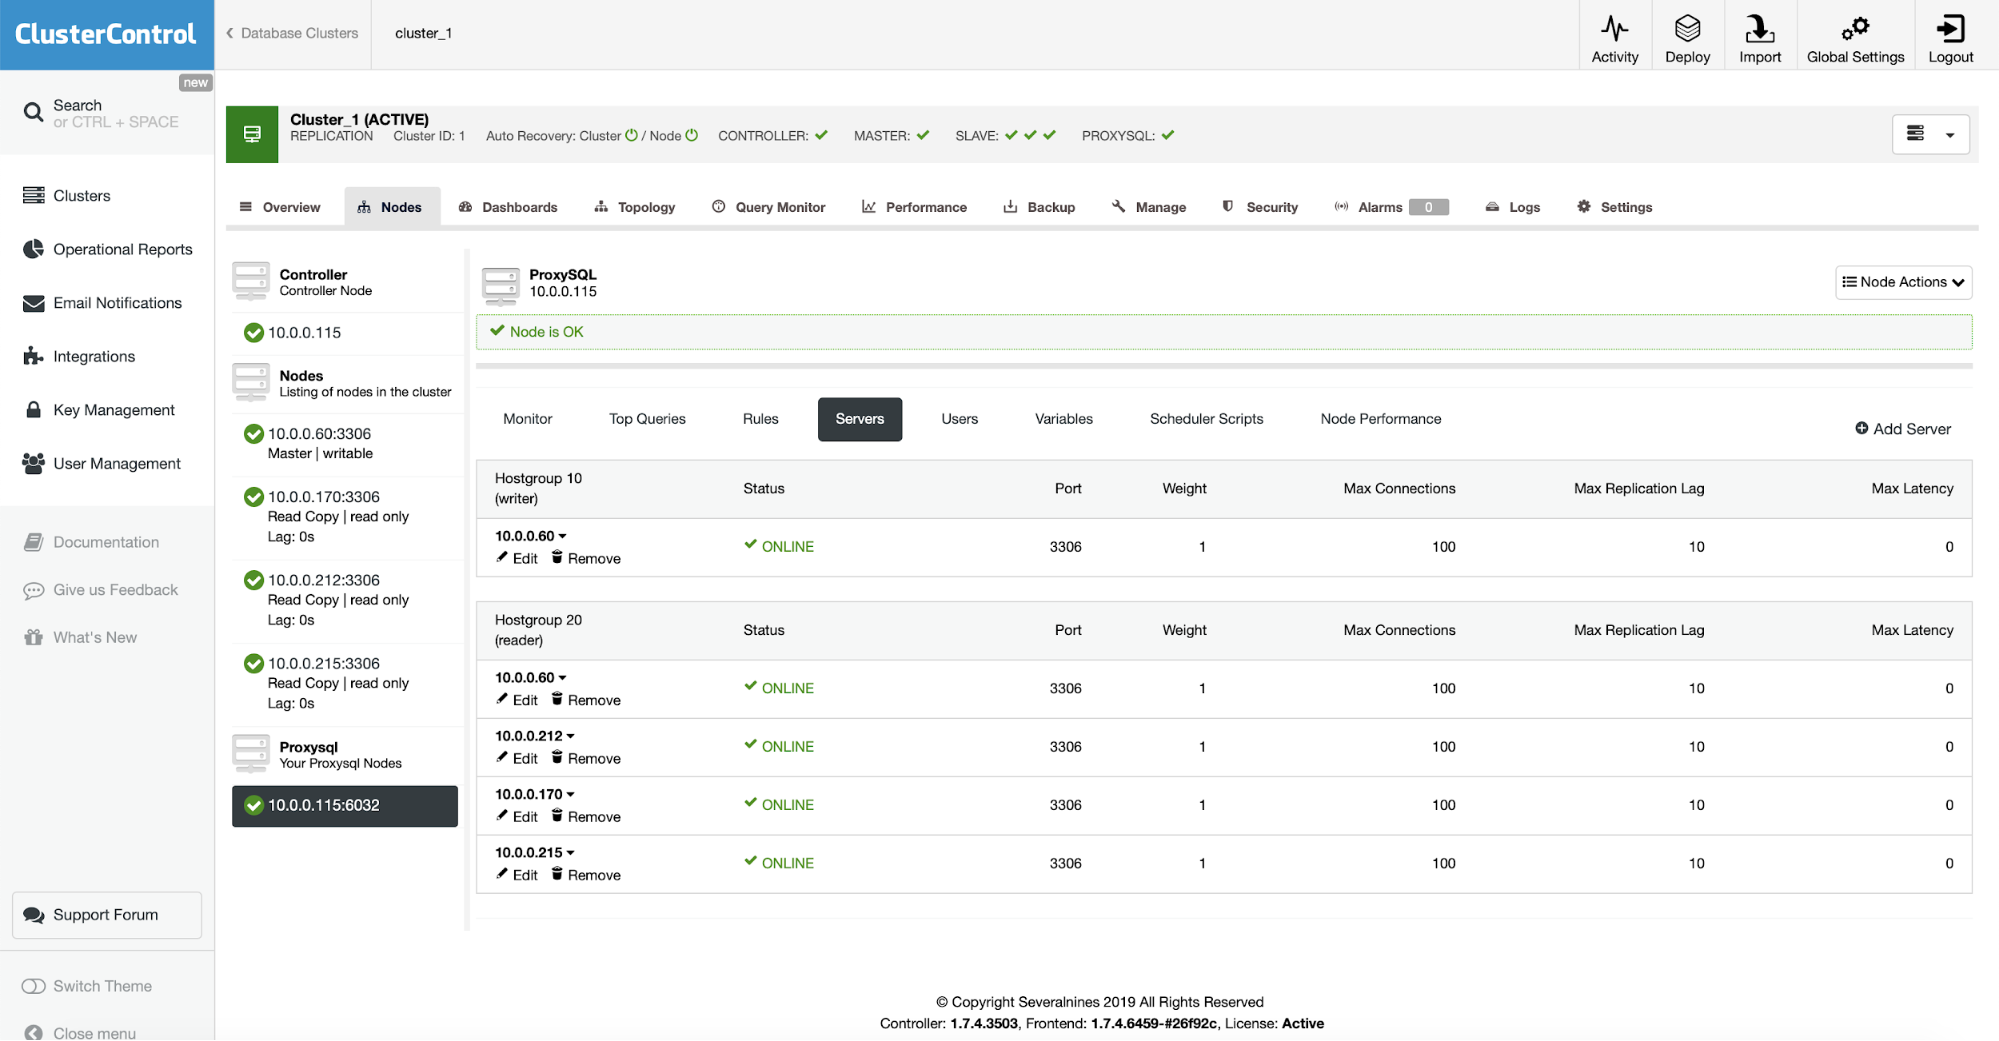
When the installation is completed, ProxySQL will show up on the list of nodes in the cluster. As you can see on the screenshot above, it already detected the topology and distributed nodes across reader and writer hostgroups.
Installing Sysbench
The final step will be to create our “application” by installing Sysbench. The process is fairly simple. At first we have to install prerequisites, libraries and tools required to compile Sysbench:
root@ip-10-0-0-115:~# apt install git automake libtool make libssl-dev pkg-config libmysqlclient-devThen we want to clone the sysbench repository:
root@ip-10-0-0-115:~# git clone https://github.com/akopytov/sysbench.gitFinally we want to compile and install Sysbench:
root@ip-10-0-0-115:~# cd sysbench/

root@ip-10-0-0-115:~/sysbench# ./autogen.sh && ./configure && make && make install
This is it, Sysbench has been installed. We now need to generate some data. For that, at first, we need to create a schema. We will connect to local ProxySQL and through it we will create a ‘sbtest’ schema on the master. Please note we used Unix socket for connection with ProxySQL.
root@ip-10-0-0-115:~/sysbench# mysql -S /tmp/proxysql.sock -u sbtest -psbtest

mysql> CREATE DATABASE sbtest;

Query OK, 1 row affected (0.01 sec)
Now we can use sysbench to populate the database with data. Again, we do use Unix socket for connection with the proxy:
root@ip-10-0-0-115:~# sysbench /root/sysbench/src/lua/oltp_read_write.lua --threads=4 --events=0 --time=3600 --mysql-socket=/tmp/proxysql.sock --mysql-user=sbtest --mysql-password=sbtest --tables=32 --report-interval=1 --skip-trx=on --table-size=100000 --db-ps-mode=disable prepareOnce the data is ready, we can proceed to our tests.
Conclusion
In the second part of this blog, we will discuss ProxySQL’s handling of connections, failover and its settings that can help us to manage the master switch in a way that will be the least intrusive to the application.