blog
Implementing a Multi-Datacenter Setup for PostgreSQL – Part Two

This blog is the second part of Implementing a Multi-Datacenter Setup for PostgreSQL. In this blow, we will show how to deploy PostgreSQL in this type of environment and how to failover in the case of master failure using the ClusterControl auto-recovery feature.
At this point, we will assume you have connectivity between the data centers (as we saw in the first part of this blog) and you have the necessary servers for this task (as we also mentioned in the previous part).
Deploy a PostgreSQL Cluster
We’ll use ClusterControl for this task, so we will assume you have it installed (it could be installed on the same Load Balancer server, but if you can use a different one even better).
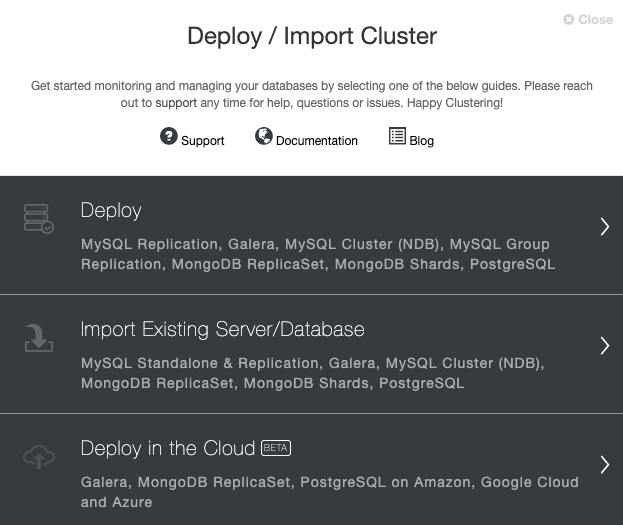
Go to your ClusterControl server, and select the option ‘Deploy’. If you already have a PostgreSQL instance running, then you need to select the ‘Import Existing Server/Database’ instead.
When selecting PostgreSQL, you must specify User, Key or Password and port to connect by SSH to our PostgreSQL hosts. You also need the name for your new cluster and if you want ClusterControl to install the corresponding software and configurations for you.
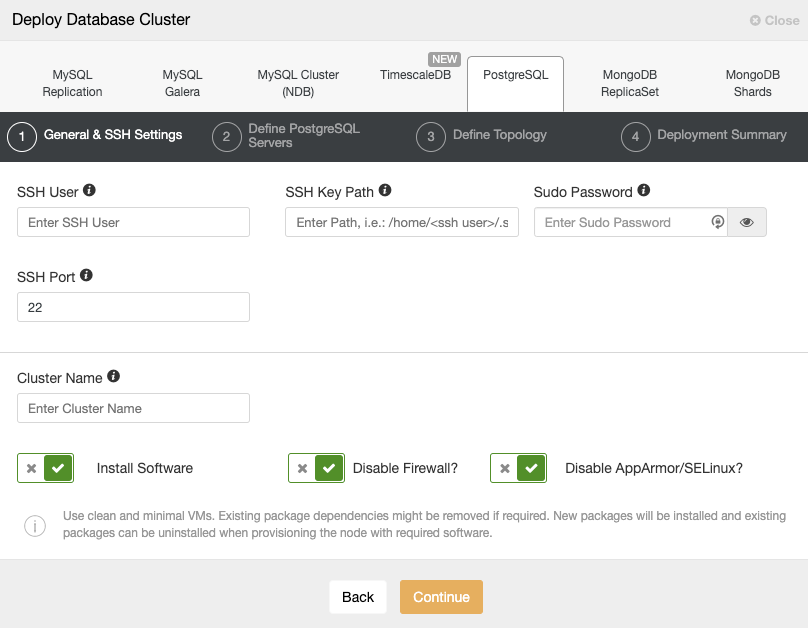
Please check the ClusterControl user requirements for this task here, but if you followed the previous blog, you should use the ‘remote’ user here and the correct SSH port (as we mentioned, is recommended to use a different one if you are using the public IP address to access it instead of a VPN).
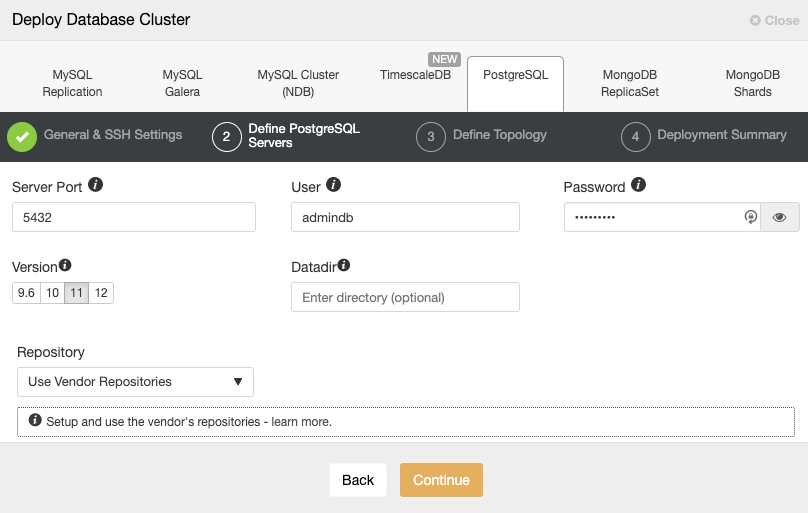
After setting up the SSH access information, you must define the database user, version and datadir (optional). You can also specify which repository to use. In the next step, you need to add your servers to the cluster you are going to create.
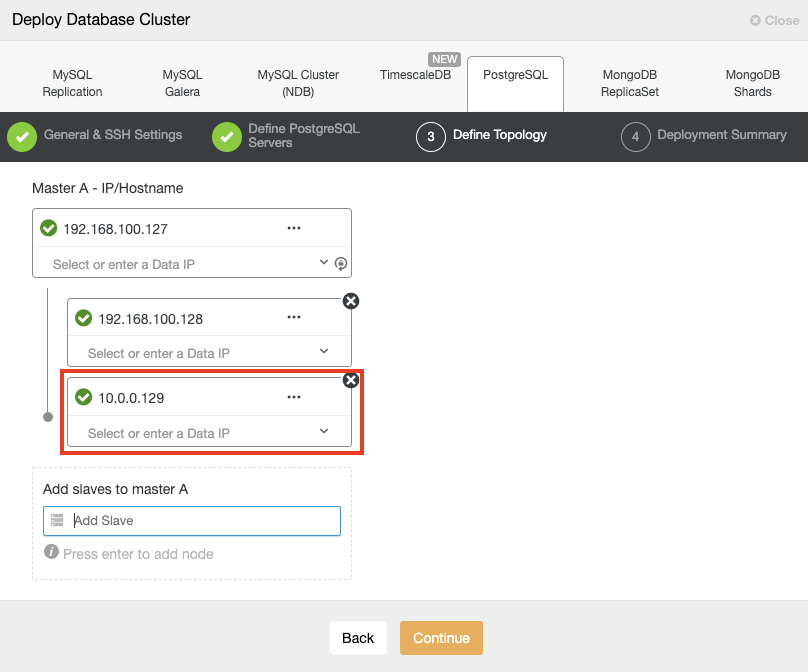
When adding your servers, you can enter IP or hostname. In this part, you will use the public IP addresses of your servers, and as you can see in the red box, I’m using a different network for the second standby node. ClusterControl doesn’t have any limitations about the network to be used. The only requirement about this is to have SSH access to the node.
So following our previous example, these IP address should be:
Primary Node: 35.166.37.12

Standby 1 Node: 35.166.37.13

Standby 2 Node: 18.197.23.14 (red box)
In the last step, you can choose if your replication will be Synchronous or Asynchronous.

In this case, it is important to use Asynchronous replication for your remote node, if not, your cluster could be affected by the latency or network issues.
You can monitor the status of the creation of your new cluster from the ClusterControl activity monitor.
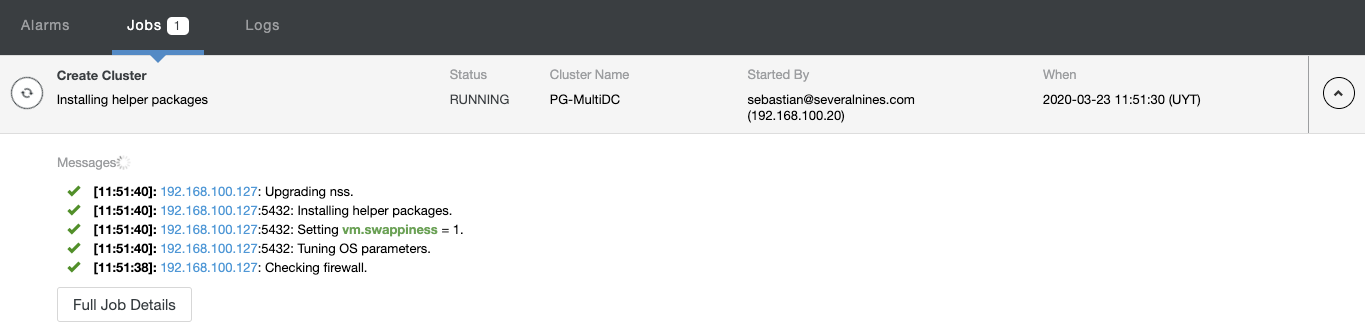
Once the task is finished, you can see your new PostgreSQL cluster in the main ClusterControl screen.

Adding a PostgreSQL Load Balancer (HAProxy)
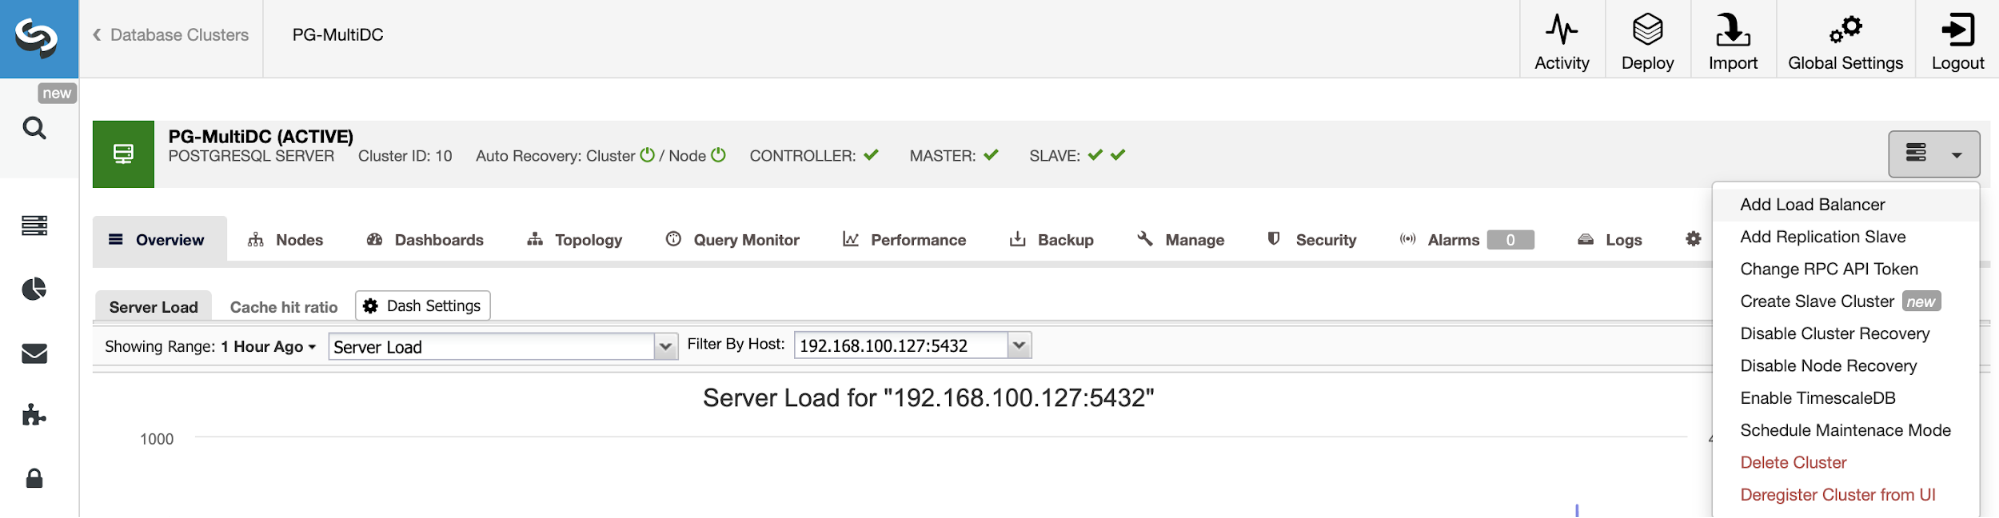
Once you have your cluster created, you can perform several tasks on it, like adding a load balancer (HAProxy) or a new replica.
To follow our previous example, let’s add a load balancer that, as we mentioned, it will help you to manage your HA environment. For this, go to ClusterControl -> Select PostgreSQL Cluster -> Cluster Actions -> Add Load Balancer.
Here you must add the information that ClusterControl will use to install and configure your HAProxy load balancer. This Load Balancer can be installed in the same ClusterControl server, but if you can use a different one, even better.
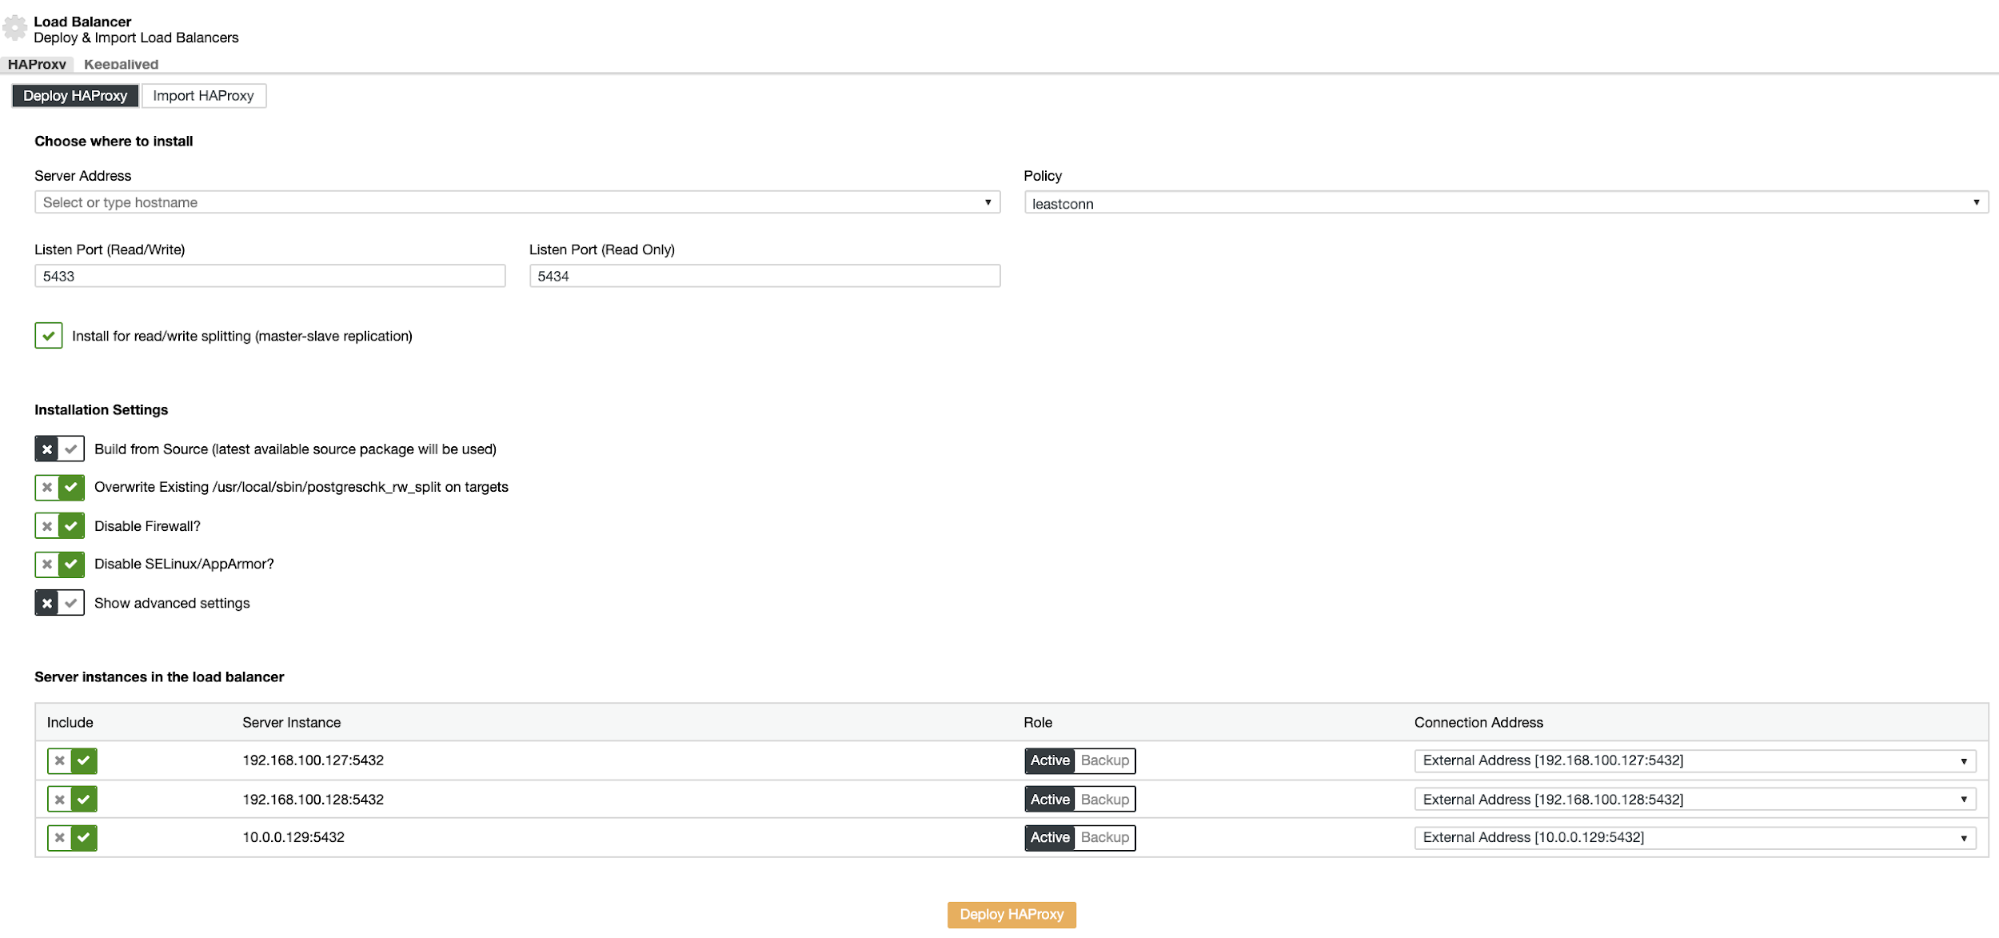
The information that you need to introduce is:
Action: Deploy or Import.
Server Address: IP Address for your HAProxy server (It can be the same ClusterControl IP Address).
Listen Port (Read/Write): Port for read/write mode.
Listen Port (Read Only): Port for read only mode.
Policy: It can be:
- leastconn: The server with the lowest number of connections receives the connection.
- roundrobin: Each server is used in turns, according to their weights.
- source: The source IP address is hashed and divided by the total weight of the running servers to designate which server will receive the request.
Install for read/write splitting: For master-slave replication.
Build from Source: You can choose Install from a package manager or build from source.
And you need to select which servers you want to add to the HAProxy configuration.
Also, you can configure Advanced Settings like Admin User, Backend Name, Timeouts, and more.
When you finish the configuration and confirm the deploy, you can follow the progress in the Activity section on ClusterControl UI.
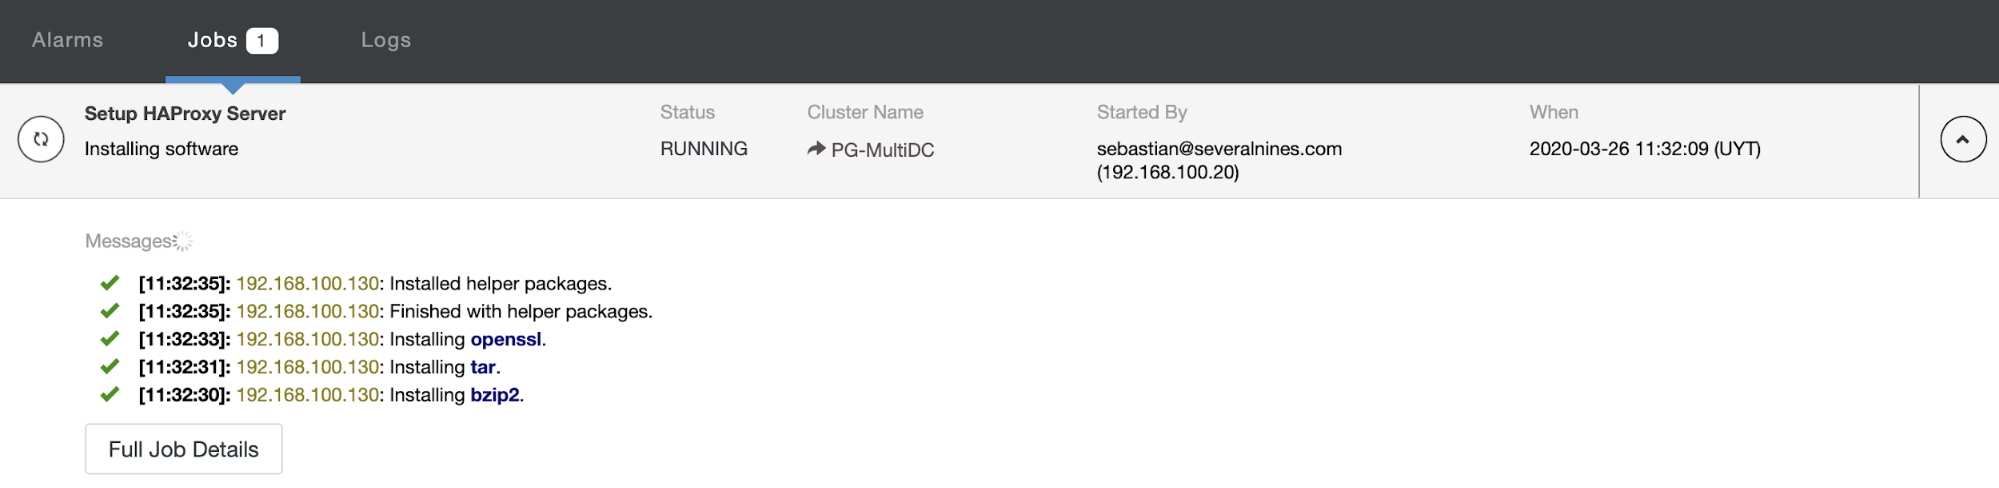
And when this finishes, you can go to ClusterControl -> Nodes -> HAProxy node, and check the current status.
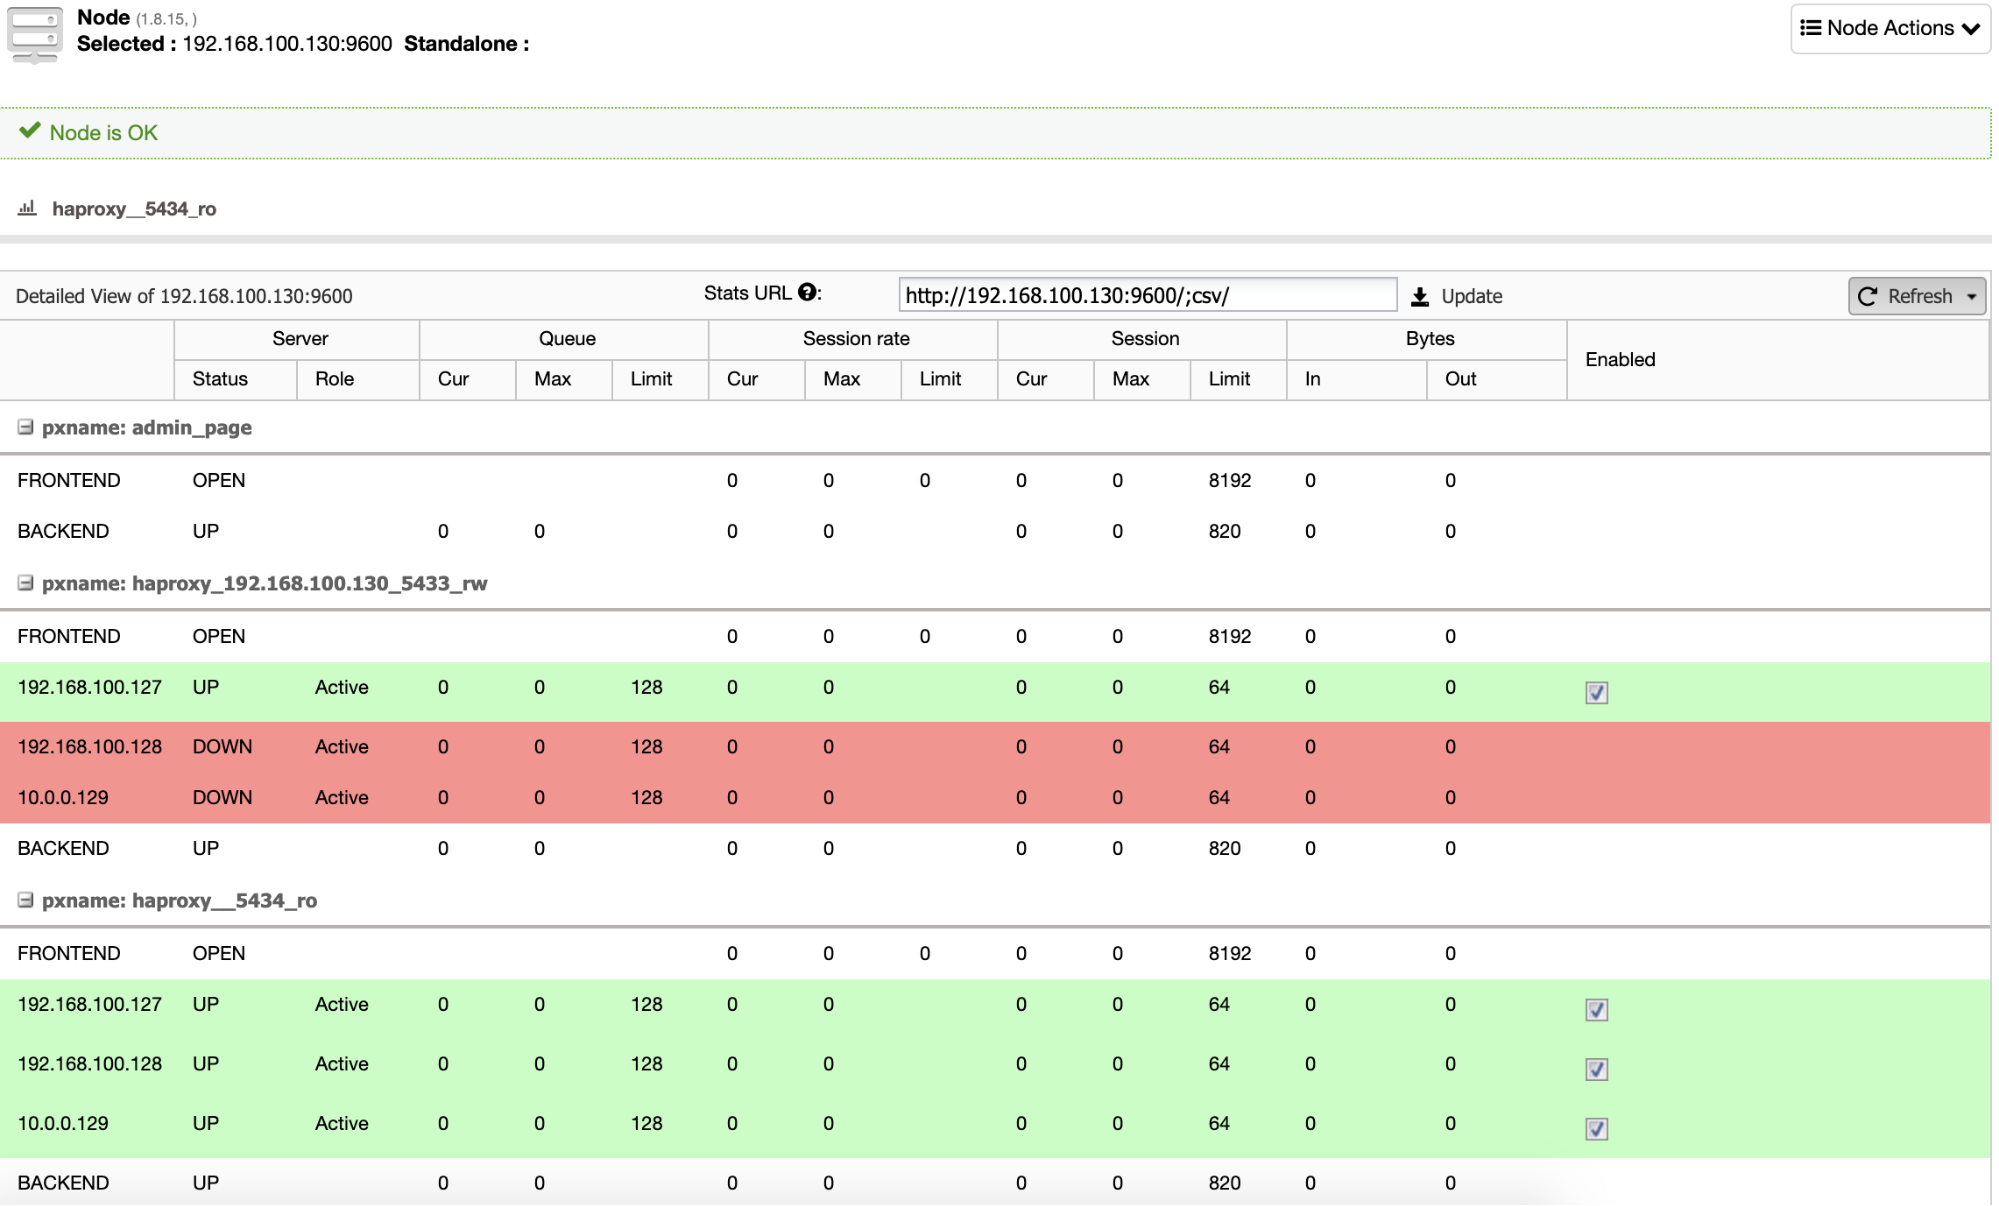
By default, ClusterControl configures HAProxy with two different ports, one for Read-Write, that will be used for the application or user to write (and read) data, and another one for Read-Only, that will be used for balancing the read traffic between all the nodes. In the Read-Write port, only the master node is enabled, and in case of master failure, ClusterControl will promote the most advanced slave to master and will reconfigure this port to disable the old master and enable the new one. In this way, your application can still work in case of a master database failure, as the traffic is redirected by the Load Balancer to the correct node.
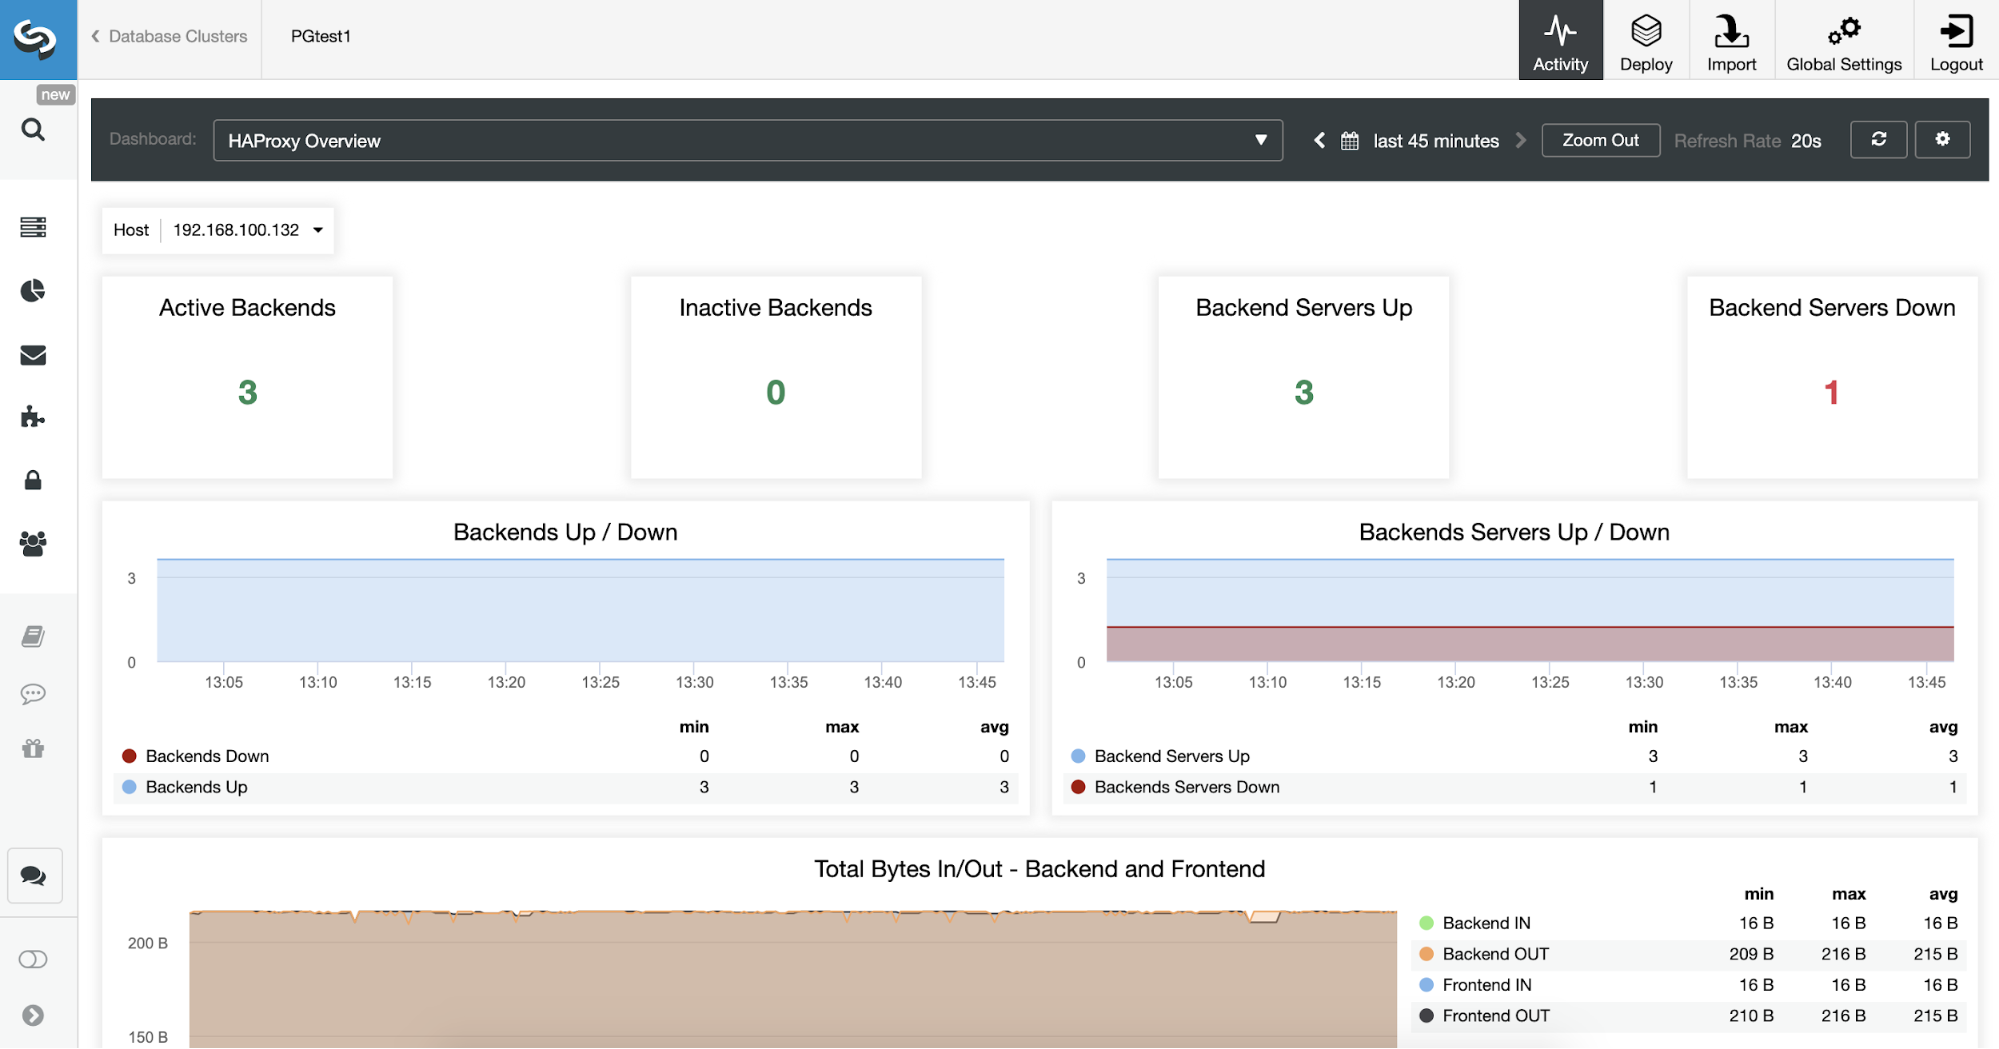
You can also monitor your HAProxy servers checking the Dashboard section.
Now, you can improve your HA design adding a new HAProxy node in the remote datacenter and configuring Keepalived service between them. Keepalived will allow you to use a virtual IP address that is assigned to the active Load Balancer node. If this node fails, this virtual IP will be migrated to the secondary HAProxy node, so having this IP configured in your application will allow you to keep everything working in case of a Load Balancer issue.
All this configuration can be performed using ClusterControl.
Conclusion
By following this two-part blog you can implement a multi-datacenter setup for PostgreSQL with High Availability and SSH connectivity between the datacenter, to avoid the complexity of a VPN configuration.
Using asynchronous replication for the remote node you will avoid any issue related to the latency and network performance, and using ClusterControl you will have automatic (or manual) failover in case of failure (among other several features). This could be the simplest way to reach this topology and we hope this would be useful for you.


