blog
Manage and Monitor Your Existing MySQL NDB Cluster

Of the different types of clustered MySQL environments, NDB Cluster is among the ones that involves most effort and resources to administer. And unless you are a command line guru, you would want to use a management tool that gives you a full view of what is going on in your cluster and administers it for you.
At Severalnines, that tool or system is ClusterControl, which you can use to easily deploy, monitor and manage your (existing) MySQL Cluster (NDB).
In this blog post, we are going to show you how to add two existing MySQL Clusters (production and staging) to ClusterControl in order to more easily and efficiently manage them.
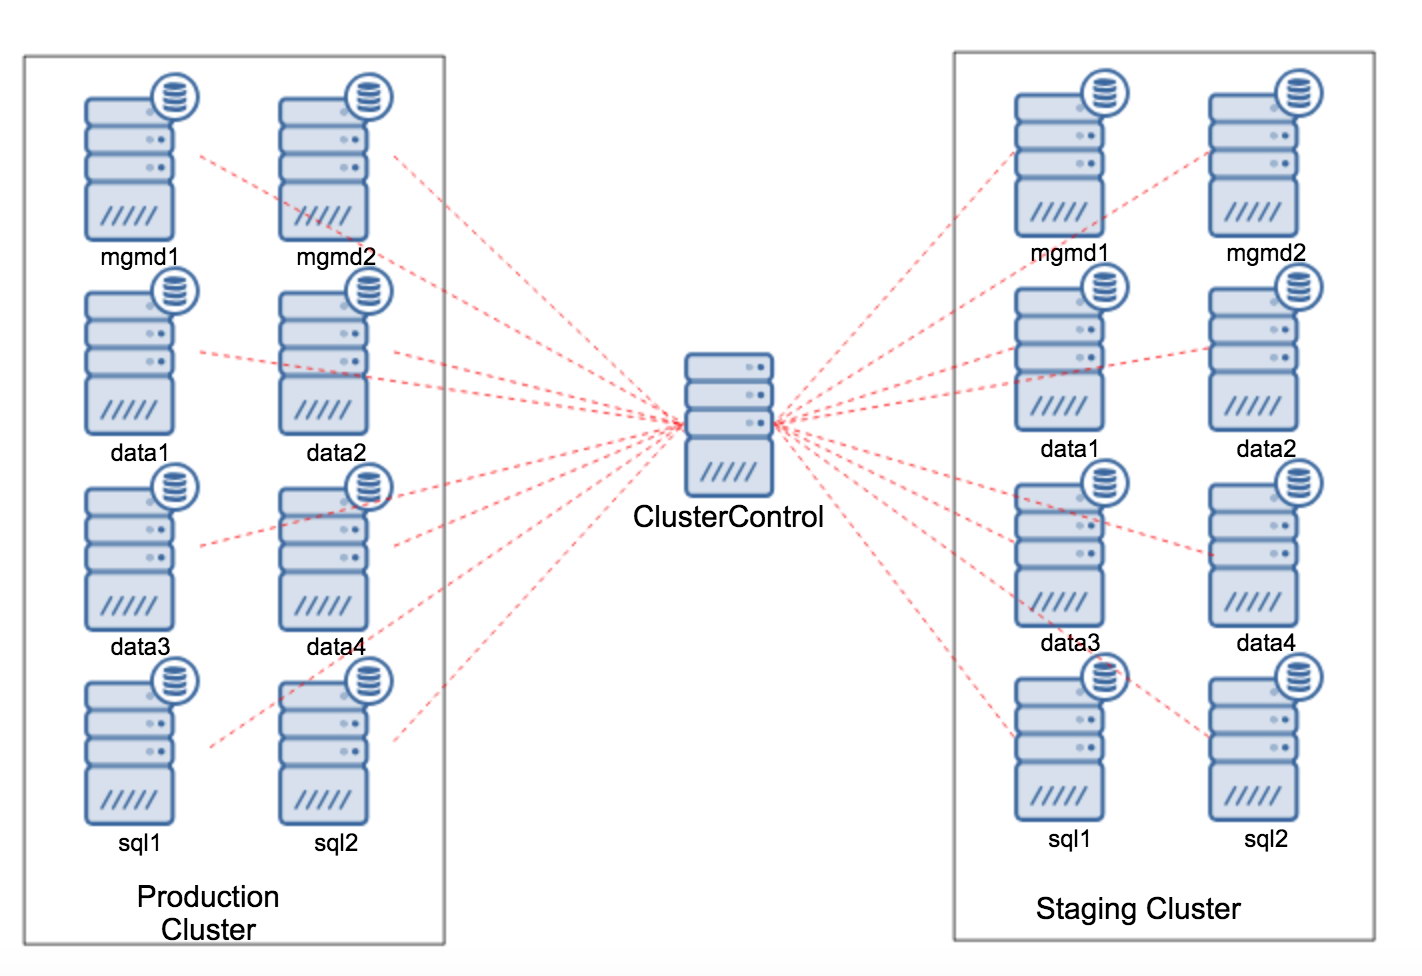
ClusterControl: 10.0.0.100
Cluster #1:
- Management node: mgmd1 – 10.0.0.141
- Management node: mgmd2 – 10.0.0.142
- Data node: data1 – 10.0.0.143
- Data node: data2 – 10.0.0.144
- Data node: data3 – 10.0.0.145
- Data node: data4 – 10.0.0.146
- SQL node: sql1 – 10.0.0.147
- SQL node: sql2 – 10.0.0.148
Cluster #2:
- Management node: mgmd1 – 10.0.1.141
- Management node: mgmd2 – 10.0.1.142
- Data node: data1 – 10.0.1.143
- Data node: data2 – 10.0.1.144
- Data node: data3 – 10.0.1.145
- Data node: data4 – 10.0.1.146
- SQL node: sql1 – 10.0.1.147
- SQL node: sql2 – 10.0.1.148
Adding the First Cluster
Based on the above architecture diagram, here is what you should do to add the first cluster to ClusterControl:
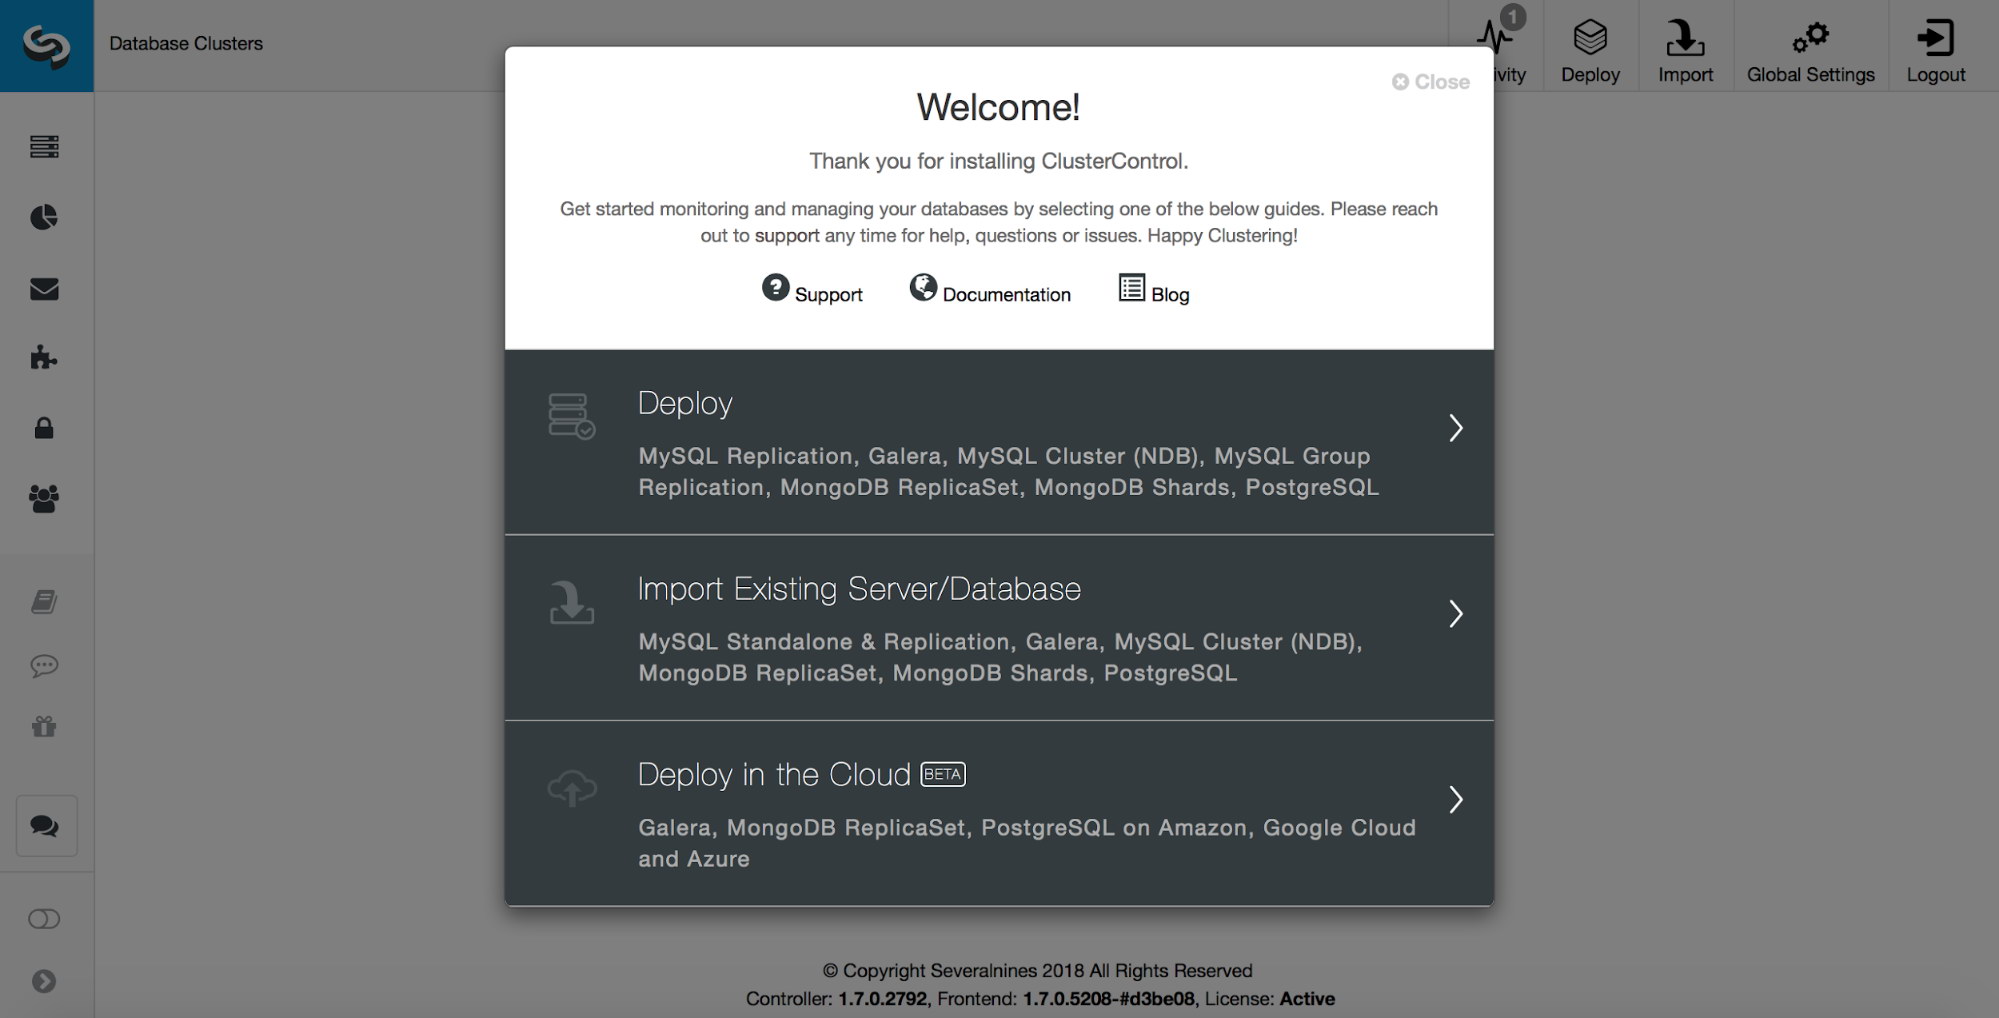
1. Install the latest ClusterControl. Once done, register the default admin user/password and log into the ClusterControl dashboard:
2. As root or sudo user, setup passwordless SSH to all nodes (including the ClusterControl node):
$ whoami
root
$ ssh-keygen -t rsa
$ ssh-copy-id 10.0.0.141
$ ssh-copy-id 10.0.0.142
$ ssh-copy-id 10.0.0.143
$ ssh-copy-id 10.0.0.144
$ ssh-copy-id 10.0.0.145
$ ssh-copy-id 10.0.0.146
$ ssh-copy-id 10.0.0.147
$ ssh-copy-id 10.0.0.148
Also ensure that the controller can connect to the management servers (ndb_mgmd) on port 1186, and on port 3306 (or the port used by the MySQL servers).
Adding the Cluster
Once the SSH access is configured, you can use the “Import Existing Server/Database” option in ClusterControl to import your first cluster.
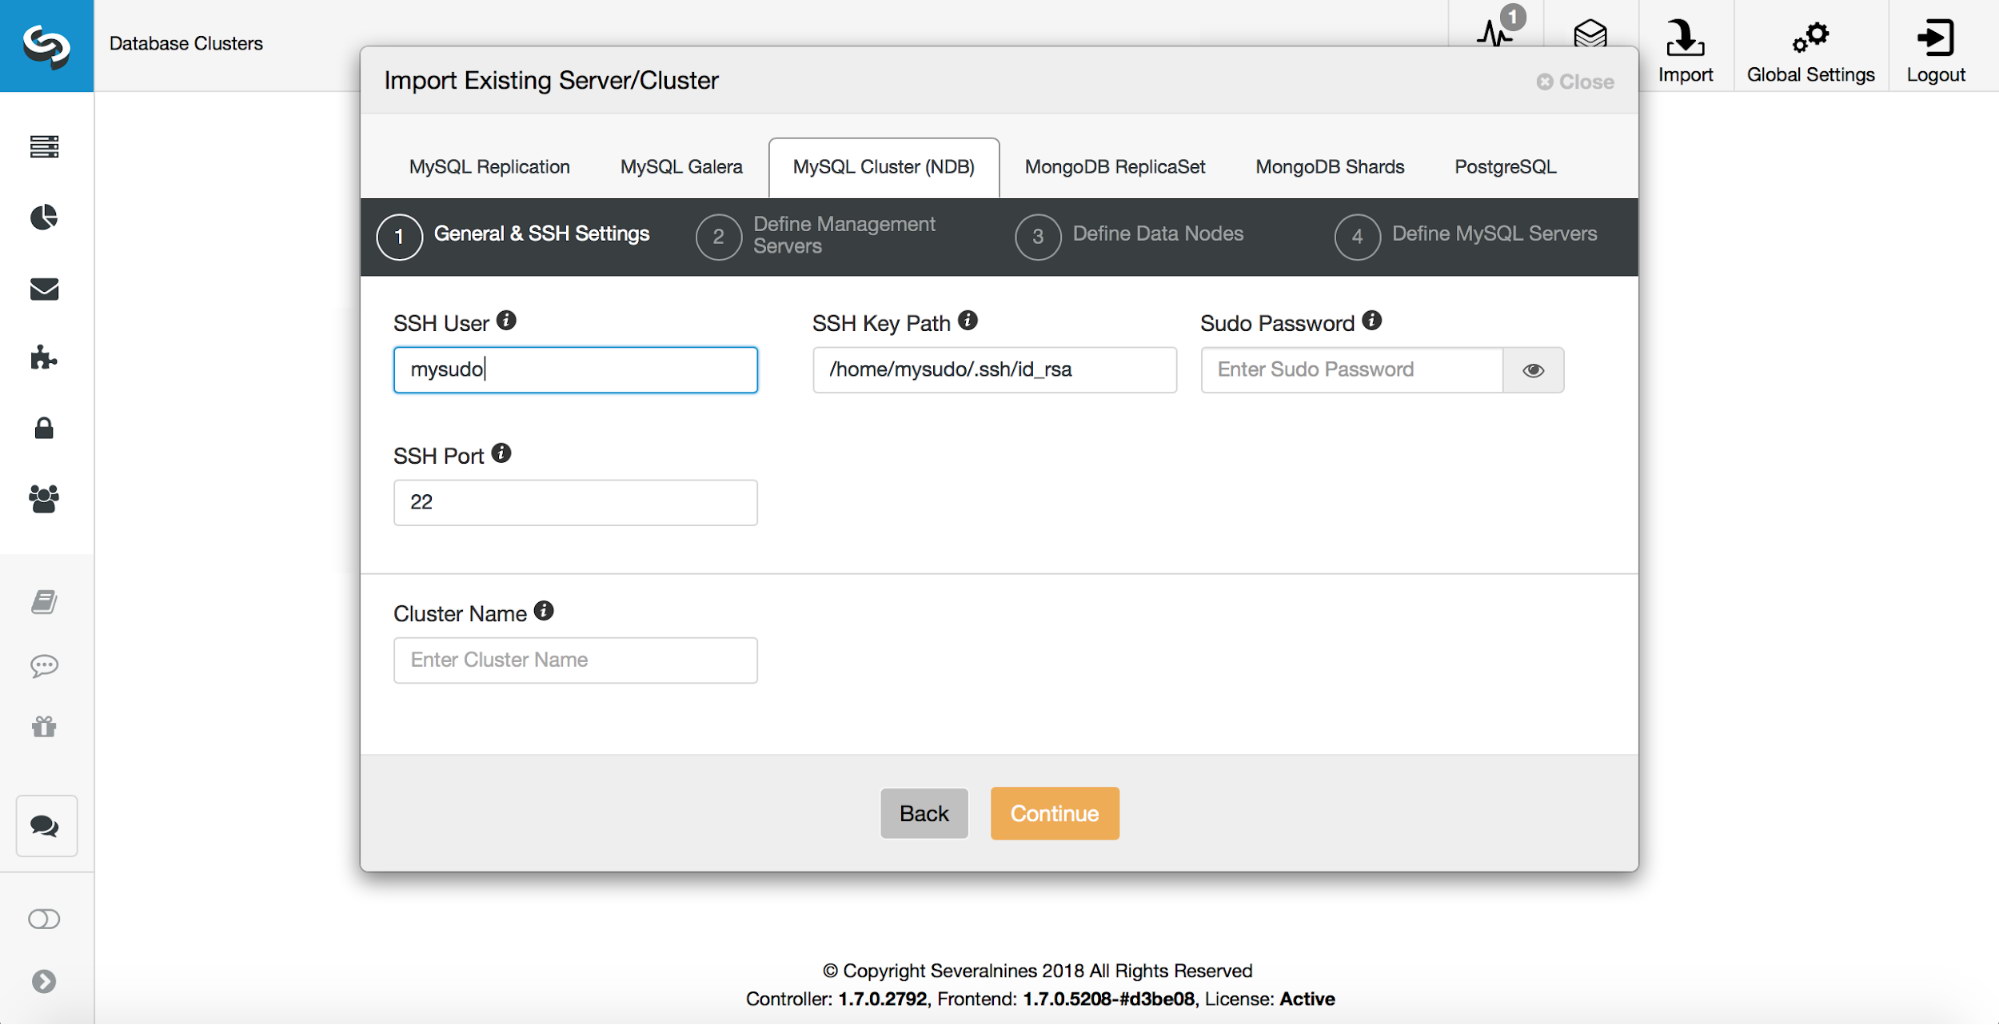
Make sure you pick MySQL Cluster (NDB) from the list. Then, you need to define how the SSH access should look like. ClusterControl supports password-less SSH using root or sudo user (with or without password).
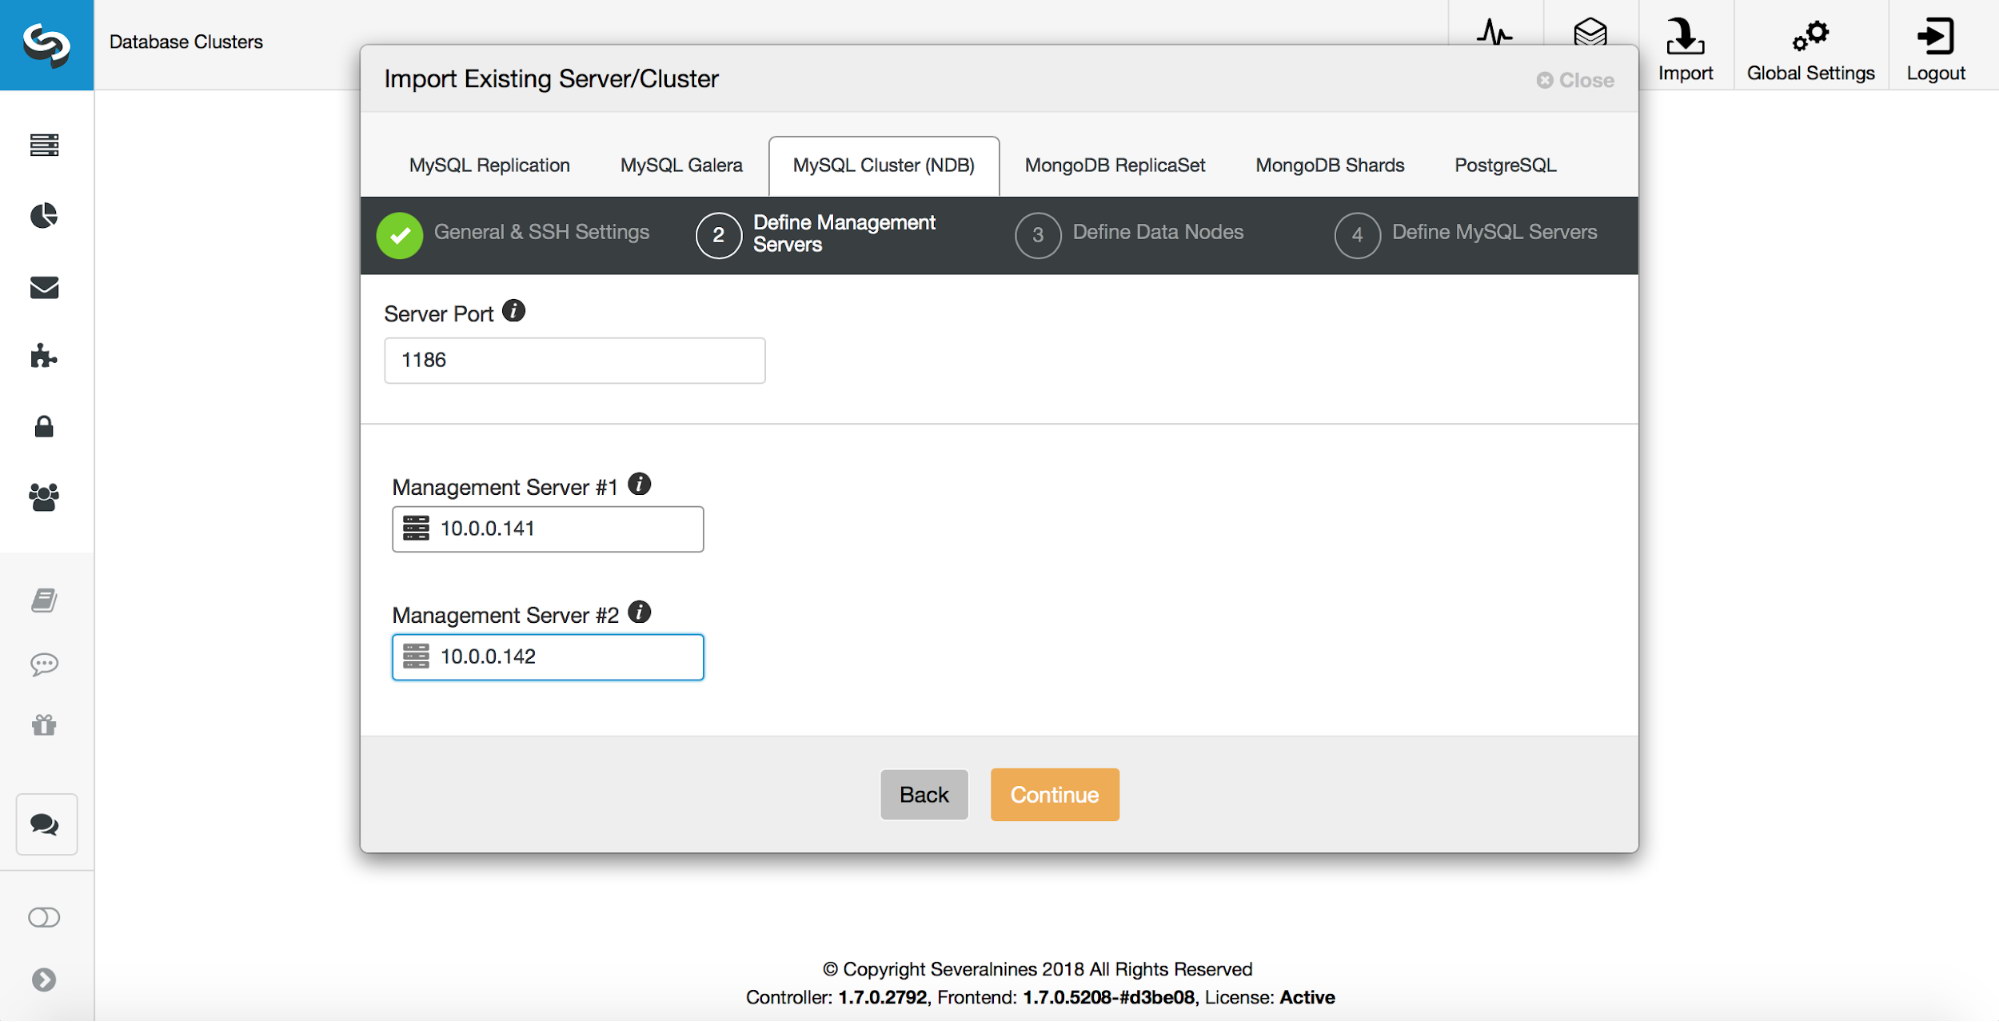
The rest is all about defining services. At first, you have to provide IPs or hostnames of management servers. Make sure that the port is correct and it is reachable.
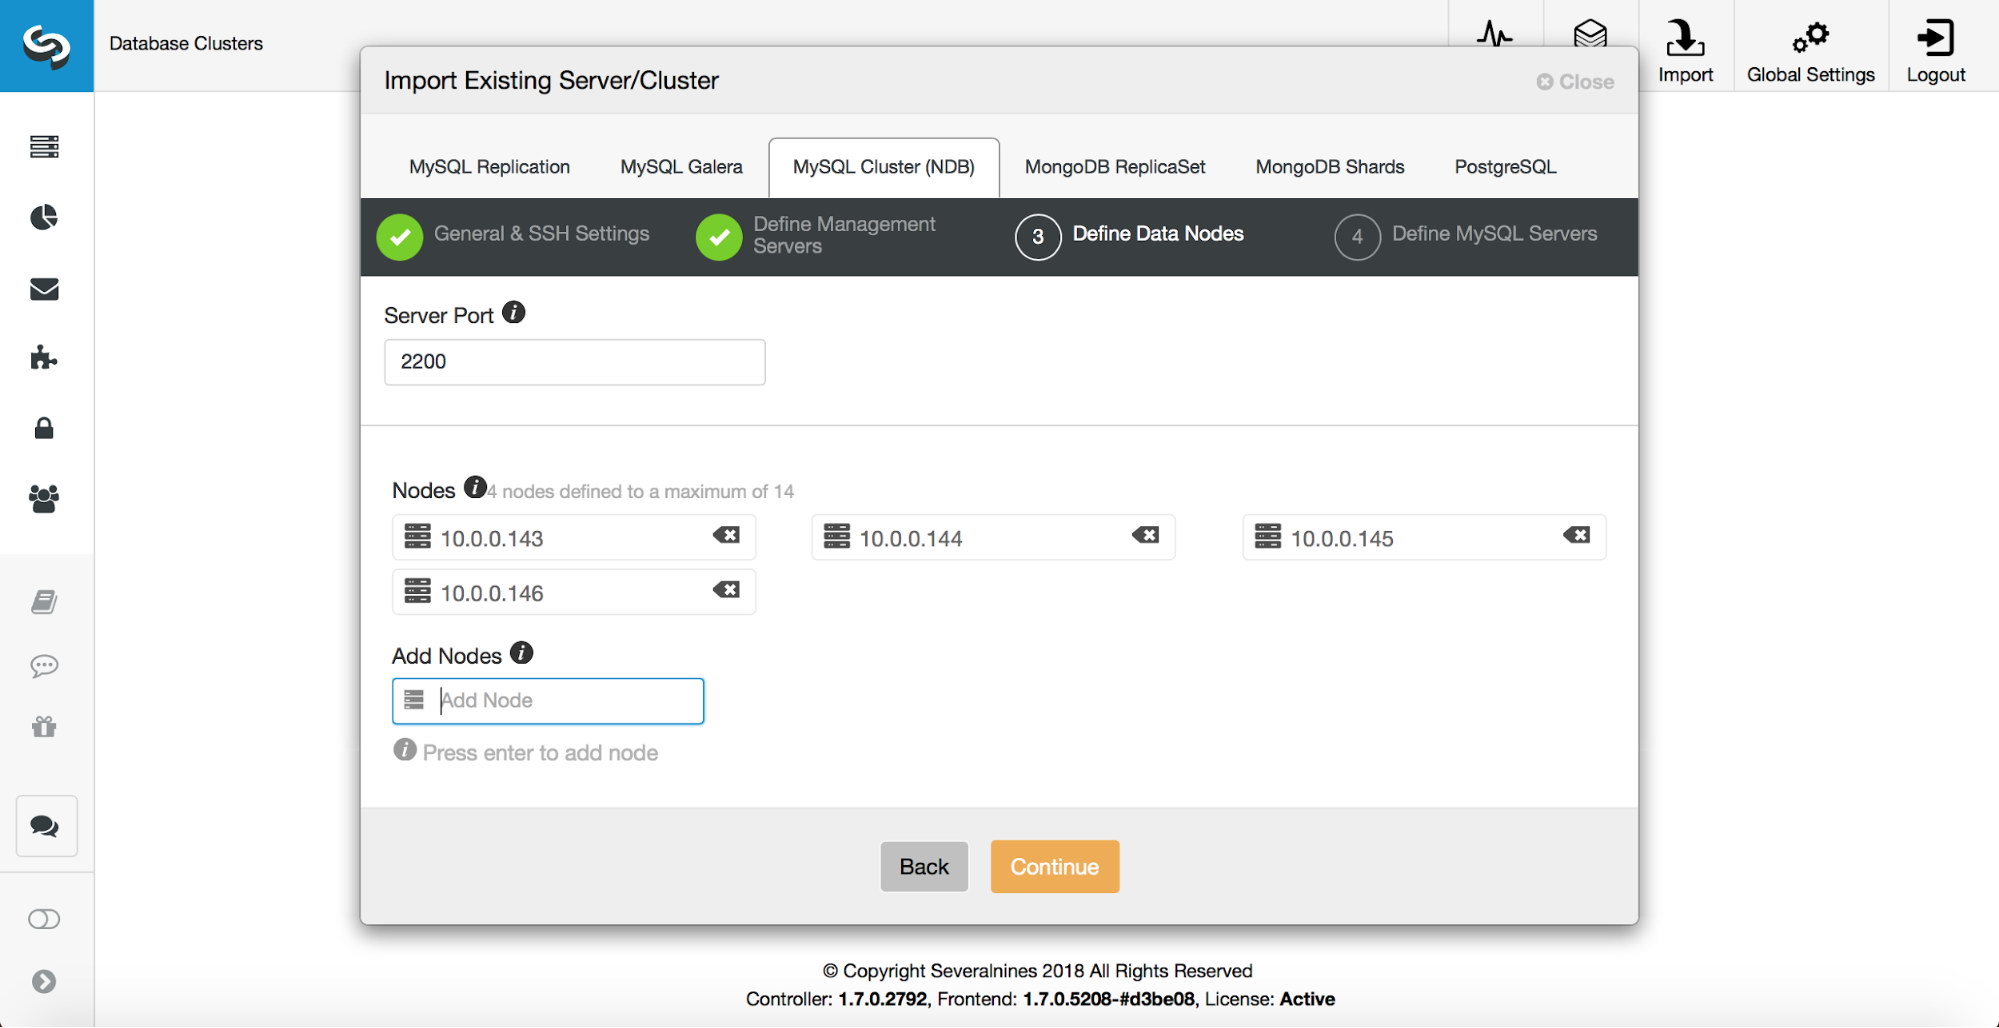
As a next step you have to define data nodes. Again, make sure the port is ok and reachable. You can also use either IP or a hostname here.
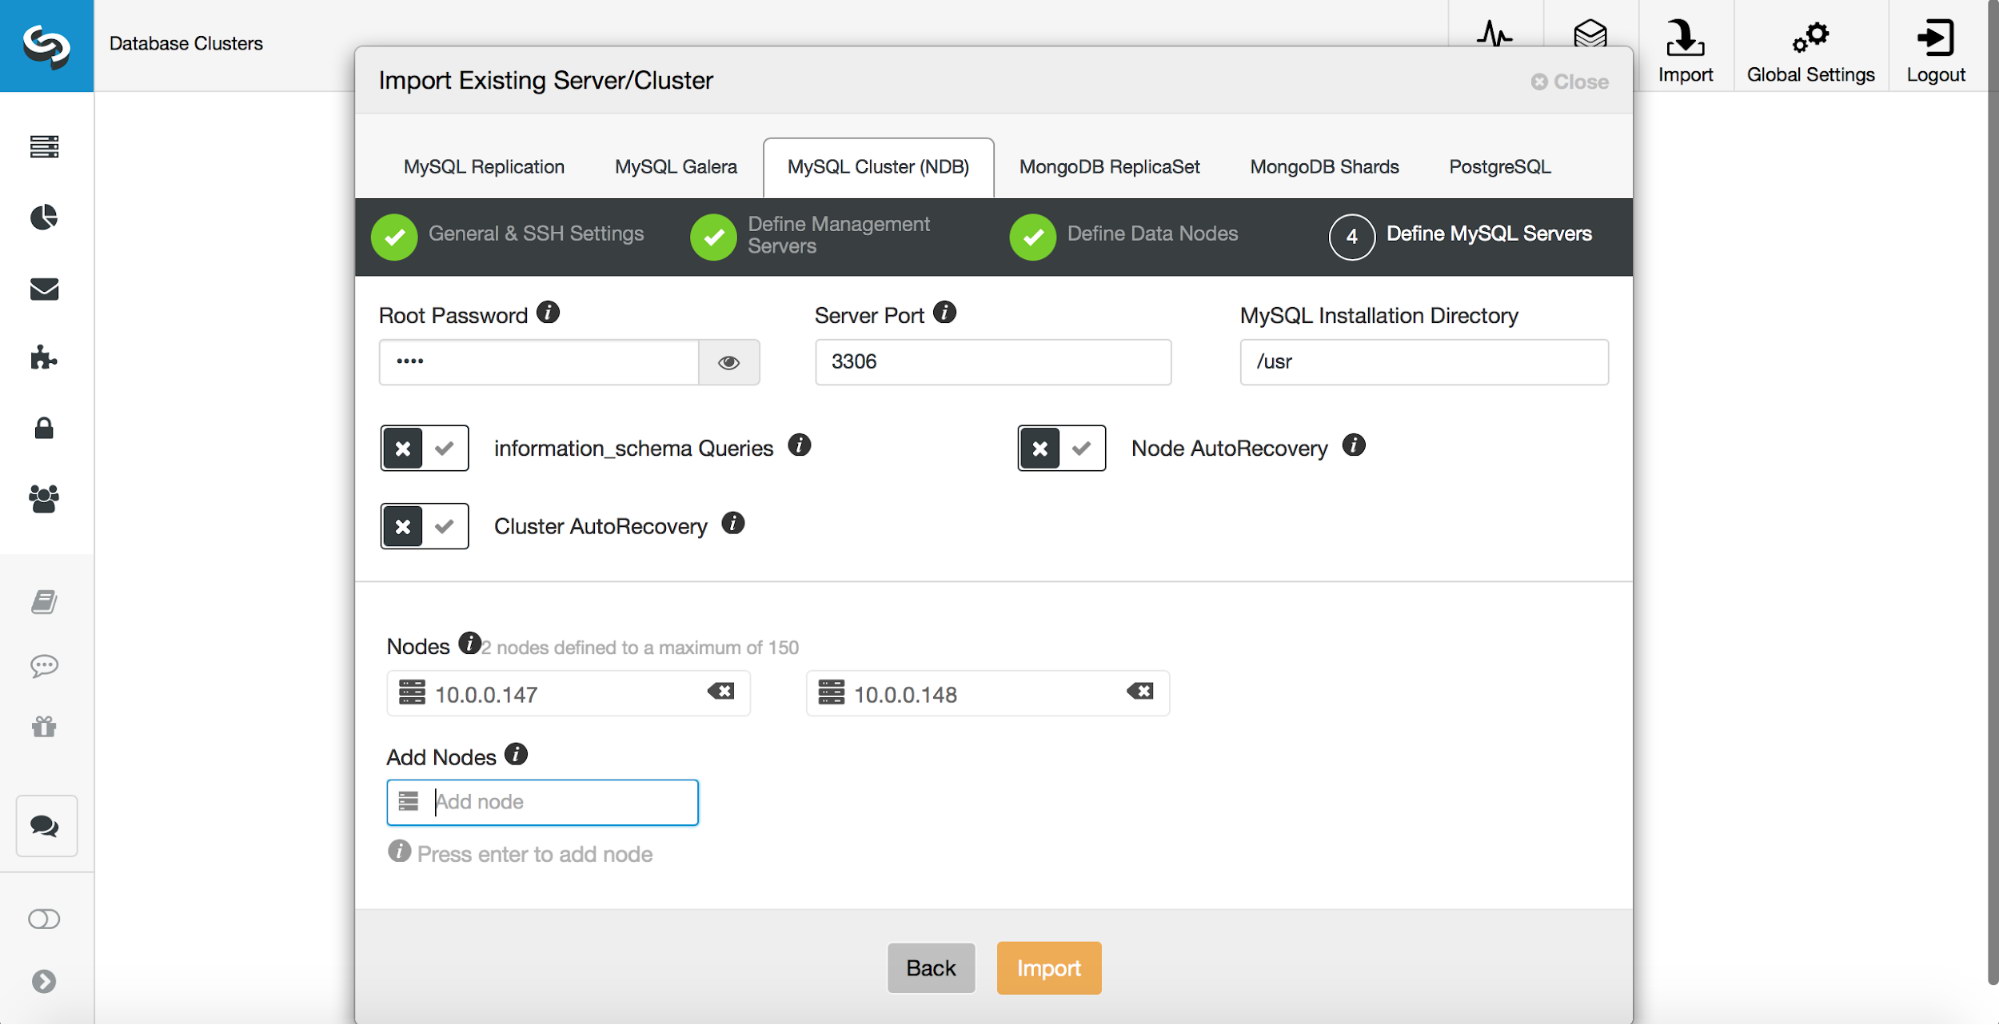
Finally, you need to pass information about SQL nodes. On top of the port and IP/hostname you have to pass root password to MySQL and MySQL installation directory.
You also have a couple of options to decide upon.
You can either enable or disable queries to the information_schema. We found that in some cases (setups with tens of thousands of tables) such queries may cause issues. You can also enable cluster and node autorecovery or keep it disabled and enable it at the later time.
Keeping auto recovery disabled may make sense especially if you already have some scripts in place and you don’t want ClusterControl to take over the recovery from the beginning. You can always transition to ClusterControl later after you prepare and test a maintenance plan for that.
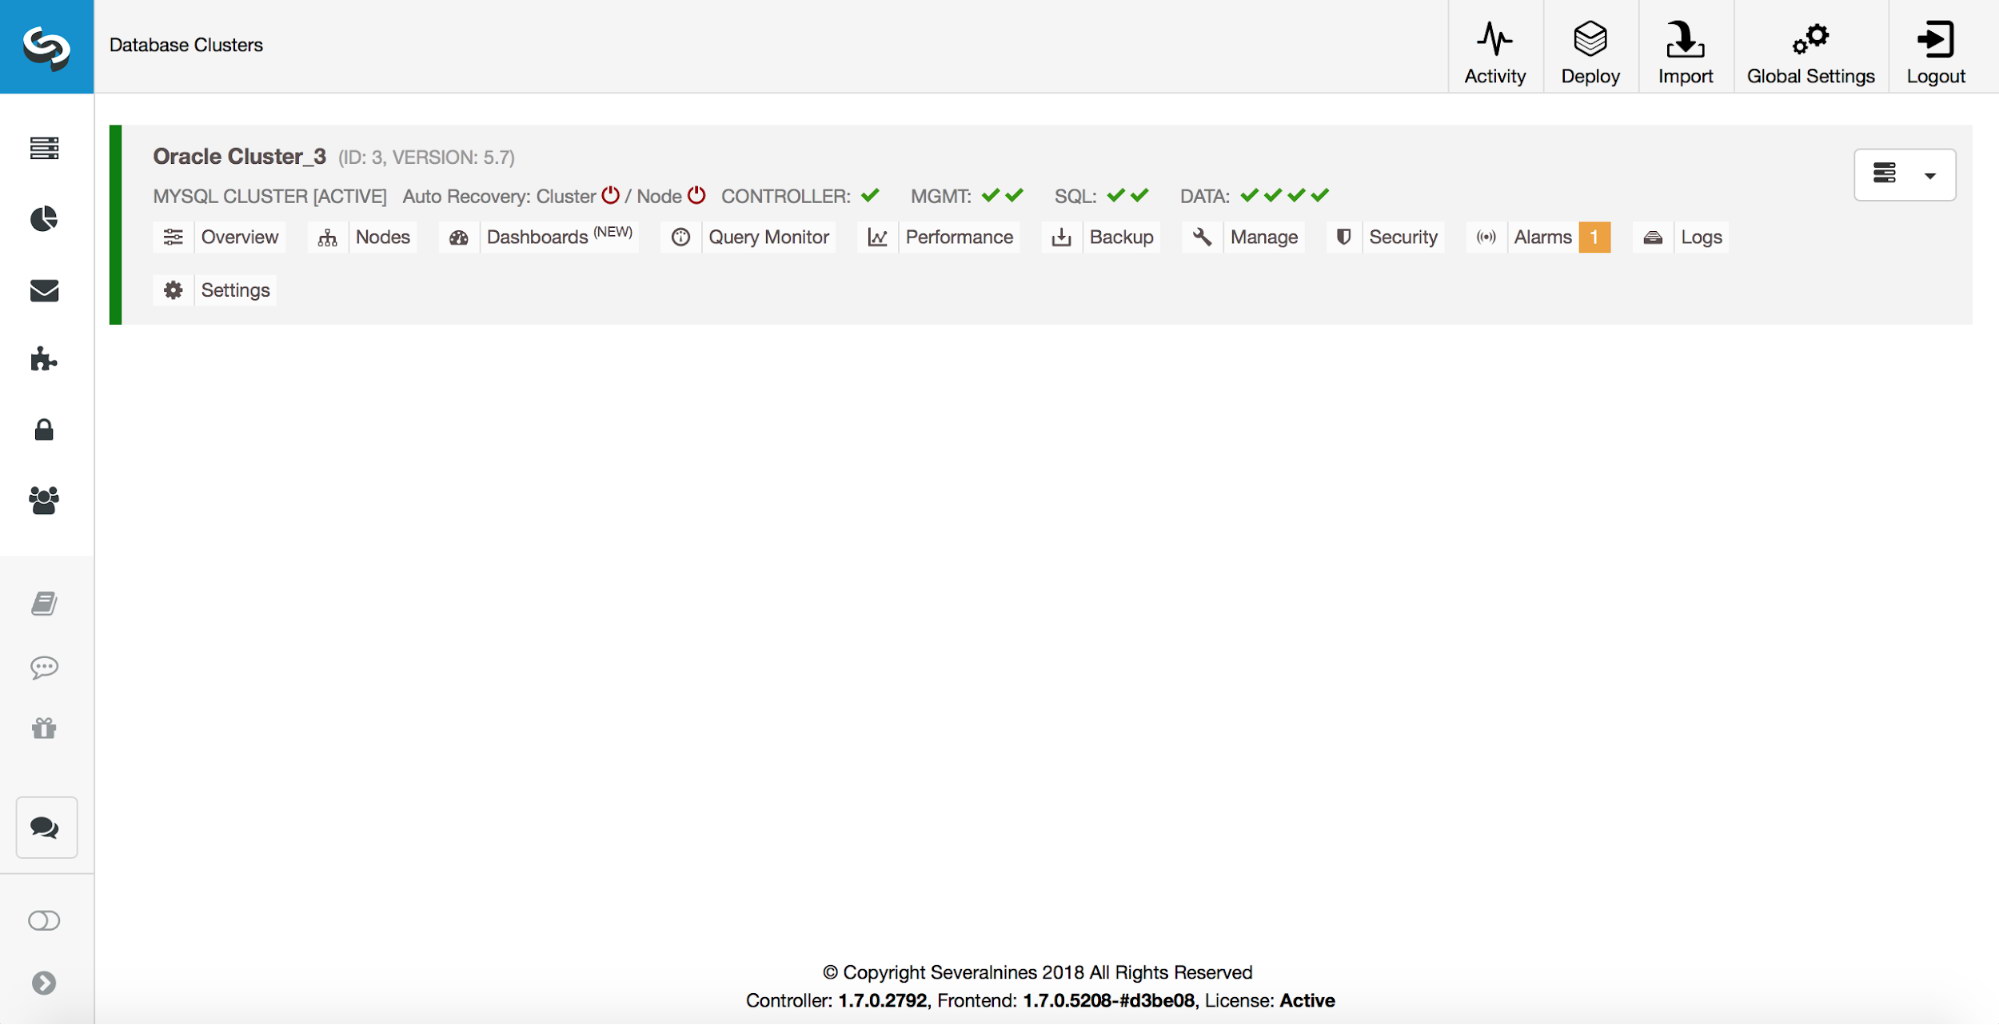
When you click on “Import”, ClusterControl will attempt to import your NDB Cluster. It may take a moment and, as long as all the connectivity is working just fine, it should complete successfully and a new cluster should show up in the UI. Now you can repeat exactly the same process for the second, staging cluster.
You can now manage, monitor and scale your MySQL Clusters from the ClusterControl system.
Happy clustering!