blog
How to configure SELinux for MySQL-based systems (MySQL/MariaDB Replication + Galera)

In the era that we are living in now, anything with a less secure environment is easily a target for an attack and becomes a bounty for the attackers. Compared to the past 20 years, hackers nowadays are more advanced not only with the skills but also with the tools that they are using. It’s no surprise why some giant companies are being hacked and their valuable data is leaked.
In the year 2021 alone, there are already more than 10 incidents related to data breaches. The most recent incident was reported by BOSE, a well-known audio maker that occurred in May. BOSE discovered that some of its current and former employees’ personal information was accessed by the attackers. The personal information exposed in the attack includes names, Social Security Numbers, compensation information, and other HR-related information.
What do you think is the purpose of this kind of attack and what motivates the hacker to do so? It’s obviously all about the money. Since stolen data is also frequently sold, by attacking big companies hackers can earn money. Not only the important data can be sold to the competitors of the business, but the hackers can also ask for a huge ransom at the same time.
So how could we relate this to databases? Since the database is one of the big assets for the company, it is recommended to take care of it with enhanced security so that our valuable data is protected most of the time. In my last blog post, we already went through some introduction about SELinux, how to enable it, what type of mode SELinux has and how to configure it for MongoDB. Today, we will take a look into how to configure SELinux for MySQL based systems.
Top 5 Benefits of SELinux
Before going further, perhaps some of you are wondering if SELinux provides any positive benefits given it’s a bit of a hassle to enable it. Here are the top 5 SELinux benefits that you don’t want to miss and should consider:
-
Enforcing data confidentiality and integrity at the same time protecting processes
-
The ability to confine services and daemons to be more predictable
-
Reducing the risk of privilege escalation attacks
-
The policy enforced systems-wide, not set at user discretion and administratively-define
-
Providing a fine-grained access control
Before we start configuring the SELinux for our MySQL instances, why not go through how to enable SELinux with ClusterControl for all MySQL based deployments. Even though the step is the same for all database management systems, we think it is a good idea to include some screenshots for your reference.
Steps To Enable SELinux for MySQL Replication
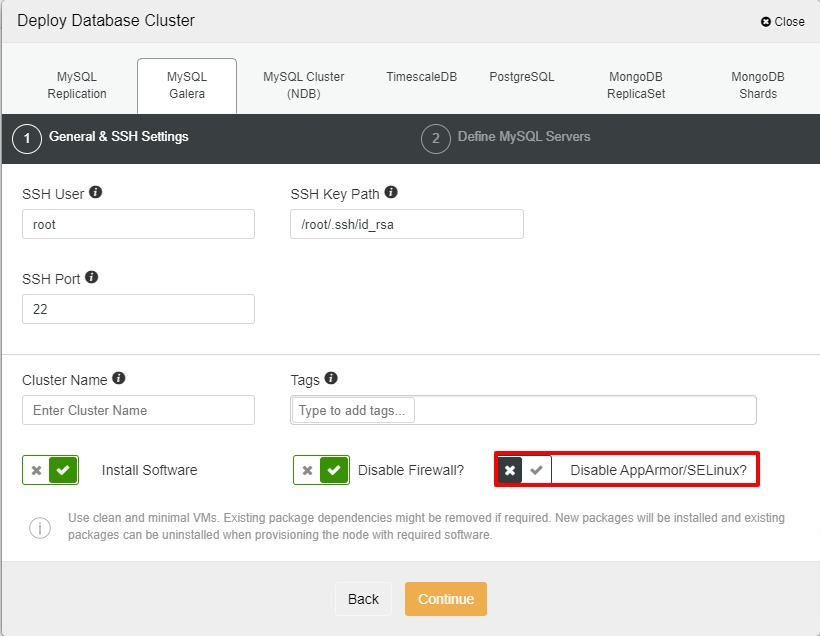
In this section, we are going to deploy MySQL Replication with ClusterControl 1.8.2. The steps are the same for MariaDB, Galera Cluster or MySQL: assuming all nodes are ready and passwordless SSH is configured, let’s start the deployment. To enable SELinux for our setup, we need to untick “Disable AppArmor/SELinux” which means SELinux will be set as “permissive” for all nodes.
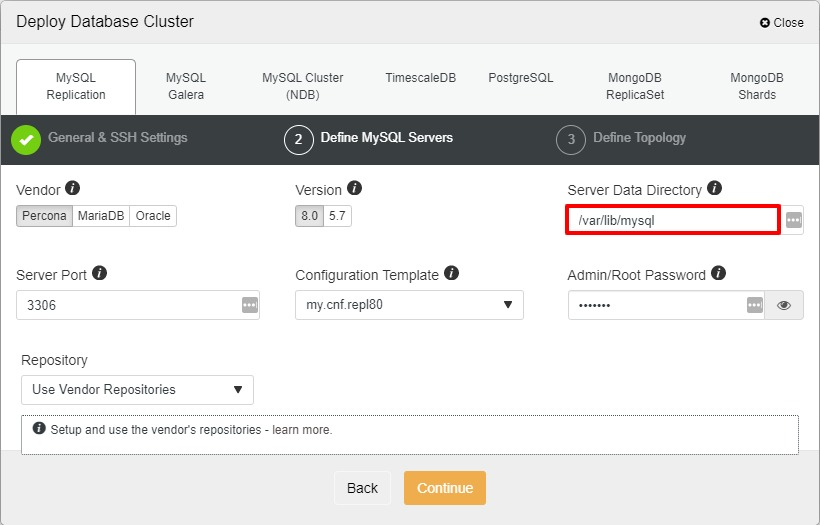
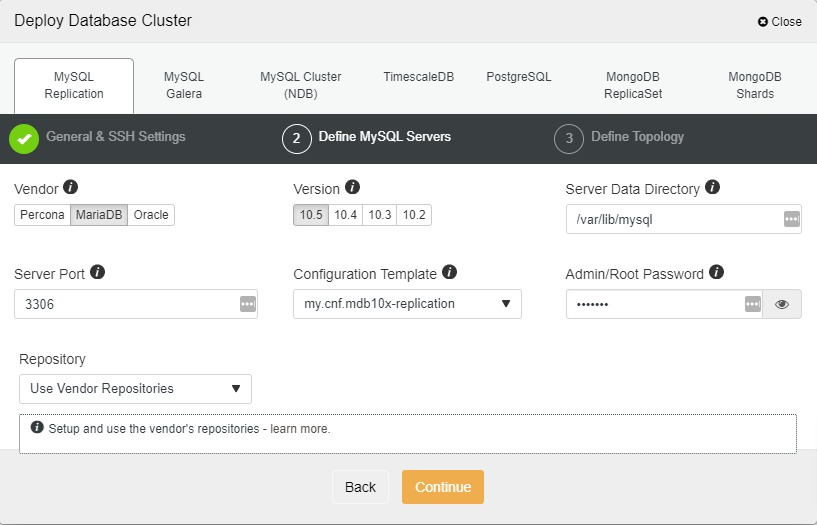
Next, we will choose Percona as a vendor (you can also choose MariaDB, Oracle or MySQL 8 as well), then specify the “root” password. You may use a default location or your other directories depending on your setup.
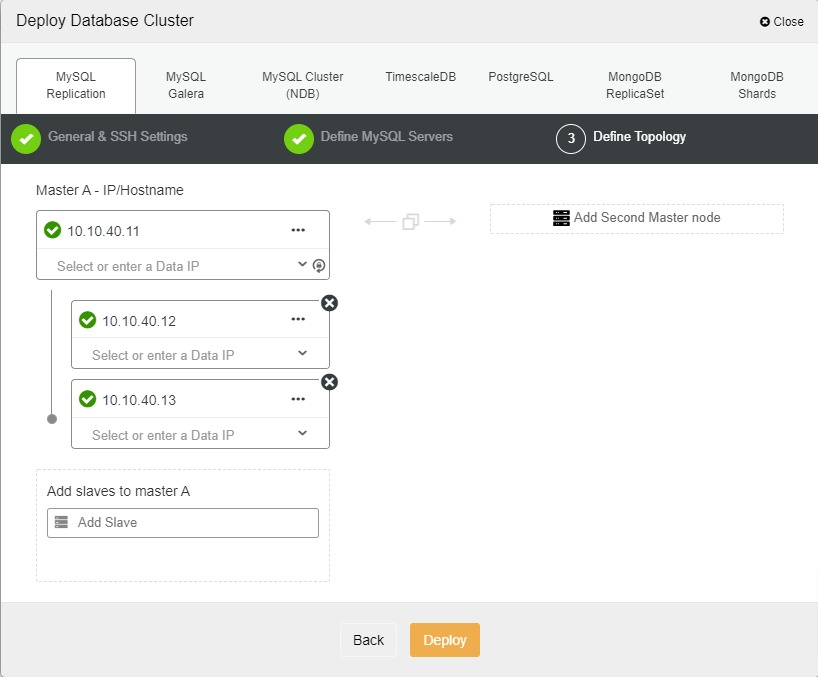
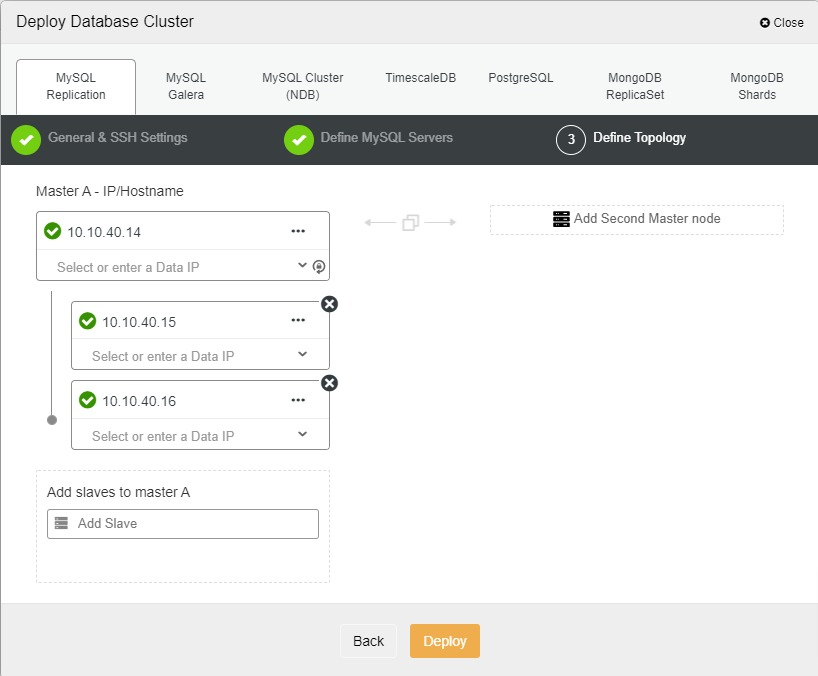
Once all hosts have been added, we can start the deployment and let it finish before we can begin with the SELinux configuration.
Steps To Enable SELinux for MariaDB Replication
In this section, we are going to deploy MariaDB Replication with ClusterControl 1.8.2.
We will choose MariaDB as a vendor and version 10.5 as well as specify the “root” password. You may use a default location or your other directories depending on your setup.
Once all hosts have been added, we can start the deployment and let it finish before we can proceed with the SELinux configuration.
Steps To Enable SELinux for Galera Cluster
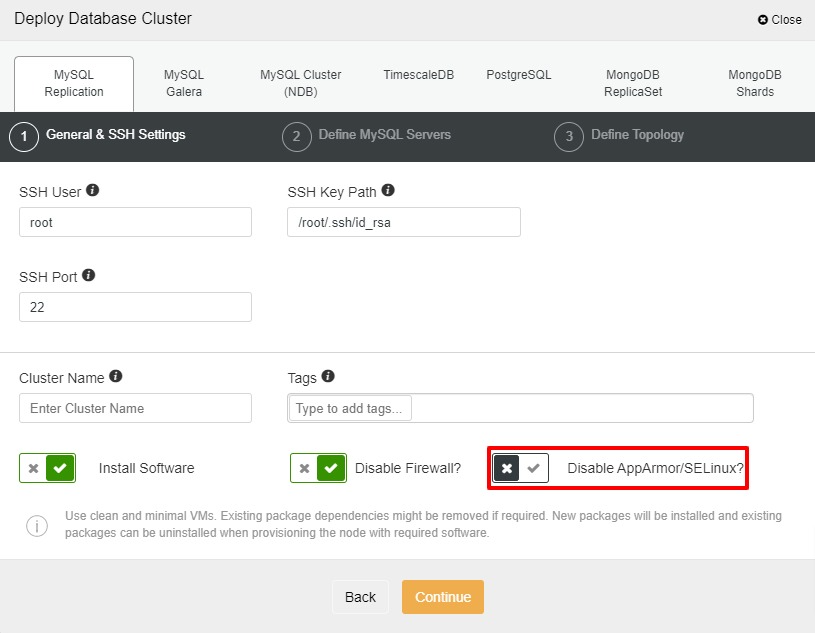
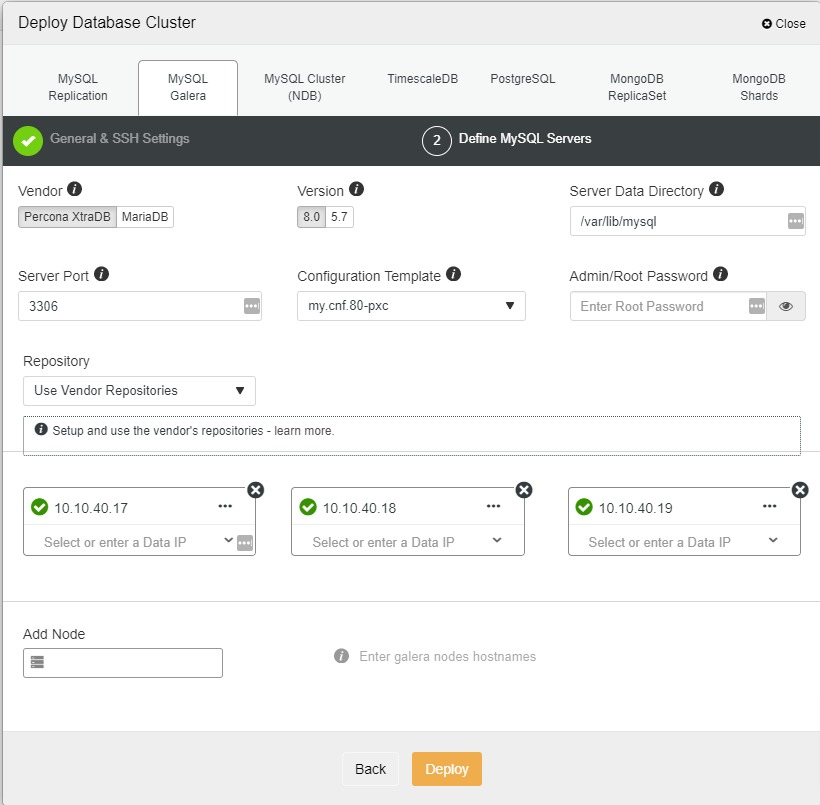
In this section, we are going to deploy Galera Cluster with ClusterControl 1.8.2. Once again, untick “Disable AppArmor/SELinux” which means SELinux will be set as “permissive” for all nodes:
Next, we will choose Percona as a vendor and MySQL 8 as well as specify the “root” password. You may use a default location or your other directories depending on your setup. Once all hosts have been added, we can start the deployment and let it finish.
As usual, we can monitor the status of the deployment in the “Activity” section of the UI.
How To Configure SELinux For MySQL
Considering all our clusters are MySQL based, the steps to configure SELinux are also the same. Before we start with the setup and since this is a newly setup environment we suggest you disable auto recovery mode for both cluster and node as per the screenshot below. By doing this, we could avoid the cluster run into a failover while we are doing the testing or restart the service:

First, let’s see what is the context for “mysql”. Go ahead and run the following command to view the context:
$ ps -eZ | grep mysqld_tAnd the example of the output is as below:
system_u:system_r:mysqld_t:s0 845 ? 00:00:01 mysqldThe definition for the output above is:
-
system_u – User
-
system_r – Role
-
mysqld_t – Type
-
s0 845 – Sensitivity level
If you check the SELinux status, you can see the status is “permissive” which is not fully enabled yet. We need to change the mode to “enforcing” and in order to accomplish that we have to edit the SELinux configuration file to make it permanent.
$ vi /etc/selinux/config
SELINUX=enforcing
Proceed to reboot the system after the changes. As we are changing the mode from “permissive” to “enforcing”, we need to relabel the file system again. Typically, you can choose whether to relabel the entire file system or only for one application. The reason why relabel is required due to the fact that “enforcing” mode needs the correct label or function to run correctly. In some instance, those labels are changed during the “permissive” or “disabled” mode.
For this example, we will relabel only one application (MySQL) using the following command:
$ fixfiles -R mysqld restoreFor a system that has been used for quite some time, it is a good idea to relabel the entire file system. The following command will do the job without rebooting and this process might take a while depending on your system:
$ fixfiles -f -F relabelLike many other databases, MySQL also demands to read and write a lot of files. Without a correct SELinux context for those files, the access will be unquestionably denied. To configure the policy for SELinux, “semanage” is required. “semanage” also allows any configuration without a need of recompiling the policy sources. For the majority of Linux systems, this tool already installed by default. As for our case, it’s already installed with the following version:
$ rpm -qa |grep semanage
python3-libsemanage-2.9-3.el8.x86_64
libsemanage-2.9-3.el8.x86_64
For the system that does not have it installed, the following command will help you to install it:
$ yum install -y policycoreutils-python-utilsNow, let’s see what is the MySQL file contexts:
$ semanage fcontext -l | grep -i mysqlAs you may notice, there are a bunch of files that are connected to MySQL once the above command is executed. If you recall at the beginning, we are using a default “Server Data Directory”. Should your installation is using a different data directory location, you need to update the context for “mysql_db_t” which refers to the /var/lib/mysql/
The first step is to change the SELinux context by using any of these options:
$ semanage fcontext -a -t mysqld_db_t /var/lib/yourcustomdirectory
$ semanage fcontext -a -e /var/lib/mysql /var/lib/yourcustomdirectory

After the step above, run the following command:

$ restorecon -Rv /var/lib/yourcustomdirectory
And lastly, restart the service:
$ systemctl restart mysqlIn some setup, likely a different log location is required for any purpose. For this situation, “mysqld_log_t” needs to be updated as well. “mysqld_log_t” is a context for default location /var/log/mysqld.log and the steps below can be executed to update it:
$ semanage fcontext -a -t mysqld_log_t "/your/custom/error.log"
$ restorecon -Rv /path/to/my/custom/error.log
$ systemctl restart mysql
There will be a situation when the default port is configured using a different port other than 3306. For example, if you are using port 3303 for MySQL, you need to define the SELinux context with the following command:
$ semanage port -a -t mysqld_port_t -p tcp 3303And to verify that the port has been updated, you may use the following command:
$ semanage port -l | grep mysqldUsing audit2allow To Generate Policy
Another way to configure the policy is by using “audit2allow” which already included during the “semanage” installation just now. What this tool does is by pulling the log events from the audit.log and use that information to create a policy. Sometimes, MySQL might need a non-standard policy, so this is the best way to achieve that.
First, let’s set the mode to permissive for the MySQL domain and verify the changes:
$ semanage permissive -a mysqld_t
$ semodule -l | grep permissive
permissive_mysqld_t
permissivedomains
The next step is to generate the policy using the command below:
$ grep mysqld /var/log/audit/audit.log | audit2allow -M {yourpolicyname}
$ grep mysqld /var/log/audit/audit.log | audit2allow -M mysql_new
You should see the output like the following (will differ depending on your policy name that you set):
******************** IMPORTANT ***********************
To make this policy package active, execute:
semodule -i mysql_new.ppAs stated, we need to execute “semodule -i mysql_new.pp” to activate the policy. Go ahead and execute it:
$ semodule -i mysql_new.ppThe final step is to put the MySQL domain back to the “enforcing” mode:
$ semanage permissive -d mysqld_tlibsemanage.semanage_direct_remove_key: Removing last permissive_mysqld_t module (no other permissive_mysqld_t module exists at another priority).
What Should You Do If SELinux is Not Working?
A lot of times, the SELinux configuration requires so much testing. One of the best ways to test the configuration is by changing the mode to “permissive”. If you want to set it only for the MySQL domain, you can just use the following command. This is good practice to avoid configuring the whole system to “permissive”:
$ semanage permissive -a mysqld_tOnce everything is done, you may change the mode back to the “enforcing”:
$ semanage permissive -d mysqld_tIn addition to that, /var/log/audit/audit.log provides all logs related to the SELinux. This log will help you a lot in identifying the root cause and the reason. All you have to do is to filter “denied” using “grep”.
$ more /var/log/audit/audit.log |grep "denied"We are now finished with configuring SELinux policy for MySQL based system. One thing worth mentioning is that the same configuration needs to be done on all nodes of your cluster, you might need to repeat the same process for them.


