blog
Deploying MySQL Galera Cluster 4.0 onto Amazon AWS EC2

Galera Cluster is one of the most popular high availability solutions for MySQL. It is a virtually synchronous cluster, which helps to keep the replication lag under control. Thanks to the flow control, Galera cluster can throttle itself and allow more loaded nodes to catch up with the rest of the cluster. Recent release of Galera 4 brought new features and improvements. We covered them in blog post talking about MariaDB 10.4 Galera Cluster and a blog post discussing existing and upcoming features of Galera 4.
How does Galera 4 fares when used in Amazon EC2? As you probably know, Amazon offers Relational Database Services, which are designed to provide users with an easy way to deploy highly available MySQL database. My colleague, Ashraf Sharif, compared failover times for RDS MySQL and RDS Aurora in his blog post. Failover times for Aurora looks really great but there are buts. First of all, you are forced to use RDS. You cannot deploy Aurora on the instances you manage. If the existing features and options available in Aurora are not enough for you, you do not have any other option but to deploy something on your own. Here enters Galera. Galera, unlike Aurora, is not a proprietary black box. Contrary, it is an open source software, which can be used freely on all supported environments. You can install Galera Cluster on AWS Elastic Computing Cloud (EC2) and, through that, build a highly available environment where failover is almost instant: as soon as you can detect node’s failure, you can reconnect to the other Galera node. How does one deploy Galera 4 in EC2? In this blog post we will take a look at it and we will provide you with step-by-step guide showing what is the simplest way of accomplishing that.
Deploying a Galera 4 Cluster on EC2
First step is to create an environment which we will use for our Galera cluster. We will go with Ubuntu 18.04 LTS virtual machines.
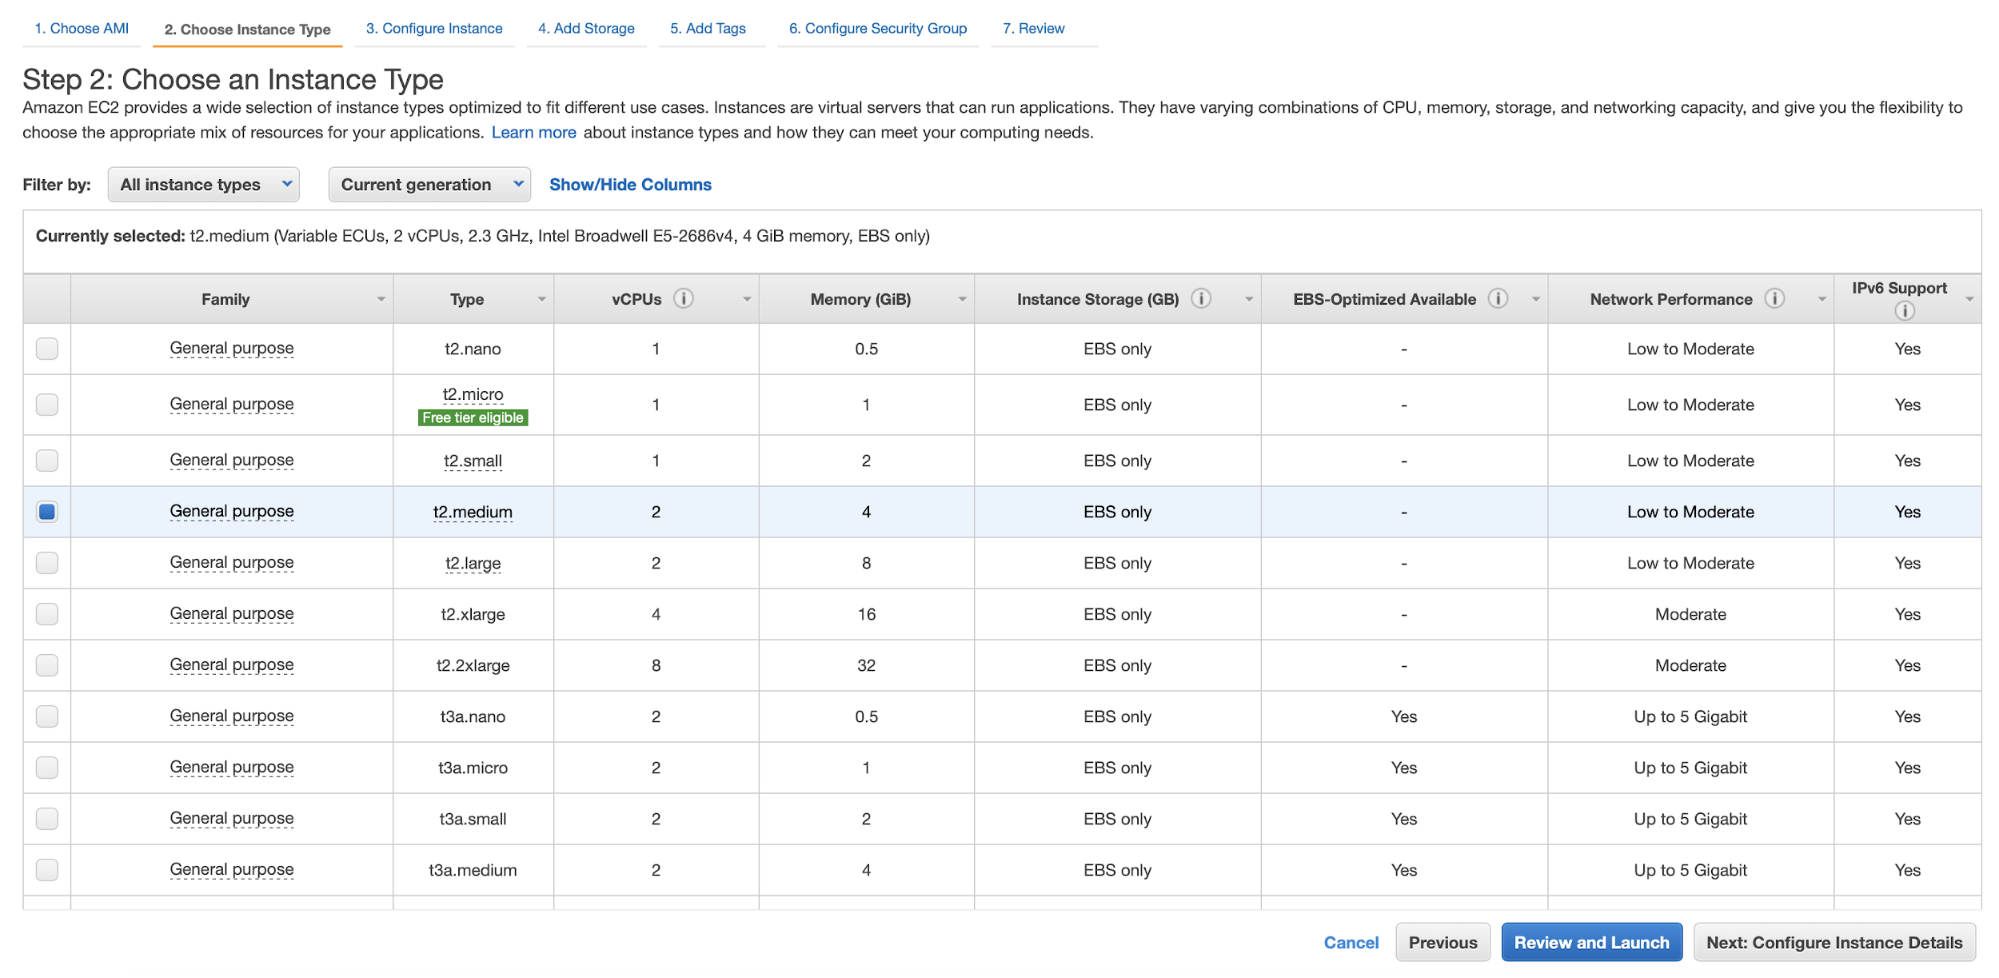
We will go with t2.medium instance size for the purpose of this blog post. You should scale your instances based on the expected load.
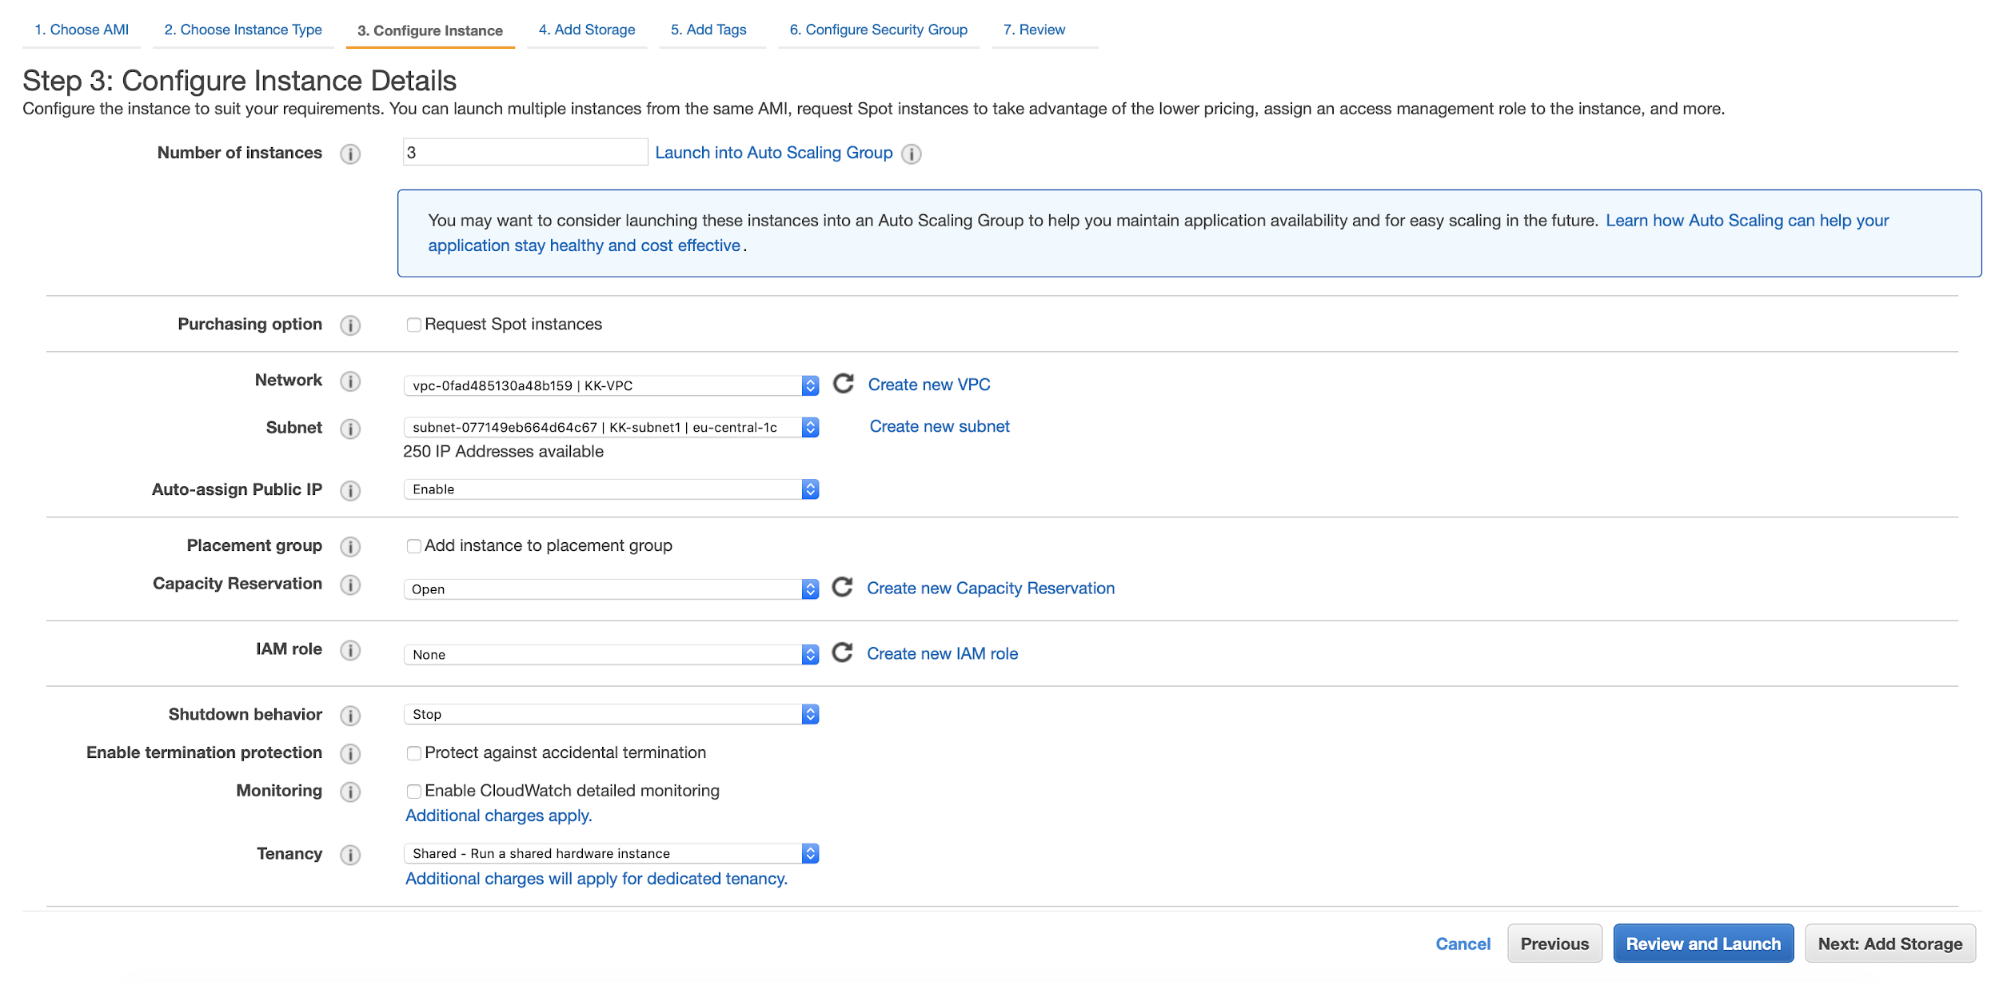
We are going to deploy three nodes in the cluster. Why three? We have a blog that explains how Galera maintains high availability.
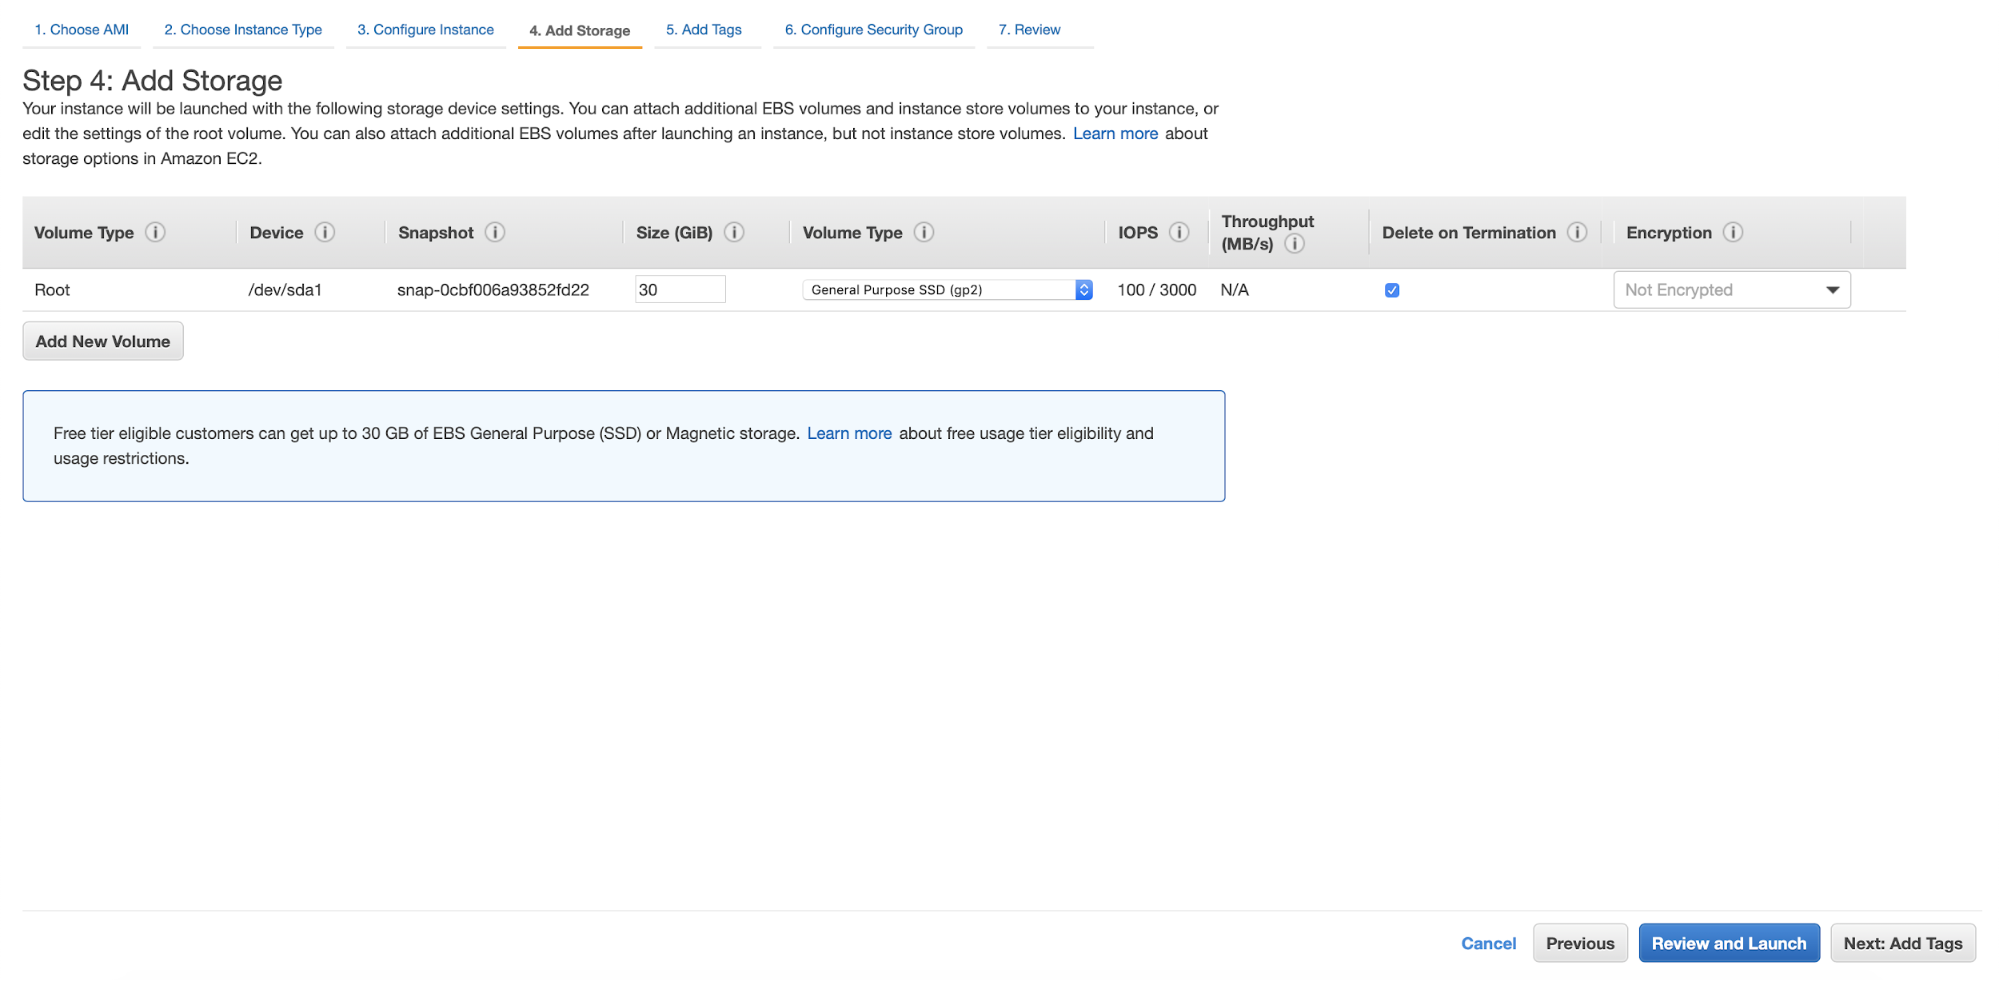
We are going to configure storage for those instances.
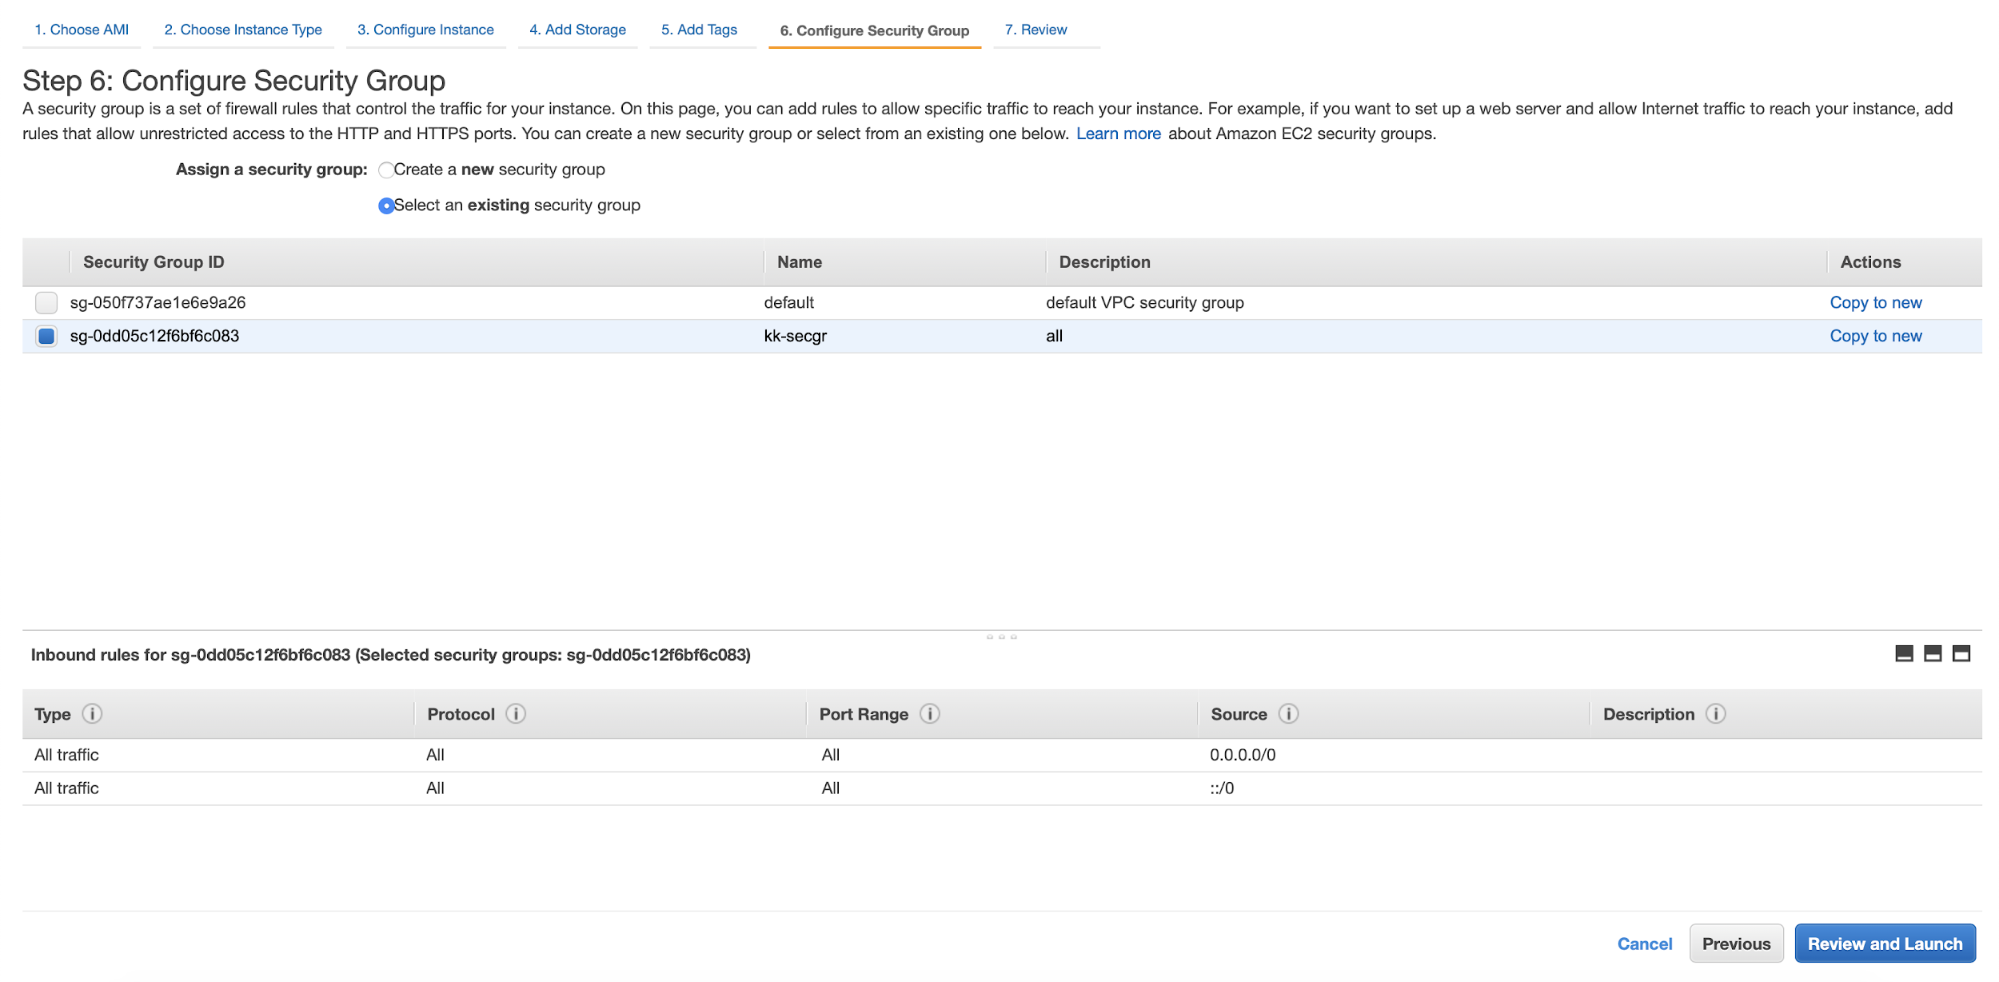
We will also pick proper security group for the nodes. Again, in our case security group is quite open. You should ensure the access is limited as much as possible – only nodes which have to access databases should be allowed to connect to them.
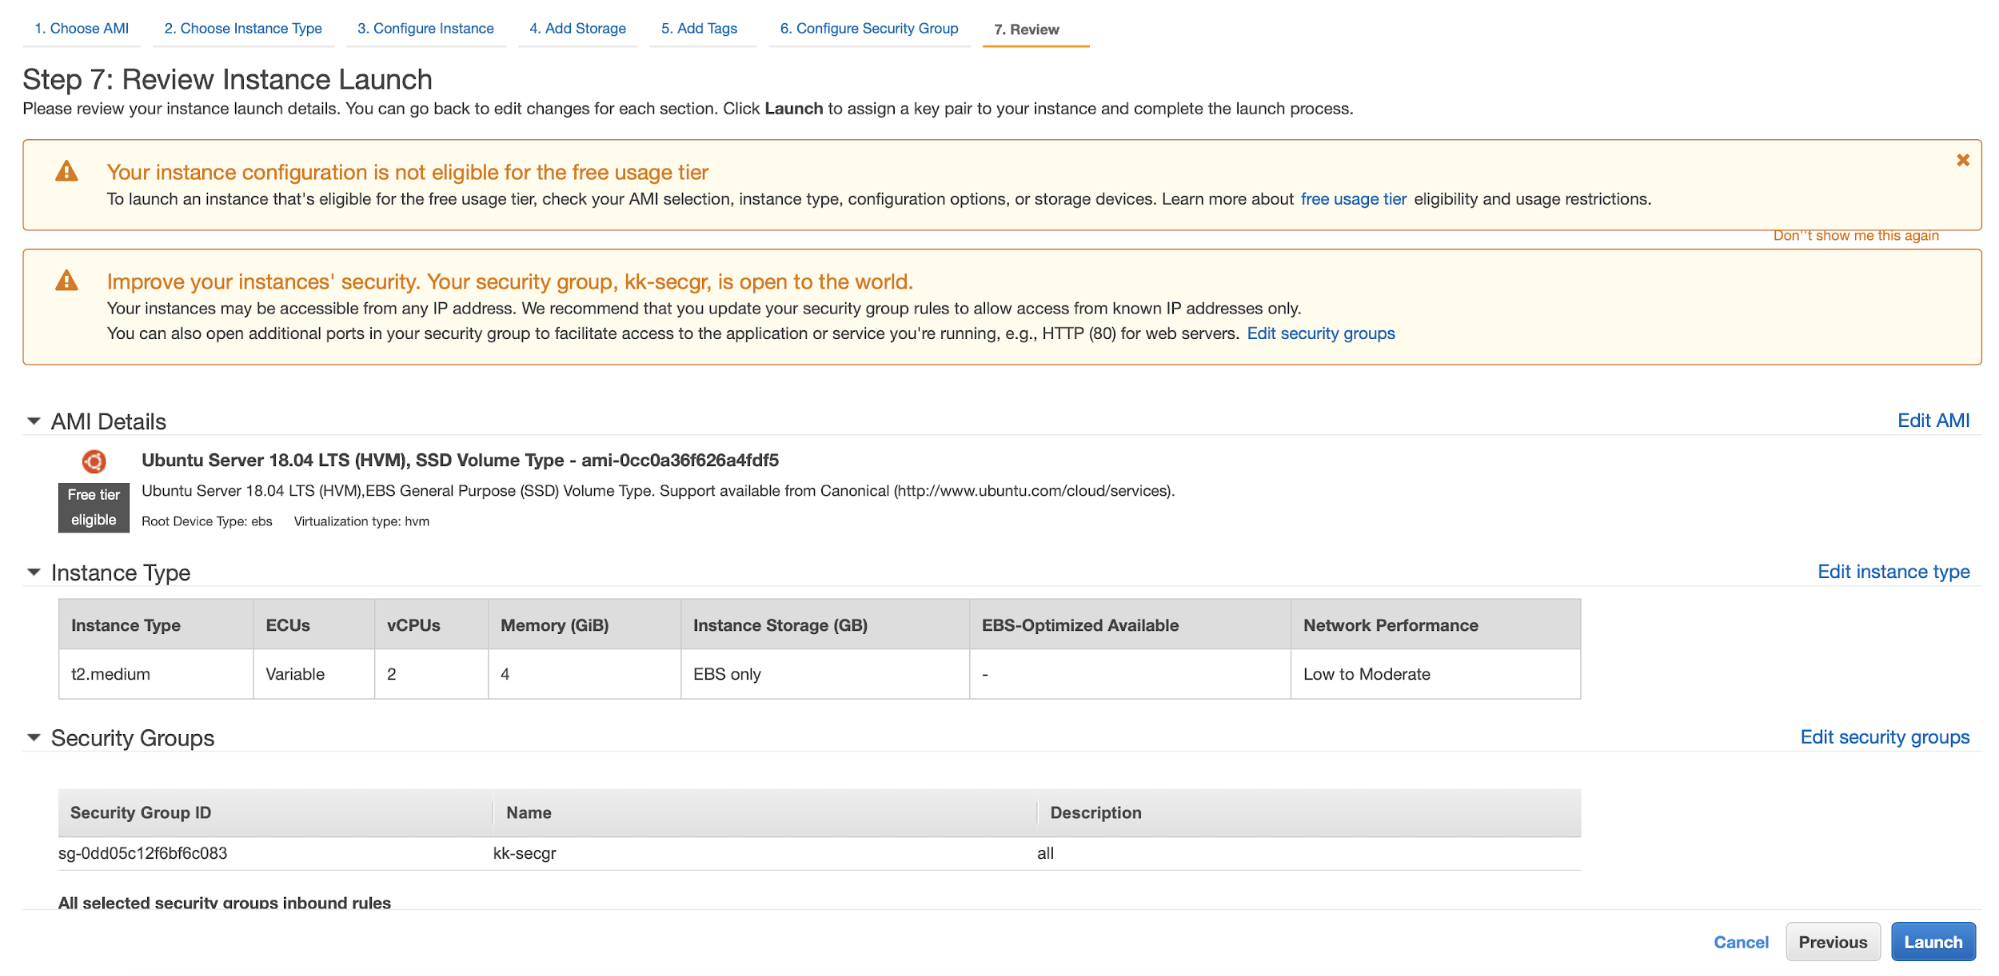
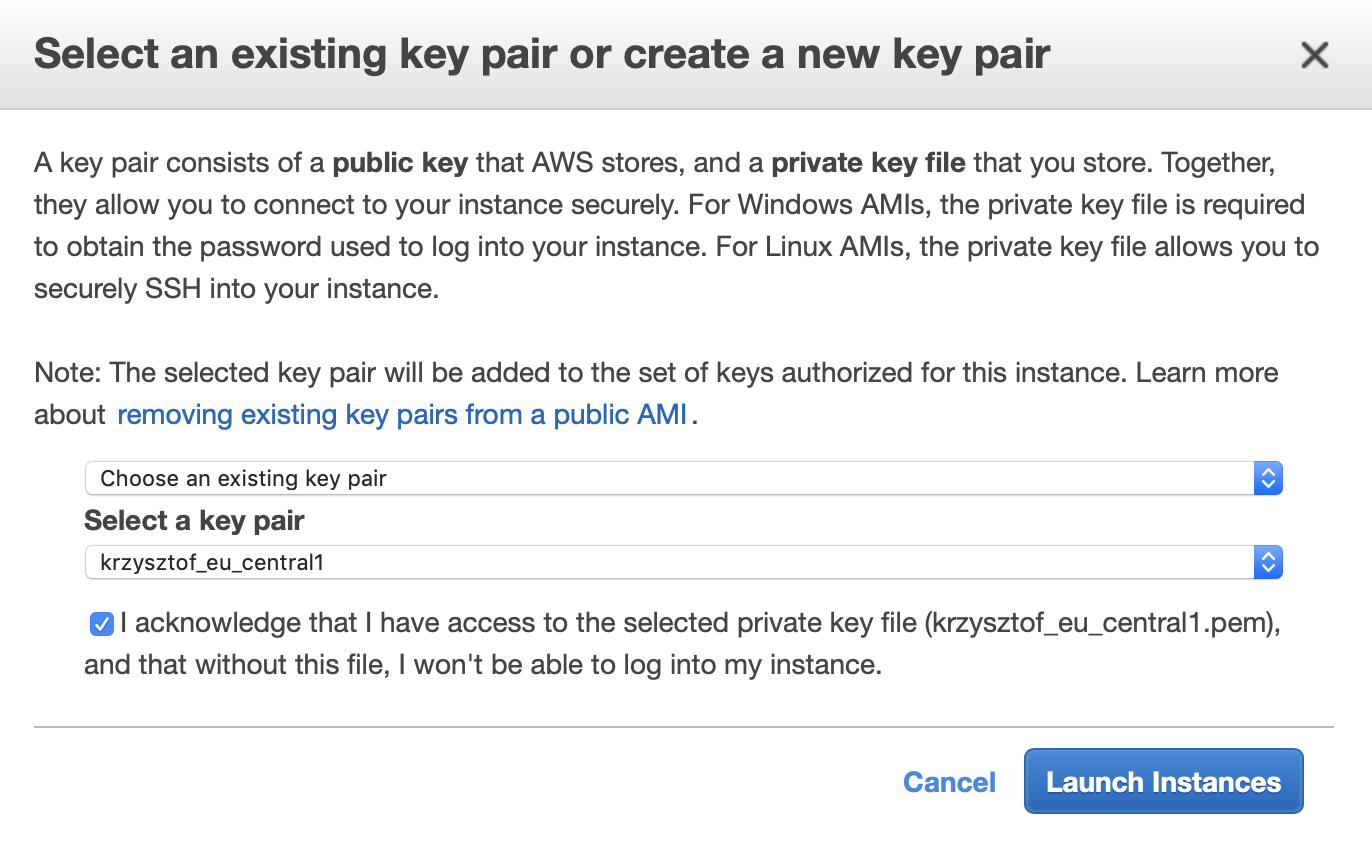
Finally, we either pick an existing key par or create a new one. After this step our three instances will be launched.

Once they are up, we can connect to them via SSH and start configuring the database.
We decided to go with ‘node1, node2, node3’ naming convention therefore we had to edit /etc/hosts on all nodes and list them alongside their respective local IP’s. We also made the change in /etc/hostname to use the new name for nodes. When this is done, we can start setting up our Galera cluster. At the time of writing only vendor that provides GA version of Galera 4 is MariaDB with its 10.4 therefore we are going to use MariaDB 10.4 for our cluster. We are going to proceed with the installation using the suggestions and guides from the MariaDB website.
Deploying a MariaDB 10.4 Galera Cluster
We will start with preparing repositories:
wget https://downloads.mariadb.com/MariaDB/mariadb_repo_setup

bash ./mariadb_repo_setup
We downloaded script which is intended to set up the repositories and we ran it to make sure everything is set up properly. This configured repositories to use the latest MariaDB version, which, at the time of writing, is 10.4.
root@node1:~# apt update

Hit:1 http://eu-central-1.ec2.archive.ubuntu.com/ubuntu bionic InRelease

Hit:2 http://eu-central-1.ec2.archive.ubuntu.com/ubuntu bionic-updates InRelease

Hit:3 http://eu-central-1.ec2.archive.ubuntu.com/ubuntu bionic-backports InRelease

Hit:4 http://downloads.mariadb.com/MariaDB/mariadb-10.4/repo/ubuntu bionic InRelease

Ign:5 http://downloads.mariadb.com/MaxScale/2.4/ubuntu bionic InRelease

Hit:6 http://downloads.mariadb.com/Tools/ubuntu bionic InRelease

Hit:7 http://downloads.mariadb.com/MaxScale/2.4/ubuntu bionic Release

Hit:8 http://security.ubuntu.com/ubuntu bionic-security InRelease

Reading package lists... Done

Building dependency tree

Reading state information... Done

4 packages can be upgraded. Run 'apt list --upgradable' to see them.
As you can see, repositories for MariaDB 10.4 and MaxScale 2.4 have been configured. Now we can proceed and install MariaDB. We will do it step by step, node by node. MariaDB provides guide on how you should install and configure the cluster.
We need to install packages:
apt-get install mariadb-server mariadb-client galera-4 mariadb-backupThis command installs all required packages for MariaDB 10.4 Galera to run. MariaDB creates a set of configuration files. We will add a new one, which would contain all the required settings. By default it will be included at the end of the configuration file so all previous settings for the variables we set will be overwritten. Ideally, afterwards, you would edit existing configuration files to remove settings we put in the galera.cnf to avoid confusion where given setting is configured.
root@node1:~# cat /etc/mysql/conf.d/galera.cnf

[mysqld]

bind-address=10.0.0.103

default_storage_engine=InnoDB

binlog_format=row

innodb_autoinc_lock_mode=2


# Galera cluster configuration

wsrep_on=ON

wsrep_provider=/usr/lib/galera/libgalera_smm.so

wsrep_cluster_address="gcomm://10.0.0.103,10.0.0.130,10.0.0.62"

wsrep_cluster_name="Galera4 cluster"

wsrep_sst_method=mariabackup

wsrep_sst_auth='sstuser:pa55'


# Cluster node configuration

wsrep_node_address="10.0.0.103"

wsrep_node_name="node1"
When configuration is ready, we can start.
root@node1:~# galera_new_clusterThis should bootstrap the new cluster on the first node. Next we should proceed with similar steps on remaining nodes: install required packages and configure them keeping in mind that the local IP changes so we have to change the galera.cnf file accordingly.
When the configuration files are ready, we have to create a user which will be used for the Snapshot State Transfer (SST):
MariaDB [(none)]> CREATE USER 'sstuser'@'localhost' IDENTIFIED BY 'pa55';

Query OK, 0 rows affected (0.022 sec)

MariaDB [(none)]> GRANT PROCESS, RELOAD, LOCK TABLES, REPLICATION CLIENT ON *.* TO 'sstuser'@'localhost';

Query OK, 0 rows affected (0.022 sec)
We should do that on the first node. Remaining nodes will join the cluster and they will receive full state snapshot so the user will be transferred to them. Now the only thing we have to do is to start the remaining nodes:
root@node2:~# service mysql start

root@node3:~# service mysql start
and verify that cluster indeed has been formed:
MariaDB [(none)]> show global status like 'wsrep_cluster_size';

+--------------------+-------+

| Variable_name      | Value |

+--------------------+-------+

| wsrep_cluster_size | 3     |

+--------------------+-------+

1 row in set (0.001 sec)
All is good, the cluster is up and it consists of three Galera nodes. We managed to deploy MariaDB 10.4 Galera Cluster on Amazon EC2.


