blog
Database Failover for WordPress Websites

Every profitable enterprise requires high availability. Websites & Blogs are no different as even smaller companies and individuals require their sites to stay live to keep their reputation.
WordPress is, by far, the most popular CMS in the world powering millions of websites from small to large. But how can you ensure that your website stays live. More specifically, how can I ensure the unavailability of my database will not impact my website?
In this blog post we will show how to achieve failover for your WordPress website using ClusterControl.
The setup we will use for this blog will use Percona Server 5.7. We will have another host which contains the Apache and WordPress application. We will not touch the application high-availability portion, but this also something you want to make sure to have. We will use ClusterControl to manage databases to ensure the availability and we will use a third host to install and setup ClusterControl itself.
Assuming that the ClusterControl is up and running, we will need to import our existing database into it.
Importing a Database Cluster with ClusterControl
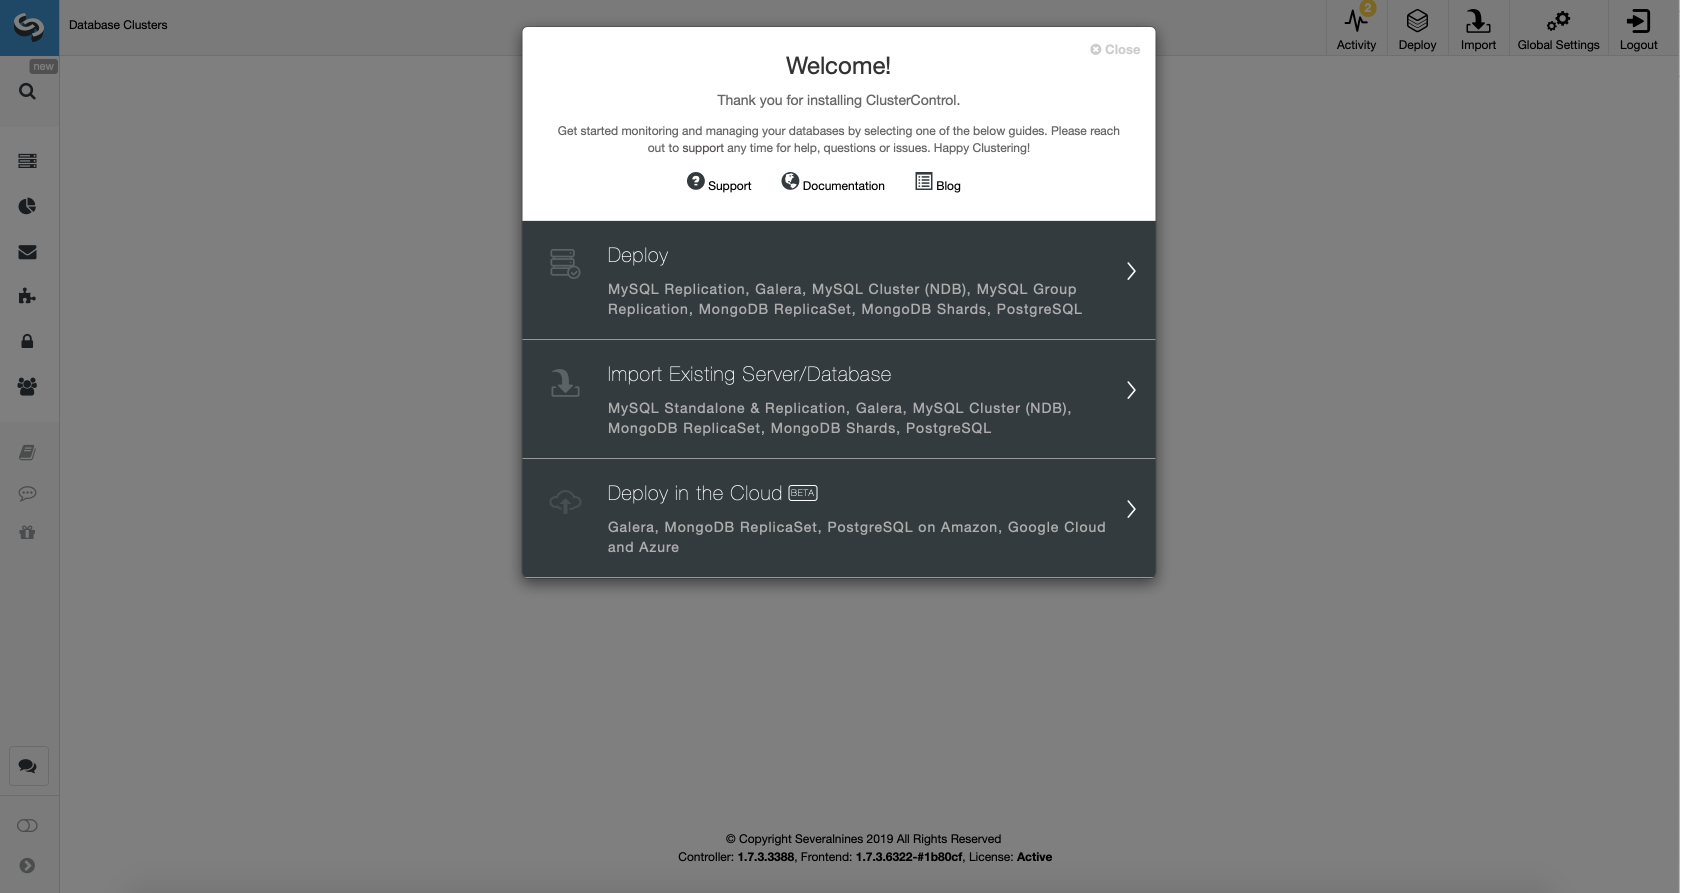
Go to the Import Existing Server/Database option in the deployment wizard.
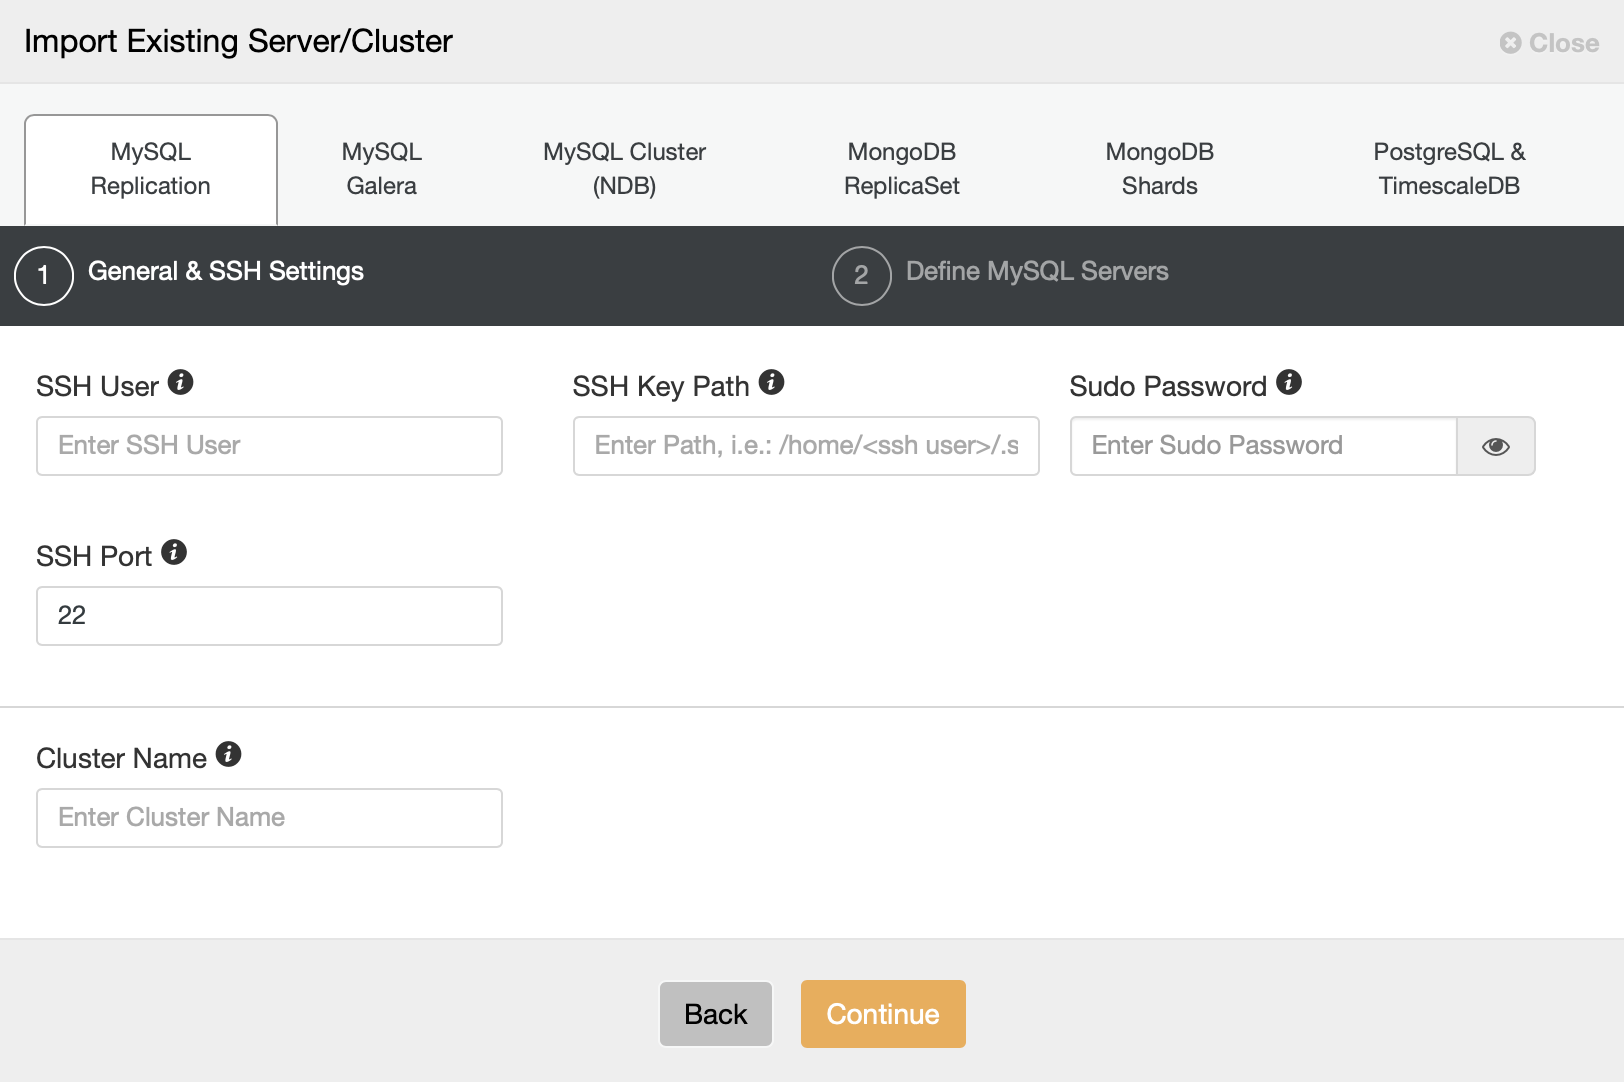
We have to configure the SSH connectivity as this is a requirement for ClusterControl to be able to manage the nodes.
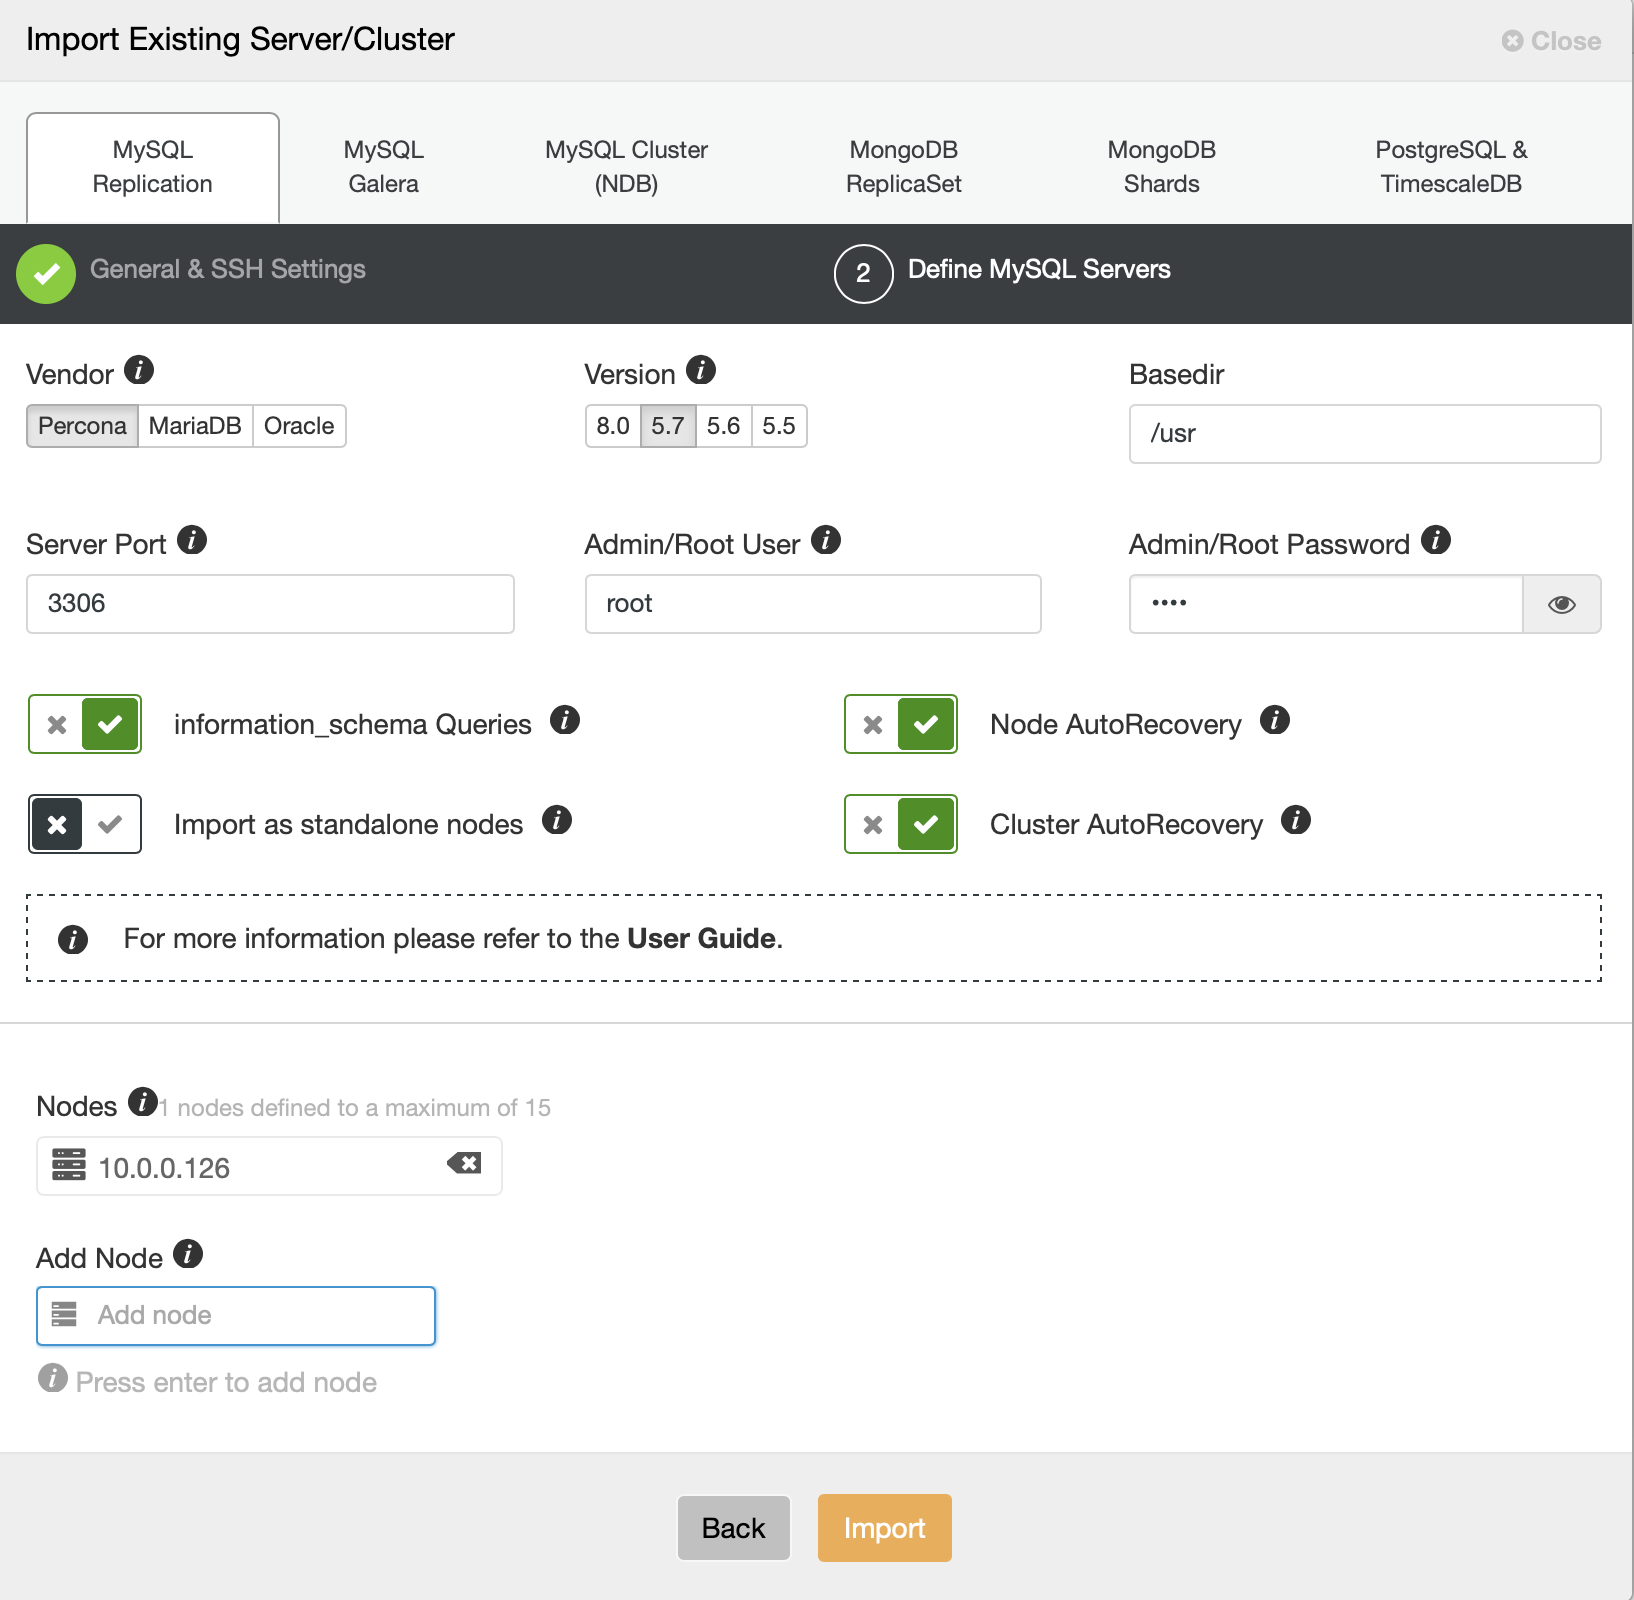
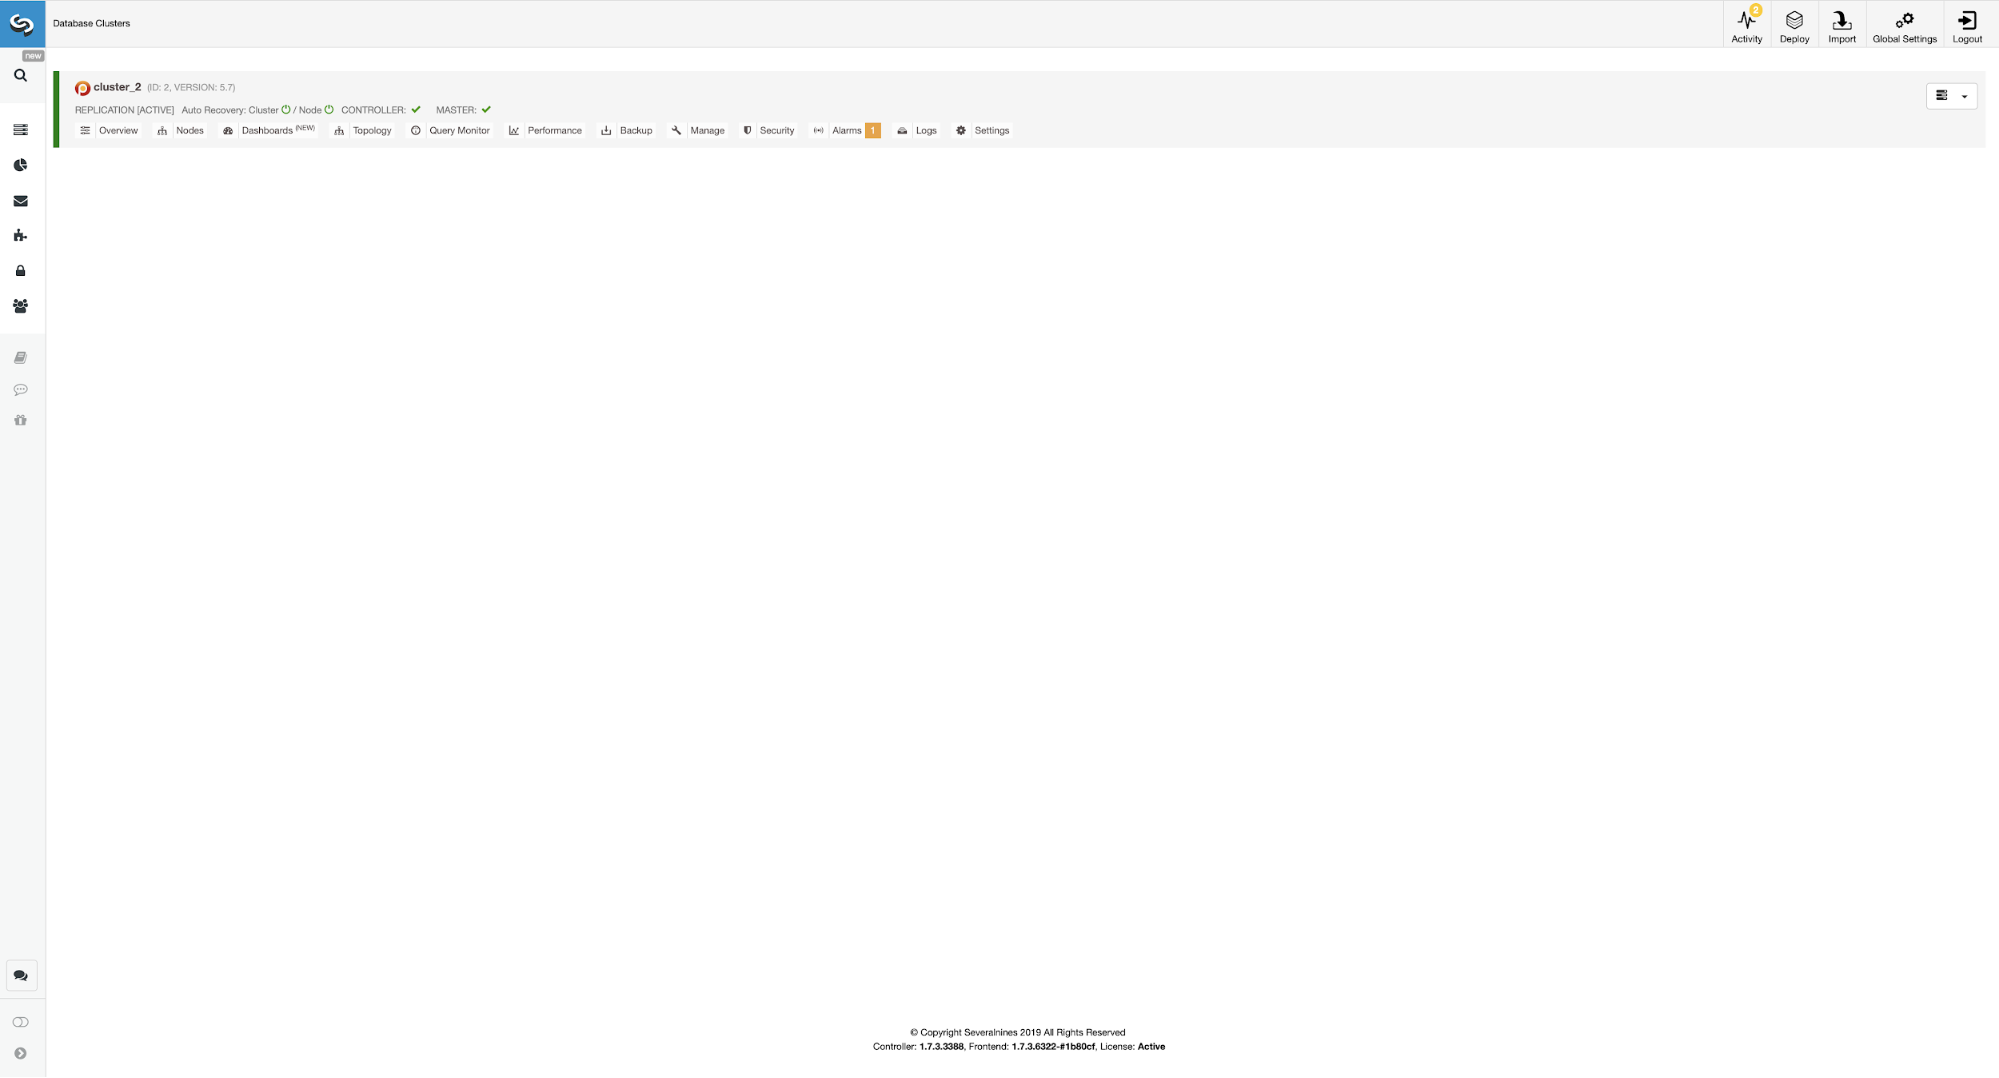
We now have to define some details about the vendor, version, root user access, the node itself, and if we want ClusterControl to manage autorecovery for us or not. That’s all, once the job succeeds, you will be presented with a cluster on the list.
To set up the highly-available environment, we need to execute a couple of actions. Our environment will consists of…
- Master – Slave pair
- Two ProxySQL instances for read/write split and topology detection
- Two Keepalived instances for Virtual IP management
The idea is simple – we will deploy the slave to our master so we will have a second instance to failover to should the master fail. ClusterControl will be responsible for failure detection and it will promote the slave should the master become unavailable. ProxySQL will keep the track of the replication topology and it will redirect the traffic to the correct node – writes will be sent to the master, no matter which node it’s in, reads can either be sent to master-only or distributed across master and slaves. Finally, Keepalived will be collocated with ProxySQL and it will provide VIP for the application to connect to. That VIP will always be assigned to one of ProxySQL instances and Keepalived will move it to the second one, should the “main” ProxySQL node fail.
Having said all of that, let’s configure this using ClusterControl. All of it can be done in just a couple of clicks. We’ll start with adding the slave.
Adding a Database Slave with ClusterControl
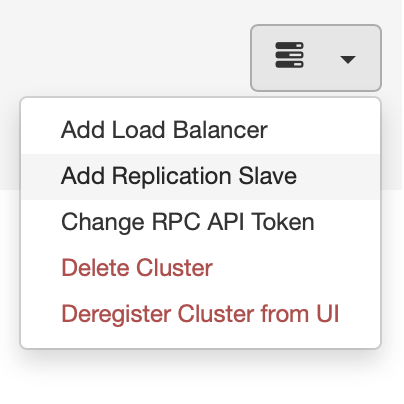
We start with picking “Add Replication Slave” job. Then we are asked to fill a form:
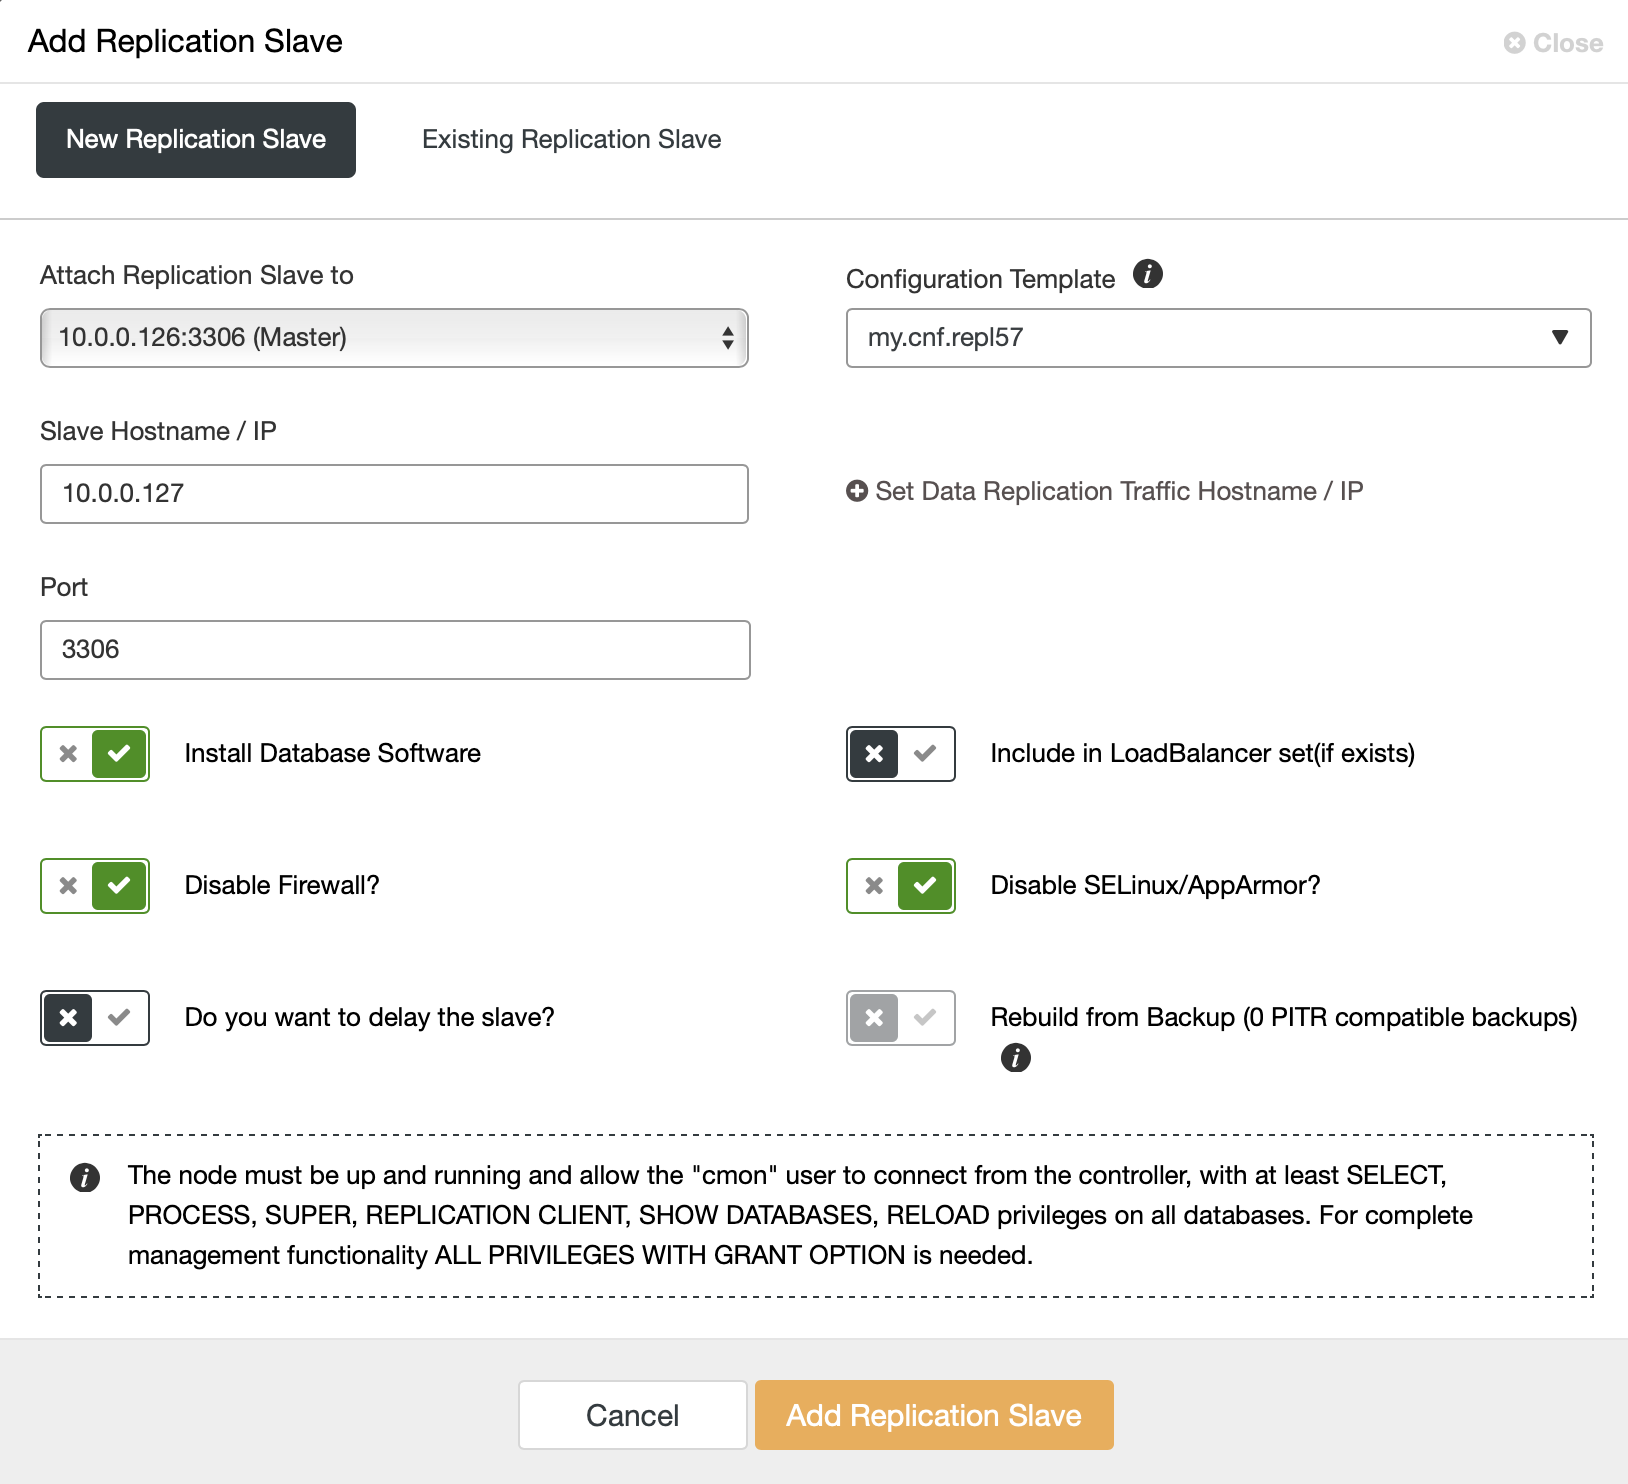
We have to pick the master (in our case we don’t really have many options), we have to pass the IP or hostname for the new slave. If we had backups previously created, we could use one of them to provision the slave. In our case this is not available and ClusterControl will provision the slave directly from the master. That’s all, the job starts and ClusterControl performs required actions. You can monitor the progress in the Activity tab.

Finally, once the job completes successfully, the slave should be visible on the cluster list.

Now we will proceed with configuring the ProxySQL instances. In our case the environment is minimal so, to keep things simpler, we will locate ProxySQL on one of the database nodes. This is not, however, the best option in a real production environment. Ideally, ProxySQL would either be located on a separate node or collocated with the other application hosts.
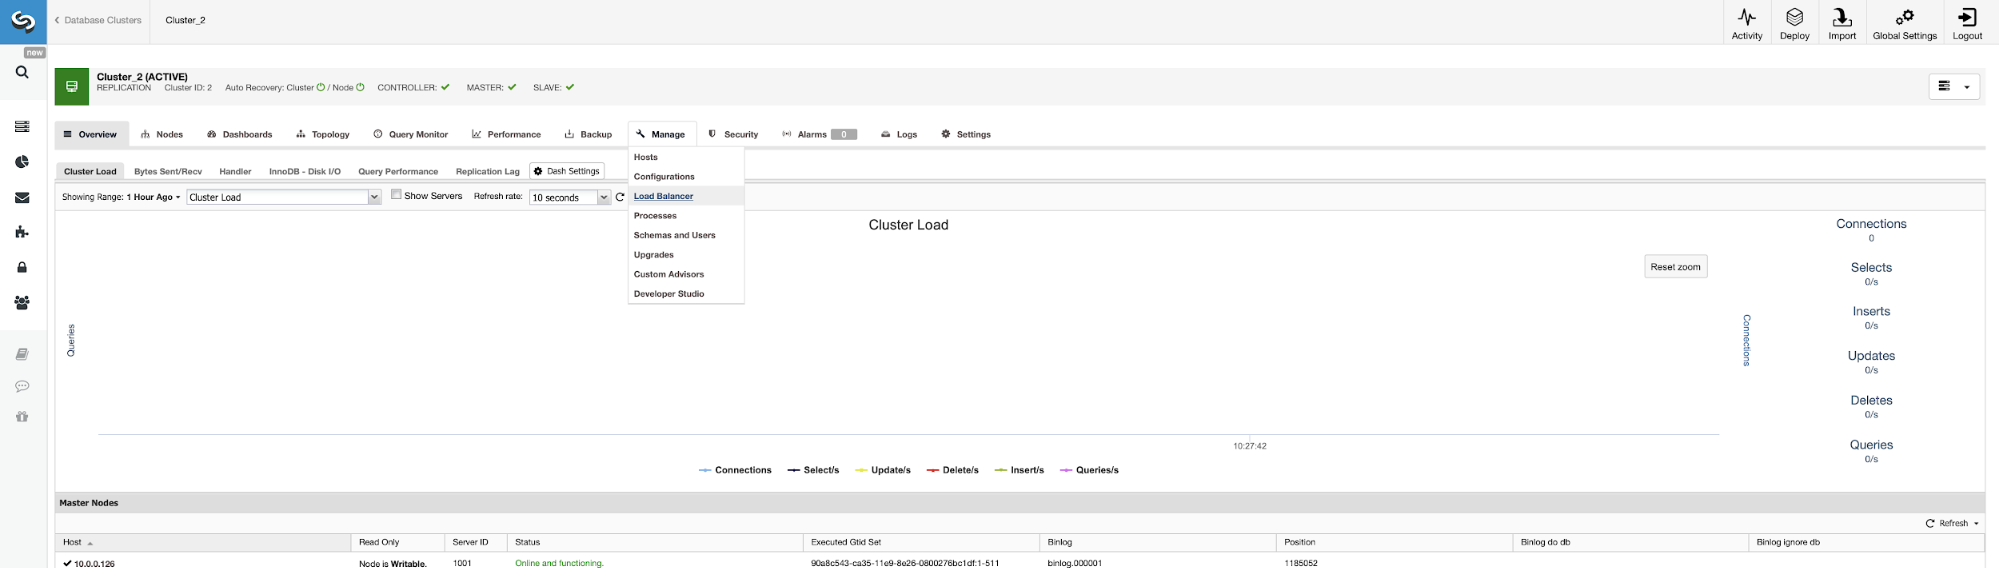
The place to start the job is Manage -> Loadbalancers.
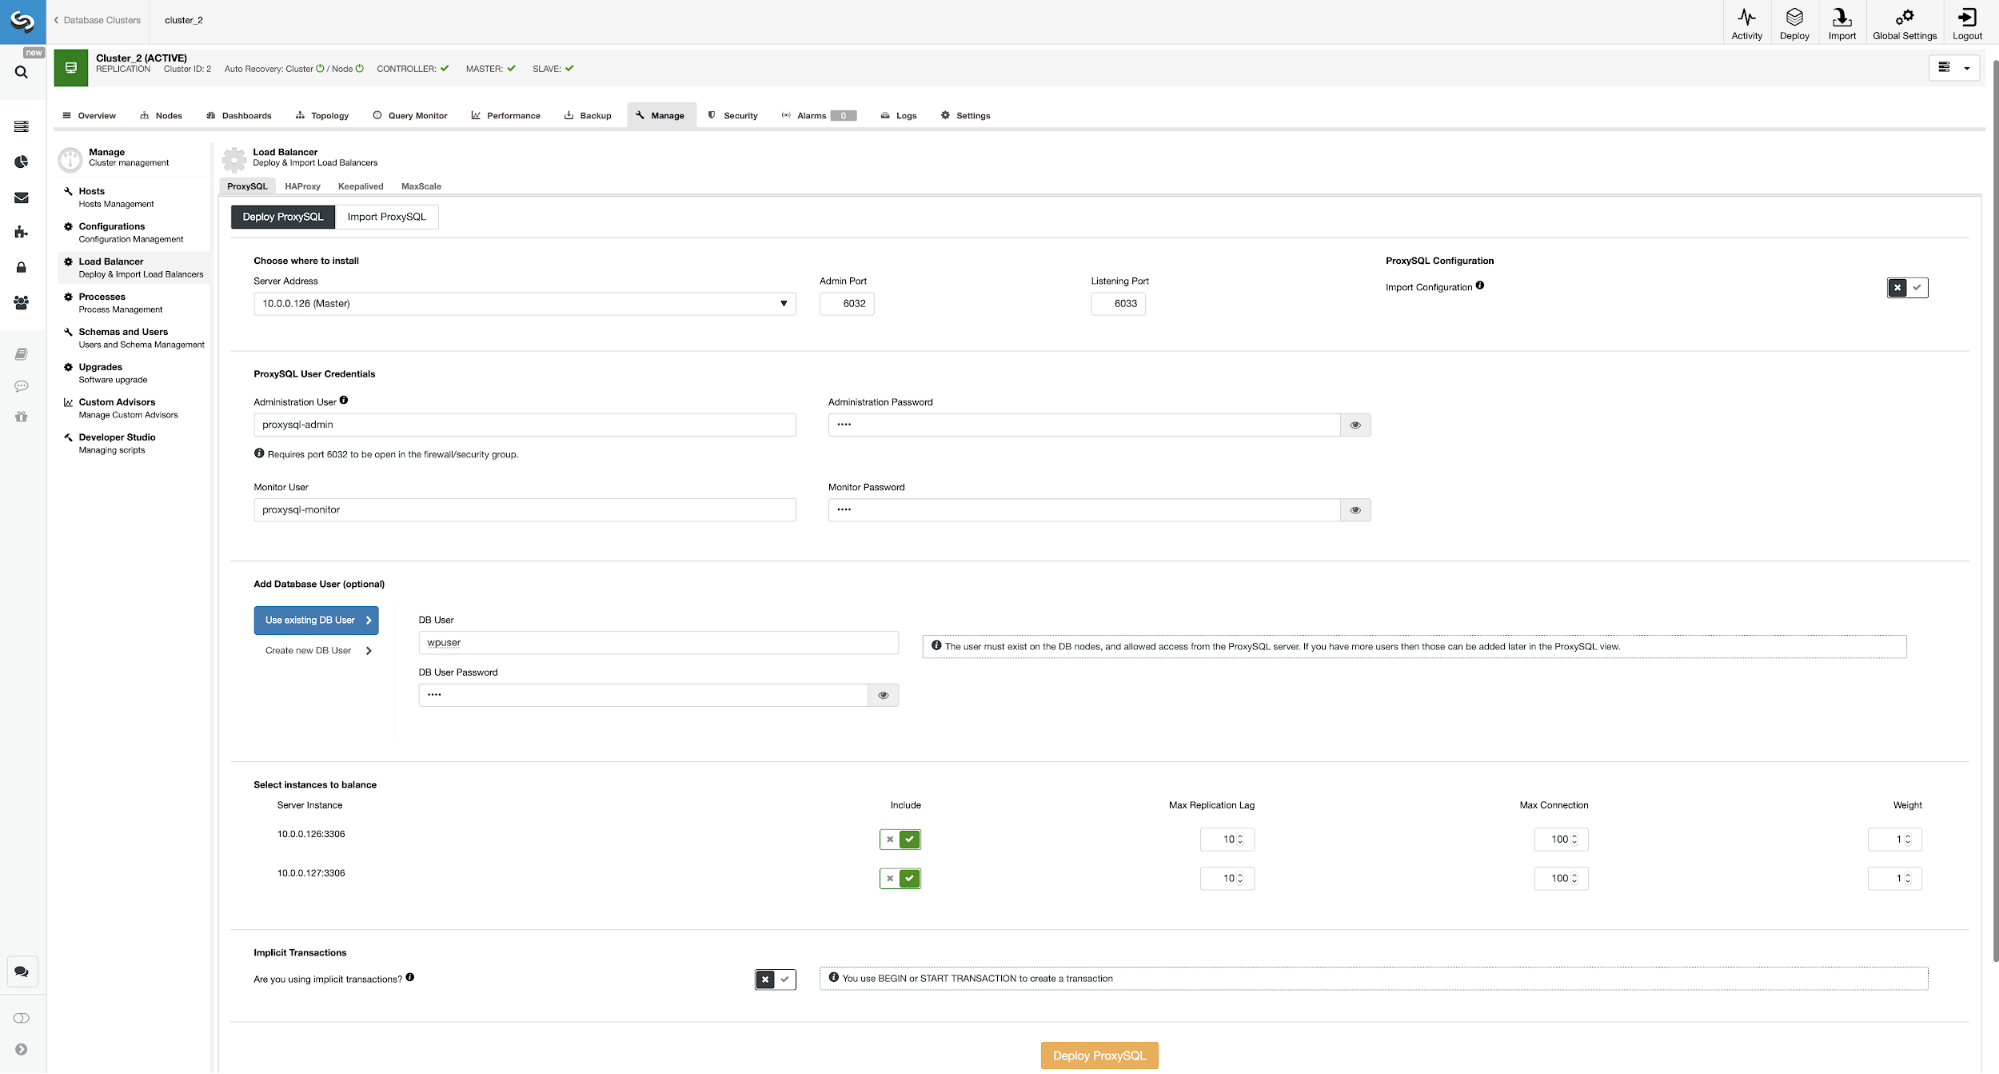
Here you have to pick where the ProxySQL should be installed, pass administrative credentials, and add a database user. In our case, we will use our existing user as our WordPress application already uses it for connecting to the database. We then have to pick which nodes to use in ProxySQL (we want both master and slave here) and let ClusterControl know if we use explicit transactions or not. This is not really relevant in our case, as we will reconfigure ProxySQL once it will be deployed. When you have that option enabled, read/write split will not be enabled. Otherwise ClusterControl will configure ProxySQL for read/write split. In our minimal setup we should seriously think if we want the read/write split to happen. Let’s analyse that.
The Advantages & Disadvantages of Read/Write Spit in ProxySQL
The main advantage of using the read/write split is that all the SELECT traffic will be distributed between the master and the slave. This means that the load on the nodes will be lower and response time should also be lower. This sounds good but keep in mind that should one node fail, the other node will have to be able to accommodate all of the traffic. There is little point in having automated failover in place if the loss of one node means that the second node will be overloaded and, de facto, unavailable too.
It might make sense to distribute the load if you have multiple slaves – losing one node out of five is less impactful than losing one out of two. No matter what you decide on, you can easily change the behavior by going to ProxySQL node and clicking on the Rules tab.
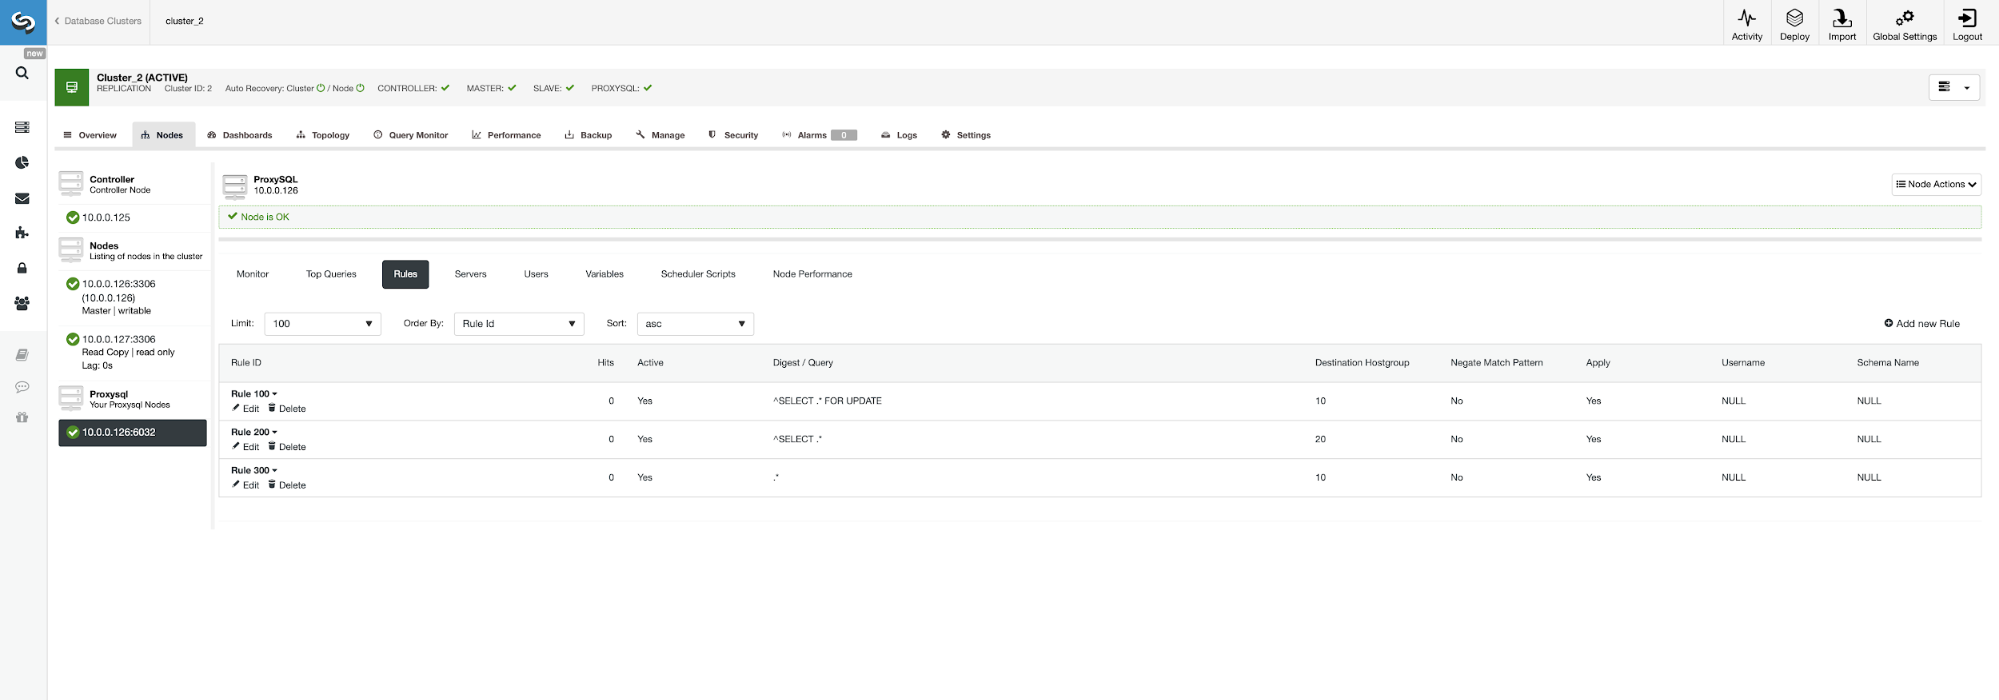
Make sure to look at rule 200 (the one which catches all SELECT statements). On the screenshot below you can see that the destination hostgroup is 20, which means all nodes in the cluster – read/write split and scale-out is enabled. We can easily disable this by editing this rule and changing the Destination Hostgroup to 10 (the one which contain master).
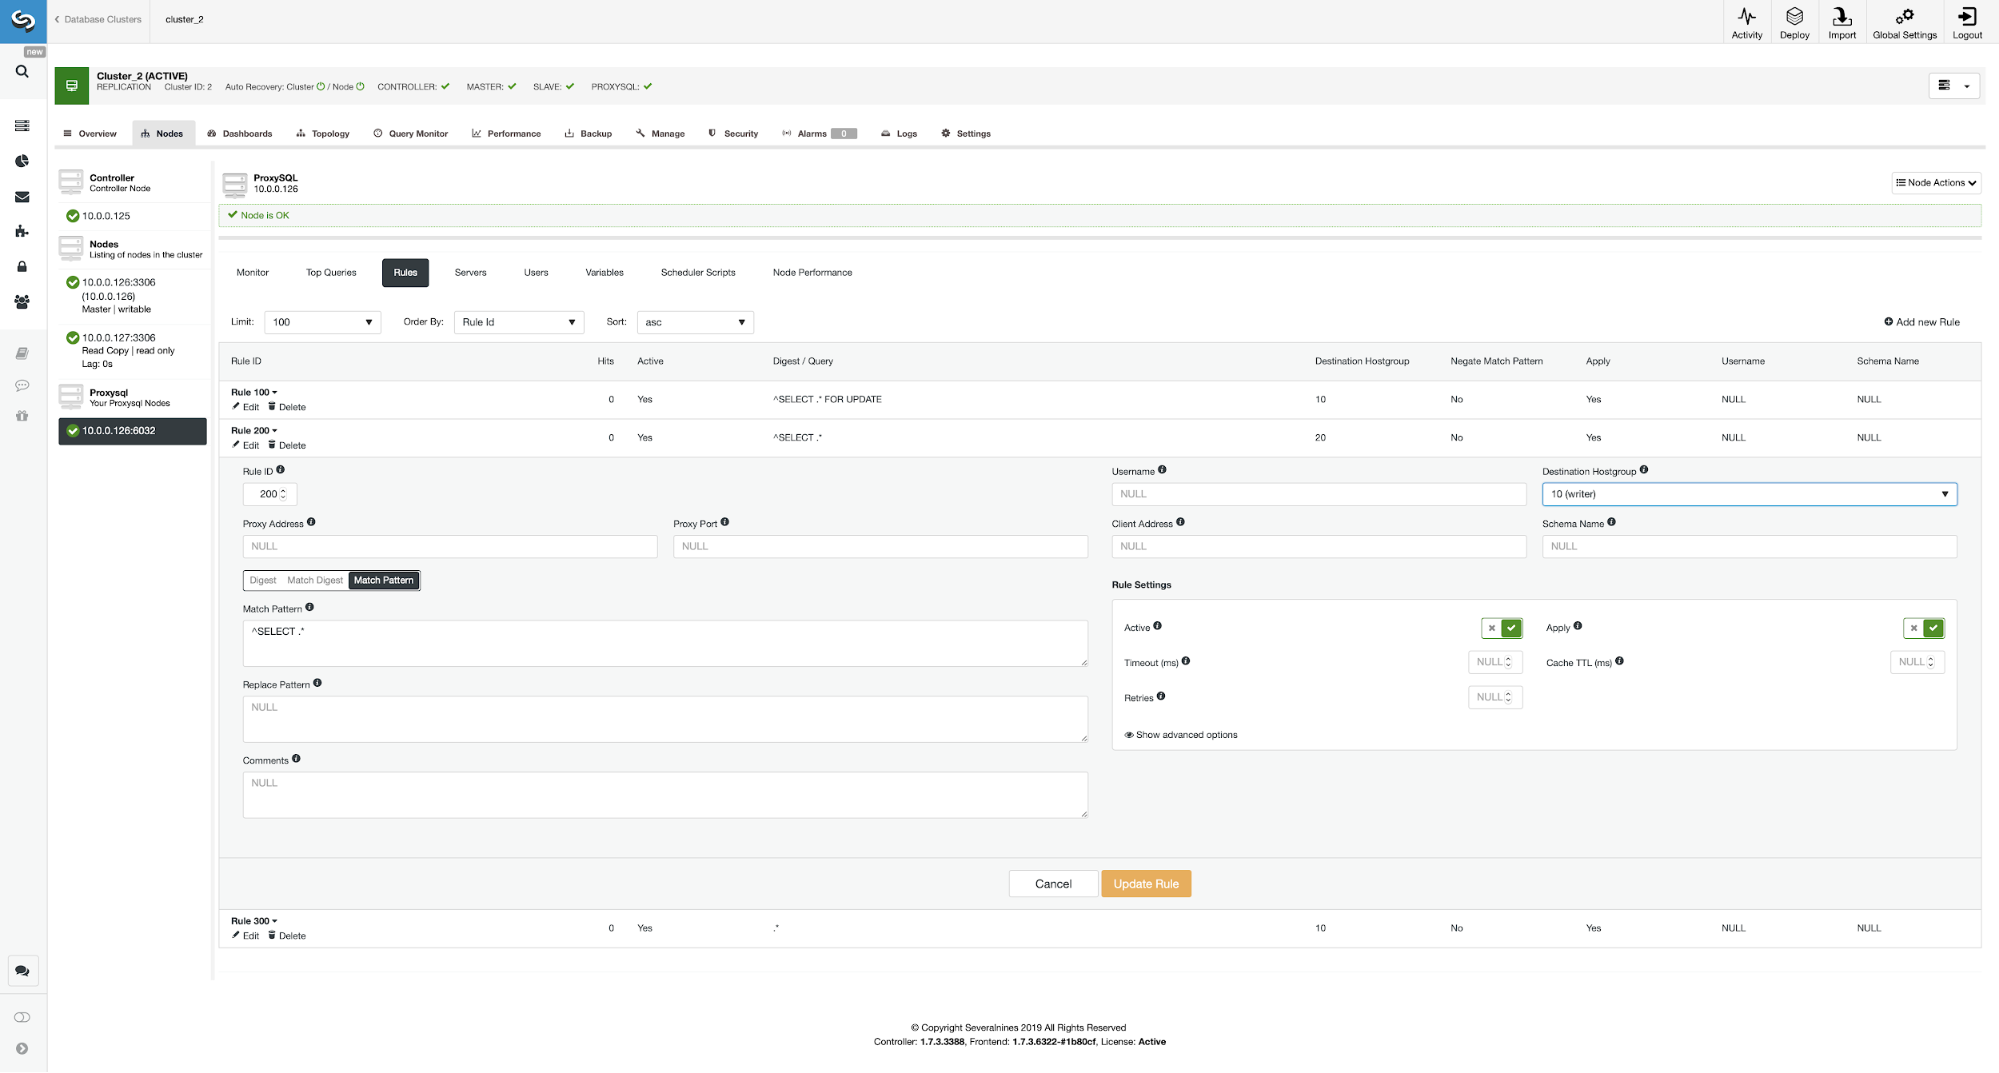
If you would like to enable the read/write split, you can easily do so by editing this query rule again and setting the destination hostgroup back to 20.
Now, let’s deploy second ProxySQL.
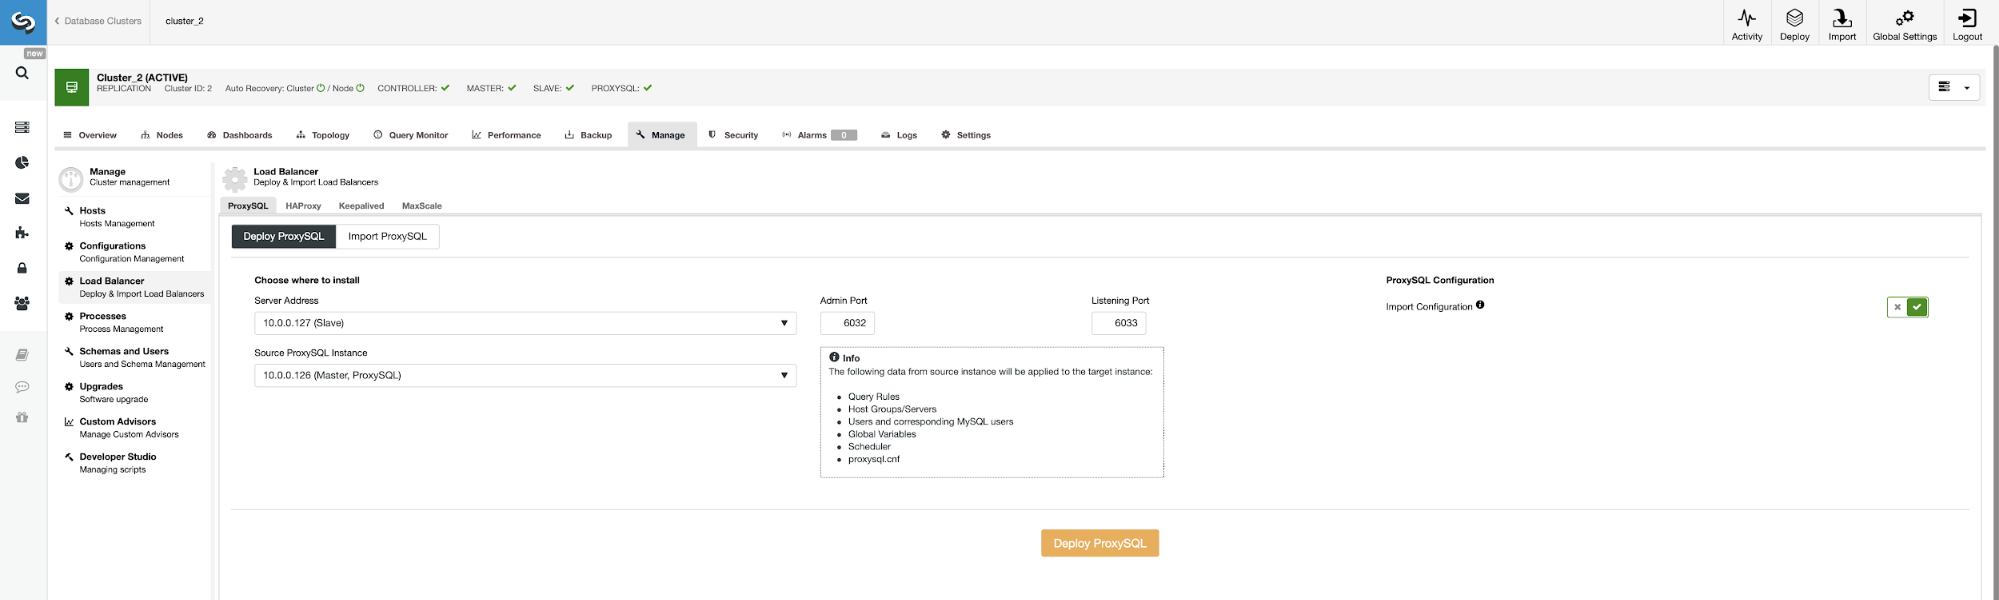
To avoid passing all the configuration options again we can use the “Import Configuration” option and pick our existing ProxySQL as the source.
When this job will complete we still have to perform the last step in setting our environment. We have to deploy Keepalived on top of the ProxySQL instances.
Deploying Keepalived on Top of ProxySQL Instances
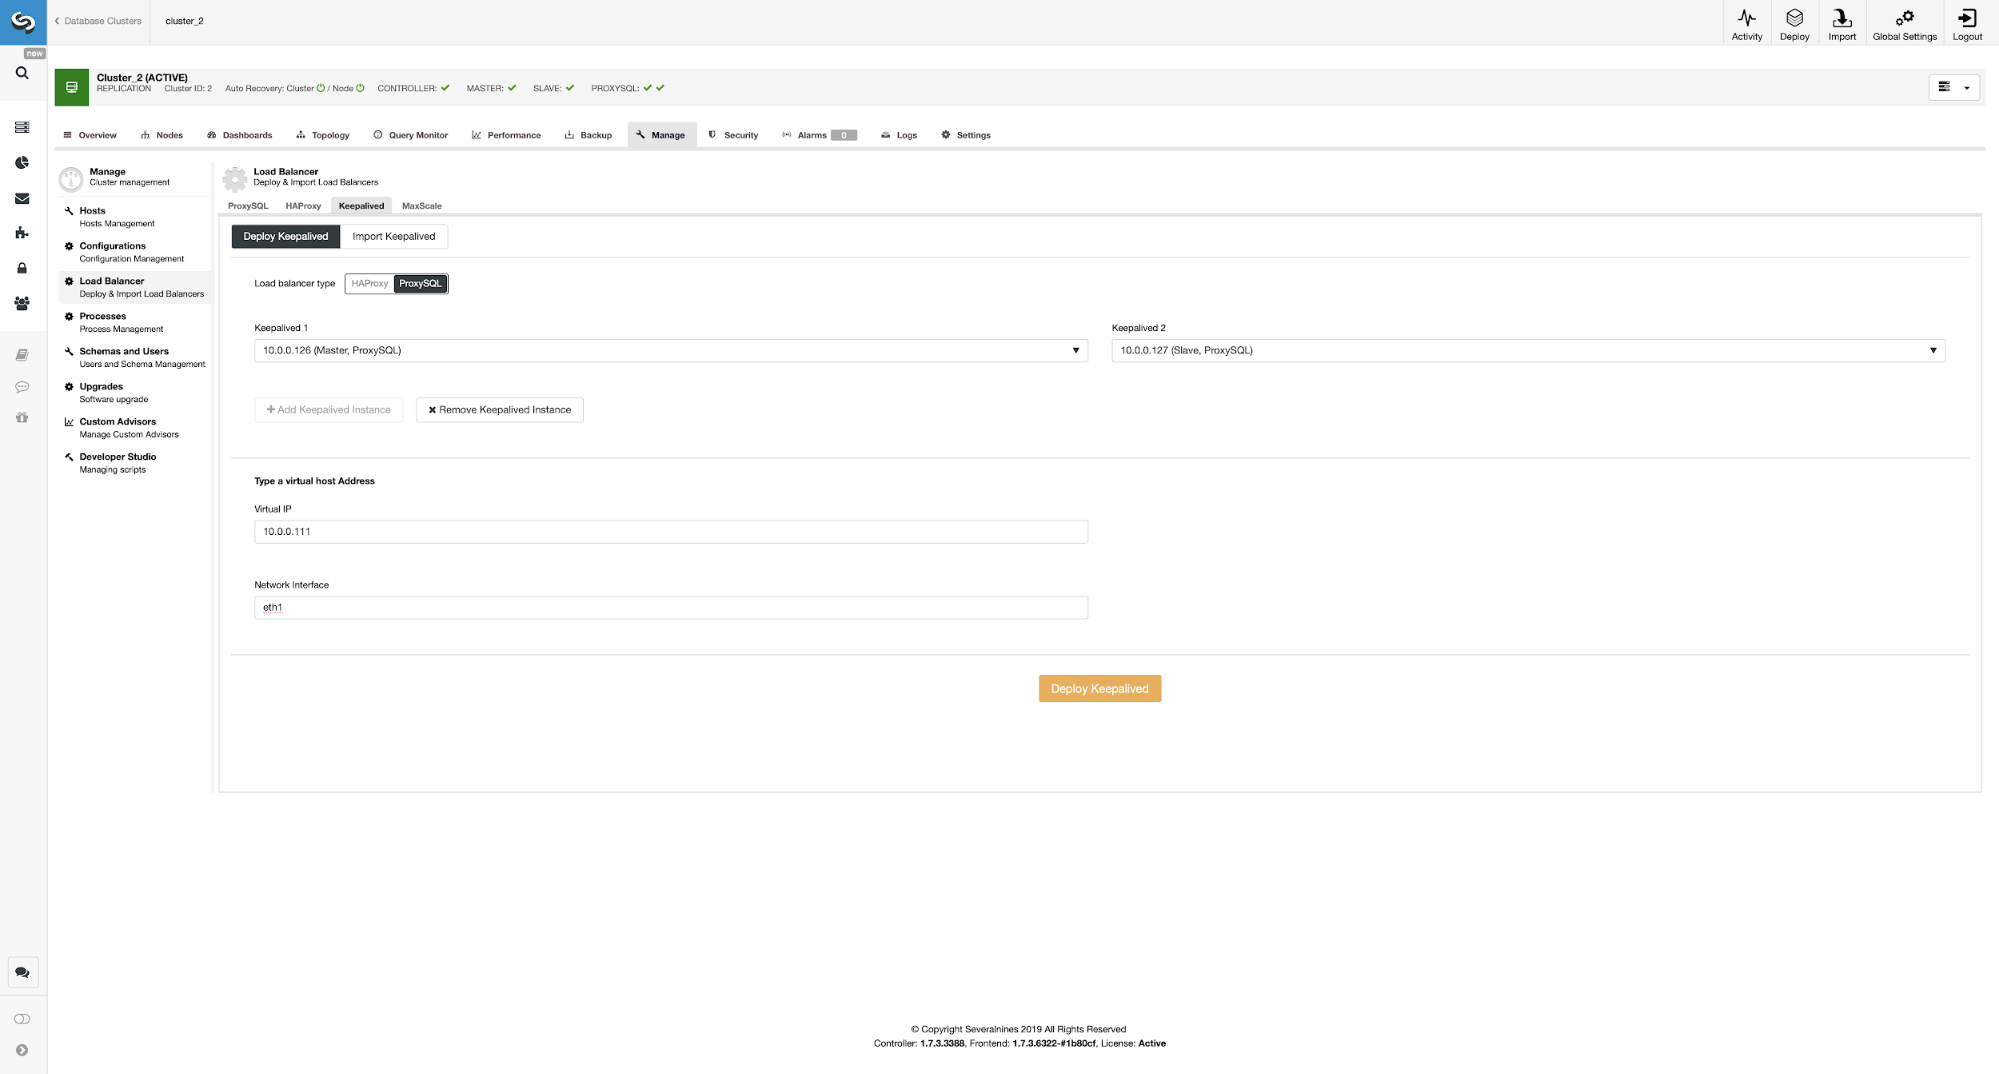
Here we picked ProxySQL as the load balancer type, passed both ProxySQL instances for Keepalived to be installed on and we typed our VIP and network interface.
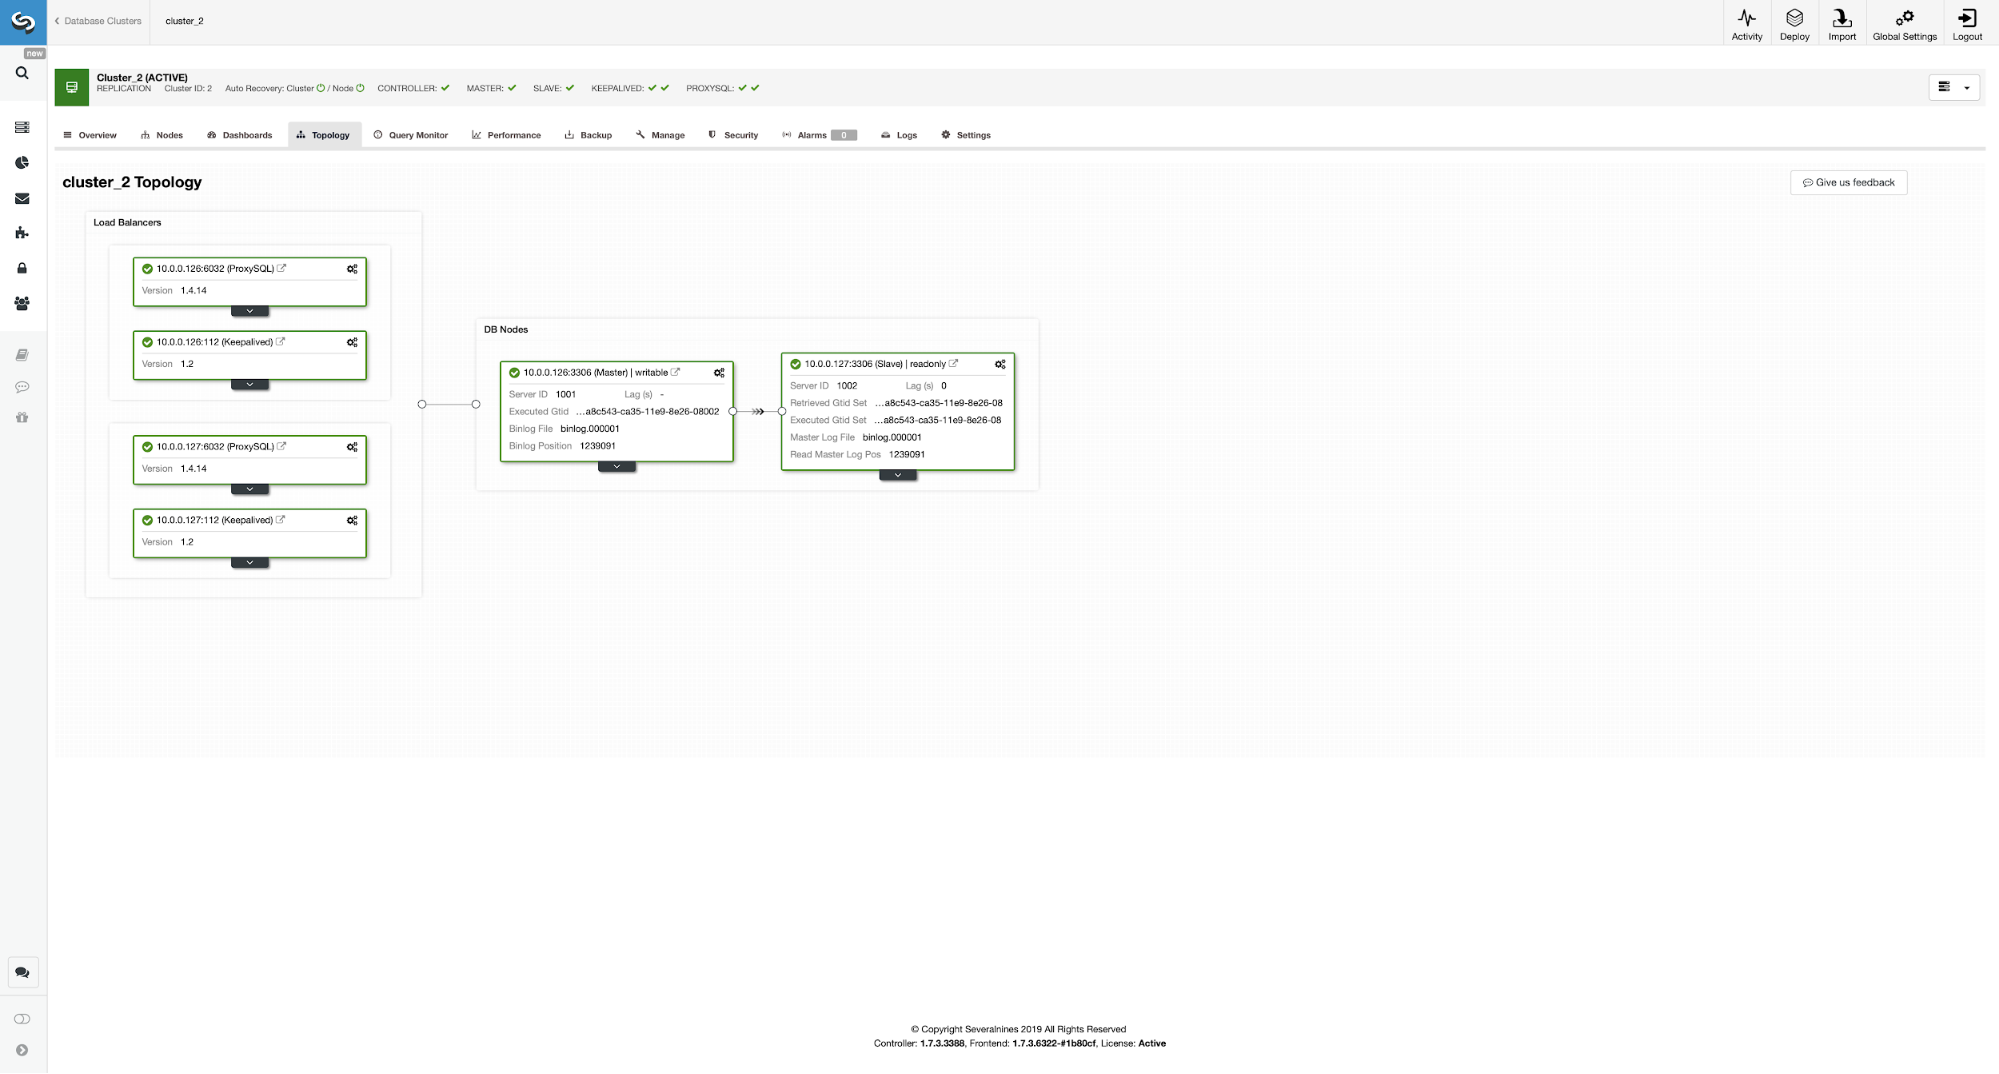
As you can see, we now have the whole setup up and ready. We have a VIP of 10.0.0.111 which is assigned to one of the ProxySQL instances. ProxySQL instances will redirect our traffic to the correct backend MySQL nodes and ClusterControl will keep an eye on the environment performing failover if needed. The last action we have to take is to reconfigure WordPress to use the Virtual IP to connect to the database.
To do that, we have to edit wp-config.php and change the DB_HOST variable to our Virtual IP:
/** MySQL hostname */

define( 'DB_HOST', '10.0.0.111' );
Conclusion
From now on WordPress will connect to the database using VIP and ProxySQL. In case the master node fails, ClusterControl will perform the failover.
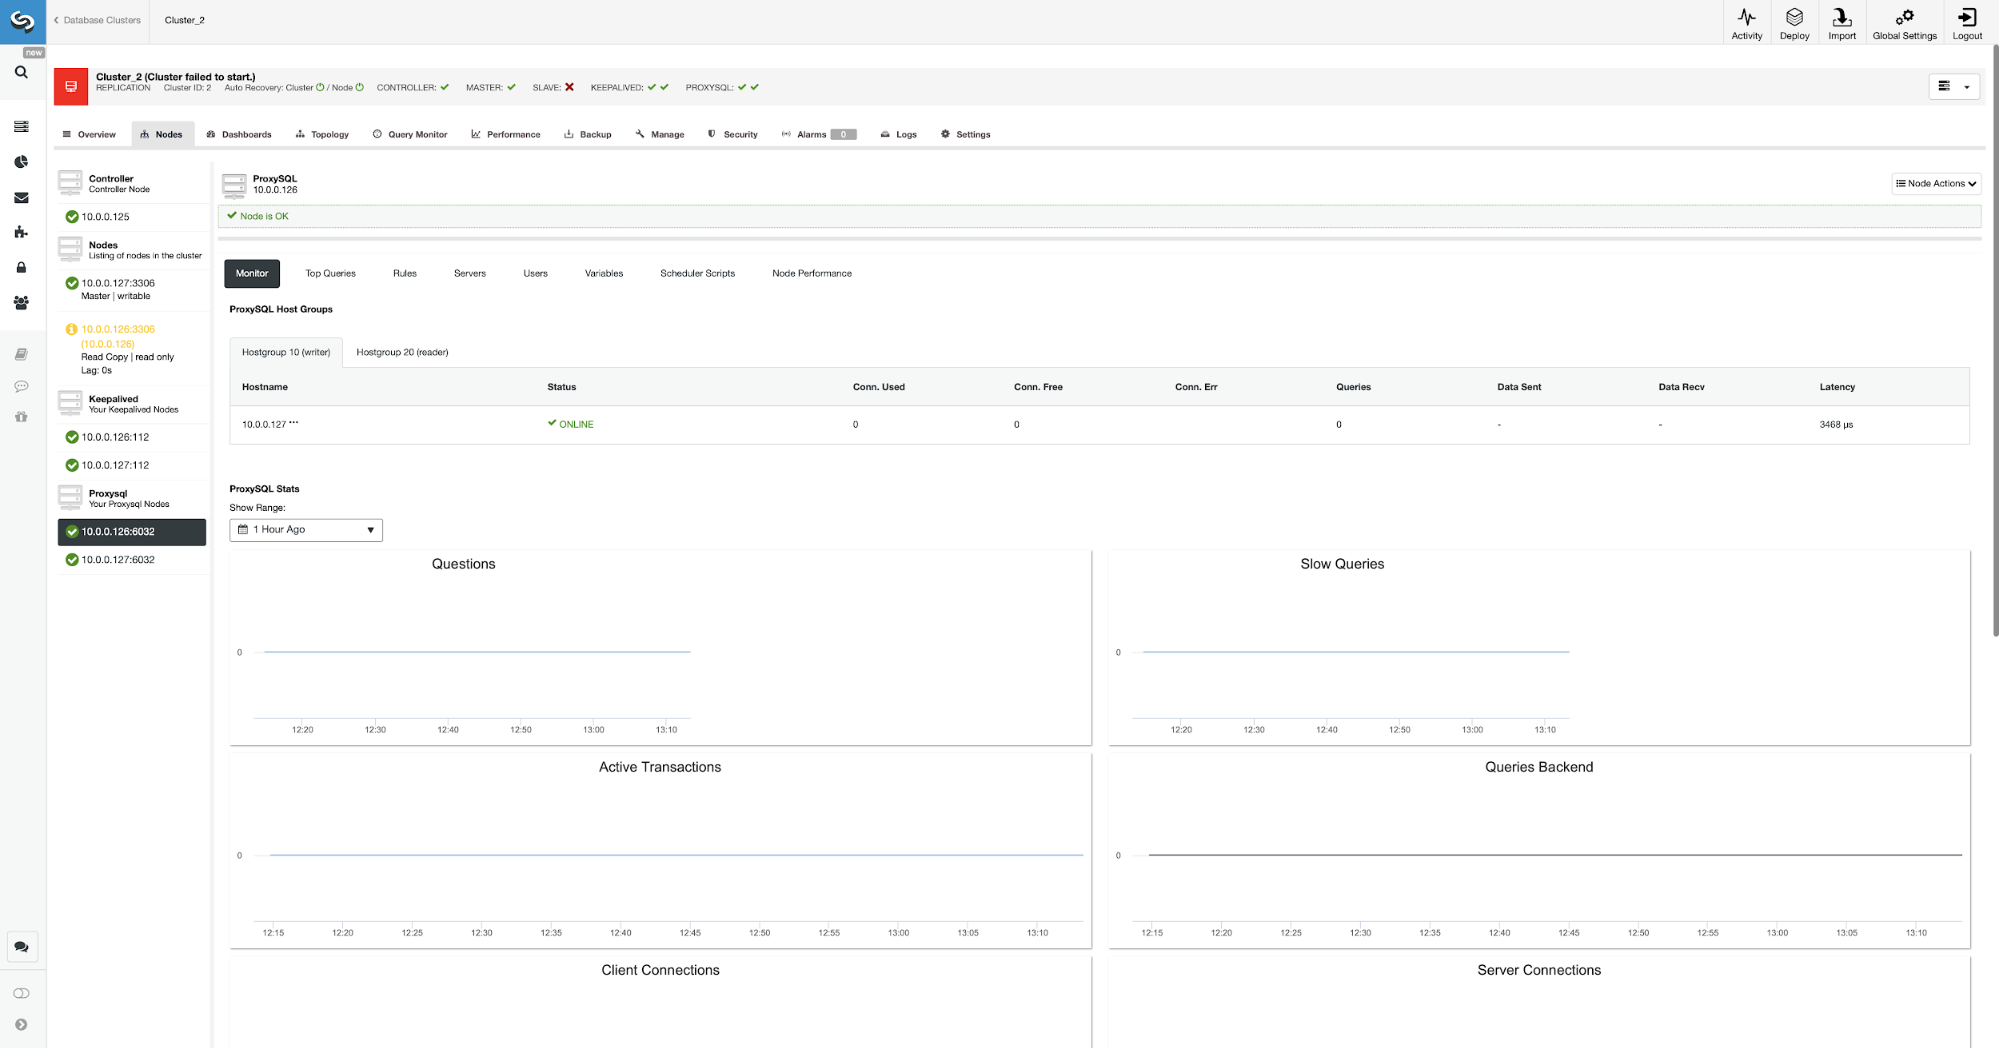
As you can see, new master has been elected and ProxySQL also points towards new master in the hostgroup 10.
We hope this blog post gives you some idea about how to design a highly-available database environment for a WordPress website and how ClusterControl can be used to deploy all of its elements.