blog
Clustering SugarCRM with MySQL Galera for High Availability and Performance

SugarCRM is the leader in open source CRM systems, and has been adopted by some of the largest firms, including IBM. The CRM software includes all sales, marketing and support tools out of the box, and can also be extended to integrate social media sources. For those depending on SugarCRM, especially when deploying in cloud environments with lower SLAs, having a high availability architecture can make a lot of sense.
![]()
In this blog post, we will show you how to cluster SugarCRM Community Edition with MySQL Galera Cluster. For simplicity, we will use NFS as the shared storage system (storage1) but keep in mind that storage1 is a single point of failure. Have a look at our previous blogs on how to deploy other shared file systems like GlusterFS, OCFS2, GFS2, csync2 with lsyncd or CephFS.
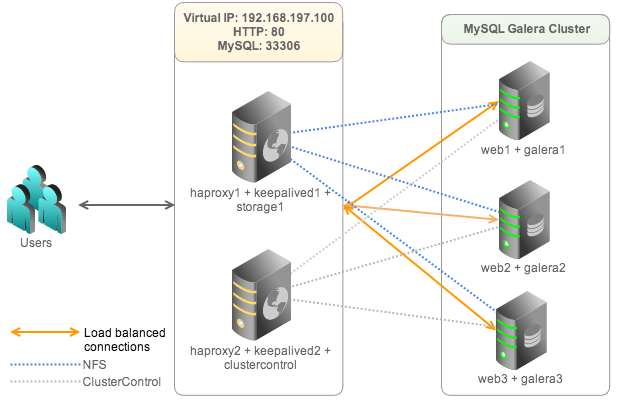
We will use a total of 5 servers. SugarCRM will be co-hosted with the Galera nodes, NFS storage will be co-hosted with the primary HAproxy while ClusterControl will be co-hosted with secondary HAproxy node. The high-level architecture is illustrated in following figure:
Turn SElinux and firewalls off on all nodes. They should have the following host definitions in /etc/hosts:
192.168.197.100		virtual-ip mysql
192.168.197.101		haproxy1 keepalived1 storage1
192.168.197.102		haproxy2 keepalived2 clustercontrol
192.168.197.111		web1 galera1
192.168.197.112		web2 galera2
192.168.197.113		web3 galera3
Deploying MySQL Galera Cluster, HAproxy and Keepalived (Virtual IP)
1. Use the Galera Configurator to deploy a three-node Galera Cluster. Use galera1, galera2 and galera3 for the MySQL nodes, and haproxy2 (192.168.197.102) for the ClusterControl node. Once deployed, enable passwordless SSH from the ClusterControl node to haproxy1 so ClusterControl can provision the node:
$ ssh-copy-id -i ~/.ssh/id_rsa 192.168.197.101
2. On haproxy2, there is an Apache HTTP server running (for ClusterControl). Configure that HTTP server to use port 8080 since port 80 will be used by HAproxy to load balance SugarCRM HTTP connections. You should update the following line in /etc/httpd/conf/httpd.conf:
Listen 8080
Then, restart httpd service on haproxy2:
$ service httpd restart
From now onwards, you need to use port 8080 to access the ClusterControl UI eg: http://192.168.197.102:8080/clustercontrol.
3. Add haproxy1 and haproxy2 into load balancing set by using Add Load Balancer wizard.
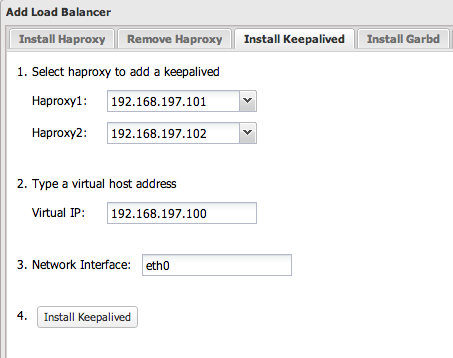
4. Install Keepalived and configure an appropriate virtual IP for HAProxy failover, similar to screenshot below:
At the end of the deployment, the top summary bar in the ClusterControl UI should look like this:

5. Configure HAProxy to serve SugarCRM on port 80 by adding the following lines in /etc/haproxy/haproxy.cfg on haproxy1 and haproxy2:
listen sugarcrm_80
	bind *:80
	mode tcp
	option httpchk GET /sugarcrm
	balance leastconn
	server web1 192.168.197.111 check inter 5000
	server web2 192.168.197.112 check inter 5000
	server web3 192.168.197.113 check inter 5000
Restart the HAProxy instance:
$ service haproxy restart
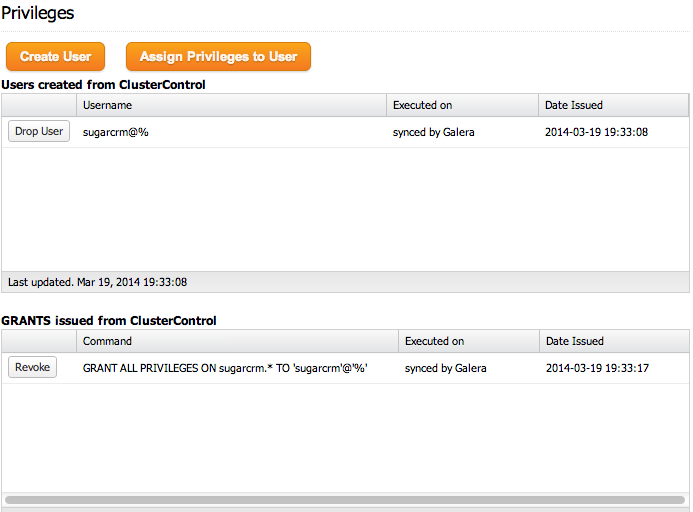
6. Create a schema for SugarCRM by using Manage >> Schema and Users >> Create a database called “sugarcrm”. Then create a user called “sugarcrm” and assign all privileges to the schema with a wildcard host (‘%’).
At this point, MySQL Galera Cluster is load balanced with virtual IP 192.168.197.100 listening on port 33306.
Configuring NFS Storage
Following steps should be performed on storage1.
1. Install NFS related packages:
$ yum install -y nfs-utils
2. Enable NFS on boot:
$ chkconfig nfs on
$ service rpcbind start
$ service nfs start
3. Create NFS configuration file to export a directory:
$ vim /etc/exports
And add the following line:
/storage 192.168.197.0/24(rw,sync,no_root_squash,no_subtree_check)
4. Create the shared directory:
$ mkdir /storage
Configuring NFS Clients
Following steps should be performed on web1, web2 and web3:
1. Create SugarCRM directory located under /var/www/html:
$ mkdir -p /var/www/html/sugarcrm
2. Add following line into /etc/fstab:
storage1:/storage /var/www/html/sugarcrm nfs noatime,nodiratime,noacl,noac,nocto 0 0
3. Mount the shared storage:
$ mount -a
Verify the NFS storage is mounted correctly:
$ df -h | grep storage
storage1:/storage             8.5G  833M  7.2G  11% /var/www/html/sugarcrm
Configuring the Web Service
Following steps should be performed on web1, web2 and web3.
1. Install all required packages to run SugarCRM on Apache:
$ yum install httpd php php-devel php-gd php-imap php-ldap php-mysql php-odbc php-pear php-xml php-xmlrpc php-magickwand php-mapserver php-mbstring php-mcrypt php-mssql php-shout php-snmp php-soap php-tidy curl curl-devel perl-libwww-perl ImageMagick libxml2 libxml2-devel unzip wget cronie -y
2. Tune some PHP settings inside /etc/php.ini:
post_max_size = 20M
upload_max_filesize = 20M
3. Start and enable httpd on boot:
$ service httpd start
$ chkconfig httpd on
Installing SugarCRM
Following steps should be performed on web1 unless specified.
1. Download the latest version of SugarCRM community edition, extract and move the content to /var/www/html/sugarcrm:
$ wget --content-disposition http://sourceforge.net/projects/sugarcrm/files/latest/download?source=files
$ unzip SugarCE-6.5.16.zip
$ mv SugarCE-Full-6.5.16/* /var/www/html/sugarcrm/
2. Assign correct ownership:
$ chown nobody.nobody /var/www/html/sugarcrm -Rf
3. Open the SugarCRM page at http://192.168.197.111/sugarcrm and you will be redirected to an installer page:
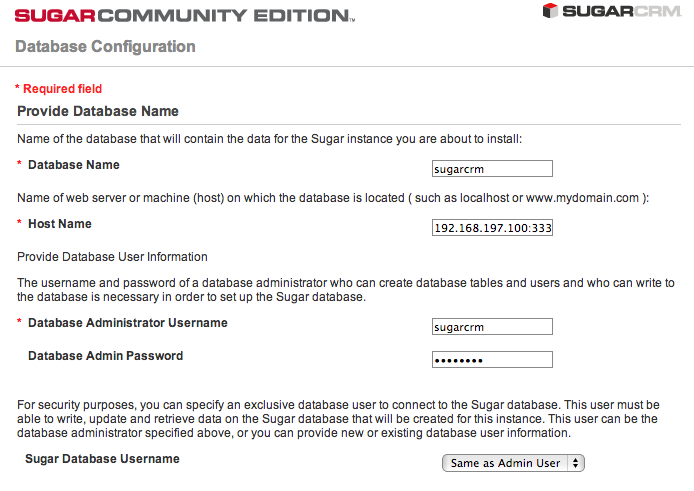
4. Proceed with the installation wizard. Make sure you pass the compatibility check. Choose ‘Custom Installation’ and once you reach the database configuration stage, specify the virtual IP, 192.168.197.100 with HAproxy MySQL port, 33306. Use the username and password for sugarcrm user that was created earlier.
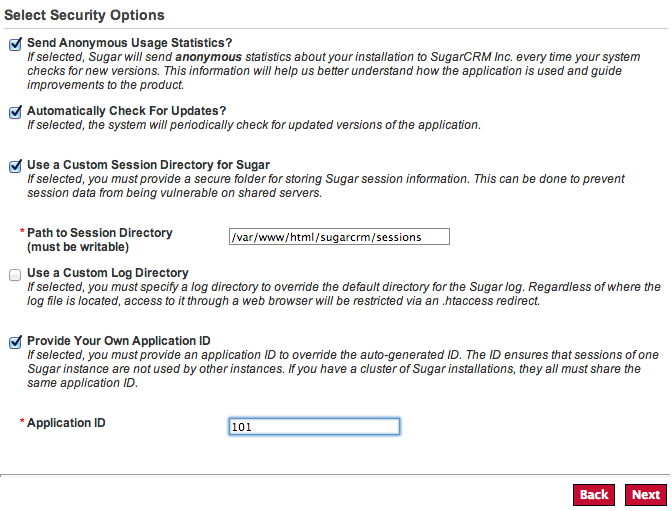
5. Before finalizing the installation, create session directory with global write permission:
$ mkdir /var/www/html/sugarcrm/sessions
$ chmod 777 /var/www/html/sugarcrm/sessions
6. On the last page of installation wizard, specify the session directory and Application ID, similar to screenshot below:
7. Click ‘Next’ and proceed to finalize the SugarCRM installation. Then, setup the cron job for SugarCRM using crontab:
$ crontab -e
And add the following line:
* * * * * cd /var/www/html/sugarcrm; php -f cron.php > /dev/null 2>&1
Restart crond to apply the change:
$ service crond restart
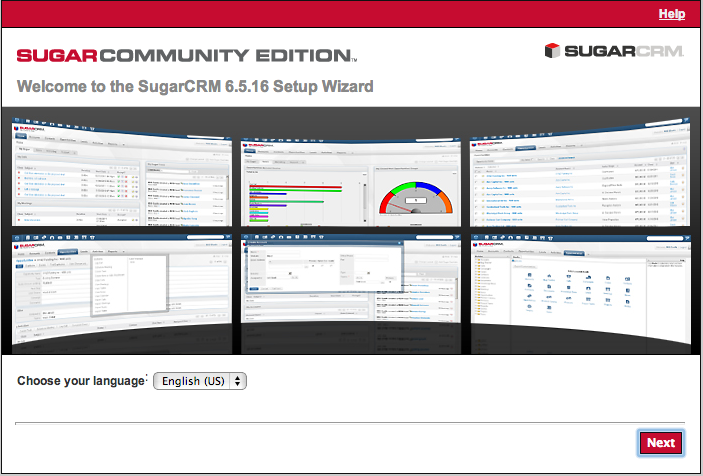
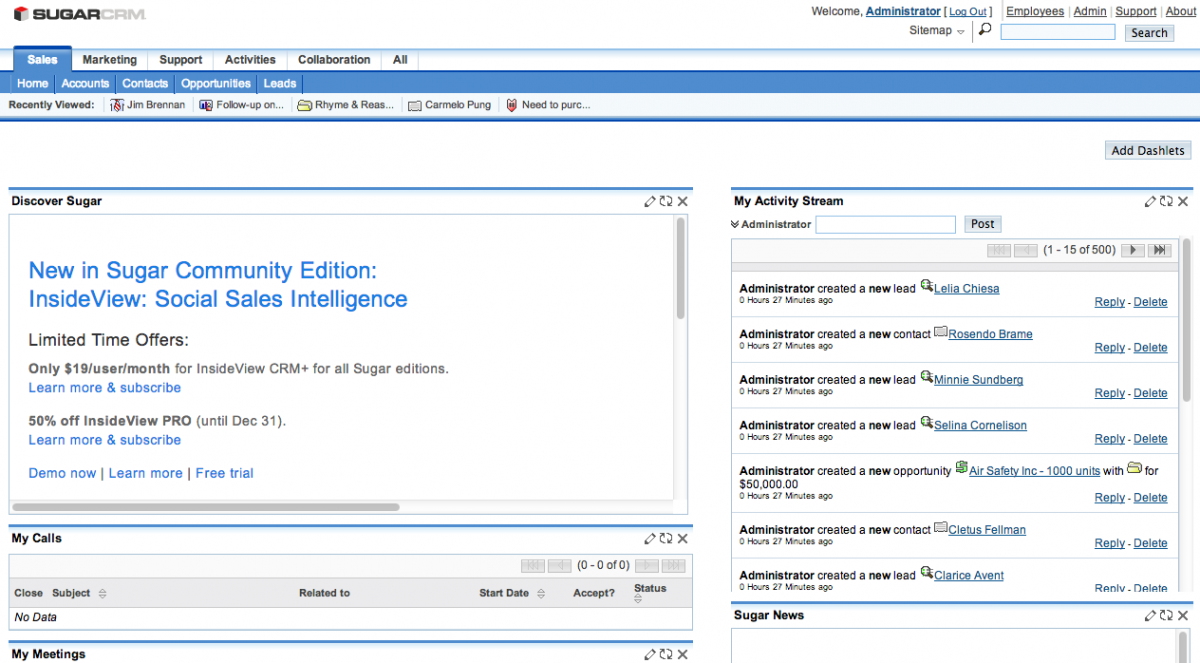
Installation completed. From now on, you should able to access SugarCRM from the virtual IP, http://192.168.197.100/sugarcrm. Once logged in, you should see the SugarCRM dashboard similar to the screenshot below:
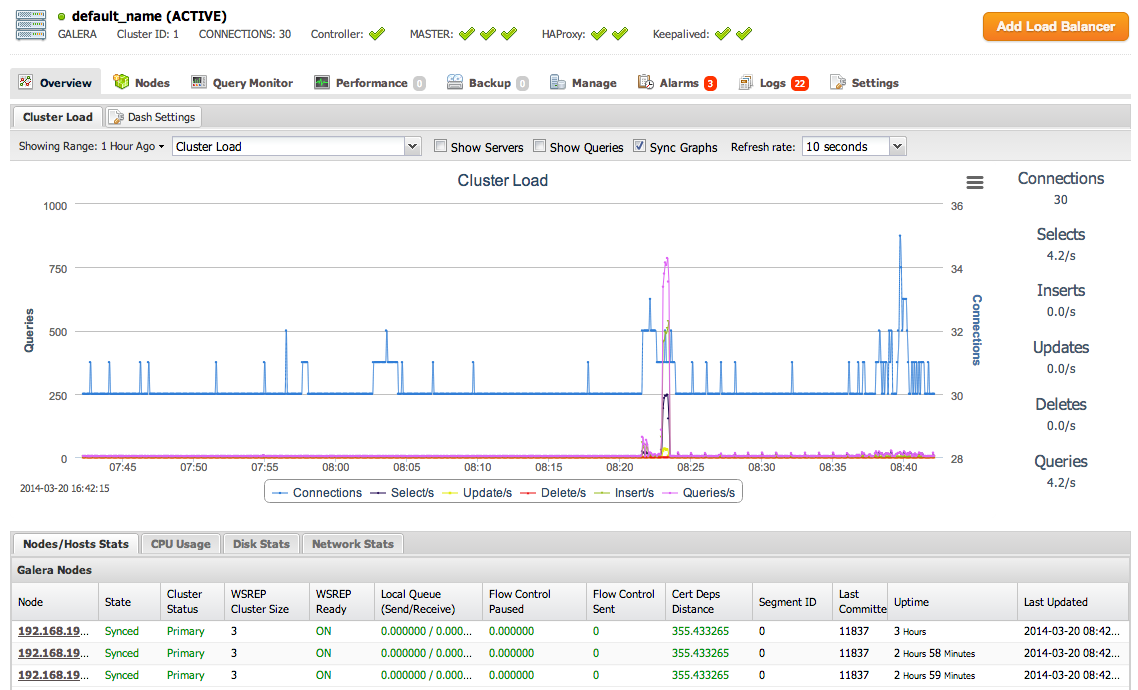
You should see some database activity on your cluster, as seen from the ClusterControl dashboard at http://192.168.197.102:8080/clustercontrol:
References
- Sugar Community Edition Installation Guide – http://support.sugarcrm.com/02_Documentation/01_Sugar_Editions/05_Sugar_Community_Edition/Sugar_Community_Edition_6.5/Sugar_Community_Edition_Installation_Guide_6.5.0
- Sugar Community Edition Administrator Guide – http://support.sugarcrm.com/02_Documentation/01_Sugar_Editions/05_Sugar_Community_Edition/Sugar_Community_Edition_6.5/Administration_Guide
- Setting up an NFS Server – http://www.tldp.org/HOWTO/NFS-HOWTO/server.html


