blog
ClusterControl – Advanced Backup Management – mariabackup Part I

ClusterControl can, among others, act as a great tool to help you design and execute the backup schedule. Numerous features are available including backup verification, transparent backup encryption and many others. What is quite commonly missing is the ability of ClusterControl to tune backup tools that we use to create the backup. In this blog we would like to go over some of the settings that can be applied to MariaBackup. Let’s get started.
Initial setup
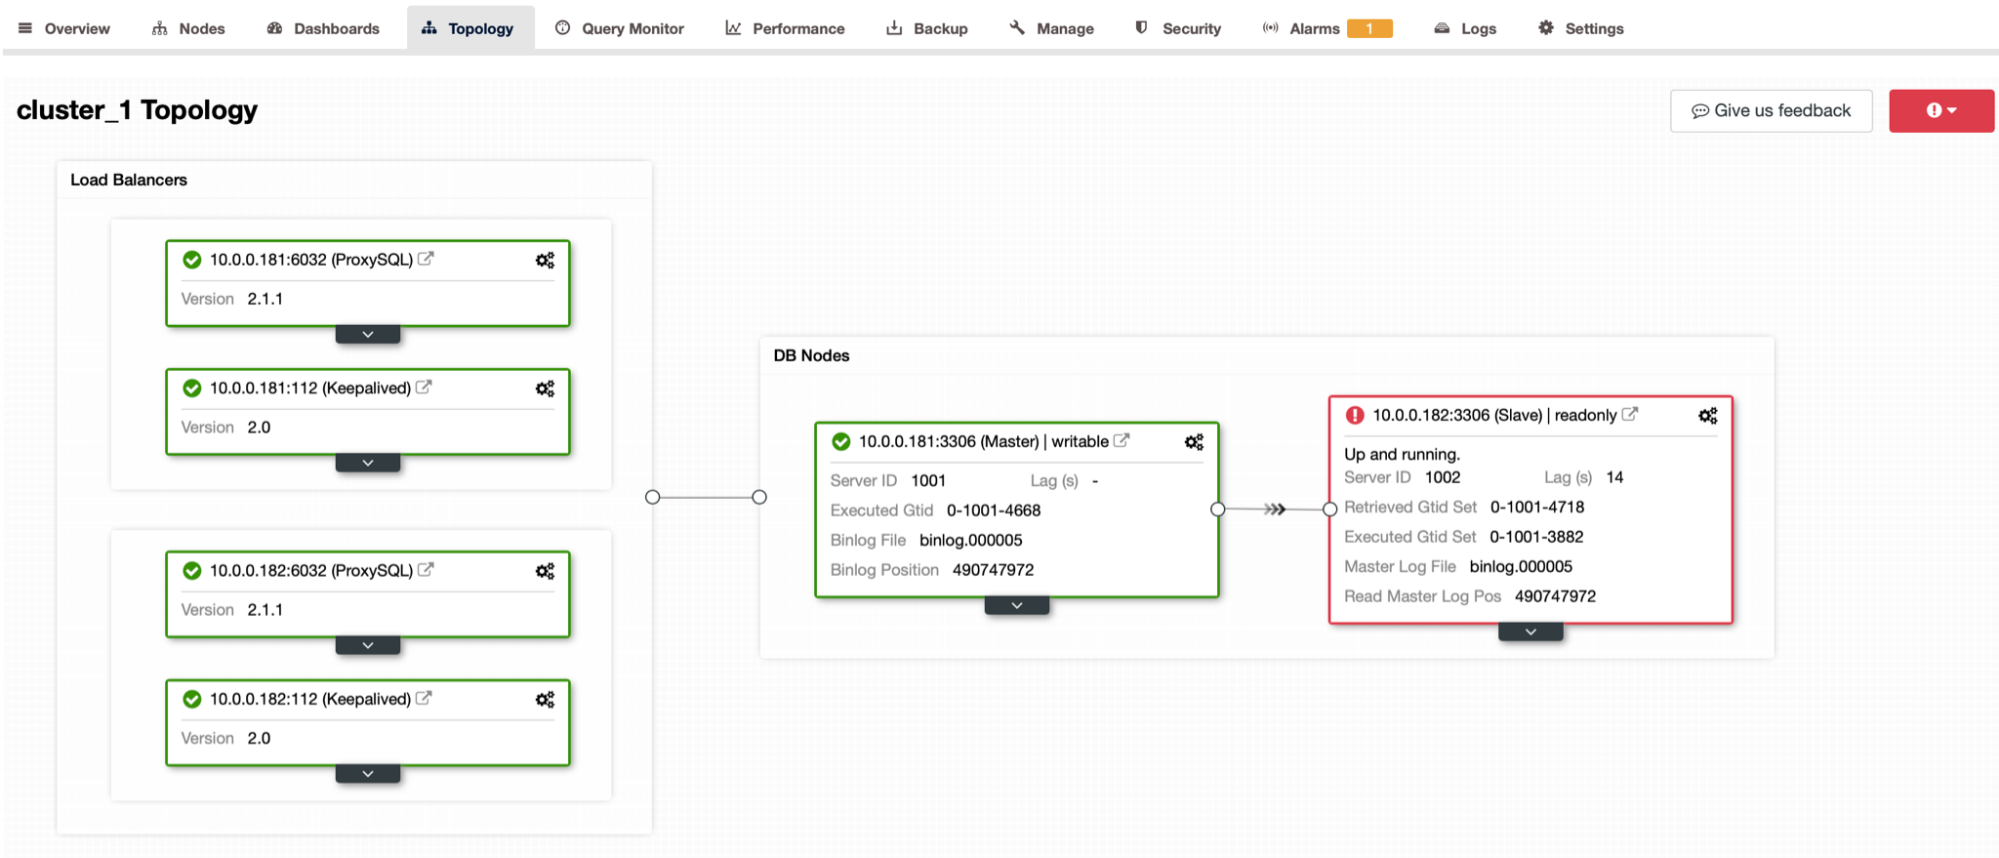
The initial setup is a MariaDB cluster with one master and one replica which is lagging at this moment due to the import of the data running in the background.
We have two ProxySQL nodes and two Keepalived nodes, providing Virtual IP and making sure that the ProxySQL is reachable. We are populating the cluster (thus the lag) with data generated by sysbench. We have used following command to trigger this process:
sysbench /root/sysbench/src/lua/oltp_read_write.lua --threads=4 --mysql-host=10.0.0.111 --mysql-user=sbtest --mysql-password=sbtest --mysql-port=6033 --tables=32 --table-size=1000000 prepareThis will generate around 7.6GB of data that we are going to test different backup settings on.
Compression settings
As we mentioned, there are quite a few settings that you can use to tweak MariaBackup and other tools involved in the backup process.
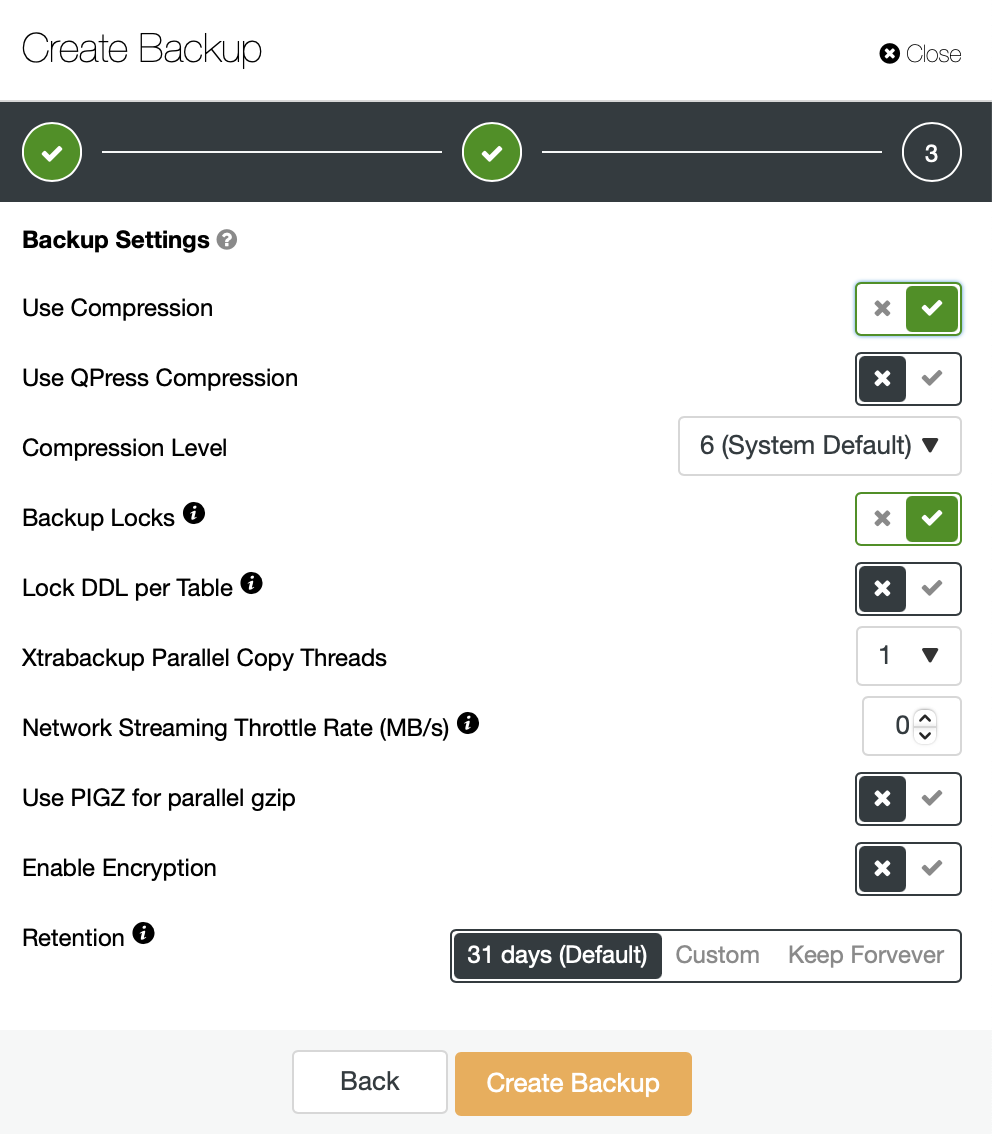
In this blog post we would like to focus on the compression level and see if it has any kind of real impact on our backup process. Does it change the length of the backup run? Does it change the size of the backup? How? Does it make any point in actually using anything else than the default setting? Let’s take a look at it shortly.
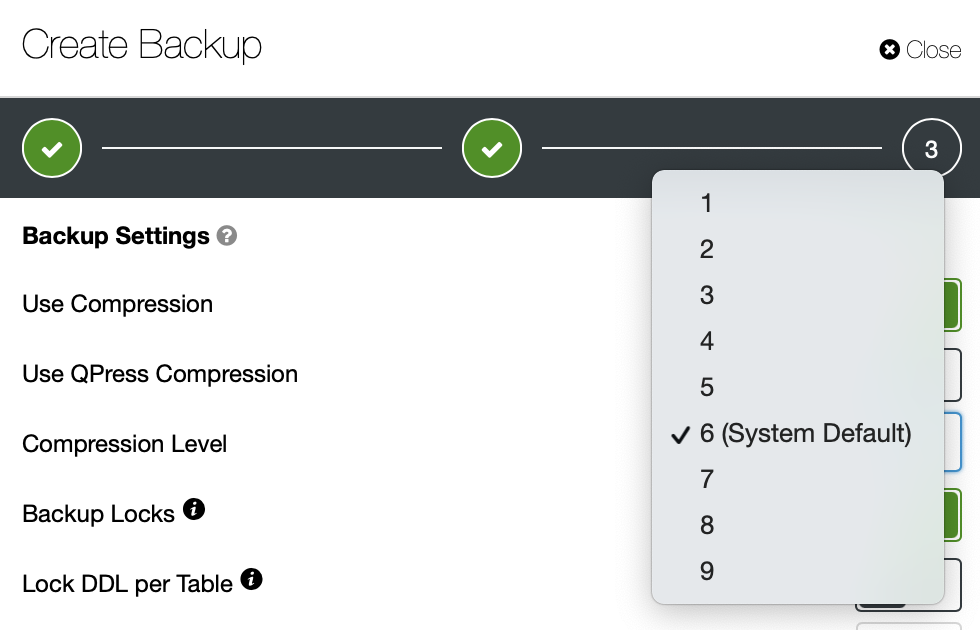
We are going to run backups using all the settings from the Compression level dropdown:
Backups will be stored on the node, locally, to minimize the impact caused by the network. We are going to use full MariaBackup. Data in the database is not encrypted or compressed in any way.
We will start 9 backup jobs, each with a different setting of the compression level. This setting is passed to gzip that is used, by default, to compress the data. What we expect to see is an increase of the backup execution time and reduction of the backup size when we’ll increase this setting.
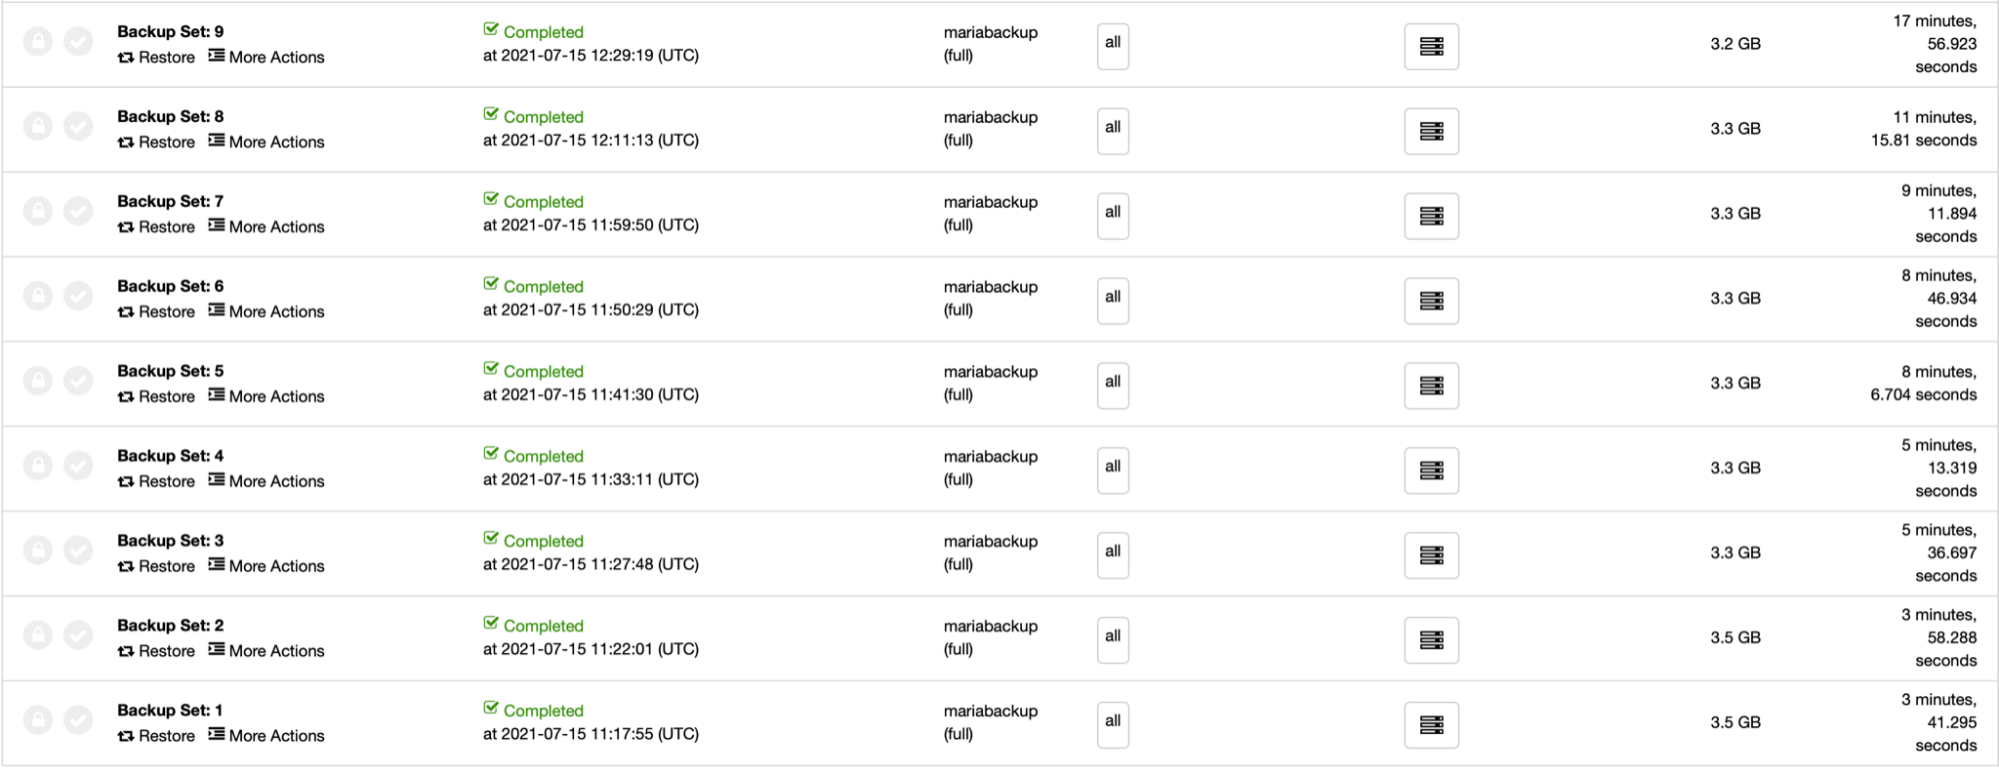
As you can see, with an exception of backup 4, which we can just count out as a transient fluctuation, the backup execution time increases starting from 3 minutes and 41 seconds up to 17 minutes and 57 seconds. The backup size decreases from 3.5GB to 3.3GB. We can also check the exact size of the backup:
du -s /root/backups/*
3653288 /root/backups/BACKUP-1
3643088 /root/backups/BACKUP-2
3510420 /root/backups/BACKUP-3
3486304 /root/backups/BACKUP-4
3449392 /root/backups/BACKUP-5
3437504 /root/backups/BACKUP-6
3429152 /root/backups/BACKUP-7
3425492 /root/backups/BACKUP-8
3405348 /root/backups/BACKUP-9
This confirms that the backup size, in fact, decreases with every compression level but the differences are quite small between the first and the last level we tested. Smallest backup has 93.2% of the size of the largest one. On the other hand, its execution time (1077 seconds) is almost 5 times longer than the execution time of the largest backup (221 seconds).
Please keep in mind that your mileage will vary. You may use data that compress better, making the impact of the compression level more significant. Based on the outcome of this test, for sysbench dataset it hardly makes sense to use a compression level higher than 3.
Qpress compression
Another option we would like to test today is the Qpress compression. Qpress is a compression method that can be used to replace gzip.

As you can see, it is definitely faster than gzip but it comes with a significant increase in the size of the data. After 100 seconds of compression, we got 4.6GB of data.
Picking the most suitable compression method may require a series of tests but, as we hope you can see, it definitely makes a point to do that. For large data sets being able to trade a somewhat larger archive for an almost 5 times faster backup process may be quite handy. If we consider using Qpress, we can trade disk space even for a 10 times faster backup process. This may mean a difference between 20 hours backup and 2 hours backup. Sure, the increase of the disk space needed for storing such data will be visible but then, when you think about it, getting a larger disk volume is doable. Adding additional hours to the day, when 24 hours are not enough to get the backup done, is not.
We hope this short blog was insightful for you and it will encourage you to play with and tweak different settings that can be used for MariaBackup. If you would like to share your experience with them, we’d love to see your comments.