blog
Automating and Managing MongoDB in the Cloud

Database management has traditionally been complex and time-consuming. Deployment, with the headaches of security, complex networking, backup planning and implementation, and monitoring, has been a headache. Scaling out your database cluster has been a major undertaking. And in a world where 24/7 availability and rapid disaster recovery is expected, managing even a single database cluster can be a full-time job.
Severalnines’ ClusterControl is a database deployment and management system that addresses the above, facilitating rapid deployment of redundant, secure database clusters or nodes, including advanced backup and monitoring functionality – whether on premise or in the cloud. With plugins supporting Nagios, PagerDuty, and Zabbix, among others, ClusterControl integrates well with existing infrastructure and tools to help you manage your database servers with confidence.
MongoDB is the leading NoSQL database server in the world today. Using ClusterControl, with which you can deploy and manage either official MongoDB or Percona Server for MongoDB, Percona’s competing offering incorporating MongoDB Enterprise features, we are going to walk through deploying a MongoDB Replica Set with three data nodes, and look at some of the features of the ClusterControl application.
We’re going to run through some key features of ClusterControl, especially as they pertain to MongoDB, using Amazon Web Services. Amazon Web Services (or AWS) is the largest Infrastructure as a Service cloud provider globally, hosting millions of users all over the world.It comprises many services for all use cases from virtually unlimited object storage with S3 and highly scalable virtual machine infrastructure using EC2 all the way to enterprise database warehousing with Redshift and even Machine Learning.
Once you’ve read this blog, you may also wish to read our DIY Cloud Database on Amazon Web Services Whitepaper, which discusses configuration and performance considerations for database servers in the AWS Cloud in more detail. In addition, we have Become a MongoDB DBA, a whitepaper with more in depth MongoDB-specific detail.
To begin, first you will need to deploy four AWS instances. For a production platform, the instance type should be carefully chosen based on the guidelines we have previously discussed, but for our purposes instances with 2 virtual CPUs and 4GB RAM will be sufficient. One of these nodes will host ClusterControl, the others will be used to deploy the three database nodes.
Begin by creating your database nodes’ security group, allowing inbound traffic on port 27017. There is no need to restrict outbound traffic, but should you wish to do so, allow outbound traffic on ports 1024-65535 to facilitate outbound communication from the database servers.
Next create the security group for your ClusterControl node. Allow inbound traffic on ports 22, and 80. Add this security group ID to your database nodes security group, and allow unrestricted TCP communication. This will facilitate communication between the two security groups, without allowing ssh access to the database nodes from external clients.
Launch the instances into their respective security groups, choosing for each instance a KeyPair for which you have the ssh key. For the purposes of this task, use the same KeyPair for all instances. If you have lost the ssh key for your KeyPair, you will have to create a new KeyPair. When launching the instances, do not choose the default Amazon Linux image, instead choose an AMI based on a supported operating system listed here. As I am using AWS region EU-CENTRAL-1, I will use community AMI ami-fa2df395, a CentOS 7.3 image, for this purpose.
If you have the AWS command line tools installed, use the aws ec2 describe-instances command detailed previously to confirm that your instances are running–otherwise view your instances in the AWS web console–and when confirmed, log in to the ClusterControl instance via ssh.
Copy the public key file you downloaded when creating your KeyPair to the ClusterControl instance. You can use the scp command for this purpose. For now, let’s leave it in the default /home/centos directory, the home directory of the centos user. I have called mine s9s.pem. You will need the wget tool installed; install it using the following command:
$ sudo yum -y install wgetTo install ClusterControl, run the following commands:
$ wget https://severalnines.com/downloads/cmon/install-cc
$ chmod +x install-cc
$ ./install-cc # as root or sudo user
The installation will walk you through some initial questions, after which it will take a few minutes to retrieve and install dependencies using your operating system’s package manager.
When installation is complete, point your web browser to http://
. You can find the external facing address of the instance using the describe-instances command, or via the AWS web console.Once you have successfully logged in, you will see the following screen, and can continue to deploy your MongoDB Replica Set.
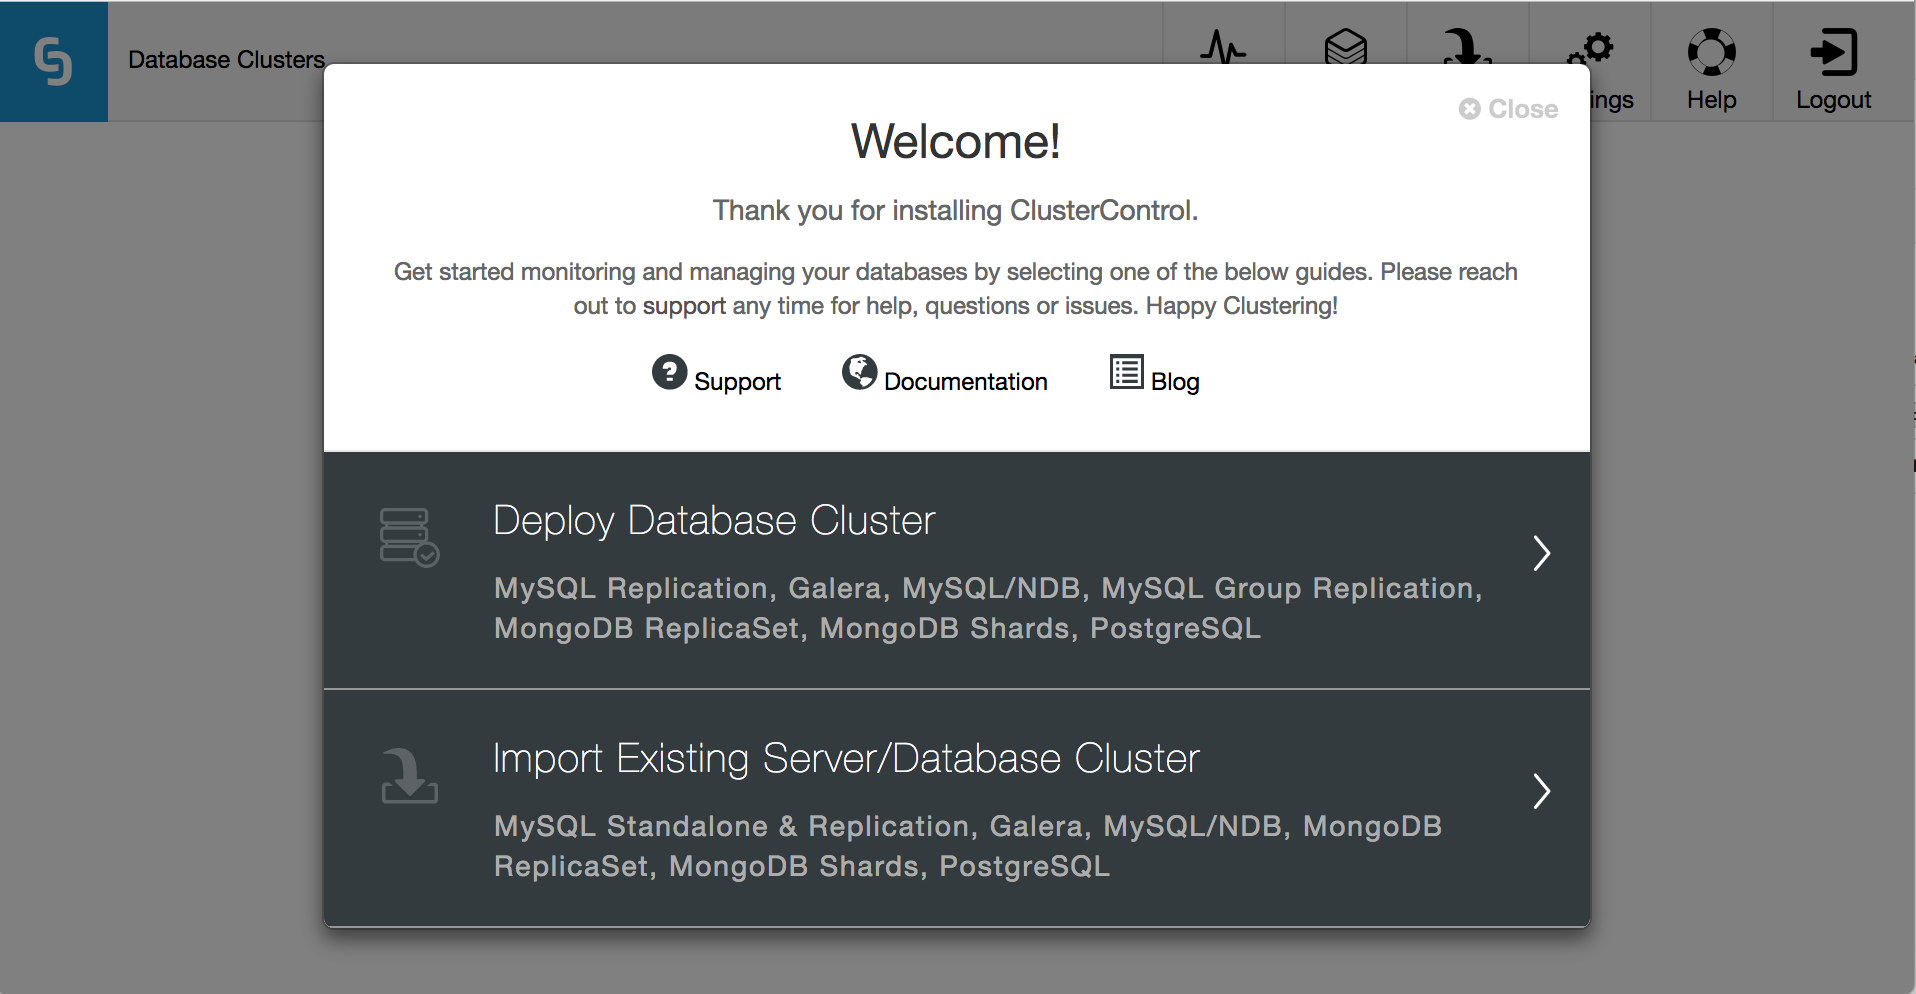
As you can see, ClusterControl can also import existing database clusters, allowing it to manage your existing infrastructure as easily as new deployments.
For our purposes, you are going to click Deploy Database Cluster. On the next screen you will see the selection of database servers and cluster types that ClusterControl supports. Click the tab labelled MongoDB ReplicaSet. Here the values with which you are concerned are SSH User, SSH Key Path, and Cluster Name. The port should already be 22, the default ssh port, and the AMI we are using does not require a Sudo Password.
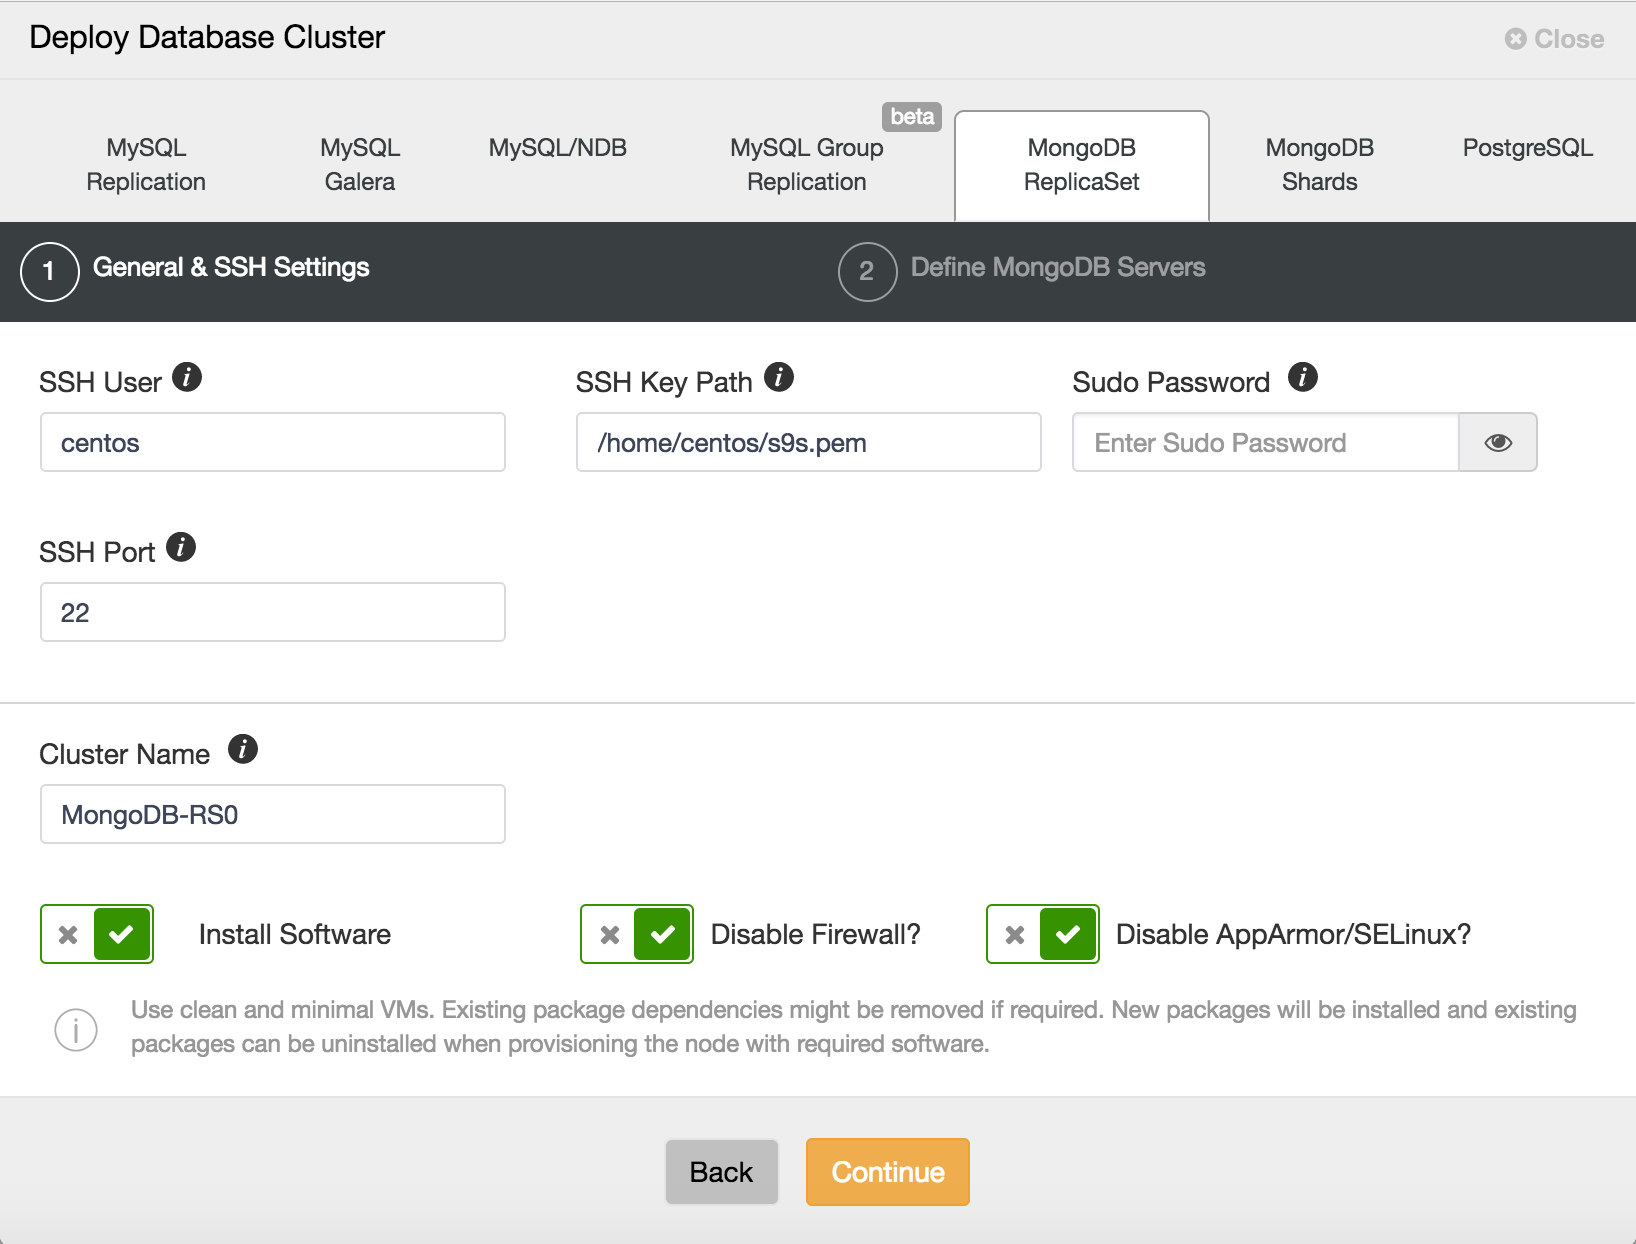
The ssh user for the CentOS 7 AMI is centos, and the SSH Key Path is /home/centos/s9s.pem, or the appropriate path depending on your own Key file name. Let’s use MongoDB-RS0 as the Cluster Name. Accepting the default options, we click Continue.

Here we can choose between the MongoDB official build, and a Percona build. Select whichever you prefer, and supply an admin user and password with which to configure MongoDB securely. Note that ClusterControl will not let you proceed unless you provide these details. Make a note of the credentials you have supplied, you will need them to log in to the deployed MongoDB database, if you wish to later use it. Now choose a Replica Set name, or accept the default. We are going to use the vendor repositories, but be aware that you can configure ClusterControl to use your own repositories or those of a third party, if you prefer.
Add your database nodes, one at a time. You can choose to use the external IP address, but if you provide the hostname, which is generally recommended, ClusterControl will record all network interfaces in the hosts, and you will be able to choose the interface on which you would like to deploy. Once you have added your three database nodes, click Deploy. ClusterControl will now deploy your MongoDB Replica Set. Click Full Job Details to observe as it carries out the configuration of your cluster. When the job is complete, go to the Database Clusters screen and see your cluster.

Taking a closer look, you can see that Auto Recovery is enabled at both a cluster and a node level; in the case of failures, ClusterControl will attempt to recover your cluster or the individual node having an issue. The green tick beside each node also displays the cluster’s health status at a glance.
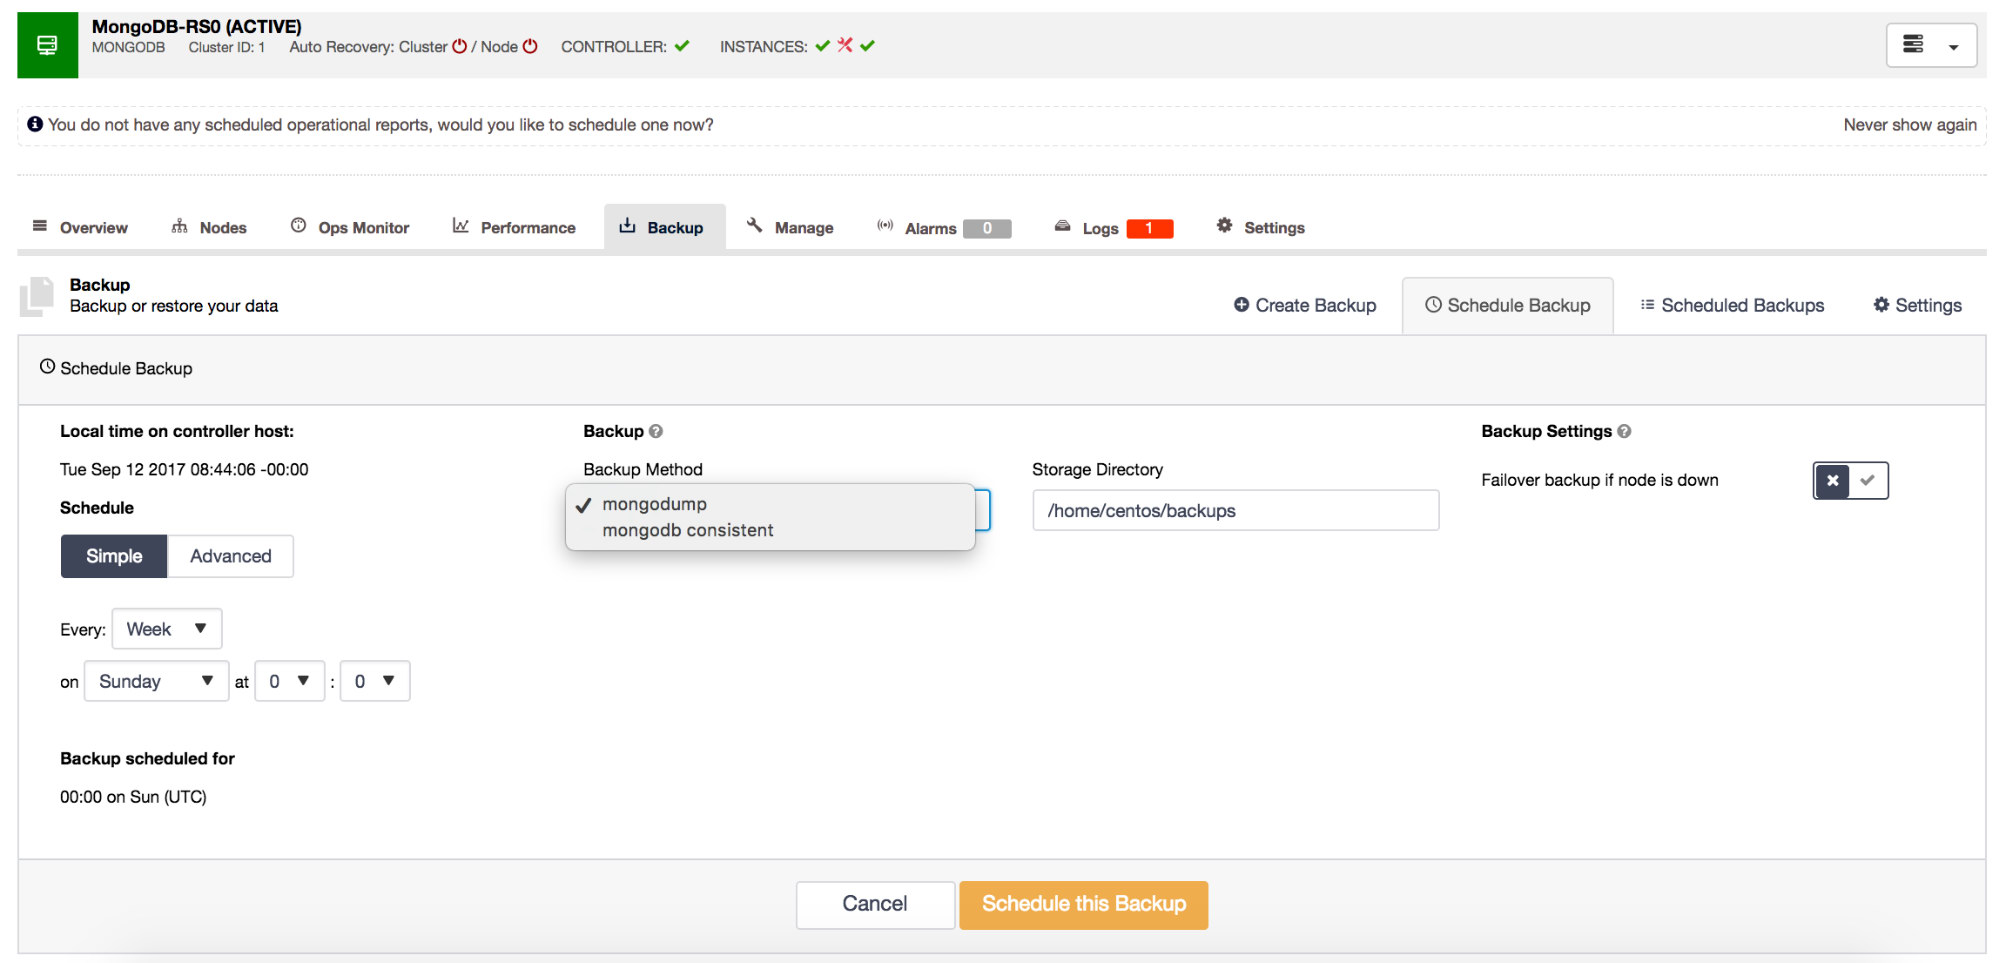
The last feature we will cover here is Backups. ClusterControl provides a backup feature that allows a full cluster consistent backup, or simply a standard mongodump backup if you prefer. It also provides the facility to create scheduled backups to run periodically to a schedule of your choosing. Backup retention is also handled, with the option to retain backups for a limited period, avoiding storage issues.
In this blog I’ve attempted to give you a brief overview of using ClusterControl with MongoDB, but there are many more features supported by ClusterControl. Deployment of Sharded Clusters, with hidden and/or delayed slaves, arbiters and other features are all available. More information is available on our website, where you can also find webinars, whitepapers, tutorials, and training, and try out ClusterControl free.


