blog
ACL using s9s CLI

Starting with ClusterControl 1.8.2, we have introduced new user management, permissions as well as access controls. From this version onwards, all of the features we mentioned earlier will be controlled by a set of Access Control List (ACL) text forms called read (r), write (w), and execute (x). ACL is not a new thing to most system administrators in configuring permission for users and groups, in fact, this is one of the common ways in allowing certain privileges.
In ClusterControl 1.8.1 and earlier, role-based access control (RBAC) is used. The roles need to be created and assigned a set of permissions to access certain features or pages. While the role enforcement happens on the front-end, the ClusterControl controller service (cmon) does not really know whether the active user has the privilege to access the functionality since the information is not shared between the two authentication engines. Over time, this method would make both authentication and authorization hard to control especially for the features compatible with both GUI and CLI interfaces.
In this blog post, we will review how to enable ACL using s9s CLI especially for the use case that requires some external ClusterControl access. We also will briefly review how to manage the access from the GUI.
Access Control in ClusterControl UI
There are 2 ways that can be applied to configure the permission in ClusterControl either by using GUI or the CLI. With ClusterControl GUI, the steps are less complicated and easy to follow as opposed to the CLI. All cluster is owned by a team, the team can be configured either to have admin, denied the access or read access only, all of these are similar to the earlier ClusterControl version. From your ClusterControl 1.8.2 UI, this option is available on the left sidebar like in the screenshot below:
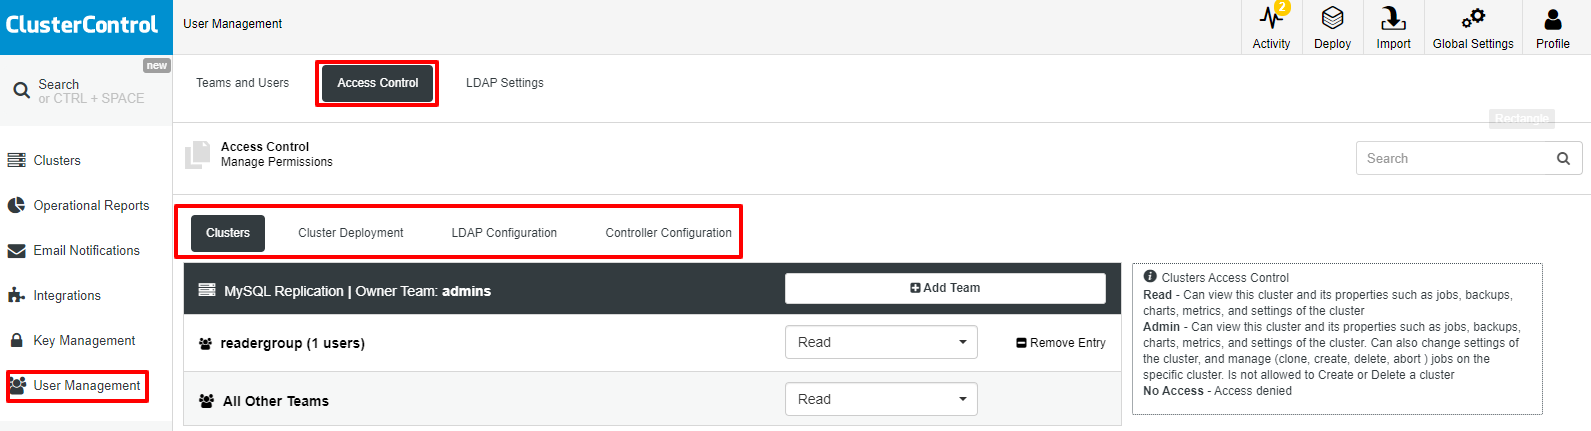
As you may notice, there are 4 options that you could manage the permissions as listed below:
-
Clusters
-
Cluster Deployment
-
LDAP Configuration
-
Controller Configuration
If you click on each of the tabs, the information will be displayed in the textbox on the right-hand side. For example, for “Cluster Access Control” the following information is displayed:
Read - Can view this cluster and its properties such as jobs, backups, charts, metrics, and settings of the cluster

Admin - Can view this cluster and its properties such as jobs, backups, charts, metrics, and settings of the cluster. Can also change settings of the cluster, and manage (clone, create, delete, abort ) jobs on the specific cluster. Is not allowed to Create or Delete a cluster

No Access - Access denied
On this page also, you can add/remove any team or group that you would like to assign permission to by clicking on the “Add Team” button. From the previous screenshot also, you may notice “readergroup” has been assigned with “read” access for the “Cluster Access Control”.
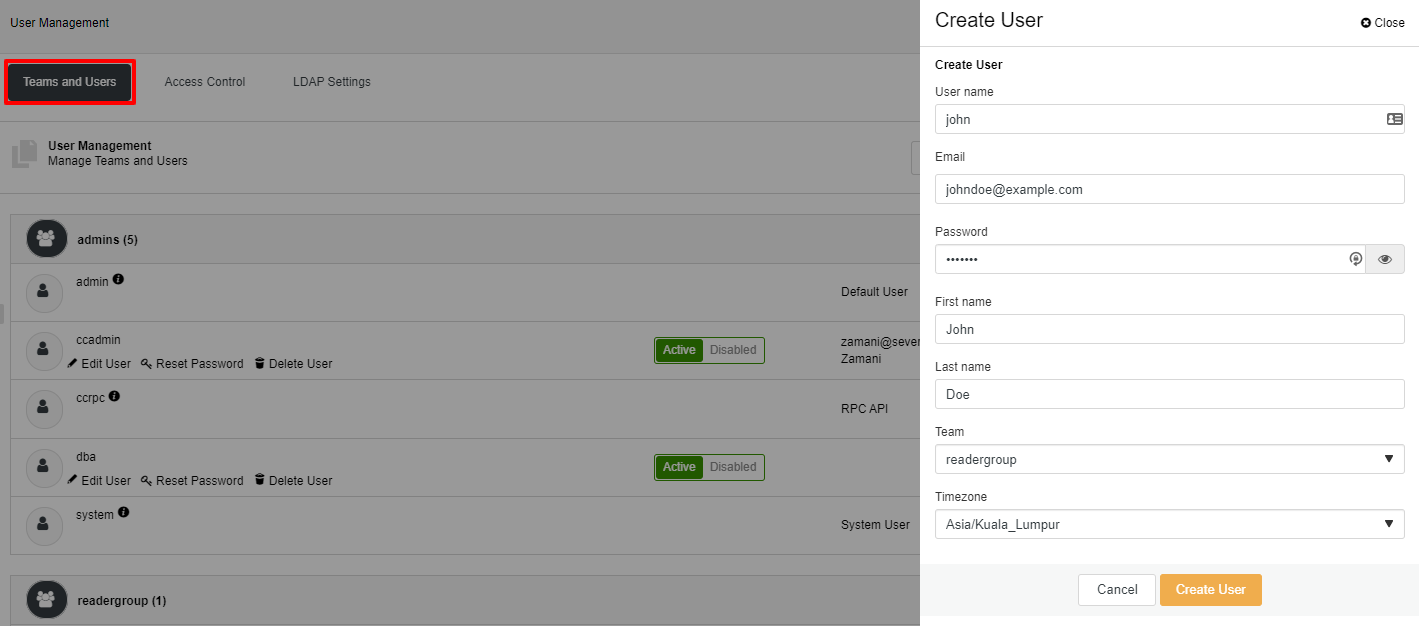
To add a user to the team, you may do so from the “Team and Users” page. Simply click on the “Create User” button and fill in all the required information as per the example below:
If any of the members from “readergroup” access the ClusterControl UI, they will see a different interface compare to the user from with the “admin” access. The following screenshot is what they will see:
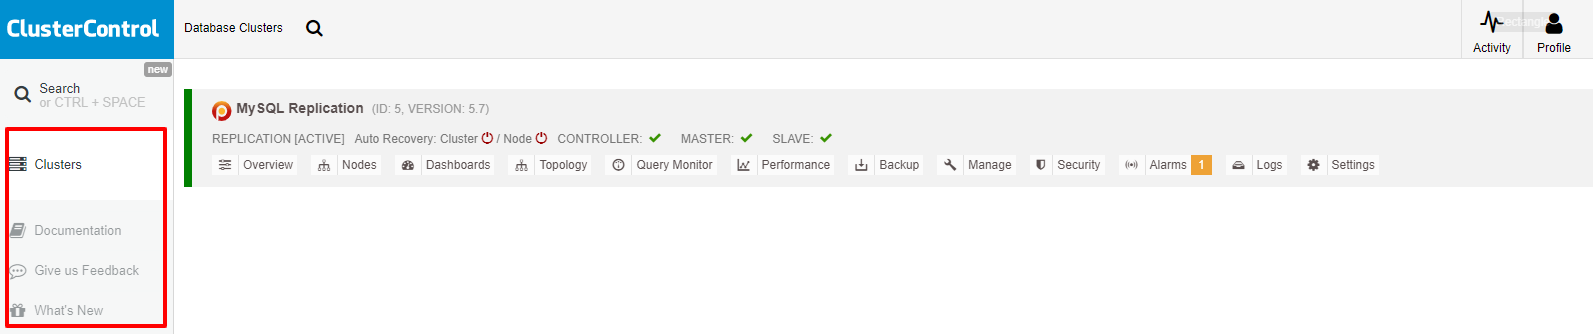
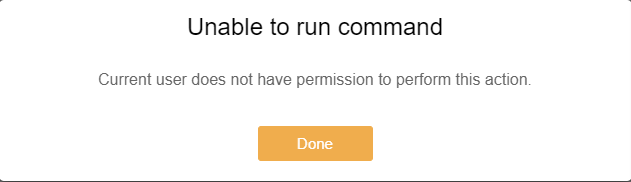
They will not see some of the options and if they try to change any of the settings the following popup will appear:
That is a brief example of how to use Access Control and manage the permission using the GUI. The detailed step on how to use the new user management can be found in our documentation here.
ACL Using s9s CLI
In this section, we will go through a few examples of the common permissions setting that are being used and configure them using the “s9s” CLI. For the first example, we will configure a dedicated read-only user that will be connected from his client and integrate with the ClusterControl platform via the RPC interface. For this purpose, the requirements would be like in the list below:
-
A client/host that will act as the ClusterControl monitor server
-
ClusterControl node, 10.10.80.10
-
MySQL Replication setup – you could use your own setup
-
PostgreSQL 13 – you could use your own setup
Creating a Read-only User
Assuming all of our requirements are ready, let’s go ahead with the steps. Take note that this needs to be done in the ClusterControl node:
-
Add the following line inside /etc/default/cmon. Take note of the IP address, it should be the same as your ClusterControl node IP:
RPC_BIND_ADDRESSES="10.10.80.10,127.0.0.1"-
Restart CMON service to make sure ClusterControl listens on port 9501 for both IP addresses defined above:
$ systemctl restart cmon-
Create a read-only user called “readeruser” (you could choose any name):
$ s9s user --create --group=readergroup --create-group --generate-key --new-password=s3cr3tP455 [email protected] --first-name=Reader --last-name=User --batch readeruser
*A new private and public key will be created under ~/.s9s directory called readeruser.key and readeruser.pub.
-
Run the following command to confirm the user is created:
$ s9s user --list --long
A ID UNAME      GROUPS      EMAIL                 REALNAME
-  1 system     admins      -                     System User
-  2 nobody     nobody      -                     Default User
-  3 admin      admins      -                     Default User
-  4 ccrpc      admins      -                     RPC API
-  5 ccadmin    admins      [email protected]        Zamani
A  9 dba        admins      -                     -
- 11 worf       users       [email protected] Worf Doe
- 15 readeruser readergroup [email protected]  Reader User
Total: 8-
Get the Cmon Directory Tree (CDT) value for your cluster (imagine this as ls -al in UNIX). In this example, our cluster name is “MySQL Replication”, as shown below:
$ s9s tree --list --long
MODE        SIZE OWNER      GROUP  NAME
crwxrwxr--+    - ccadmin    admins MySQL Replication
srwxrwxrwx     - system     admins localhost
drwxrwxr--  1, 0 system     admins groups
urwxr--r--     - admin      admins admin
urwxr--r--     - ccadmin    admins ccadmin
urwxr--r--     - ccrpc      admins ccrpc
urwxr--r--     - dba        admins dba
urwxr--r--     - nobody     admins nobody
urwxr--r--     - readeruser admins readeruser
urwxr--r--     - system     admins system
urwxr--r-- - worf admins worf-
Assign read permission for “readeruser” and “readergroup” for the cluster that you want. Our CDT path is “/MySQL Replication” (take note to always start with a “/”, similar to UNIX):
$ s9s tree --add-acl --acl="group:readergroup:r--" "/MySQL Replication"
Acl is added.
$ s9s tree --add-acl --acl="user:readeruser:r--" "/MySQL Replication"
Acl is added.
The configuration is complete for the ClusterControl node part. Next, we need to configure the s9s client in the reader’s workstation/host.
Client Configuration
All the commands that we are going to execute should be done on the reader’s workstation. You could have as many readers as you want. The steps would be the same for all workstations (client).
-
Install s9s CLI. Detailed instructions can be found here.
$ wget http://repo.severalnines.com/s9s-tools/install-s9s-tools.sh
$ chmod 755 install-s9s-tools.sh
$ ./install-s9s-tools.sh-
Make sure .s9s directory is created. If it’s not, proceed to create the directory and copy the readeruser.key and readeruser.pub from the ClusterControl server into it:
$ mkdir ~/.s9s
$ cd ~/.s9s
$ scp [email protected]:~/.s9s/readeruser.key .
$ scp [email protected]:~/.s9s/readeruser.pub .-
Edit the s9s configuration file at ~/.s9s/s9s.conf:
[global]
cmon_user=readeruser
controller=https://10.10.80.10:9501
At this point, the configuration is complete on the client-side. You may test it by executing the following commands to list out the cluster’s objects (from the reader’s workstation):
$ s9s cluster --list --long
ID STATE   TYPE        OWNER   GROUP  NAME              COMMENT
 5 STARTED replication ccadmin admins MySQL Replication All nodes are operation…
Total: 1
$ s9s cluster --cluster-id=5 --stat
Creating a Read/Write User
In this example, we will review the steps to create the read/write user and add the ACL. These steps need to be performed in the ClusterControl node:
-
Create a read/write user called “writeuser” (you could choose any name):
$ s9s user --create --group=writegroup --create-group --generate-key --new-password=s3cr3tP455 [email protected] --first-name=Write --last-name=User --batch writeuser*A new private and public key will be created under ~/.s9s directory called writeuser.key and writeuser.pub.
-
Run the following command to confirm the user is created:
$ s9s user --list --long
A ID UNAME      GROUPS      EMAIL                   REALNAME
-  1 system     admins      -                       System User
-  2 nobody     nobody      -                       Default User
-  3 admin      admins      -                       Default User
-  4 ccrpc      admins      -                       RPC API
-  5 ccadmin    admins      [email protected]          Zamani
A  9 dba        admins      -                       -
- 11 worf       users       [email protected]   Worf Doe
- 15 readeruser readergroup [email protected]    Reader User
- 16 writeuser  writegroup  [email protected] Write User
Total: 9-
Get the Cmon Directory Tree (CDT) value for your cluster. In this example, we will use “PostgreSQL 13”, as shown below:
$ s9s tree --list --long
MODE        SIZE OWNER      GROUP  NAME
crwxrwxr--+    - ccadmin    admins MySQL Replication
crwxrwx---     - ccadmin    admins PostgreSQL 13
srwxrwxrwx     - system     admins localhost
drwxrwxr--  1, 0 system     admins groups
urwxr--r--     - admin      admins admin
urwxr--r--     - ccadmin    admins ccadmin
urwxr--r--     - ccrpc      admins ccrpc
urwxr--r--     - dba        admins dba
urwxr--r--     - nobody     admins nobody
urwxr--r--     - readeruser admins readeruser
urwxr--r--     - system     admins system
urwxr--r--     - worf       admins worf
urwxr--r-- - writeuser admins writeuser-
Assign read/write permission for “writeuser” and “writegroup” for the cluster that you want. Our CDT path is “/PostgreSQL 13” (take note to always start with a “/”, similar to UNIX):
$ s9s tree --add-acl --acl="group:writegroup:rw-" "/PostgreSQL 13"
Acl is added.
$ s9s tree --add-acl --acl="user:writeuser:rw-" "/PostgreSQL 13"
Acl is added.
For the client configuration, make sure the private key, public key and ~/.s9s/s9s.conf updated accordingly. Once all of them are updated, you may test the access using the following command:
$ s9s user --whoami
writeuser
$ s9s tree --add-tag --tag="Production" "/PostgreSQL 13"
Tag is added.
Adding Multiple Groups To A Cluster
If you have a situation where you want to add multiple groups for a particular cluster, you may achieve this by using the following command. Suppose you would like to add “writegroup” and “users” for cluster “MySQL Replication”:
$ s9s tree --add-acl --acl="group:writegroup:rw-" "/MySQL Replication";s9s tree --add-acl --acl="group:users:rw-" "/MySQL Replication"
Acl is added.
Acl is added.
You may verify the access using the following command:
$ s9s tree --get-acl "/MySQL Replication" |grep 'writegroup|users'
group:users:rw-
group:writegroup:rw-
Allowing One Group For Multiple Clusters
In the event you would like to allow one group for multiple clusters, the following command could be executed. Suppose you would like to add “readergroup” for both “MySQL Replication” and “PostgreSQL 13” clusters:
$ s9s tree --add-acl --acl="group:readergroup:r--" "/MySQL Replication";s9s tree --add-acl --acl="group:readergroup:r--" "/PostgreSQL 13"
Acl is added.
Acl is added.
Verify again the access for the group by executing the following commands:
$ s9s tree --get-acl "/MySQL Replication";s9s tree --get-acl "/PostgreSQL 13"
# name: MySQL Replication
# owner: ccadmin
# group: admins
user::rwx
user:readeruser:r--
group::rwx
group:readergroup:r--
group:users:rw-
group:writegroup:rw-
other::r--
# name: PostgreSQL 13
# owner: ccadmin
# group: admins
user::rwx
group::rwx
group:readergroup:r--
other::---
Conclusion
ClusterControl 1.8.2 is using new user management, permissions as well as access controls. You could manage the permissions and customize them in both GUI and CLI. ACL is quite useful when you want to use an RPC call to call any object and class in ClusterControl. Should you like to learn more about our RPC, a detailed explanation of the operations can be found here.