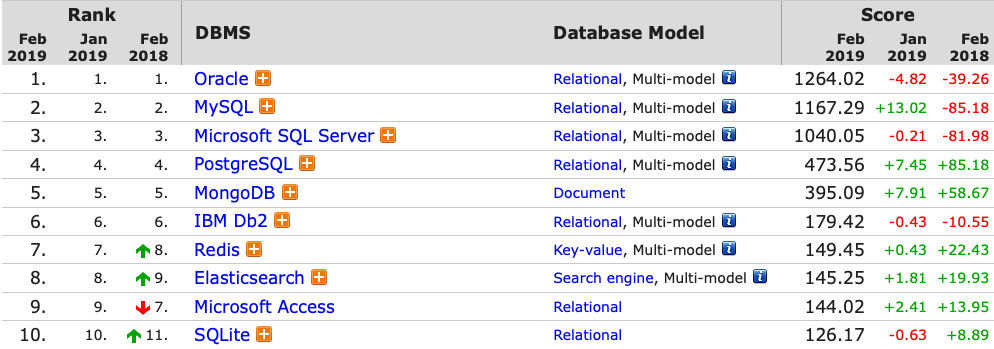
blog
How to Migrate from MSSQL to MySQL

Migrating from proprietary engines into open source engines is a trend that is growing in the industry.
However, database migration is not something to be taken lightly.
In this blog, let’s see what is needed to move from Microsoft SQL Server to MySQL Server and how to do it.
So, let’s start by reviewing what MS SQL is and what MySQL is.
Microsoft SQL Server is a very popular RDBMS with restrictive licensing and modest cost of ownership if the database is of significant size, or is used by a significant number of clients. It provides a very user-friendly and easy to learn interface, which has resulted in a large installed user base. Like other RDBMS software, MS SQL Server is built on top of SQL, a standardized programming language that database administrators (DBAs) and other IT professionals use to manage databases and query the data they contain. SQL Server is tied to Transact-SQL (T-SQL), an implementation of SQL from Microsoft that adds a set of proprietary programming extensions to the standard language.
MySQL is an Oracle-backed open source relational database management system based on SQL.
It’s the second most popular database in the world according to db-engines ranking and probably the most present database backend on the planet as it runs most of the internet services around the globe.
MySQL runs on virtually all platforms, including Linux, UNIX, and Windows. It’s an important component of an open source enterprise stack called LAMP. The MySQL Enterprise version comes with support and additional features for security and high availability.
The combination of cost-savings, platform compatibility, and feature set of MySQL makes it really appealing, and many organizations are migrating from MS SQL Server into this open-source platform to take advantage of these features.
Why Migrate?
Usually, the first reason to migrate is the cost. SQL Server is a proprietary database from Microsoft. There is a free SQL Server version called Express, but it has some limitations like 10GB of database limit, a limited amount of CPU, a limited amount of RAM, and more, so probably you need to pay the license to use it in production. You can check the pricing here.
With MySQL, you can use the community edition for free and without any limitation.
Another reason could be the operating system support. Unlike MS SQL Server, MySQL supports a wide range of Operating Systems including Linux, Windows, Mac OS, Solaris and many more.
Regarding installation and configuration, MySQL installs faster, has a smaller footprint while still being able to manage fairly large databases, and has less configuration knobs that need tuning than SQL Server.
In the area of high availability, MySQL has a number of proven solutions including replication, SANs, and MySQL Cluster, which equal or best SQL Server depending on the scenario.
The great MySQL Community provides many benefits including a great developer and DBA network of everyone working together to help ensure a high-quality product and each other’s success.
What You Should Know
Moving data and index structures over to MySQL isn’t typically a challenging task as MySQL supports all the important data types, table designs, and index structures. Anyhow, there are some objects that will face some challenges. Code related objects, like stored procedures, can be using non-standard ANSI features, as Transact-SQL has many of them.
So, the following items will need special attention when migrating:
- Assemblies
- Types
- DDL and statement-based triggers (MySQL has row-based triggers)
- Proprietary SQL Server function calls
- Certain cases of dynamic T-SQL
In the same way, Synonyms and Security Roles will need a workaround as they cannot be directly migrated into MySQL.
Datatypes Requiring Conversion
The following map can be used to convert SQL Server data types that don’t map in 1-to-1 relationship to MySQL:
| SQL Server | MySQL |
|---|---|
| IDENTITY | AUTO_INCREMENT |
| NTEXT, NATIONAL TEXT | TEXT CHARACTER SET UTF8 |
| SMALLDATETIME | DATETIME |
| MONEY | DECIMAL(19,4) |
| SMALL MONEY | DECIMAL(10,4) |
| UNIQUEIDENTIFIER | BINARY(16) |
| SYSNAME | CHAR(256) |
How to do it
There are many tools to perform the migration from MS SQL Server to MySQL like Amazon DMS or Data Integration (Kettle), but in this case, we’ll use the MySQL Workbench Migration tool.
This tool is designed to save DBA and developer time by providing visual, point and click ease of use around all phases of configuring and managing a complex migration process:
- Database migrations: Allows migrations from Microsoft SQL Server, Microsoft Access, PostgreSQL, Sybase ASE, Sybase SQL Anywhere, SQLite, and more.
- Manage Migration Projects: Allows migrations to be configured, copied, edited, executed and scheduled.
- Source and Target selection: Allows users to define specific data sources and to analyze source data in advance of the migration.
- Object migration: Allows users to select objects to migrate, assign a source to target mappings where needed, edit migration scripts and create the target schema.
- Version Upgrades: Using migration, users can easily move databases off older MySQL versions to the latest.
So, let’s do it.
For this task, we’re assuming you have:
- SQL Server installed with your database to migrate: We’ll use the Northwind sample database over MS SQL Server Express 2014 Edition.
- MySQL Server installed: We have MySQL 5.7.25 Community Edition over CentOS.
- Users on both database servers with privileges to perform the task: We have the user “sa” on SQL Server and the user “migration” with all privileges on MySQL.
- MySQL Workbench installed with access to both database servers: We’ll use MySQL Workbench 6.3.
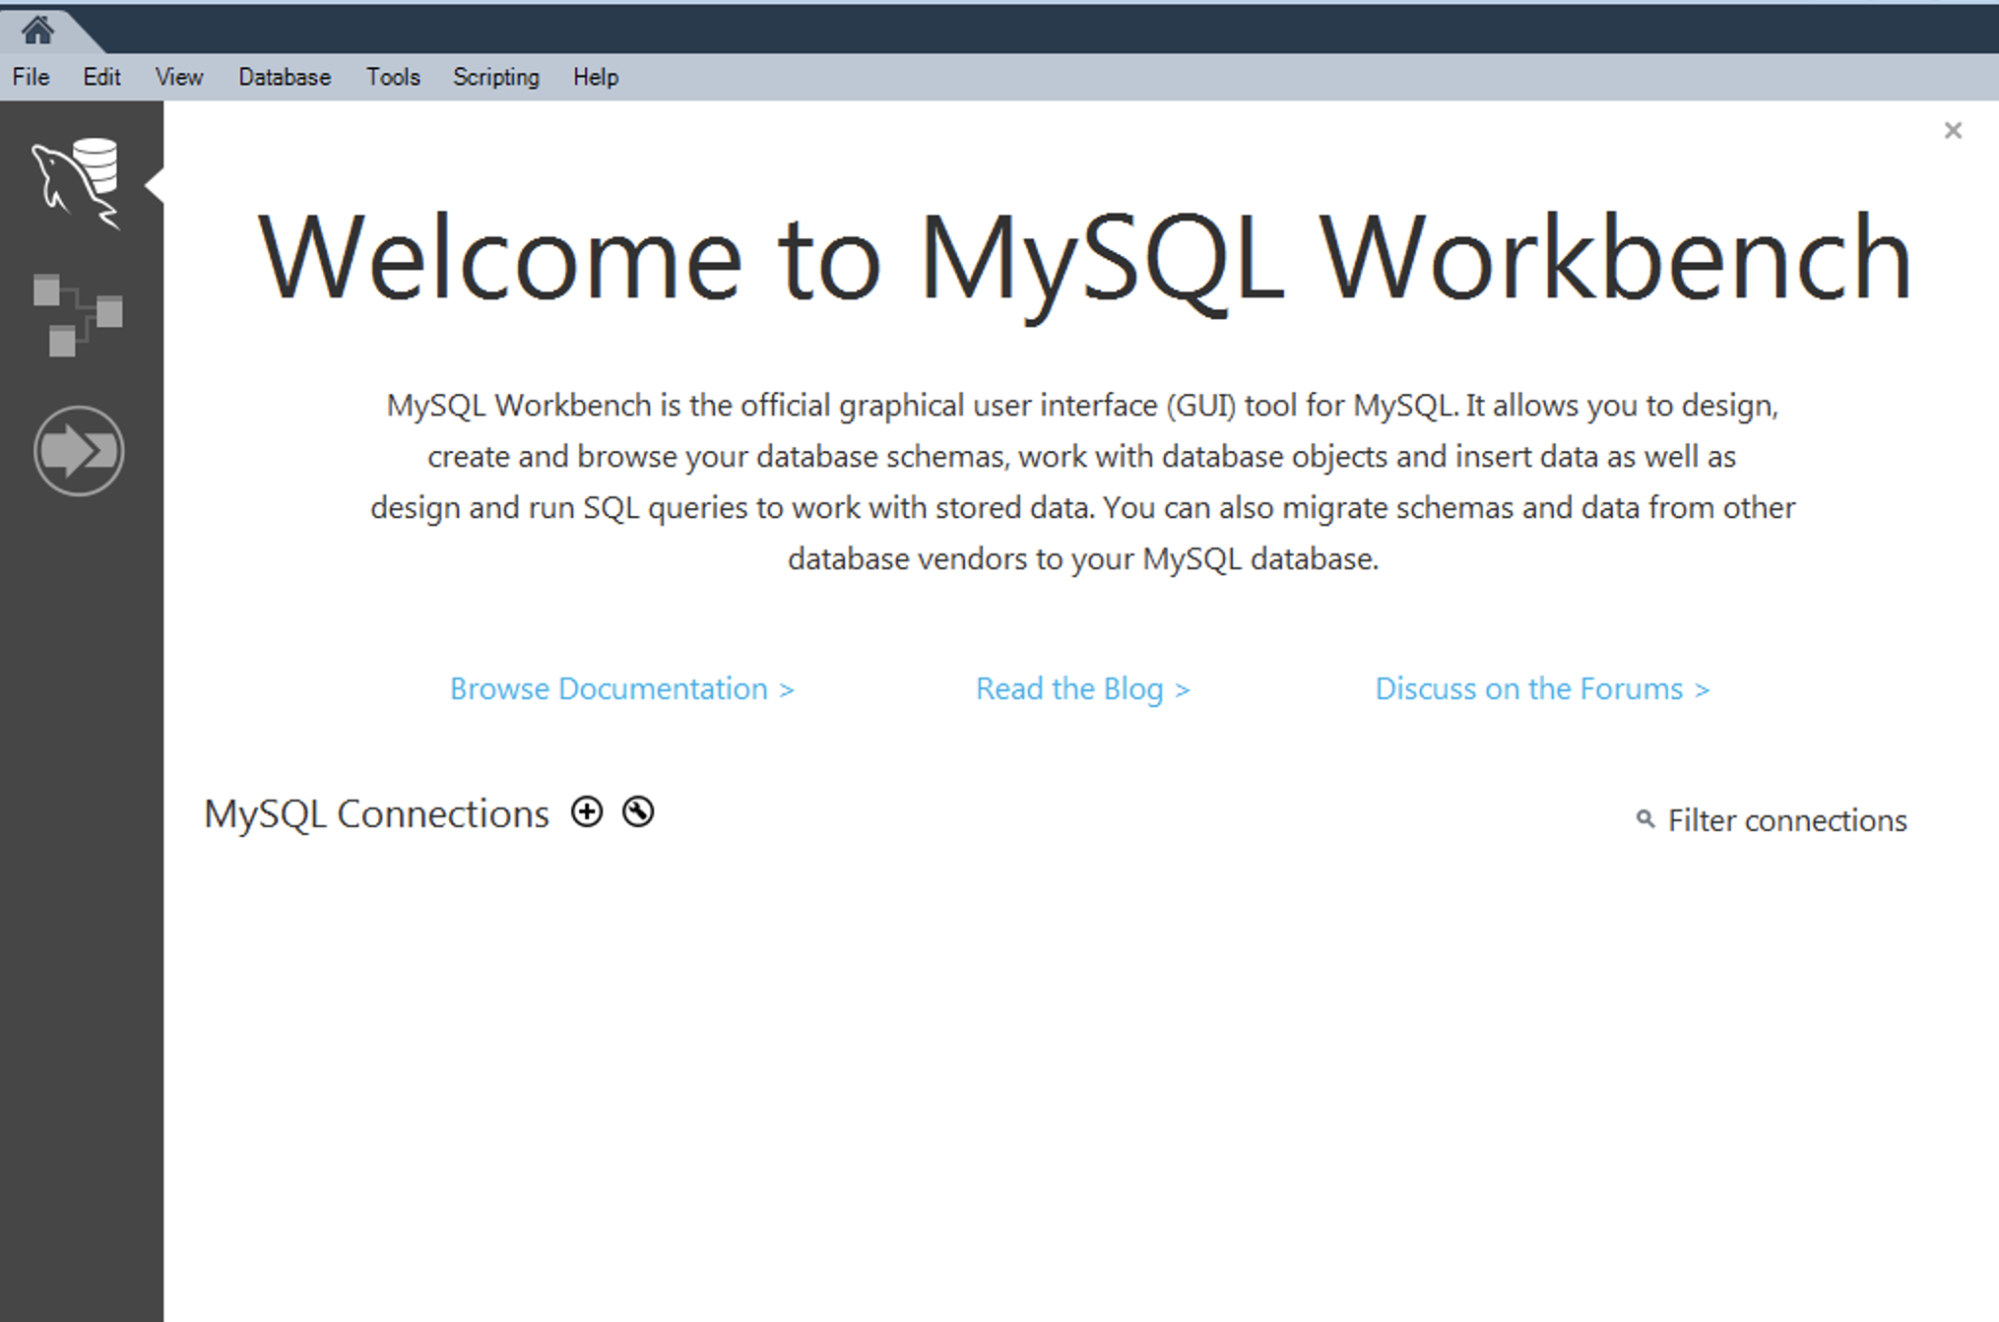
To start the migration process, on the MySQL Workbench main screen, go to Database-> Migration Wizard.
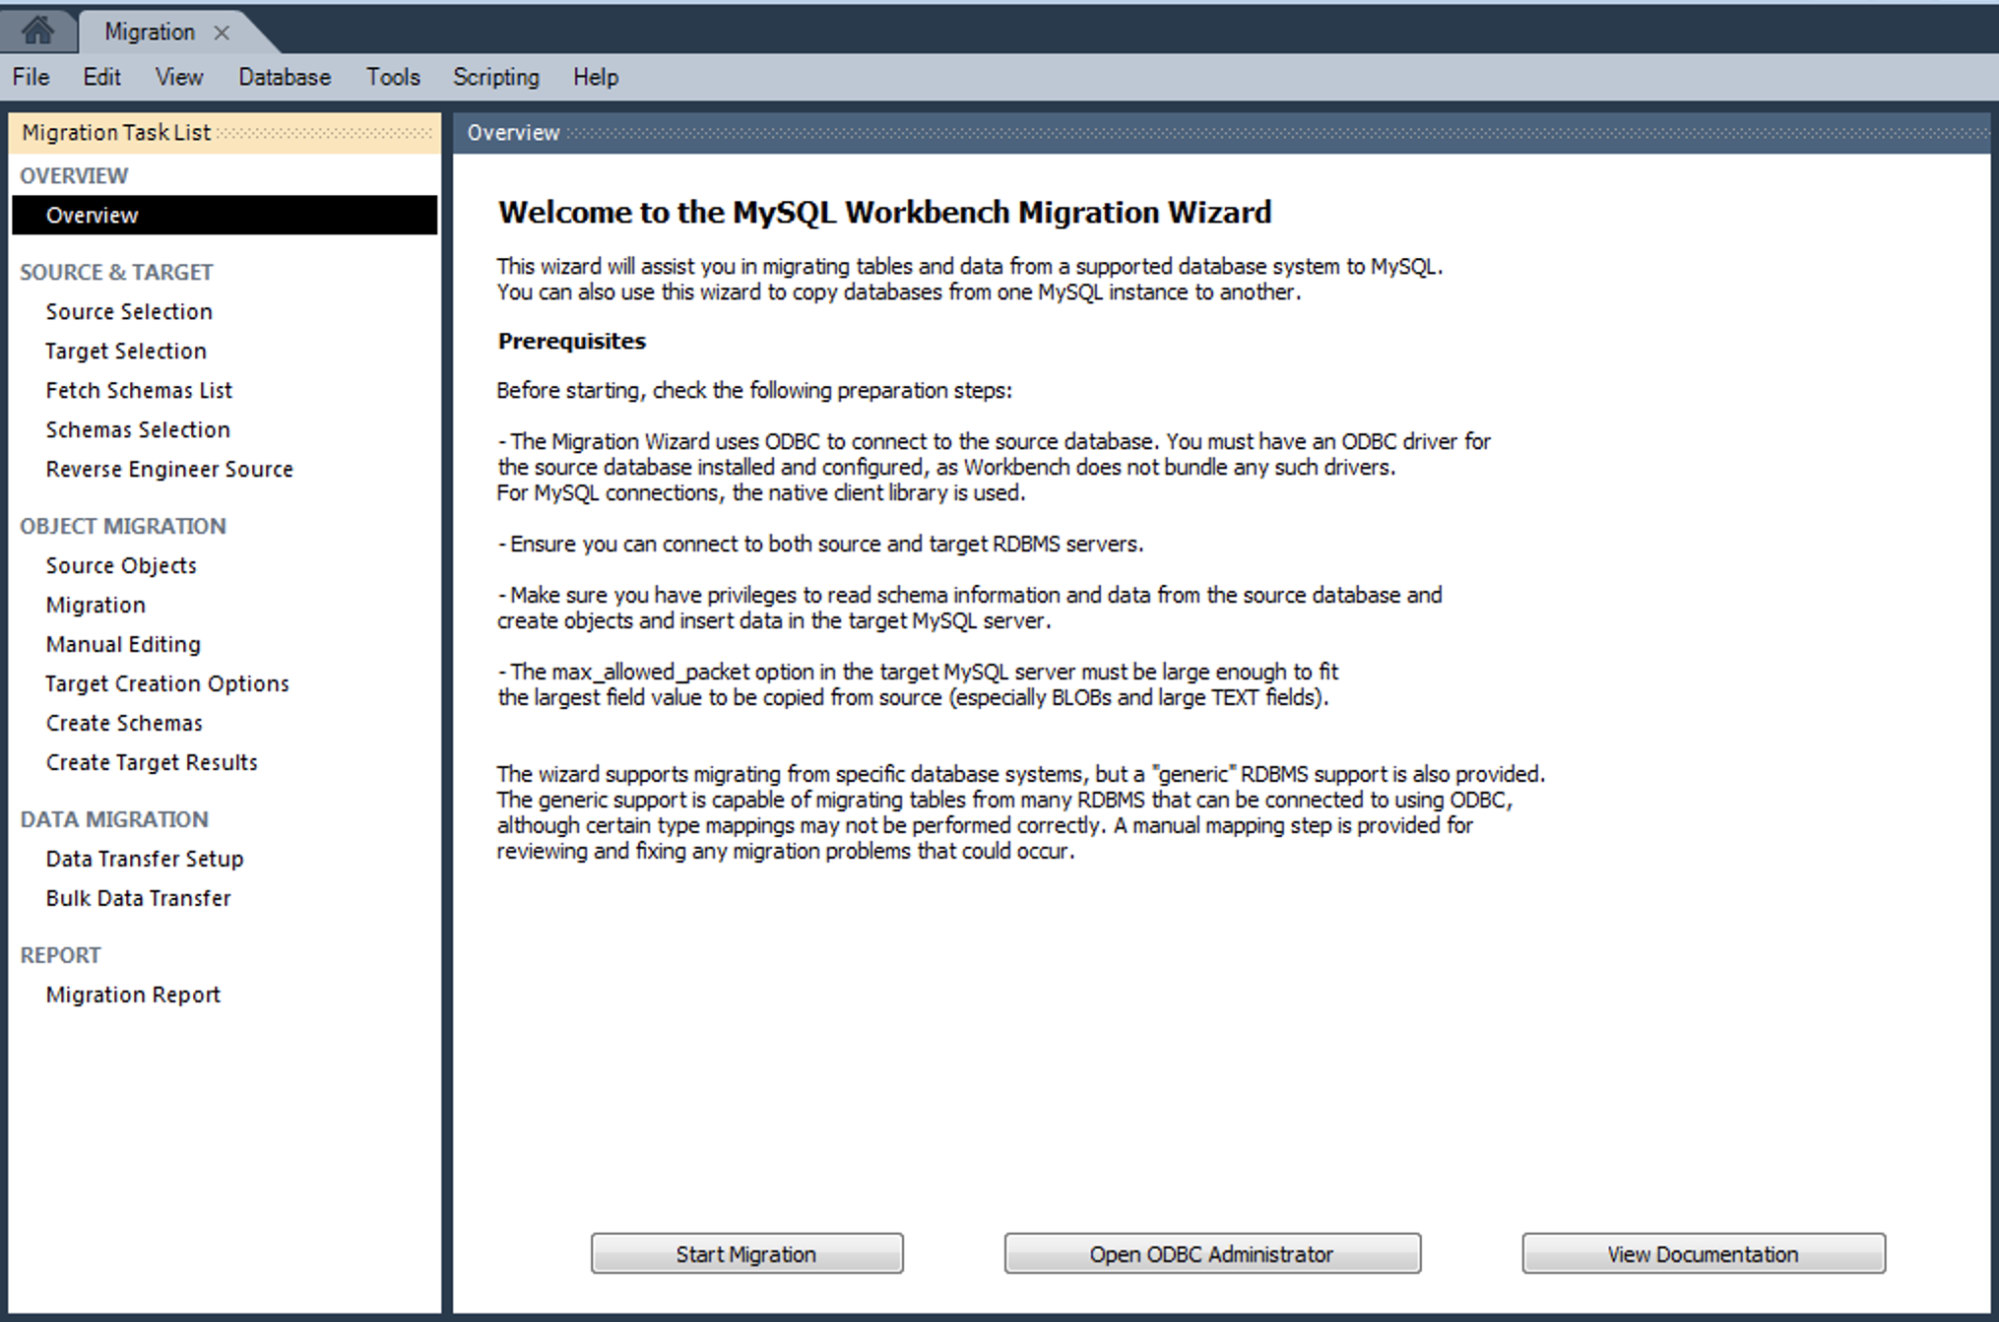
We should check the prerequisites to confirm if we can continue the task. If everything looks fine, we can press on Start Migration.
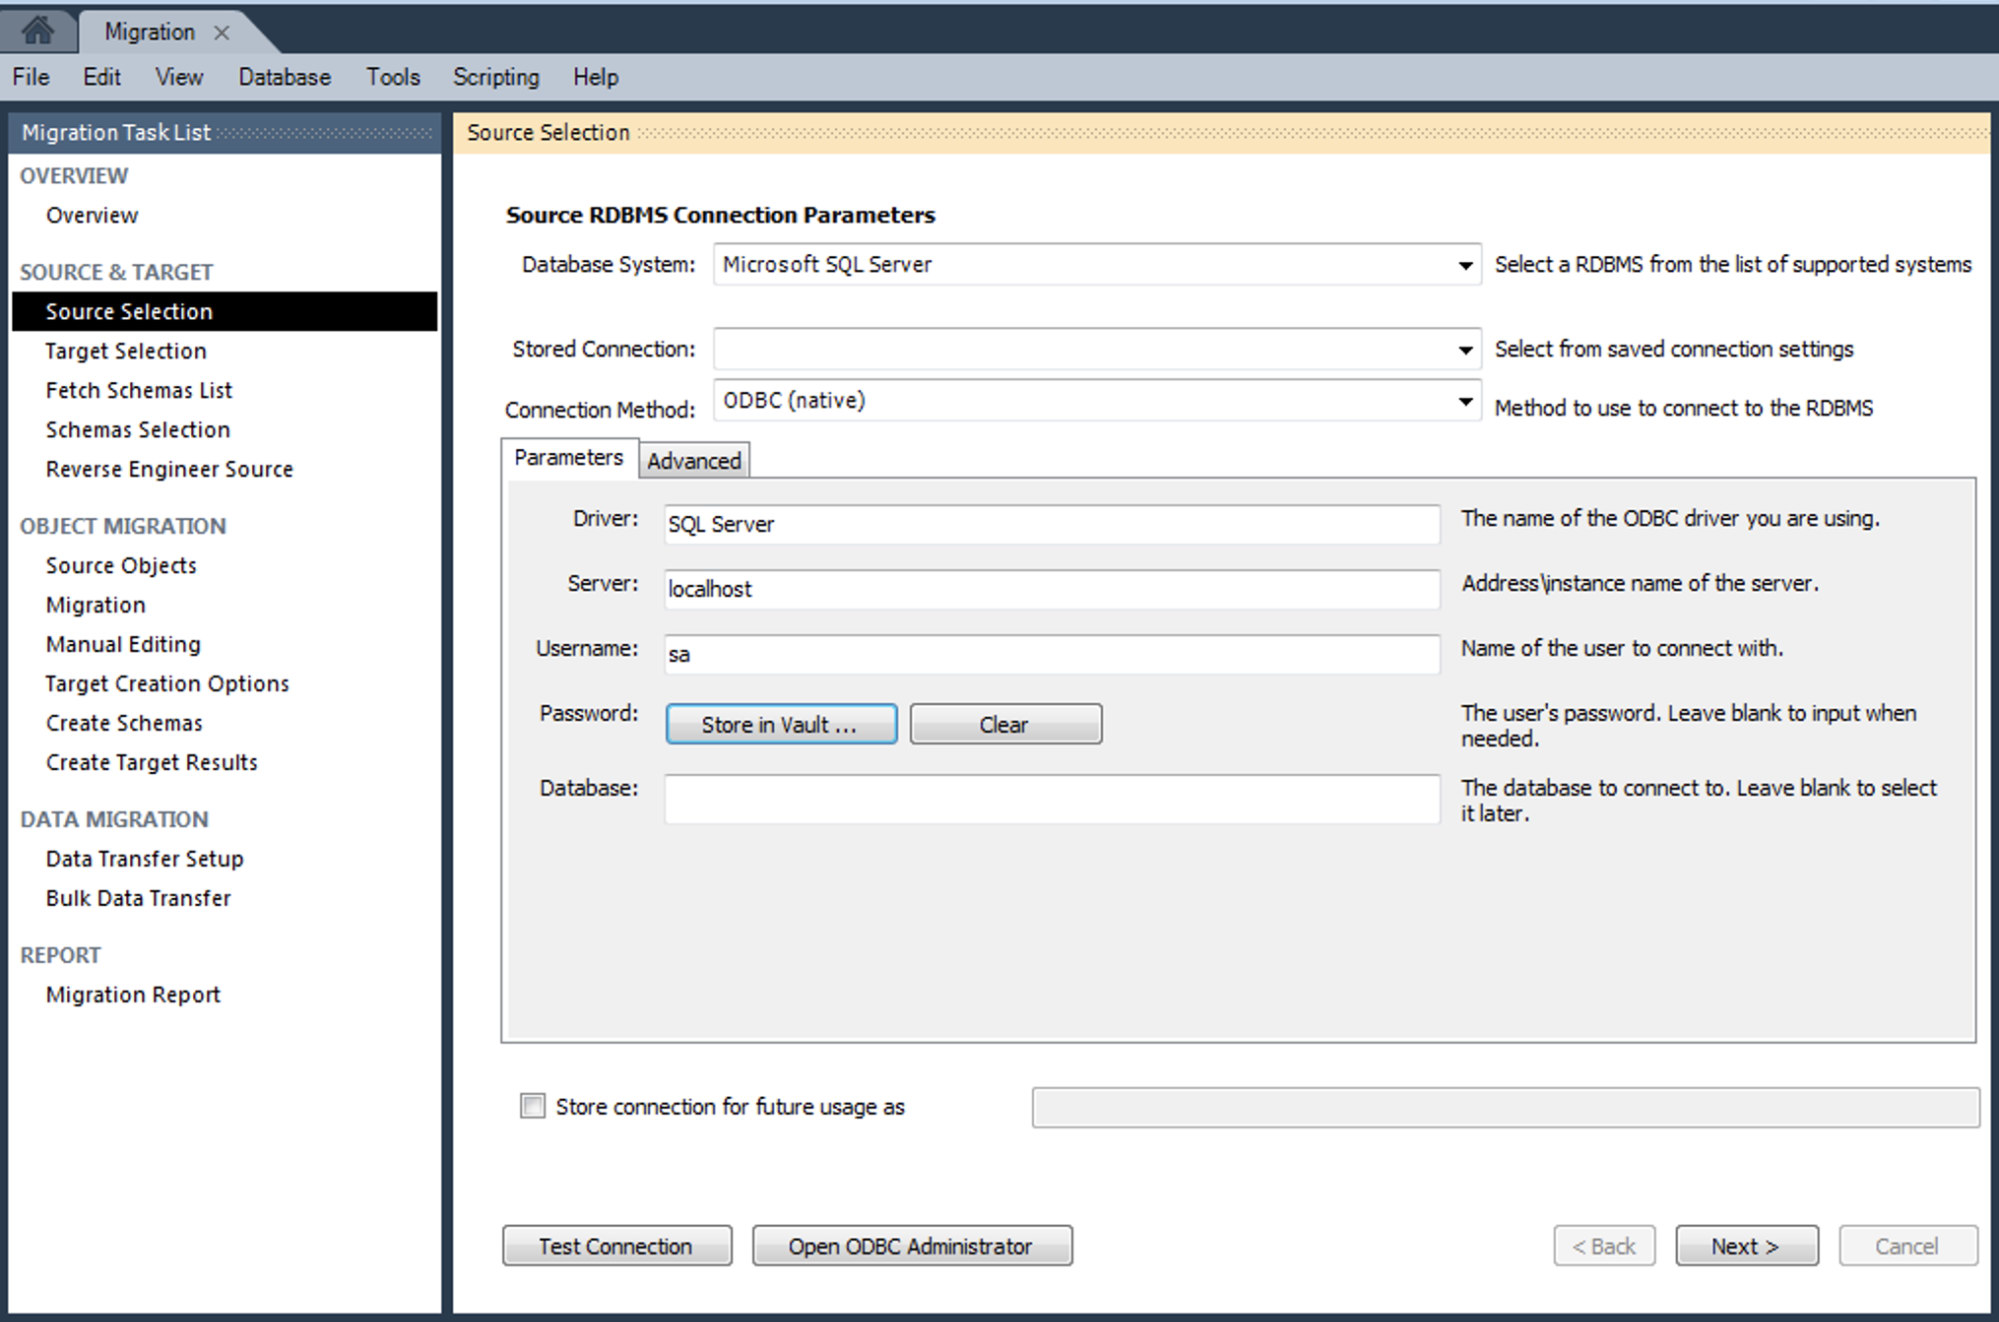
In this step, we need to provide the information about the source database, in this case, SQL Server.
We’ll configure our source parameter as you can see in the previous image:
Database System: Microsoft SQL Server
Connection Method: ODBC (Native)
Driver: SQL Server
Server: localhost
Username: sa
About the Server parameter, we’re running MySQL Workbench on the SQL Server node, but probably you’ll use the IP Address / Hostname of your database server.
Now, we can check the connection by using the Test Connection button.
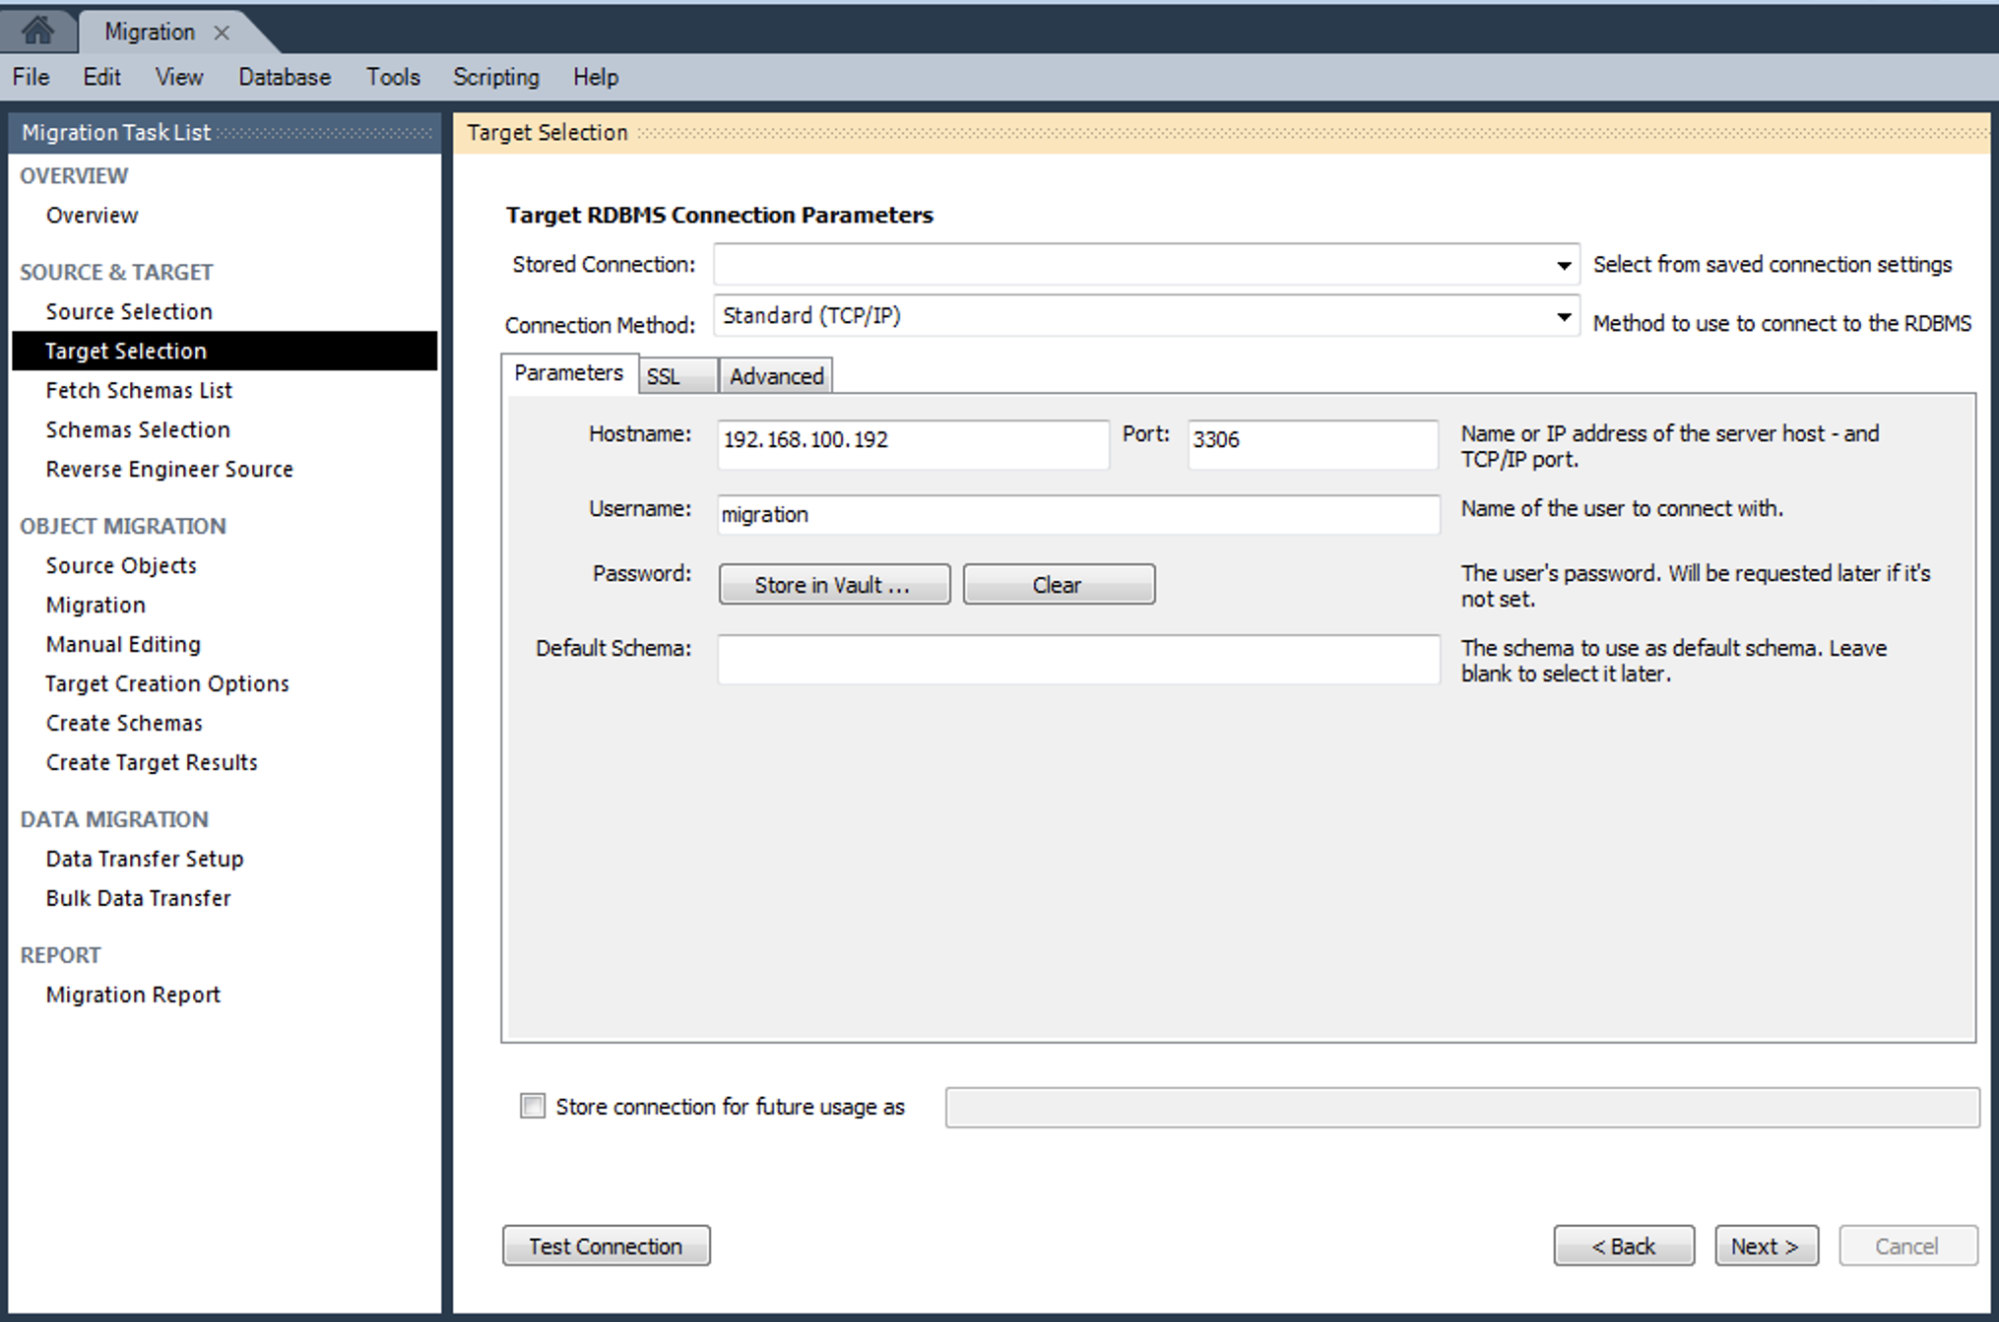
Then, we need to add the target parameters, in this case, MySQL Server:
Connection Method: Standard (TCP/IP)
Hostname: 192.168.100.192
Port: 3306
Username: migration
And press on Test Connection to confirm the added information.
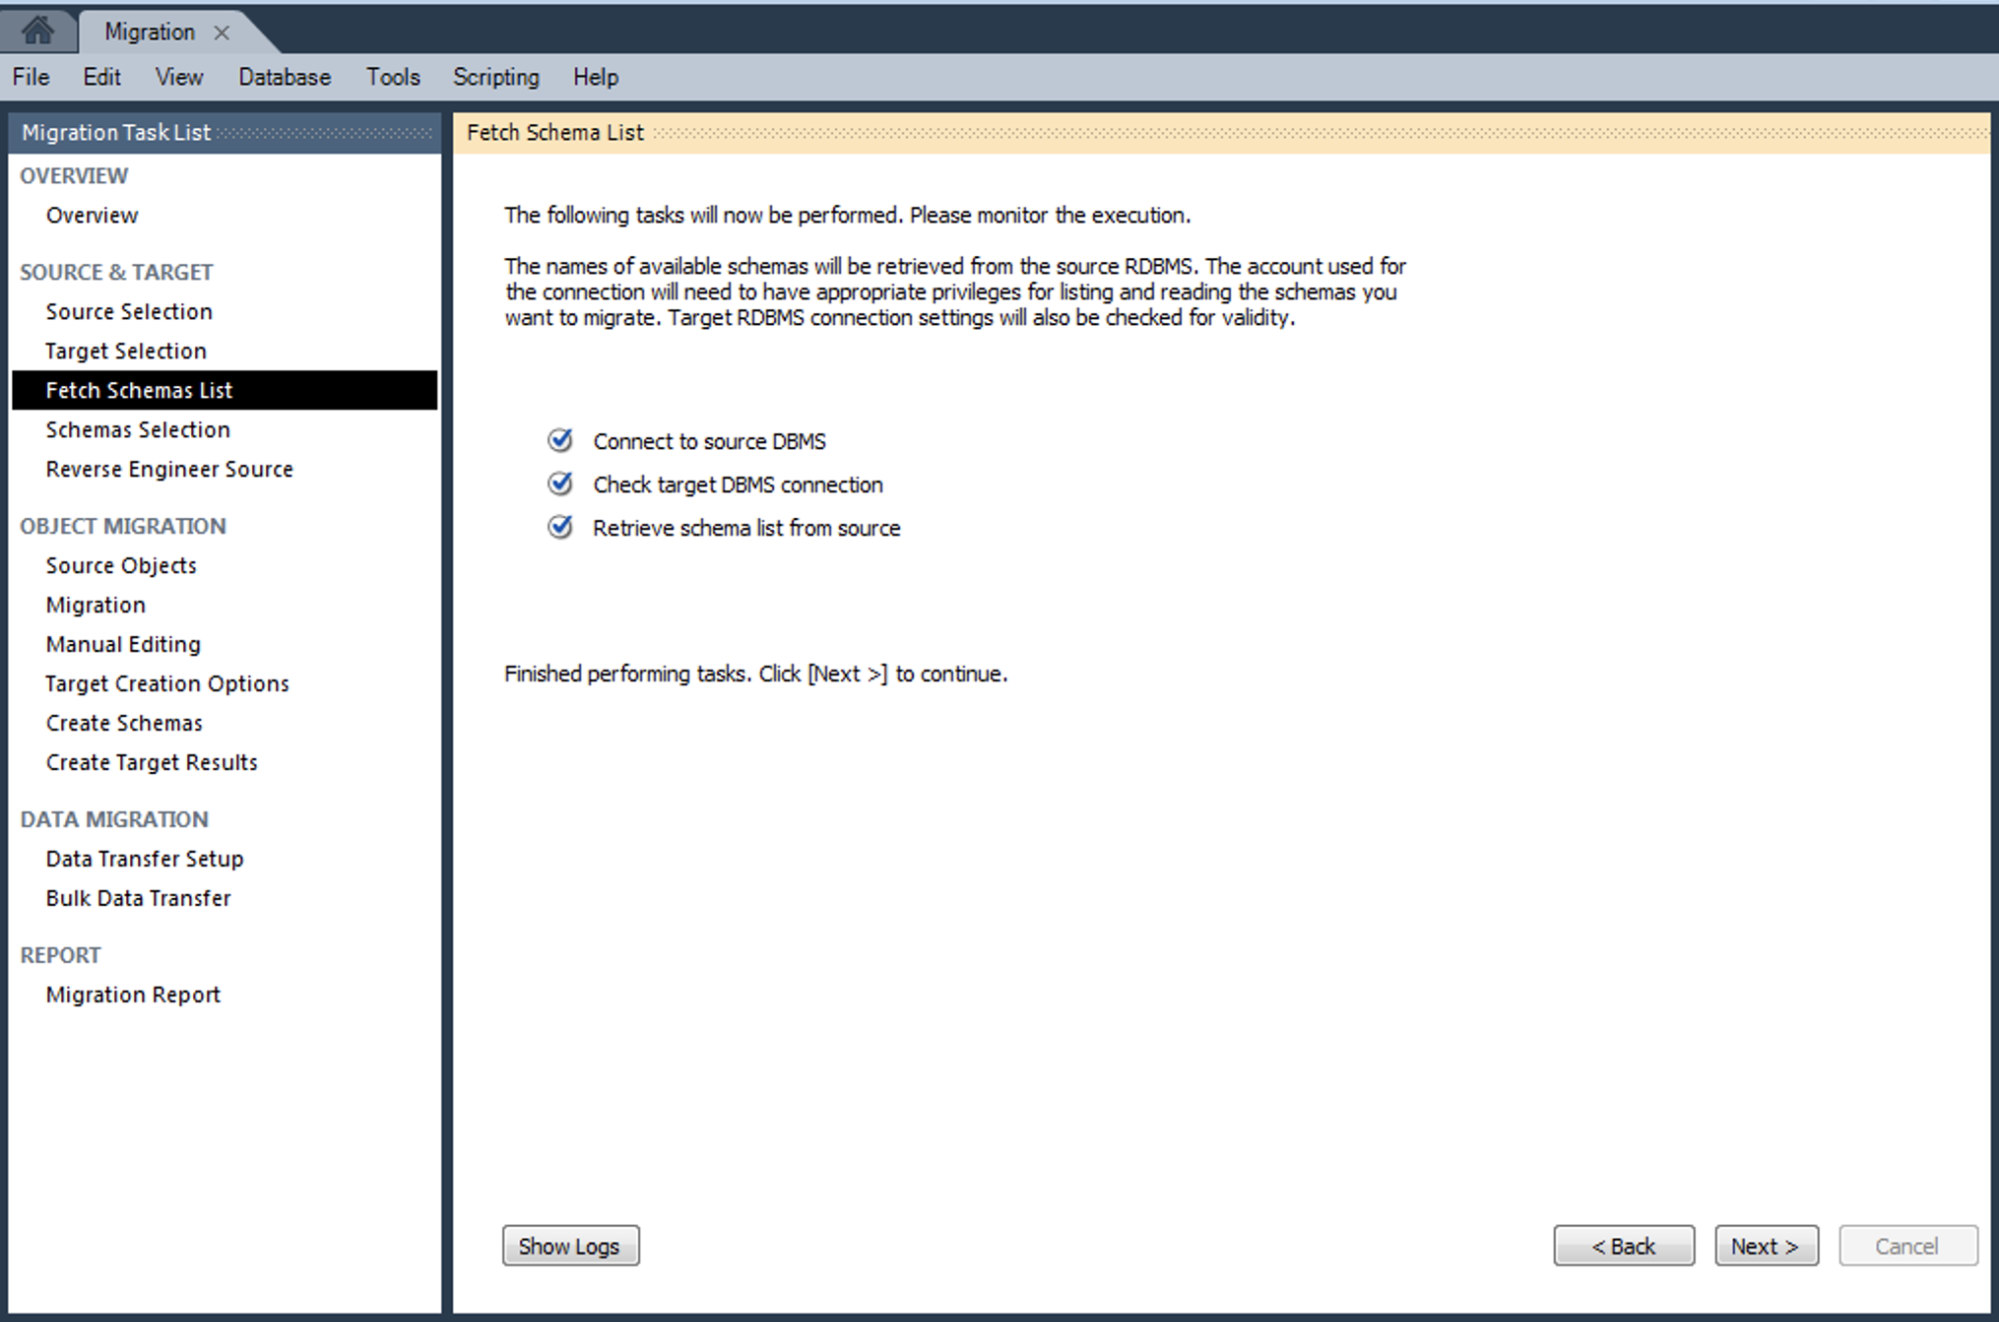
In the next step, MySQL Workbench will connect to our SQL Server to fetch a list of the catalogs and schemas.
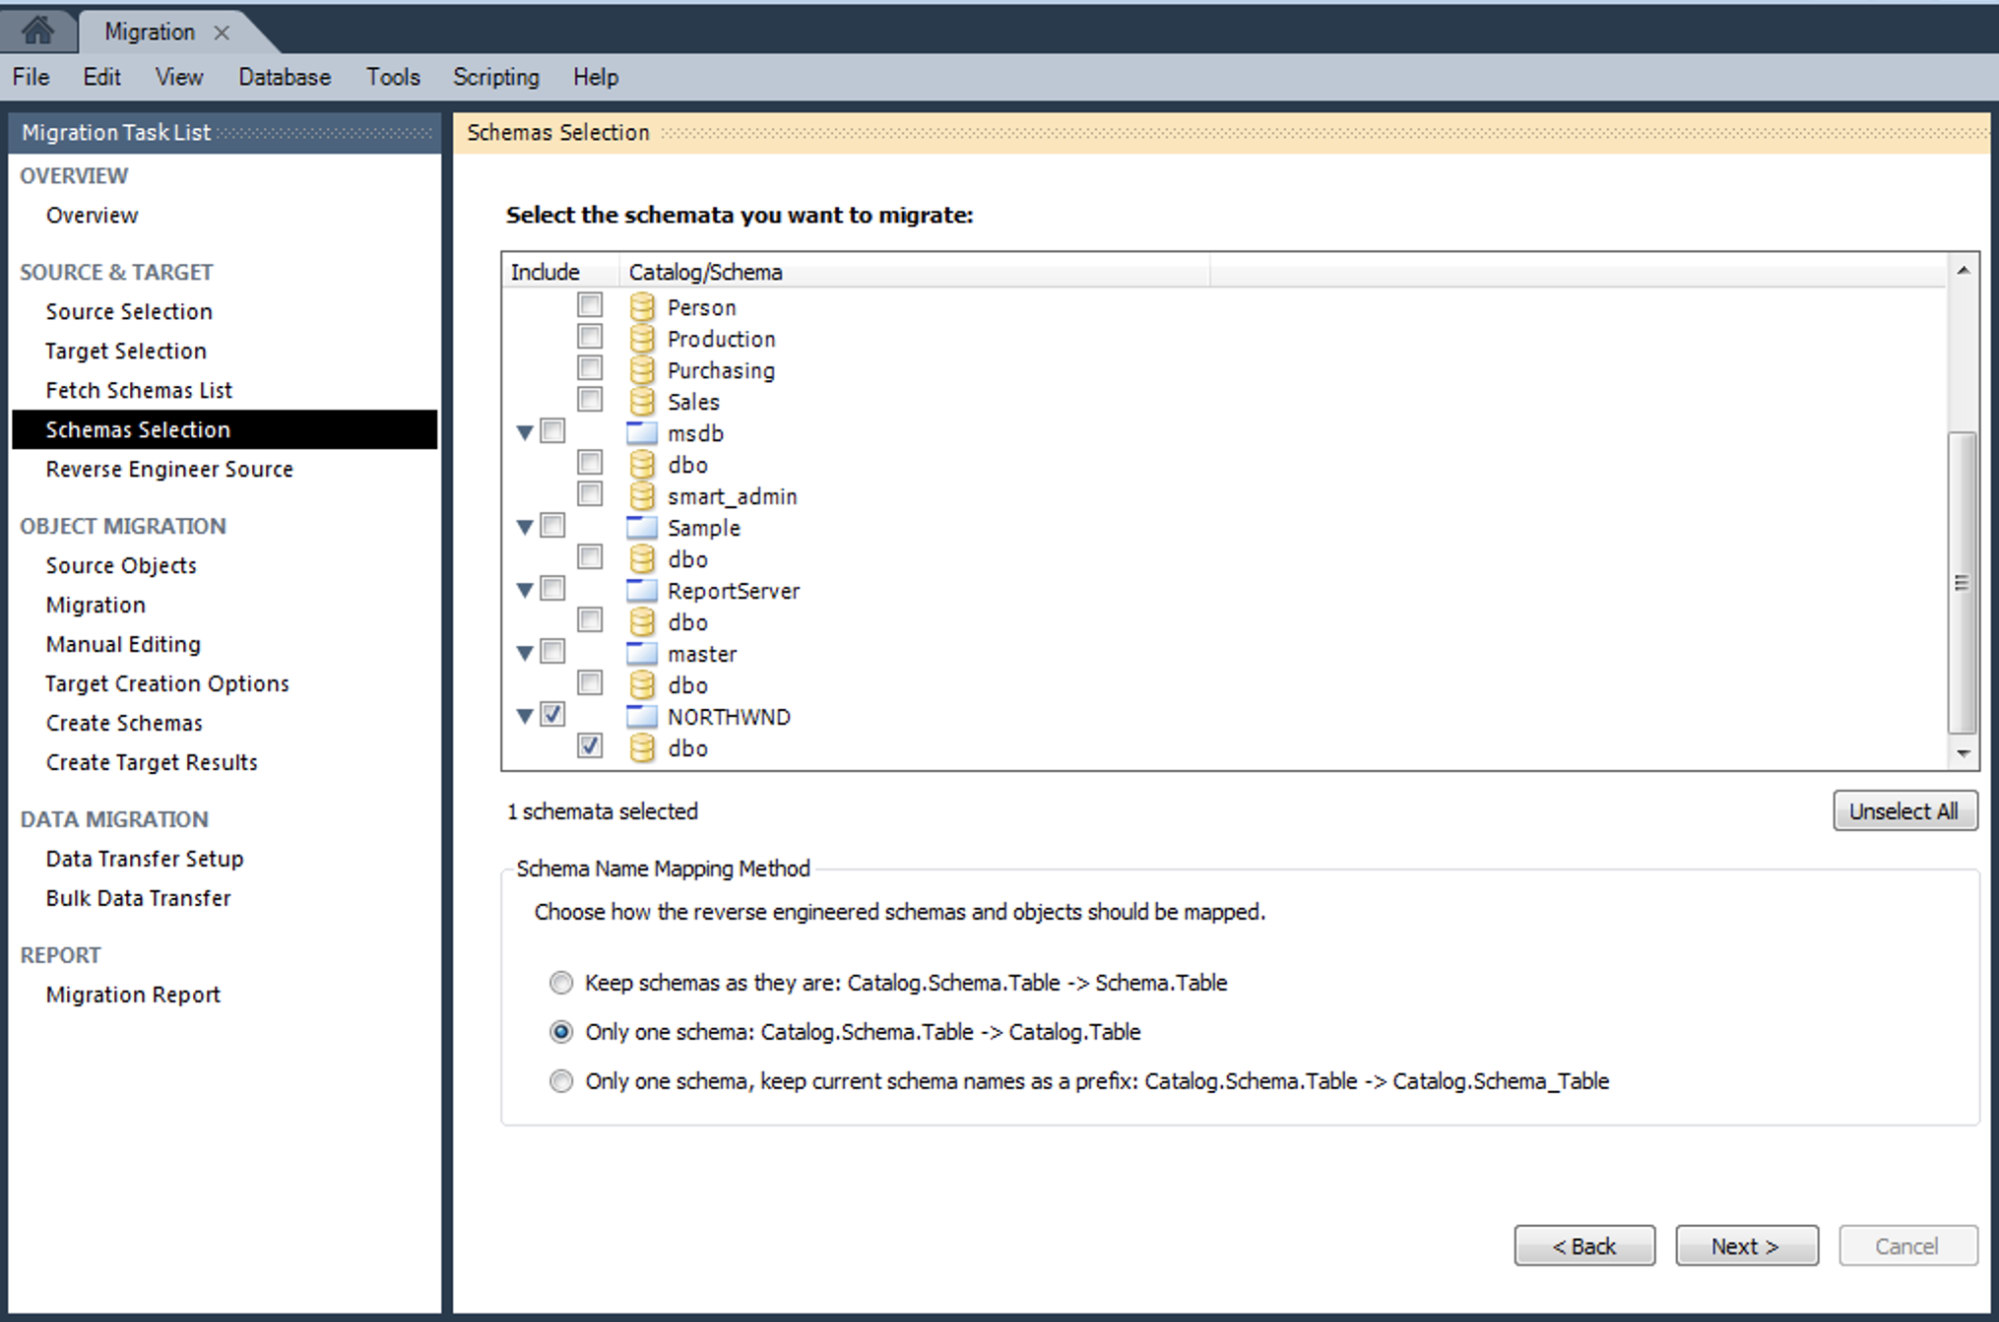
Now, we’ll choose the Northwind sample database from the list.
We can choose how the reverse engineered schemas and object should be mapped. We’ll use Catalog.Schema.Table -> Catalog.Table option, so in our MySQL, we’ll have a database called Northwind, and the current tables that we have in our SQL Server database.
If everything went fine, we’ll have a list of objects to be migrated.
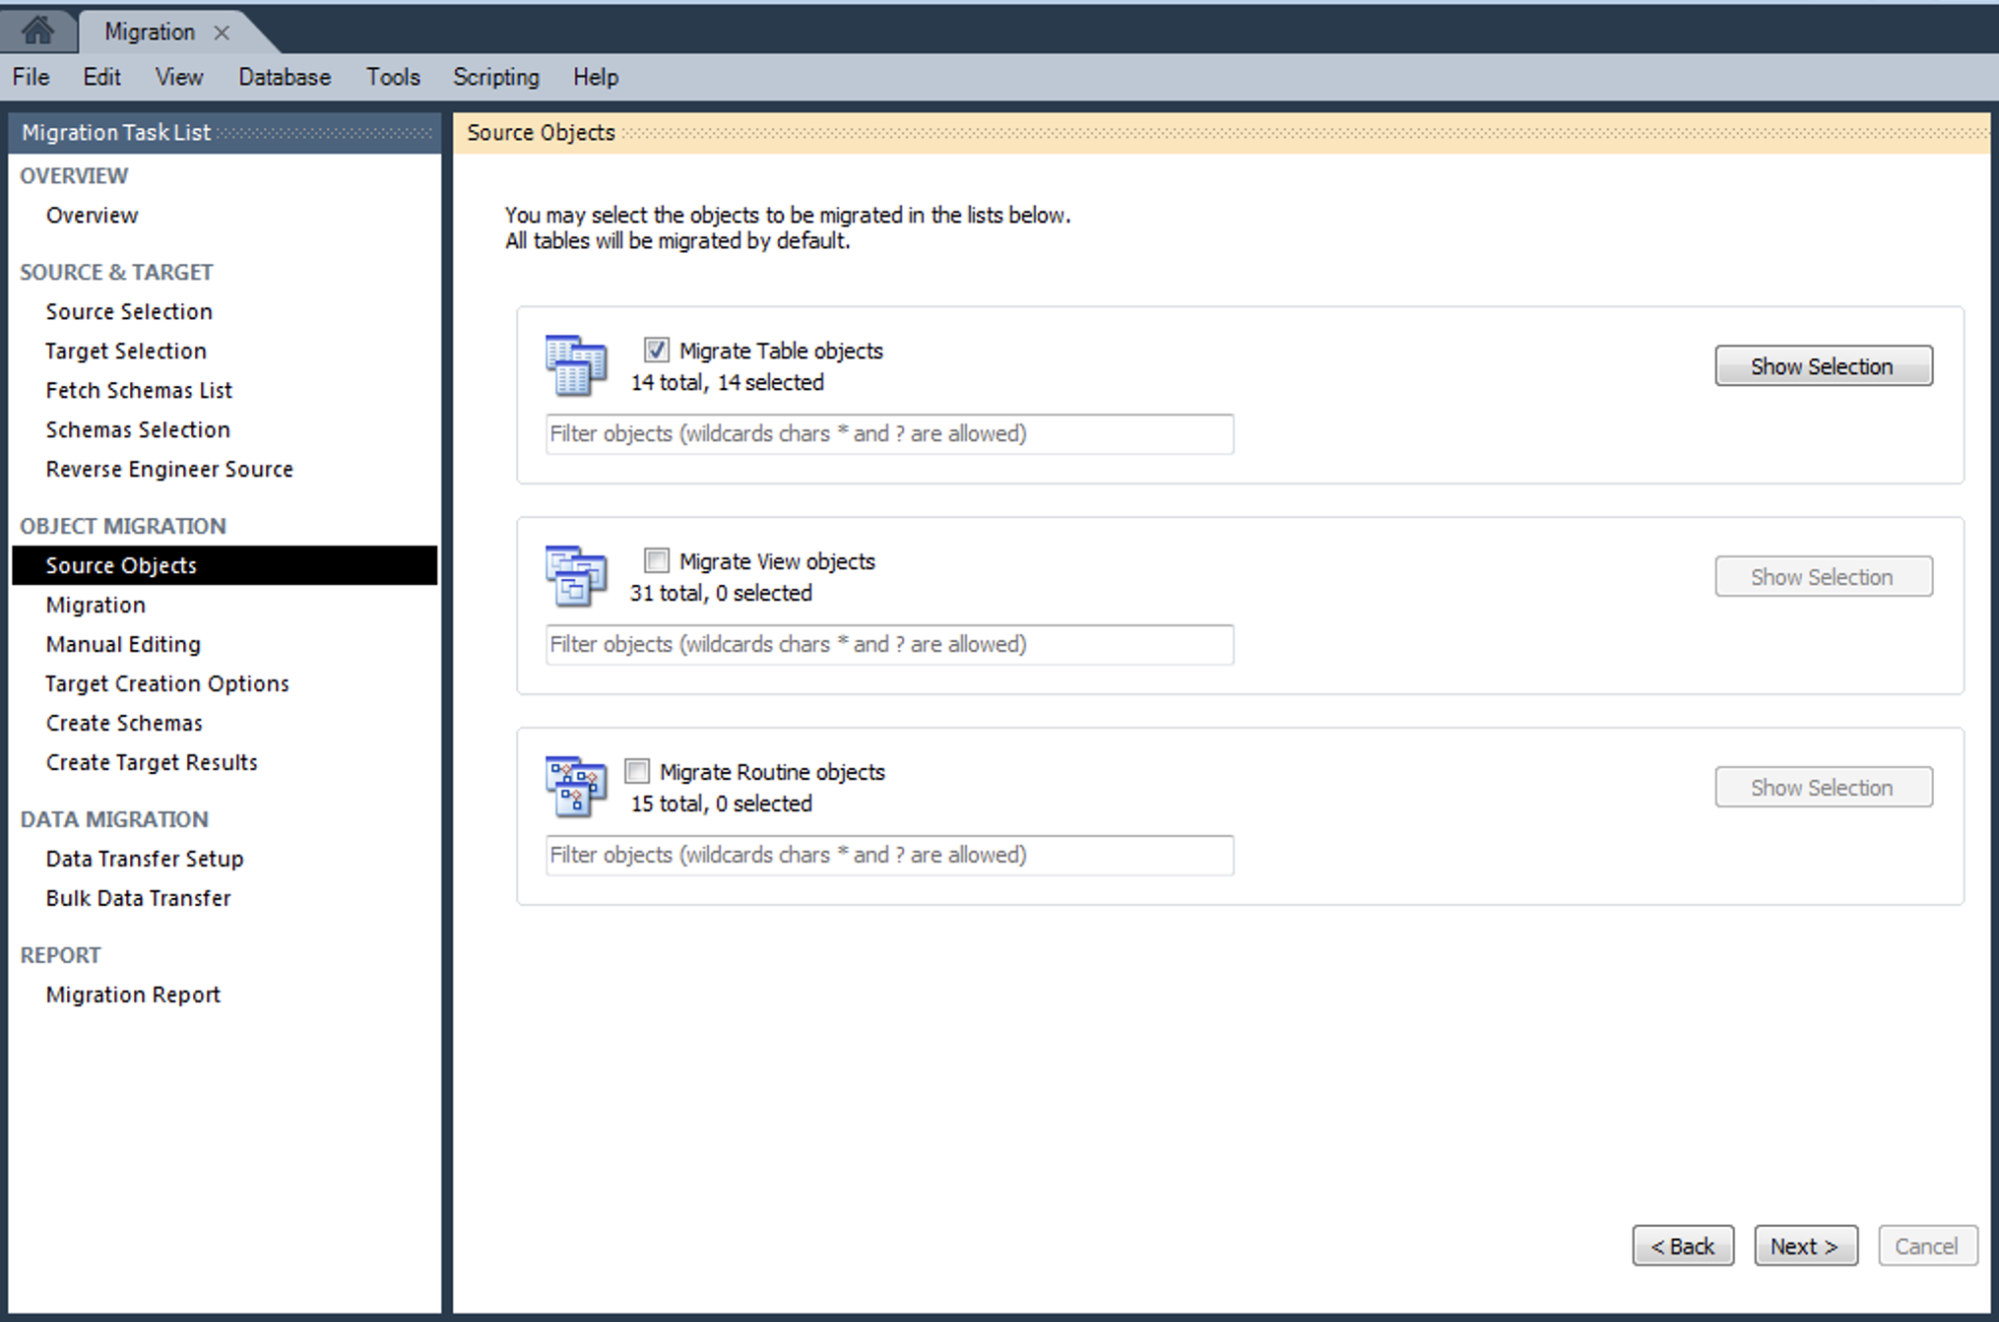
In this case, we have Table Objects, View Objects and Routine Objects. We’ll only select the Table Objects because for the rest of the object we should check the corresponding MySQL equivalent code manually.

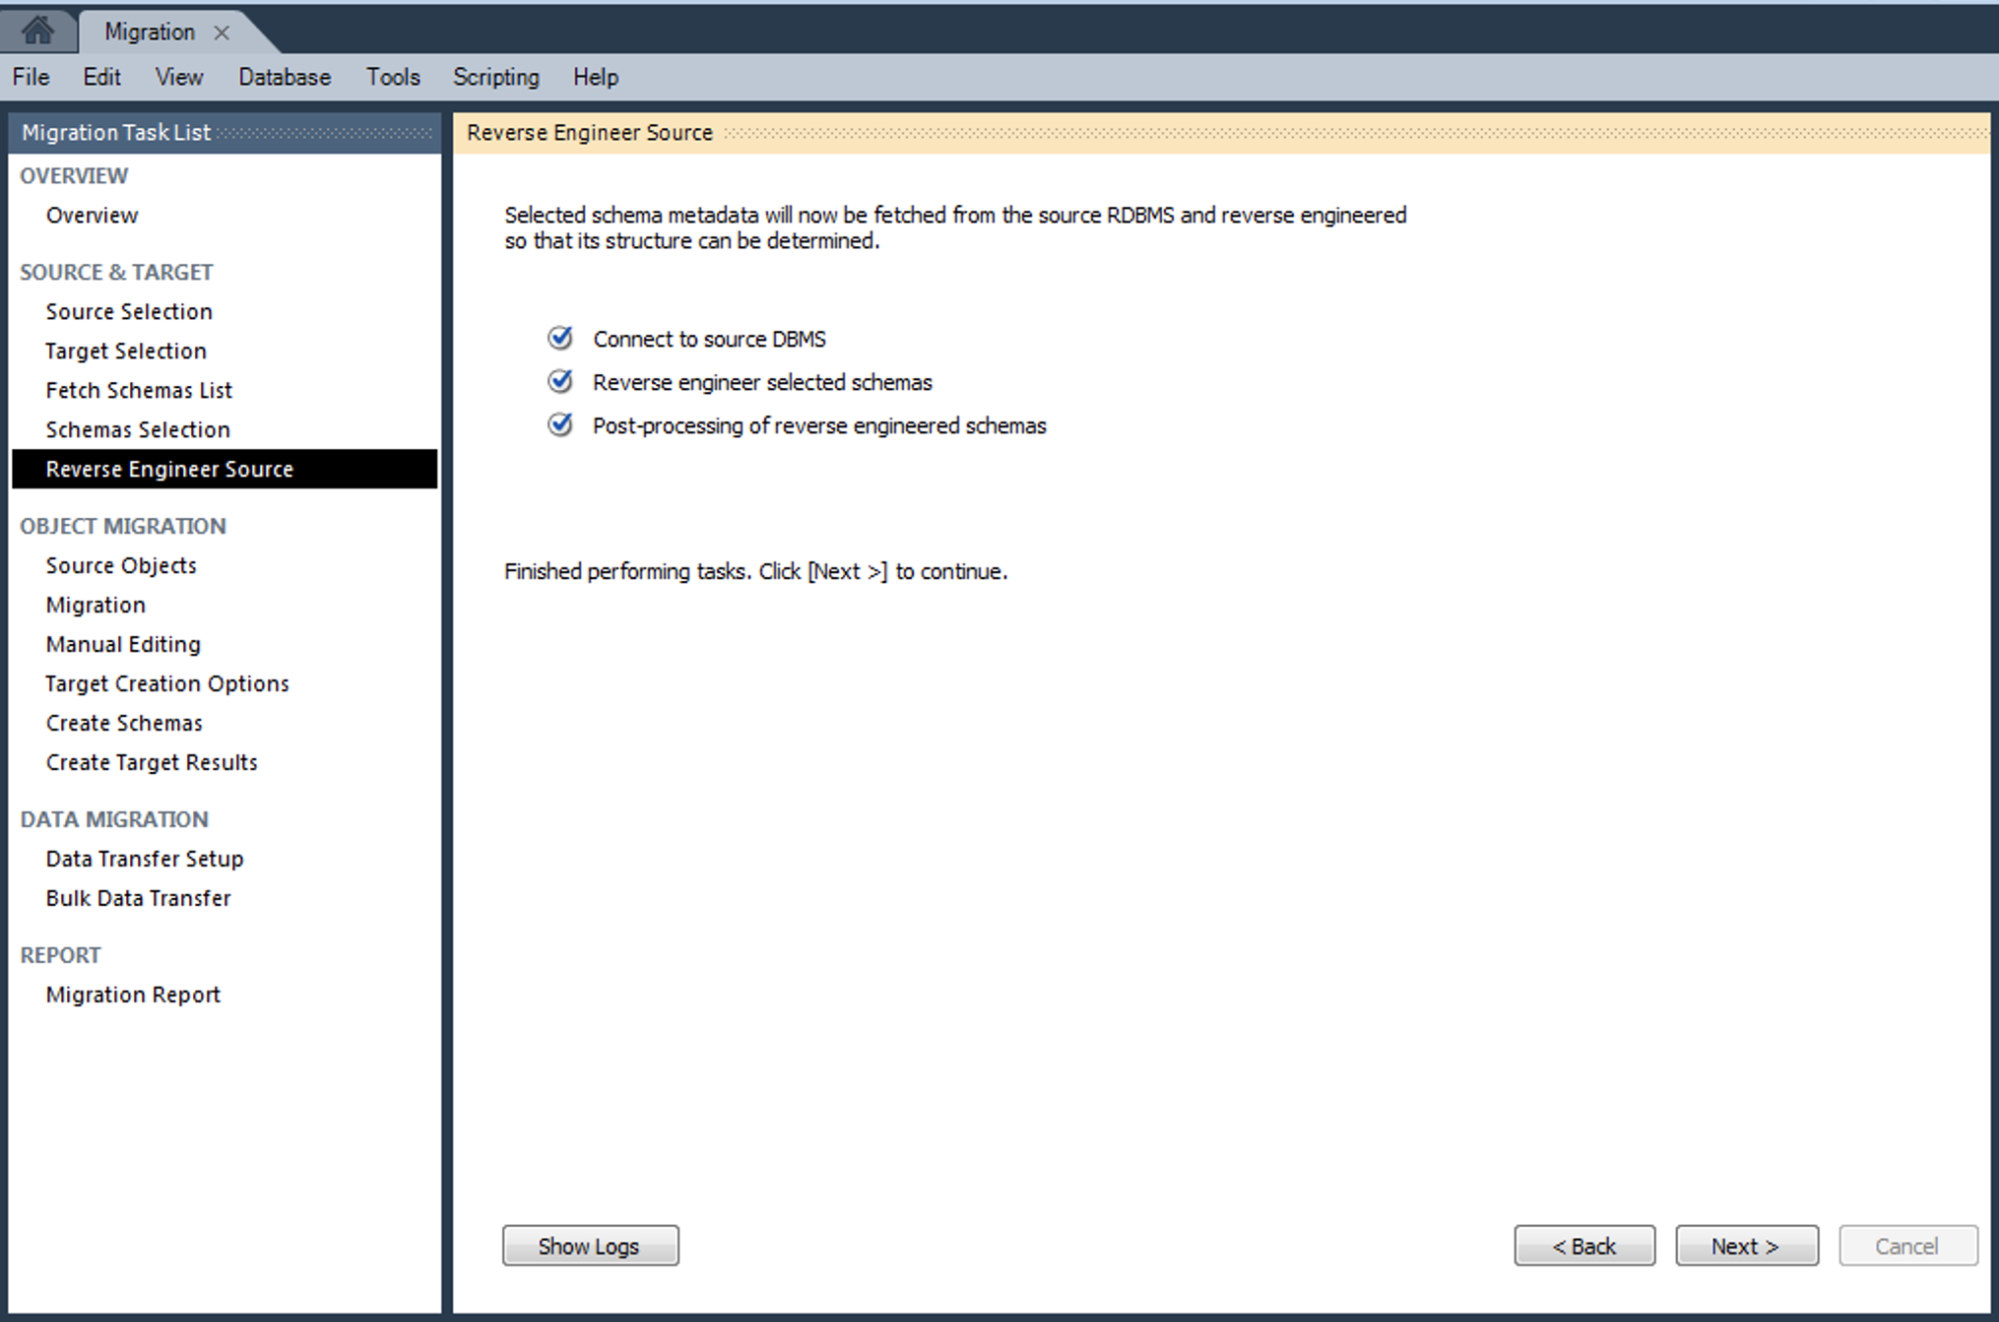
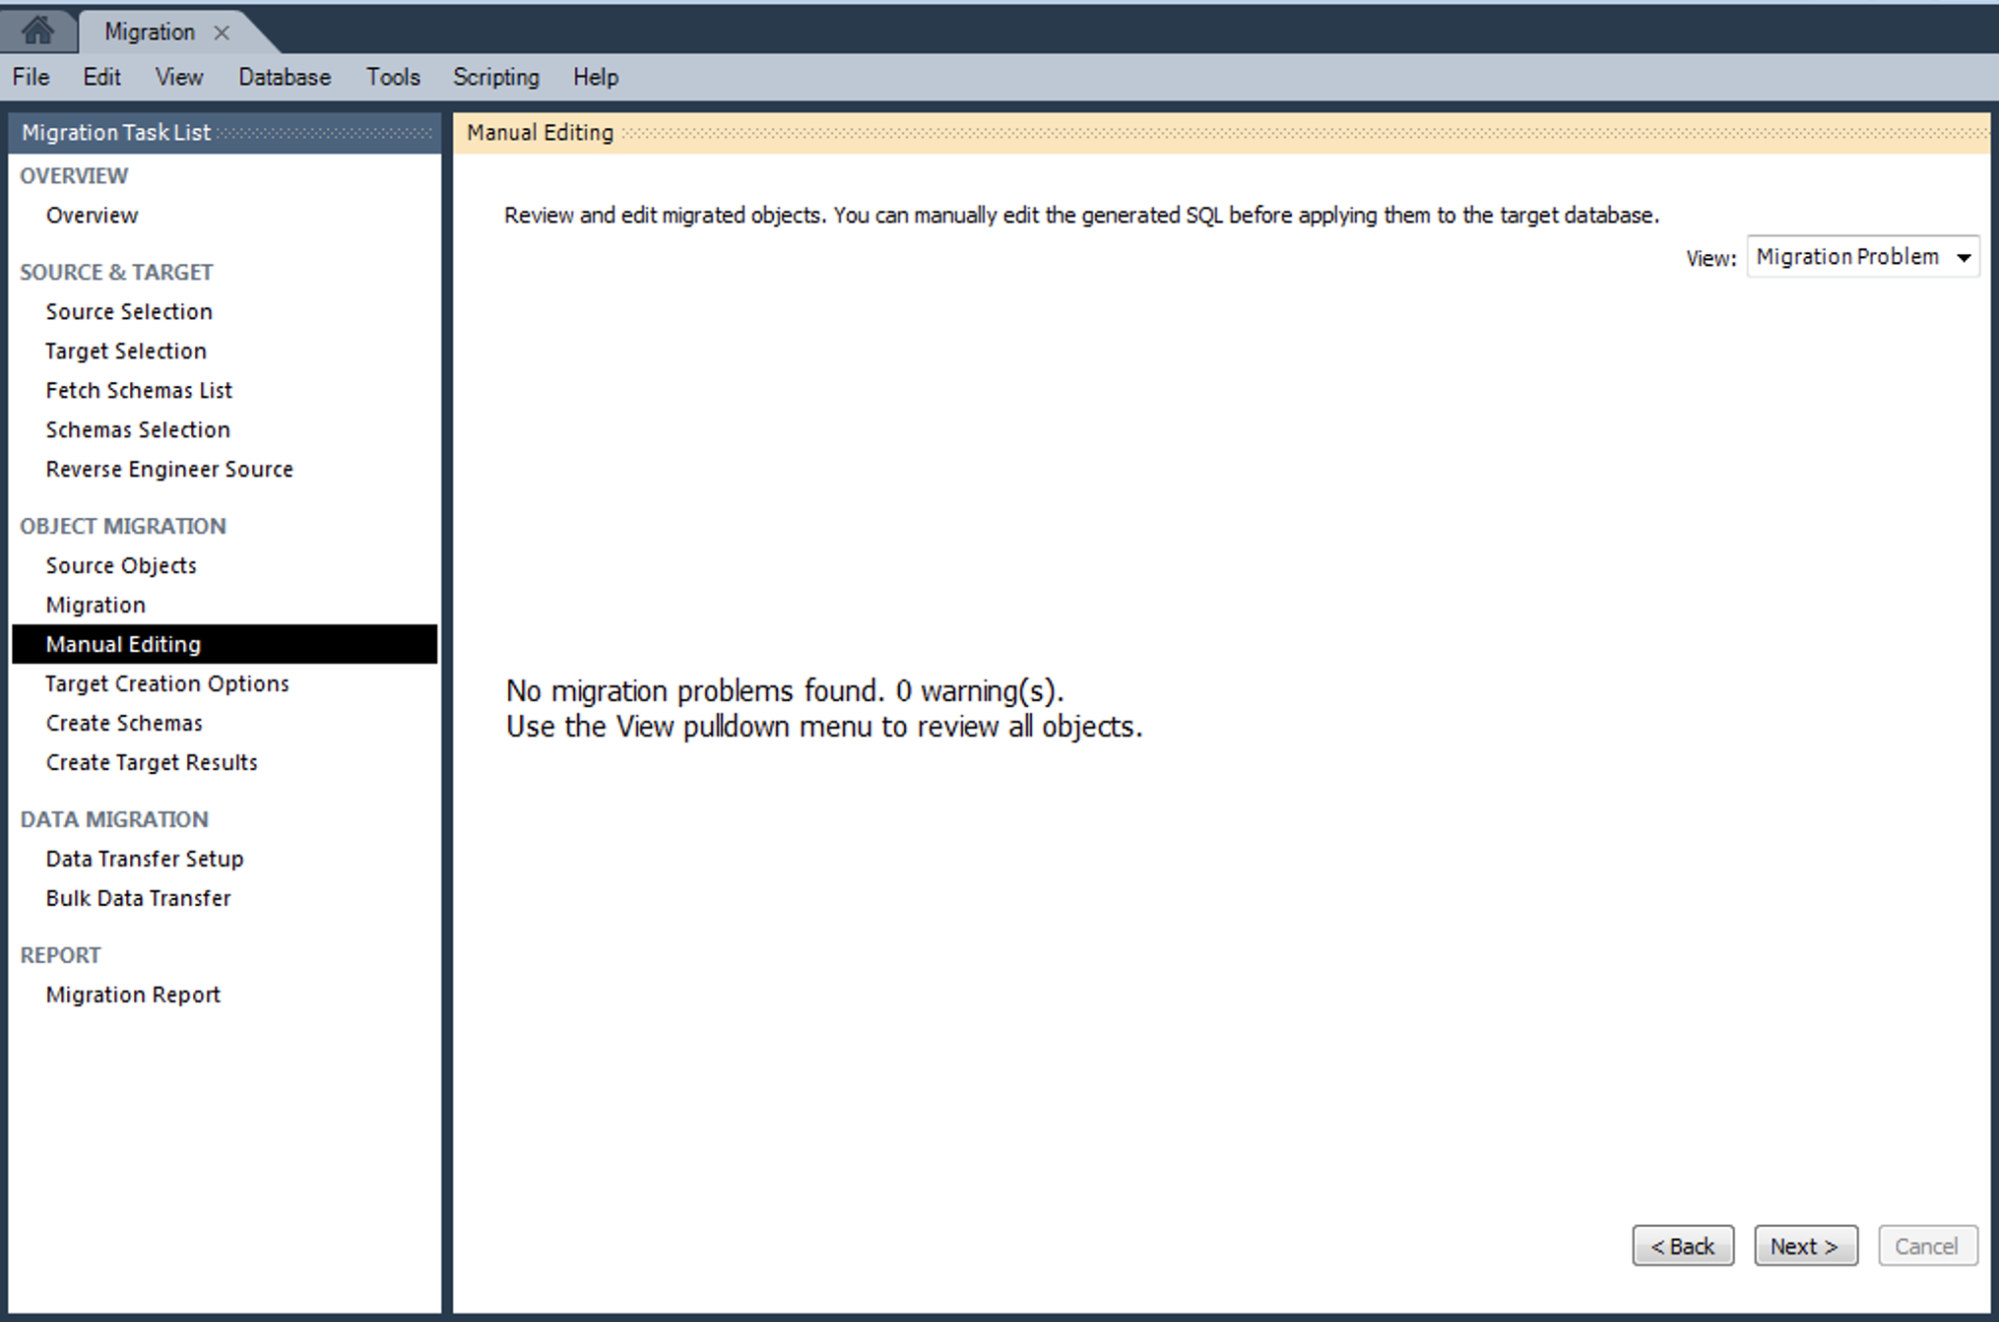
In this step, the objects from the source are converted into MySQL compatible objects.
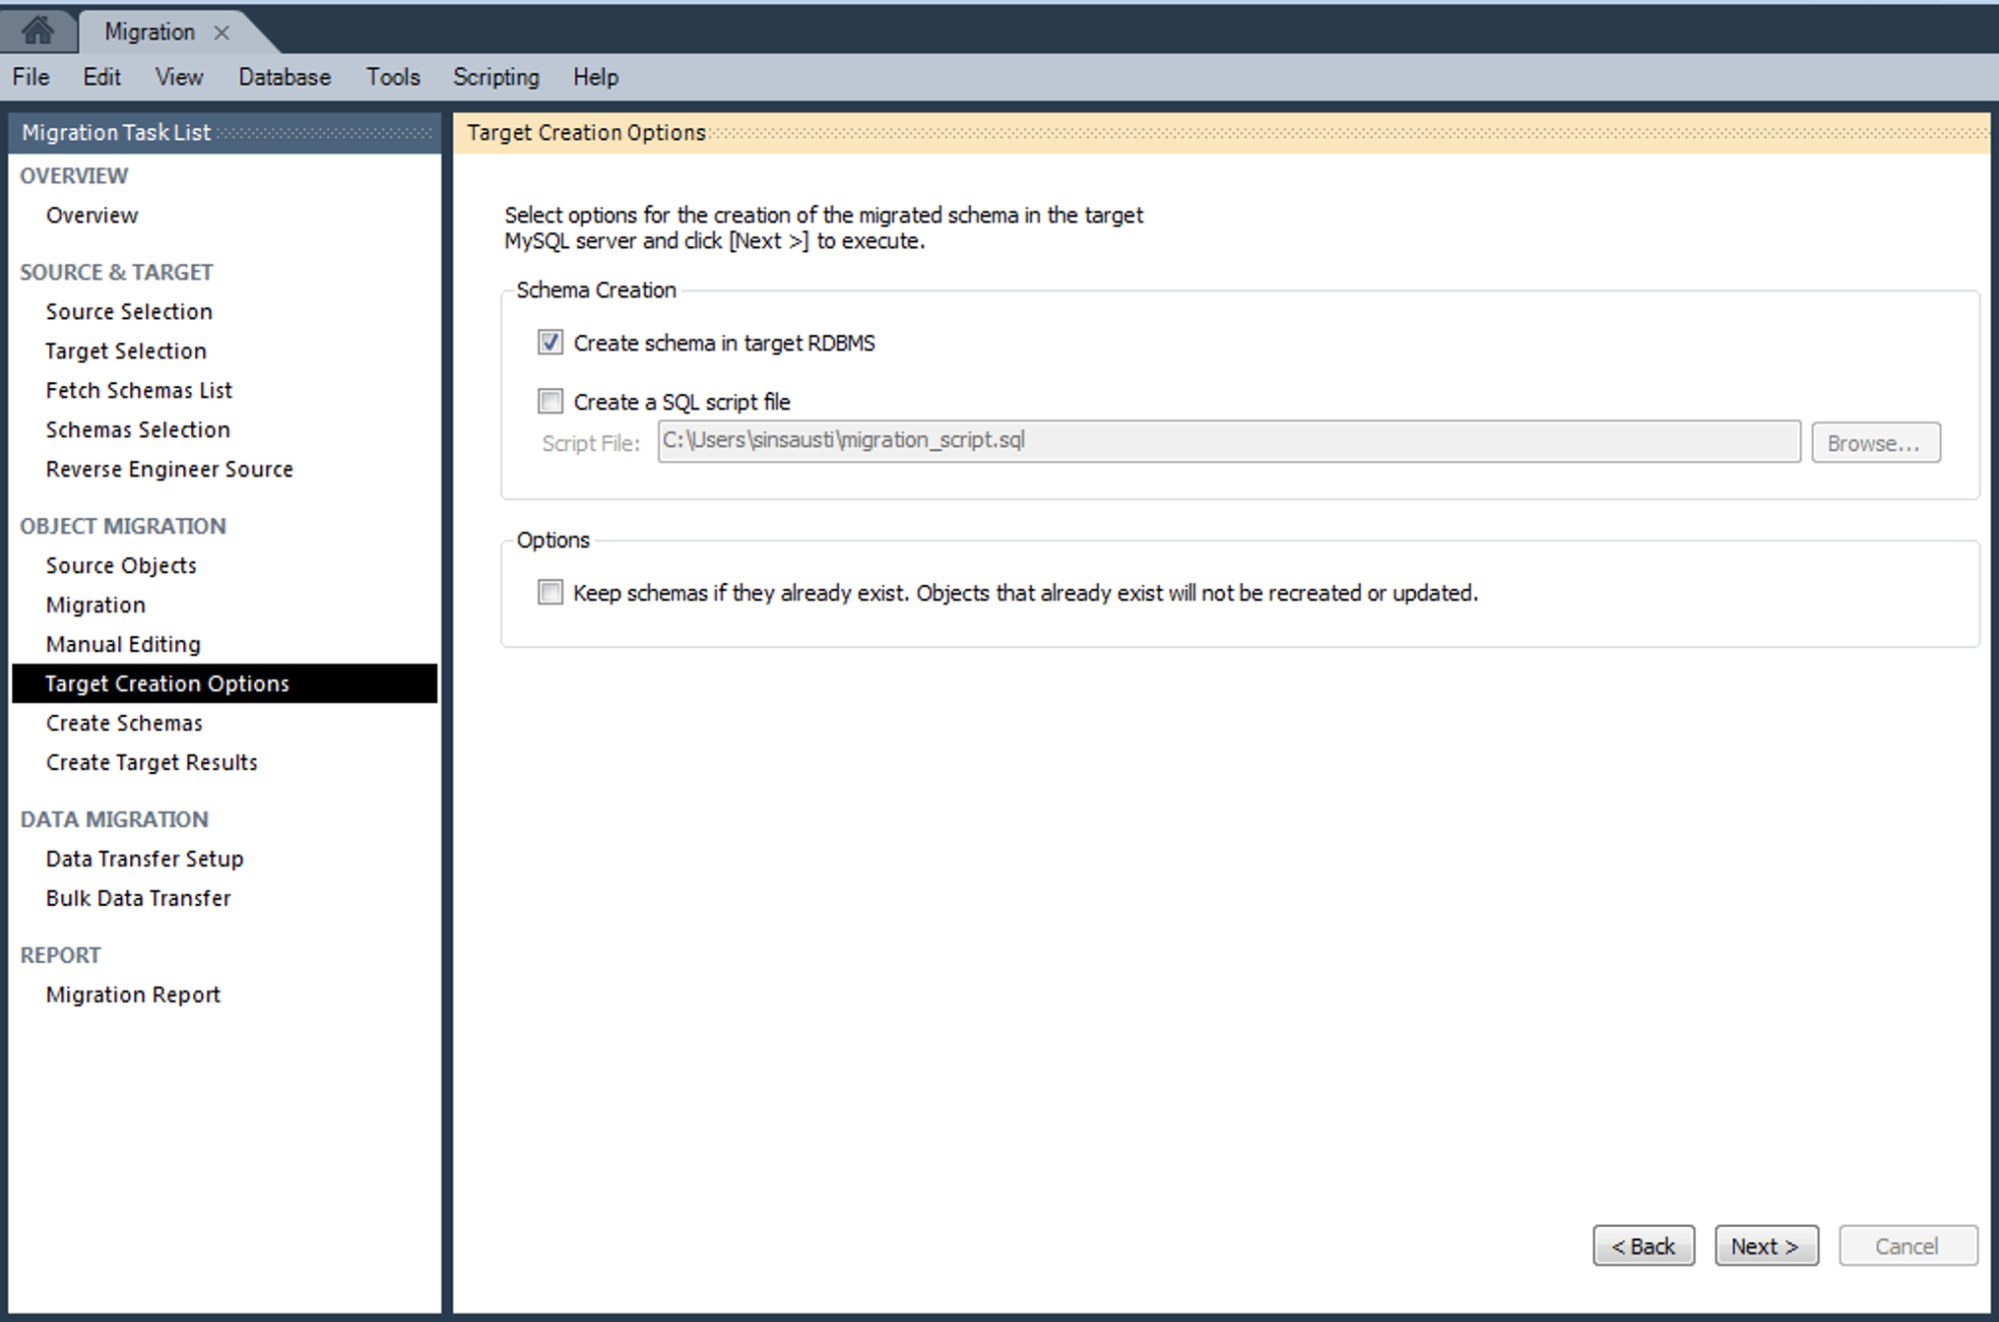
If everything went fine, we can continue by selecting how we want to create the migrated schema in the target. We’ll use the default “Create schema in target RDBMS” option.
Now, let’s check the creation schema process.
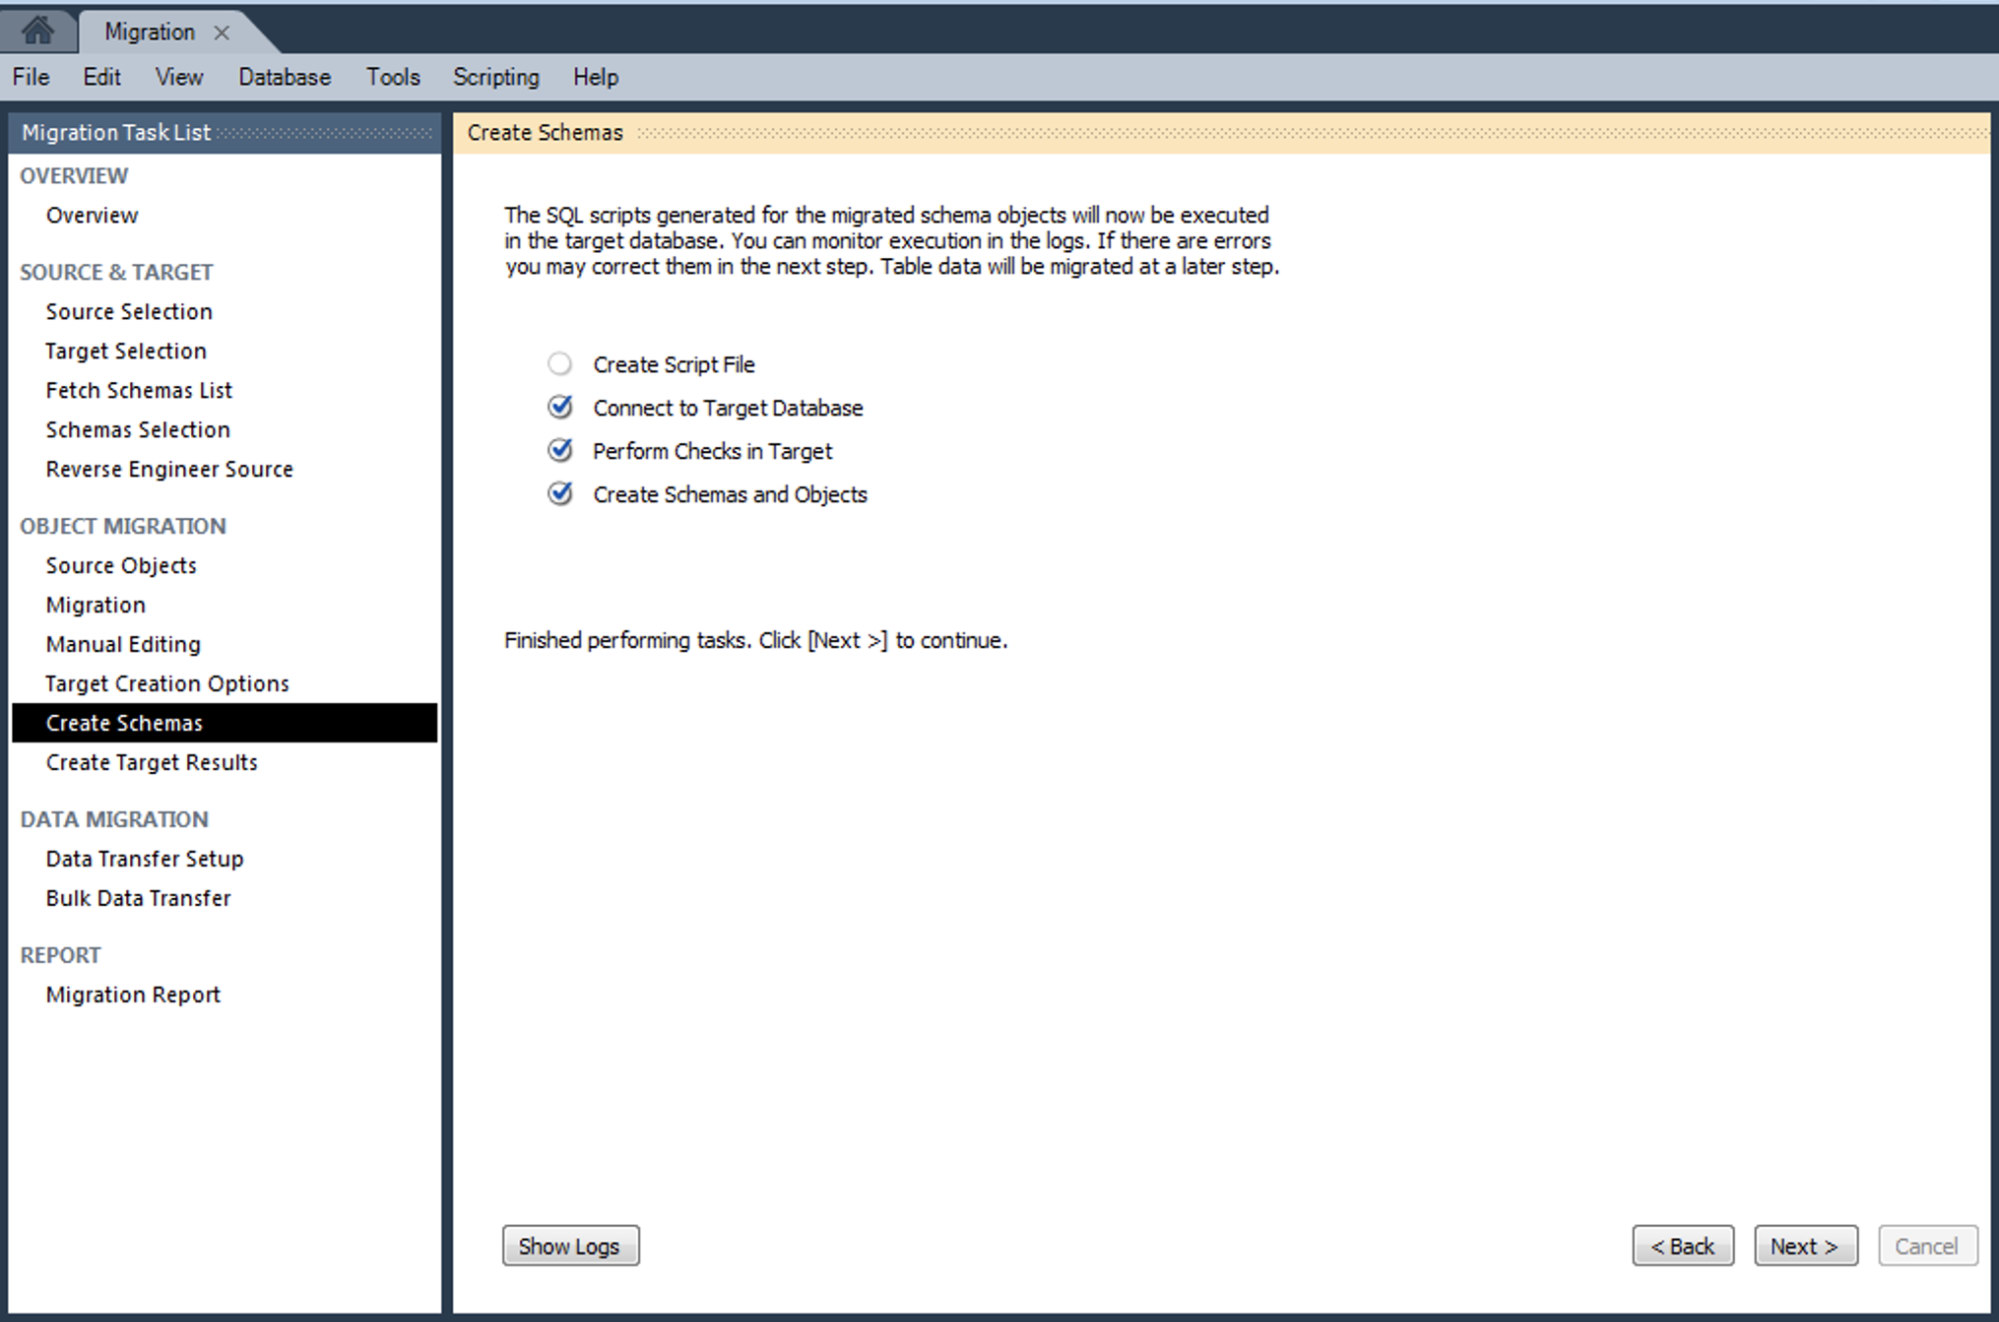
In the next step, we can check the result of each script execution, and we can check the new database created on our MySQL Server.
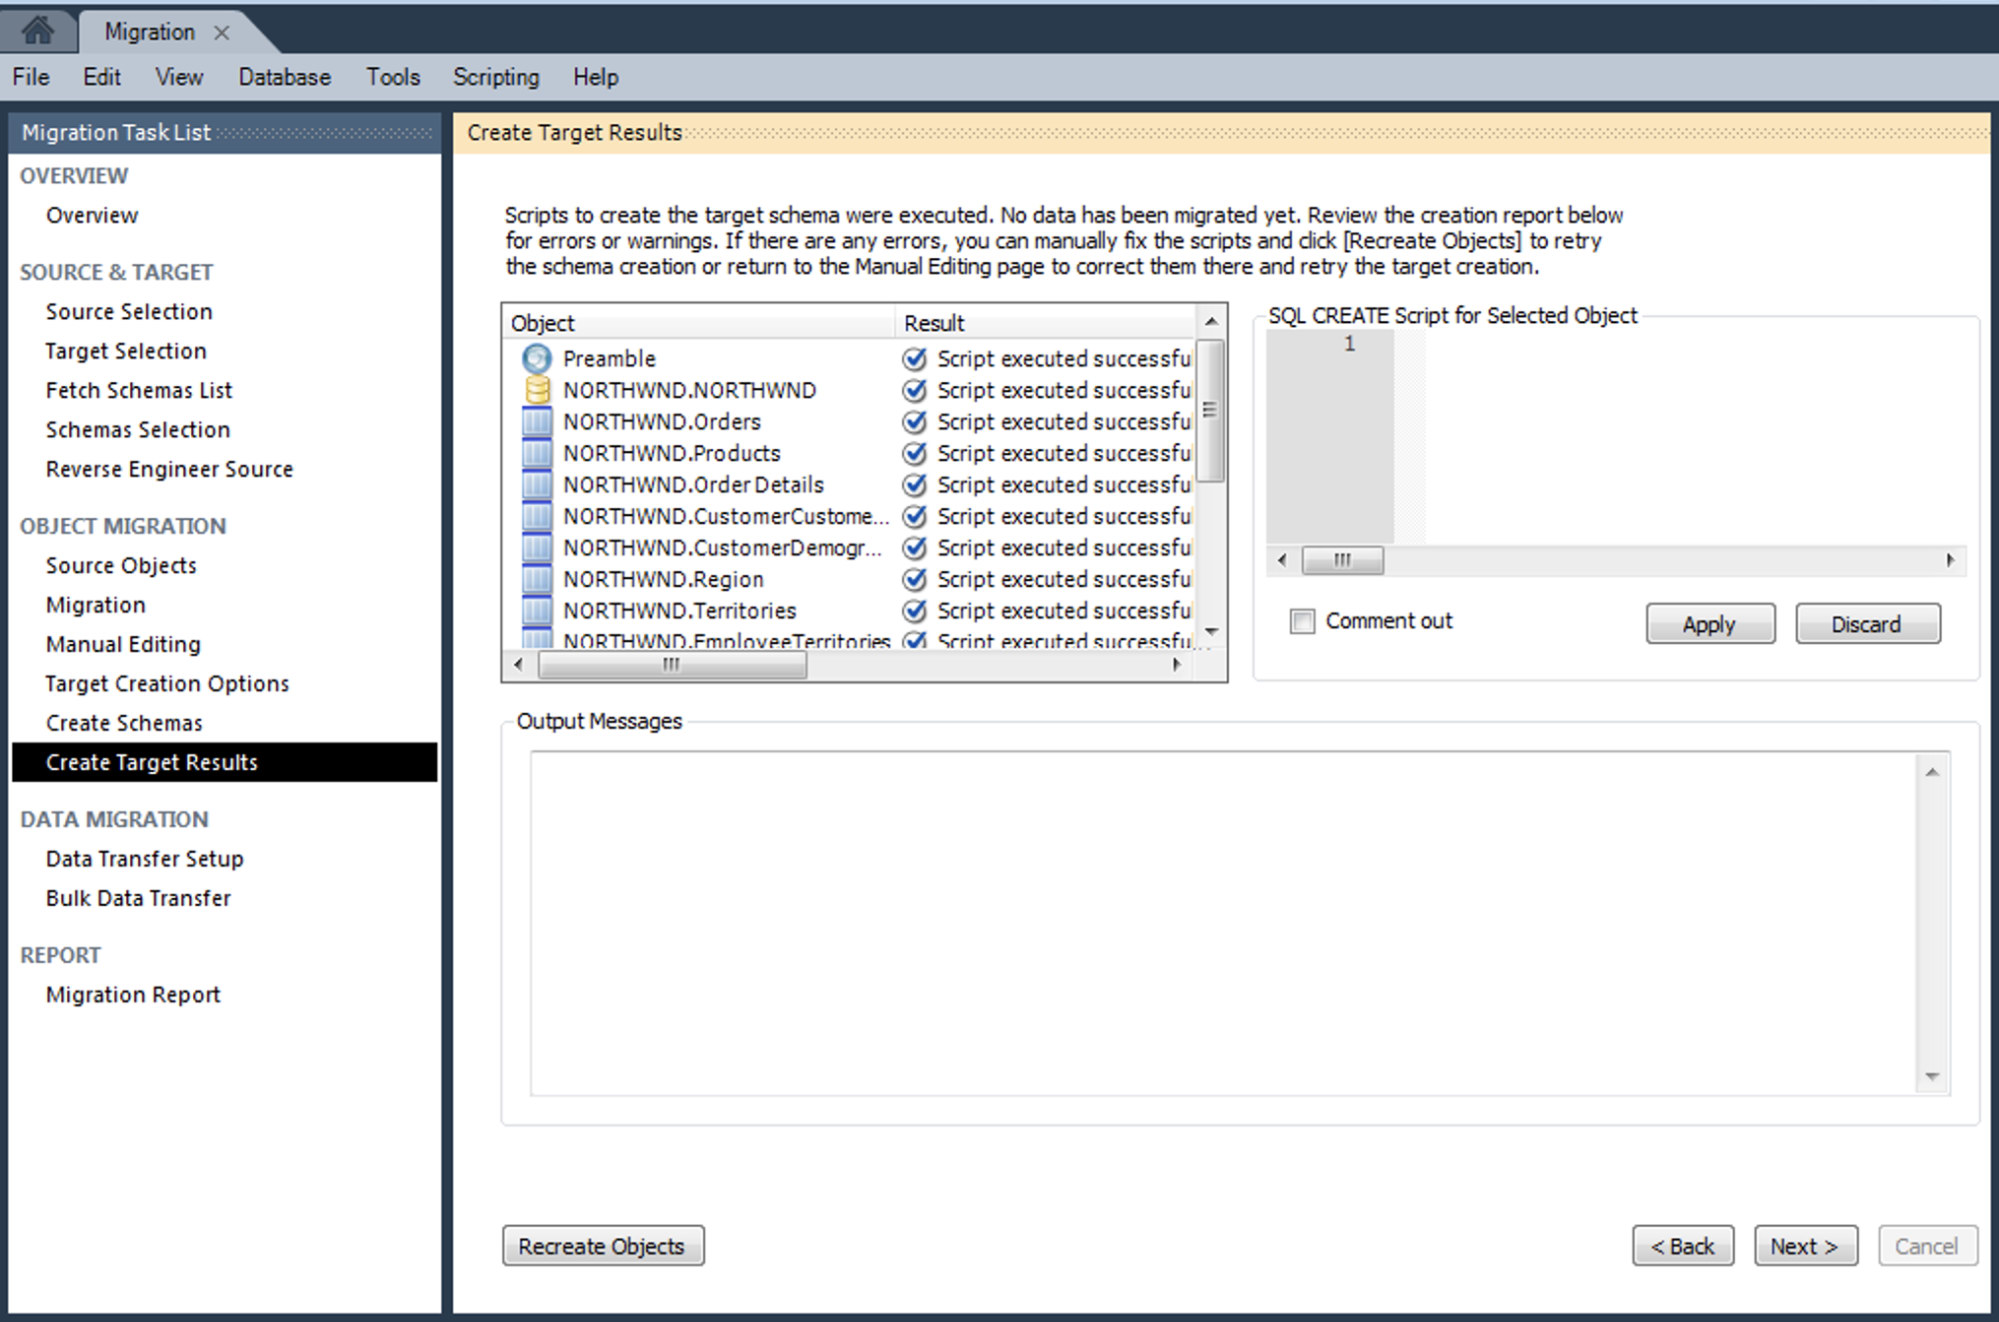
In our MySQL Server, we have:
mysql> SHOW DATABASES;
+--------------------+
| Database |
+--------------------+
| information_schema |
| NORTHWND |
| mysql |
| performance_schema |
| sys |
+--------------------+
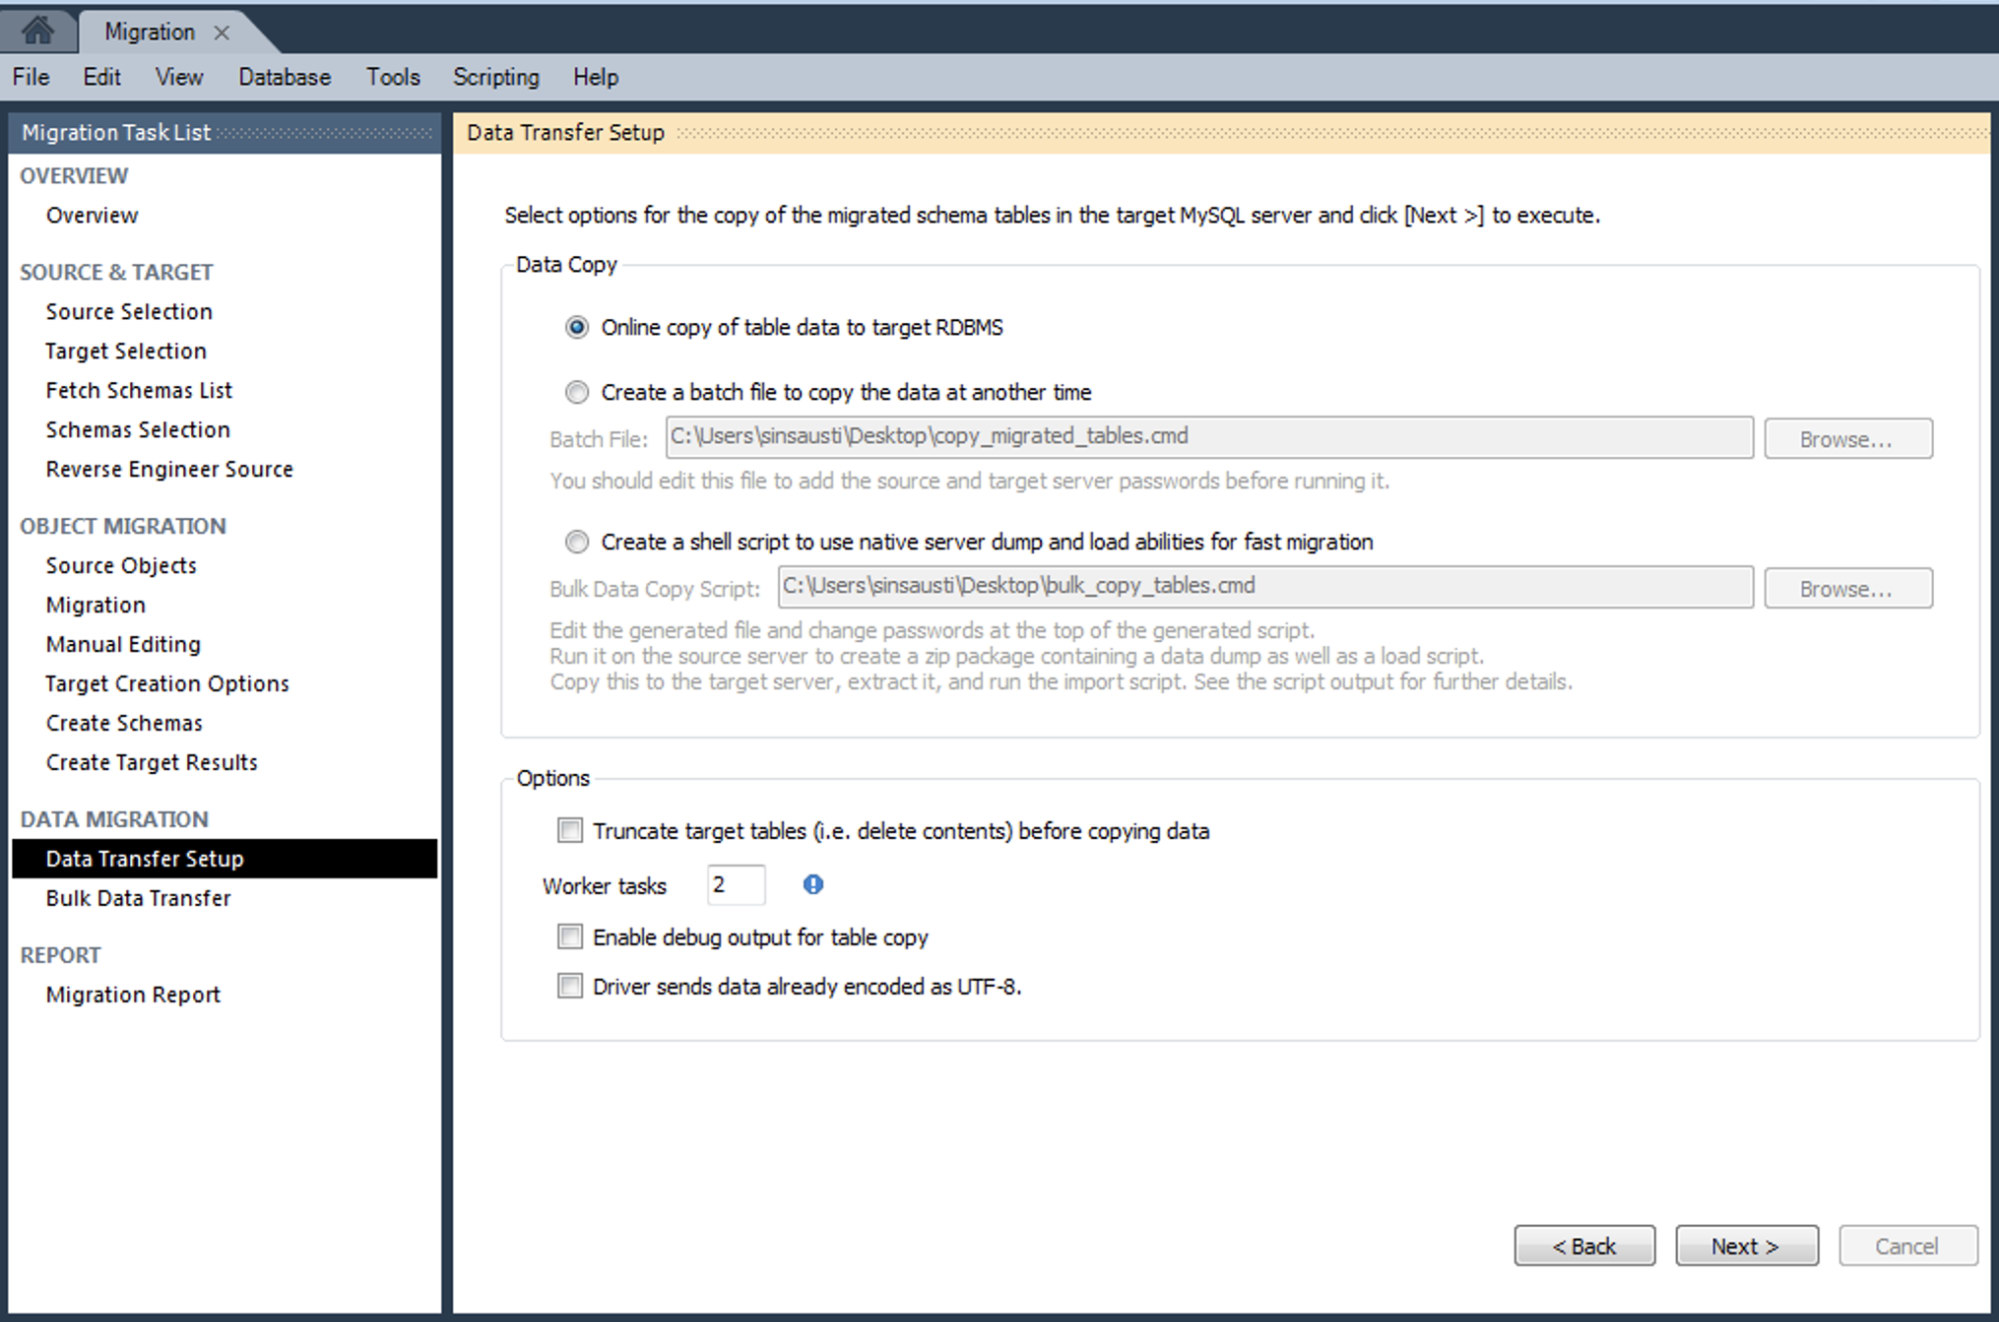
5 rows in set (0.01 sec)At this point, we’ll have the database structure, but we don’t have the data yet. Now, we’ll select how we want to copy the data in the MySQL Server. We’ll use the “Online copy of table data to target RDBMS” option.
And we can monitor the copy process from the MySQL Workbench application.
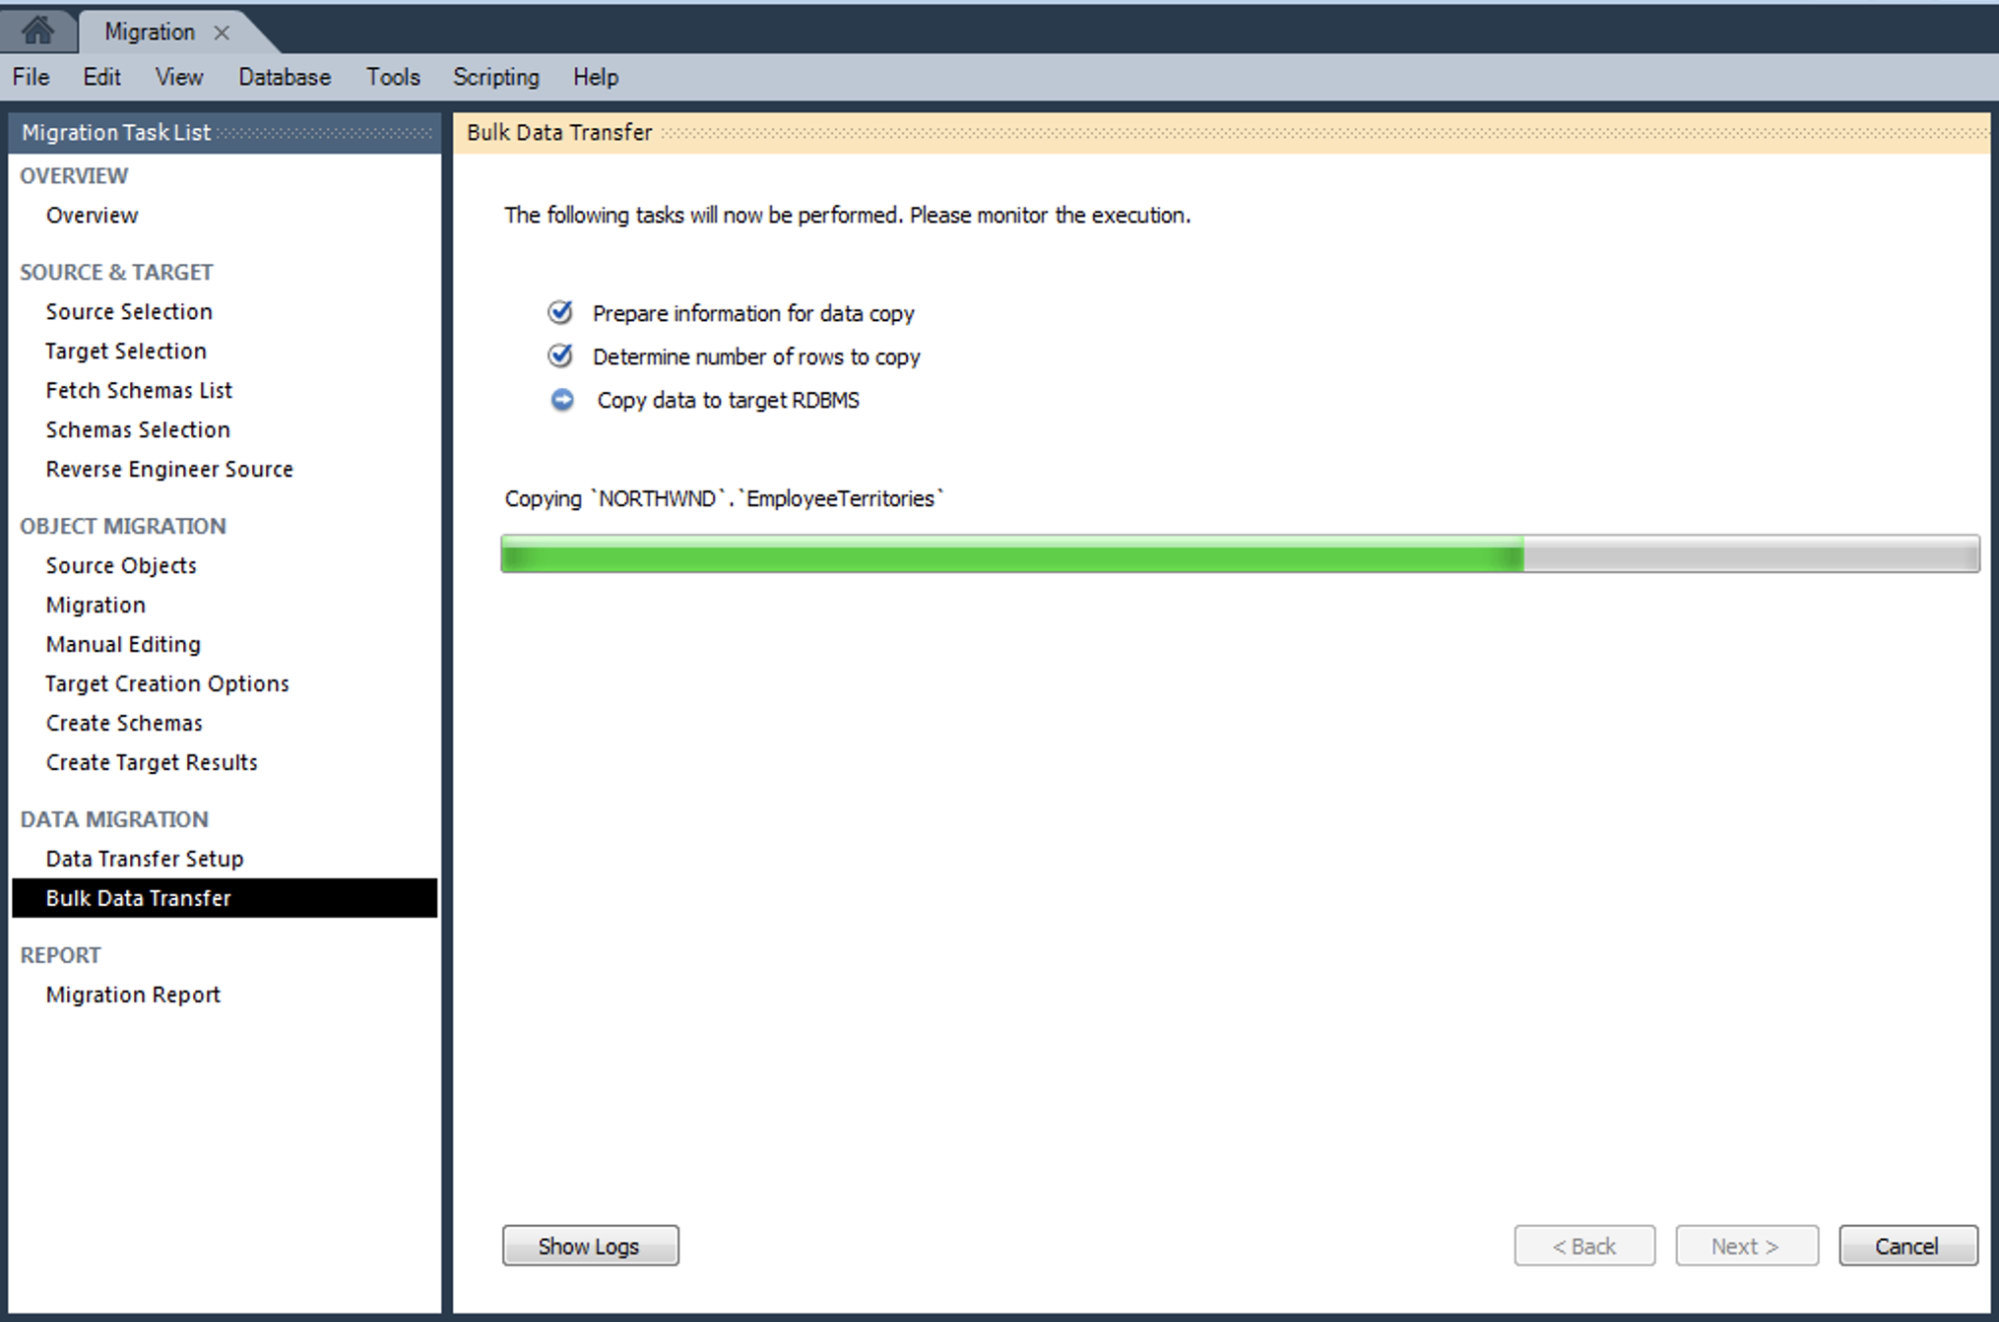
At this point, we have all the information migrated to our MySQL Server.
mysql> SELECT * FROM NORTHWND.Region;
+----------+-------------------+
| RegionID | RegionDescription |
+----------+-------------------+
|        1 | Eastern           |
|        2 | Western           |
|        3 | Northern          |
|        4 | Southern          |
+----------+-------------------+
4 rows in set (0.00 sec)
In the last step, we can check the migration report and finish the task.
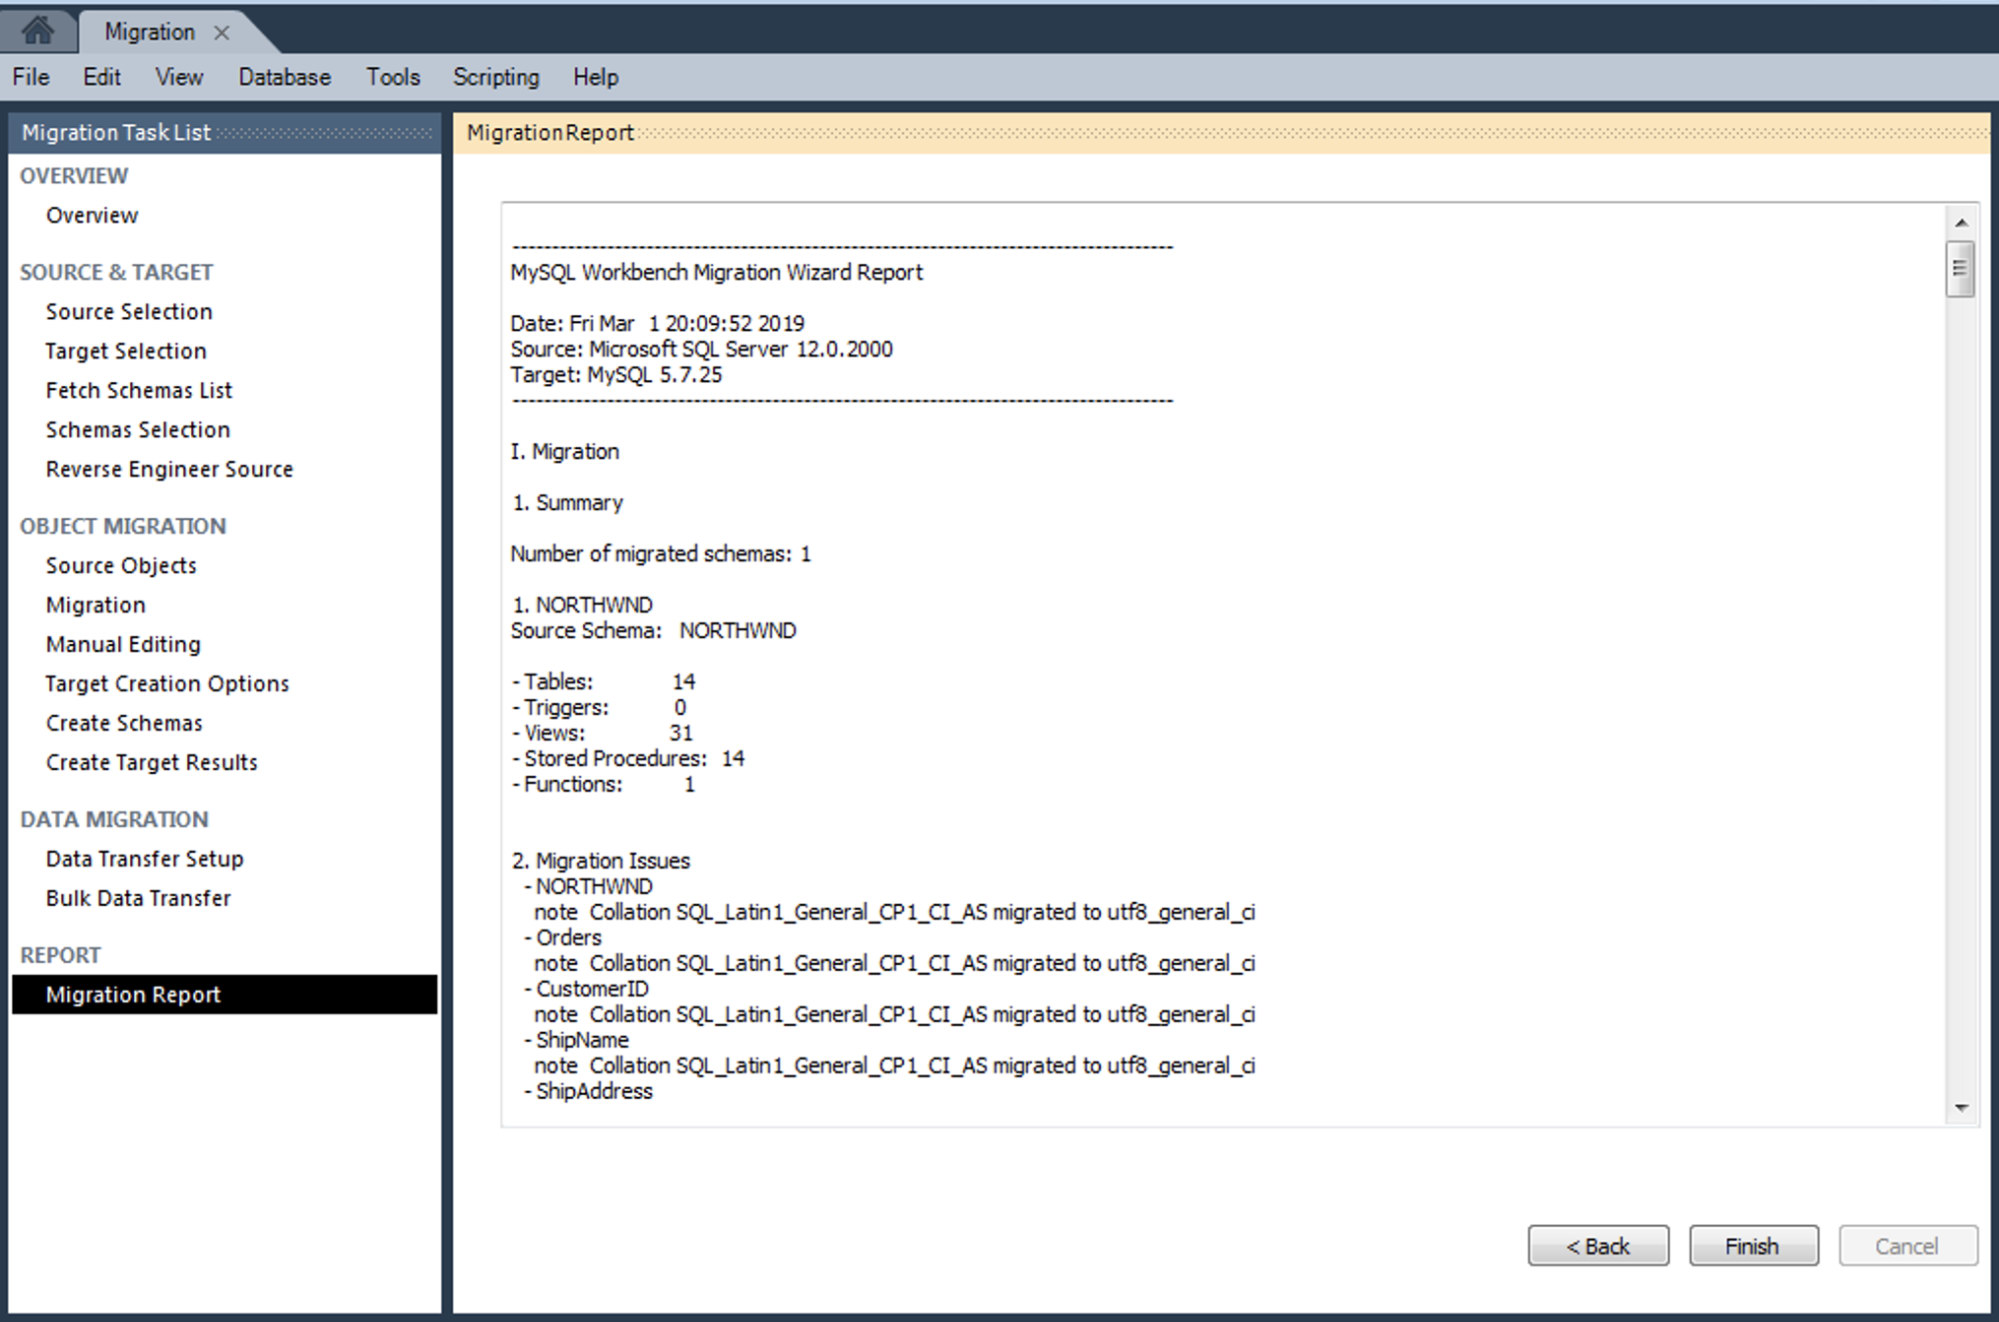
The migration is done!
Testing
Before the migration process, you should test the application and the MySQL database to know the behavior with the new engine.
It should also be useful to perform a benchmark test to validate the performance before the migration.
There are some tips to take into account:
- The test should simulate the number of user connections that are expected.
- The connected sessions should perform tasks as they would occur during a normal day.
- You should load your database with test data that is approximately the size you expect your database to be in the real world.
For this test task, you can use the mysqlslap tool. It’s a diagnostic program designed to emulate client load for a MySQL Server and to report the timing of each stage.
Conclusion
As we have reviewed in this blog, there are several reasons that can make a business decide a database migration, going from a proprietary engine into an open source one. We have seen here a popular use case, a migration from SQL Server into MySQL, and made a step by step example by using one widely known MySQL tool, the MySQL Workbench. We hope you find this article useful.