blog
How to Deploy a Highly Available Canvas LMS with a PostgreSQL Database Cluster

In these pandemic times, Learning Management System (LMS) platforms are getting more and more important to allow you to continue learning remotely when the traditional education system just isn’t available anymore.
Having an LMS platform without High Availability could be a problem in case of failure, as all your efforts to keep the system running won’t make sense without having the database available at all times.
In this blog, we will see a popular LMS application called Canvas LMS, and how to deploy it in a high availability way using PostgreSQL and ClusterControl.
What is Canvas?
Canvas is a web-based Learning Management System (LMS). It is used by learning institutions, educators, and students to access and manage online course learning materials and communicate about skill development and learning achievement.
Canvas includes a variety of customizable course creation and management tools, course and user analytics and statistics, and internal communication tools.
Canvas LMS PostgreSQL Database Deployment
First, let’s deploy a PostgreSQL Cluster, which will be used by the Canvas LMS application. For this, we will use ClusterControl to deploy 3 PostgreSQL nodes (1 Primary and 2 Standby nodes), and 2 HAProxy Load Balancers with Keepalived configured between them.
HAProxy is a load balancer that distributes traffic from one origin to one or more destinations and can define specific rules and/or protocols for this task. If any of the destinations stops responding, it is marked as offline, and the traffic is sent to the rest of the available destinations.
Keepalived is a service that allows you to configure a Virtual IP Address within an active/passive group of servers. This Virtual IP Address is assigned to an active server. If this server fails, the IP Address is automatically migrated to the “Secondary” passive server, allowing it to continue working with the same IP Address in a transparent way for the systems.
So, let’s see how to implement the mentioned topology using ClusterControl.
Database Deployment
To perform a deployment from ClusterControl, simply select the option “Deploy” and follow the instructions that appear.
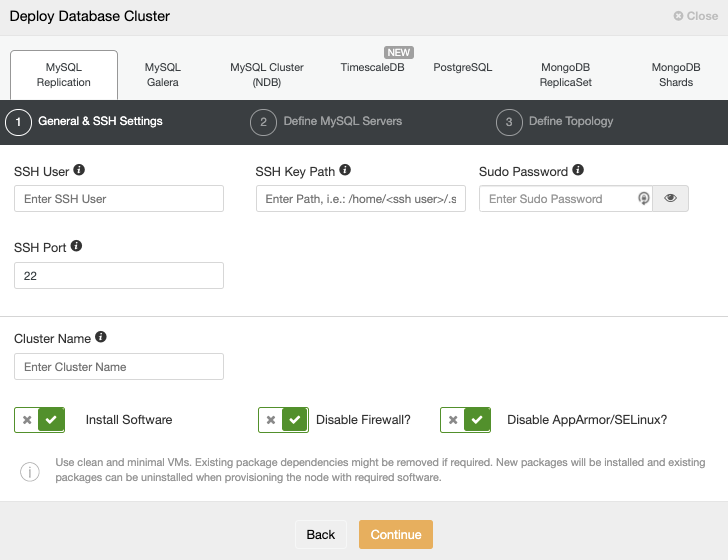
When selecting PostgreSQL, you must specify User, Key or Password, and Port to connect by SSH to your servers. You can also add a name for your new cluster and if you want ClusterControl to install the corresponding software and configurations for you.
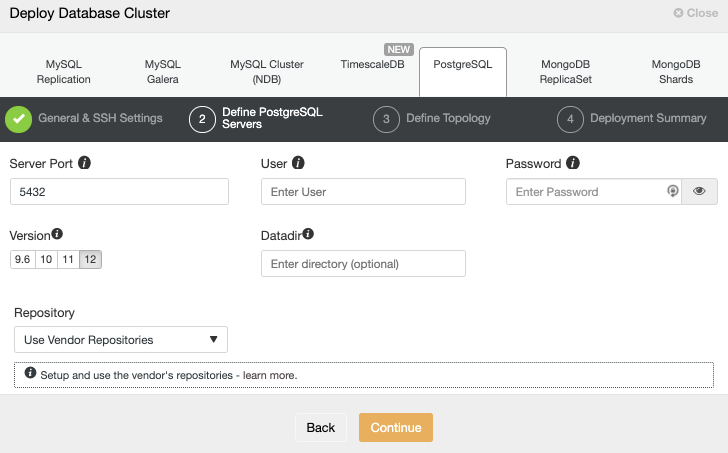
After setting up the SSH access information, you need to define the database credentials, version, and datadir (optional). You can also specify which repository to use.
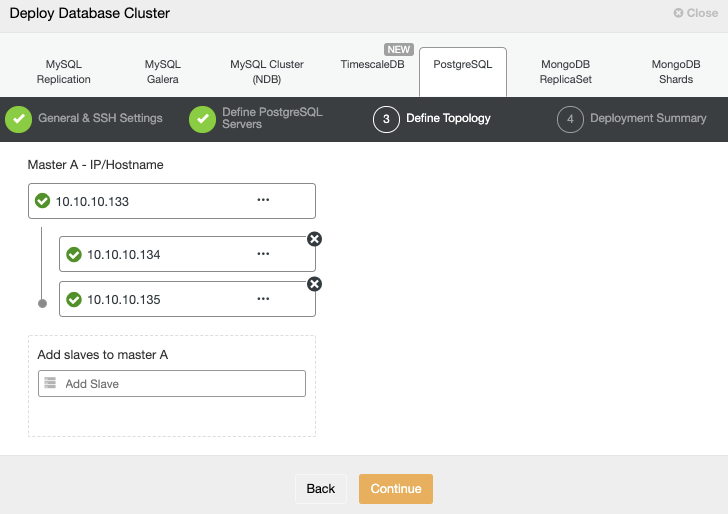
In the next step, you need to add your servers to the cluster that you are going to create using the IP Address or Hostname.
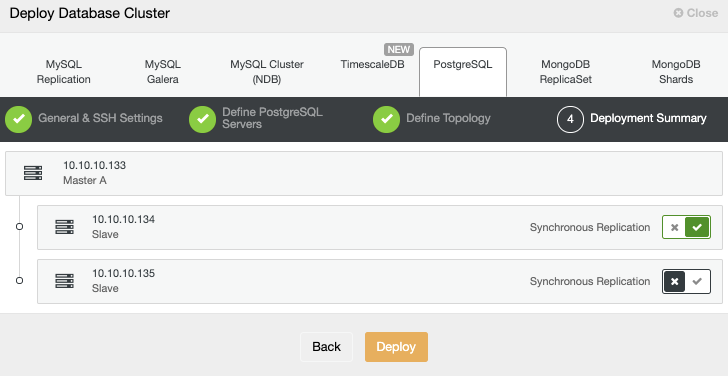
In the last step, you can choose if your replication will be Synchronous or Asynchronous, and then just press on “Deploy”
Once the task is finished, you can see your new PostgreSQL cluster in the main ClusterControl screen.

Now you have your cluster created, you can perform several tasks on it, like adding a load balancer (HAProxy) or a new replica.
Load Balancer Deployment
To perform a load balancer deployment, select the option “Add Load Balancer” in the cluster actions, and complete the asked information.
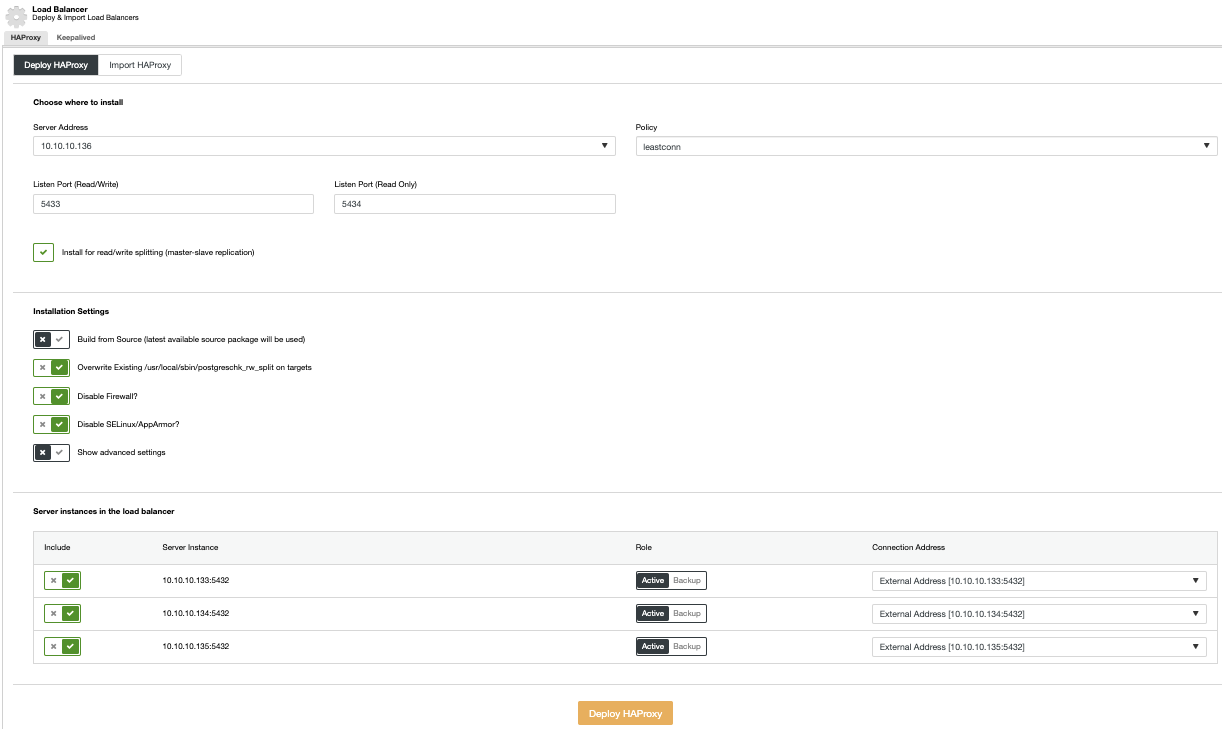
You only need to add IP or Hostname, Port, Policy, and the nodes you are going to use.
Keepalived Deployment
To perform a Keepalived deployment, select the option “Add Load Balancer” in the cluster actions and then, go to the Keepalived Tab.
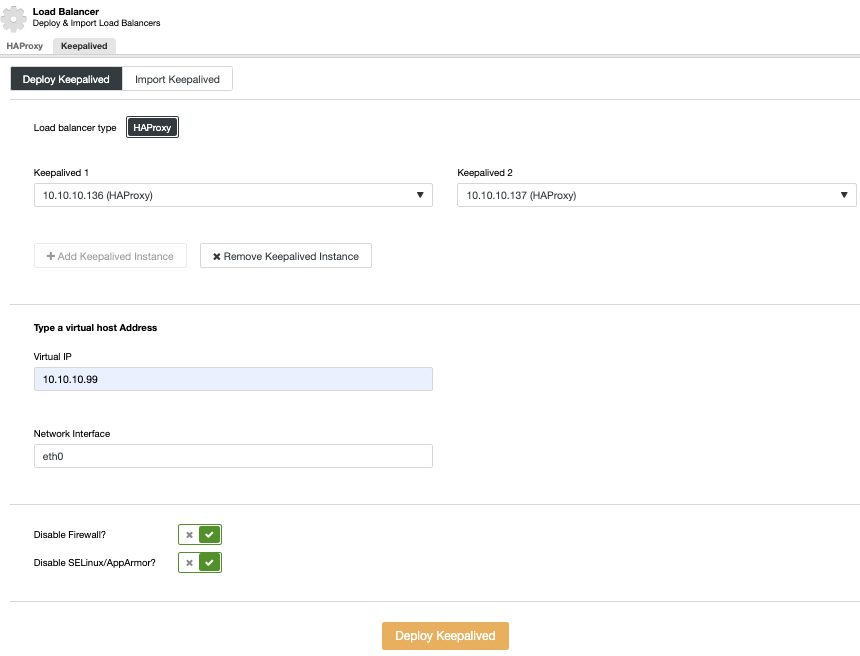
Here, select the HAProxy nodes, and specify the Virtual IP Address that will be used to access the database.
At this moment, you should have the following topology:
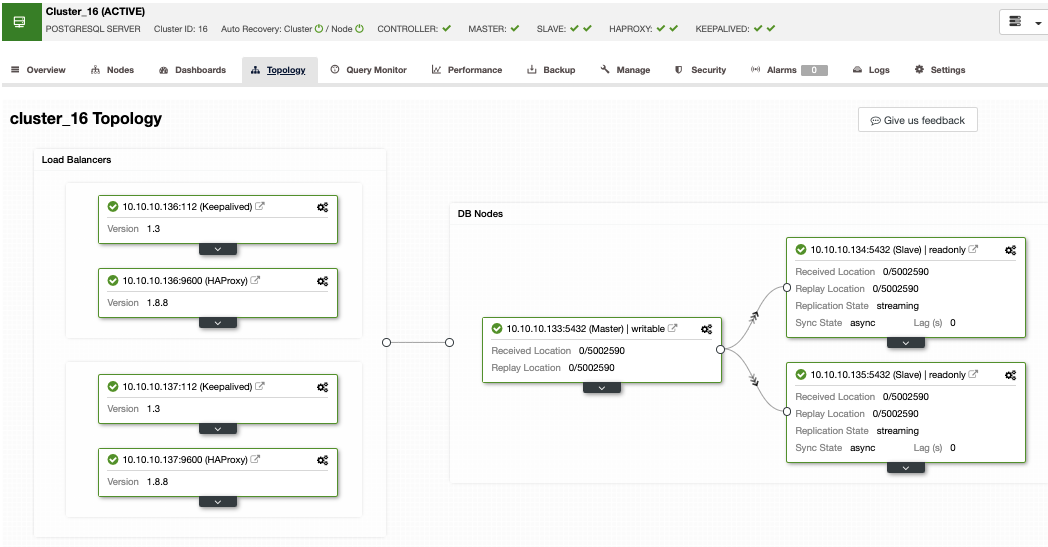
Now, let’s connect this environment to Canvas LMS for High Availability.
How to Configure Canvas LMS
First, you will need to install it. There are different ways to do it, using an automated setup on Docker, manually, or even using different approaches like QuickStart or Production-Oriented installation. You can check the official documentation to choose the best method for you.
Once you have Canvas LMS installed, you can proceed to configure the database.yml file to use the PostgreSQL High Availability environment that you just deployed.
$ cat config/database.yml

production:

  adapter: postgresql

  encoding: utf8

  database: canvas_production

  host: VIRTUAL_IPADDRESS

  username: CANVAS_USER

  password: CANVAS_PASSWD

  timeout: 5000
Here, replace:
-
VIRTUAL_IPADDRESS for Virtual IP Address configured in Keepalived
-
CANVAS_USER for the Canvas database user
-
CANVAS_PASSWD for the Canvas database password
Make sure you can access your database using your Virtual IP Address as the host and it is allowed in the pg_hba.conf PostgreSQL configuration file. You can test it by running the following command from your application server:
$ psql -h VIRTUAL_IPADDRESS -U CANVAS_USER canvas_productionClusterControl Autorecovery Feature
So, the question is, apart from the deployment process, what is the role of ClusterControl here?
In case of failure, ClusterControl will promote the most advanced standby node to primary as well as notify you of the problem. It also fails over the rest of the standby node to replicate from the new primary server.
By default, HAProxy is configured with two different ports: read-write and read-only. In the read-write port, you have your primary node as online and the rest of the nodes as offline, and in the read-only port, you have both the primary and the standby nodes online.
When HAProxy detects that one of your nodes is not accessible, it automatically marks it as offline and does not take it into account for sending traffic to it. Detection is done by health check scripts that are configured by ClusterControl at the time of deployment. These check whether the instances are up, whether they are undergoing recovery, or are read-only.
When ClusterControl promotes a standby node, HAProxy marks the old primary as offline for both ports and puts the promoted node online in the read-write port.
If your active HAProxy, which is assigned a Virtual IP Address to which your systems connect, fails, Keepalived migrates this IP Address to your passive HAProxy automatically. This means that your systems are then able to continue to function normally.
Conclusion
In this blog, we talked about the importance of having a High Availability PostgreSQL environment to use with your Canvas LMS platform, and how ClusterControl can help you with both Deployment and Autorecovery tasks. We had also mentioned how to improve this environment by adding HAProxy and Keepalived for High Availability purposes.