blog
ClusterControl’s Vault Integration Adds Dynamic Data Security Protections

The security is paramount nowadays, especially for the organizations that deal with the sensitive data – financial, health, personal data. In those cases you are obliged to comply with numerous security and data protection standards like HIPAA, PCI DSS or similar. With the most recent release, ClusterControl makes it even easier to meet the strict standards. ClusterControl 1.8.0 comes with the support for integration with HashiCorp Vault. Let’s take a look at the improvements it brings.
ClusterControl integration with HashiCorp Vault
ClusterControl is a management platform therefore it requires full access to the systems it manages – databases. It has to store passwords for management users. Currently it’s done in the cluster configuration files – all the required access details for the cluster are stored in one of the configuration files located in /etc/cmon.d/cmon_X.cnf. Here is the example for the PostgreSQL cluster:
postgresql_password=pass

postgresql_server_addresses=10.0.0.105:5432,10.0.0.106:5432

postgresql_user=myuser

repl_password=!ROos}Shf9Z,6fWdF2Iq83V0wXom!P03

repl_user=cmon_replication

rpc_key=yx9i2r8olpou9lgi
As you can see, whoever can access this file will be able to access the PostgreSQL nodes. It also stores rpc_key that can be used to manage the cluster using ClusterControl. Of course, those files are accessible only to the root user and one can argue that if someone has gained access to the root account, you are pretty much in a bad spot anyway, but ensuring that there are no passwords in the configuration file is still a good practice.
root@vagrant:~# ls -alh /etc/cmon.d/

total 28K

drwx------   2 root root 4.0K Sep 23 10:02 .

drwxr-xr-x 103 root root 4.0K Sep 23 13:34 ..

-rw-------   1 root root  668 Sep 23 13:34 cmon_1.cnf

-rw-------   1 root root  695 Sep 23 13:34 cmon_2.cnf

-rw-------   1 root root  600 Sep 23 13:34 cmon_3.cnf

-rw-------   1 root root  585 Sep 23 13:34 cmon_4.cnf

-rw-r--r--   1 root root   81 Sep  1  2016 README.txt
Here enters HashiCorp Vault – it is a product dedicated to storing sensitive data, just like the passwords we want to protect. It made sense to use it to integrate with ClusterControl. As of now, in ClusterControl 1.8.0, the only way to integrate is to use a pre-deployed Vault. Vault can be deployed in a number of ways, including clustered deployment. Covering this is out of the scope of this blog, we will still show you how to test the integration by deploying a standalone node of HashiCorp Vault and configure it with ClusterControl. Let’s take a look at the steps required to accomplish this.
Deploying HashiCorp Vault
The deployment process for HashiCorp Vault is pretty straightforward. First, let’s start with the Ubuntu/Debian Linux distribution.
We start with updating the package manager and install GPG and wget (if they are not installed in your system)
$ sudo apt update && sudo apt install gpg wget
Then we should download the keyring:
$ wget -O- https://apt.releases.hashicorp.com/gpg | sudo gpg --dearmor -o /usr/share/keyrings/hashicorp-archive-keyring.gpg
Next, we should verify the keyring:
$ gpg --no-default-keyring --keyring /usr/share/keyrings/hashicorp-archive-keyring.gpg --fingerprint
Add the Hashicorp repository:
$ echo "deb [arch=$(dpkg --print-architecture) signed-by=/usr/share/keyrings/hashicorp-archive-keyring.gpg] https://apt.releases.hashicorp.com $(lsb_release -cs) main" | sudo tee /etc/apt/sources.list.d/hashicorp.list
Install Harshicorp Vault
$ sudo apt update && sudo apt install vault
Now let’s see how to install in CentOS/RHEL Linux distribution:
Install yum-config-manager to manage your repositories:
$ sudo yum install -y yum-utilsUse yum-config-manager to add the official HashiCorp Linux repository:
Install Vault:
$ sudo yum -y install vaultOnce this is done, you can verify the Vault installed successfully by executing:
$ vaultYou should see help output similar to the following:
Common commands:

read                Read data and retrieves secrets
write               Write data, configuration, and secrets
delete              Delete secrets and configuration
list                List data or secrets
login               Authenticate locally
agent               Start a Vault agent
server              Start a Vault server
status              Print seal and HA status
unwrap              Unwrap a wrapped secret


Other commands:

Audit               Interact with audit devices
auth                Interact with auth methods
debug               Runs the debug command
events
kv                  Interact with Vault's Key-Value storage
lease               Interact with leases
monitor             Stream log messages from Vault server
namespace           Interact with namespaces
operator            Perform operator-specific tasks
patch               Patch data, configuration, and secrets
path-help           Retrieve API help for paths
pki                 Interact with Vault's PKI Secrets Engine
plugin              Interact with Vault plugins and catalog
policy              Interact with policies
print               Prints runtime configurations
proxy               Start a Vault Proxy
secrets             Interact with secrets engines
ssh                 Initiate an SSH session
token               Interact with tokens
transform           Interact with Vault's Transform Secrets Engine
transit             Interact with Vault's Transit Secrets Engine
version-history     Prints the version history of the target Vault server
The Vault will have to be initialized and later unsealed before ClusterControl will be able to use it.
However, before we do this you will need to edit the vault configuration file /etc/vault.d/vault.hcl and change the IP to the vault’s host IP to be able to access the vault:
listener "tcp" {
address = "IP:8200"
tls_cert_file = "/opt/vault/tls/tls.crt"
tls_key_file = "/opt/vault/tls/tls.key"
Then restart the vault to effect the changes:
service vault restart
Once this is done, you can access the UI at https://IP:8200/ui/. We will have to initialize the Vault now as shown below:
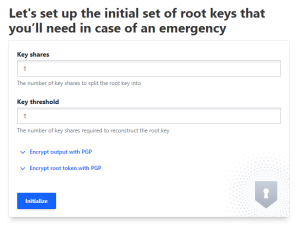
Once you click the Initialize button, you will see the unseal key and root token. You can download the keys for safekeeping. The unseal key is required to unseal the Vault, which we will do in the next step. Root token will be used by ClusterControl to connect to the Vault.
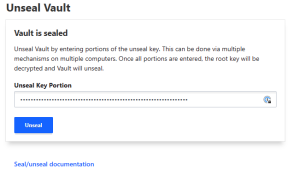
Let’s unseal the Vault:
Now we have to setup ClusterControl to use the Vault to store passwords. This can be accomplished by creating following entries in the /etc/cmon.cnf:
vault_token=s.f1kl9XUBuFjdyV048QIgHoJh
vault_auto_migrate=true
vault_addr=https://IP:8200
Vault_token should contain a root token for the Vault, vault_addrs should contain the full URL (including protocol and port) where the Vault server is listening and vault_auto_migrate=true means that ClusterControl will automatically migrate data from configuration files into the Vault. This is a good moment to make a copy of your existing configuration files located in /etc/cmon.d/ as you will need them should you decide to revert this process and not use Vault at some point in the future.
Once you have the configuration set up, you have to restart cmon process to migrate data into the Vault:
service cmon restartThis is it, ClusterControl, from now on, will use the data in the Vault to access the backend databases. We can easily check what exactly is stored there:
root@vagrant:~/vault# export VAULT_TOKEN=s.f1kl9XUBuFjdyV048QIgHoJh

root@vagrant:~/vault# ./vault secrets list

Path               Type         Accessor              Description

----               ----         --------              -----------

clustercontrol/    kv           kv_939a83de           Created by ClusterControl

cubbyhole/         cubbyhole    cubbyhole_42b40ca0    per-token private secret storage

identity/          identity     identity_594e8bfc     identity store

sys/               system       system_9509de58       system endpoints used for control, policy and debugging
Now, knowing the path, we can query the data:
root@vagrant:~/vault# ./vault kv list clustercontrol/

Keys

----

clustercontrol/


root@vagrant:~/vault# ./vault kv list clustercontrol/clustercontrol

Keys

----

cluster_0

cluster_1

cluster_2

cluster_3

cluster_4
Let’s retrieve data for cluster_4:
root@vagrant:~/vault# ./vault kv get clustercontrol/clustercontrol/cluster_4
====== Metadata ======
Key Value
--- -----
created_time 2020-09-24T10:51:27.242621166Z
deletion_time n/a
destroyed false
version 5
============ Data ============
Key Value
--- -----
backup_user_password Y3rocu-7wWGSJ-56iMK7cd8@yK+70AzH
mysql_password pass
postgresql_password pass
repl_password !ROos}Shf9Z,6fWdF2Iq83V0wXom!P03
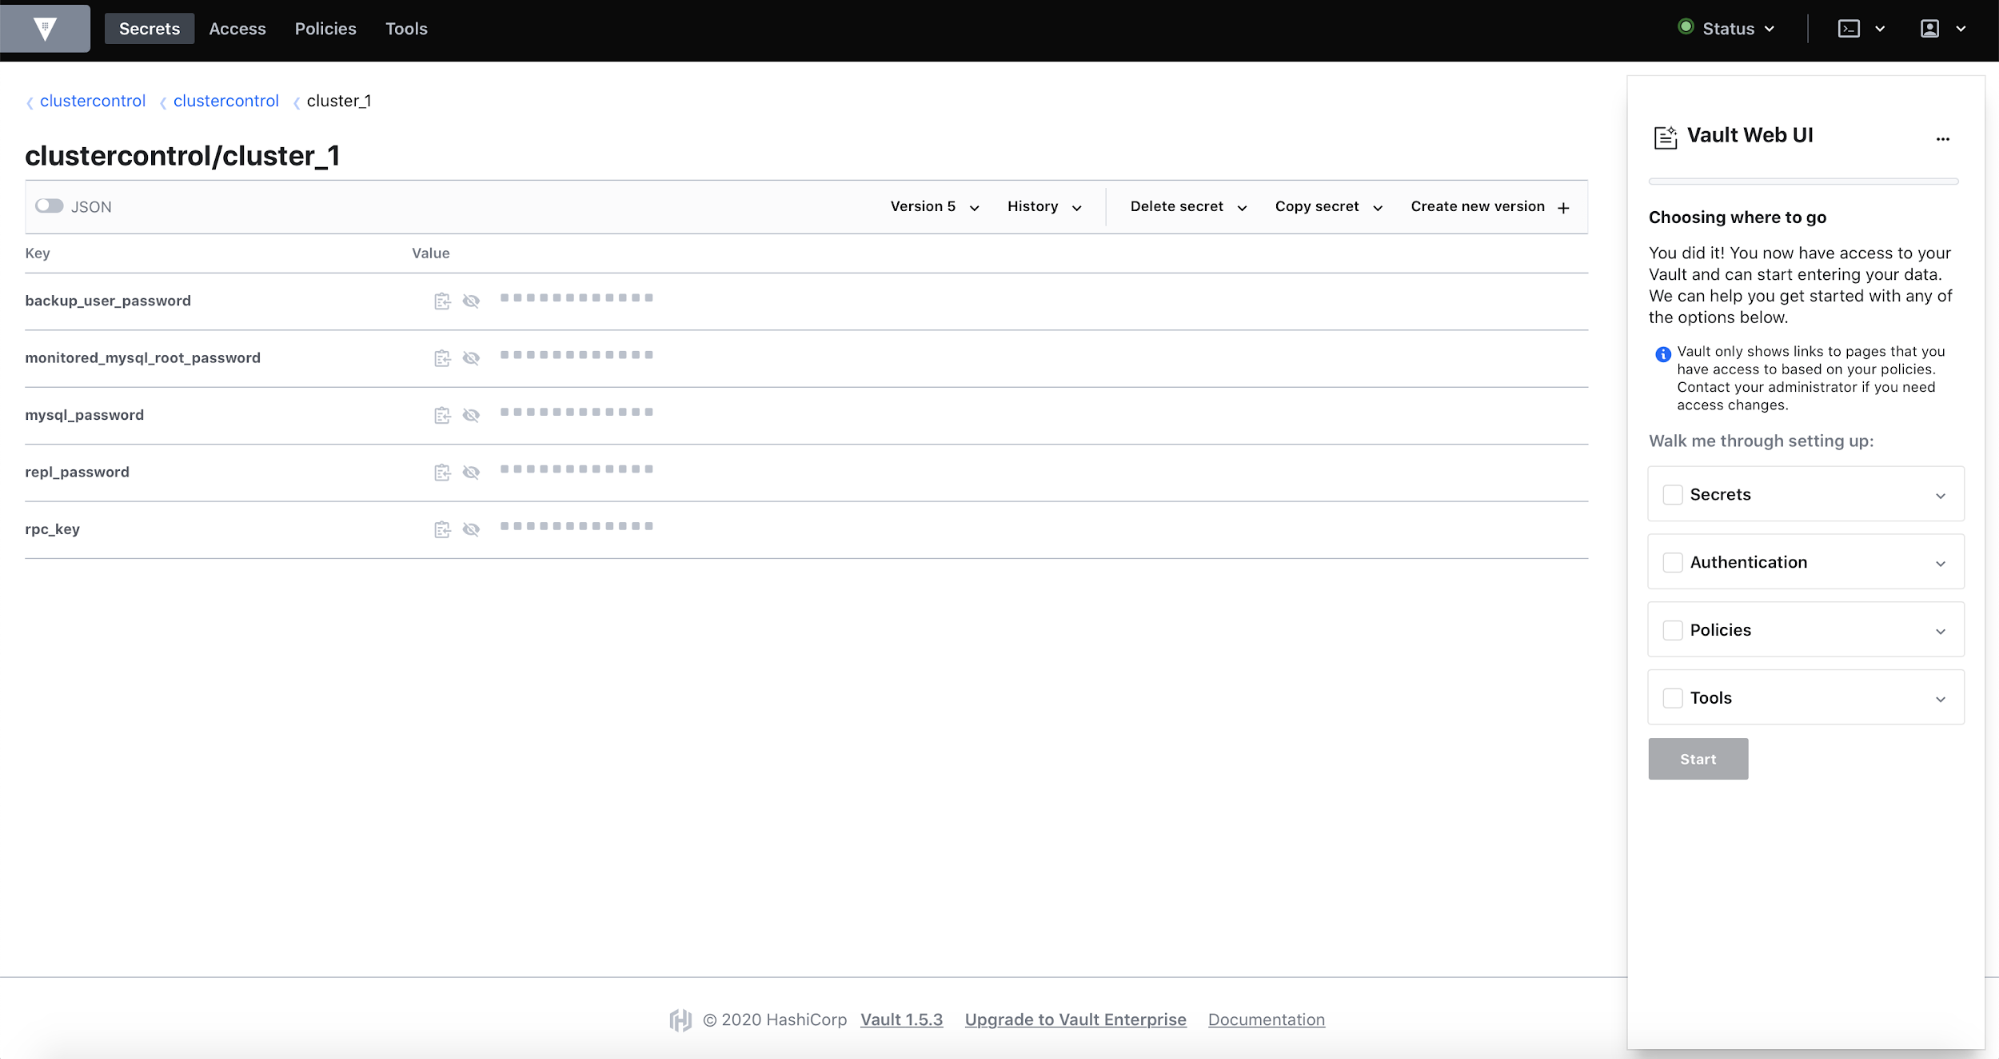
rpc_key yx9i2r8olpou9lgiAs you can see, the passwords are stored in the Vault. You can access the data using the UI as well, after authenticating with root token:
Please keep in mind that ClusterControl, once it is configured to work with Vault, will require Vault to be available and unsealed before ClusterControl can work properly. If it won’t be available, ClusterControl won’t work.
Should you want to revert this process, you should follow those steps:
- Get all the keys and values from the Vault for all of the clusters.
- Stop cmon process
- Remove Vault configuration from /etc/cmon.cnf
- Add the keys and values you extracted from the Vault into respective configuration files in /etc/cmon.d. You can use the backup copy of the configuration from before Vault has been used but please keep in mind that some additional passwords might have been added in the meantime – double check that your old configuration files contain all the data that is stored in the Vault.
We hope this short introduction to ClusterControl integration with HashiCorp Vault will be useful. If you decided to give it a try, let us know how it worked for you.


