blog
Redis How To: Installation, setup and configuration

Twitter, GitHub, Pinterest, Snapchat, Craigslist, StackOverflow and Flickr just to name a few are the companies that are adopting Redis either for their storage or as a cache to boost performance. Redis is an in-memory data structure store that can be used as a database, cache, message broker and an open-source (BSD licensed). The word Redis is derived from REmote Dictionary Server.
The history of Redis begins in 2009 when Salvatore Sanfilippo, the original author of Redis, encountered significant obstacles in scaling some types of workloads using traditional database systems. This issue started to become famous and get more interest after he announced the project on Hacker News.
In this blog post, we will go through the steps to install Redis, setup and configuration.
Top 5 Benefits of Redis
Redis is written in ANSI C and runs in most POSIX systems like Linux, BSD, and OS X, with no external dependencies required. Moreover, Redis supports data structures like strings, hashes, lists, sets, and sorted sets with range queries, bitmaps, hyperloglogs, also geospatial indexes with radius queries. Let’s take a look at the top 5 benefits of using Redis with some details:
-
In-memory data store
-
Most of the databases store their data on disk or SSD, but for Redis the data remains in the server’s main memory. By doing this, it eliminates the need for a roundtrip to disk which results in blazing fast performance with average read or write operations taking less than a millisecond.
-
Simplicity and ease-of-use
-
With this simplicity, you may write fewer lines of code in your applications for the purpose of storing, accessing and using the data. Redis supports languages like Java, Python, PHP, C, C++, C#, JavaScript, Node.js, Ruby, R, Go etc.
-
High availability and scalability
-
Redis can be deployed either as a primary-replica architecture in a single node primary or a clustered topology which allows us to build highly available solutions. High availability can be achieved through Redis Sentinel plus automatic partitioning across multiple Redis nodes with Redis Cluster.
-
Replication and persistence
-
Redis supports asynchronous replication where data can be replicated to many replica servers. For persistence, it supports point-in-time backups.
-
Extensibility
-
Even though Redis is an open-source project, it has a very active community.
How To Install Redis Using Source
For simplification, we will install and run Redis in a standalone server without any high availability setup. If you are interested in high availability using Redis Sentinel, we recommend learning more about that in this blog post.
While you could install Redis using the package manager of your Linux distribution, nevertheless, this approach is discouraged to avoid installing an outdated version. The best way to install Redis is by compiling it from sources as they have no dependencies. The only prerequisites are a GCC compiler for your system and libc. In this example, we will install Redis on a Ubuntu 20.04 server.
The first step is to download the latest version of Redis tarball. You can choose whether you want to download from the redis.io website or you can simply use this URL that will redirect you to the latest stable version of Redis.
As mentioned before, we need GCC and libc to compile the source code. Since our test system does not have those packages yet, we will proceed to install them first by executing the following command. Typically it will take a while considering there are a lot of packages to be installed:
$ apt-get install build-essential -yNow let’s go ahead and download the tarball – we will use the second option to download it since this is the easier way to do it. Once the tarball is ready and we may proceed to extract the file:
$ wget http://download.redis.io/redis-stable.tar.gz
$ tar xvzf redis-stable.tar.gz
The next 2 steps are to navigate into the extracted directory and run the compiler.
$ cd redis-stable
$ make
If you run the compilation without installing GCC and libc packages, the following error will appear:
zmalloc.h:50:10: fatal error: jemalloc/jemalloc.h: No such file or directory
 #include
          ^~~~~~~~~~~~~~~~~~~~~
To fix the error, you may simply run the following command. If there is no error, the command does not need to be executed:
$ make distcleanOnce the compilation is complete, you should see the message that suggests running “make test” like below. This is an optional step however we recommend doing so to make sure the previous process ran properly. The final step is to execute the following command to make sure “redis-server” and “redis-cli” are moved to the correct directory:
$ make install

cd src && make install

make[1]: Entering directory '/root/redis/redis-stable/src'

    CC Makefile.dep

Hint: It's a good idea to run 'make test' ;)

    INSTALL redis-server

    INSTALL redis-benchmark

    INSTALL redis-cli
We may verify all Redis files are moved to that directory:
$ ls /usr/local/bin/ |grep redis
redis-benchmark
redis-check-aof
redis-check-rdb
redis-cli
redis-sentinel
redis-server
To start Redis, simply type “redis-server” and you will see the welcome message as follows:
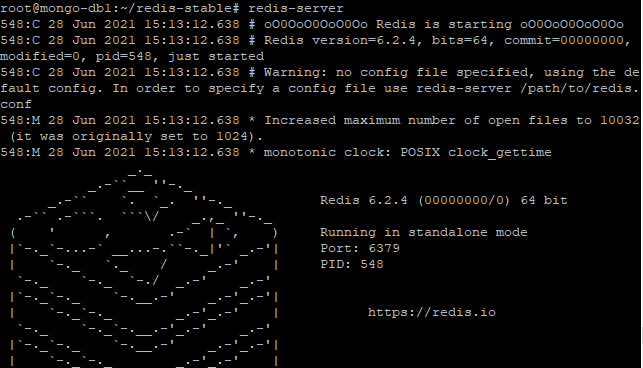
How To Make Redis Application Friendly
It’s worth mentioning that the installation that we went through just now is only suitable for the purpose of testing and development. In order for us to make Redis more application friendly, we could either run Redis using “screen” or do a proper install using an init script (the most suggested option). In this section, we will go through the steps on how to configure init script for Redis providing both “redis-server” and “redis-cli” already copied to /usr/local/bin
The first step is to create the following directory to store your Redis config files:
$ mkdir /etc/redis
$ mkdir /var/redis
Copy the init script that is available in the “utils” directory (from the previously extracted tarball) into /etc/init.d. The best suggestion for the name is by calling it with the port number for Redis. For our case, since we are using a default port, we can use the following:
$ cp utils/redis_init_script /etc/init.d/redis_6379The next step is to edit the init file and modify the parameter for the port if you are using a different port other than the default. Skip this step if you are using port 6379.
$ vi /etc/init.d/redis_6379Copy the template configuration file that is available in the root directory of our extracted distribution tarball into /etc/redis/ and preferably use the port number as a name:
$ cp redis.conf /etc/redis/6379.confNow, create the following directory inside /var/redis. This directory will work as the data and working directory for our Redis instance:
$ mkdir /var/redis/6379We need to make some adjustments on the configuration file to the following parameters (this is important):
$ /etc/redis/6379.conf

daemonize yes

pidfile /var/run/redis_6379.pid (modify the port according to your setting)

port 6379 (modify the port according to your setting)

loglevel notice (modify to your preferred level)

logfile /var/log/redis_6379.log

dir /var/redis/6379 (important)
The last step is to add our Redis init script to all default runlevels with the following command and start our instance. Test with redis-cli to make sure it’s running properly:
$ update-rc.d redis_6379 defaults
$ /etc/init.d/redis_6379 start
$ redis-cli
127.0.0.1:6379> info server
# Server
redis_version:6.2.4
redis_git_sha1:00000000
redis_git_dirty:0
redis_build_id:3b0db603495bd2d2
redis_mode:standalone
os:Linux 4.19.0-17-amd64 x86_64
arch_bits:64
multiplexing_api:epoll
atomicvar_api:c11-builtin
gcc_version:8.3.0
process_id:20732
process_supervised:no
run_id:27bfed8c945c506789f08cdff6ee0be2dd17ce16
tcp_port:6379
server_time_usec:1624898338307033
uptime_in_seconds:934
uptime_in_days:0
hz:10
configured_hz:10
lru_clock:14285602
executable:/usr/local/bin/redis-server
config_file:/etc/redis/6379.conf
io_threads_active:0
In the event that you are not able to get the Redis instance running, you may troubleshoot the error from the log that you set (for example /var/log/redis_6379.log). However, the log name is probably different if you use other names than the default.
The previous configuration that we just completed is suited for Debian or Ubuntu-based distributions and not tested in other distributions. Even though the installation through the package manager is not suggested, you are still able to install it if you would like to run Redis in other distributions. We hope this blog post will benefit you to some extent