blog
MySQL in the Cloud – Online Migration from Amazon RDS to Your own Server: Part2

As we saw earlier, it might be challenging for companies to move their data out of RDS for MySQL. In the first part of this blog, we showed you how to set up your target environment on EC2 and insert a proxy layer (ProxySQL) between your applications and RDS. In this second part, we will show you how to do the actual migration of data to your own server, and then redirect your applications to the new database instance without downtime.
Copying Data out of RDS
Once we have our database traffic running through ProxySQL, we can start preparations to copy our data out of RDS. We need to do this in order to set up replication between RDS and our MySQL instance running on EC2. Once this is done, we will configure ProxySQL to redirect traffic from RDS to our MySQL/EC2.
As we discussed in the first blog post in this series, the only way you can get data out of the RDS is via logical dump. Without access to the instance, we cannot use any hot, physical backup tools like xtrabackup. We cannot use snapshots either as there is no way to build anything else other than a new RDS instance from the snapshot.
We are limited to logical dump tools, therefore the logical option would be to use mydumper/myloader to process the data. Luckily, mydumper can create consistent backups so we can rely on it to provide binlog coordinates for our new slave to connect to. The main issue while building RDS replicas is binlog rotation policy – logical dump and load may take even days on larger (hundreds of gigabytes) datasets and you need to keep binlogs on the RDS instance for the duration of this whole process. Sure, you can increase binlog rotation retention on RDS (call mysql.rds_set_configuration(‘binlog retention hours’, 24); – you can keep them up to 7 days) but it’s much safer to do it differently.
Before we proceed with taking a dump, we will add a replica to our RDS instance.
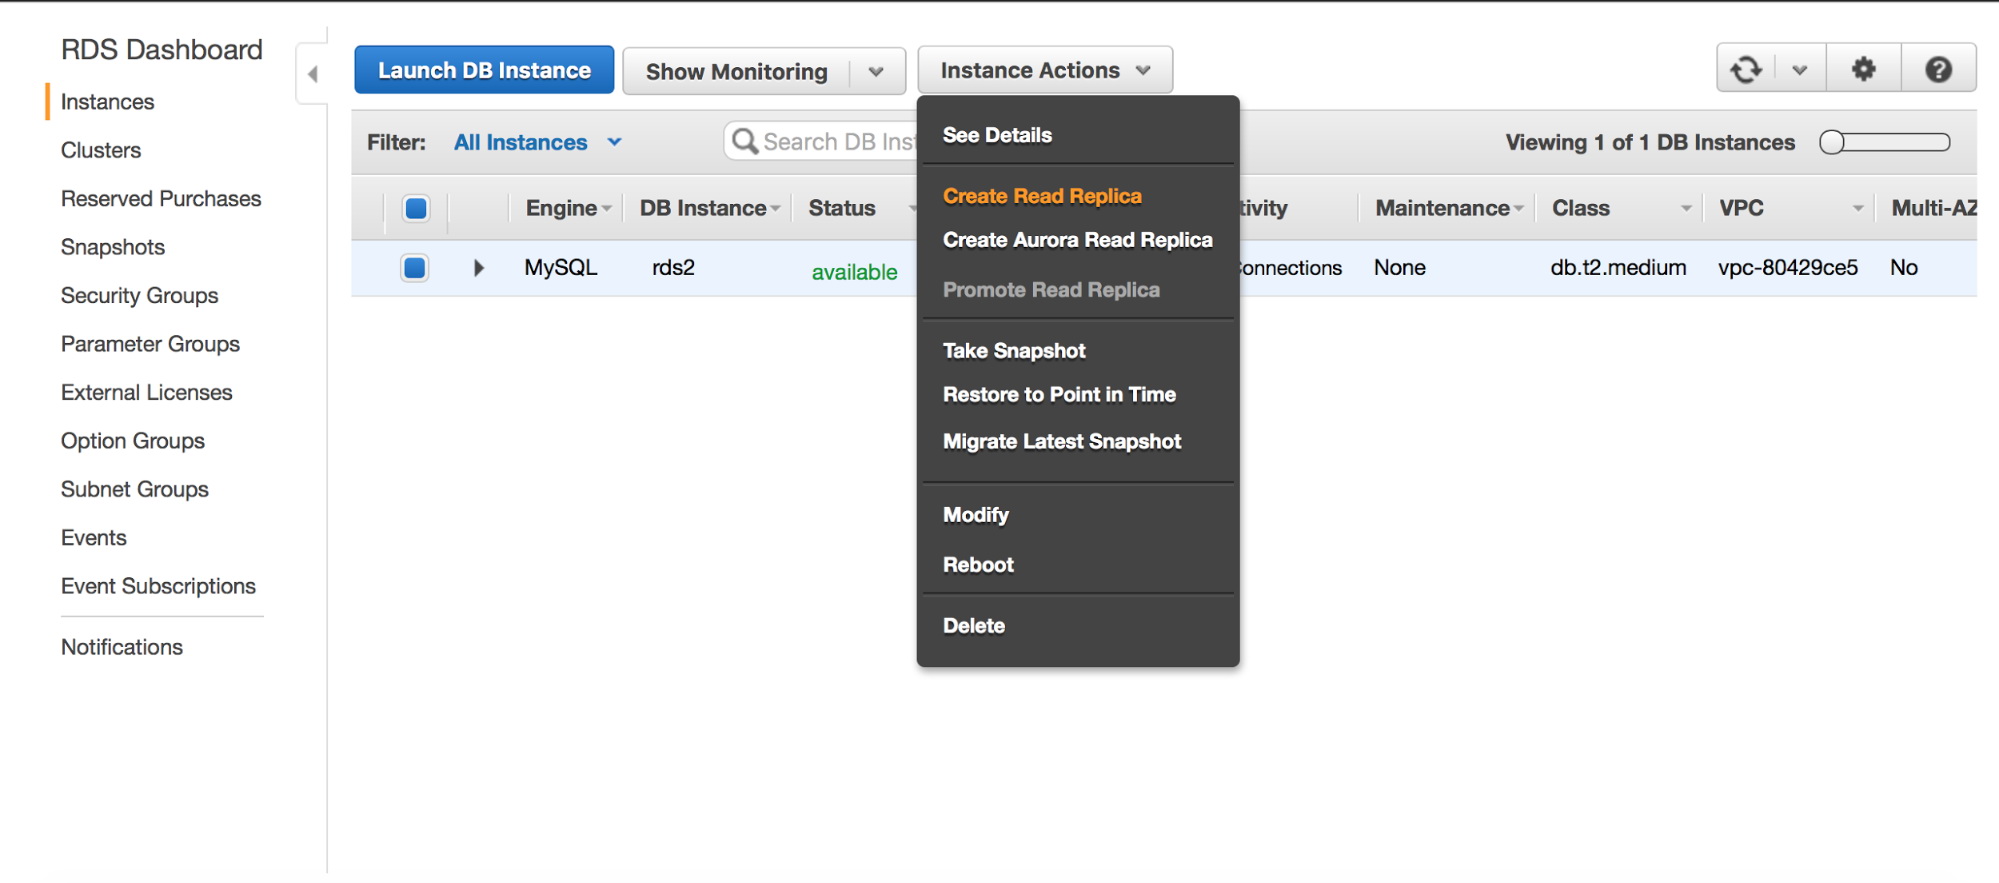
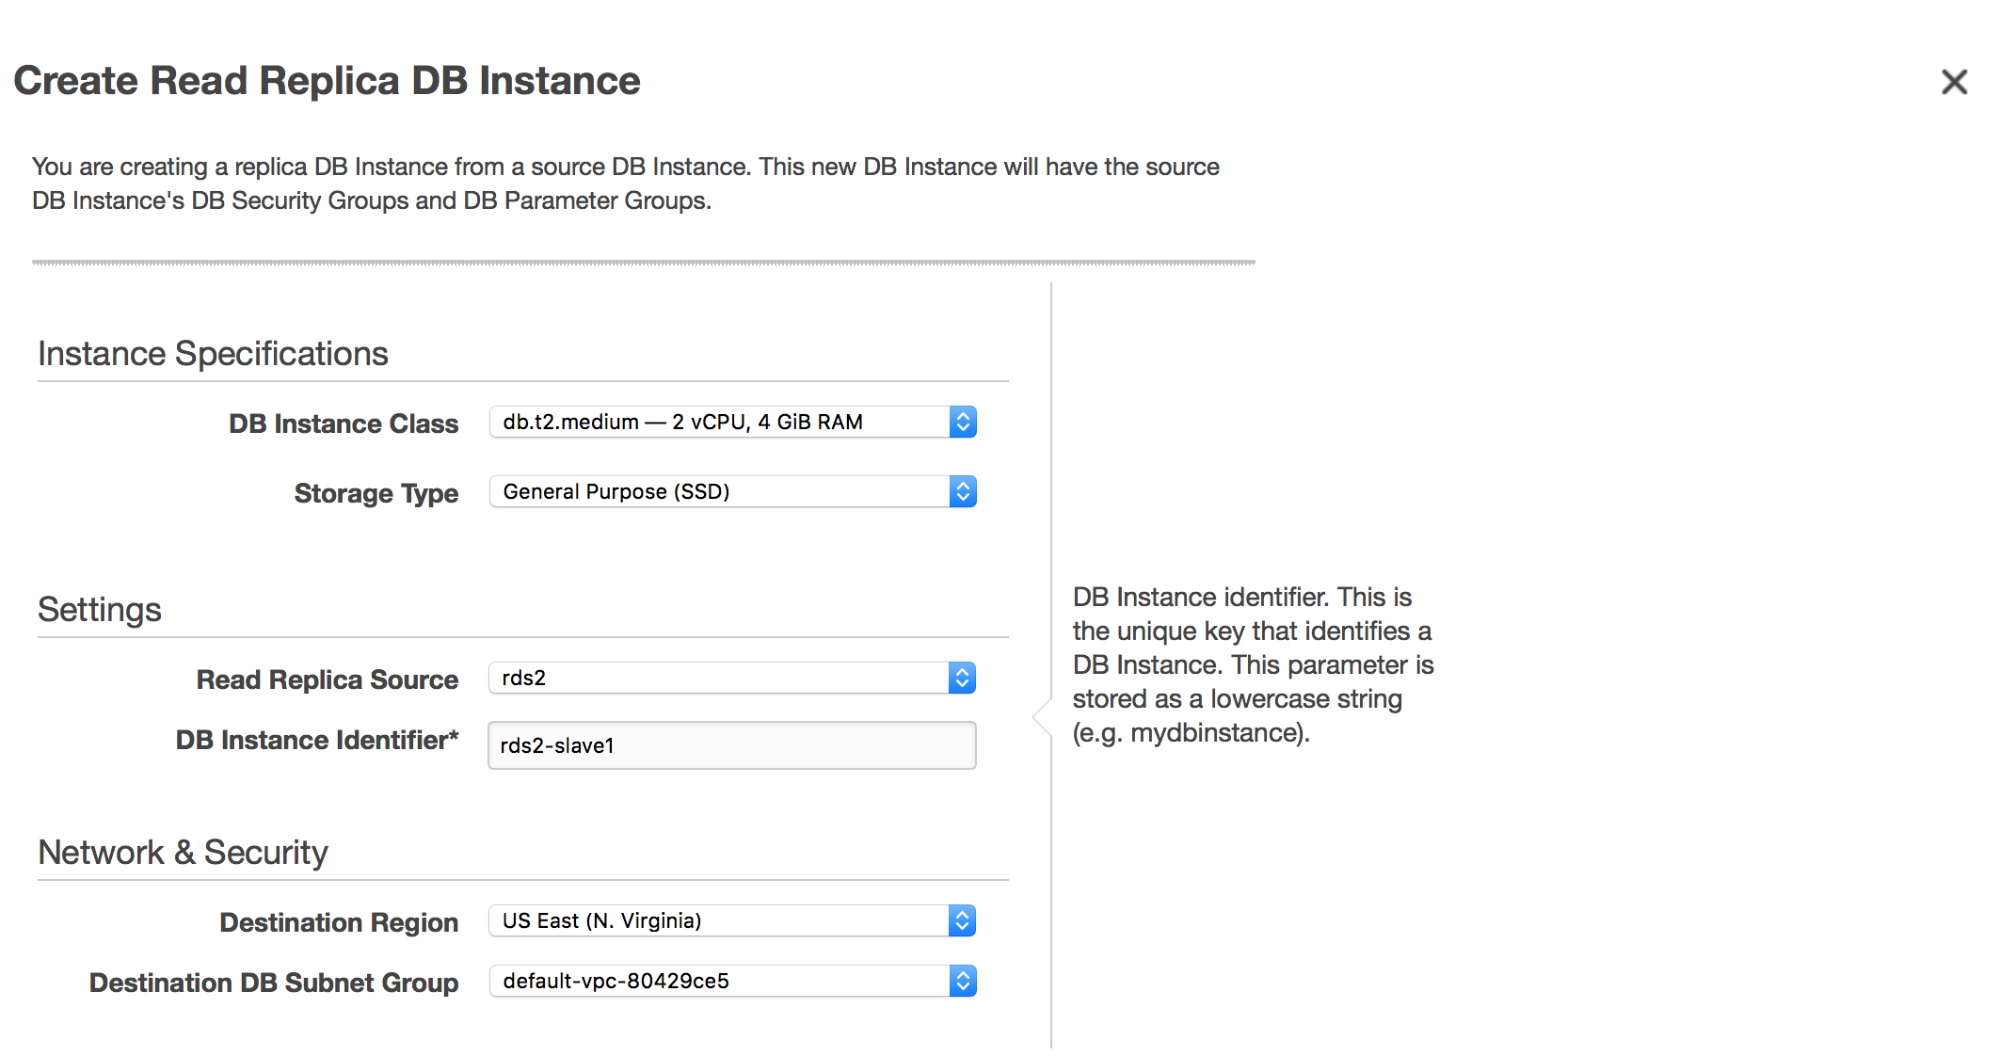
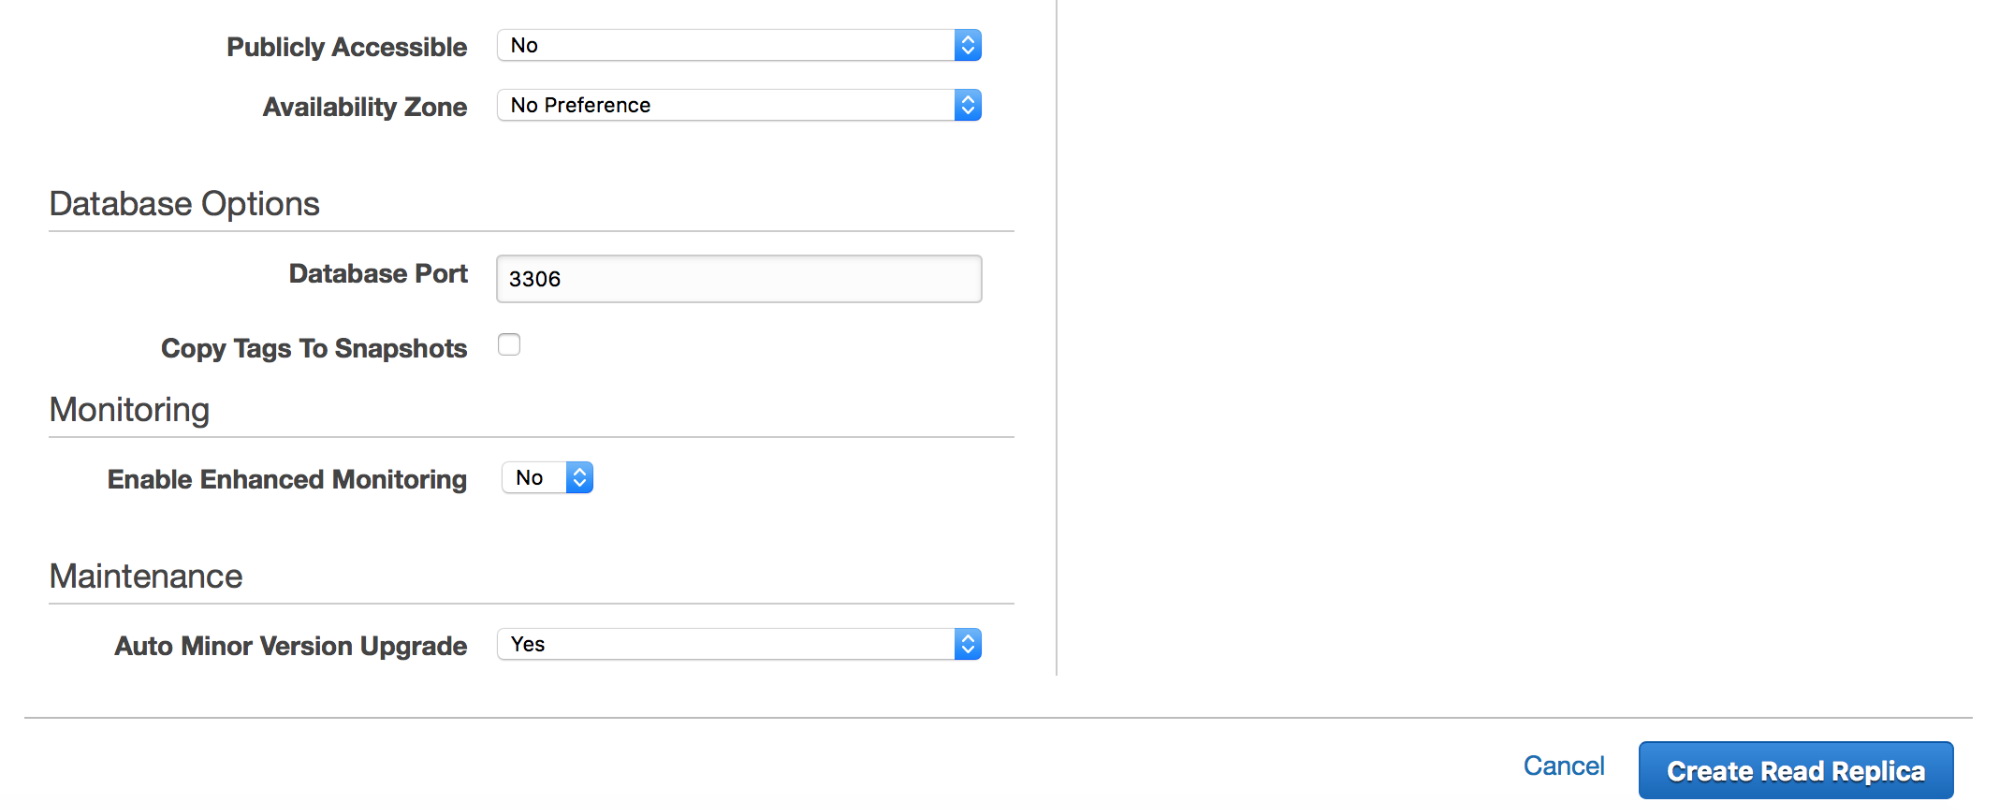
Once we click on the “Create Read Replica” button, a snapshot will be started on the “master” RDS replica. It will be used to provision the new slave. The process may take hours, it all depends on the volume size, when was the last time a snapshot was taken and performance of the volume (io1/gp2? Magnetic? How many pIOPS a volume has?).

When slave is ready (its status has changed to “available”), we can log into it using its RDS endpoint.
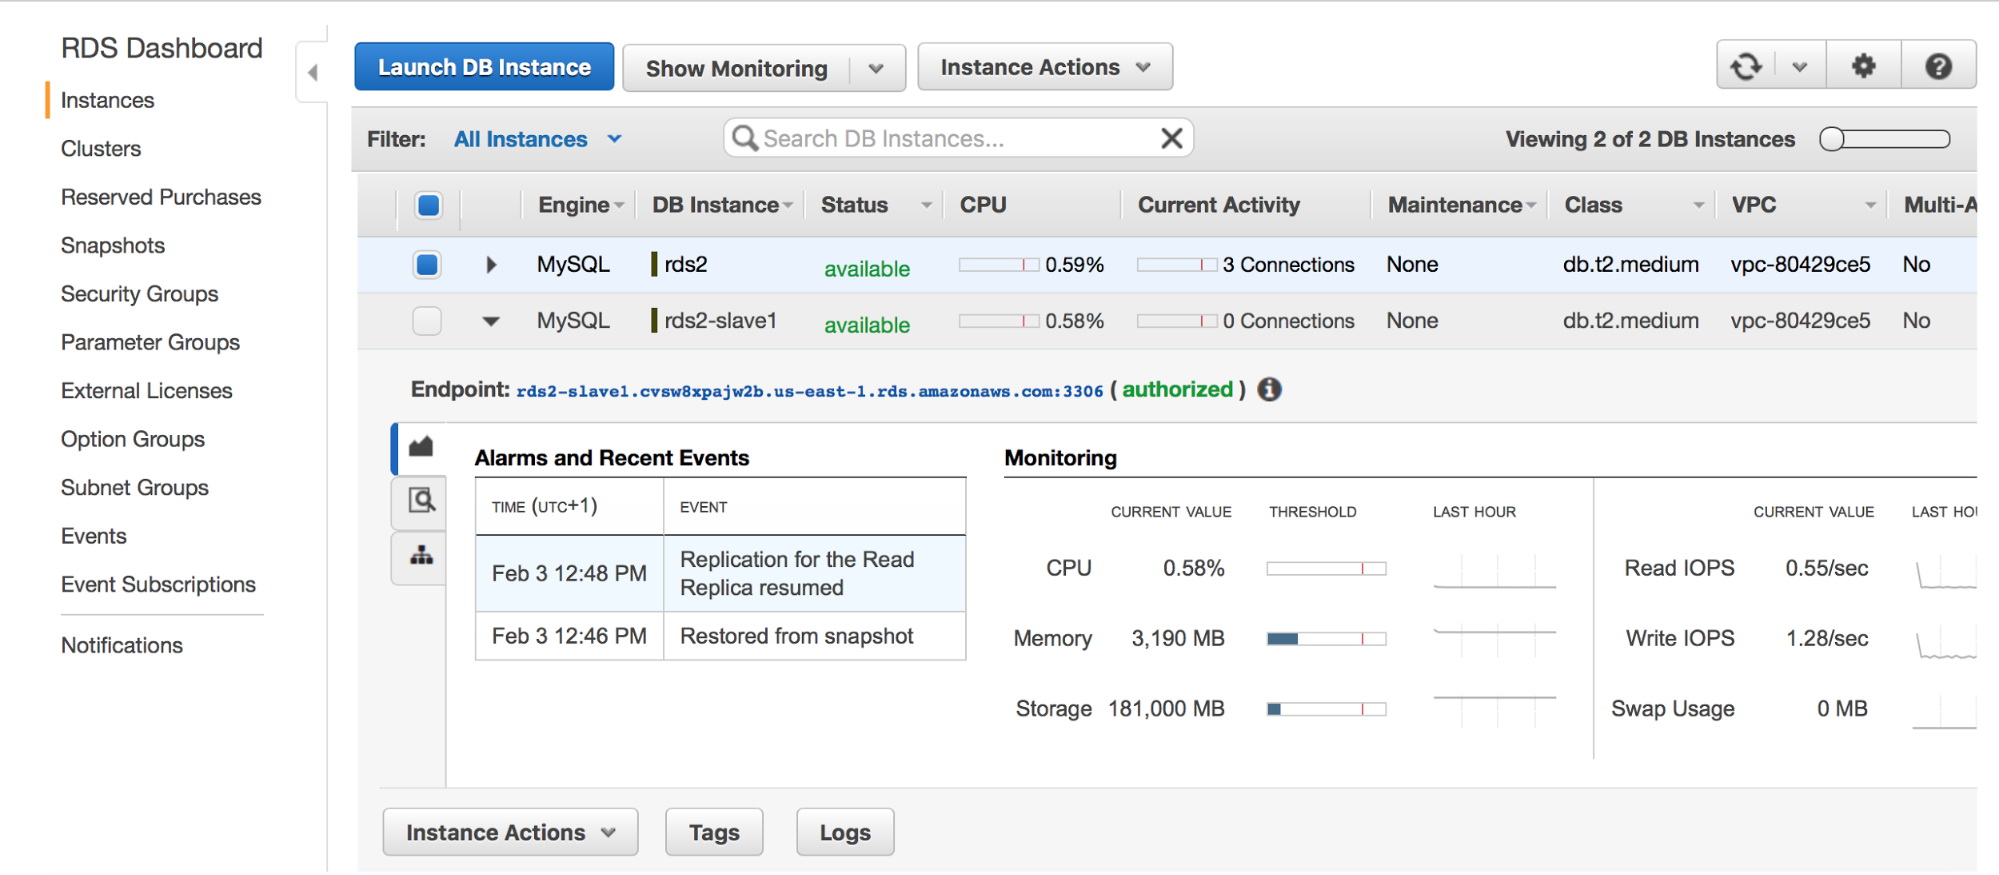
Once logged in, we will stop replication on our slave – this will ensure the RDS master won’t purge binary logs and they will be still available for our EC2 slave once we complete our dump/reload process.
mysql> CALL mysql.rds_stop_replication;
+---------------------------+
| Message                   |
+---------------------------+
| Slave is down or disabled |
+---------------------------+
1 row in set (1.02 sec)

Query OK, 0 rows affected (1.02 sec)
Now, it’s finally time to copy data to EC2. First, we need to install mydumper. You can get it from github: https://github.com/maxbube/mydumper. The installation process is fairly simple and nicely described in the readme file, so we won’t cover it here. Most likely you will have to install a couple of packages (listed in the readme) and the harder part is to identify which package contains mysql_config – it depends on the MySQL flavor (and sometimes also MySQL version).
Once you have mydumper compiled and ready to go, you can execute it:
root@ip-172-30-4-228:~/mydumper# mkdir /tmp/rdsdump
root@ip-172-30-4-228:~/mydumper# ./mydumper -h rds2.cvsw8xpajw2b.us-east-1.rds.amazonaws.com -p tpccpass -u tpcc  -o /tmp/rdsdump  --lock-all-tables --chunk-filesize 100 --events --routines --triggers
.
Please note –lock-all-tables which ensures that the snapshot of the data will be consistent and it will be possible to use it to create a slave. Now, we have to wait until mydumper complete its task.
One more step is required – we don’t want to restore the mysql schema but we need to copy users and their grants. We can use pt-show-grants for that:
root@ip-172-30-4-228:~# wget http://percona.com/get/pt-show-grants
root@ip-172-30-4-228:~# chmod u+x ./pt-show-grants
root@ip-172-30-4-228:~# ./pt-show-grants -h rds2.cvsw8xpajw2b.us-east-1.rds.amazonaws.com -u tpcc -p tpccpass > grants.sql
Sample of pt-show-grants may look like this:
-- Grants for 'sbtest'@'%'
CREATE USER IF NOT EXISTS 'sbtest'@'%';
ALTER USER 'sbtest'@'%' IDENTIFIED WITH 'mysql_native_password' AS '*2AFD99E79E4AA23DE141540F4179F64FFB3AC521' REQUIRE NONE PASSWORD EXPIRE DEFAULT ACCOUNT UNLOCK;
GRANT ALTER, ALTER ROUTINE, CREATE, CREATE ROUTINE, CREATE TEMPORARY TABLES, CREATE USER, CREATE VIEW, DELETE, DROP, EVENT, EXECUTE, INDEX, INSERT, LOCK TABLES, PROCESS, REFERENCES, RELOAD, REPLICATION CLIENT, REPLICATION SLAVE, SELECT, SHOW DATABASES, SHOW VIEW, TRIGGER, UPDATE ON *.* TO 'sbtest'@'%';
It is up to you to pick what users are required to be copied onto your MySQL/EC2 instance. It doesn’t make sense to do it for all of them. For example, root users don’t have ‘SUPER’ privilege on RDS so it’s better to recreate them from scratch. What you need to copy are grants for your application user. We also need to copy users used by ProxySQL (proxysql-monitor in our case).
Inserting Data into Your MySQL/EC2 Instance
As stated above, we don’t want to restore system schemas. Therefore we will move files related to those schemas out of our mydumper directory:
root@ip-172-30-4-228:~# mkdir /tmp/rdsdump_sys/
root@ip-172-30-4-228:~# mv /tmp/rdsdump/mysql* /tmp/rdsdump_sys/
root@ip-172-30-4-228:~# mv /tmp/rdsdump/sys* /tmp/rdsdump_sys/
When we are done with it, it’s time to start to load data into the MySQL/EC2 instance:
root@ip-172-30-4-228:~/mydumper# ./myloader -d /tmp/rdsdump/ -u tpcc -p tpccpass -t 4 --overwrite-tables -h 172.30.4.238Please note that we used four threads (-t 4) – make sure you set this to whatever makes sense in your environment. It’s all about saturating the target MySQL instance – either CPU or I/O, depending on the bottleneck. We want to squeeze as much out of it as possible to ensure we used all available resources for loading the data.
After the main data is loaded, there are two more steps to take, both are related to RDS internals and both may break our replication. First, RDS contains a couple of rds_* tables in the mysql schema. We want to load them in case some of them are used by RDS – replication will break if our slave won’t have them. We can do it in the following way:
root@ip-172-30-4-228:~/mydumper# for i in $(ls -alh /tmp/rdsdump_sys/ | grep rds | awk '{print $9}') ; do echo $i ;  mysql -ppass -uroot  mysql < /tmp/rdsdump_sys/$i ; done
mysql.rds_configuration-schema.sql
mysql.rds_configuration.sql
mysql.rds_global_status_history_old-schema.sql
mysql.rds_global_status_history-schema.sql
mysql.rds_heartbeat2-schema.sql
mysql.rds_heartbeat2.sql
mysql.rds_history-schema.sql
mysql.rds_history.sql
mysql.rds_replication_status-schema.sql
mysql.rds_replication_status.sql
mysql.rds_sysinfo-schema.sql
Similar problem is with timezone tables, we need to load them using data from the RDS instance:
root@ip-172-30-4-228:~/mydumper# for i in $(ls -alh /tmp/rdsdump_sys/ | grep time_zone | grep -v schema | awk '{print $9}') ; do echo $i ;  mysql -ppass -uroot  mysql < /tmp/rdsdump_sys/$i ; done
mysql.time_zone_name.sql
mysql.time_zone.sql
mysql.time_zone_transition.sql
mysql.time_zone_transition_type.sql
When all this is ready, we can setup replication between RDS (master) and our MySQL/EC2 instance (slave).
Setting up replication
Mydumper, when performing a consistent dump, writes down a binary log position. We can find this data in a file called metadata in the dump directory. Let’s take a look at it, we will then use the position to setup replication.
root@ip-172-30-4-228:~/mydumper# cat /tmp/rdsdump/metadata
Started dump at: 2017-02-03 16:17:29
SHOW SLAVE STATUS:
    Host: 10.1.4.180
    Log: mysql-bin-changelog.007079
    Pos: 10537102
    GTID:

Finished dump at: 2017-02-03 16:44:46
One last thing we lack is a user that we could use to setup our slave. Let’s create one on the RDS instance:
root@ip-172-30-4-228:~# mysql -ppassword -h rds2.cvsw8xpajw2b.us-east-1.rds.amazonaws.commysql> CREATE USER IF NOT EXISTS 'rds_rpl'@'%' IDENTIFIED BY 'rds_rpl_pass';
Query OK, 0 rows affected (0.04 sec)mysql> GRANT REPLICATION SLAVE ON *.* TO 'rds_rpl'@'%';
Query OK, 0 rows affected (0.01 sec)Now it’s time to slave our MySQL/EC2 server off the RDS instance:
mysql> CHANGE MASTER TO MASTER_HOST='rds2.cvsw8xpajw2b.us-east-1.rds.amazonaws.com', MASTER_USER='rds_rpl', MASTER_PASSWORD='rds_rpl_pass', MASTER_LOG_FILE='mysql-bin-changelog.007079', MASTER_LOG_POS=10537102;
Query OK, 0 rows affected, 2 warnings (0.03 sec)
mysql> START SLAVE;
Query OK, 0 rows affected (0.02 sec)mysql> SHOW SLAVE STATUSG
*************************** 1. row ***************************
Slave_IO_State: Queueing master event to the relay log
Master_Host: rds2.cvsw8xpajw2b.us-east-1.rds.amazonaws.com
Master_User: rds_rpl
Master_Port: 3306
Connect_Retry: 60
Master_Log_File: mysql-bin-changelog.007080
Read_Master_Log_Pos: 13842678
Relay_Log_File: relay-bin.000002
Relay_Log_Pos: 20448
Relay_Master_Log_File: mysql-bin-changelog.007079
Slave_IO_Running: Yes
Slave_SQL_Running: Yes
Replicate_Do_DB:
Replicate_Ignore_DB:
Replicate_Do_Table:
Replicate_Ignore_Table:
Replicate_Wild_Do_Table:
Replicate_Wild_Ignore_Table:
Last_Errno: 0
Last_Error:
Skip_Counter: 0
Exec_Master_Log_Pos: 10557220
Relay_Log_Space: 29071382
Until_Condition: None
Until_Log_File:
Until_Log_Pos: 0
Master_SSL_Allowed: No
Master_SSL_CA_File:
Master_SSL_CA_Path:
Master_SSL_Cert:
Master_SSL_Cipher:
Master_SSL_Key:
Seconds_Behind_Master: 258726
Master_SSL_Verify_Server_Cert: No
Last_IO_Errno: 0
Last_IO_Error:
Last_SQL_Errno: 0
Last_SQL_Error:
Replicate_Ignore_Server_Ids:
Master_Server_Id: 1237547456
Master_UUID: b5337d20-d815-11e6-abf1-120217bb3ac2
Master_Info_File: mysql.slave_master_info
SQL_Delay: 0
SQL_Remaining_Delay: NULL
Slave_SQL_Running_State: System lock
Master_Retry_Count: 86400
Master_Bind:
Last_IO_Error_Timestamp:
Last_SQL_Error_Timestamp:
Master_SSL_Crl:
Master_SSL_Crlpath:
Retrieved_Gtid_Set:
Executed_Gtid_Set:
Auto_Position: 0
Replicate_Rewrite_DB:
Channel_Name:
Master_TLS_Version:
1 row in set (0.01 sec)Last step will be to switch our traffic from the RDS instance to MySQL/EC2, but we need to let it catch up first.
When the slave has caught up, we need to perform a cutover. To automate it, we decided to prepare a short bash script which will connect to ProxySQL and do what needs to be done.
# At first, we define old and new masters
OldMaster=rds2.cvsw8xpajw2b.us-east-1.rds.amazonaws.com
NewMaster=172.30.4.238

(
# We remove entries from mysql_replication_hostgroup so ProxySQL logic won’t interfere
# with our script

echo "DELETE FROM mysql_replication_hostgroups;"

# Then we set current master to OFFLINE_SOFT - this will allow current transactions to
# complete while not accepting any more transactions - they will wait (by default for
# 10 seconds) for a master to become available again.

echo "UPDATE mysql_servers SET STATUS='OFFLINE_SOFT' WHERE hostname="$OldMaster";"
echo "LOAD MYSQL SERVERS TO RUNTIME;"
) | mysql -u admin -padmin -h 127.0.0.1 -P6032


# Here we are going to check for connections in the pool which are still used by
# transactions which haven’t closed so far. If we see that neither hostgroup 10 nor
# hostgroup 20 has open transactions, we can perform a switchover.

CONNUSED=`mysql -h 127.0.0.1 -P6032 -uadmin -padmin -e 'SELECT IFNULL(SUM(ConnUsed),0) FROM stats_mysql_connection_pool WHERE status="OFFLINE_SOFT" AND (hostgroup=10 OR hostgroup=20)' -B -N 2> /dev/null`
TRIES=0
while [ $CONNUSED -ne 0 -a $TRIES -ne 20 ]
do
  CONNUSED=`mysql -h 127.0.0.1 -P6032 -uadmin -padmin -e 'SELECT IFNULL(SUM(ConnUsed),0) FROM stats_mysql_connection_pool WHERE status="OFFLINE_SOFT" AND (hostgroup=10 OR hostgroup=20)' -B -N 2> /dev/null`
  TRIES=$(($TRIES+1))
  if [ $CONNUSED -ne "0" ]; then
    sleep 0.05
  fi
done

# Here is our switchover logic - we basically exchange hostgroups for RDS and EC2
# instance. We also configure back mysql_replication_hostgroups table.

(
echo "UPDATE mysql_servers SET STATUS='ONLINE', hostgroup_id=110 WHERE hostname="$OldMaster" AND hostgroup_id=10;"
echo "UPDATE mysql_servers SET STATUS='ONLINE', hostgroup_id=120 WHERE hostname="$OldMaster" AND hostgroup_id=20;"
echo "UPDATE mysql_servers SET hostgroup_id=10 WHERE hostname="$NewMaster" AND hostgroup_id=110;"
echo "UPDATE mysql_servers SET hostgroup_id=20 WHERE hostname="$NewMaster" AND hostgroup_id=120;"
echo "INSERT INTO mysql_replication_hostgroups VALUES (10, 20, 'hostgroups');"
echo "LOAD MYSQL SERVERS TO RUNTIME;"
) | mysql -u admin -padmin -h 127.0.0.1 -P6032
When all is done, you should see the following contents in the mysql_servers table:
mysql> select * from mysql_servers;
+--------------+-----------------------------------------------+------+--------+--------+-------------+-----------------+---------------------+---------+----------------+-------------+
| hostgroup_id | hostname                                      | port | status | weight | compression | max_connections | max_replication_lag | use_ssl | max_latency_ms | comment     |
+--------------+-----------------------------------------------+------+--------+--------+-------------+-----------------+---------------------+---------+----------------+-------------+
| 20           | 172.30.4.238                                  | 3306 | ONLINE | 1      | 0           | 100             | 10                  | 0       | 0              | read server |
| 10           | 172.30.4.238                                  | 3306 | ONLINE | 1      | 0           | 100             | 10                  | 0       | 0              | read server |
| 120          | rds2.cvsw8xpajw2b.us-east-1.rds.amazonaws.com | 3306 | ONLINE | 1      | 0           | 100             | 10                  | 0       | 0              |             |
| 110          | rds2.cvsw8xpajw2b.us-east-1.rds.amazonaws.com | 3306 | ONLINE | 1      | 0           | 100             | 10                  | 0       | 0              |             |
+--------------+-----------------------------------------------+------+--------+--------+-------------+-----------------+---------------------+---------+----------------+-------------+
On the application side, you should not see much of an impact, thanks to the ability of ProxySQL to queue queries for some time.
With this we completed the process of moving your database from RDS to EC2. Last step to do is to remove our RDS slave - it did its job and it can be deleted.
In our next blog post, we will build upon that. We will walk through a scenario in which we will move our database out of AWS/EC2 into a separate hosting provider.