blog
Database Load Balancing Using HAProxy on Amazon AWS

When traffic to your database increases day-after-day it can start to become hard to manage. When this situation happens it’s useful to distribute the traffic across multiple servers, thus improving performance. Depending on the application, however, this may not be possible (if you have a single configurable endpoint). To achieve a split, you will need to use a load balancer to perform the task.
A load balancer can redirect applications to available/healthy database nodes and then failover when required. To deploy it, you don’t need a physical server as you can deploy it in the cloud; making it easier and faster. In this blog, we’ll take a look at the popular database load balancer HAProxy and how to deploy it to Amazon AWS both manually and with ClusterControl’s help.
What is HAProxy?
HAProxy is an open source proxy that can be used to implement high availability, load balancing, and proxying for TCP and HTTP based applications.
As a load balancer, HAProxy distributes traffic from one origin to one or more destinations and can define specific rules and/or protocols for this task. If any of the destinations stops responding, it is marked as offline, and the traffic is sent to the rest of the available destinations.
An Overview of Amazon EC2
Amazon Elastic Compute Cloud (or EC2) is a web service that provides resizable compute capacity in the cloud. It gives you complete control of your computing resources and allows you to set up and configure everything within your instances from the operating system up to your applications. It also allows you to quickly scale capacity, both up and down, as your computing requirements change.
Amazon EC2 supports different operating systems like Amazon Linux, Ubuntu, Windows Server, Red Hat Enterprise Linux, SUSE Linux Enterprise Server, Fedora, Debian, CentOS, Gentoo Linux, Oracle Linux, and FreeBSD.
Now, let’s see how to create an EC2 instance to deploy HAProxy there.
Creating an Amazon EC2 Instance
For this example, we’ll assume that you have an Amazon AWS account.
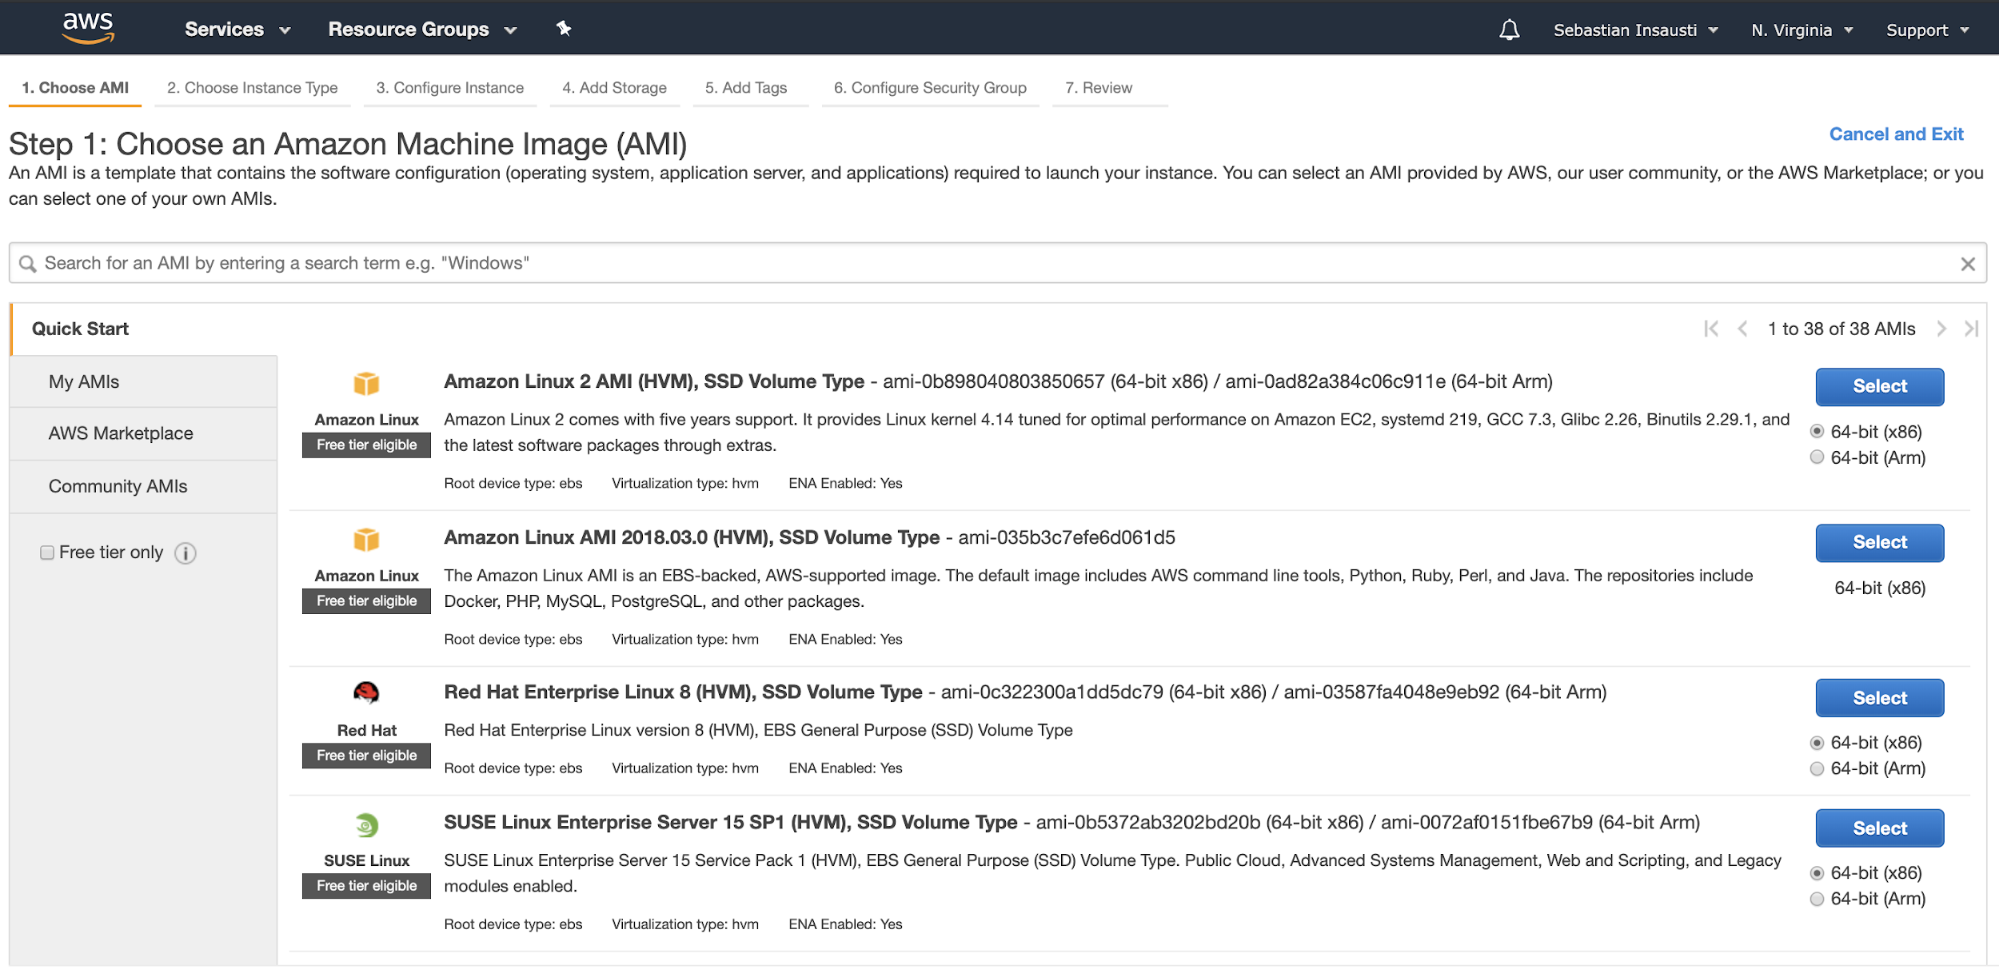
Go to the Amazon EC2 section, and press on Launch Instance. In the first step, you must choose the EC2 instance operating system.
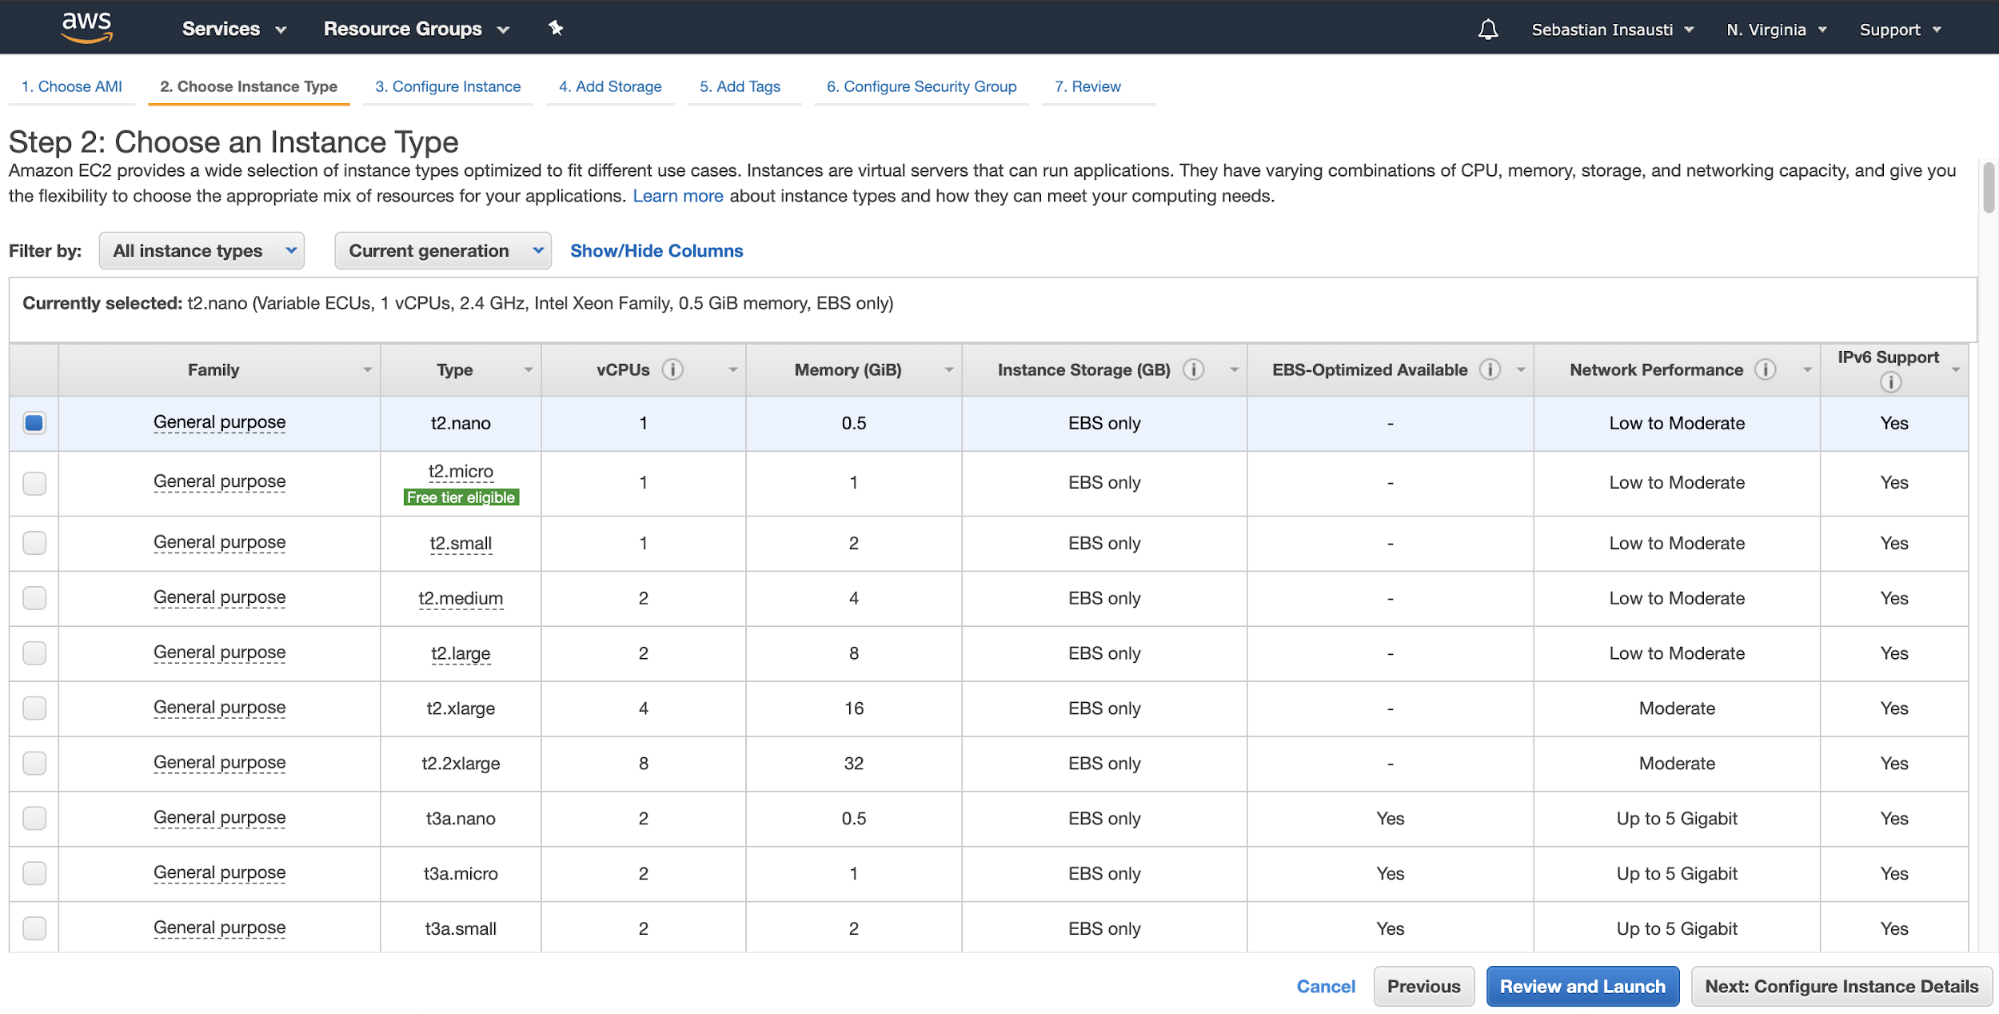
In the next step, you must choose the resources for the new instance.
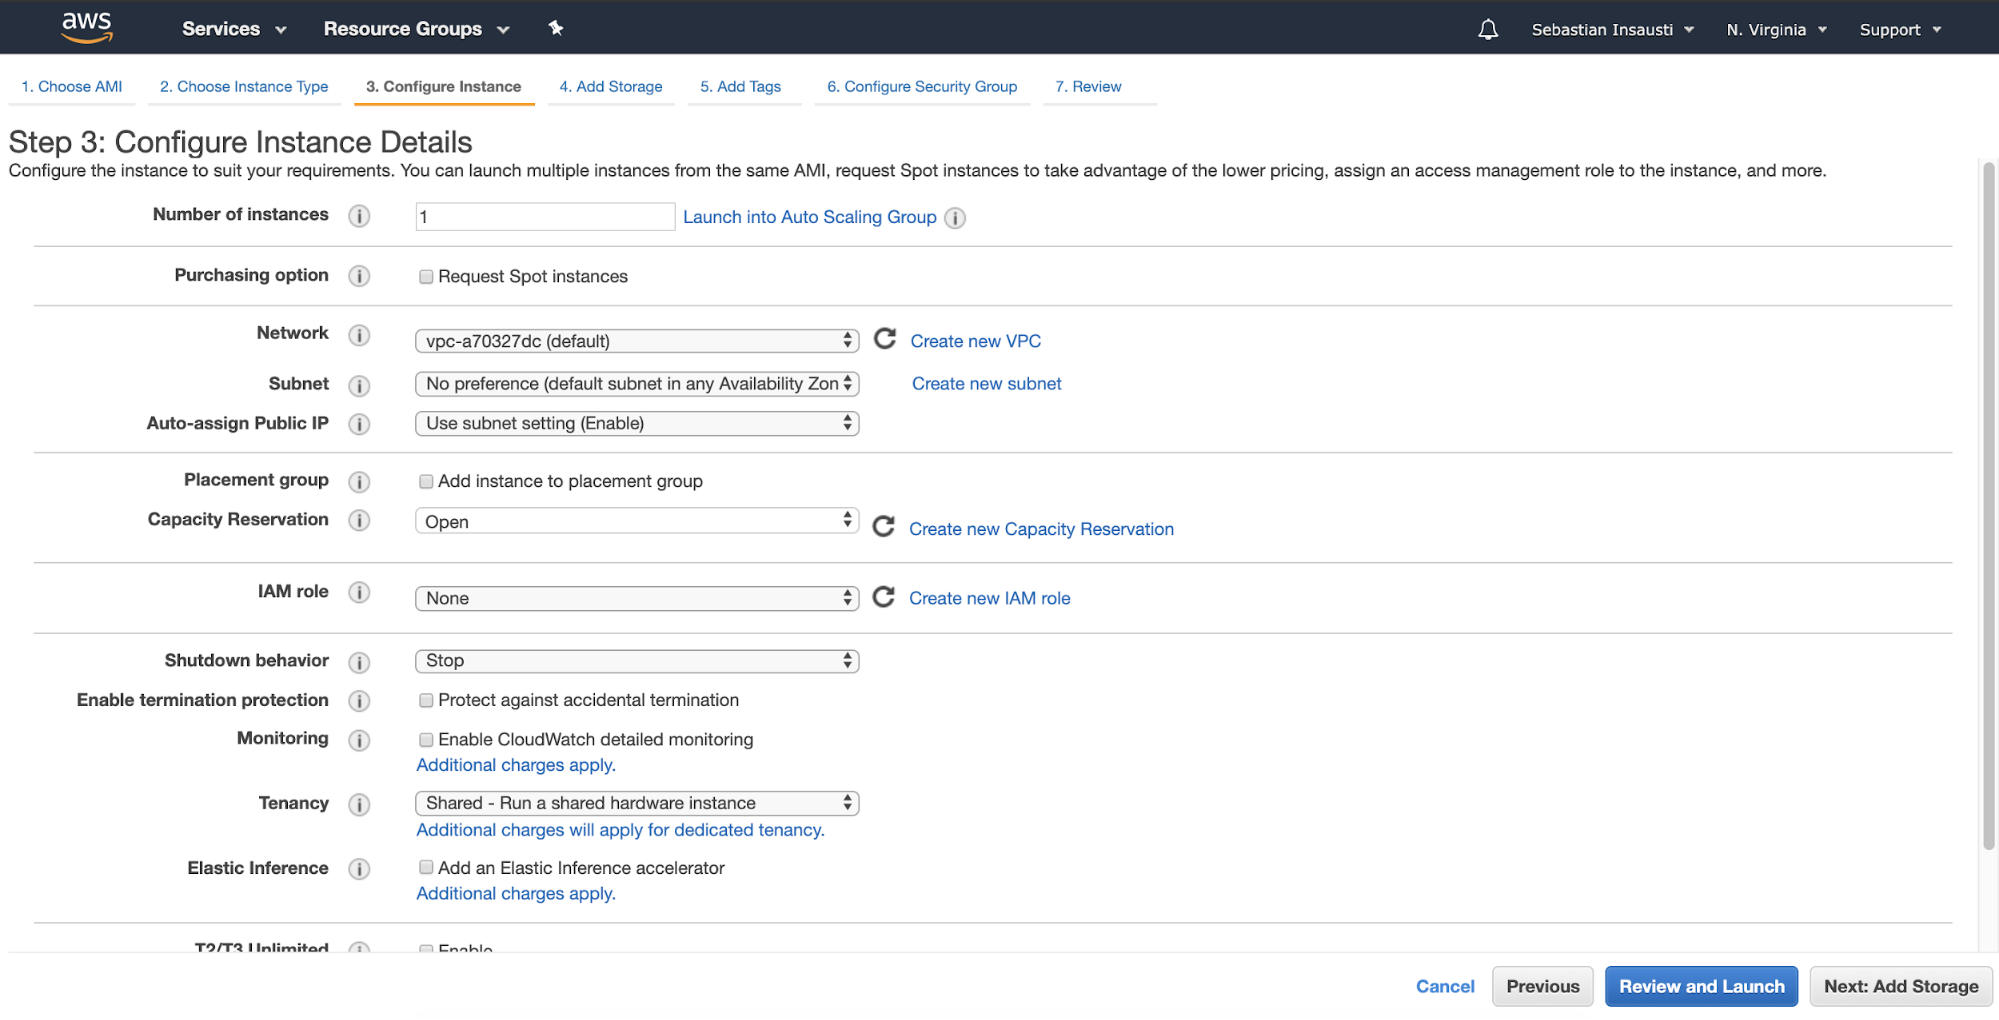
Then, you can specify a more detailed configuration like network, subnet, and more.
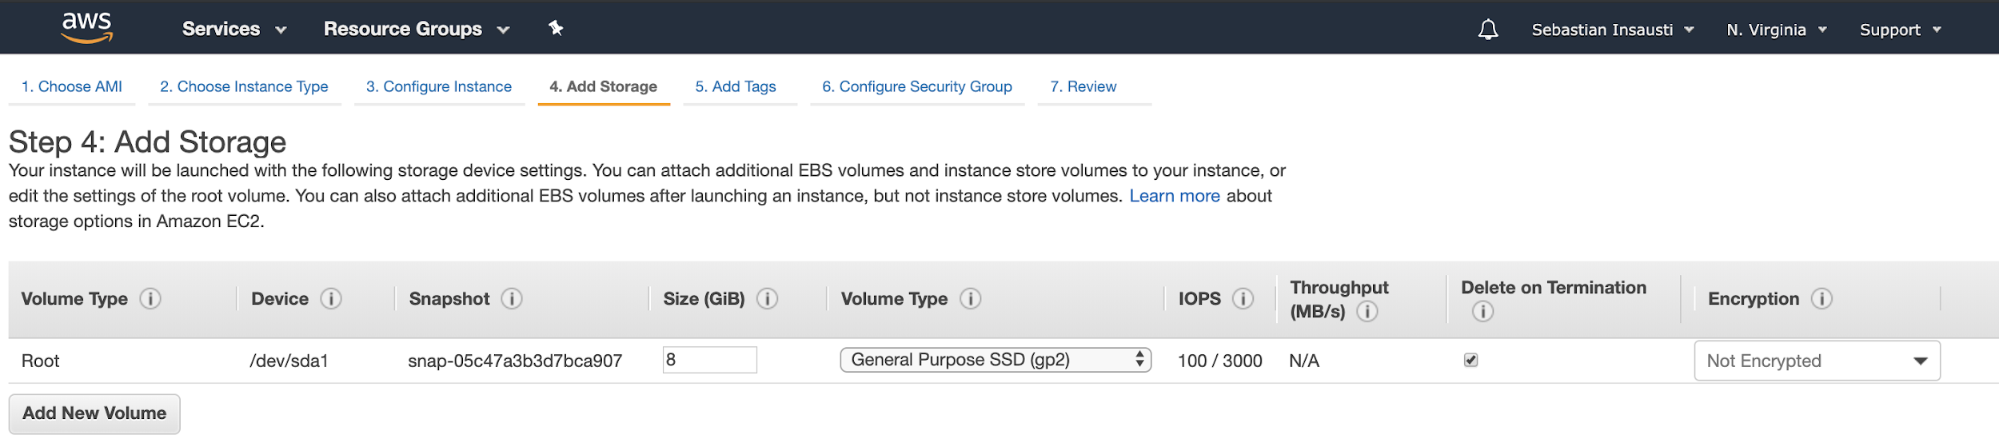
We can now add more storage capacity on this new instance, as this will be only a load balancer (it’s probably not necessary).
When we finish the creation task, we can go to the Instances section to see our new EC2 instance.
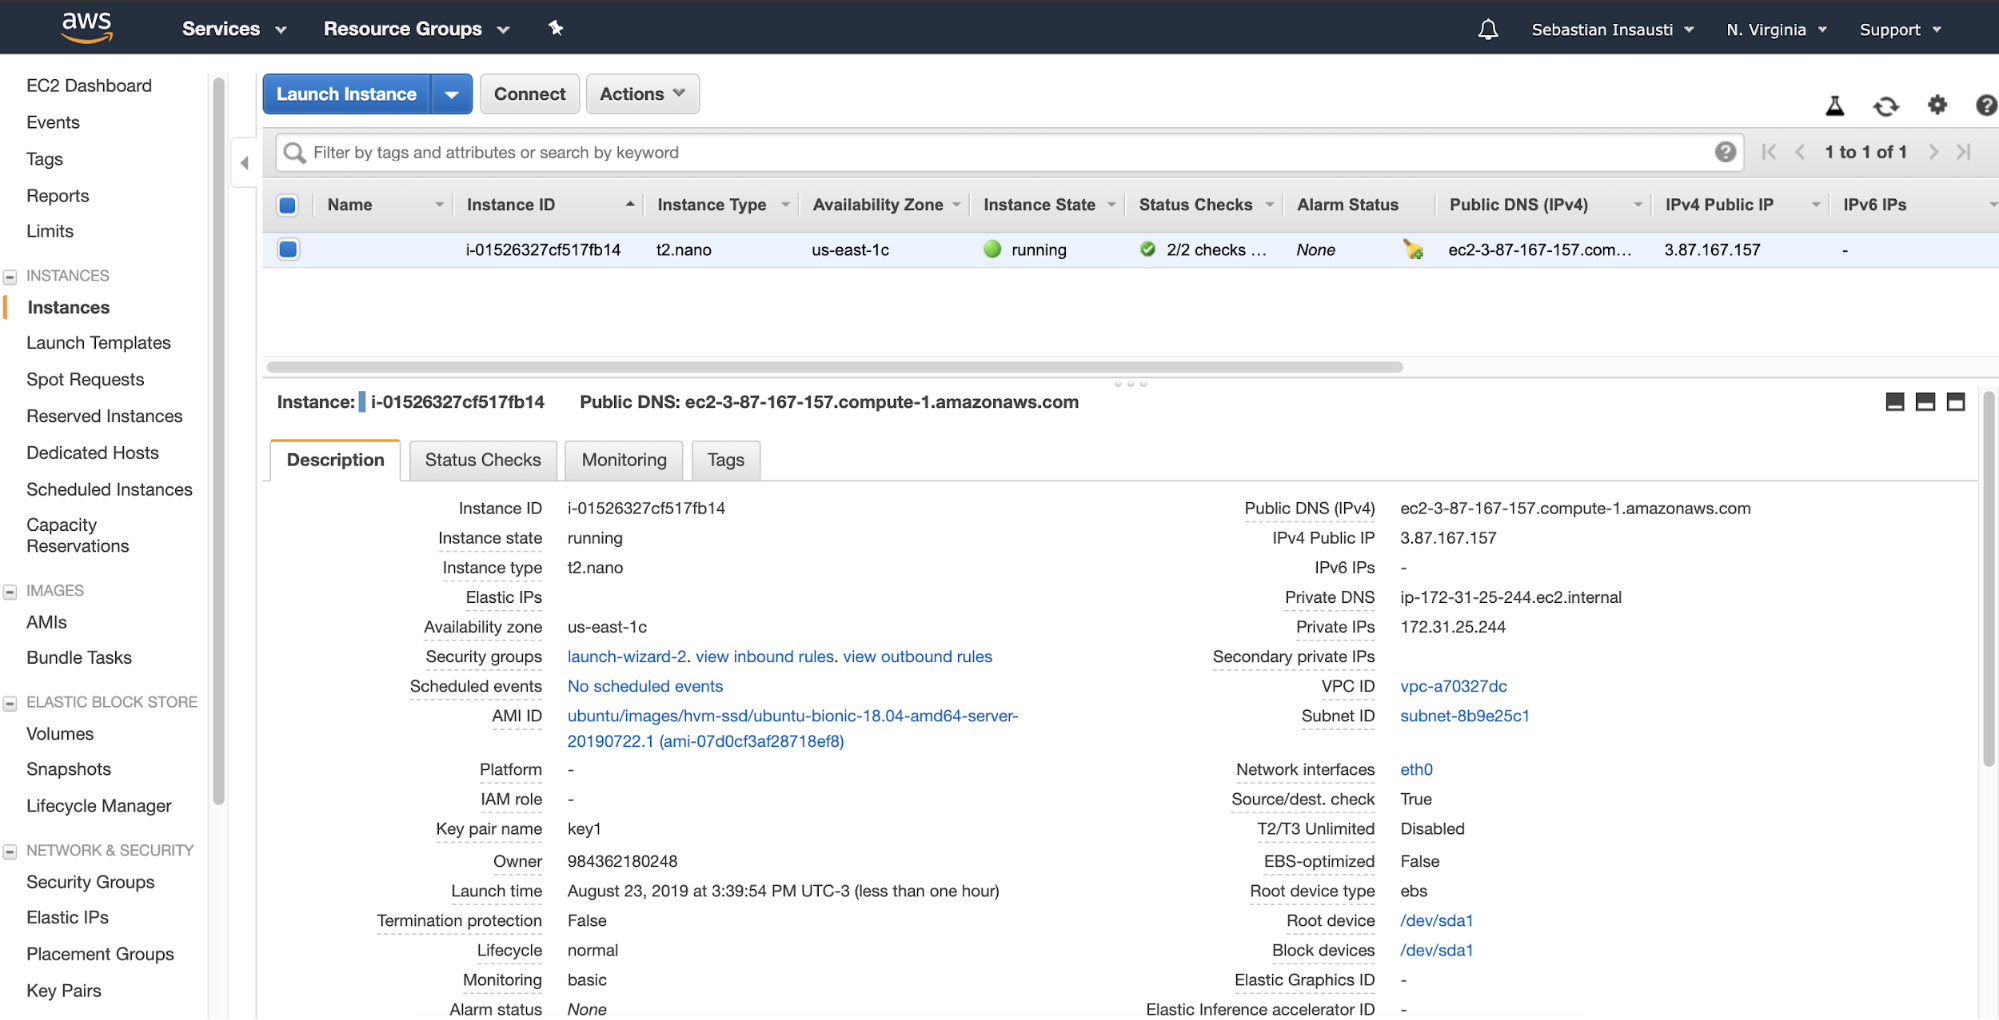
Now that our EC2 instance is ready (Instance State running), we can deploy our load balancer here. For this task, we’ll see two different ways, manually and using ClusterControl.
How Manually Install and Configure HAProxy
To install HAProxy on Linux you can use the following commands in our EC2 instance:
On Ubuntu/Debian OS:
$ apt-get install haproxy -yOn CentOS/RedHat OS:
$ yum install haproxy -yAnd then we need to edit the following configuration file to manage our HAProxy configuration:
$ /etc/haproxy/haproxy.cfgConfiguring our HAProxy is not complicated, but we need to know what we are doing. We have several parameters to configure, depending on how we want HAProxy to work. For more information, we can follow the documentation about the HAProxy configuration.
Let’s look at a basic configuration example. Suppose that you have the following database topology:
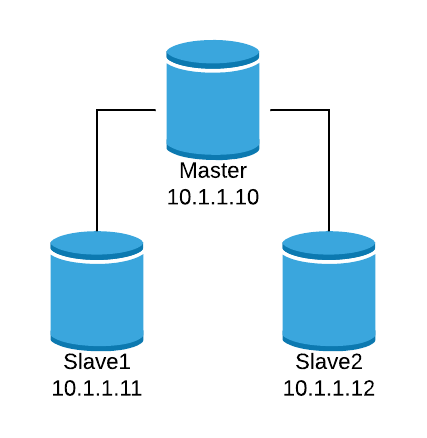
We want to create an HAProxy listener to balance the read traffic between the three nodes.
listen haproxy_read

   bind *:5434

   balance     roundrobin

   server  node1 10.1.1.10:5432 check

   server  node2 10.1.1.11:5432 check

   server  node3 10.1.1.12:5432 check
As we mentioned before, there are several parameters to configure here, and this configuration depends on what we want to do. For example:
listen  haproxy_read

       bind *:5434

       mode tcp

       timeout client  10800s

       timeout server  10800s

       tcp-check expect string is running

       balance leastconn

       option tcp-check

       default-server port 9201 inter 2s downinter 5s rise 3 fall 2 slowstart 60s maxconn 64 maxqueue 128 weight 100

       server  node1 10.1.1.10:5432 check

       server  node2 10.1.1.11:5432 check

       server  node3 10.1.1.12:5432 check
Now, let’s see how ClusterControl can make this task in an easy way.
How to Install and Configure HAProxy with ClusterControl
For this task, we’ll assume that you have ClusterControl installed (on-prem or in the cloud) and it’s currently managing your databases.
Go to ClusterControl -> Select Cluster -> Cluster Actions -> Add Load Balancer.

Here we must add the information that ClusterControl will use to install and configure our HAProxy load balancer.
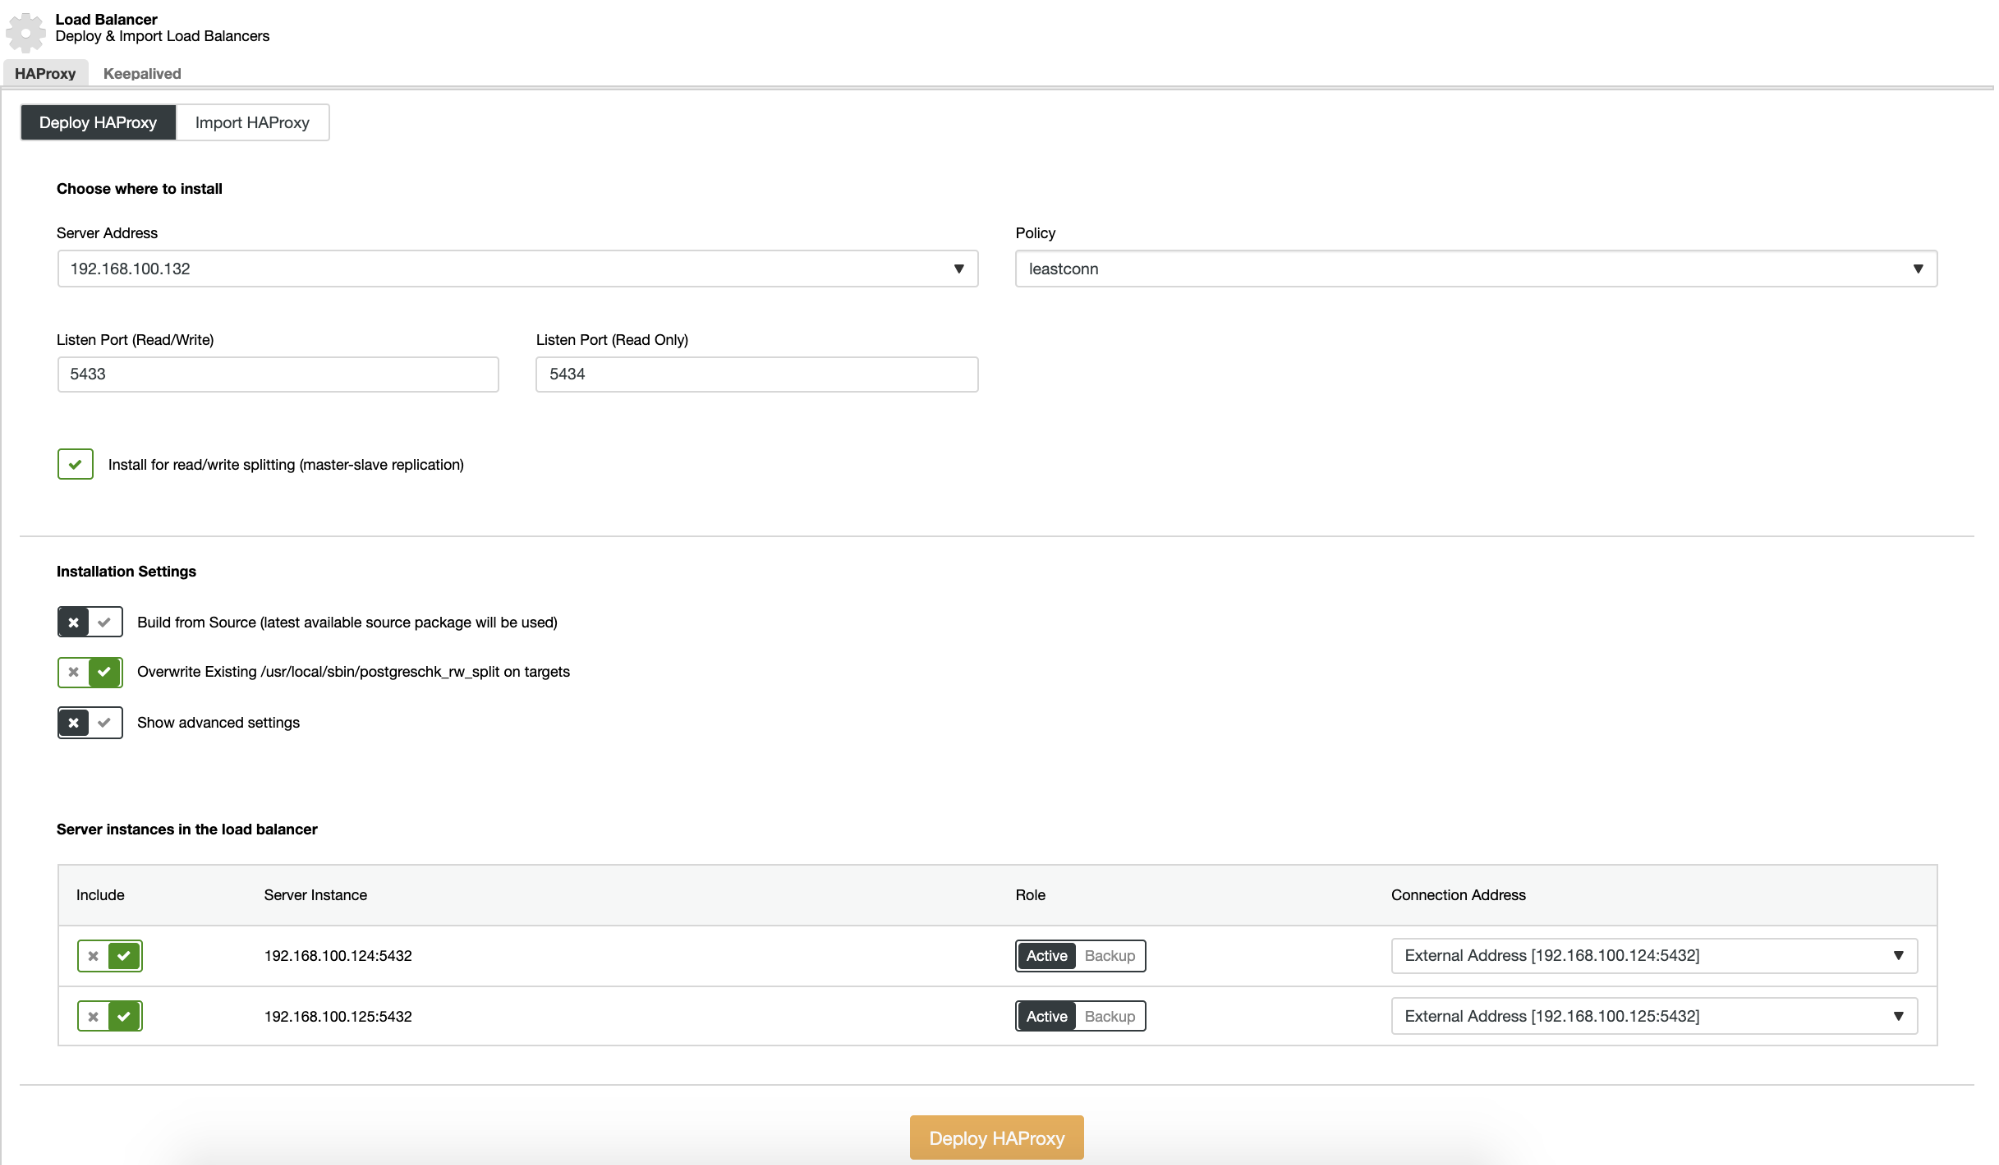
The information that we need to introduce is:
Action: Deploy or Import.
Server Address: IP Address for our HAProxy server.
Listen Port (Read/Write): Port for read/write mode.
Listen Port (Read Only): Port for read only mode.
Policy: It can be:
- leastconn: The server with the lowest number of connections receives the connection.
- roundrobin: Each server is used in turns, according to their weights.
- source: The source IP address is hashed and divided by the total weight of the running servers to designate which server will receive the request.
Install for read/write splitting: For master-slave replication.
Build from Source: We can choose Install from a package manager or build from source.
And we need to select which servers you want to add to the HAProxy configuration and some additional information like:
Role: It can be Active or Backup.
Include: Yes or No.
Connection address information.
Also, we can configure Advanced Settings like Admin User, Backend Name, Timeouts, and more.
When you finish the configuration and confirm the deploy, we can follow the progress in the Activity section on ClusterControl UI.
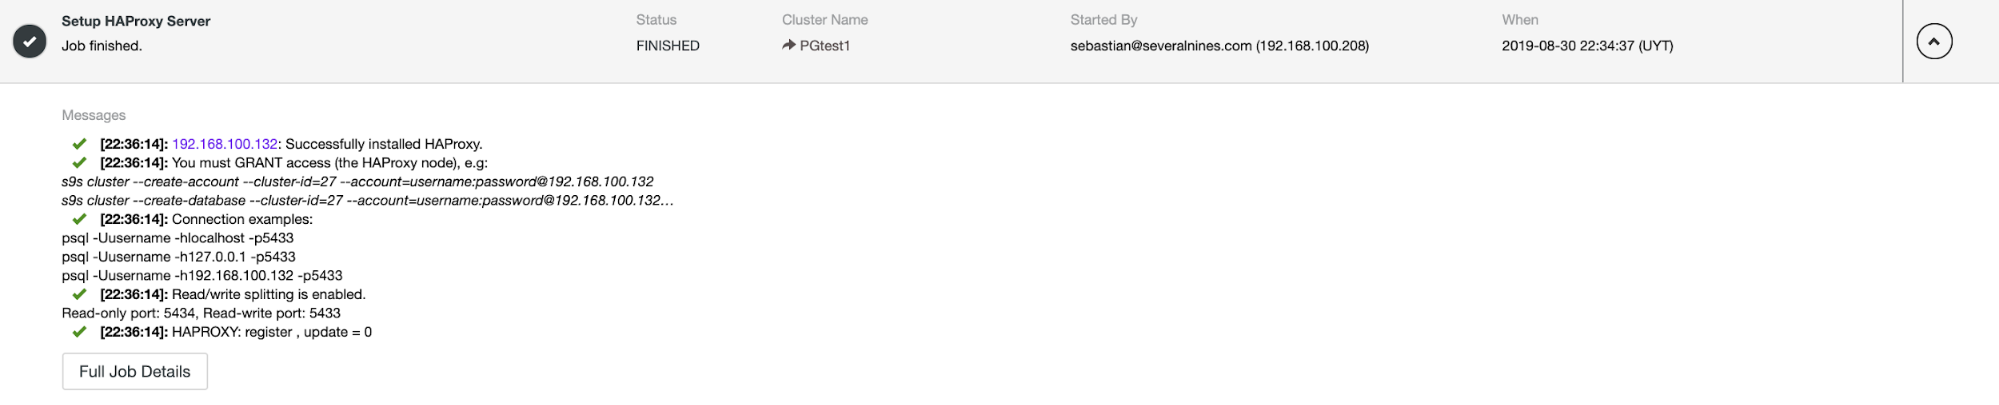
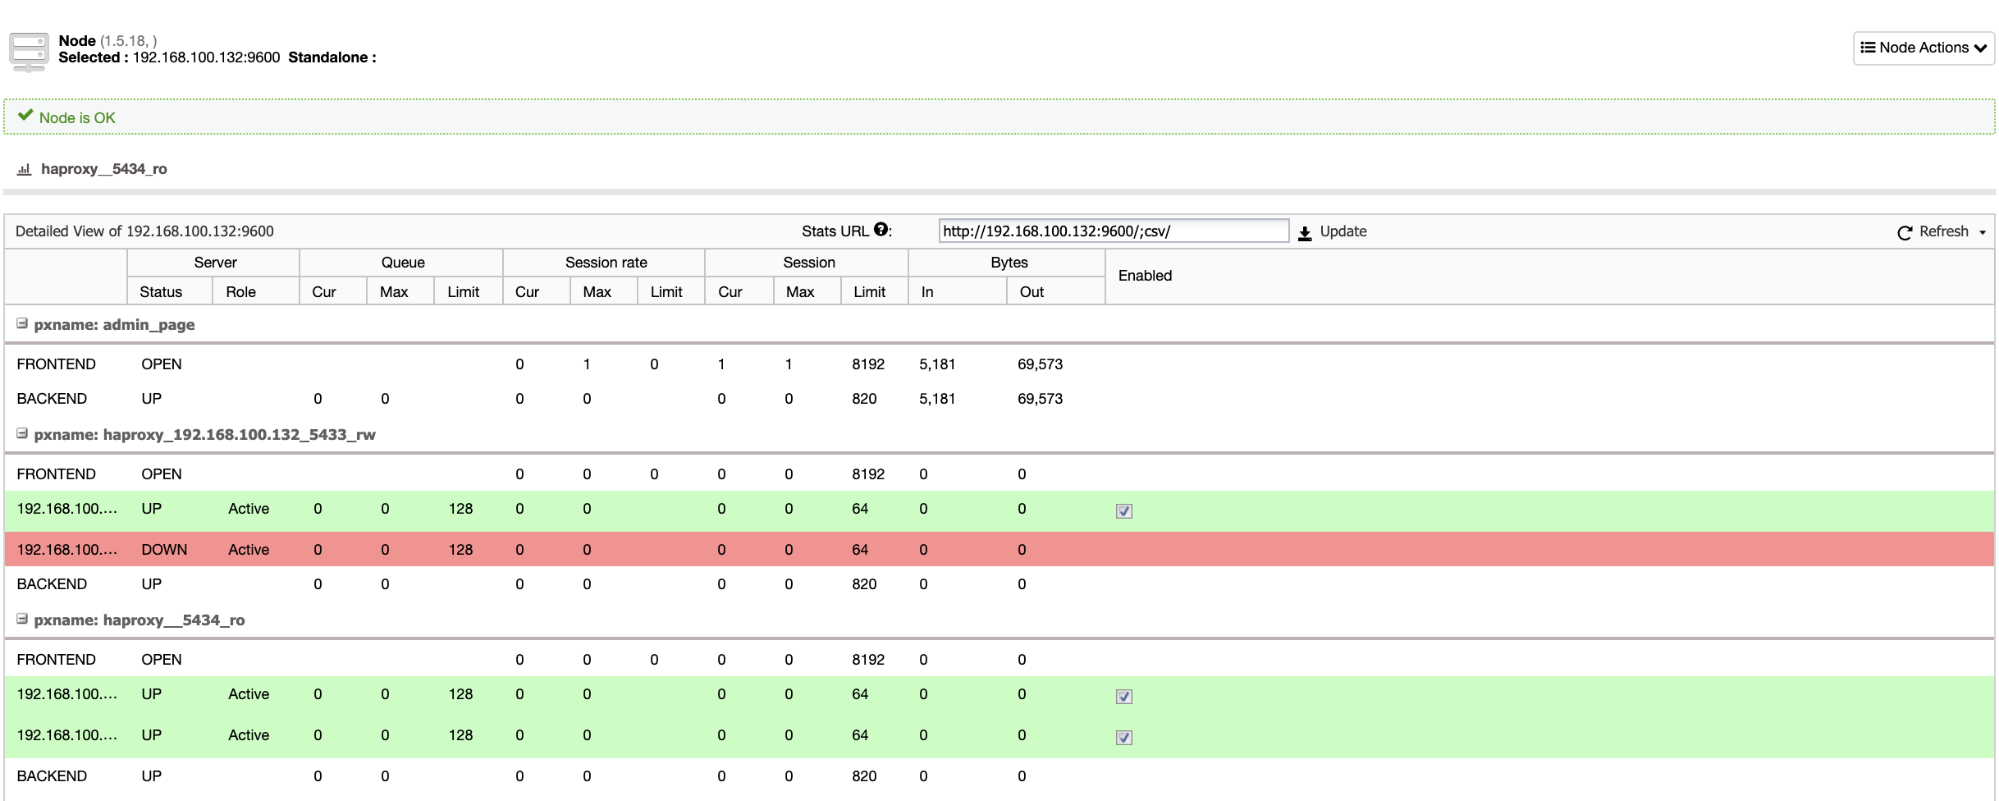
And when this finishes, we can go to ClusterControl -> Nodes -> HAProxy node, and check the current status.
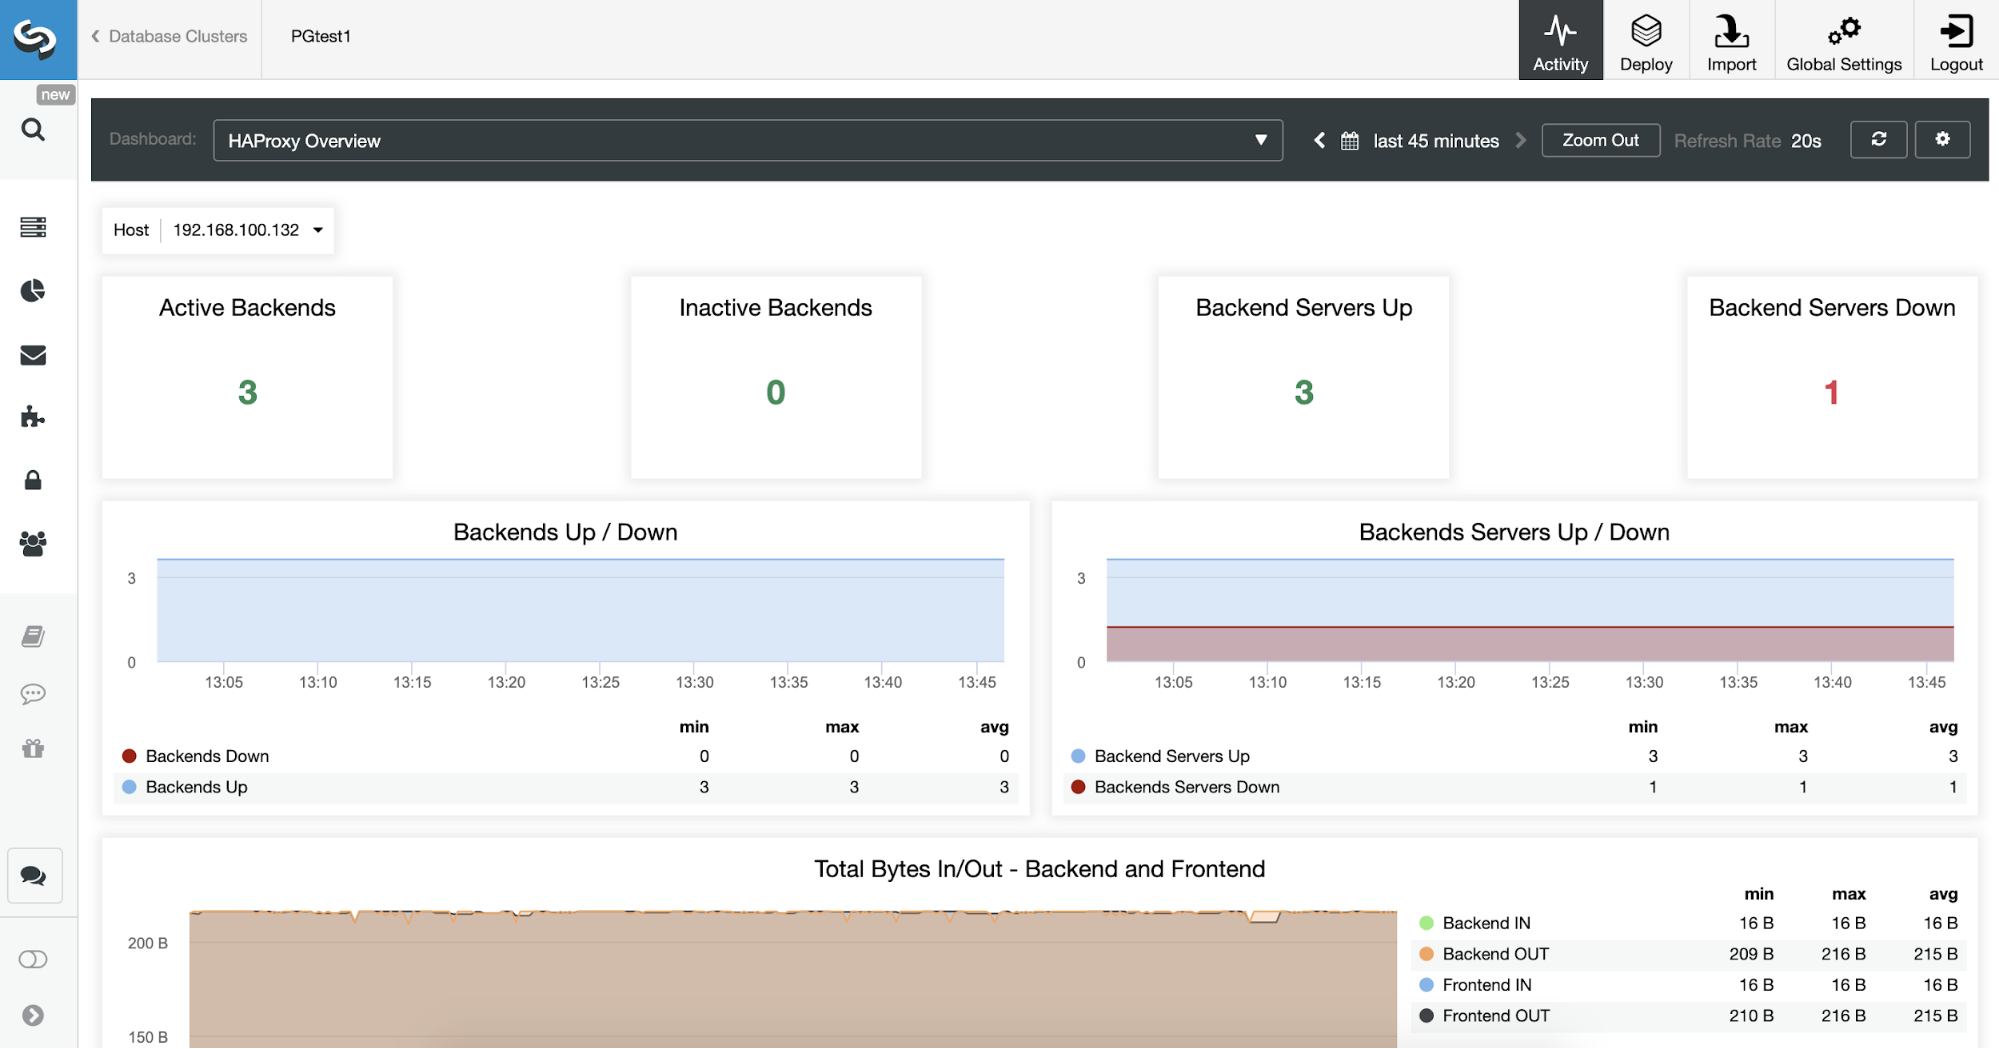
We can also monitor our HAProxy servers from ClusterControl checking the Dashboard section.
We can improve our HA design adding a new HAProxy node and configuring Keepalived service between them. All this can be performed by ClusterControl.
What is Amazon Elastic Load Balancing?
HAProxy is not the only possibility to deploy a Load Balancer on AWS as they have their own product for this task. Amazon Elastic Load Balancing (or ELB) distributes incoming application or network traffic across multiple targets, such as Amazon EC2 instances, containers, and IP addresses, in multiple Availability Zones.
You can add and remove compute resources from your load balancer as your needs change, without disrupting the overall flow of requests to your applications.
You can configure health checks, which are used to monitor the health of the compute resources so that the load balancer can send requests only to the healthy ones. You can also offload the work of encryption and decryption to your load balancer so that your compute resources can focus on their main work.
To configure it, go to the Amazon EC2 section, and click on the Load Balancers option in the left menu. There, we’ll see three different options.
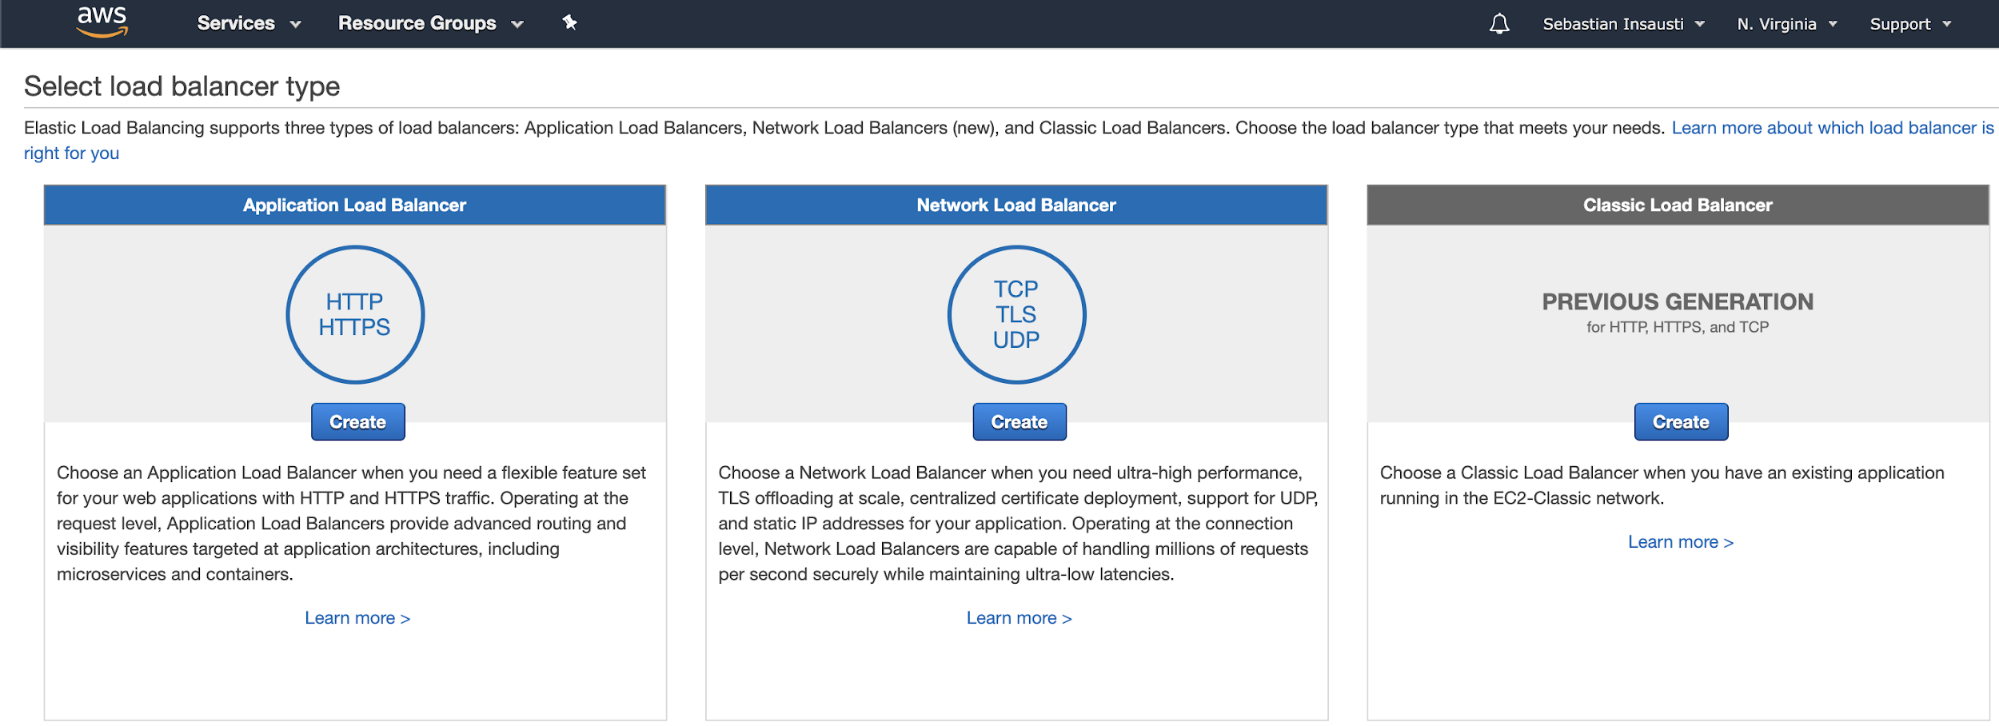
- Application Load Balancer: If you need a flexible feature set for your web applications with HTTP and HTTPS traffic. Operating at the request level, Application Load Balancers provide advanced routing and visibility features targeted at application architectures, including microservices and containers.
- Network Load Balancer: If you need ultra-high performance, TLS offloading at scale, centralized certificate deployment, support for UDP, and static IP addresses for your application. Operating at the connection level, Network Load Balancers are capable of handling millions of requests per second securely while maintaining ultra-low latencies.
- Classic Load Balancer: If you have an existing application running in the EC2-Classic network.
Conclusion
As we could see, a Load Balancer can help us manage our database traffic by balancing it between multiple servers. It’s also useful to improve our high availability environment by performing failover tasks. We can deploy it manually on AWS or by using ClusterControl in a fast and easy way. With ClusterControl (download for FREE!) we can also take advantage of different features like monitoring, management and scaling for different database technologies, and we can deploy this system on-prem or in the cloud.


