blog
ClusterControl Alert Integration Using Webhooks

There is no doubt that monitoring and alerting is one of critical aspects for any application, especially for a mission-critical environment. From those alerts and notifications, one should be able to act or respond in a timely manner and investigate the reported issue furthermore take the appropriate action. There is a quote from Kevin Mitnick that goes:
“I believe in having each device secured and monitoring each device, rather than just monitoring holistically on the network, and then responding in short enough time for damage control.”
With a good alert not only we could know what is happening but also could fix the issue the soonest as possible so that there is no interruption on the system as well as avoid more damaging events. For our customers that are using ClusterControl, there are several types of integration that they could choose from depending on their needs. Those integrations are PagerDuty, VictorOps, Telegram, OpsGenie, Slack, Webhook and also ServiceNow. In today’s blog post, we will review how to enable one of them – Webhook.
Webhook or sometimes called “HTTP callback” can be defined as a way for a web application to communicate with others with real-time information. In order to achieve that “webhook URL” is used as a middle man for the data exchange between the applications. Simply think that this “webhook URL” is like a phone number provided by the receiving application so that the other applications can call whenever any event happens.
Generally, a webhook can be used to handle various types of conditions. For example, you can use webhook in:
-
Handling Text Messages by using the Twillio API
-
Handling Emails by using the API from SendGrid, MailChimp, and Mailgun
-
Responding to Changes in Your Code
-
Handling Payments
-
Responding to Changes on the Web Itself
-
Responding to What’s Happening On Your Servers
-
Handling Files and Documents
Integrating Webhooks with Discord and ClusterControl
In ClusterControl, all the integrations that are provided are using webhooks. The reason why we add a separate webhook as another option is to assist the user in customizing their alerts so that they can send the notifications to any channel that they want. In this section, we are going to review how to use webhook integration with Discord.
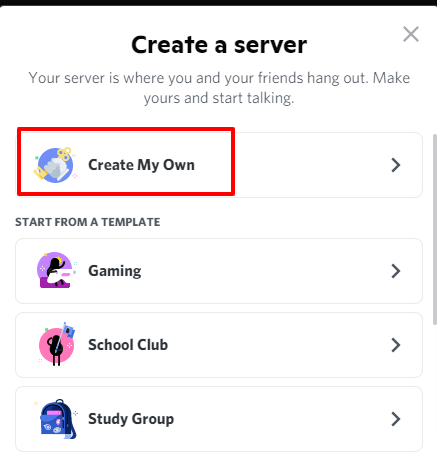
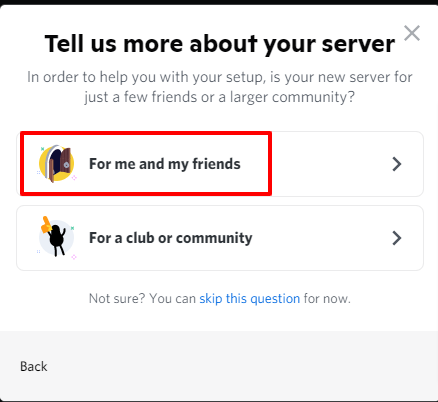
Similar to Slack, Discord is a hosted chat. Discord allows you to set up a free messaging system that lets you communicate with text messages, images, audio, and video. Before we can integrate a webhook in Discord, we need to setup our own Discord server. If you don’t have the Discord application installed on your computer, you may do it using the browser. Head over to Discord and follow the steps outlined in screenshots below:

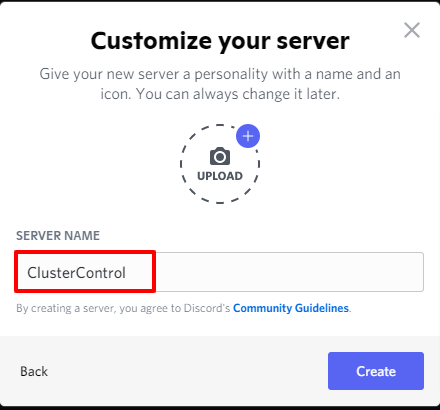
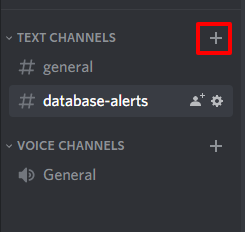
You may use any name that you would like to use. For our example, we will use “ClusterControl”. If you would like to create a channel specifically for the alert, you could add the channel by referring to the screenshot below:
Before you could send any message to the channel, we need to create a “webhook URL”. For this example, we are using Pipedream to create it. In case some of you are wondering, Pipedream is a production-scale serverless platform to connect APIs and it is remarkably fast. To use Pipedream, you need to sign up to the website – Pipedream is free.
If you like to learn more about Pipedream, you may have a look at their documentation. Let’s go ahead and create the workflow for our Discord alerts. Workflow is a step that we defined on how we would like to handle the request. From the Pipedream UI, you may click on the Workflow tab on the left sidebar and then click New:

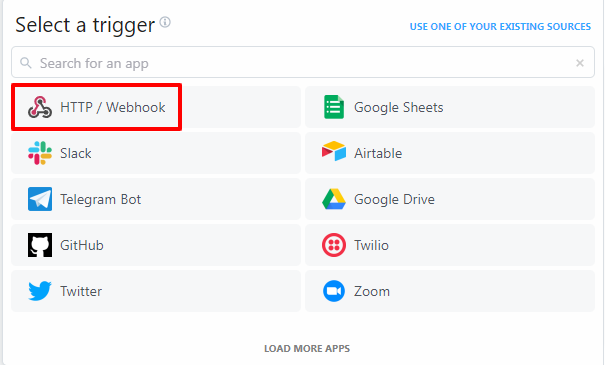
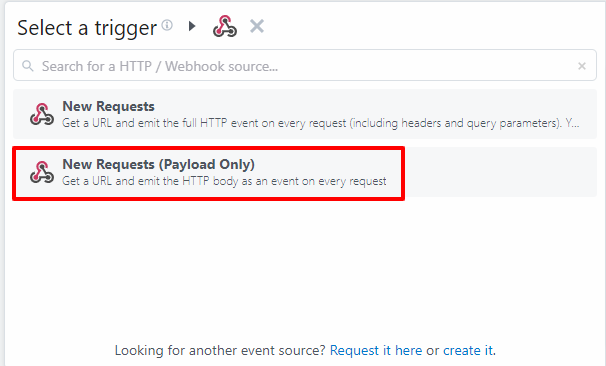
Next, we need to select a trigger, choose “HTTP/Webhook”, then click on the “New Requests (Payload Only)” in the next screen. You may refer to the following screenshots:
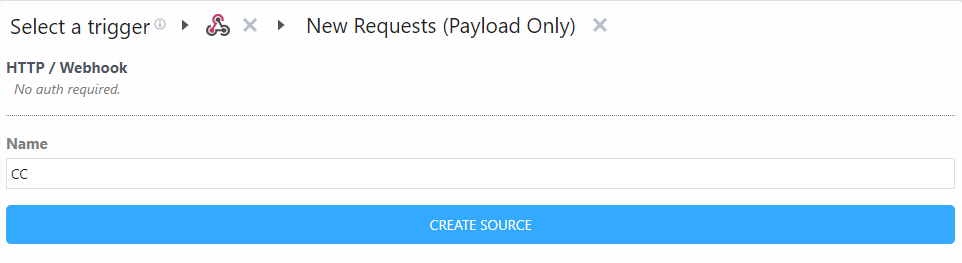
You could choose whether to put a name or not for it. After that click “Create Source”
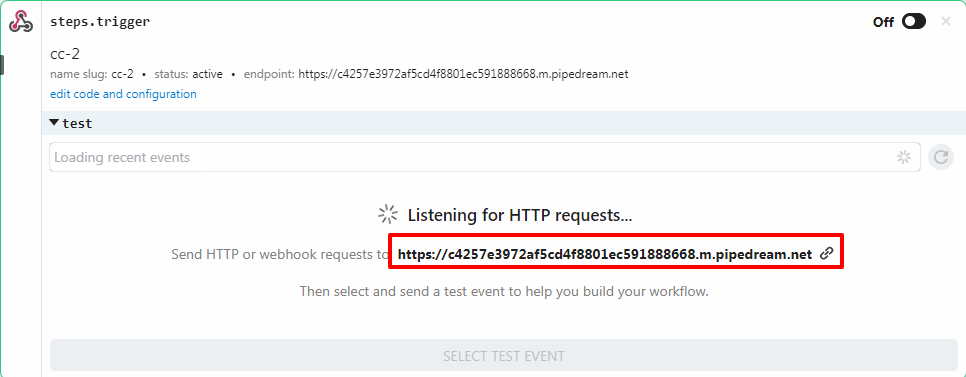
The following screen will appear, take note of the URL that has been generated. We need to copy the URL and add it to the ClusterControl integration. If the URL is not configured in ClusterControl, the page will keep on listening for the HTTP requests until it finds some:
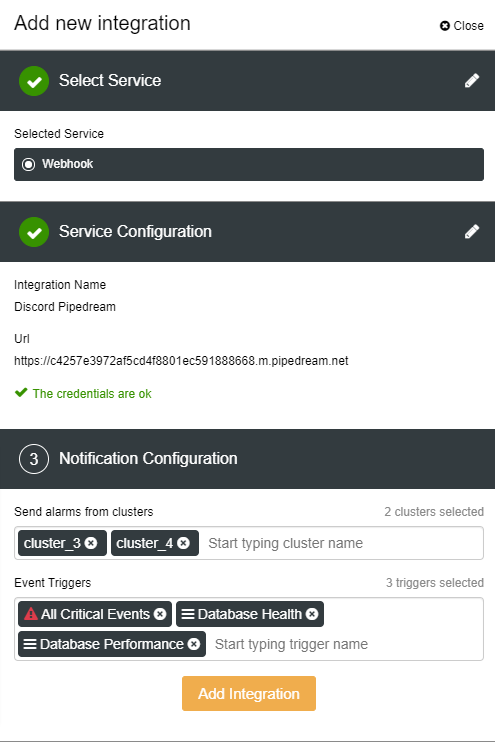
To add a new integration in ClusterControl, you may go to ClusterControl UI > Integration > Add new integration > Webhook. You can fill in the name and then paste the URL in the URL textbox before clicking on the “Test” button. If the test is successful, click on “Continue” to configure the alarms. For this purpose, we will use the following configuration. You could tweak the configuration for the alarm section depending on what are the things that you would like to receive for the alert:
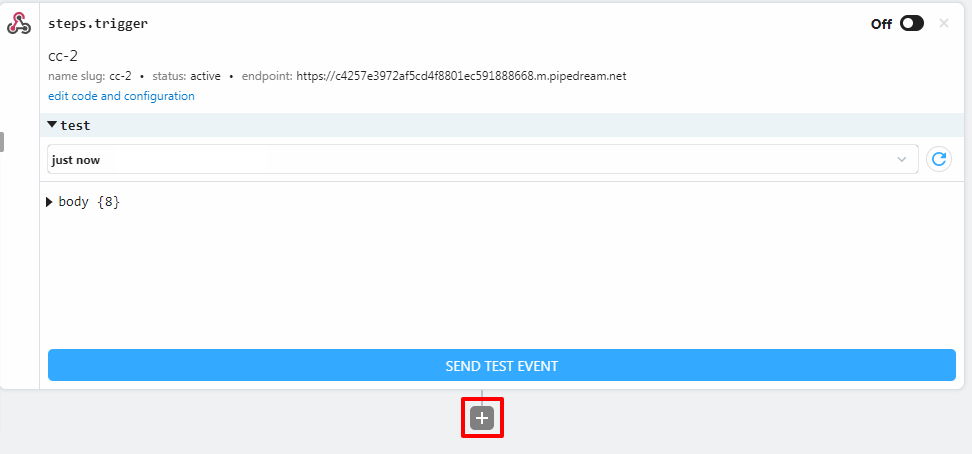
Now, let’s go back to Pipedream’s workflow page. You will notice the following screen which indicates that the first request has been triggered. Before the workflow can send any message to Discord, we need to connect and authorize it first. The next step is to connect it with Discord, click on the (+) button to add:
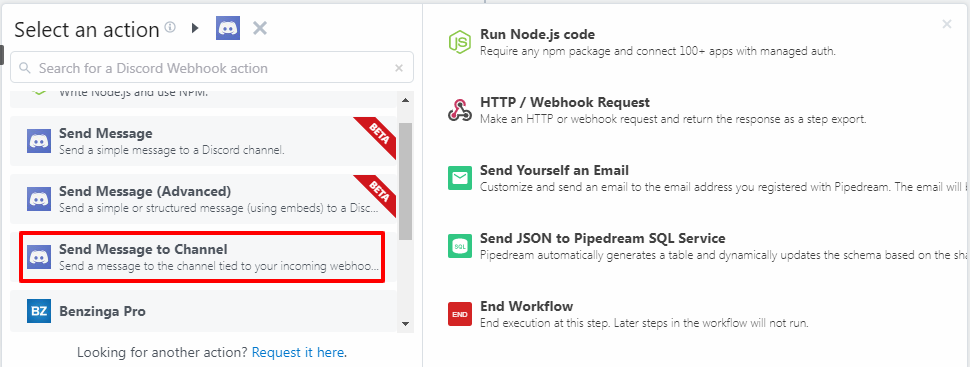
In the next screen, choose “Discord Webhook” as the action. For the next option, choose “Send Message to Channel”:
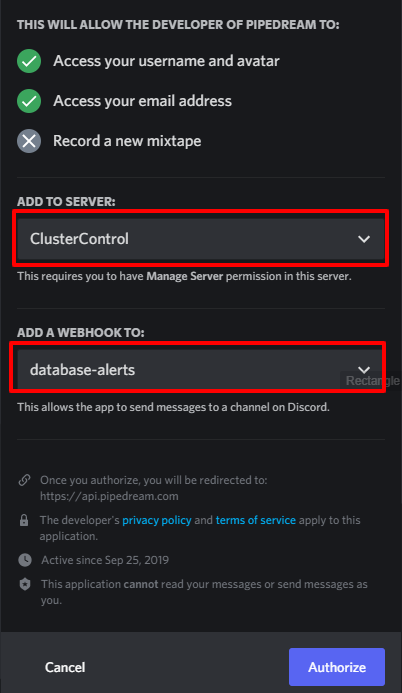
A popup will appear, click on the “Select an account” > Connect Discord Webhook. Add your Discord server in the server section and choose the channel that you want to send the alert to. Don’t forget to click on the “Authorize” button:
In the next part, we will go through the steps on how we would like the workflow to send the message to Discord. There are several parameters that you could choose. For example, you could choose whether to add a message, embed anything, add the username or even add the avatar. You can choose these parameters from the Discord (steps.send_message) section in the pipedream’s workflow:
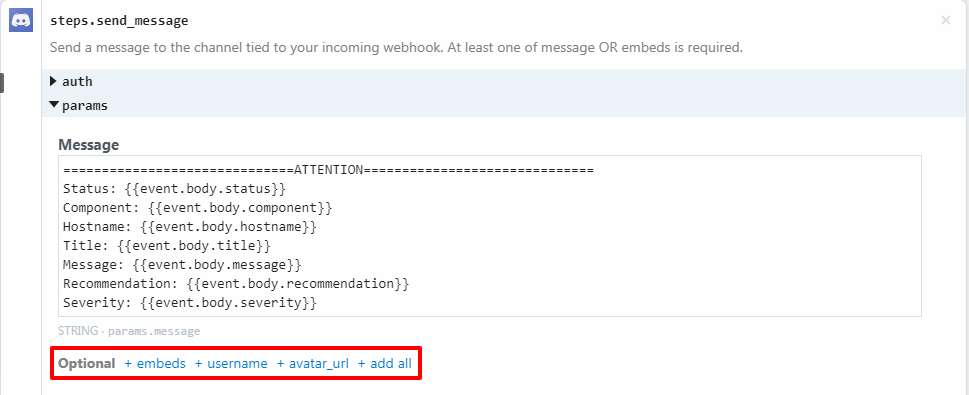
As for the message body, you could choose what value that you want to pass. As for our case, we’d like to choose all the following values, you could copy those values if you want to have the same thing:
==============================ATTENTION==============================
Status: {{event.body.status}}
Component: {{event.body.component}}
Hostname: {{event.body.hostname}}
Title: {{event.body.title}}
Message: {{event.body.message}}
Recommendation: {{event.body.recommendation}}
Severity: {{event.body.severity}}
It’s worth mentioning that you have to be careful with the value and parameters, if the workflow could not read it, it will throw the error message and you need to fix the error. After every change in the workflow, do not forget to click on “Deploy” button as per the screenshot below:

On the left-hand side, there is a panel that will list all the events that have been captured. If you want to replay the event, just choose any of the events and click on the replay button. This is very helpful in the event that you want to tweak your message in the workflow and would like to see what is being sent to Discord:

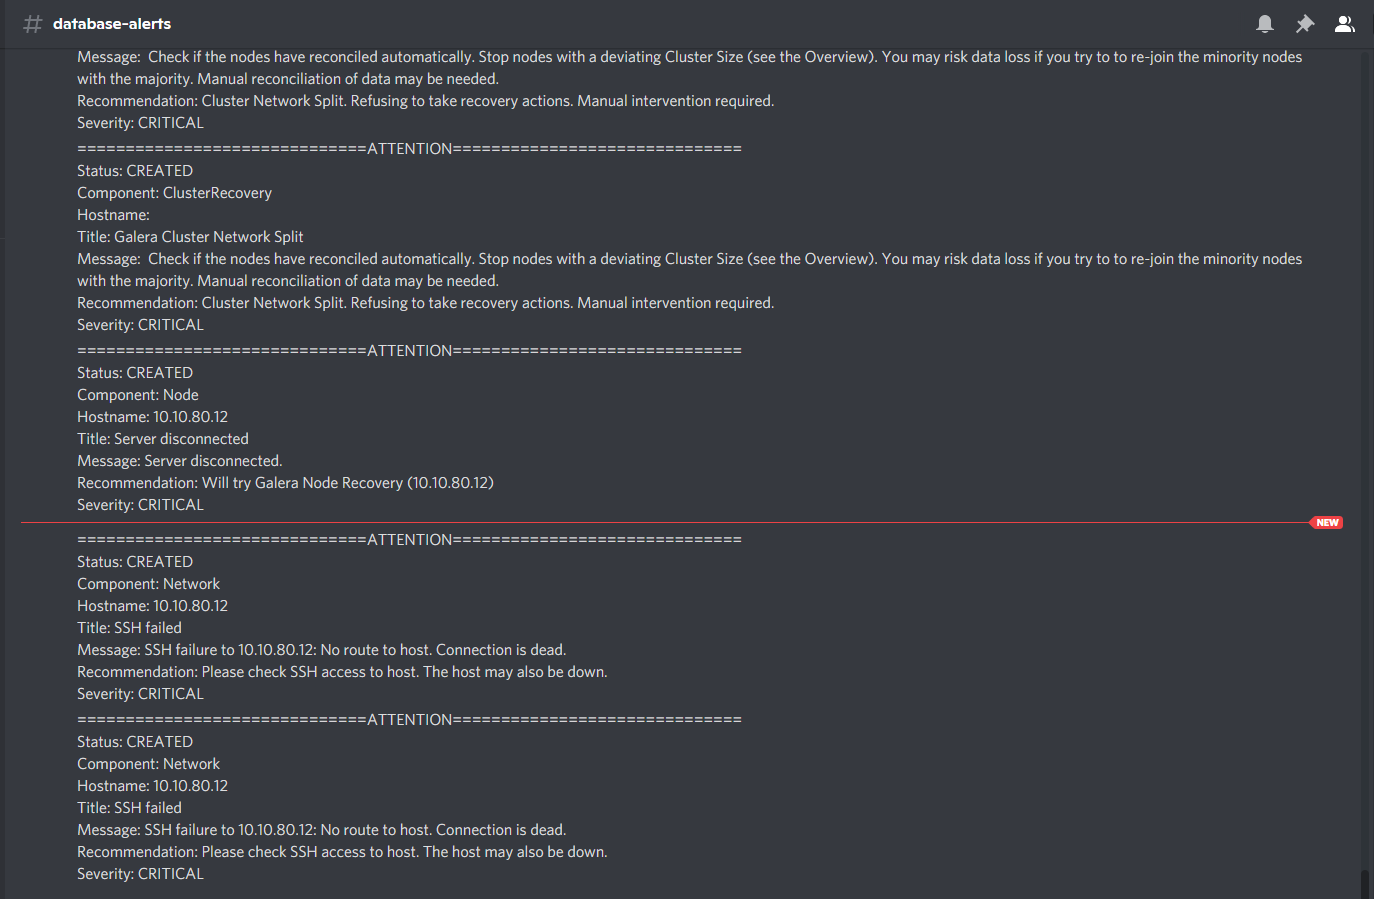
The following screenshot shows the event that has been sent by the workflow throughout our testing phase.
Now that we have completed and learned how to use webhook integration with Discord, there are a few things that we like to highlight in order to get this working:
-
You need to have your own Discord server
-
You need to create a workflow in Pipedream and authorize Discord
-
You need to add the integration in ClusterControl
We hope that this blog post will benefit you in using webhook integration with Discord.