blog
Automate Deployment of Your MySQL or Postgres Cluster From Backup

ClusterControl 1.7.1 introduces a new feature called Create Cluster from Backup, which allows you to deploy a new MySQL or Postgres-based cluster and restore data on it from a backup. This blog post shows how this new feature works, and how this type of automation can deliver improvements to your infrastructure operations.
Introducing: Create Cluster from Backup
Backup management is the most loved feature by our users, and we just lifted it to the next level. This new functionality sounds simple – ClusterControl 1.7.1 is able to deploy a new cluster from an existing backup. However, there are multiple procedures and checks involved in order to deploy a production-grade cluster directly from a backup. Restoration itself comes with its own challenges, such as:
- Full or partial restore consequences
- Base backup and its incremental backups ordering (for incremental backup)
- Backup decryption (if encrypted)
- Restoration tool options
- Decompression (if compressed)
- Backup streaming from the source to the destination server
- Disk space utilization during and after the restoration
- Restoration progress reporting
Combine the above with the complexity and repetitiveness of database cluster deployment tasks, you can save time and reduce risk in running error-prone procedures. The hardest part from the user’s perspective is to pick which backup to restore from. ClusterControl will handle all the heavy lifting behind the scene, and report the end result once finishes.
The steps are basically simple:
- Setup passwordless SSH from the ClusterControl node to the new servers.
- Pick one logical backup from the backup list, or create one under Backups -> Create Backup.
- Click Restore -> Create Cluster from Backup and follow the deployment wizard.
This feature is specifically built for MySQL Galera Cluster and PostgreSQL at the time being. Here is what you would see in the UI after clicking “Restore” on an existing backup:
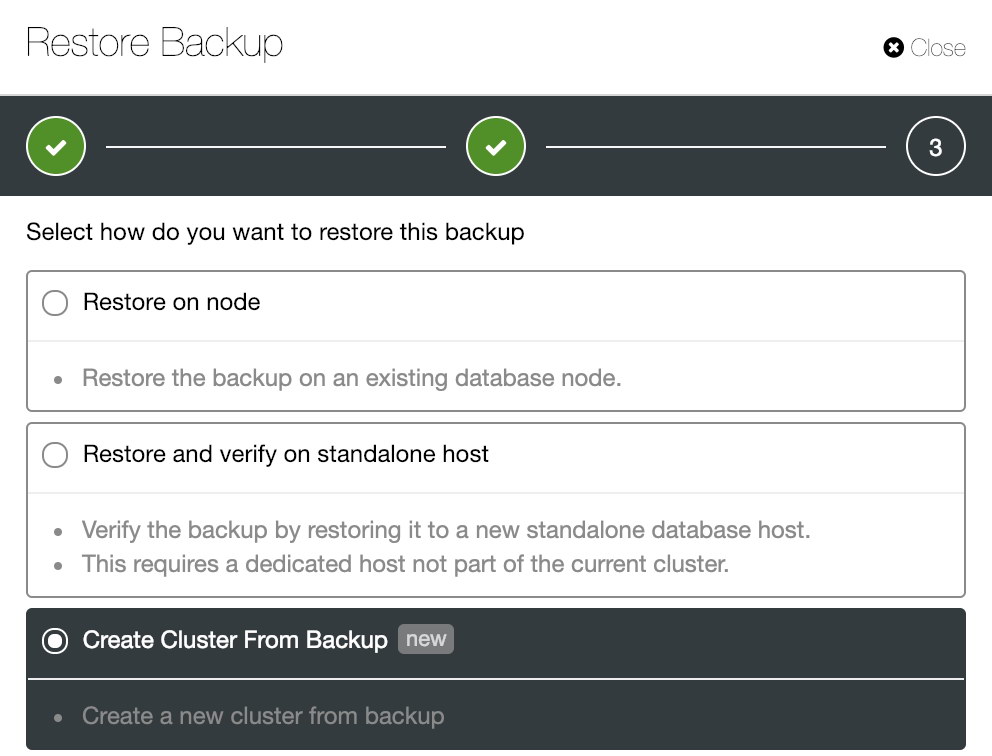
The bottom option is what we are looking for. Next, is the summary dialog on the chosen backup before the deployment configuration:
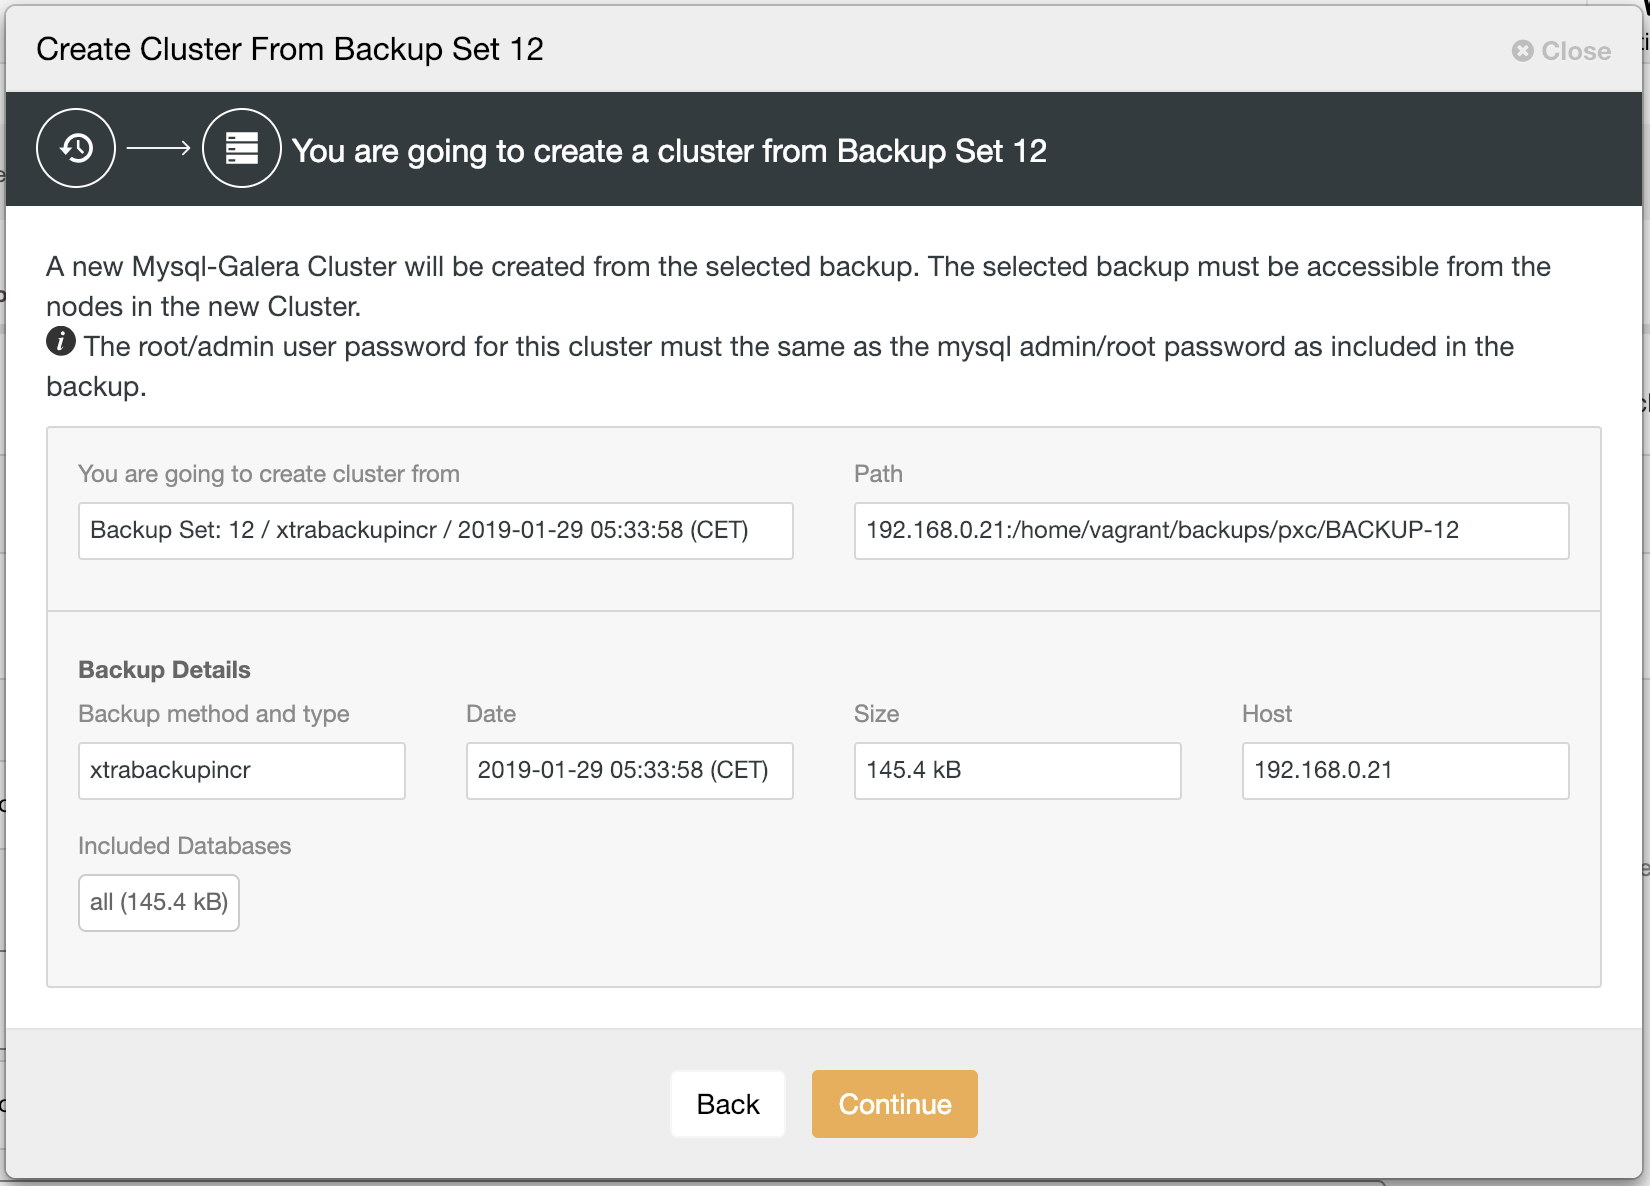
Next, the same database cluster deployment wizard for the respective cluster (MySQL Galera Cluster or PostgreSQL) will be shown to configure a new cluster:
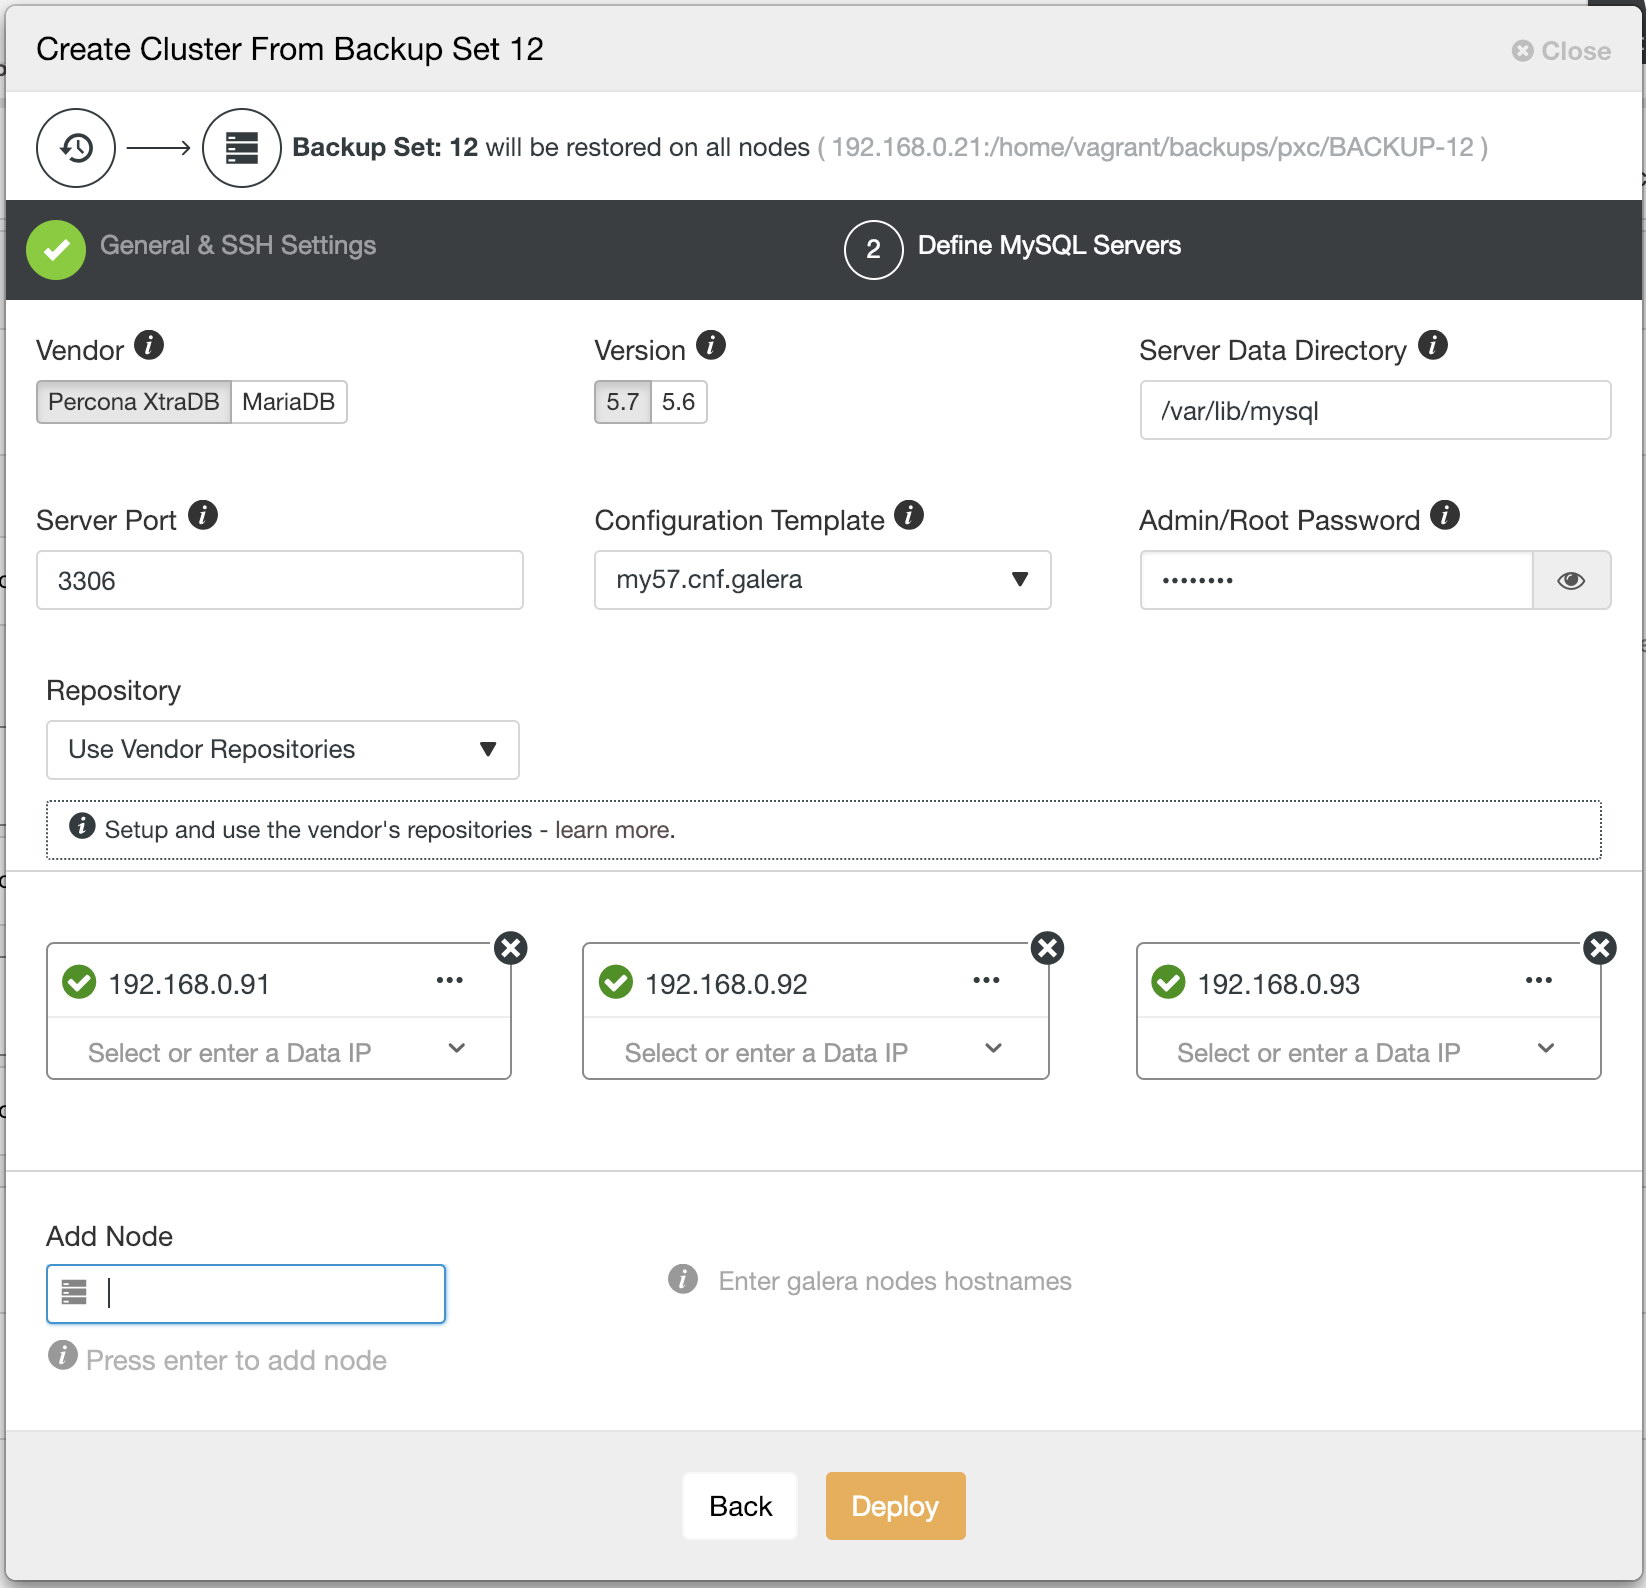
Note that you must specify the same database root/admin username and password as the one that you have in the backup. Otherwise, the deployment would fail half-way when starting up the first node. In general, restoration and deployment procedures will happen in the following order:
- Install necessary softwares and dependencies on all database nodes.
- Start the first node.
- Stream and restore backup on the first node (with auto-restart flag).
- Configure and add the rest of the nodes.
A new database cluster will be listed under ClusterControl cluster dashboard once the job completes.
What can you gain from it?
There are a number of things you could benefit from this feature, as explained in the following sections.
Test your dataset in various conditions
Sometimes, you might be wondering a the new database version would work or perform for your database workload and testing it out is the only way to know. This is where this feature comes in handy. It allows you to perform tests and benchmark on many variables involved that would affect the database stability or performance, for instance, the underlying hardware, software version, vendor and database or application workloads.
For a simple example, there is a big improvement on the DDL execution between MySQL 5.6 and MySQL 5.7. The following DROP operation on a 10 million rows table proves it all:
mysql-5.7> ALTER TABLE sbtest1 DROP COLUMN xx;
Query OK, 0 rows affected (1 min 58.12 sec)
mysql-5.6> ALTER TABLE sbtest1 DROP COLUMN xx;
Query OK, 0 rows affected (2 min 23.74 sec)Having another cluster to compare with actually allows us to measure the improvement and justify a migration.
Database migration with logical backup
Logical backup like mysqldump and pg_dumpall is the safest way to upgrade, downgrade or migrate your data from one version or vendor to another. All logical backups can be used to perform database migration. The database upgrade steps are basically simple:
- Create (or schedule) a logical backup – mysqldump for MySQL or pg_dumpall for PostgreSQL
- Setup passwordless SSH from ClusterControl node to the new servers.
- Pick one created logical backup from the backup list.
- Click Restore -> Create Cluster from Backup and follow the deployment wizard.
- Verify the data restoration on the new cluster.
- Point your application to the new cluster.
Faster total cluster recovery time
Imagine a catastrophic failure which prevents your cluster to run, like for example a centralized storage failure which affected all the virtual machines that connected to it, you could get a replacement cluster almost immediately (provided the backup files are stored outside of the failed database nodes, stating the obvious). This feature can be automated via s9s client, where you can trigger a job via the command line interface, for example:
$ s9s cluster
--create
--cluster-type=postgresql
--nodes="192.168.0.101?master;192.168.0.102?slave;192.168.0.103?slave"
--provider-version=11
--db-admin=postgres
--db-admin-passwd='s3cr3tP455'
--os-user=root
--os-key-file=/root/.ssh/id_rsa
--cluster-name="PostgreSQL 9.6 - Test"
--backup-id=214
--log
One thing to note when using this feature is to use the same admin username and password as what’s stored in the backup. Also, the passwordless SSH to all database nodes must be configured beforehand. Otherwise, if you prefer to configure it interactively, just use the web UI interface.
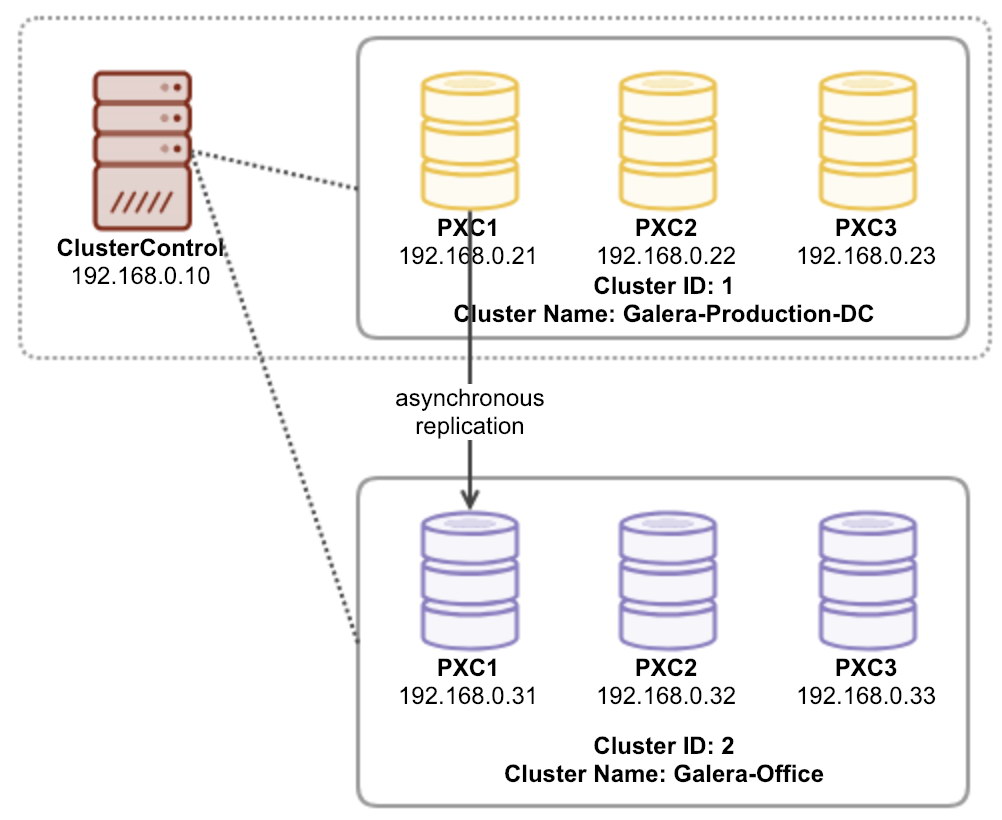
Scale Out via Asynchronous Replication
For MySQL Galera Cluster, the newly created cluster has the possibility to be scaled out via MySQL asynchronous replication. Let’s say we already restored a new cluster in the office based on the latest backup from the production cluster in the data center, and we would like the office cluster to continue replicating from the production cluster, as illustrated in the following diagram:
You may then set up the asynchronous replication link by using the following way:
-
Pick one node in the production and enable binary logging (if disabled). Go to Nodes -> pick a node -> Node Actions -> Enable Binary Logging.
-
Enable binary logging on all nodes for office cluster. This action requires a rolling restart which will be performed automatically if you choose “Yes” under “Auto-restart node” dropdown:
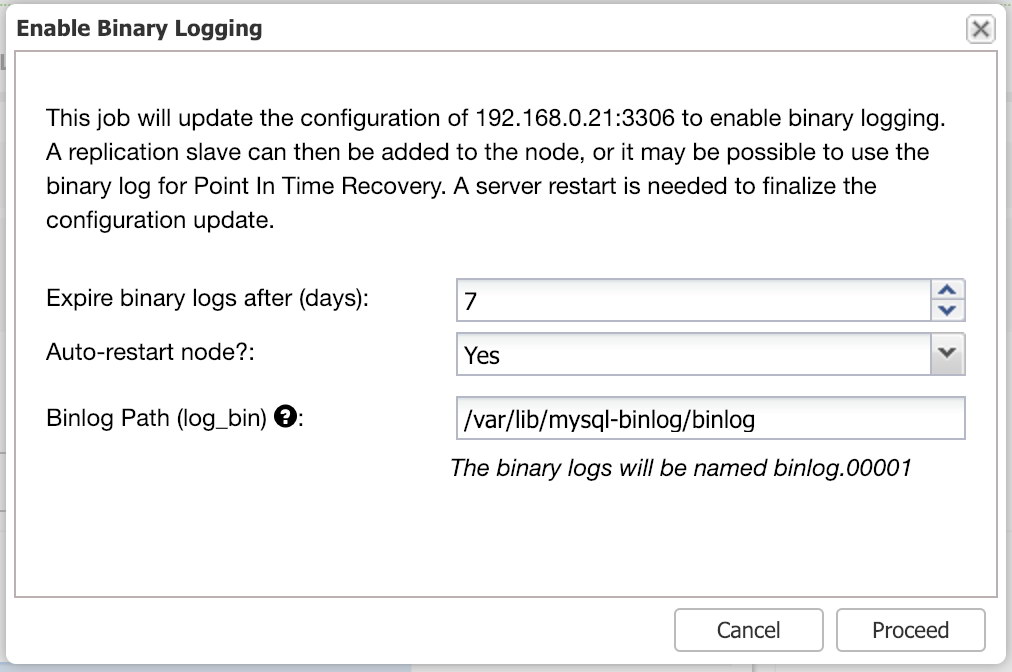
Otherwise, you can perform this operation without downtime by using Manage -> Upgrade -> Rolling Restart (or manually restart one node at a time).
-
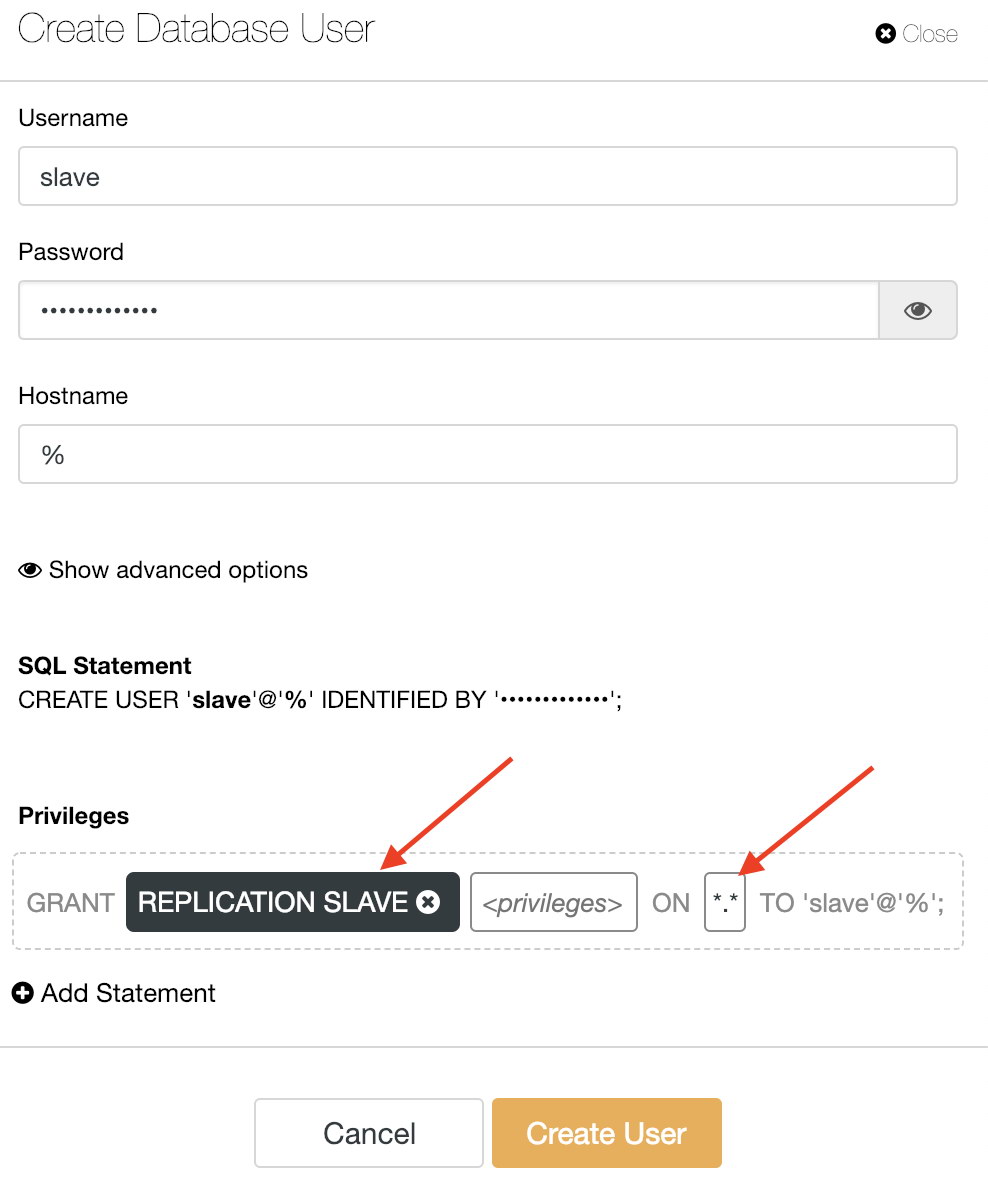
Create a replication user on the production cluster by using Manage -> Schemas and Users -> Users -> Create New User:
-
Then, pick one node to replicate to the master node in production cluster and setup the replication link:
mysql> CHANGE MASTER master_host = 'prod-mysql1', master_user = 'slave', master_password = 'slavepassw0rd', master_auto_position = 1; mysql> START SLAVE; -
Verify if the replication is running:
mysql> SHOW SLAVE STATUSGMake sure Slave_IO_Thread and Slave_SQL_thread are reporting ‘Yes’. The office’s cluster should start to catch up with the master node if it’s lagging behind.
That’s it for now folks!


