blog
How to Set Up SQL Server Always On Availability Groups on Linux

High availability is a critical component of database operations – It protects companies from lost revenue when access to their data resources and critical business applications is disrupted. There are various high availability options available for SQL Server.
For this blog, we will demonstrate how to deploy Always On availability groups (AG) for Microsoft SQL Server on Linux.
Steps for Installing Always On Availability Groups
So, what is Always On availability groups? Always On is a high availability and disaster recovery solution that capitalizes on the availability of a set of user databases. An availability group supports a failover environment for a discrete set of user databases, known as availability databases, that failover together. An availability group supports a set of read-write primary databases and one to eight sets of corresponding secondary databases.
Let’s start with understanding the architecture we will be using. The virtual machines’ details are as follows:
| Hostname | IP Address | OS | SQL Server Version | Role |
|---|---|---|---|---|
| mssql1 | 10.10.0.51 | Ubuntu 20.04 | 2019 | Primary |
| mssql2 | 10.10.0.52 | Ubuntu 20.04 | 2019 | Replica |
| mssql 3 | 10.10.0.53 | Ubuntu 20.04 | 2019 | Replica |
Update the Hosts File
The first prerequisite is updating the hosts file in all the virtual machines with the hostnames and IP Address of all servers that will participate in the availability group.
To update /etc/hosts, the following script lets you edit:
sudo vi /etc/hosts
The following example shows /etc/hosts on mssql1 after adding mssql2 and mssql3:

Enable Always On Availability Groups
To enable Always On Availability Groups on each node, run the following script and then restart SQL Server.
sudo /opt/mssql/bin/mssql-conf set hadr.hadrenabled  1

sudo systemctl restart mssql-server
Create Authentication Certificate on the Primary Node
Microsoft SQL Server on Linux uses certificates to authenticate communication between the mirroring endpoints. Therefore, we need to create a certificate and a master key, then back up the certificate and secure it with a password. Connect to the primary Microsoft SQL Server instance and run the following T-SQL script:
CREATE MASTER KEY ENCRYPTION BY PASSWORD = '7vy@d$7d';

CREATE CERTIFICATE dbm_certificate WITH SUBJECT = 'dbm';

BACKUP CERTIFICATE dbm_certificate

   TO FILE = '/var/opt/mssql/data/dbm_certificate.cer'

   WITH PRIVATE KEY (

           FILE = '/var/opt/mssql/data/dbm_certificate.pvk',

           ENCRYPTION BY PASSWORD = '7vy@d$7d'

       );
At this point, your primary node has a certificate at /var/opt/mssql/data/dbm_certificate.cer and a private key at var/opt/mssql/data/dbm_certificate.pvk. Copy these two files to the same location on the replica servers. Use the mssql user, or give permission to the mssql user to access these files.
For example, the following command copies the files to the mssql2 node on the source server. Replace the mssql2 values with the hostnames of the SQL Server instances that will host the replicas:
cd /var/opt/mssql/data

scp dbm_certificate.* root@mssql2:/var/opt/mssql/data/
On each target node, give permission to the mssql user to access the certificate:
cd /var/opt/mssql/data

chown mssql:mssql dbm_certificate.*
Note: Ensure that the master key and certificate’s location are the same on all replicas.
Create Authentication Certificate on the Replica Node
Now that we have the authentication certificate and the master key from the primary node, we need to create a master key and a certificate from the same. Run the following T-SQL script on all replica nodes:
CREATE MASTER KEY ENCRYPTION BY PASSWORD = 'Z9Y<)2jJ';

CREATE CERTIFICATE dbm_certificate

    FROM FILE = '/var/opt/mssql/data/dbm_certificate.cer'

    WITH PRIVATE KEY (

    FILE = '/var/opt/mssql/data/dbm_certificate.pvk',

    DECRYPTION BY PASSWORD = '7vy@d$7d'

            );
Note: The decryption password is the same password that you used to create the .pvk file in the previous step.
Create Mirroring Endpoints on all Replicas
To communicate between the server instances that are host availability replicas, Microsoft SQL Server uses mirroring endpoints.
A mirroring endpoint uses the TCP/IP protocol to transmit messages from primary and secondary replicas and listens on a unique TCP port number.
Run the following script to create an endpoint on Primary and Secondary nodes:
CREATE ENDPOINT [AG_mssql1]

    AS TCP (LISTENER_PORT = 5022)

    FOR DATABASE_MIRRORING (

    ROLE = ALL,

    AUTHENTICATION = CERTIFICATE dbm_certificate,

ENCRYPTION = REQUIRED ALGORITHM AES

);

ALTER ENDPOINT [AG_mssql1] STATE = STARTED;
Note: The TCP port on the firewall must be open for the listener port.
Create Availability Group
Once the mirroring points have been created, you can create an availability group. There are two ways you can create an availability group – the Microsoft SQL Server Management Studio Availability Group Wizard or using T-SQL. In our case, we are going to use a T-SQL script. The Availability Group requires at least three replicas to ensure high availability with automatic failover. This T-SQL script has the following variables that we need first to understand:
-
CLUSTER_TYPE = EXTERNAL – This specifies that an external cluster entity manages the Availability Group. Pacemaker is an example of an external cluster entity.
-
FAILOVER_MODE = EXTERNAL – This specifies that the replica interacts with an external cluster manager, like Pacemaker. This variable is determined by cluster_type.
-
SEEDING_MODE = AUTOMATIC – This specifies whether Microsoft SQL Server will automatically create the database on each secondary node.
Run the following T-SQL on the SQL Server instance that hosts the primary replica:
CREATE AVAILABILITY GROUP [sql_ag1]

     WITH (DB_FAILOVER = ON, CLUSTER_TYPE = EXTERNAL)

     FOR REPLICA ON

         N''

        WITH (

         ENDPOINT_URL = N'tcp://:<5022>',

         AVAILABILITY_MODE = SYNCHRONOUS_COMMIT,

         FAILOVER_MODE = EXTERNAL,

         SEEDING_MODE = AUTOMATIC

         ),

         N''

       WITH (

         ENDPOINT_URL = N'tcp://:<5022>',

         AVAILABILITY_MODE = SYNCHRONOUS_COMMIT,

         FAILOVER_MODE = EXTERNAL,

         SEEDING_MODE = AUTOMATIC

         ),

     N''

         WITH(

         ENDPOINT_URL = N'tcp://:<5022>',

         AVAILABILITY_MODE = SYNCHRONOUS_COMMIT,

         FAILOVER_MODE = EXTERNAL,

         SEEDING_MODE = AUTOMATIC

         );


ALTER AVAILABILITY GROUP [sql_ag1] GRANT CREATE ANY DATABASE;
The script creates an Availability Group with three synchronous replicas.
Setting up Always On Availability Groups with ClusterControl
The steps above to set up Always On may seem tedious and susceptible to human error. The good news is that ClusterControl has a fail-safe solution available in ClusterControl V2. The first step is updating the /etc/hosts in the ClusterControl node and the other nodes in the cluster.
The below example shows an updated /etc/hosts on cc-focal (ClusterControl node):

Once the hosts file is updated, log into ClusterControl V2, and on the landing page, click on “Create Service” as shown below:

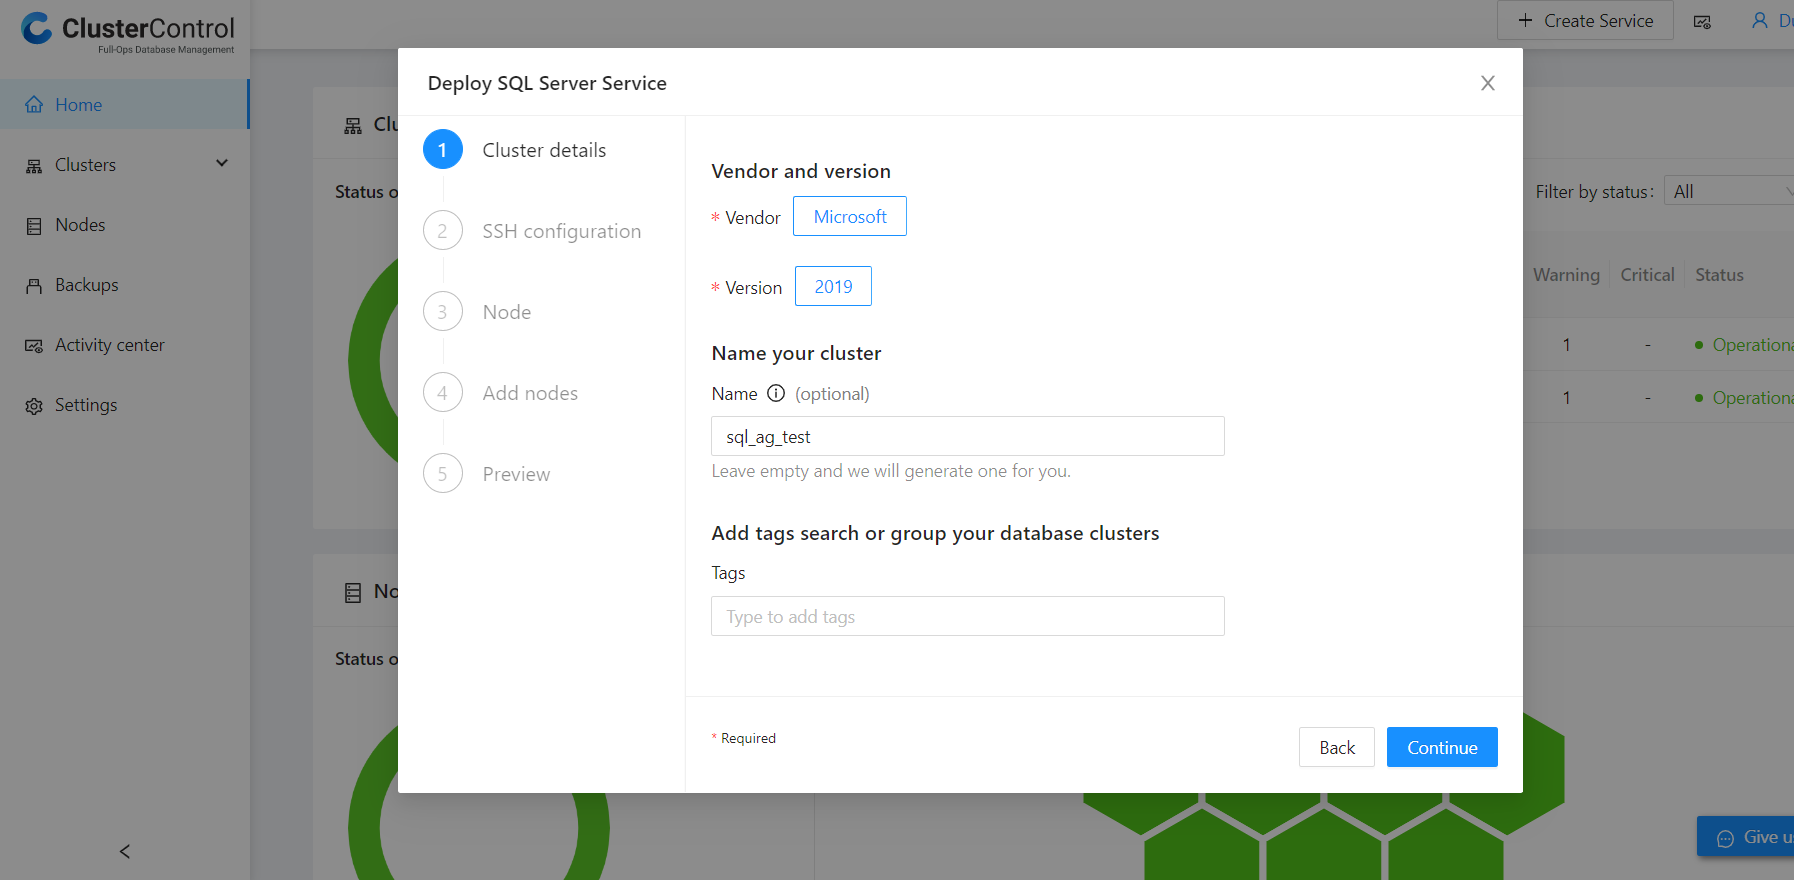
On the service launch wizard page, click on “Create a Database Cluster,” which directs us to the deploy service page, and click on the “SQL Server” option. On the deploy SQL Server Service page, the Microsoft SQL Server version is 2019 by default. You can either name your cluster or let ClusterControl generate one for you. In this instance, the cluster name is “sql_ag_test,” as shown below:
Next, is setting up SSH Configuration. We recommend using passwordless sudo for the SSH user. In our scenario, “vagrant” user will be used as shown below:
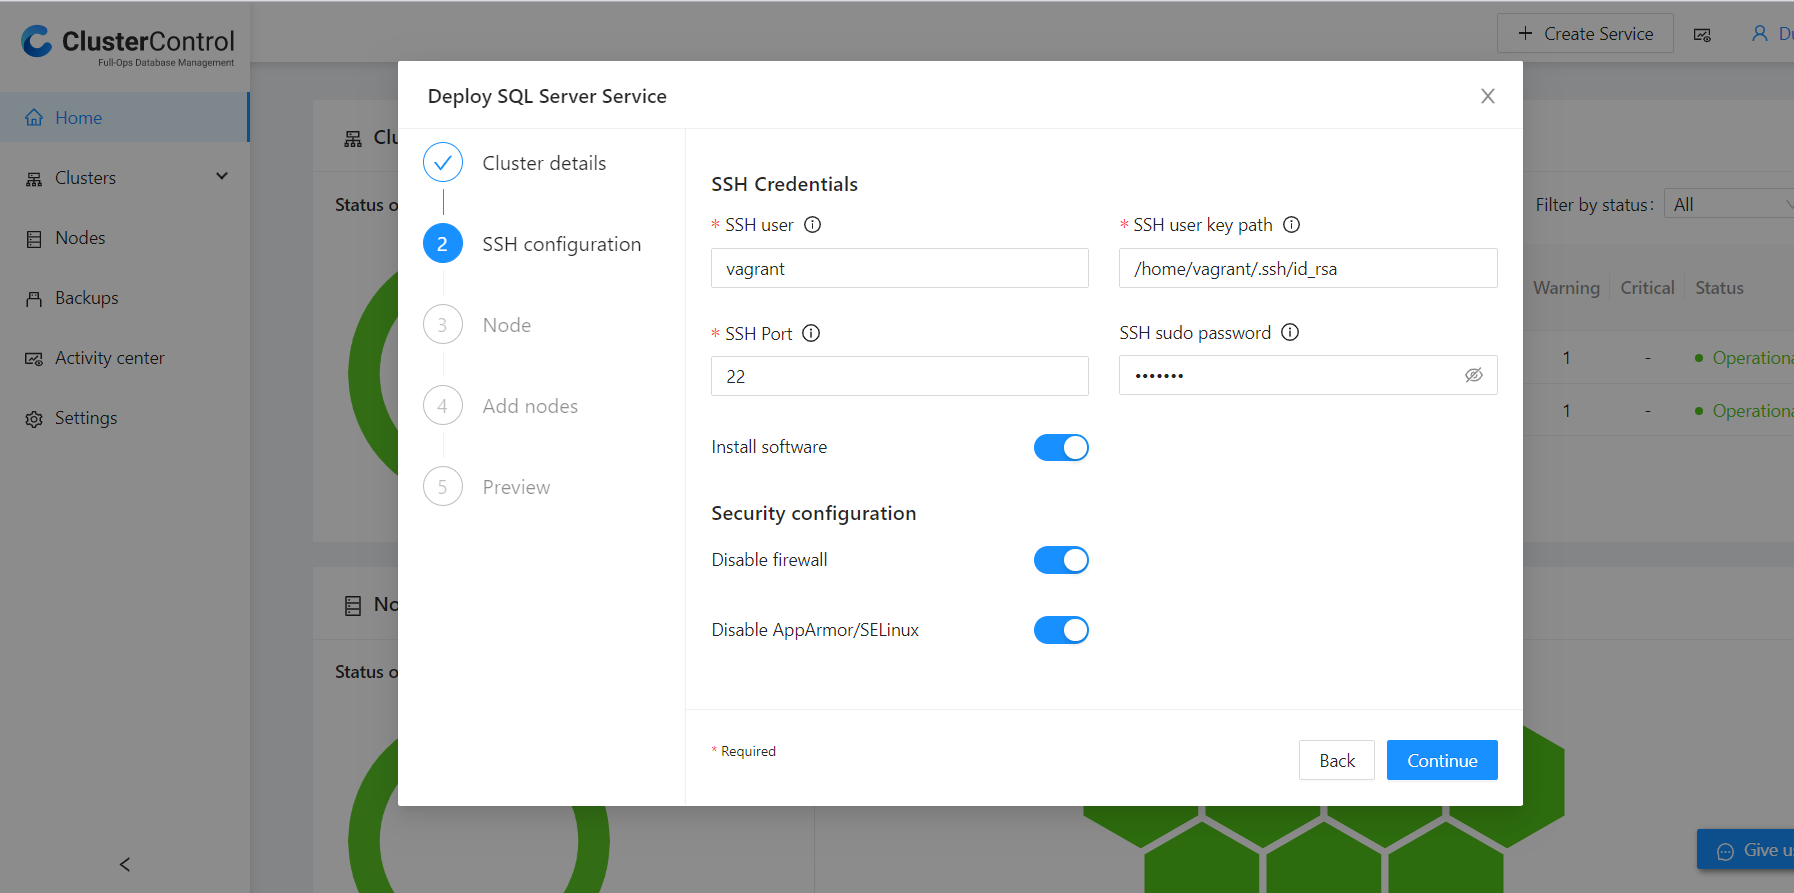
Note: Depending on whether your environment is existing (standalone servers) or new, will dictate the position of the “install software” button.
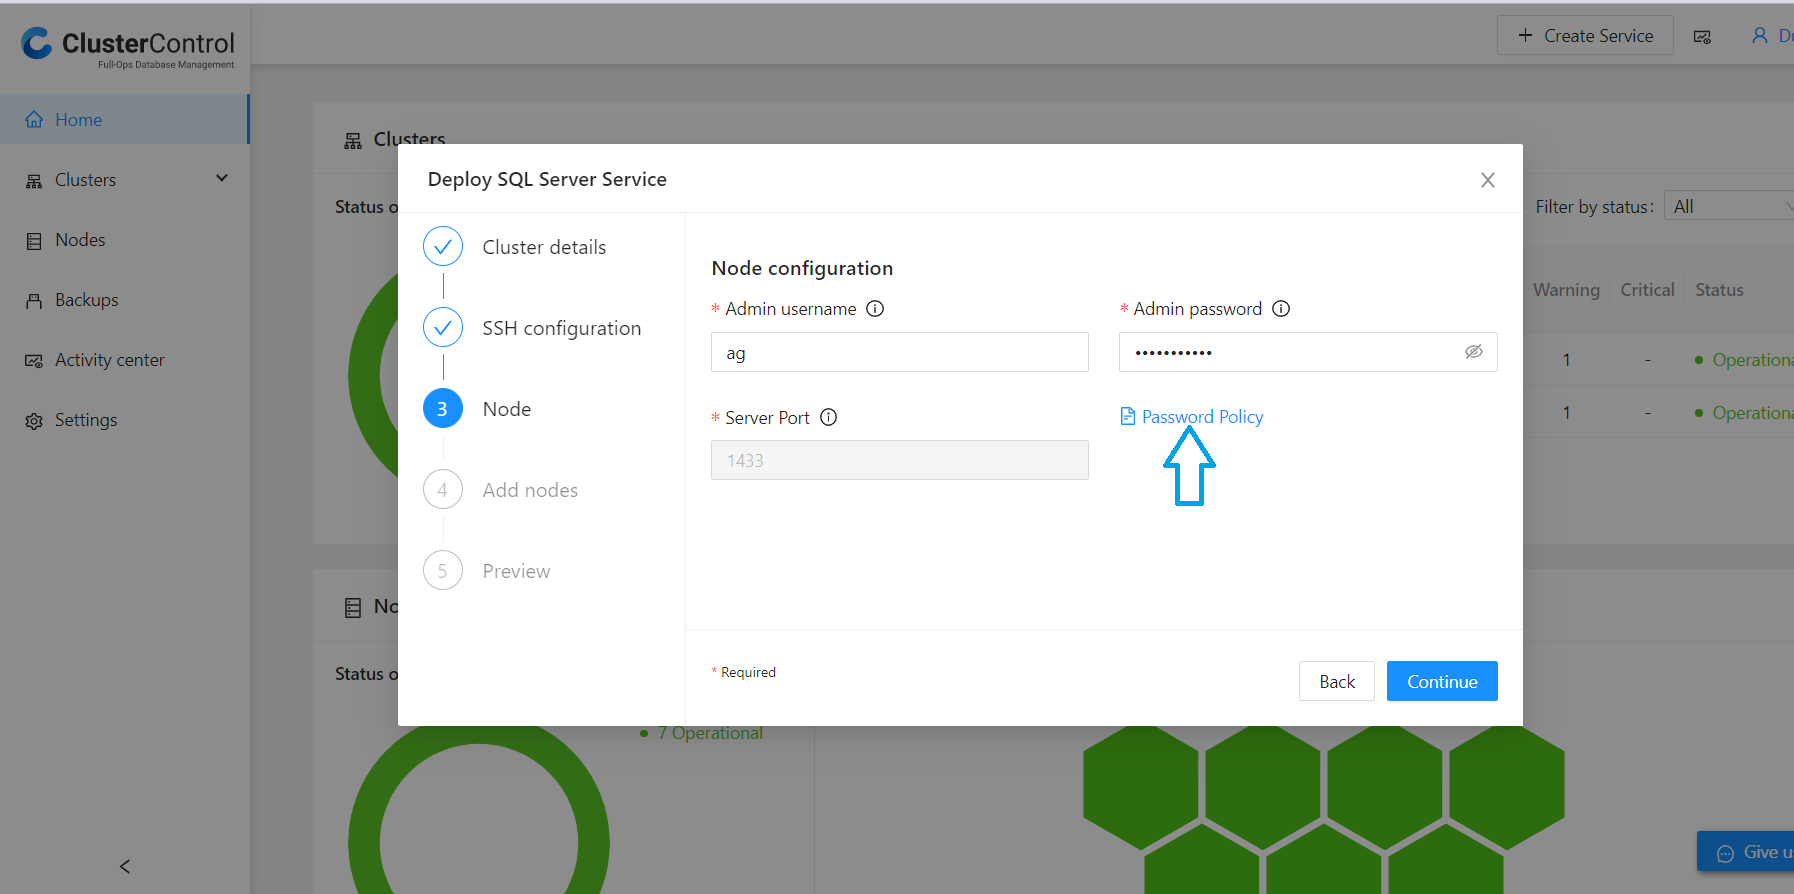
On the “Node Configuration” page, you can create an Admin Username and Password as per the password policy link on the same page. Below is an example:
Finally, we get to add the nodes, and unlike how we usually add nodes in ClusterControl using the IP_address, we will use the hostnames of the nodes as shown below:
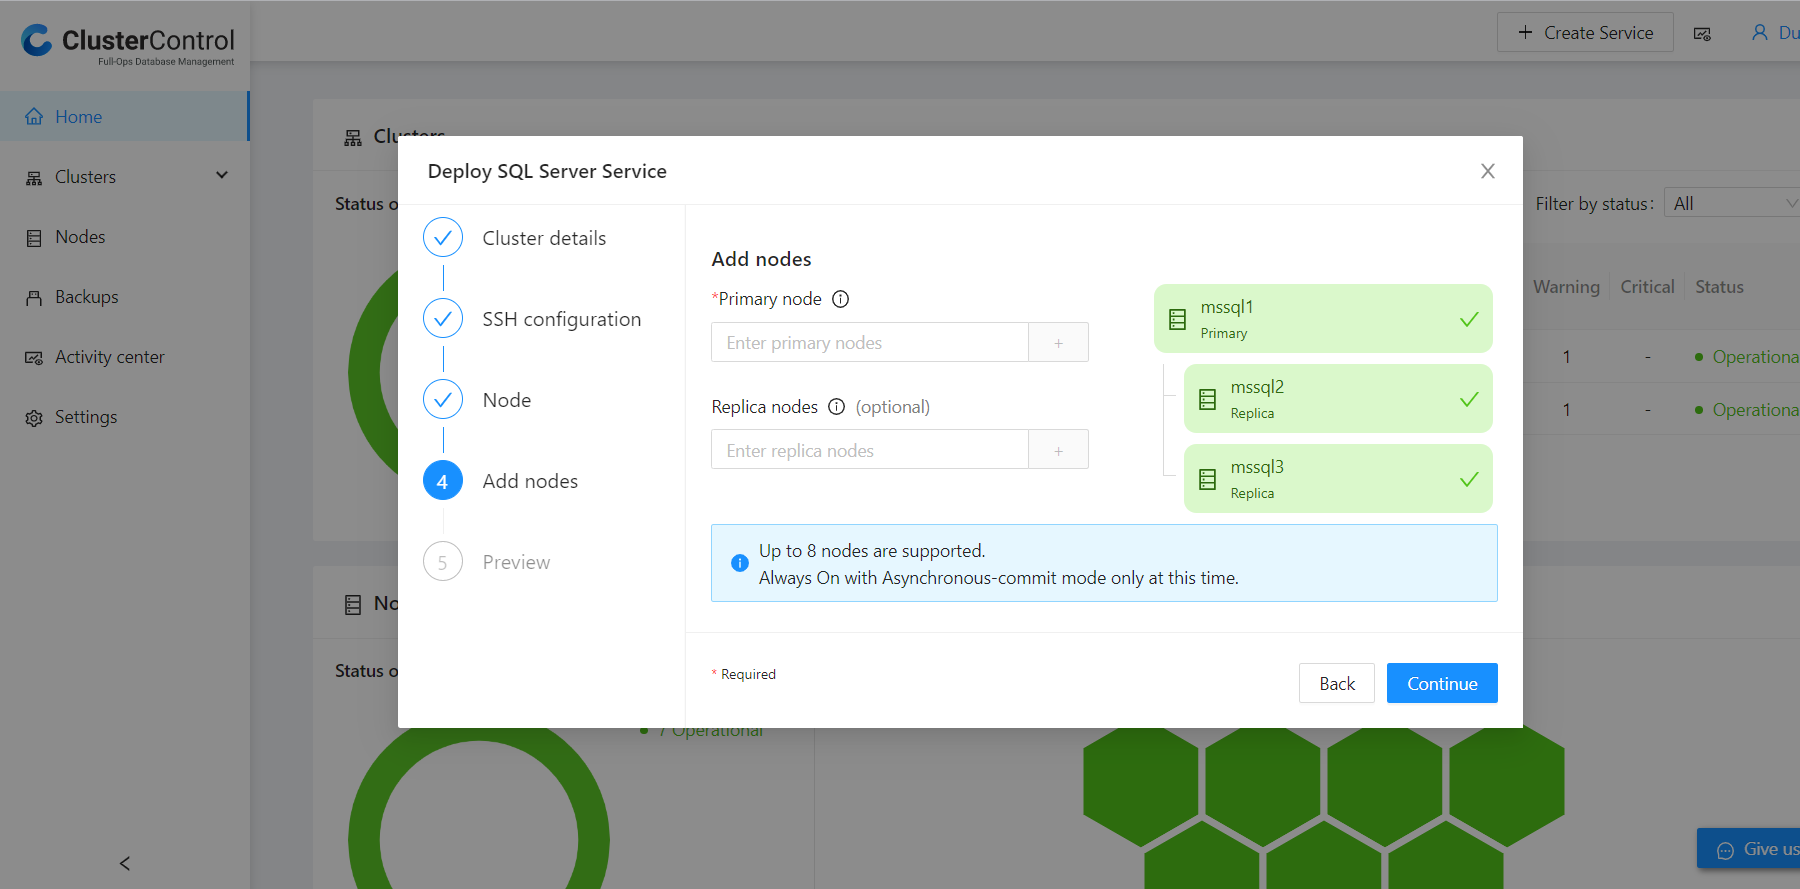
Once done, it directs to the preview page. After confirmation that the configuration is correct, the deployment process starts. You can follow up on the process in the activity list. This job log will show the action being executed and its status (success/fail). ClusterControl will install Microsoft SQL Server 2019, enable Always On, create an authentication certificate and mirroring endpoints on all nodes, and create an availability group.
Adding a Database to the Availability Group
Before adding the database to the availability group, the database must pass the following prerequisites:
-
The database must be in the FULL recovery mode.
-
The database must have a FULL log backup.
On the Primary Microsoft SQL instance, run this T-SQL script to create and backup a database called test1:
CREATE DATABASE [test1];

ALTER DATABASE [test1] SET RECOVERY FULL;

BACKUP DATABASE [test1]

   TO DISK = N'/var/opt/mssql/data/test1.bak';
On the same instance run the following T-SQL script to add test1 to the availability group s9s_ag1 (the AG name is in the job log):
ALTER AVAILABILITY GROUP [s9s_ag1] ADD DATABASE [test1];Run the following query on each secondary SQL Server replica, to see if the test1 database was created and is synchronized:
SELECT * FROM sys.databases WHERE name = 'test1';

GO

SELECT DB_NAME(database_id) AS 'database', synchronization_state_desc FROM sys.dm_hadr_database_replica_states;
Wrapping Up
SQL Server Always On availability groups is a solution for high availability and disaster recovery, with failover to a secondary database. With Always On, there’s no need to manually replicate data between databases and worry about downtime, which makes it an excellent solution for achieving high availability. Fortunately, it’s fairly easy to install Always On, but if you still have concerns about setting up and managing availability groups, don’t forget that ClusterControl offers support for AGs, and you can evaluate ClusterControl for free for 30 days.
If you’re working with SQL Server yet want to see what other high availability strategies are available, check out this overview of High Availability Options for SQL Server Linux.
However you choose to implement high availability strategies, be sure to follow us on Twitter or LinkedIn, and subscribe to our newsletter for the latest news and best practices for managing your open-source-based database infrastructure.