blog
How to Deploy Teamcity with PostgreSQL for High Availability

TeamCity is a continuous integration and continuous delivery server built in Java. It’s available as a cloud service and on-premises. As you can imagine, continuous integration and delivery tools are crucial to software development, and their availability must be unaffected. Fortunately, TeamCity can be deployed in a Highly Available mode.
This blog post will cover preparing and deploying a highly available environment for TeamCity.
The Environment
TeamCity consists of several elements. There is a Java application and a database that backs it up. It also uses agents that are communicating with the primary TeamCity instance. The highly available deployment consists of several TeamCity instances, where one is acting as the primary, and the others secondary. Those instances share access to the same database and the data directory. Helpful schema is available on the TeamCity documentation page, as shown below:
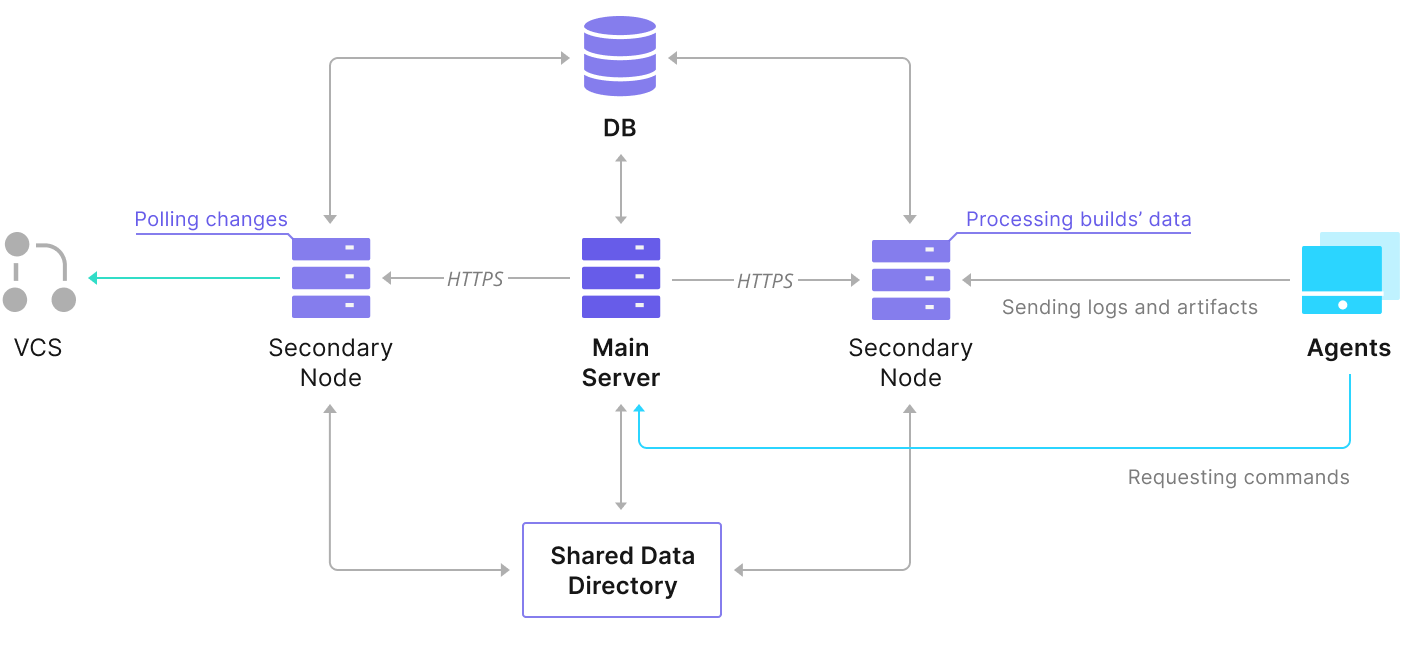
As we can see, there are two shared elements — the data directory and the database. We must ensure that those are also highly available. There are different options that you can use to build a shared mount; however, we will use GlusterFS. As for the database, we will use one of the supported relational database management systems — PostgreSQL, and we’ll use ClusterControl to build a high availability stack based around it.
How to Configure GlusterFS
Let’s start with the basics. We want to configure hostnames and /etc/hosts on our TeamCity nodes, where we will also be deploying GlusterFS. To do that, we need to setup the repository for the latest packages of GlusterFS on all of them:
sudo add-apt-repository ppa:gluster/glusterfs-7

sudo apt update
Then we can install the GlusterFS on all of our TeamCity nodes:
sudo apt install glusterfs-server

sudo systemctl enable glusterd.service

root@node1:~# sudo systemctl start glusterd.service

root@node1:~# sudo systemctl status glusterd.service

● glusterd.service - GlusterFS, a clustered file-system server

     Loaded: loaded (/lib/systemd/system/glusterd.service; enabled; vendor preset: enabled)

     Active: active (running) since Mon 2022-02-21 11:42:35 UTC; 7s ago

       Docs: man:glusterd(8)

    Process: 48918 ExecStart=/usr/sbin/glusterd -p /var/run/glusterd.pid --log-level $LOG_LEVEL $GLUSTERD_OPTIONS (code=exited, status=0/SUCCESS)

   Main PID: 48919 (glusterd)

      Tasks: 9 (limit: 4616)

     Memory: 4.8M

     CGroup: /system.slice/glusterd.service

             └─48919 /usr/sbin/glusterd -p /var/run/glusterd.pid --log-level INFO


Feb 21 11:42:34 node1 systemd[1]: Starting GlusterFS, a clustered file-system server...

Feb 21 11:42:35 node1 systemd[1]: Started GlusterFS, a clustered file-system server.
GlusterFS uses port 24007 for connectivity between the nodes; we must make sure that it is open and accessible by all of the nodes.
Once the connectivity is in place, we can create a GlusterFS cluster by running from one node:
root@node1:~# gluster peer probe node2

peer probe: success.

root@node1:~# gluster peer probe node3

peer probe: success.
Now, we can test what the status looks like:
root@node1:~# gluster peer status

Number of Peers: 2


Hostname: node2

Uuid: e0f6bc53-d47d-4db6-843b-9feea111a713

State: Peer in Cluster (Connected)


Hostname: node3

Uuid: c7d285d1-bcc8-477f-a3d7-7e56ff6bfd1a

State: Peer in Cluster (Connected)
It looks like all is good and the connectivity is in place.
Next, we should prepare a block device to be used by GlusterFS. This must be executed on all of the nodes. First, create a partition:
root@node1:~# echo 'type=83' | sudo sfdisk /dev/sdb

Checking that no-one is using this disk right now ... OK


Disk /dev/sdb: 30 GiB, 32212254720 bytes, 62914560 sectors

Disk model: VBOX HARDDISK

Units: sectors of 1 * 512 = 512 bytes

Sector size (logical/physical): 512 bytes / 512 bytes

I/O size (minimum/optimal): 512 bytes / 512 bytes


>>> Created a new DOS disklabel with disk identifier 0xbcf862ff.

/dev/sdb1: Created a new partition 1 of type 'Linux' and of size 30 GiB.

/dev/sdb2: Done.


New situation:

Disklabel type: dos

Disk identifier: 0xbcf862ff


Device     Boot Start      End  Sectors Size Id Type

/dev/sdb1        2048 62914559 62912512  30G 83 Linux


The partition table has been altered.

Calling ioctl() to re-read partition table.

Syncing disks.
Then, format that partition:
root@node1:~# mkfs.xfs -i size=512 /dev/sdb1

meta-data=/dev/sdb1              isize=512    agcount=4, agsize=1966016 blks

         =                       sectsz=512   attr=2, projid32bit=1

         =                       crc=1        finobt=1, sparse=1, rmapbt=0

         =                       reflink=1

data     =                       bsize=4096   blocks=7864064, imaxpct=25

         =                       sunit=0      swidth=0 blks

naming   =version 2              bsize=4096   ascii-ci=0, ftype=1

log      =internal log           bsize=4096   blocks=3839, version=2

         =                       sectsz=512   sunit=0 blks, lazy-count=1

realtime =none                   extsz=4096   blocks=0, rtextents=0
Finally, on all of the nodes, we need to create a directory that will be used to mount the partition and edit fstab to ensure it will be mounted at startup:
root@node1:~# mkdir -p /data/brick1

echo '/dev/sdb1 /data/brick1 xfs defaults 1 2' >> /etc/fstab
Let’s verify now that this works:
root@node1:~# mount -a && mount | grep brick

/dev/sdb1 on /data/brick1 type xfs (rw,relatime,attr2,inode64,logbufs=8,logbsize=32k,noquota)
Now we can use one of the nodes to create and start the GlusterFS volume:
root@node1:~# sudo gluster volume create teamcity replica 3 node1:/data/brick1 node2:/data/brick1 node3:/data/brick1 force

volume create: teamcity: success: please start the volume to access data

root@node1:~# sudo gluster volume start teamcity

volume start: teamcity: success
Please notice that we use the value of ‘3’ for the number of replicas. It means that every volume will exist in three copies. In our case, every brick, every /dev/sdb1 volume on all nodes will contain all data.
Once the volumes are started, we can verify their status:
root@node1:~# sudo gluster volume status

Status of volume: teamcity

Gluster process                             TCP Port  RDMA Port  Online  Pid

------------------------------------------------------------------------------

Brick node1:/data/brick1                    49152     0          Y       49139

Brick node2:/data/brick1                    49152     0          Y       49001

Brick node3:/data/brick1                    49152     0          Y       51733

Self-heal Daemon on localhost               N/A       N/A        Y       49160

Self-heal Daemon on node2                   N/A       N/A        Y       49022

Self-heal Daemon on node3                   N/A       N/A        Y       51754


Task Status of Volume teamcity

------------------------------------------------------------------------------

There are no active volume tasks
As you can see, everything looks ok. What’s important is that GlusterFS picked port 49152 for accessing that volume, and we must ensure that it’s reachable on all of the nodes where we will be mounting it.
The next step will be to install the GlusterFS client package. For this example, we need it installed on the same nodes as the GlusterFS server:
root@node1:~# sudo apt install glusterfs-client

Reading package lists... Done

Building dependency tree

Reading state information... Done

glusterfs-client is already the newest version (7.9-ubuntu1~focal1).

glusterfs-client set to manually installed.

0 upgraded, 0 newly installed, 0 to remove and 0 not upgraded.
Next, we need to create a directory on all nodes to be used as a shared data directory for TeamCity. This has to happen on all of the nodes:
root@node1:~# sudo mkdir /teamcity-storageLastly, mount the GlusterFS volume on all of the nodes:
root@node1:~# sudo mount -t glusterfs node1:teamcity /teamcity-storage/
root@node1:~# df | grep teamcity
node1:teamcity                     31440900    566768  30874132   2% /teamcity-storage
This completes the shared storage preparations.
Building a Highly Available PostgreSQL Cluster
Once the shared storage setup for TeamCity is complete, we can now build our highly available database infrastructure. TeamCity can use different databases; however, we will be using PostgreSQL in this blog. We will leverage ClusterControl to deploy and then manage the database environment.
TeamCity’s guide to building multi-node deployment is helpful, but it seems to leave out the high availability of everything other than TeamCity. TeamCity’s guide suggests an NFS or SMB server for data storage, which, on its own, does not have redundancy and will become a single point of failure. We have addressed this by using GlusterFS. They mention a shared database, as a single database node obviously does not provide high availability. We have to build a proper stack:
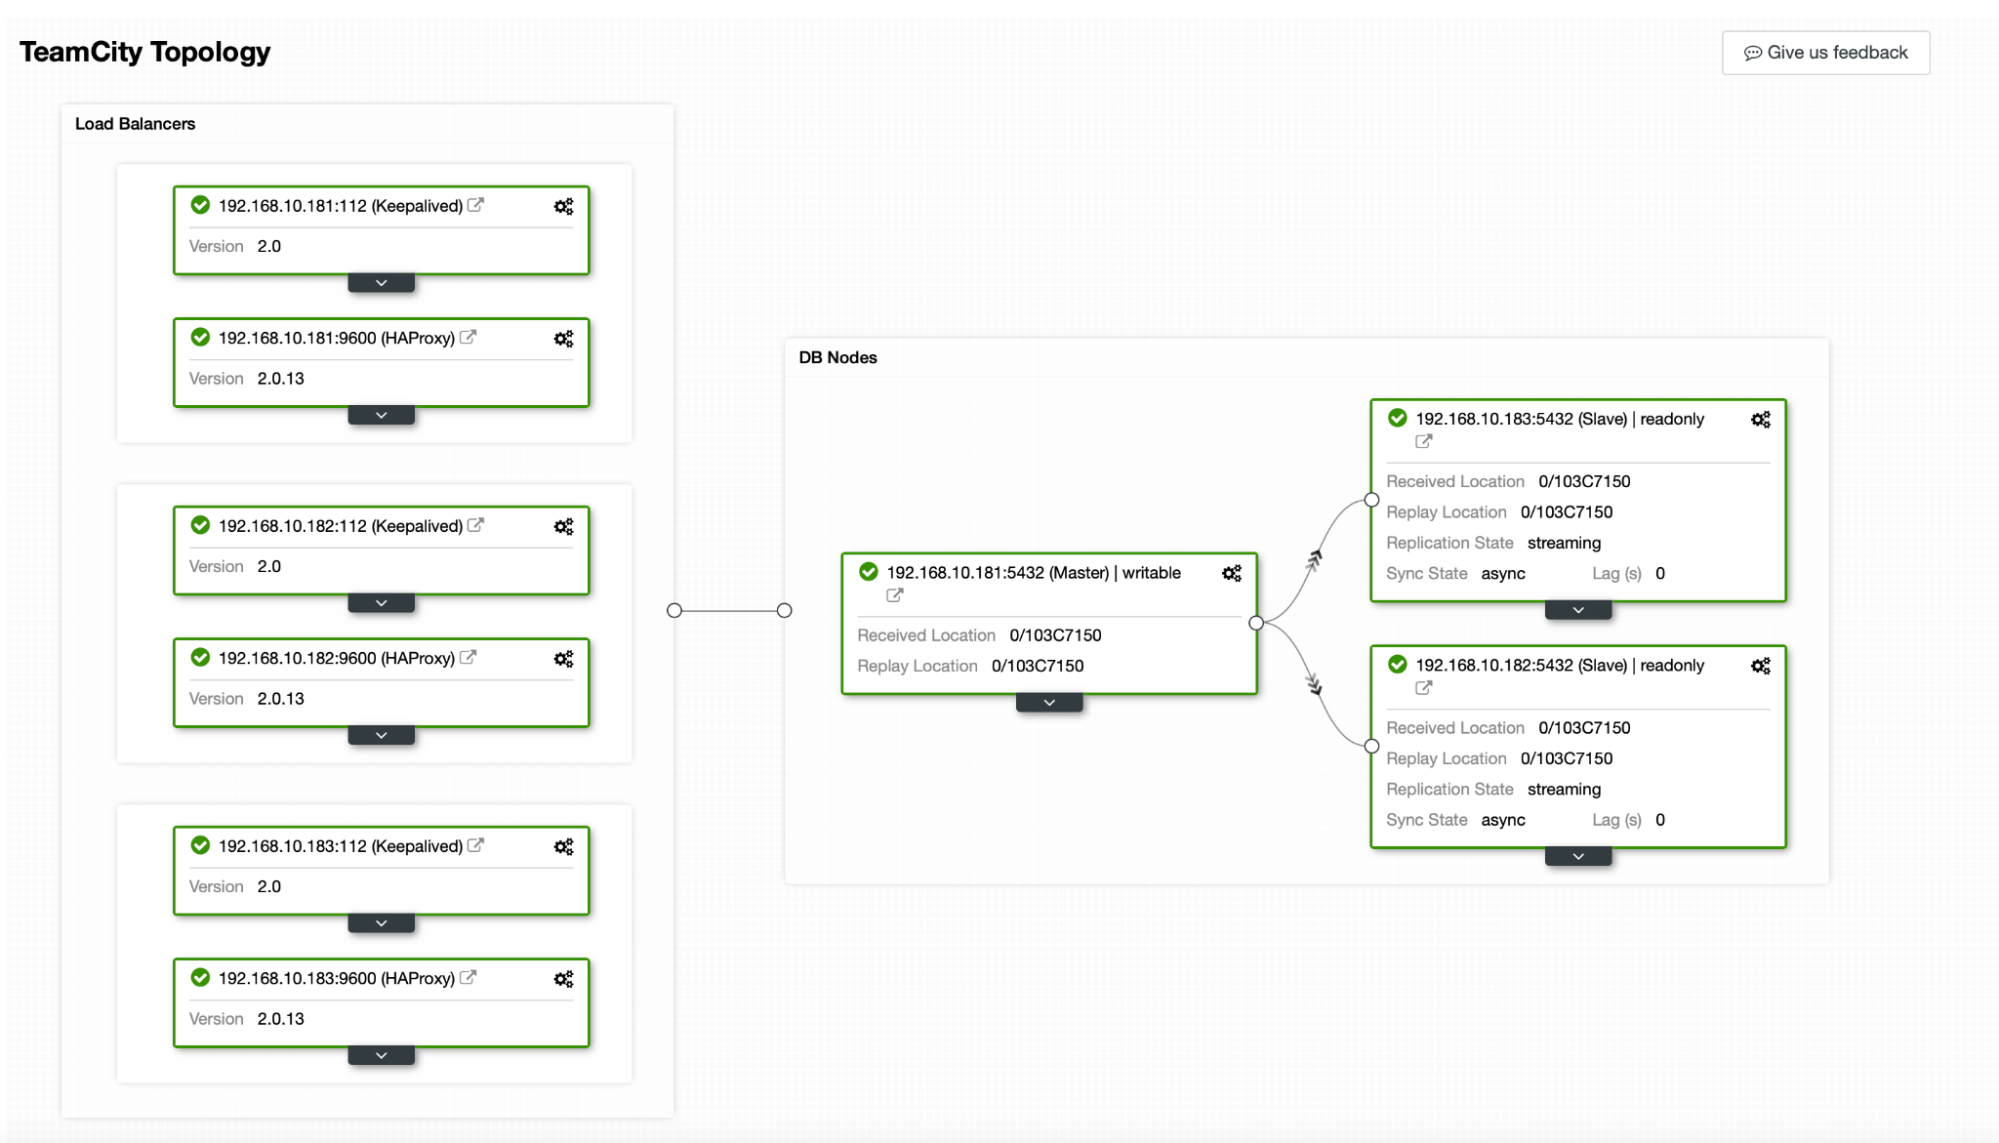
In our case. it will consist of three PostgreSQL nodes, one primary, and two replicas. We will use HAProxy as a load balancer and use Keepalived to manage Virtual IP to provide a single endpoint for the application to connect to. ClusterControl will handle failures by monitoring the replication topology and performing any required recovery as needed, such as restarting failed processes or failing over to one of the replicas if the primary node goes down.
To start, we will deploy the database nodes. Please keep in mind that ClusterControl requires SSH connectivity from the ClusterControl node to all of the nodes it manages.
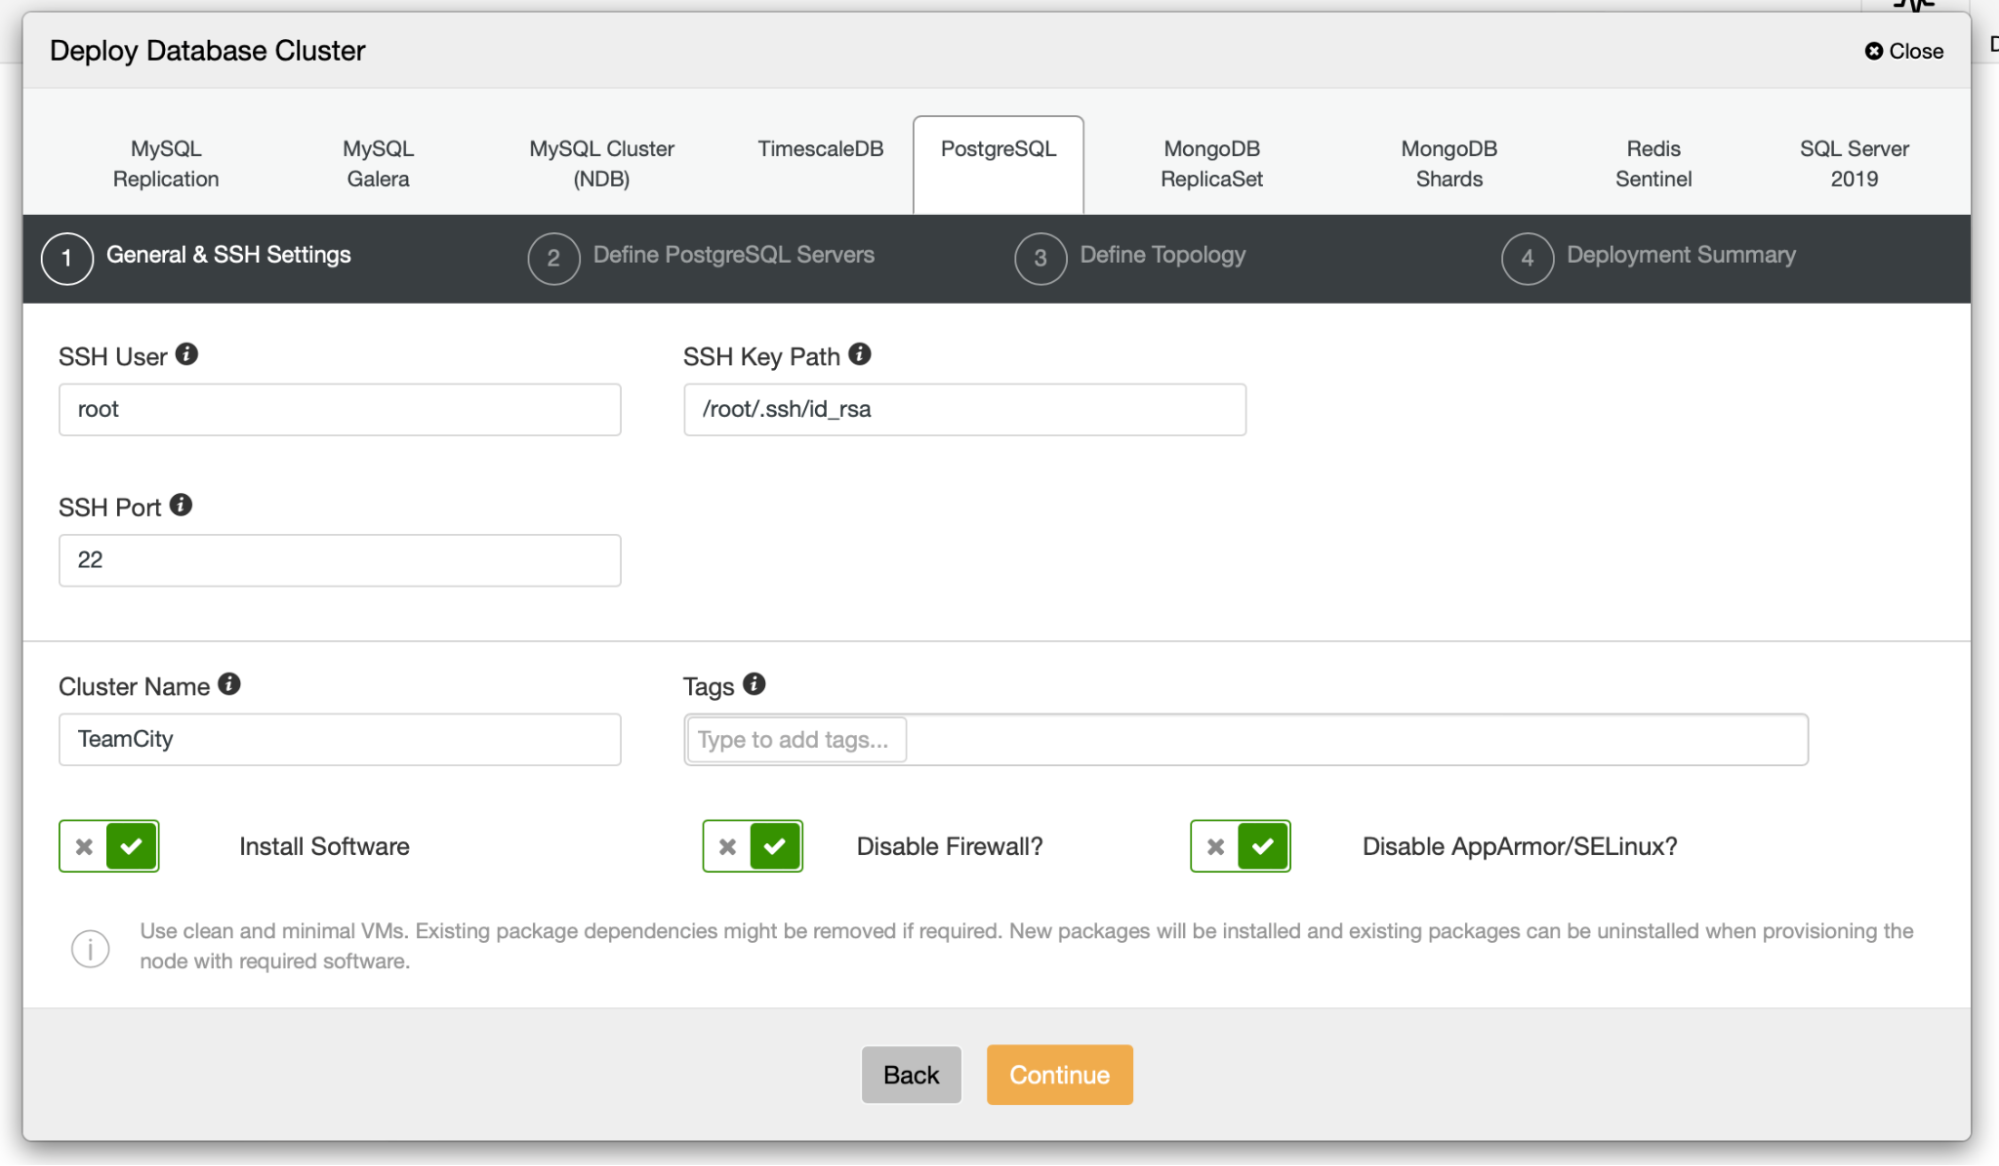
Then, we pick a user that we’ll use to connect to the database, its password, and the PostgreSQL version to deploy:

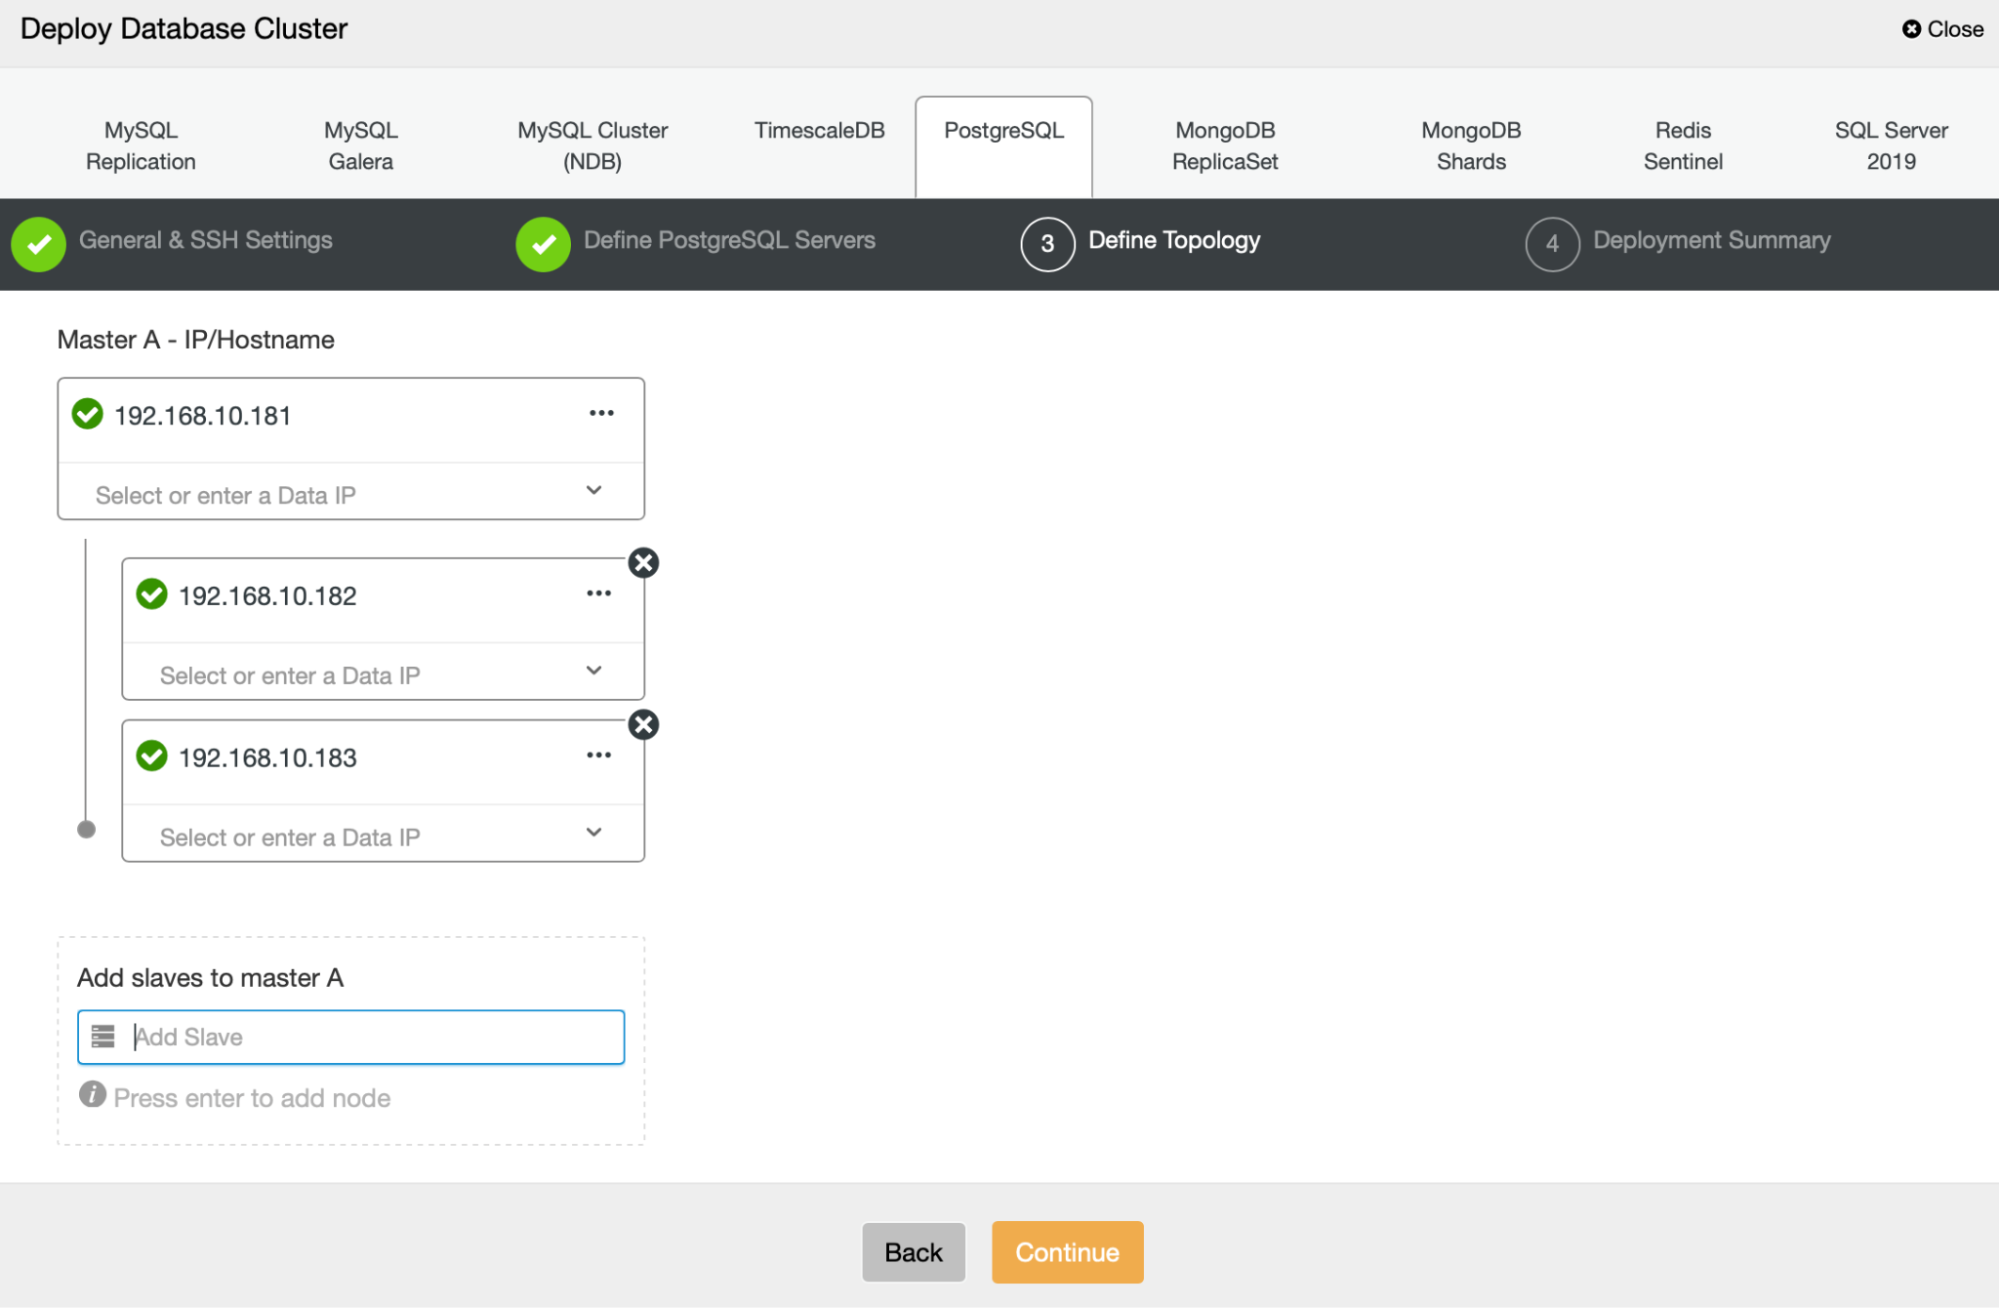
Next, we’re going to define which nodes to use for deploying PostgreSQL:
Finally, we can define if the nodes should use asynchronous or synchronous replication. The main difference between these two is that synchronous replication ensures that every transaction executed on the primary node will always be replicated on the replicas. However, synchronous replication also slows down the commit. We recommend enabling synchronous replication for the best durability, but you should verify later if the performance is acceptable.
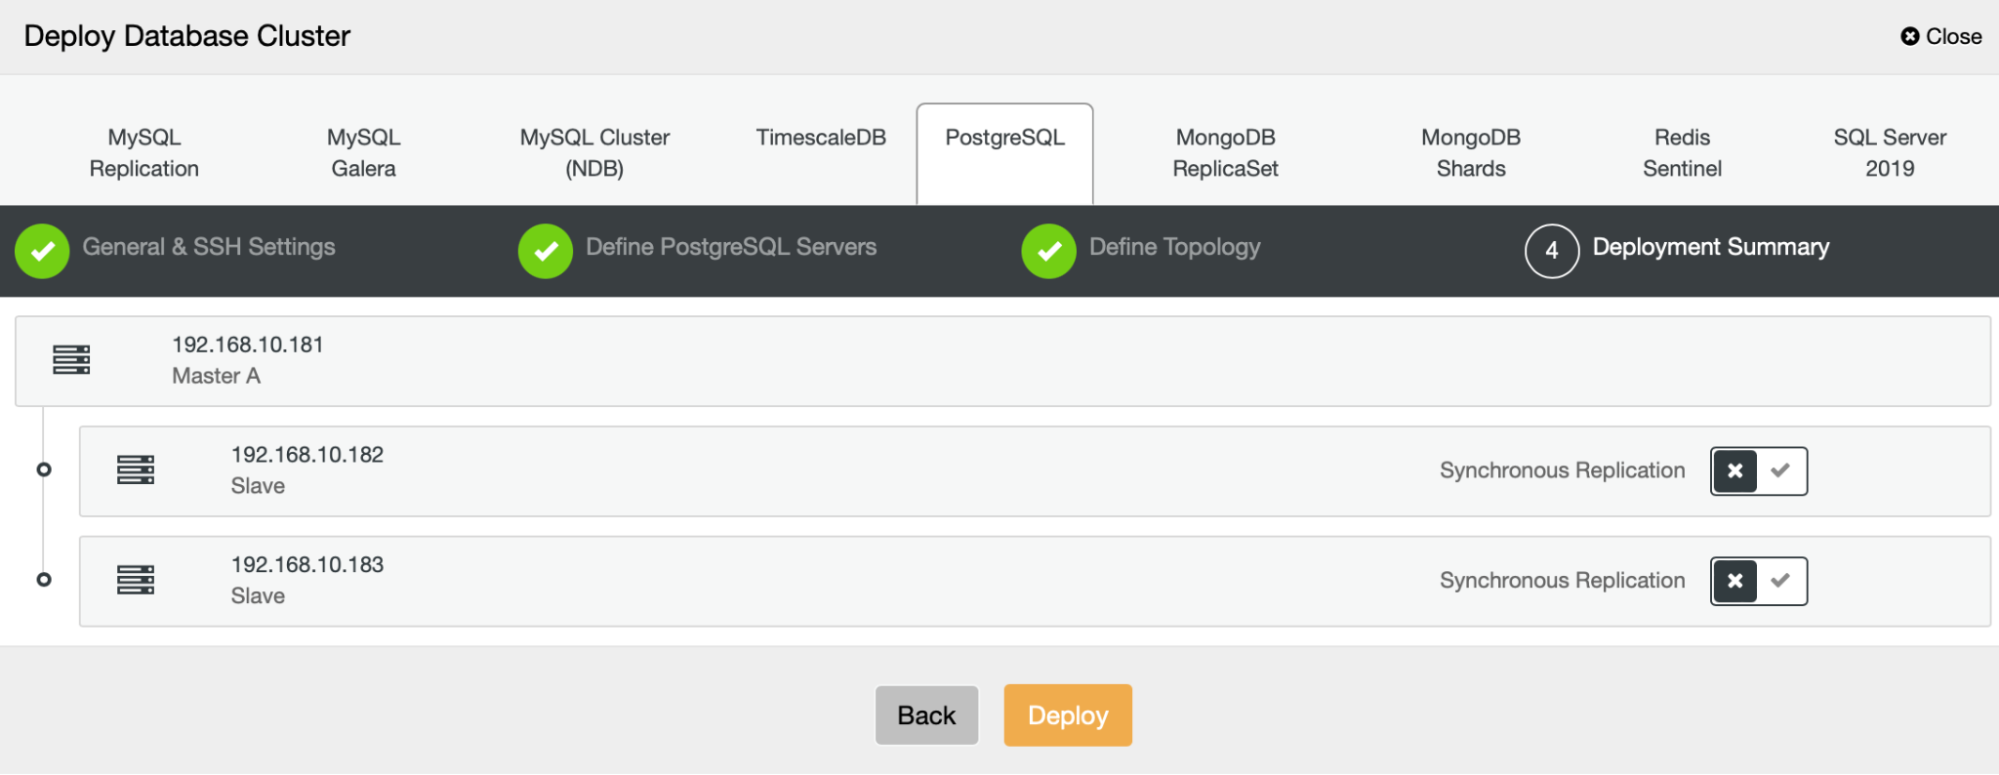
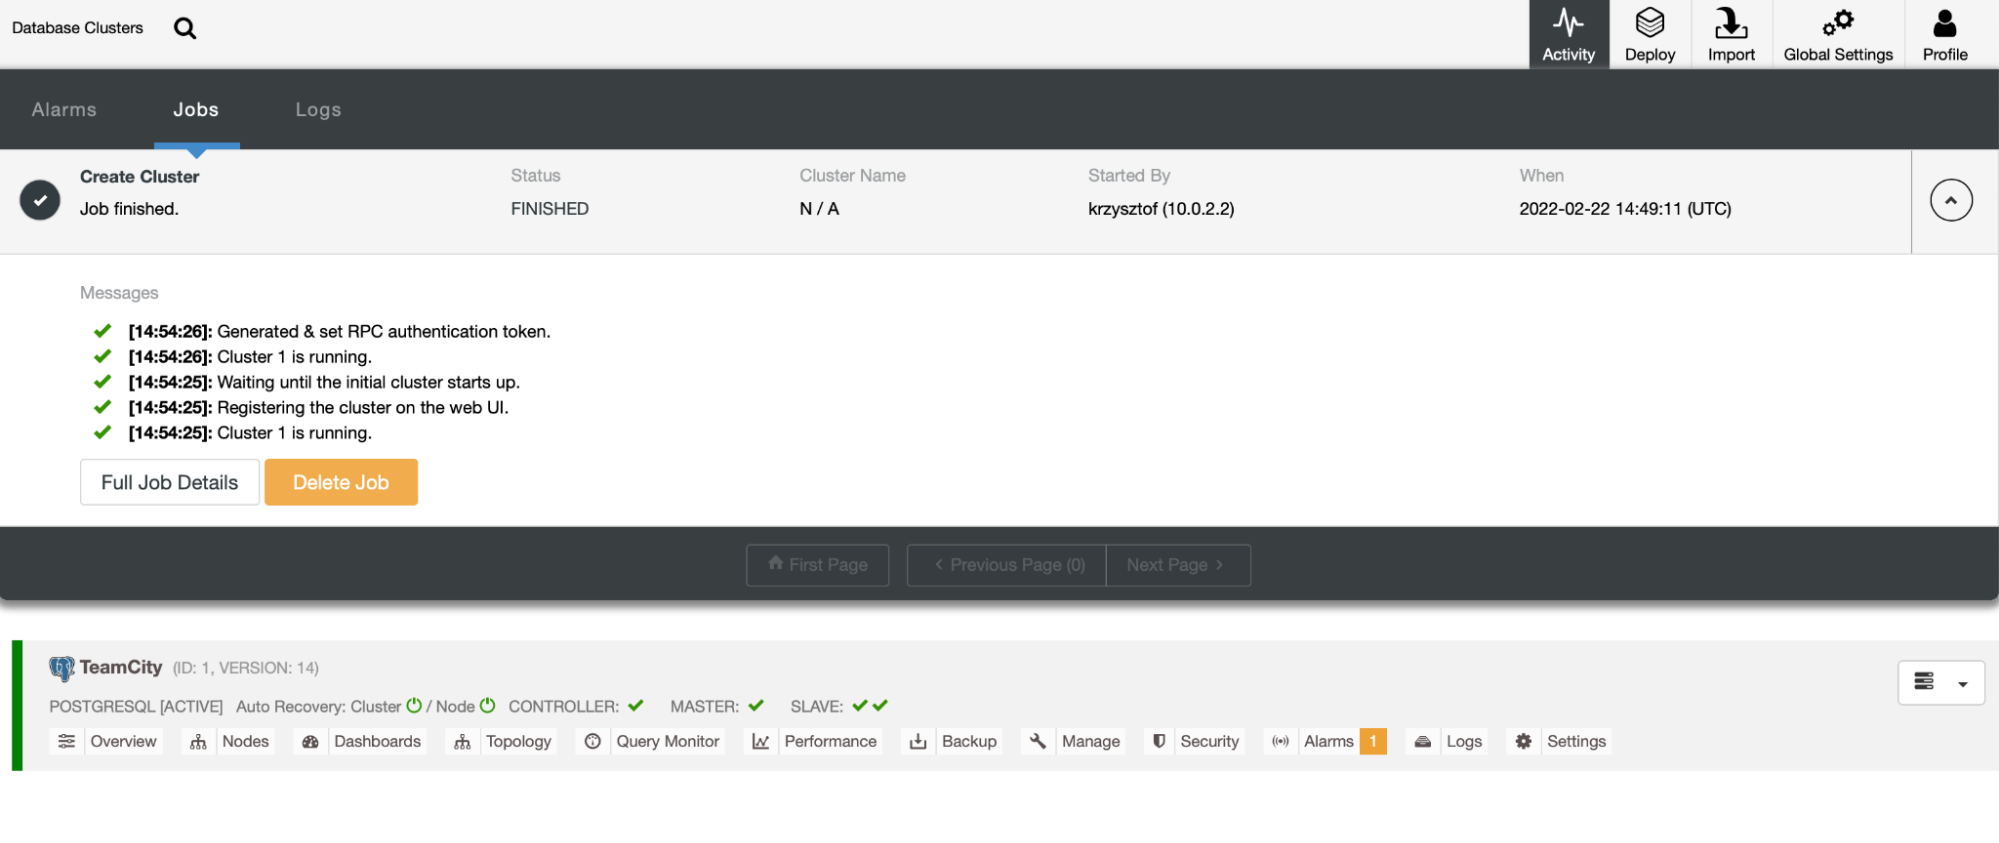
After we click “Deploy”, a deployment job will start. We can monitor its progress in the Activity tab in the ClusterControl UI. We should eventually see that the job has been completed and the cluster was successfully deployed.
Deploy HAProxy instances by going to Manage -> Load balancers. Select HAProxy as the load balancer and fill in the form. The most important choice is where you want to deploy HAProxy. We used a database node in this case, but in a production environment, you most likely want to separate load balancers from database instances. Next, select which PostgreSQL nodes to include in HAProxy. We want all of them.
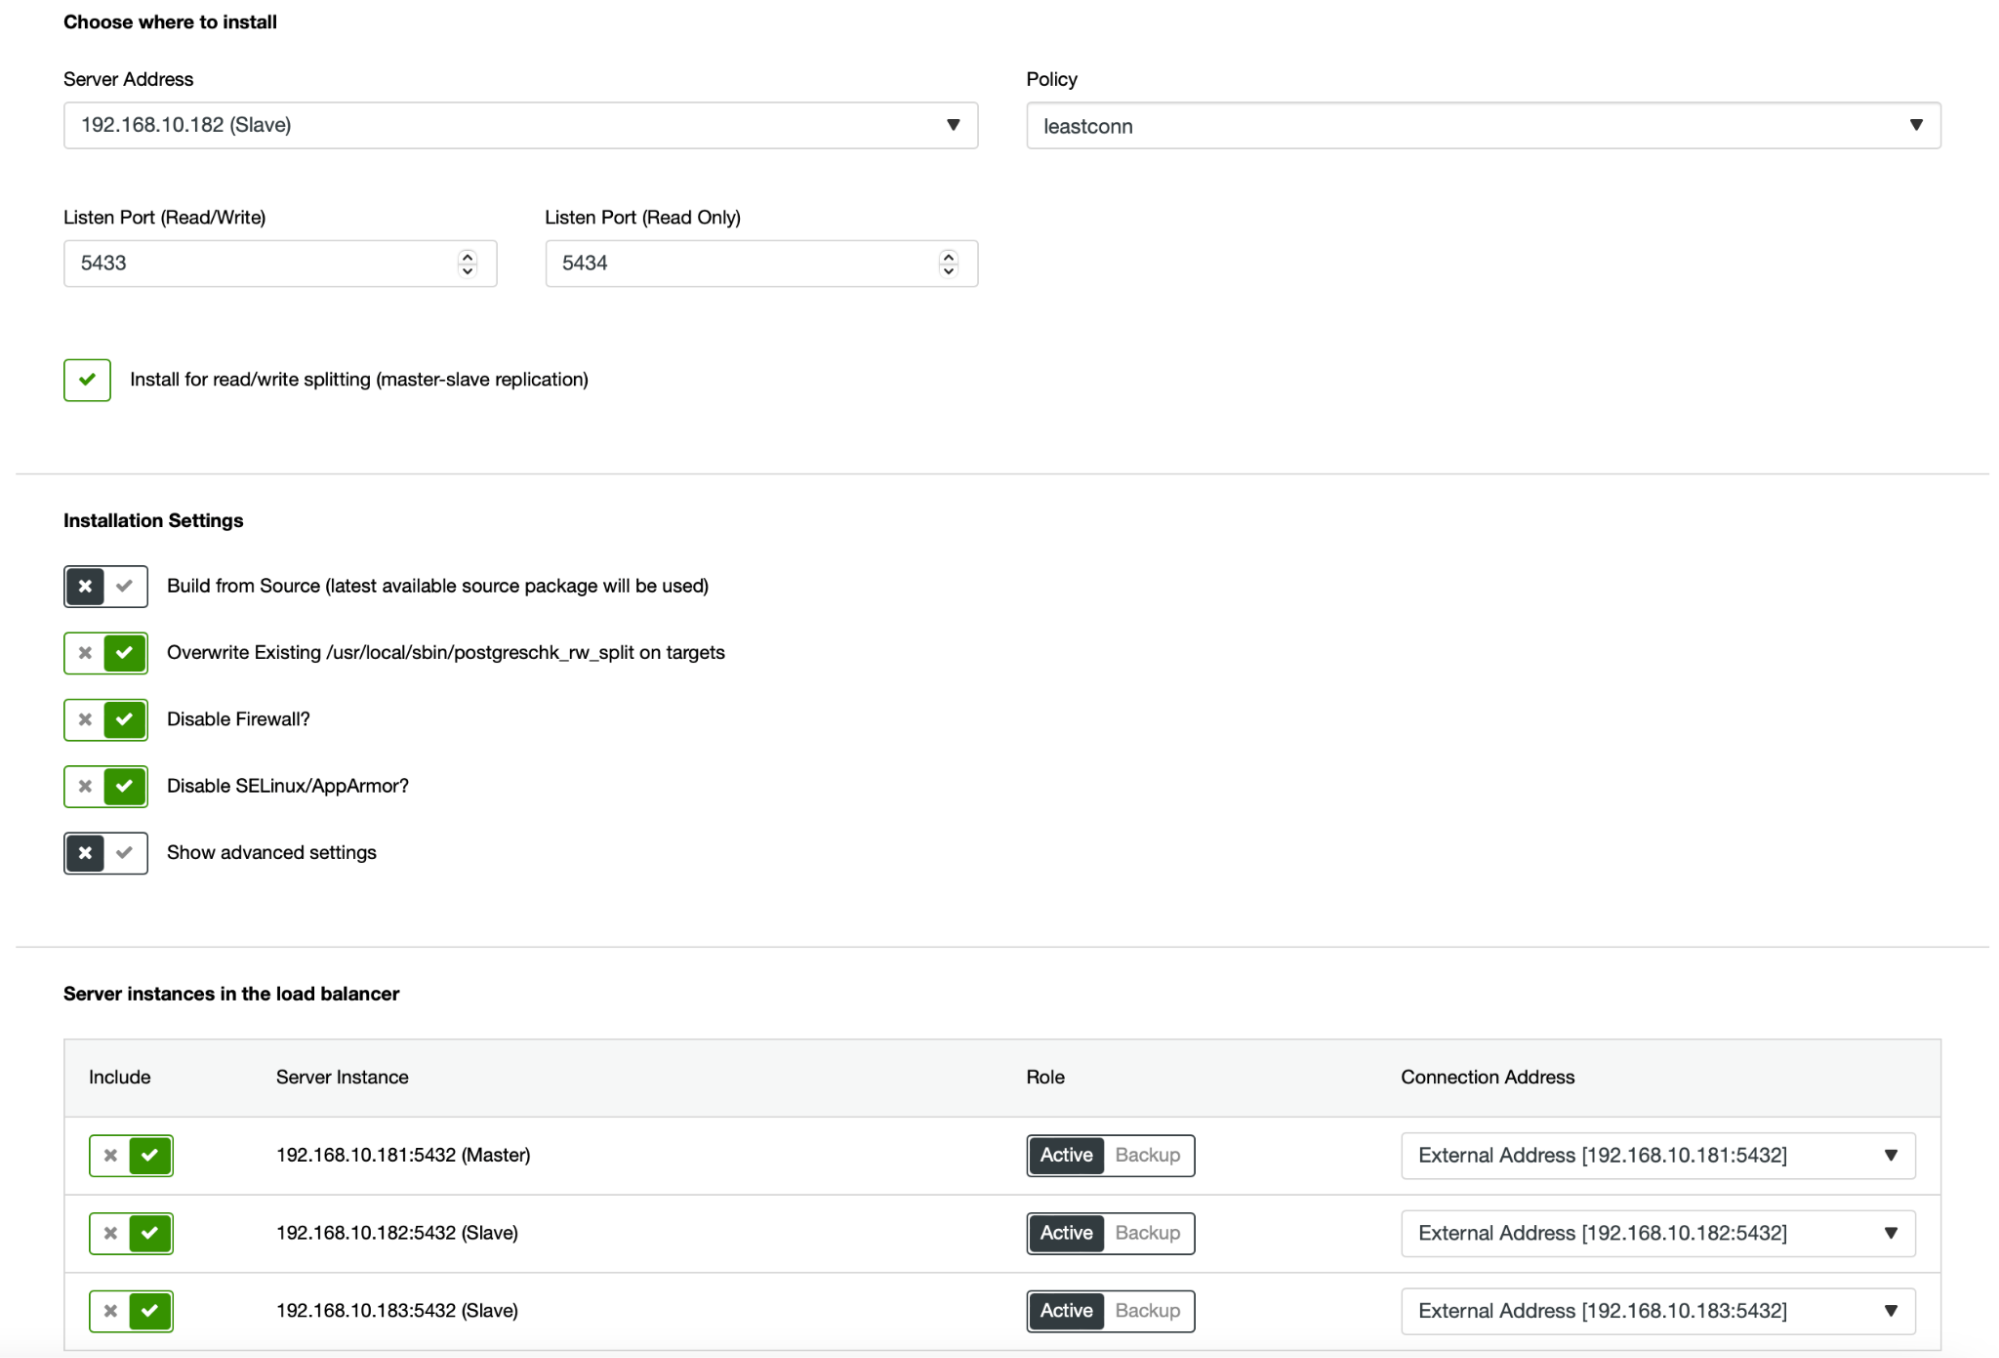
Now the HAProxy deployment will start. We want to repeat it at least once more to create two HAProxy instances for redundancy. In this deployment, we decided to go with three HAProxy load balancers. Below is a screenshot of the settings screen while configuring the deployment of a second HAProxy:
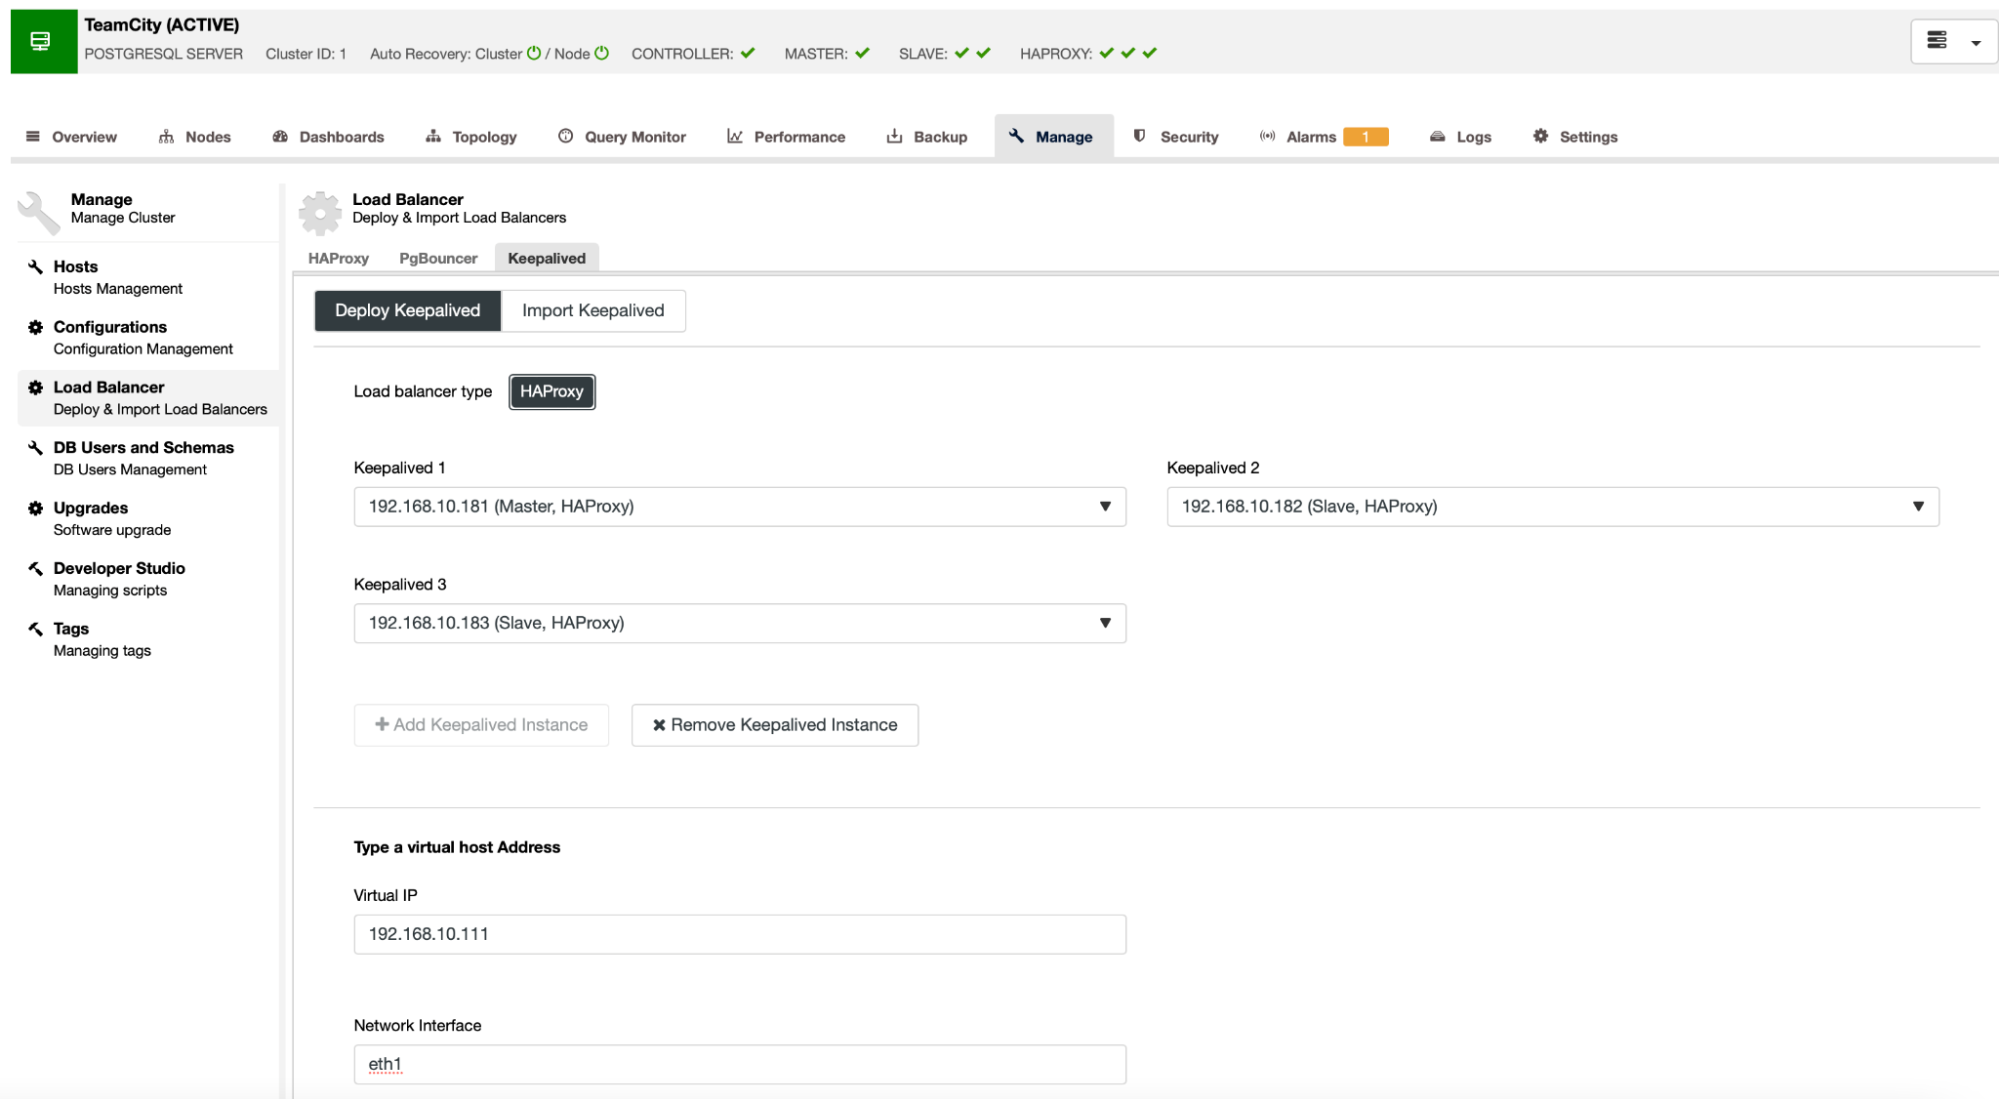
When all of our HAProxy instances are up and running, we can deploy Keepalived. The idea here is that Keepalived will be collocated with HAProxy and monitor HAProxy’s process. One of the instances with working HAProxy will have Virtual IP assigned. This VIP should be used by the application to connect to the database. Keepalived will detect if that HAProxy becomes unavailable and move to another available HAProxy instance.
The deployment wizard requires us to pass HAProxy instances that we want Keepalived to monitor. We also need to pass the IP address and network interface for VIP.
The last and final step will be to create a database for TeamCity:
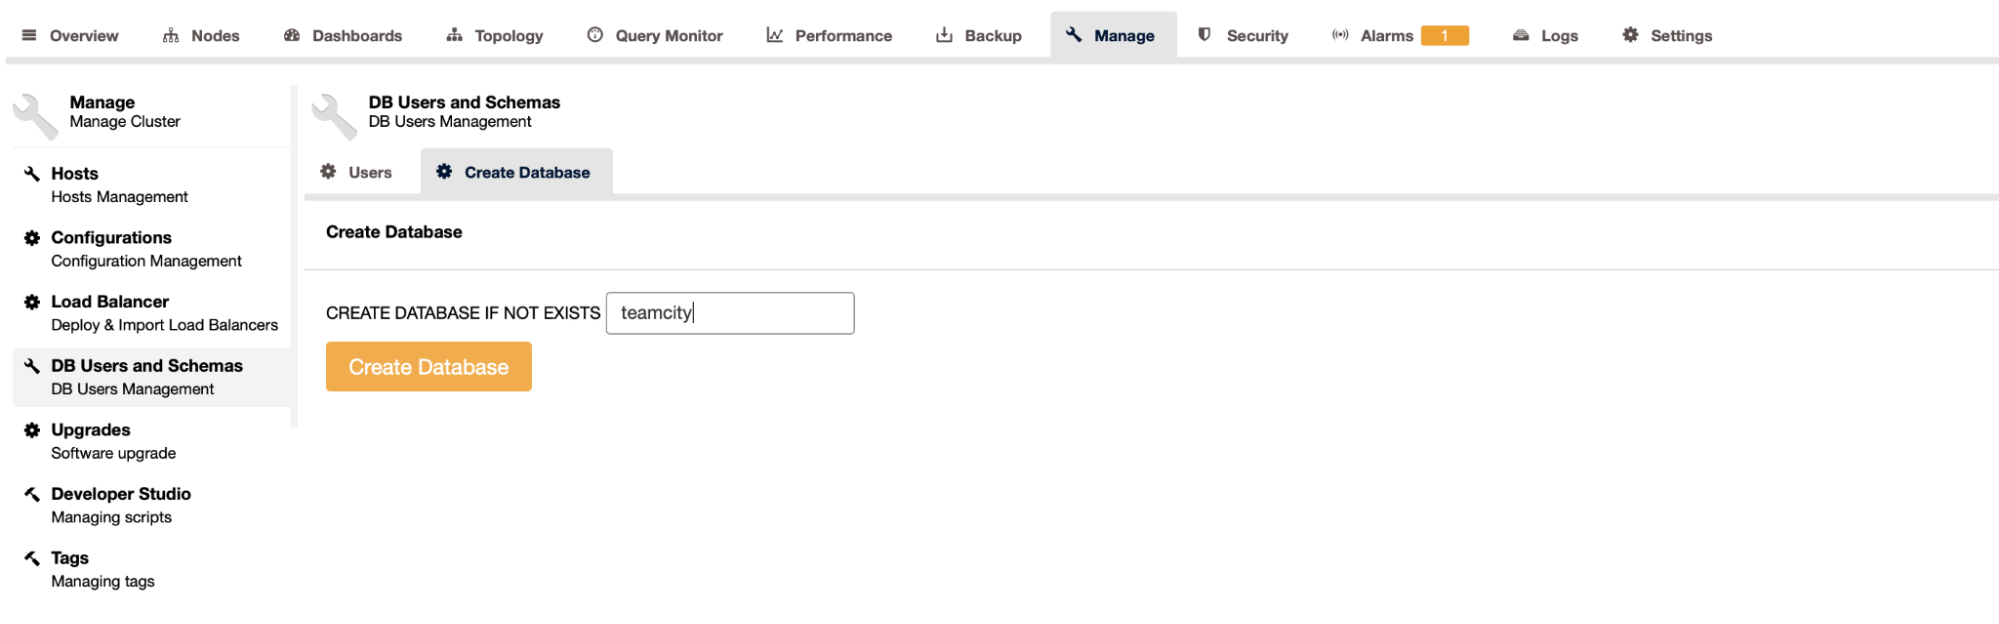
With this, we have concluded the deployment of the highly available PostgreSQL cluster.
Deploying TeamCity as Multi-node
The next step is to deploy TeamCity in a multi-node environment. We will use three TeamCity nodes. First, we have to install Java JRE and JDK that match the requirements of TeamCity.
apt install default-jre default-jdkNow, on all nodes, we have to download TeamCity. We will install in a local, not shared directory.
root@node1:~# cd /var/lib/teamcity-local/

root@node1:/var/lib/teamcity-local# wget https://download.jetbrains.com/teamcity/TeamCity-2021.2.3.tar.gz
Then we can start TeamCity on one of the nodes:
root@node1:~# /var/lib/teamcity-local/TeamCity/bin/runAll.sh start
Spawning TeamCity restarter in separate process
TeamCity restarter running with PID 83162
Starting TeamCity build agent...
Java executable is found: '/usr/lib/jvm/default-java/bin/java'
Starting TeamCity Build Agent Launcher...
Agent home directory is /var/lib/teamcity-local/TeamCity/buildAgent
Agent Launcher Java runtime version is 11
Lock file: /var/lib/teamcity-local/TeamCity/buildAgent/logs/buildAgent.properties.lock
Using no lock
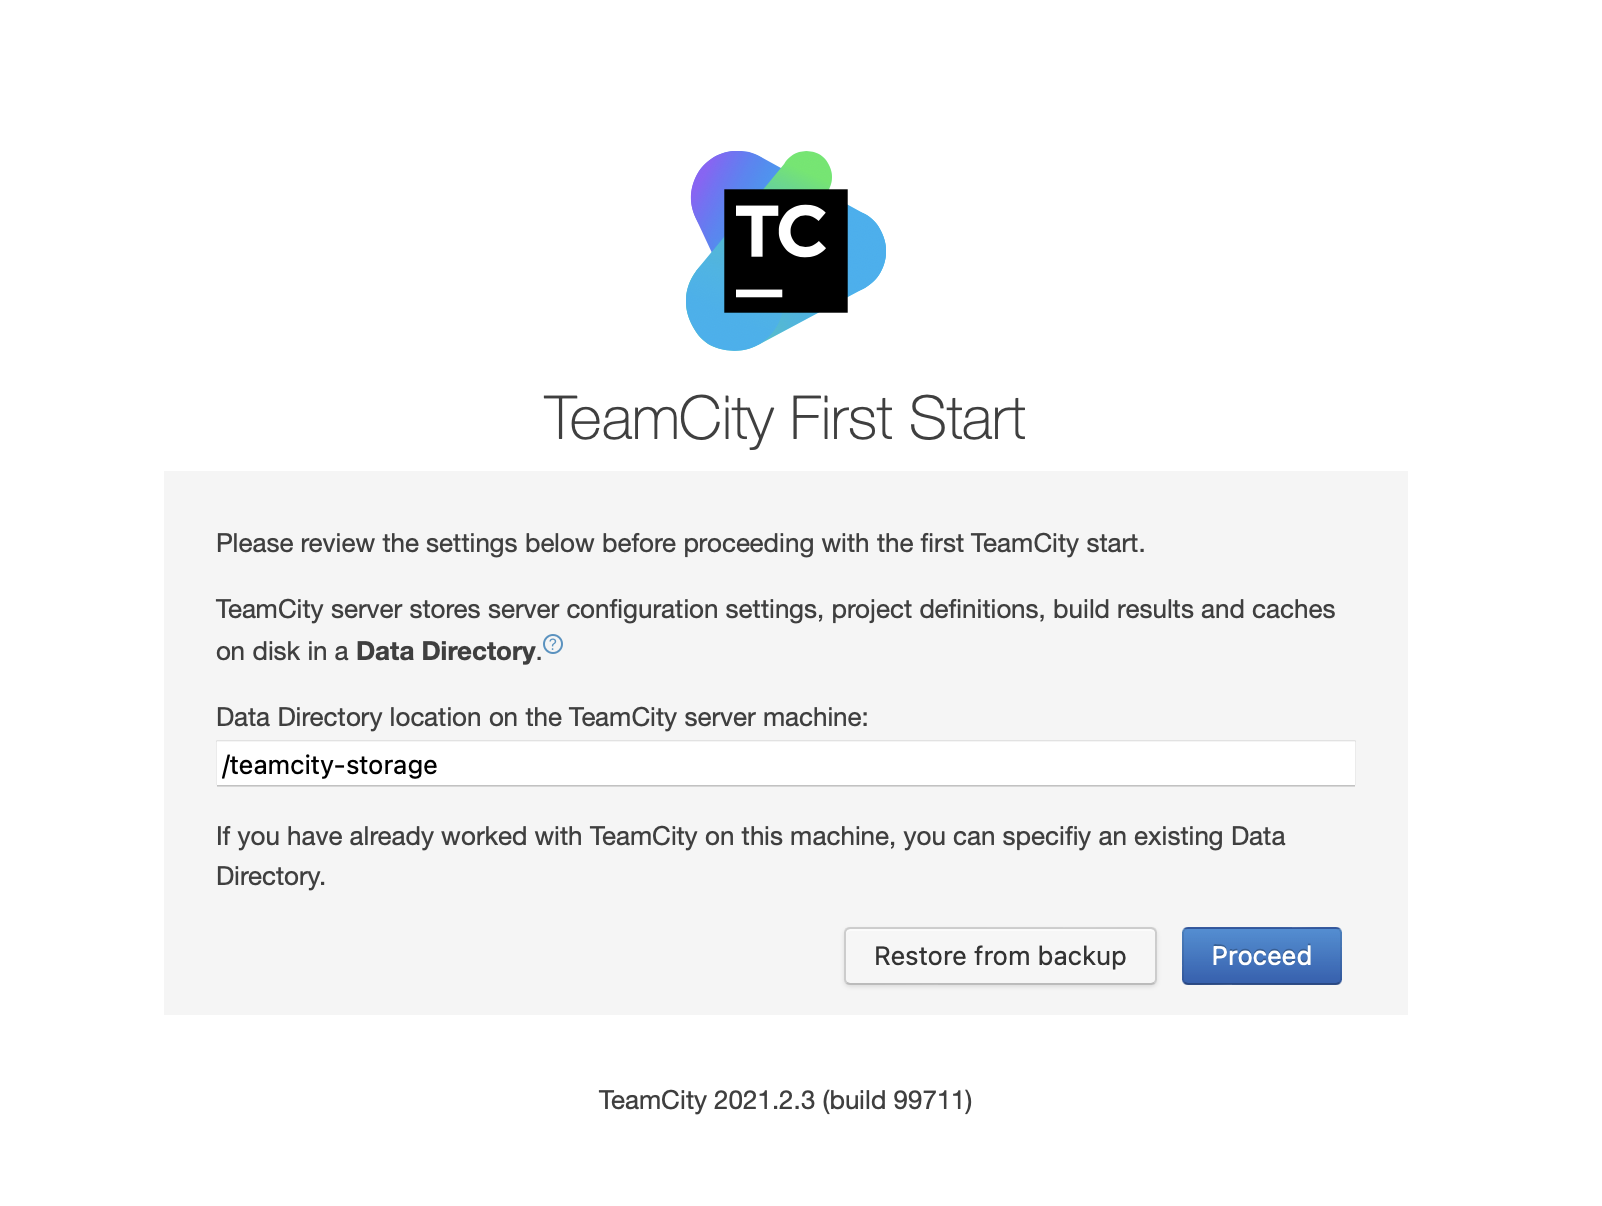
Done [83731], see log at /var/lib/teamcity-local/TeamCity/buildAgent/logs/teamcity-agent.logOnce TeamCity has started, we can access the UI and begin deployment. Initially, we have to pass the data directory location. This is the shared volume we created on GlusterFS.
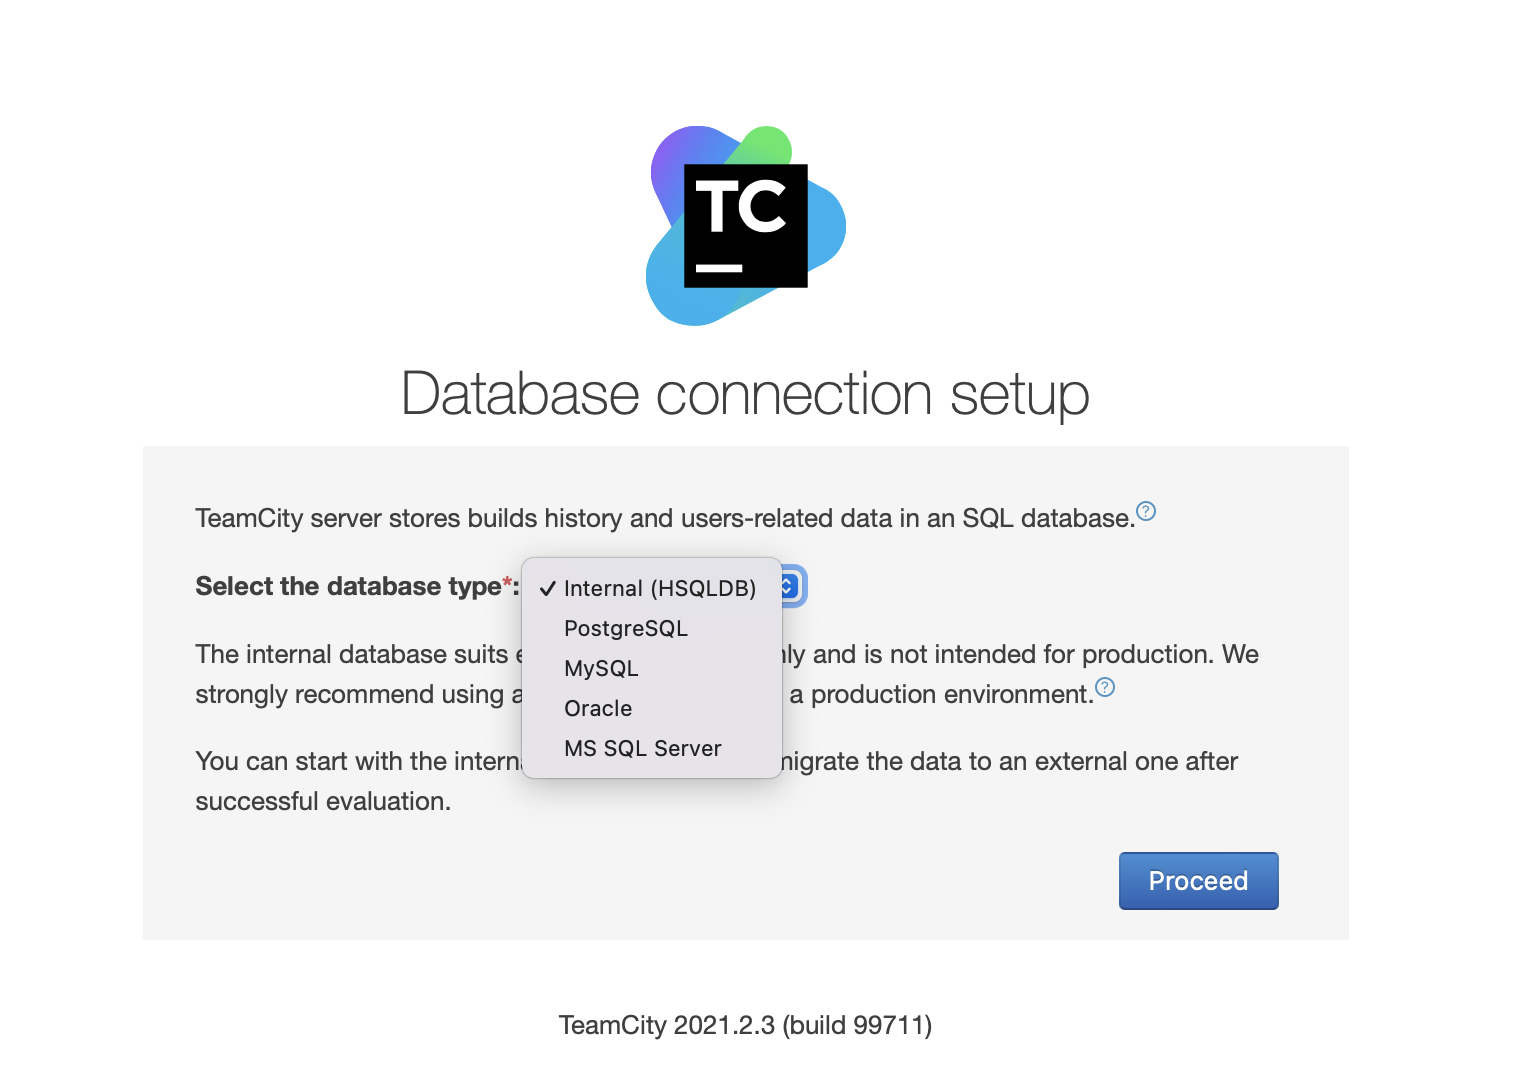
Next, pick the database. We are going to use a PostgreSQL cluster that we have already created.
Download and install the JDBC driver:
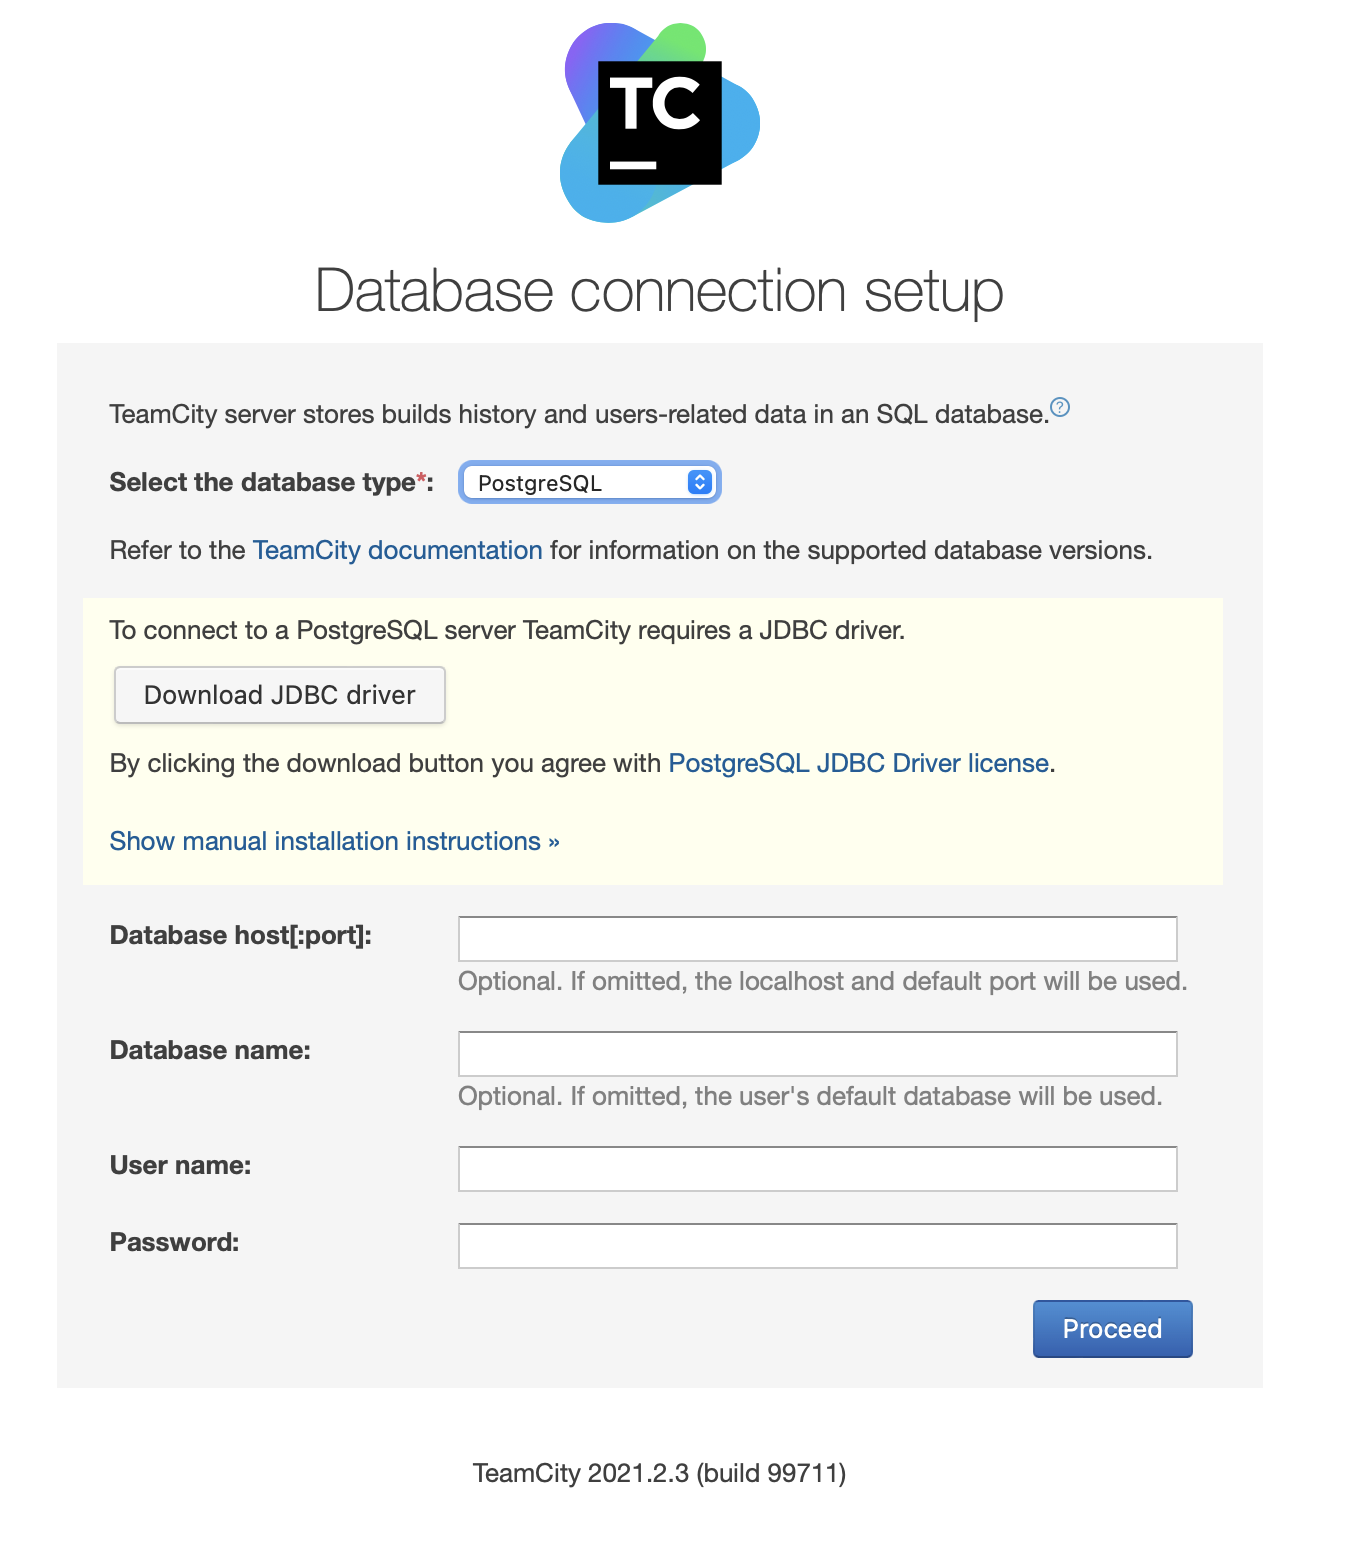
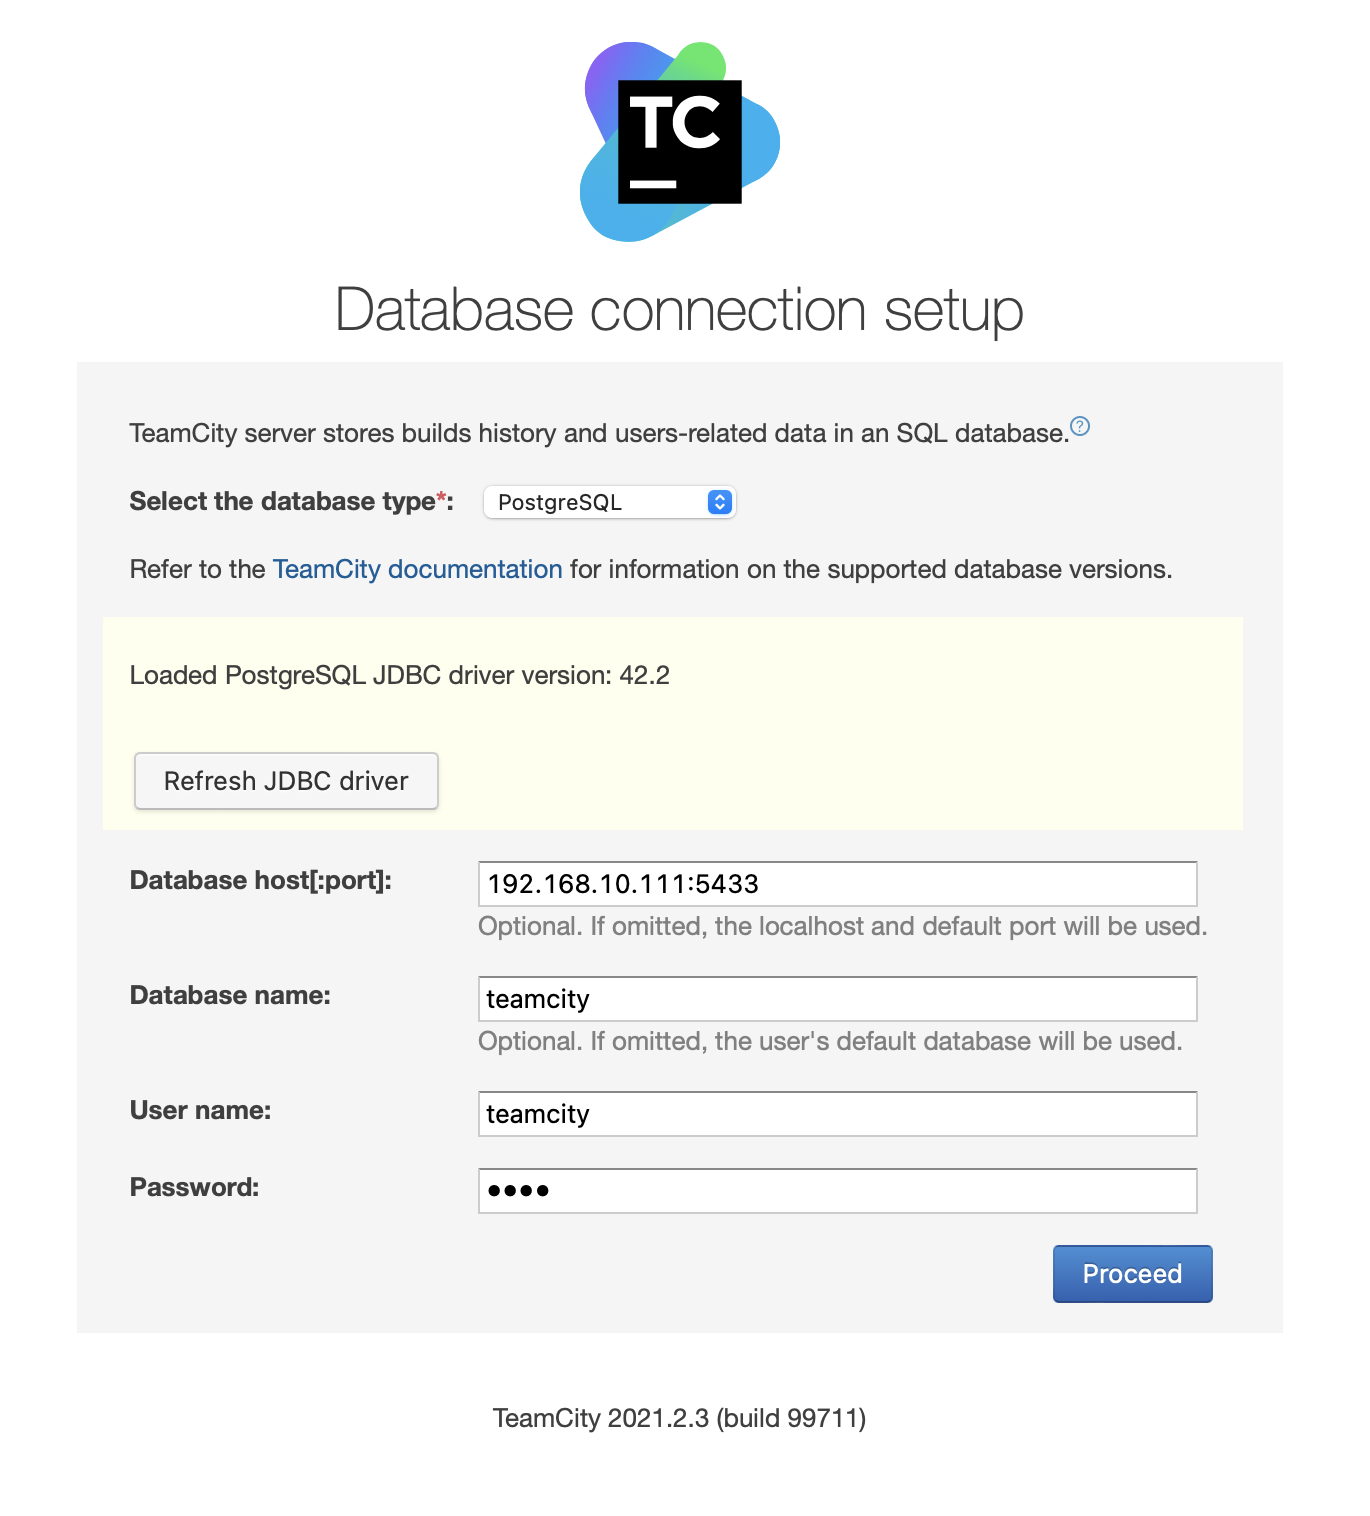
Next, fill in access details. We will use the virtual IP provided by Keepalived. Please note that we use port 5433. This is the port used for the read/write backend of HAProxy; it will always point towards the active primary node. Next, pick a user and the database to use with TeamCity.
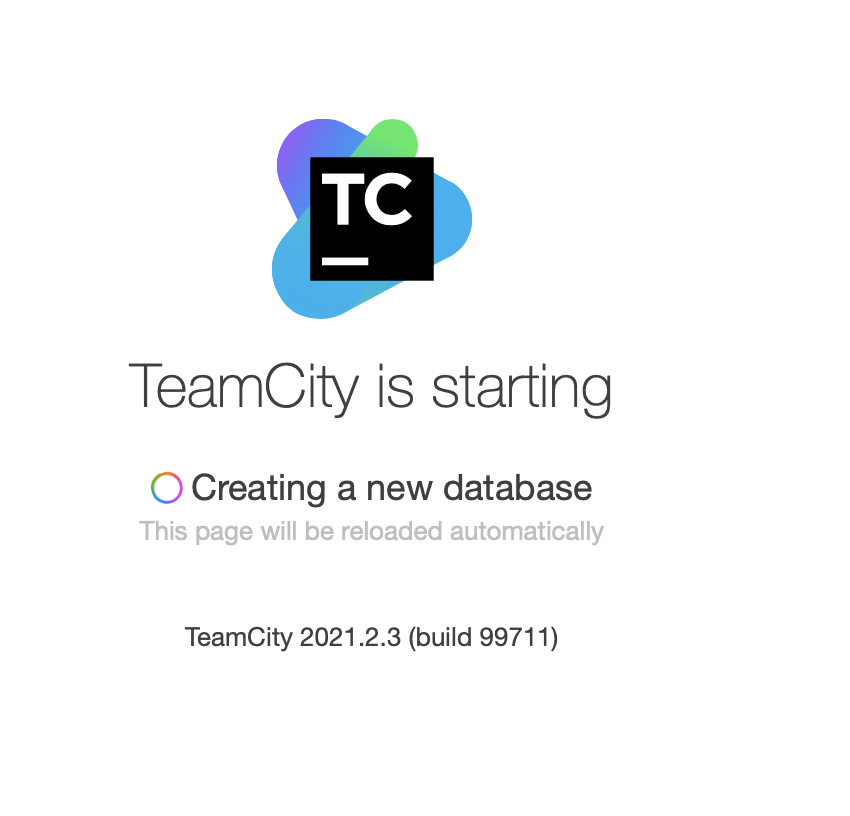
Once this is done, TeamCity will start initializing the database structure.
Agree to the License Agreement:
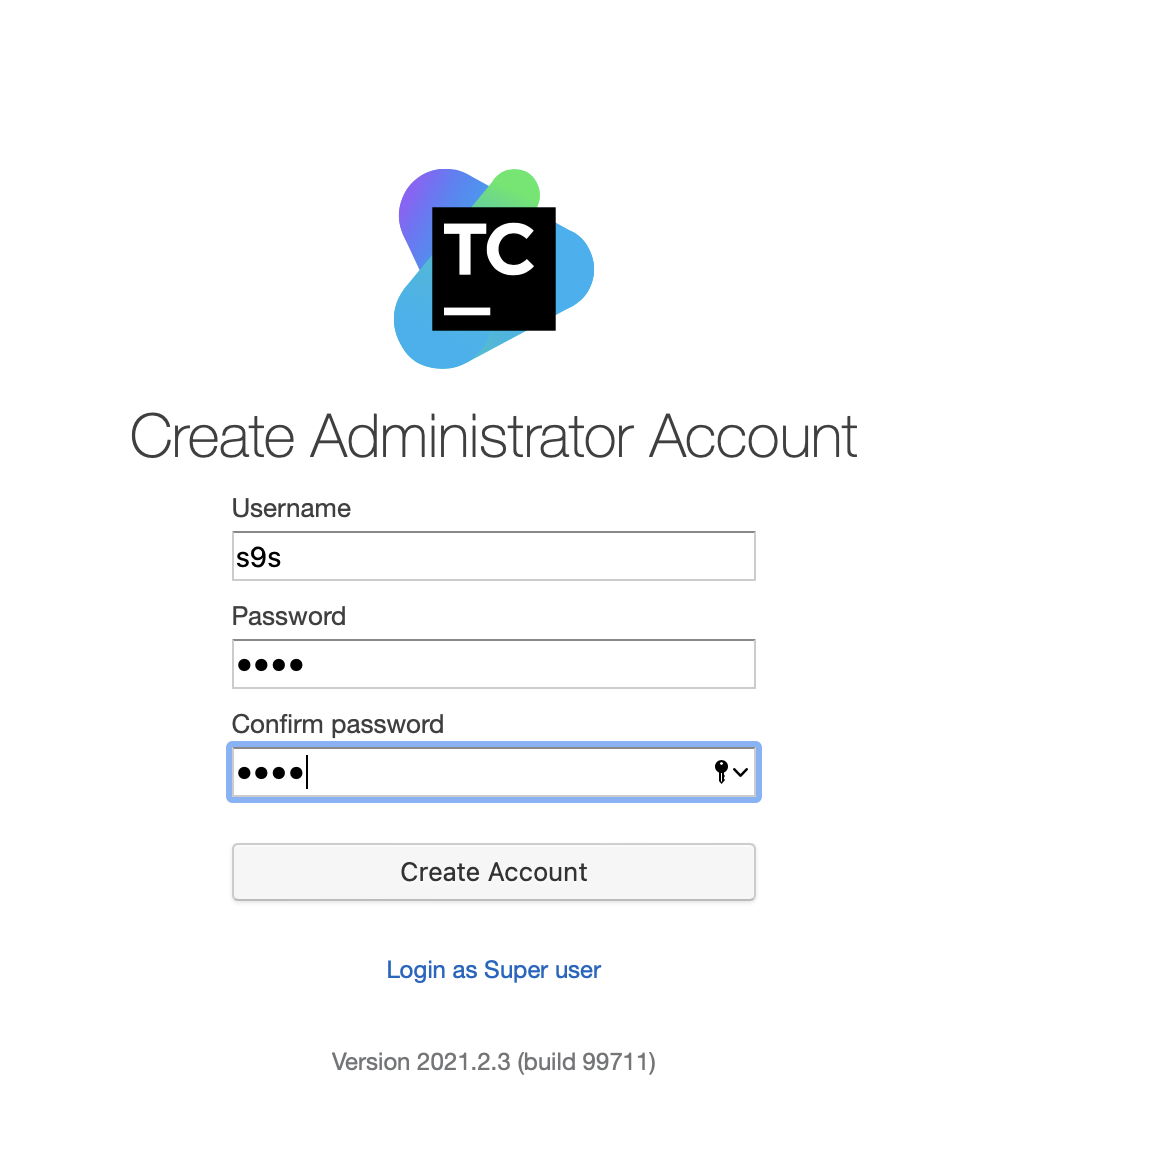
Finally, create a user for TeamCity:
That’s it! We should now be able to see the TeamCity GUI:
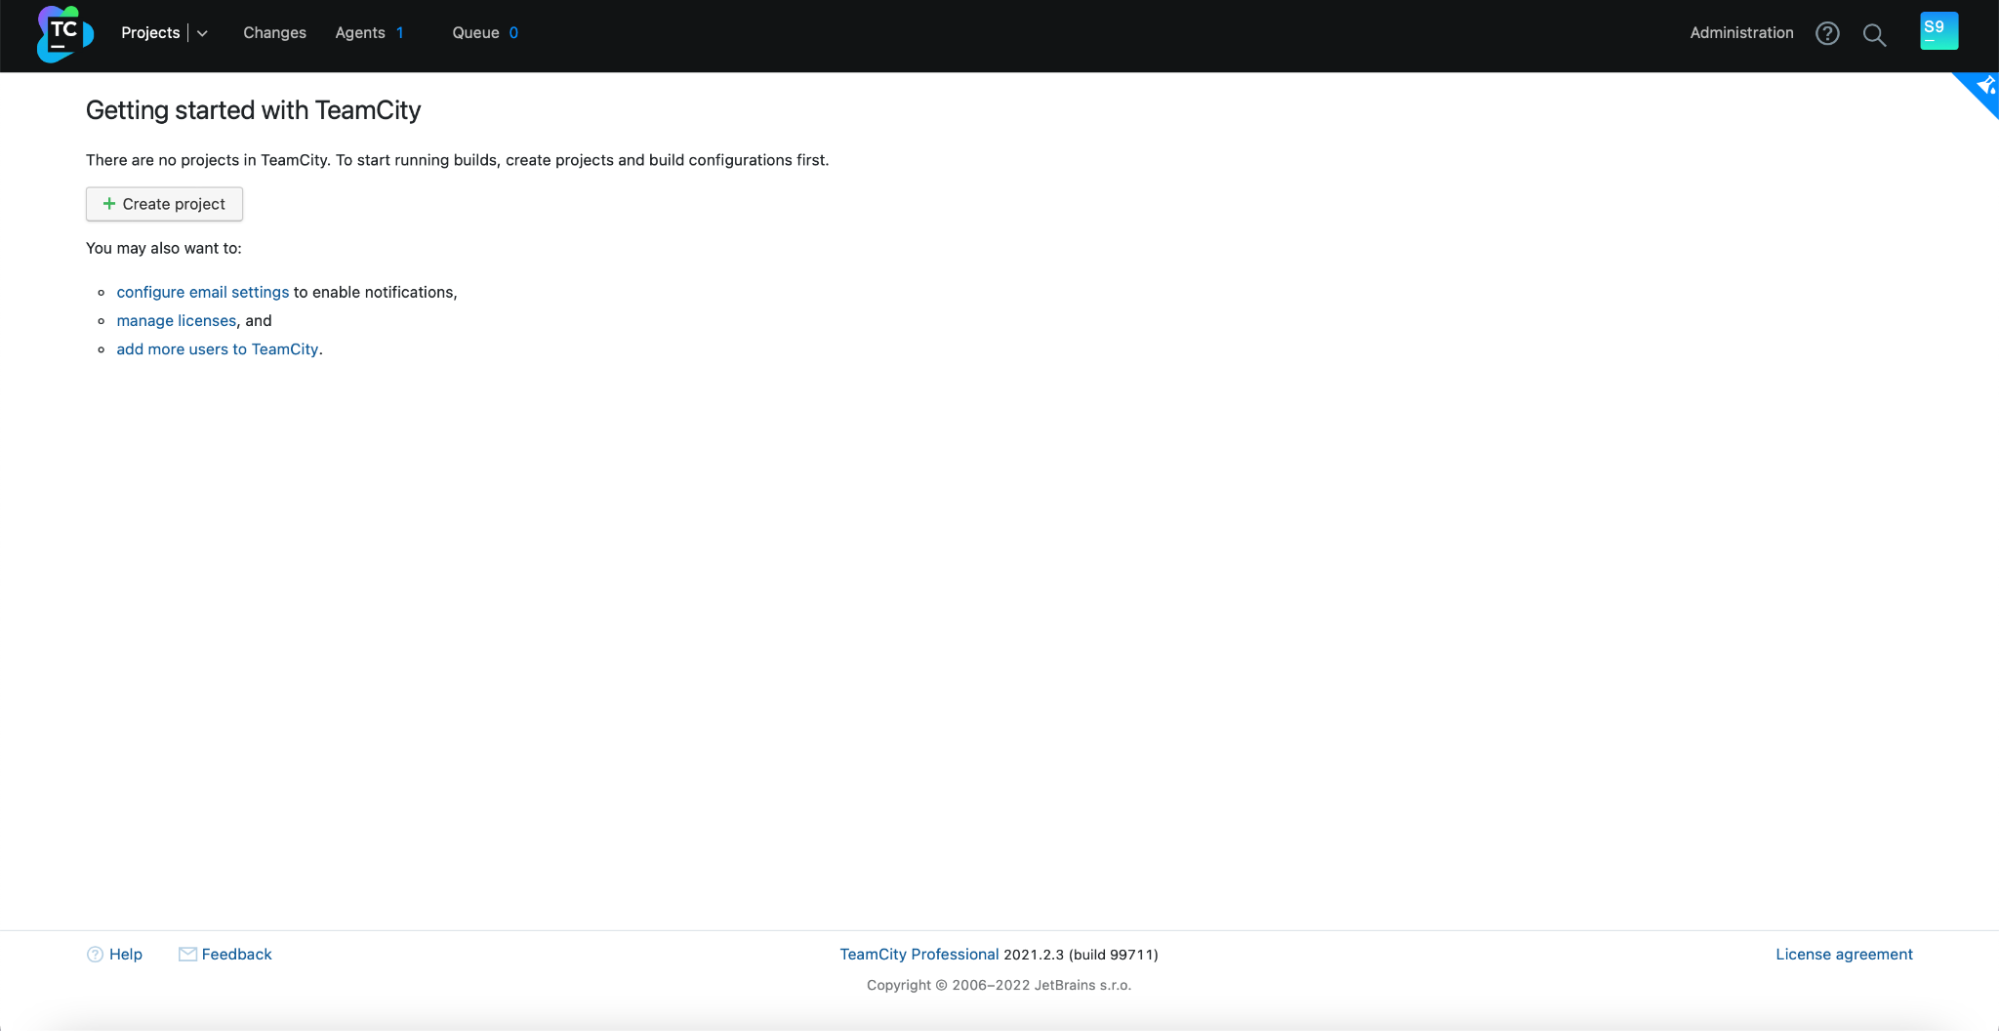
Now, we have to set up TeamCity in multi-node mode. First, we have to edit the startup scripts on all of the nodes:
root@node1:~# vim /var/lib/teamcity-local/TeamCity/bin/runAll.shWe have to make sure that the following two variables are exported. Please verify that you use the proper hostname, IP, and the correct directories for local and shared storage:
export TEAMCITY_SERVER_OPTS="-Dteamcity.server.nodeId=node1 -Dteamcity.server.rootURL=http://192.168.10.221 -Dteamcity.data.path=/teamcity-storage -Dteamcity.node.data.path=/var/lib/teamcity-local"

export TEAMCITY_DATA_PATH="/teamcity-storage"
Once this is done, you can start the remaining nodes:
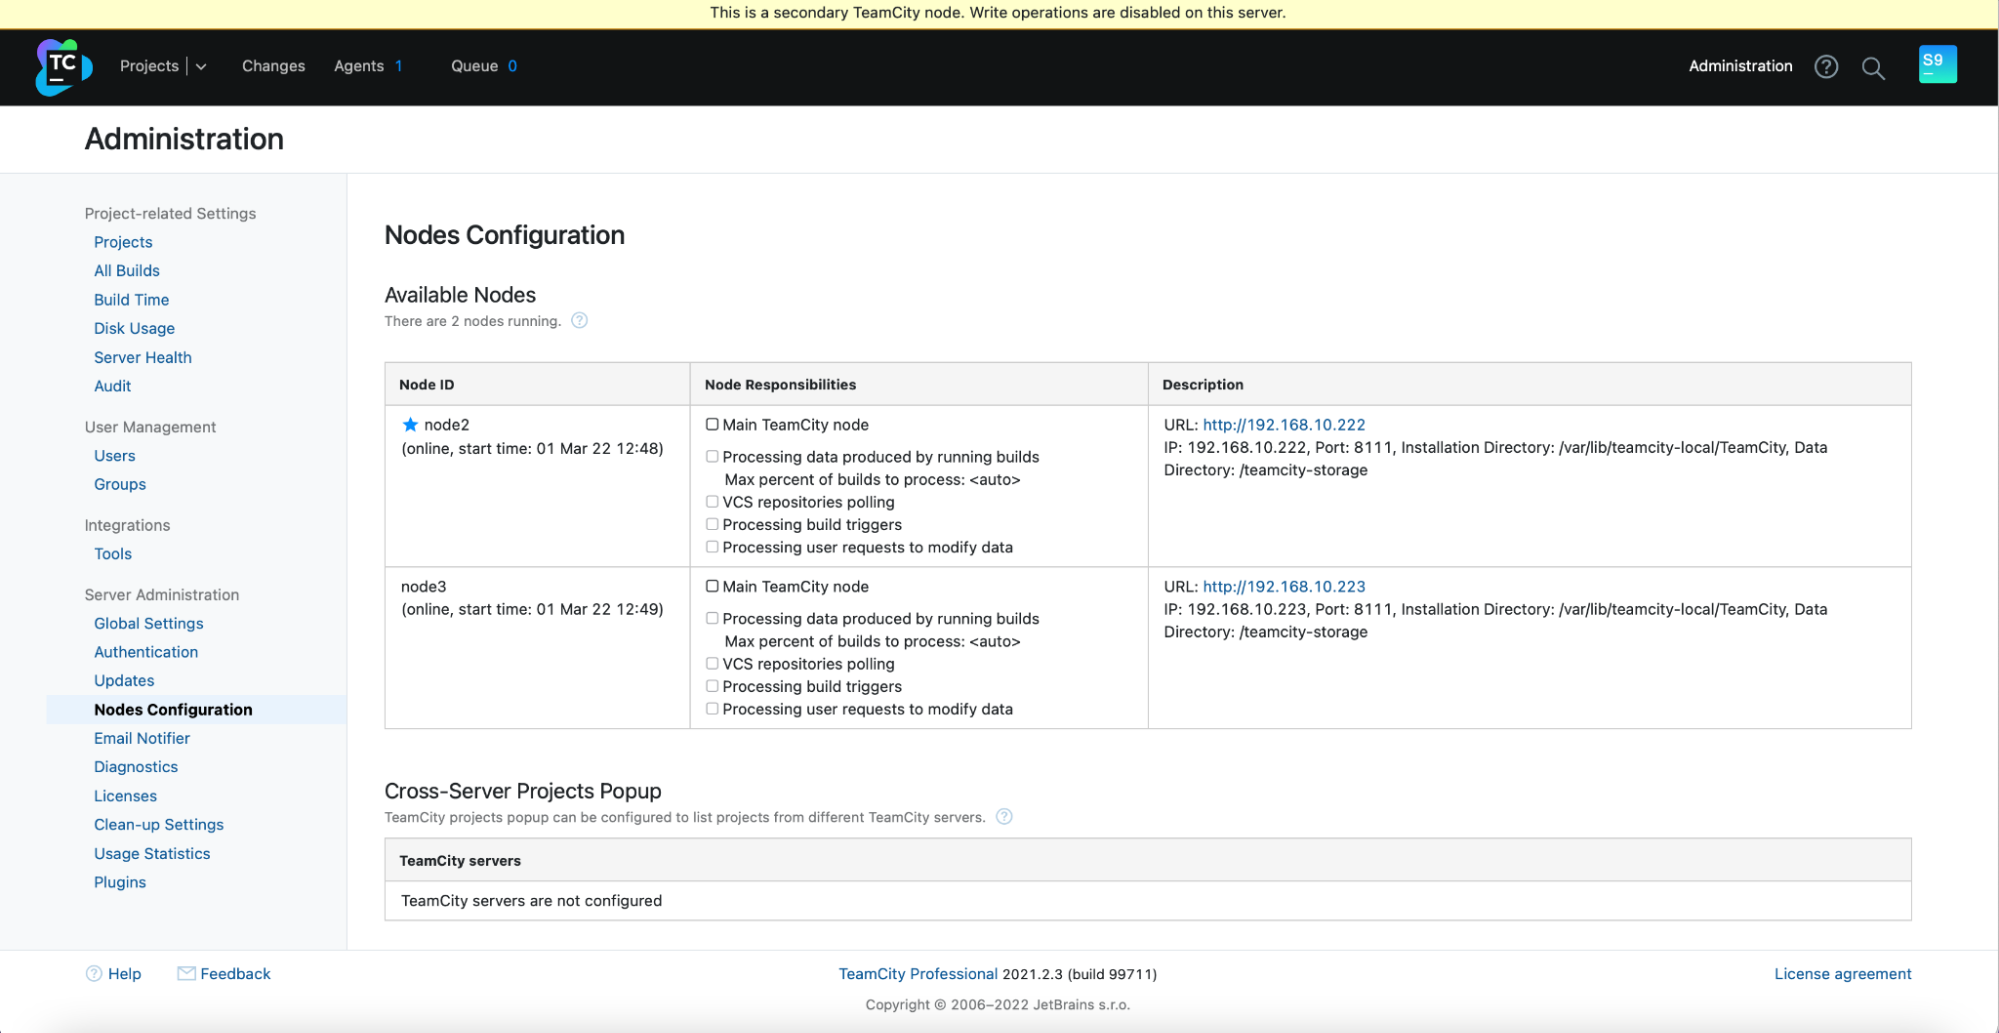
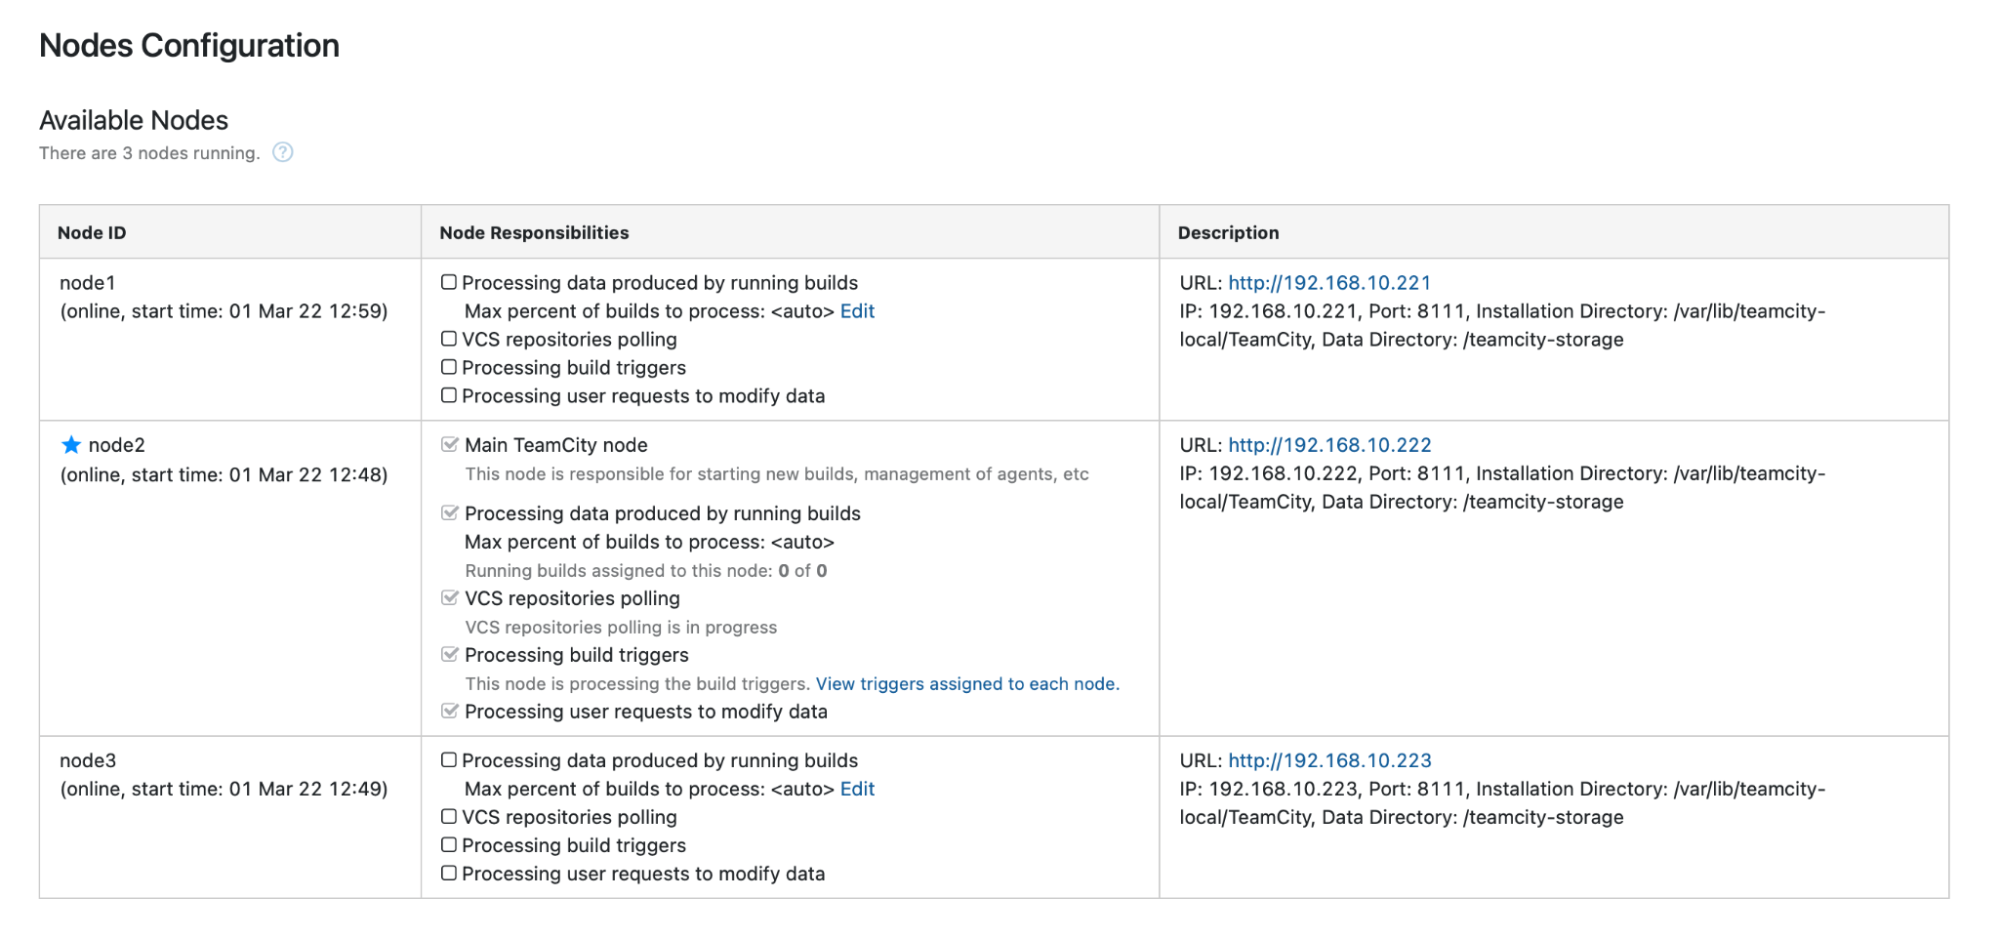
root@node2:~# /var/lib/teamcity-local/TeamCity/bin/runAll.sh startYou should see the following output in Administration -> Nodes Configuration: One main node and two standby nodes.

Please keep in mind that failover in TeamCity is not automated. If the main node stops working, you should connect to one of the secondary nodes. To do this, go to “Nodes Configuration” and promote it to the “Main” node. From the login screen, you will see a clear indication that this is a secondary node:

In the “Nodes Configuration,” you will see that the one node has dropped from the cluster:
You’ll receive a message stating that you cannot write to this node. Don’t worry; the write required to promote this node to the “main” status will work just fine:
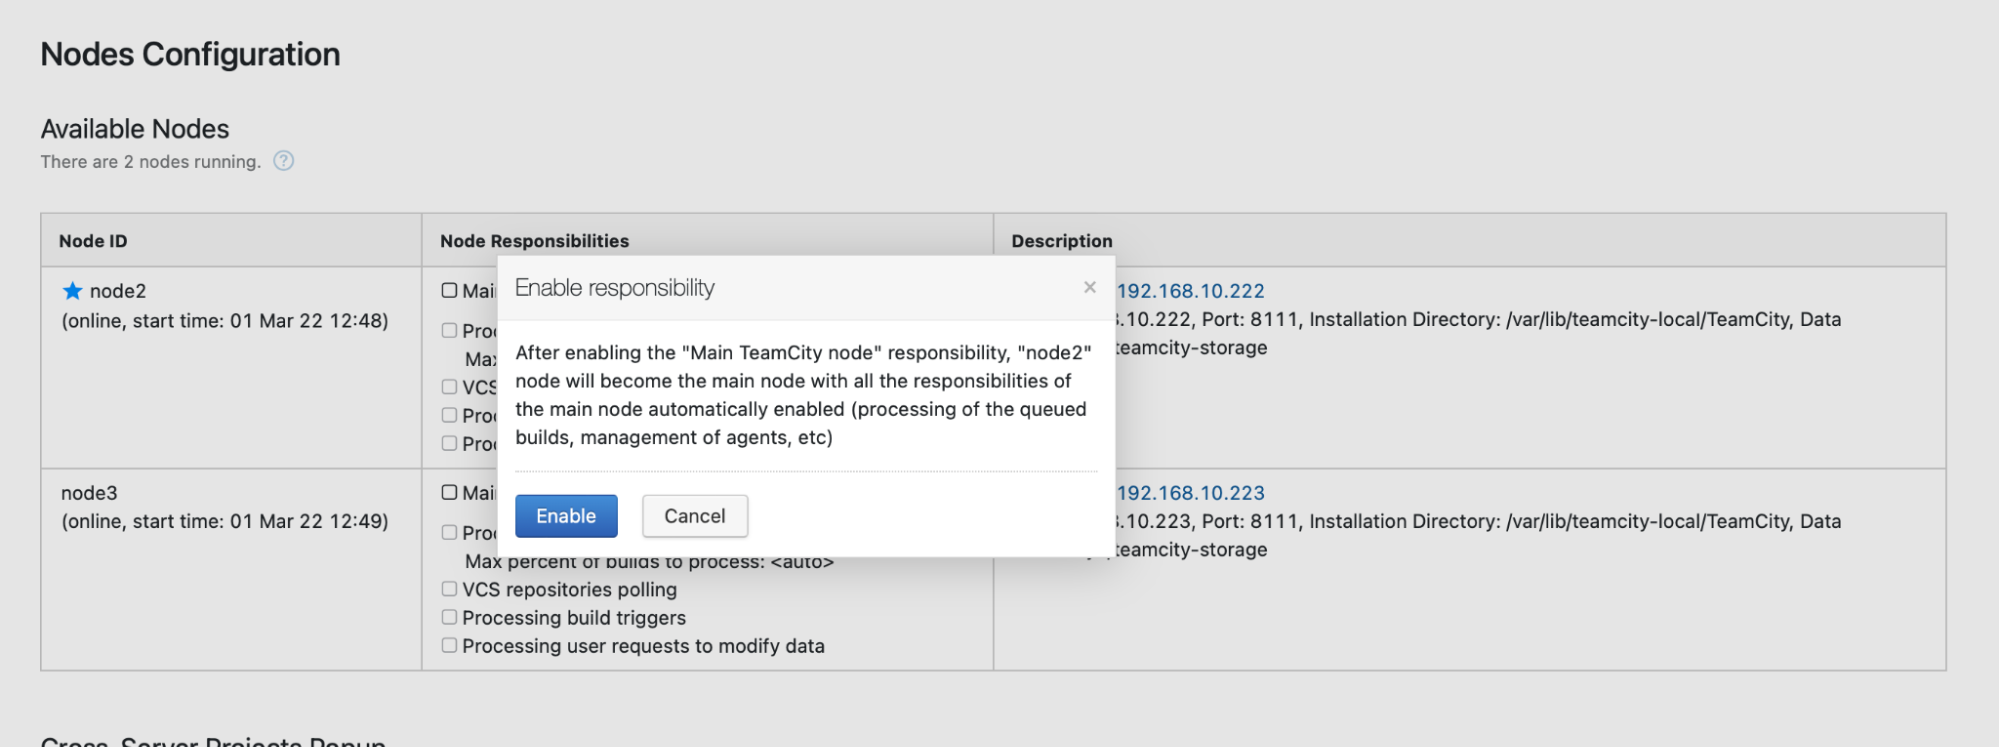
Click “Enable,” and we have successfully promoted a secondary TimeCity node:
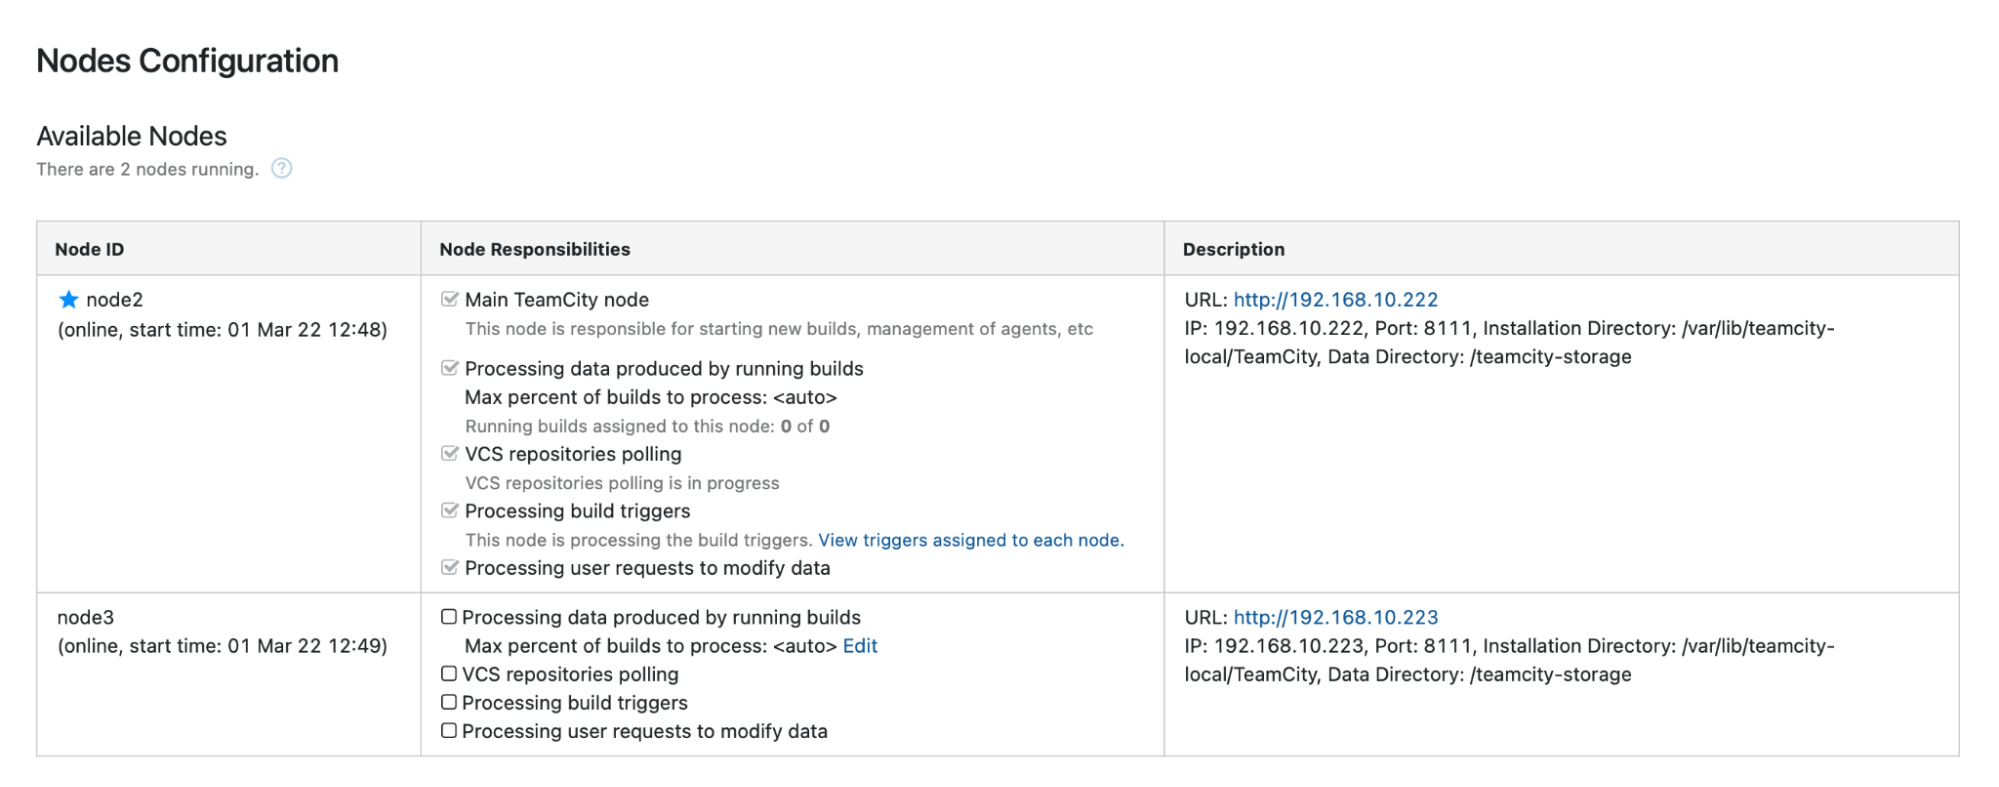
When node1 becomes available and TeamCity is started again on that node, we will see it rejoin the cluster:
If you want to improve performance further, you can deploy HAProxy + Keepalived in front of the TeamCity UI to provide a single entry point to the GUI. You can find details on configuring HAProxy for TeamCity in the documentation.
Wrapping Up
As you can see, deploying TeamCity for high availability is not that difficult — most of it has been covered thoroughly in the documentation. If you’re looking for ways to automate some of this and add a highly available database backend, consider evaluating ClusterControl free for 30 days. ClusterControl can quickly deploy and monitor the backend, providing automated failover, recovery, monitoring, backup management, and more.
For more tips on software development tools and best practices, check out how to support your DevOps team with their database needs.
To get the latest news and best practices for managing your open-source-based database infrastructure, don’t forget to follow us on Twitter or LinkedIn and subscribe to our newsletter. See you soon!