blog
How to Setup Asynchronous Replication Between MariaDB Galera Clusters

Galera Cluster, with its (virtually) synchronous replication, is commonly used in many different types of environments. Scaling it by adding new nodes is not hard (or just as simple a couple of clicks when you use ClusterControl).
The main problem with synchronous replication is, well, the synchronous part which often results in that the whole cluster being only as fast as its slowest node. Any write executed on a cluster has to be replicated to all of the nodes and certified on them. If, for whatever reason, this process slows down, it can seriously impact the cluster’s ability to accommodate writes. Flow control will then kick in, this is in order to ensure that the slowest node can still keep up with the load. This makes it quite tricky for some of the common scenarios that happen in a real world environment.
First off, let’s discuss geographically distributed disaster recovery. Sure, you can run clusters across a Wide Area Network, but the increased latency will have a significant impact on the cluster’s performance. This seriously limits the ability of using such a setup, especially over longer distances when latency is higher.
Another quite common use case – a test environment for major version upgrade. It is not a good idea to mix different versions of MariaDB Galera Cluster nodes in the same cluster, even if it is possible. On the other hand, migration to the more recent version requires detailed tests. Ideally, both reads and writes would have been tested. One way to achieve that is to create a separate Galera cluster and run the tests, but you would like to run tests in an environment as close to production as possible. Once provisioned, a cluster can be used for tests with real world queries but it would be hard to generate a workload which would be close to that of production. You cannot move some of the production traffic to such test system, this is because the data is not current.
Finally, the migration itself. Again, what we said earlier, even if it is possible to mix old and new versions of Galera nodes in the same cluster, it is not the safest way to do it.
Luckily, the simplest solution for all those three issues would be to connect separate Galera clusters with an asynchronous replication. What makes it such a good solution? Well, it’s asynchronous which makes it not affect the Galera replication. There is no flow control, thus the performance of the “master” cluster will not be affected by the performance of the “slave” cluster. As with every asynchronous replication, a lag may show up, but as long as it stays within acceptable limits, it can work perfectly fine. You also have to keep in mind that nowadays asynchronous replication can be parallelized (multiple threads can work together to increase bandwidth) and reduce replication lag even further.
In this blog post we will discuss what are the steps to deploy asynchronous replication between MariaDB Galera clusters.
How to Configure Asynchronous Replication Between MariaDB Galera Clusters?
First off we have to have to deploy a cluster. For our purposes we setup a three node cluster. We will keep the setup to the minimum, thus we will not discuss the complexity of the application and proxy layer. Proxy layer may be very useful for handling tasks for which you want to deploy asynchronous replication – redirecting a subset of the read-only traffic to the test cluster, helping in the disaster recovery situation when the “main” cluster is not available by redirecting the traffic to the DR cluster. There are numerous proxies you can try, depending on your preference – HAProxy, MaxScale or ProxySQL – all can be used in such setups and, depending on the case, some of them may be able to help you manage your traffic.
Configuring the Source Cluster
Our cluster consists of three MariaDB 10.3 nodes, we also deployed ProxySQL to do the read-write split and distribute the traffic across all nodes in the cluster. This is not a production-grade deployment, for that we would have to deploy more ProxySQL nodes and a Keepalived on top of them. It is still enough for our purposes. To set up asynchronous replication we will have to have a binary log enabled on our cluster. At least one node but it’s better to keep it enabled on all of them in case the only node with binlog enabled go down – then you want to have another node in the cluster up and running that you can slave off.
When enabling binary log, make sure that you configure the binary log rotation so the old logs will be removed at some point. You will use ROW binary log format. You should also ensure that you have GTID configured and in use – it will come very handy when you would have to reslave your “slave” cluster or if you would need to enable multi-threaded replication. As this is a Galera cluster, you want to have ‘wsrep_gtid_domain_id’ configured and ‘wsrep_gtid_mode’ enabled. Those settings will ensure that GTID’s will be generated for the traffic coming from the Galera cluster. More information can be found in the documentation. Once this is all done, you can proceed with setting up the second cluster.
Setting Up the Target Cluster
Given that currently there is no target cluster, we have to start with deploying it. We will not cover those steps in detail, you can find instructions in the documentation. Generally speaking the process consists of several steps:
- Configure MariaDB repositories
- Install MariaDB 10.3 packages
- Configure nodes to form a cluster
At the beginning we will start with just one node. You can setup all of them to form a cluster but then you should stop them and use just one for the next step. That one node will become a slave to the original cluster. We will use mariabackup to provision it. Then we will configure the replication.
First, we have to create a directory where we will store the backup:
mkdir /mnt/mariabackupThen we execute the backup and create it in the directory prepared in the step above. Please make sure you use the correct user and password to connect to the database:
mariabackup --backup --user=root --password=pass --target-dir=/mnt/mariabackup/Next, we have to copy the backup files to the first node in the second cluster. We used scp for that, you can use whatever you like – rsync, netcat, anything which will work.
scp -r /mnt/mariabackup/* 10.0.0.104:/root/mariabackup/After the backup has been copied, we have to prepare it by applying the log files:
mariabackup --prepare --target-dir=/root/mariabackup/
mariabackup based on MariaDB server 10.3.16-MariaDB debian-linux-gnu (x86_64)
[00] 2019-06-24 08:35:39 cd to /root/mariabackup/
[00] 2019-06-24 08:35:39 This target seems to be not prepared yet.
[00] 2019-06-24 08:35:39 mariabackup: using the following InnoDB configuration for recovery:
[00] 2019-06-24 08:35:39 innodb_data_home_dir = .
[00] 2019-06-24 08:35:39 innodb_data_file_path = ibdata1:100M:autoextend
[00] 2019-06-24 08:35:39 innodb_log_group_home_dir = .
[00] 2019-06-24 08:35:39 InnoDB: Using Linux native AIO
[00] 2019-06-24 08:35:39 Starting InnoDB instance for recovery.
[00] 2019-06-24 08:35:39 mariabackup: Using 104857600 bytes for buffer pool (set by --use-memory parameter)
2019-06-24  8:35:39 0 [Note] InnoDB: Mutexes and rw_locks use GCC atomic builtins
2019-06-24  8:35:39 0 [Note] InnoDB: Uses event mutexes
2019-06-24  8:35:39 0 [Note] InnoDB: Compressed tables use zlib 1.2.8
2019-06-24  8:35:39 0 [Note] InnoDB: Number of pools: 1
2019-06-24  8:35:39 0 [Note] InnoDB: Using SSE2 crc32 instructions
2019-06-24  8:35:39 0 [Note] InnoDB: Initializing buffer pool, total size = 100M, instances = 1, chunk size = 100M
2019-06-24  8:35:39 0 [Note] InnoDB: Completed initialization of buffer pool
2019-06-24  8:35:39 0 [Note] InnoDB: page_cleaner coordinator priority: -20
2019-06-24  8:35:39 0 [Note] InnoDB: Starting crash recovery from checkpoint LSN=3448619491
2019-06-24  8:35:40 0 [Note] InnoDB: Starting final batch to recover 759 pages from redo log.
2019-06-24  8:35:40 0 [Note] InnoDB: Last binlog file '/var/lib/mysql-binlog/binlog.000003', position 865364970
[00] 2019-06-24 08:35:40 Last binlog file /var/lib/mysql-binlog/binlog.000003, position 865364970
[00] 2019-06-24 08:35:40 mariabackup: Recovered WSREP position: e79a3494-964f-11e9-8a5c-53809a3c5017:25740

[00] 2019-06-24 08:35:41 completed OK!
In case of any error you may have to re-execute the backup. If everything went ok, we can remove the old data and replace it with the backup information
rm -rf /var/lib/mysql/*
mariabackup --copy-back --target-dir=/root/mariabackup/
…
[01] 2019-06-24 08:37:06 Copying ./sbtest/sbtest10.frm to /var/lib/mysql/sbtest/sbtest10.frm
[01] 2019-06-24 08:37:06         ...done
[00] 2019-06-24 08:37:06 completed OK!
We also want to set the correct owner of the files:
chown -R mysql.mysql /var/lib/mysql/We will be relying on GTID to keep the replication consistent thus we need to see what was the last applied GTID in this backup. That information can be found in xtrabackup_info file that’s part of the backup:
root@vagrant:~/mariabackup# cat /var/lib/mysql/xtrabackup_info | grep binlog_pos
binlog_pos = filename 'binlog.000003', position '865364970', GTID of the last change '9999-1002-23012'
We will also have to ensure that the slave node has binary logs enabled along with ‘log_slave_updates’. Ideally, this will be enabled on all of the nodes in the second cluster – just in case the “slave” node failed and you would have to set up the replication using another node in the slave cluster.
The last bit we need to do before we can set up the replication is to create an user which we will use to run the replication:
MariaDB [(none)]> CREATE USER 'repuser'@'10.0.0.104' IDENTIFIED BY 'reppass';
Query OK, 0 rows affected (0.077 sec)
MariaDB [(none)]> GRANT REPLICATION SLAVE ON *.* TO 'repuser'@'10.0.0.104';
Query OK, 0 rows affected (0.012 sec)That’s all we need. Now, we can start the first node in the second cluster, our to-be-slave:
galera_new_clusterOnce it’s started, we can enter MySQL CLI and configure it to become a slave, using the GITD position we found couple steps earlier:
mysql -ppassMariaDB [(none)]> SET GLOBAL gtid_slave_pos = '9999-1002-23012';
Query OK, 0 rows affected (0.026 sec)Once that’s done, we can finally set up the replication and start it:
MariaDB [(none)]> CHANGE MASTER TO MASTER_HOST='10.0.0.101', MASTER_PORT=3306, MASTER_USER='repuser', MASTER_PASSWORD='reppass', MASTER_USE_GTID=slave_pos;
Query OK, 0 rows affected (0.016 sec)
MariaDB [(none)]> START SLAVE;
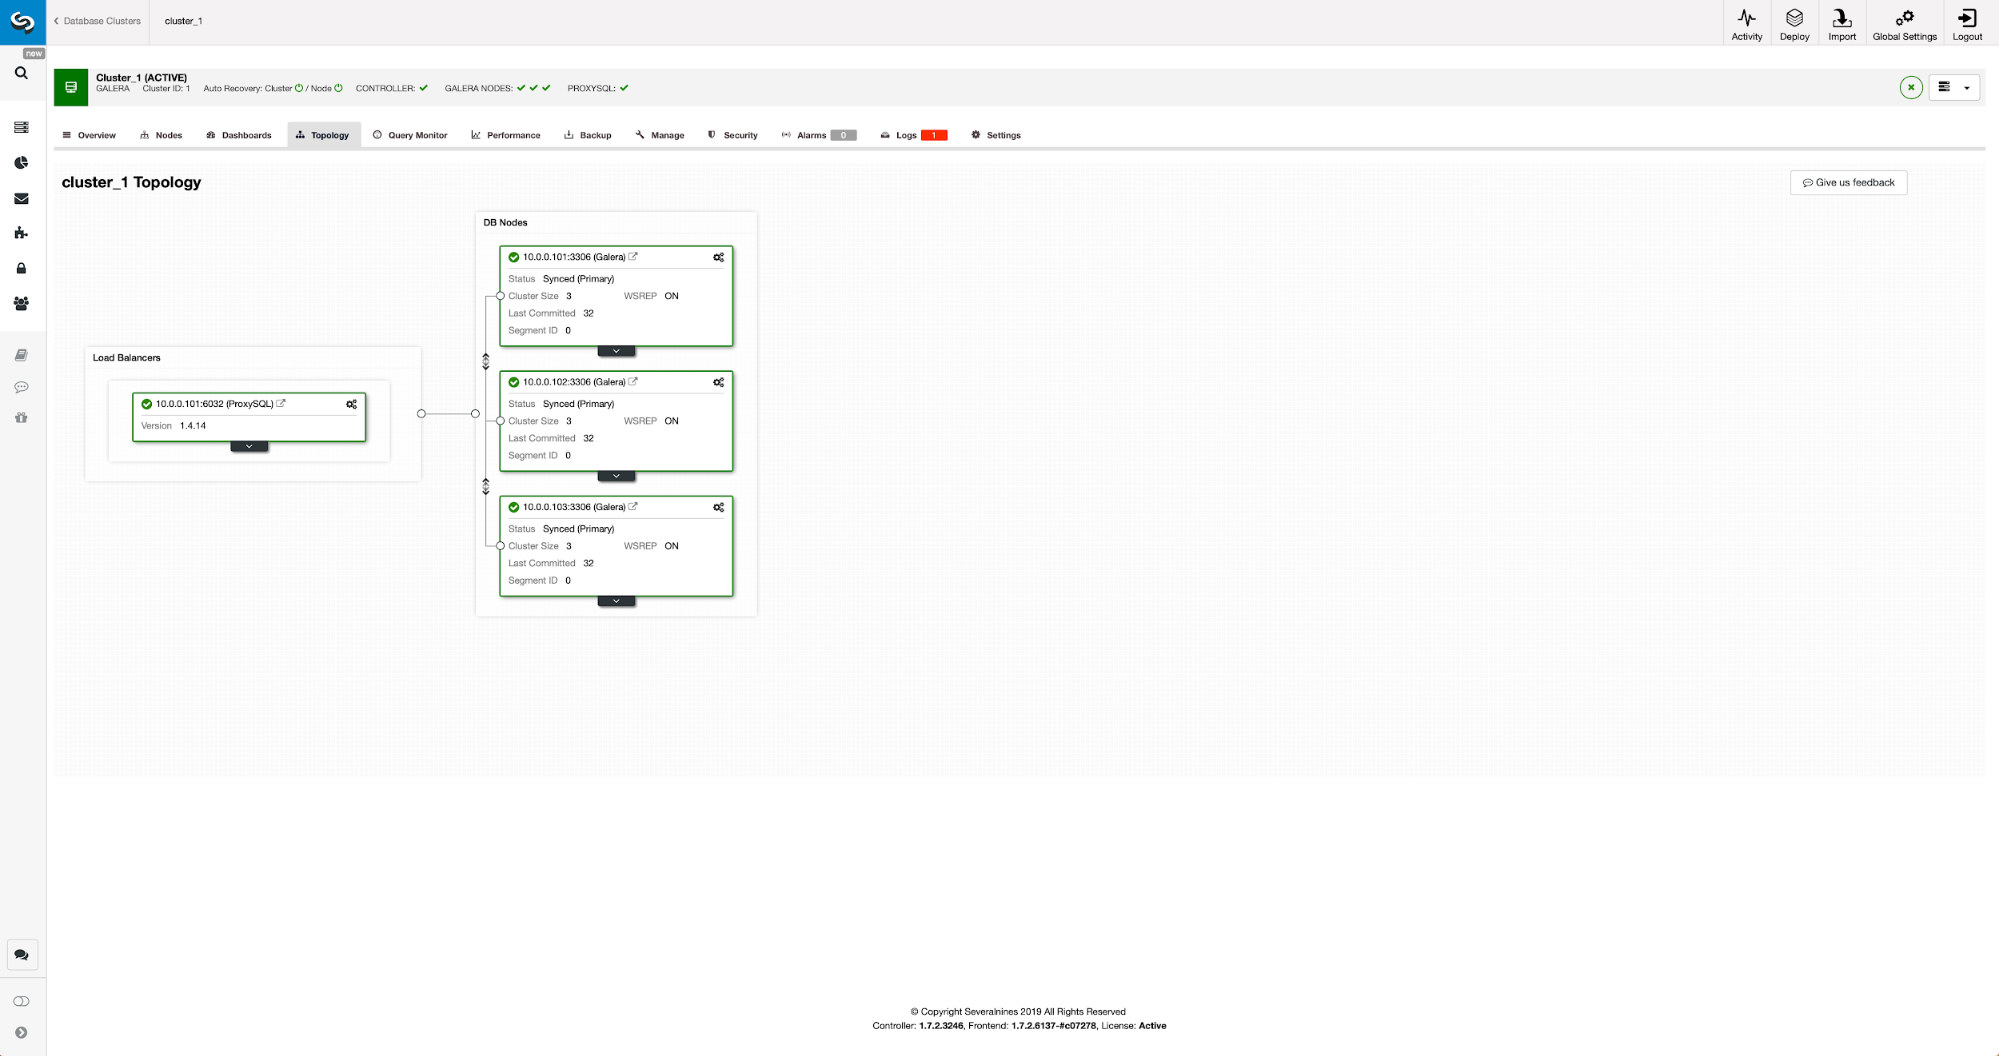
Query OK, 0 rows affected (0.010 sec)At this point we have a Galera Cluster consisting of one node. That node is also a slave of the original cluster (in particular, its master is node 10.0.0.101). To join other nodes we will use SST but to make it work first we have to ensure that SST configuration is correct – please keep in mind that we just replaced all the users in our second cluster with the contents of the source cluster. What you have to do now is to ensure that ‘wsrep_sst_auth’ configuration of the second cluster matches the one of the first cluster. Once that’s done, you can start remaining nodes one by one and they should join the existing node (10.0.0.104), get the data over SST and form the Galera cluster. Eventually, you should end up with two clusters, three node each, with asynchronous replication link across them (from 10.0.0.101 to 10.0.0.104 in our example). You can confirm that the replication is working by checking the value of:
MariaDB [(none)]> show global status like 'wsrep_last_committed';
+----------------------+-------+
| Variable_name        | Value |
+----------------------+-------+
| wsrep_last_committed | 106   |
+----------------------+-------+
1 row in set (0.001 sec)
MariaDB [(none)]> show global status like 'wsrep_last_committed';
+----------------------+-------+
| Variable_name | Value |
+----------------------+-------+
| wsrep_last_committed | 114 |
+----------------------+-------+
1 row in set (0.001 sec)How to Configure Asynchronous Replication Between MariaDB Galera Clusters Using ClusterControl?
As of the time of this blog, ClusterControl does not have the functionality to configure asynchronous replication across multiple clusters, we are working on it as I type this. Nonetheless ClusterControl can be of great help in this process – we will show you how you can speed up the laborious manual steps using automation provided by ClusterControl.
From what we showed before, we can conclude that those are the general steps to take when setting up replication between two Galera clusters:
- Deploy a new Galera cluster
- Provision new cluster using data from the old one
- Configure new cluster (SST configuration, binary logs)
- Set up the replication between the old and the new cluster
First three points are something you can easily do using ClusterControl even now. We are going to show you how to do that.
Deploy and Provision a New MariaDB Galera Cluster Using ClusterControl
The initial situation is similar – we have one cluster up and running. We have to set up the second one. One of the more recent features of ClusterControl is an option to deploy a new cluster and provision it using the data from backup. This is very useful to create test environments, it is also an option we will use to provision our new cluster for the replication setup. Therefore the first step we will take is to create a backup using mariabackup:
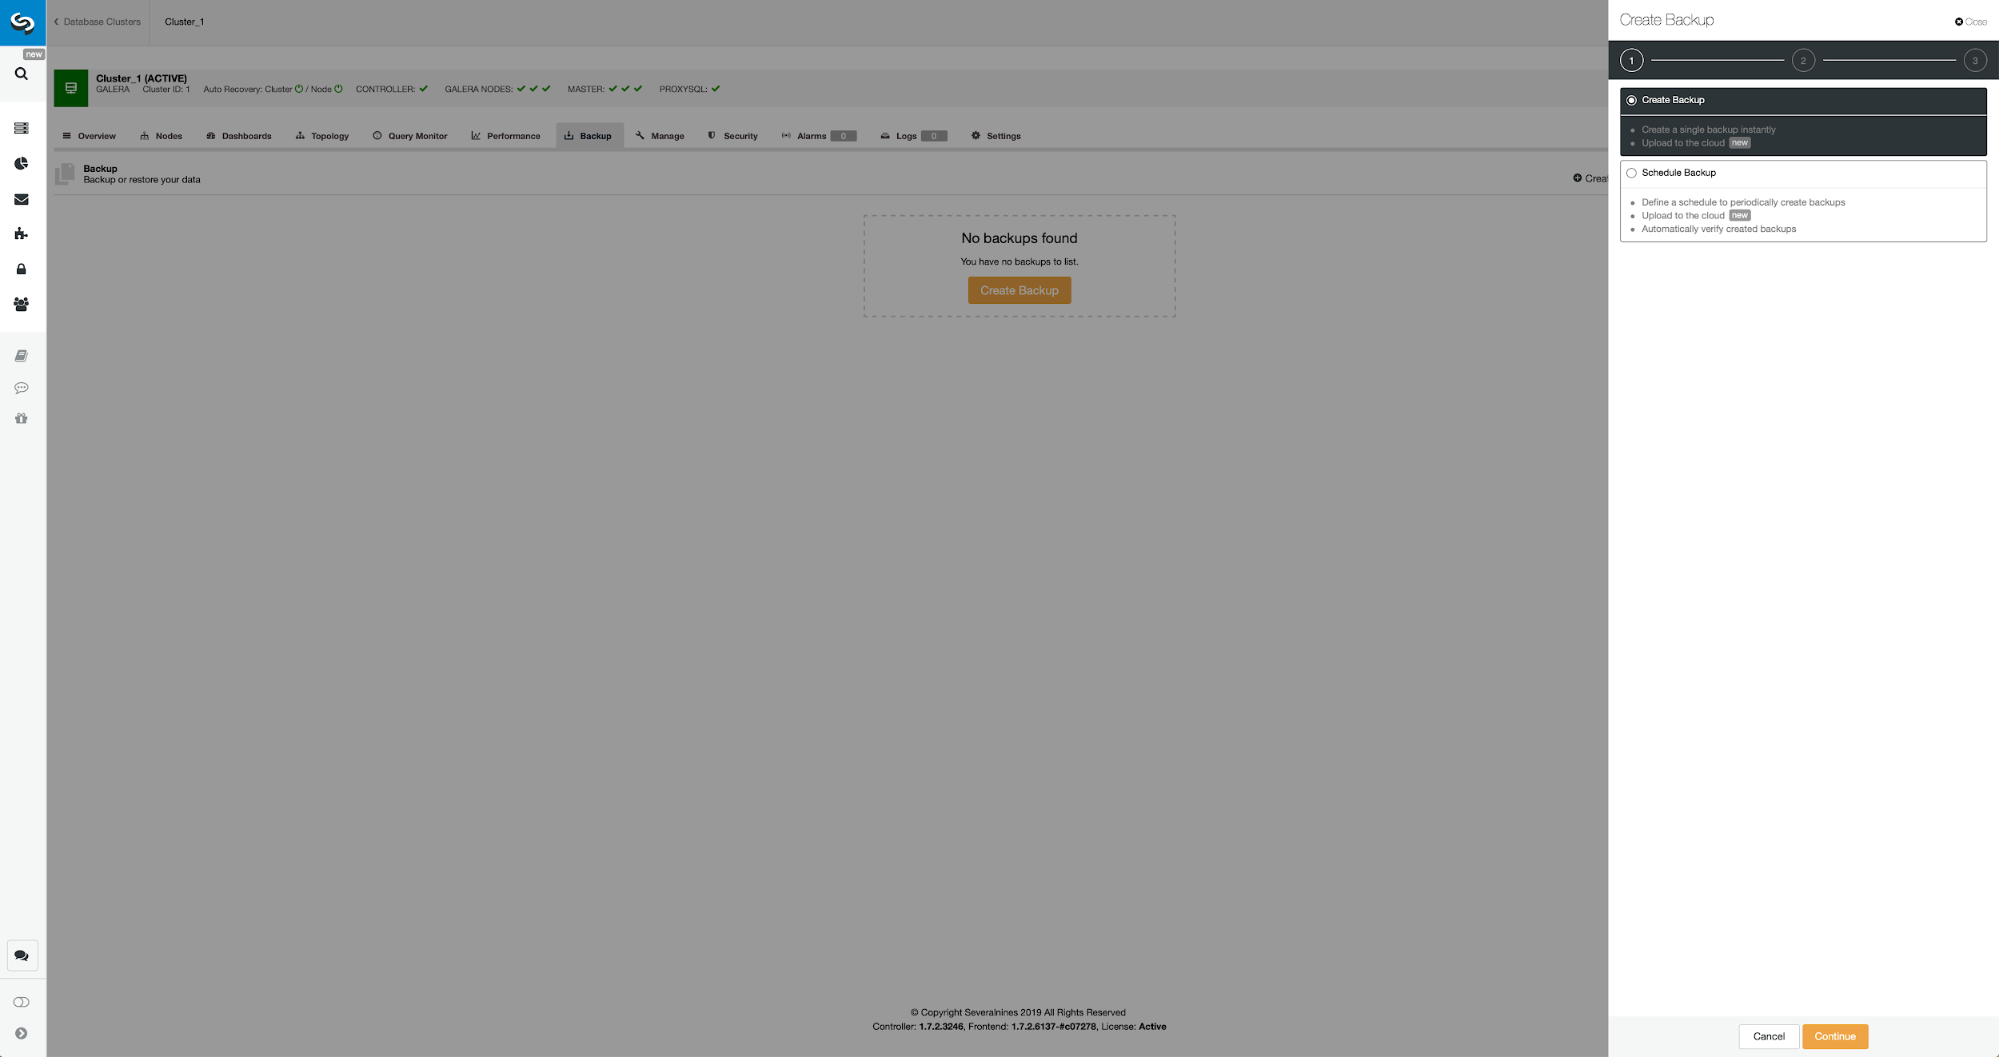
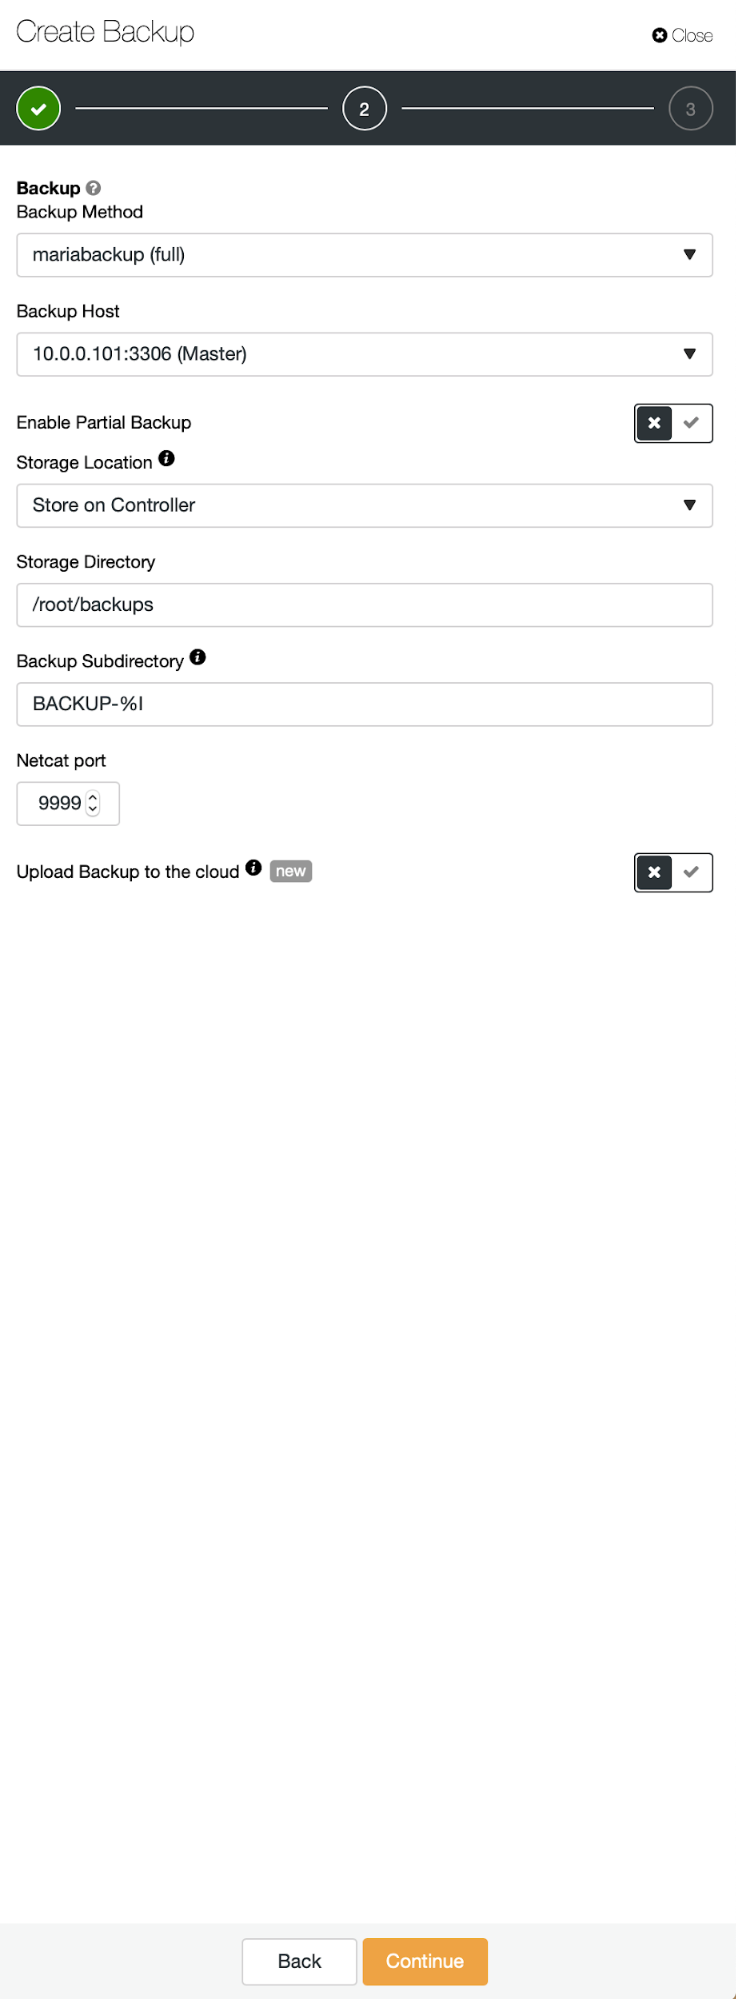
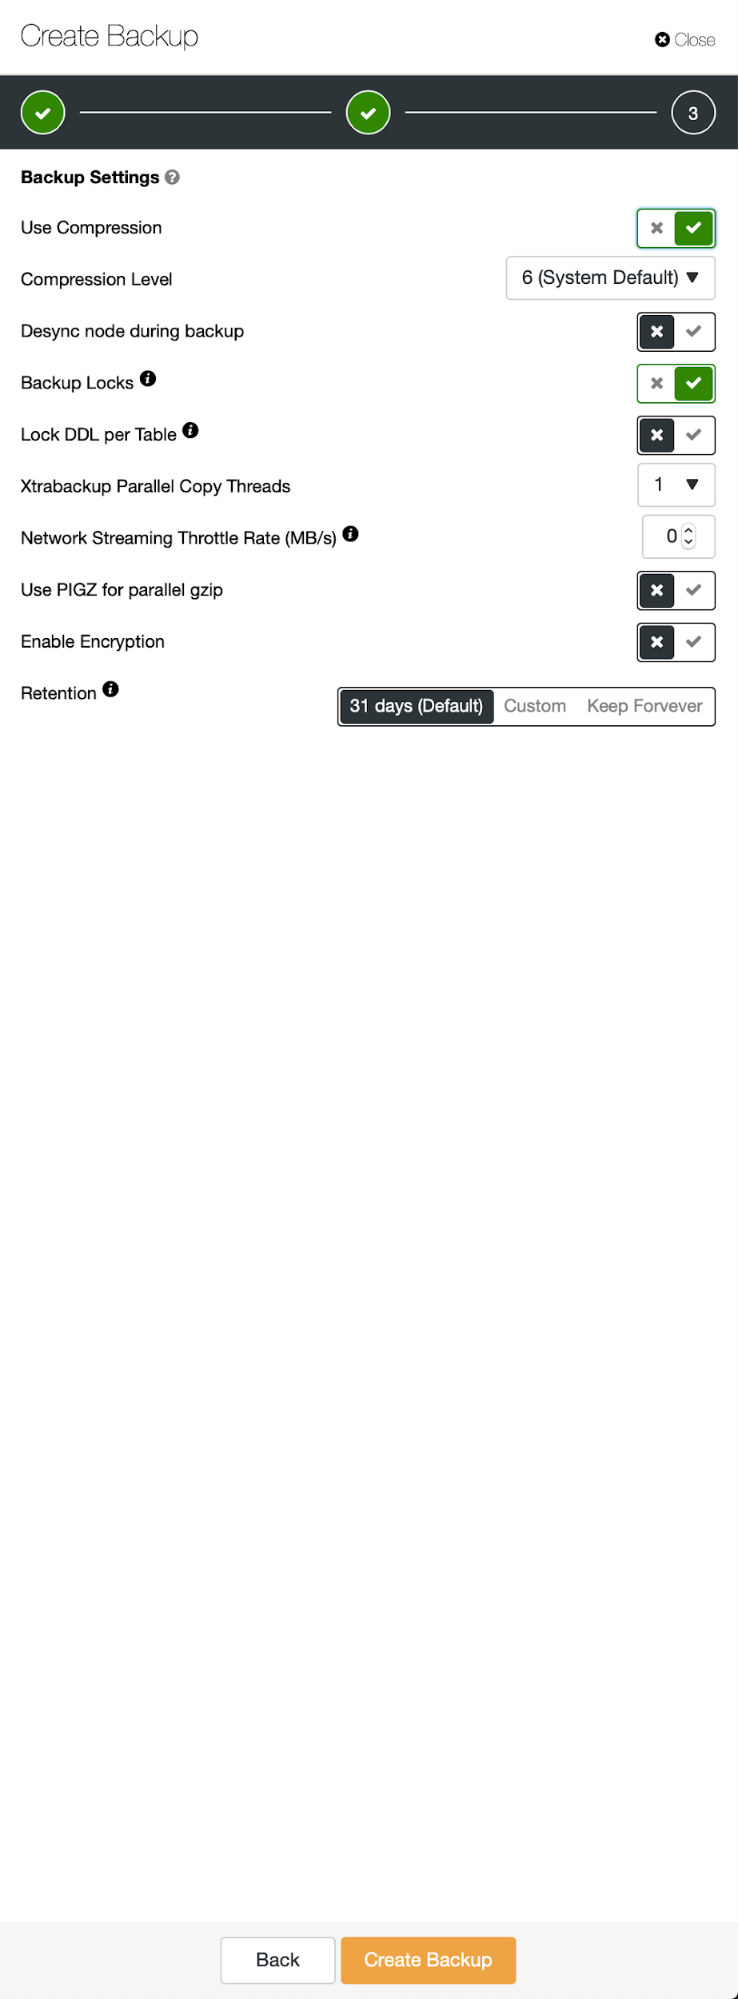
Three steps in which we picked the node to take the backup off it. This node (10.0.0.101) will become a master. It has to have binary logs enabled. In our case all of the nodes have binlog enabled but if they hadn’t it’s very easy to enable it from the ClusterControl – we will show the steps later, when we will do it for the second cluster.
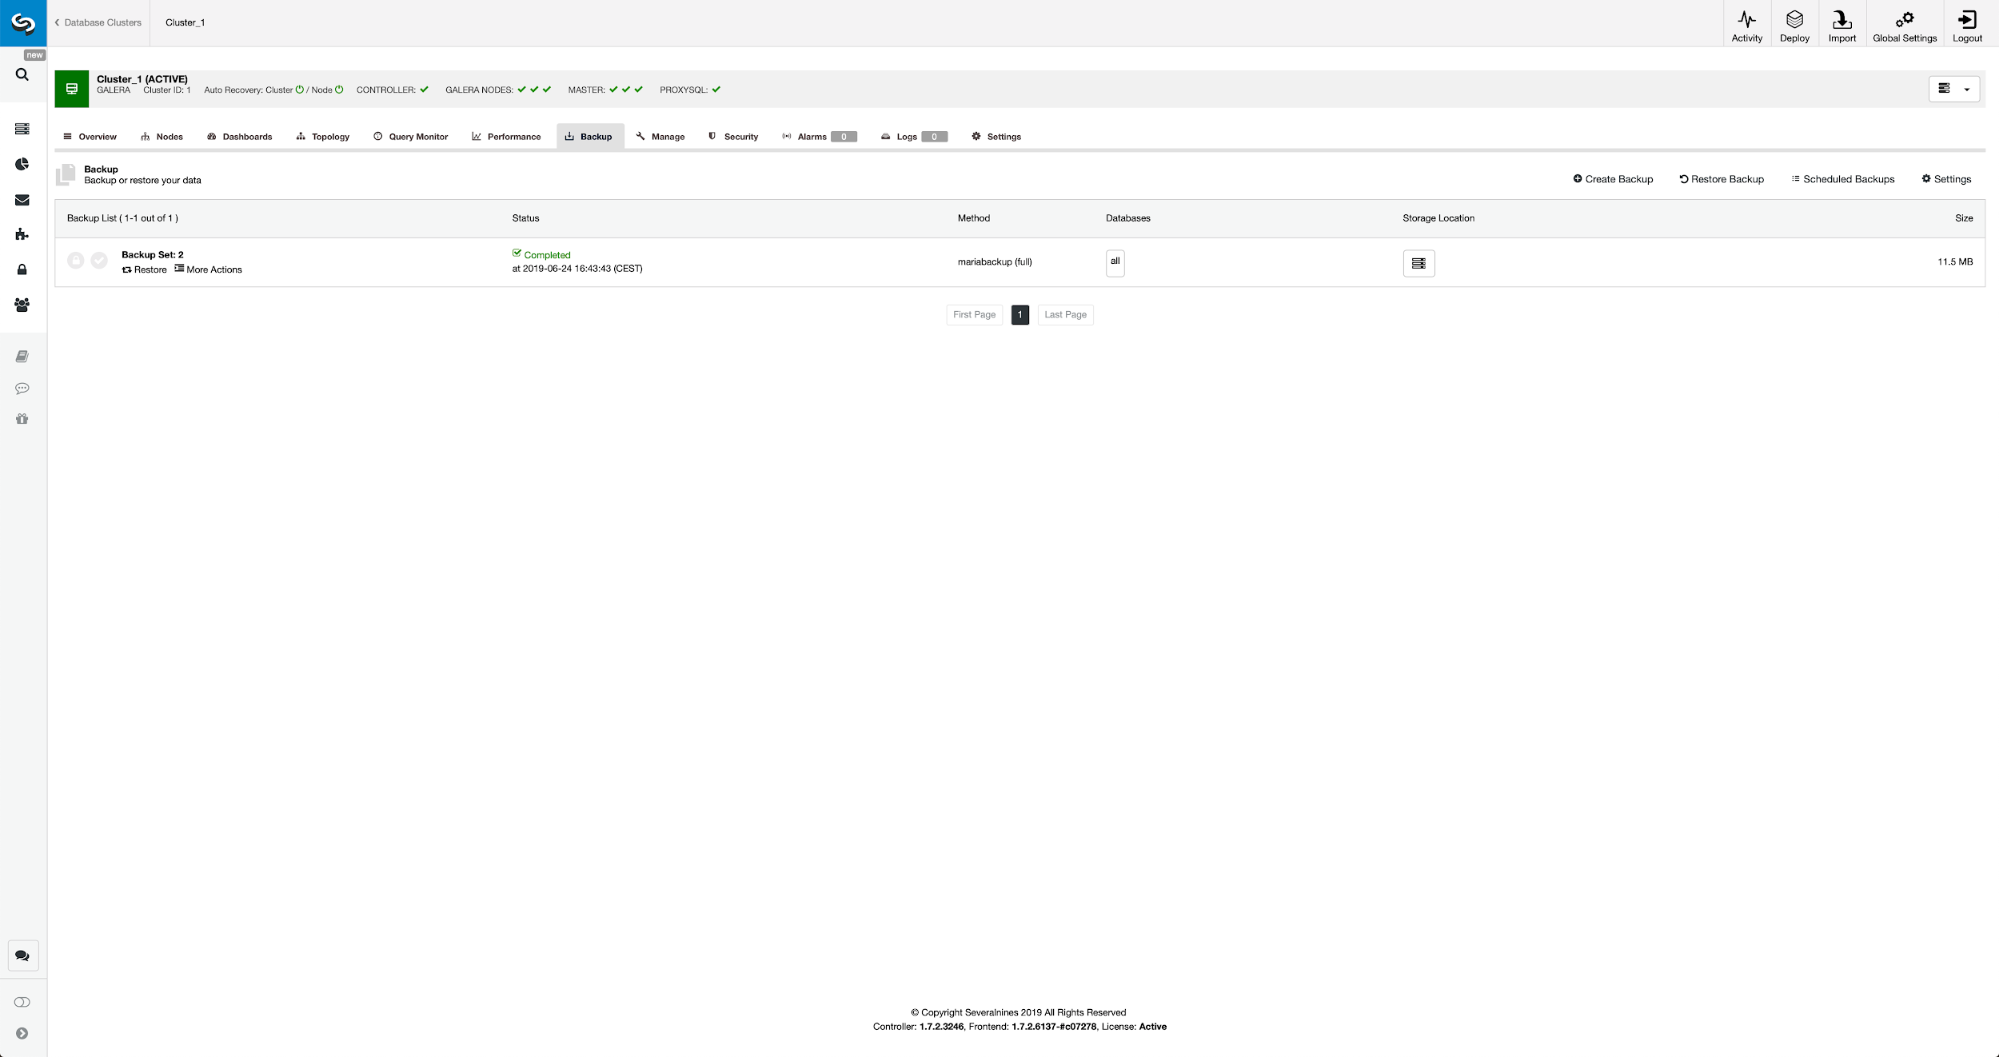
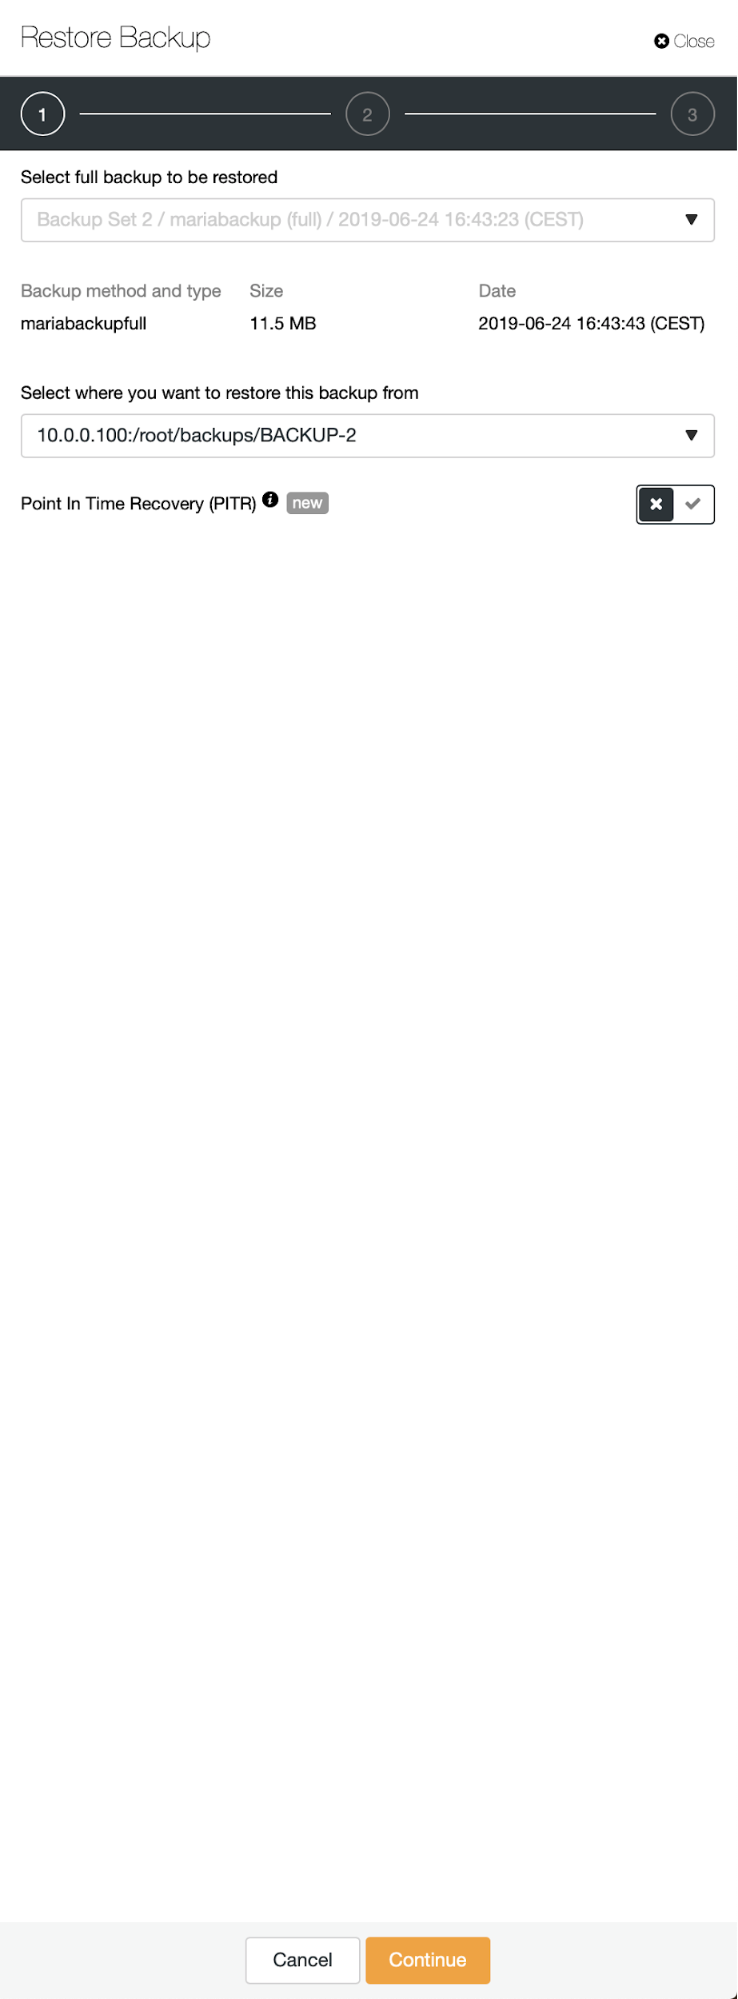
Once the backup is completed, it will become visible on the list. We can then proceed and restore it:
Should we want that, we could even do the Point-In-Time Recovery, but in our case it does not really matter: once the replication will be configured, all required transactions from binlogs will be applied on the new cluster.
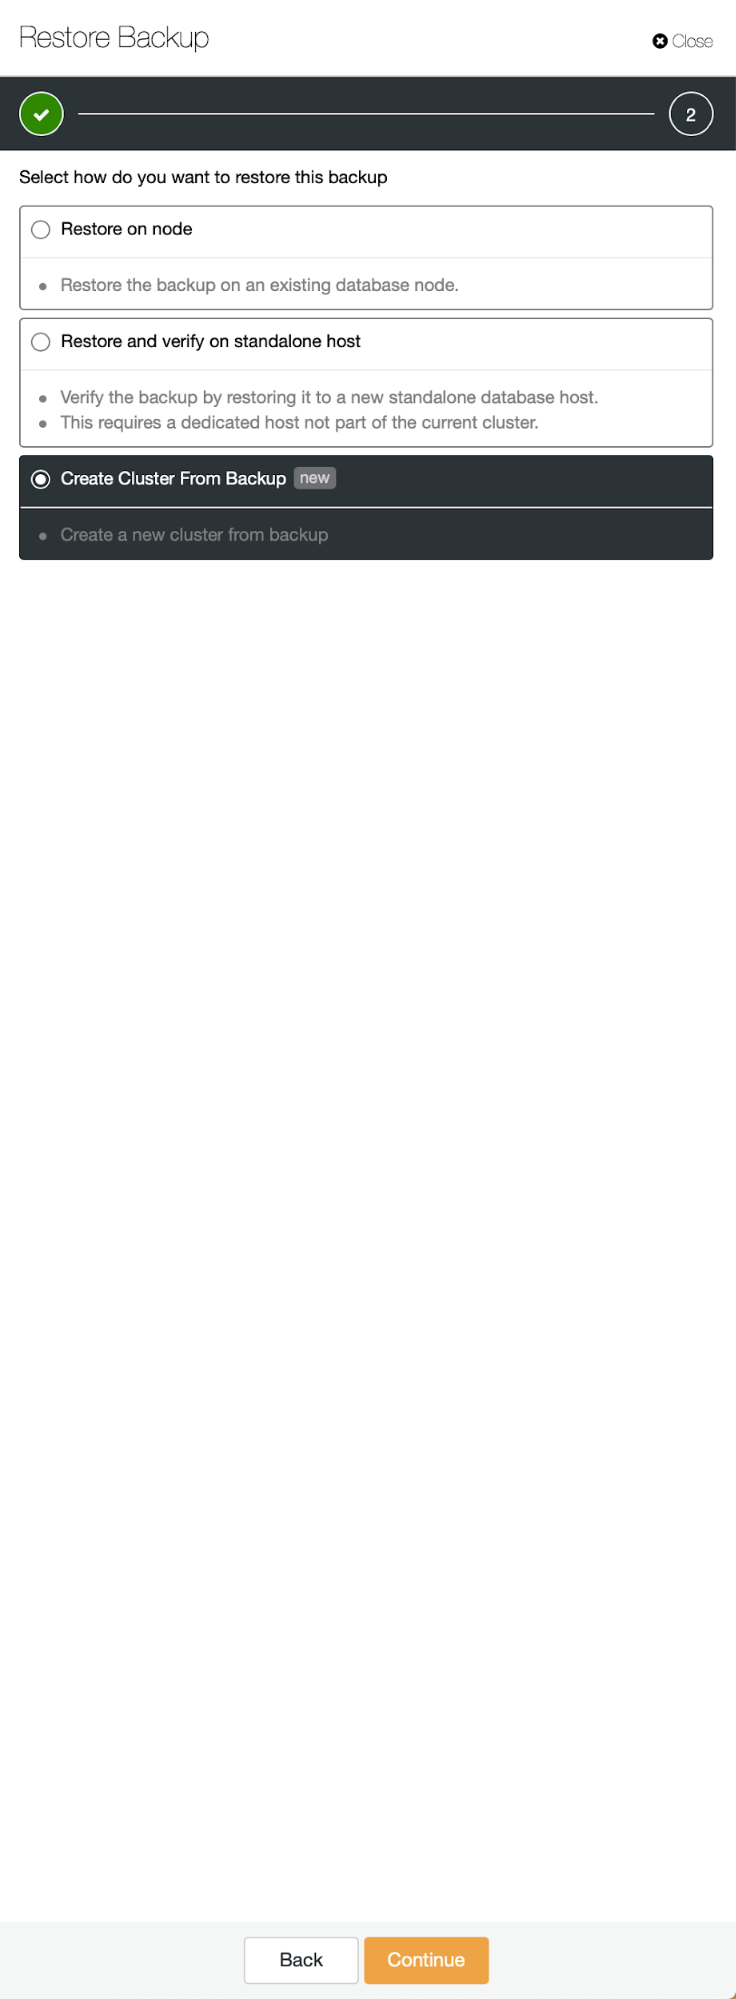
Then we pick the option to create a cluster from the backup. This opens another dialog:
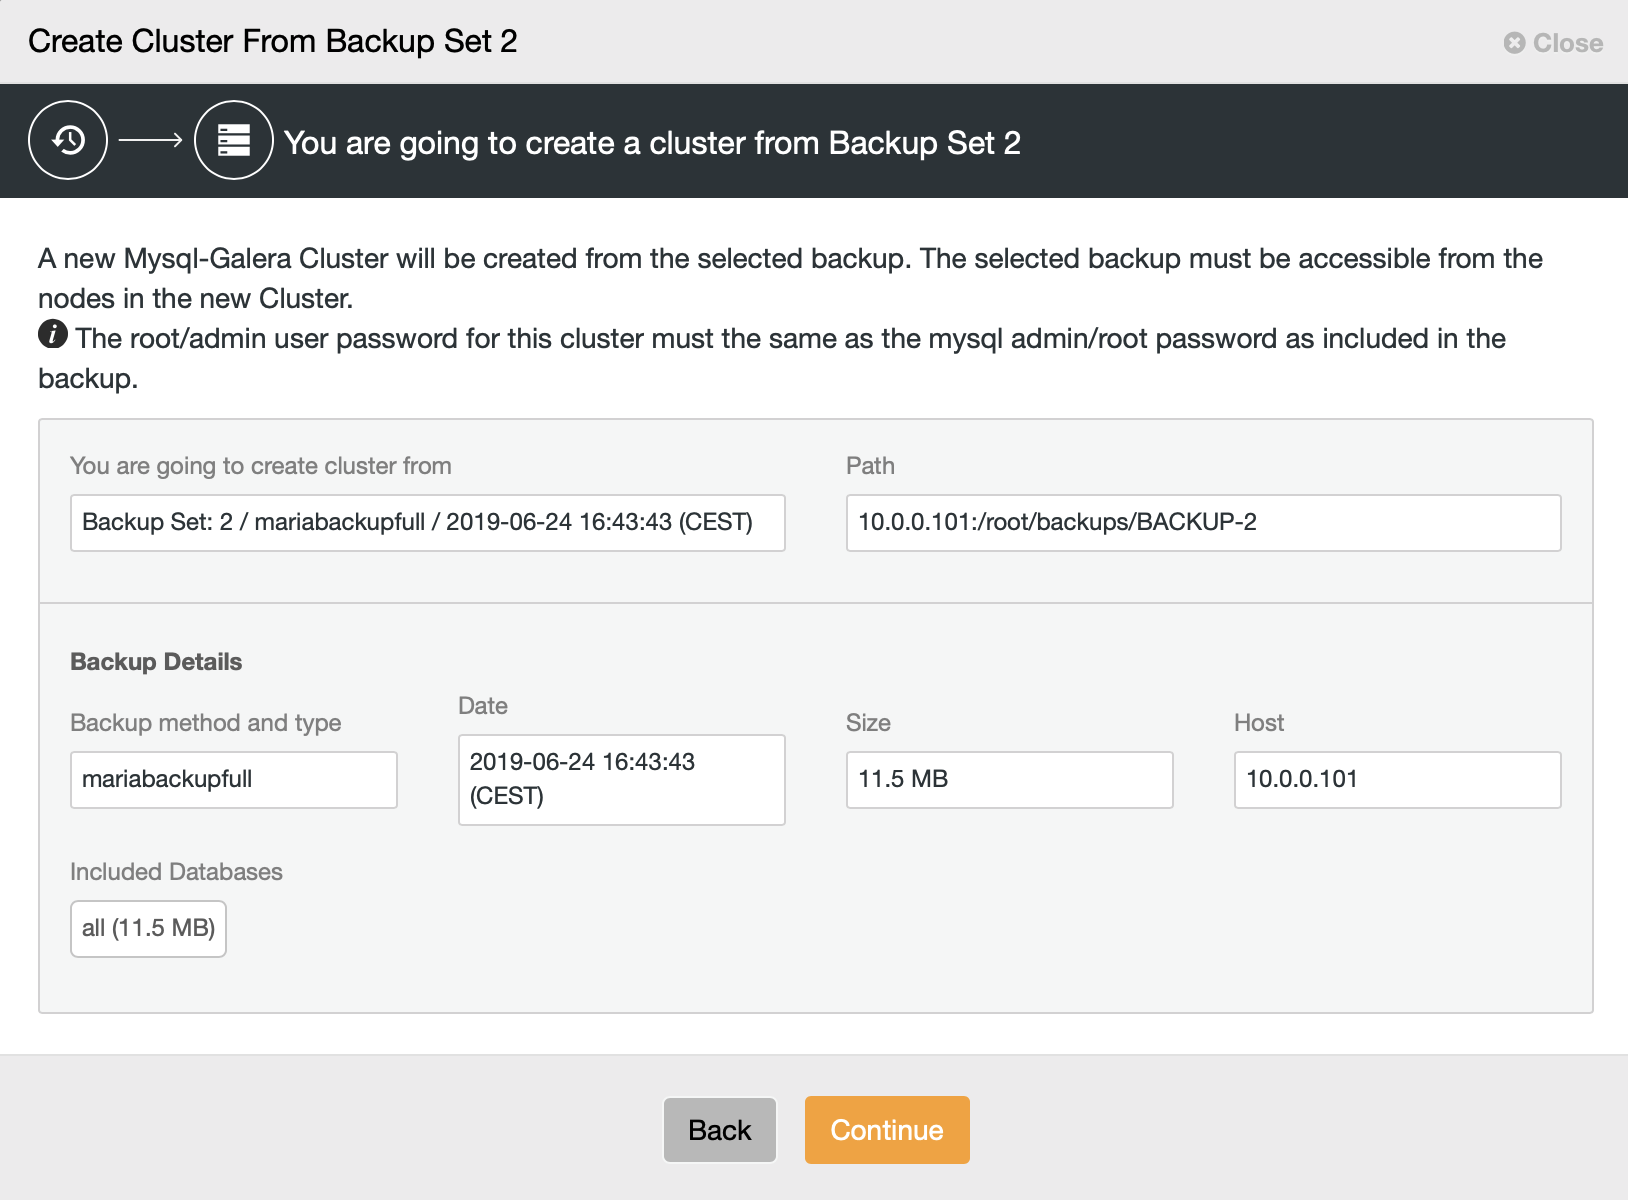
It is a confirmation which backup will be used, which host the backup was taken from, what method was used to create it and some metadata to help verify if the backup looks sound.
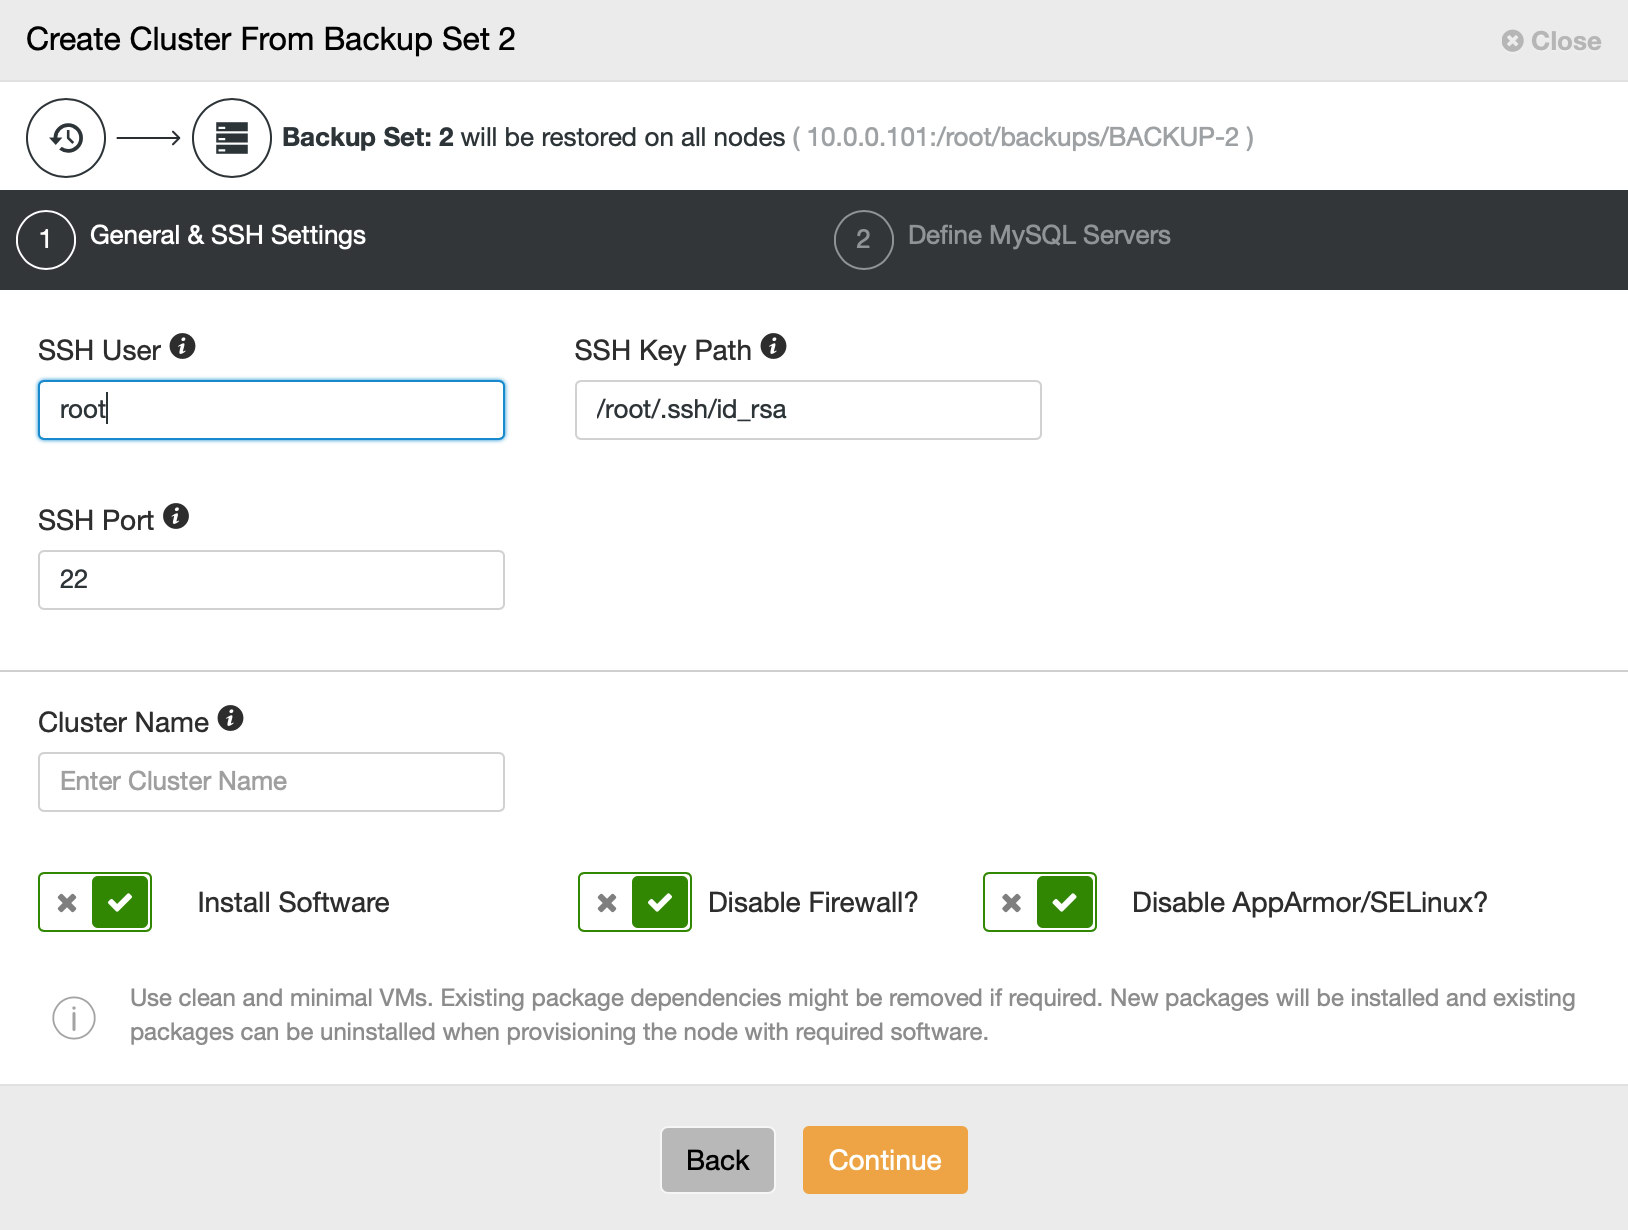
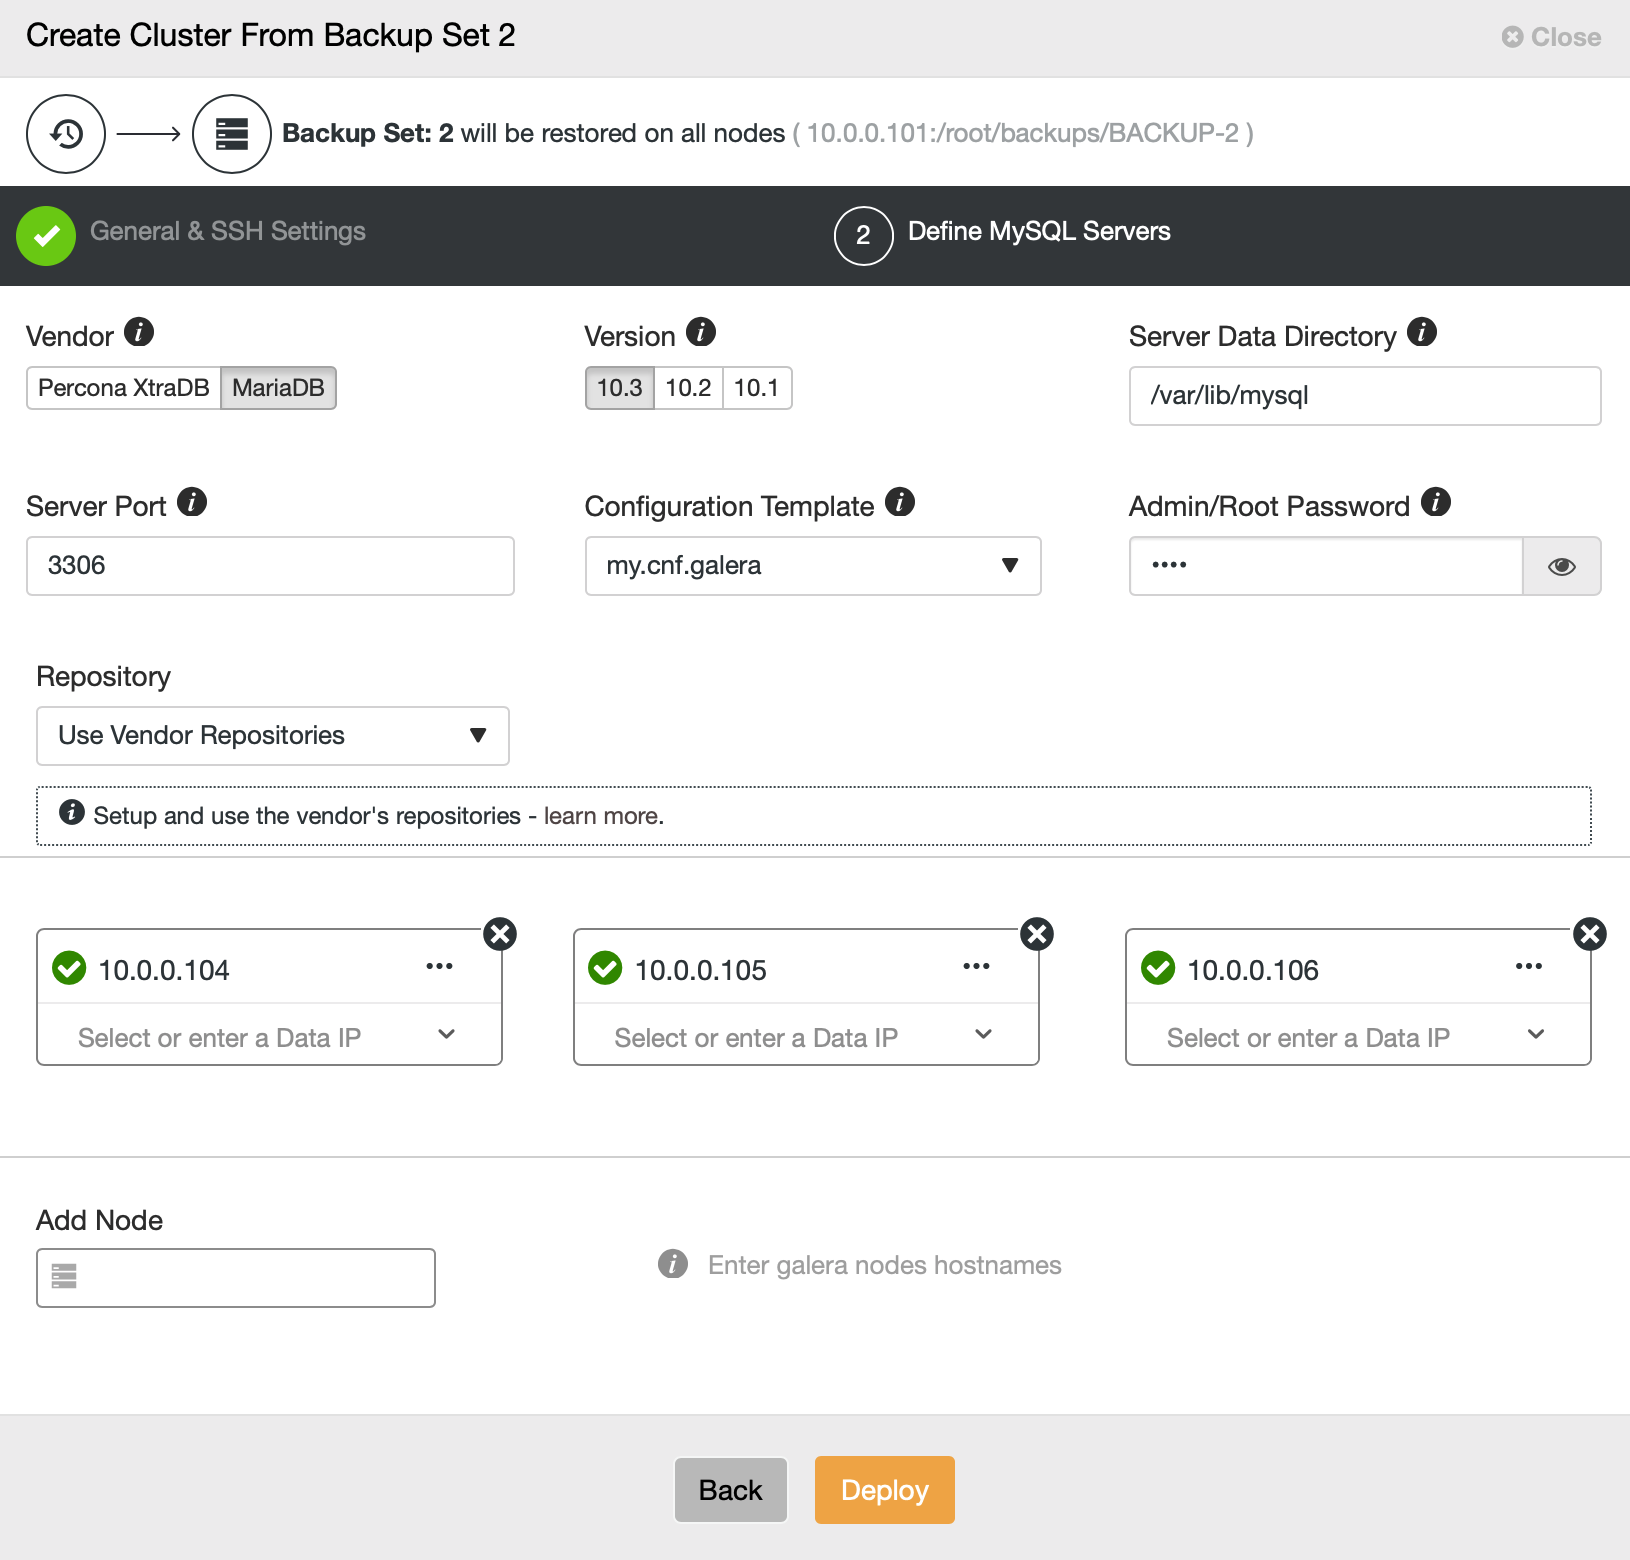
Then we basically go to the regular deployment wizard in which we have to define SSH connectivity between ClusterControl host and the nodes to deploy the cluster on (the requirement for ClusterControl) and, in the second step, vendor, version, password and nodes to deploy on:
That’s all regarding deployment and provisioning. ClusterControl will set up the new cluster and it will provision it using the data from the old one.

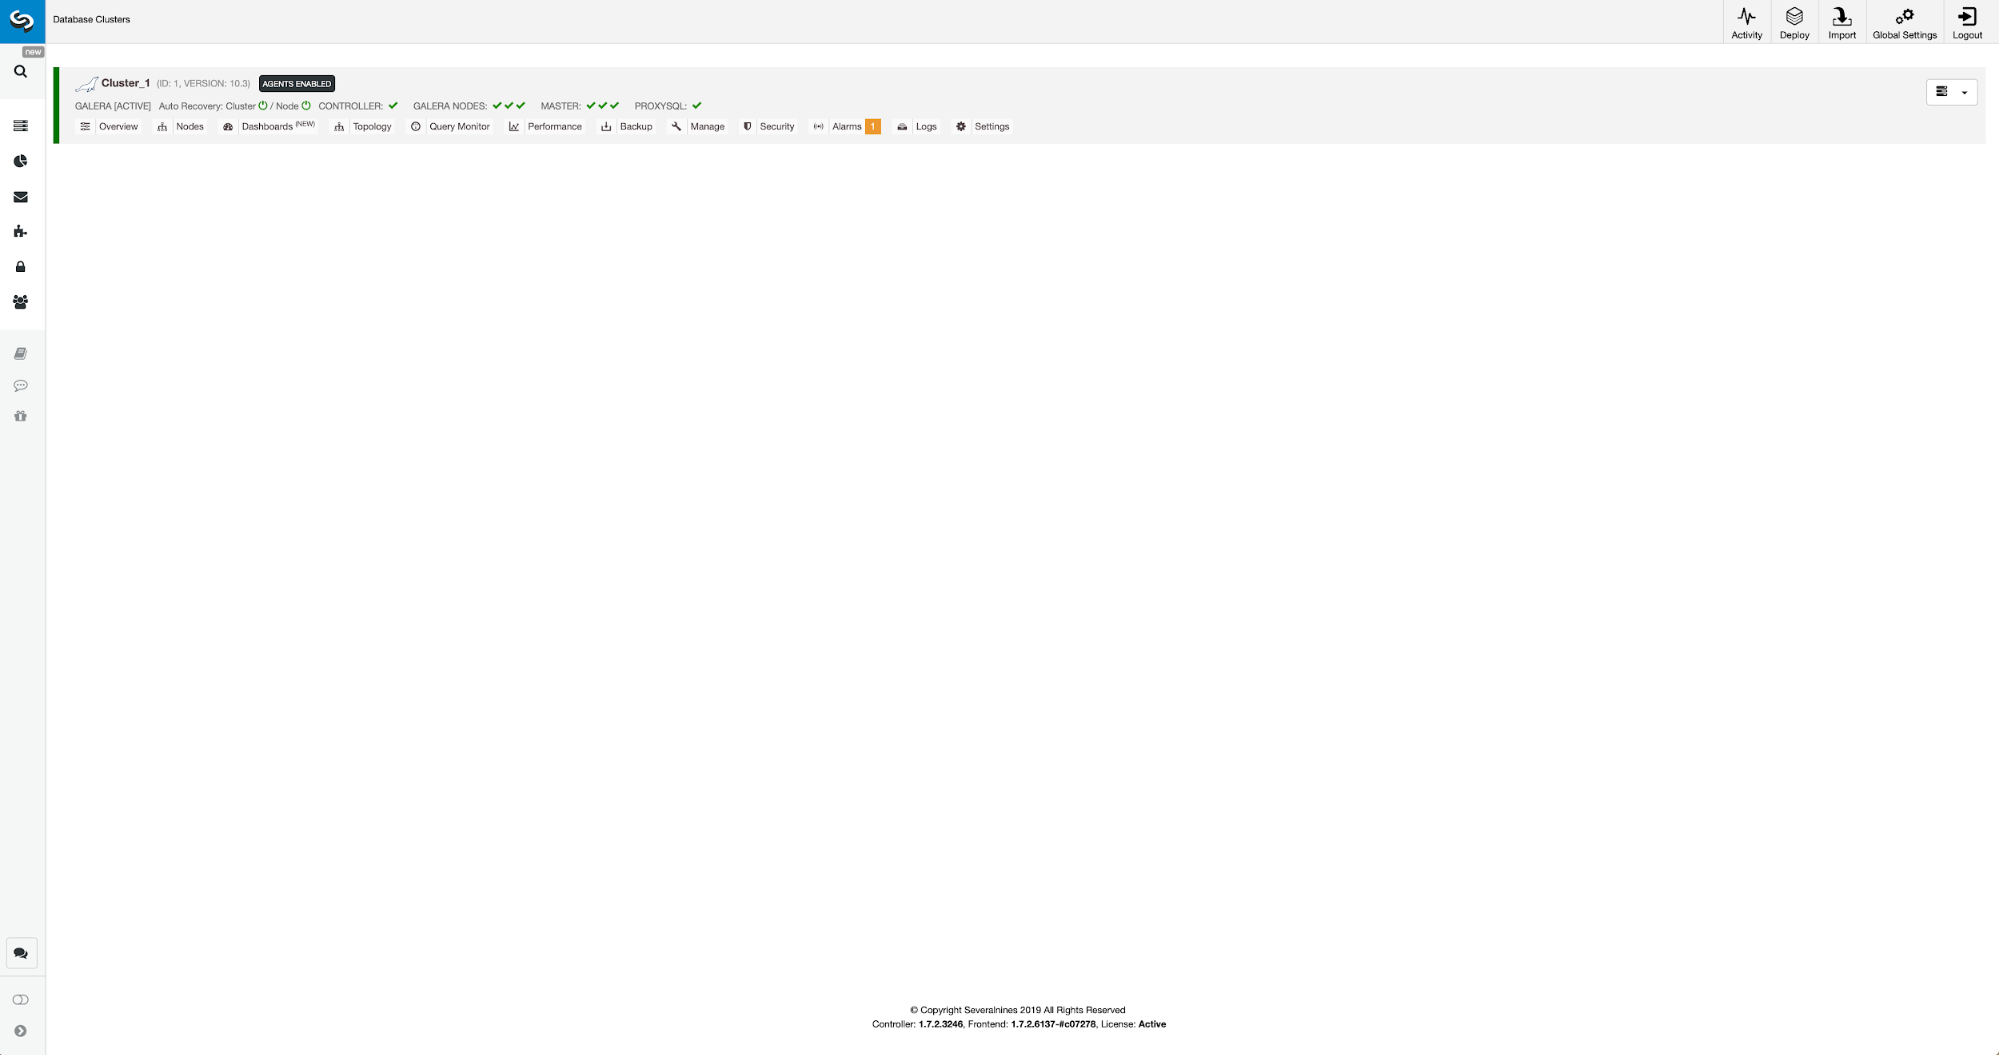
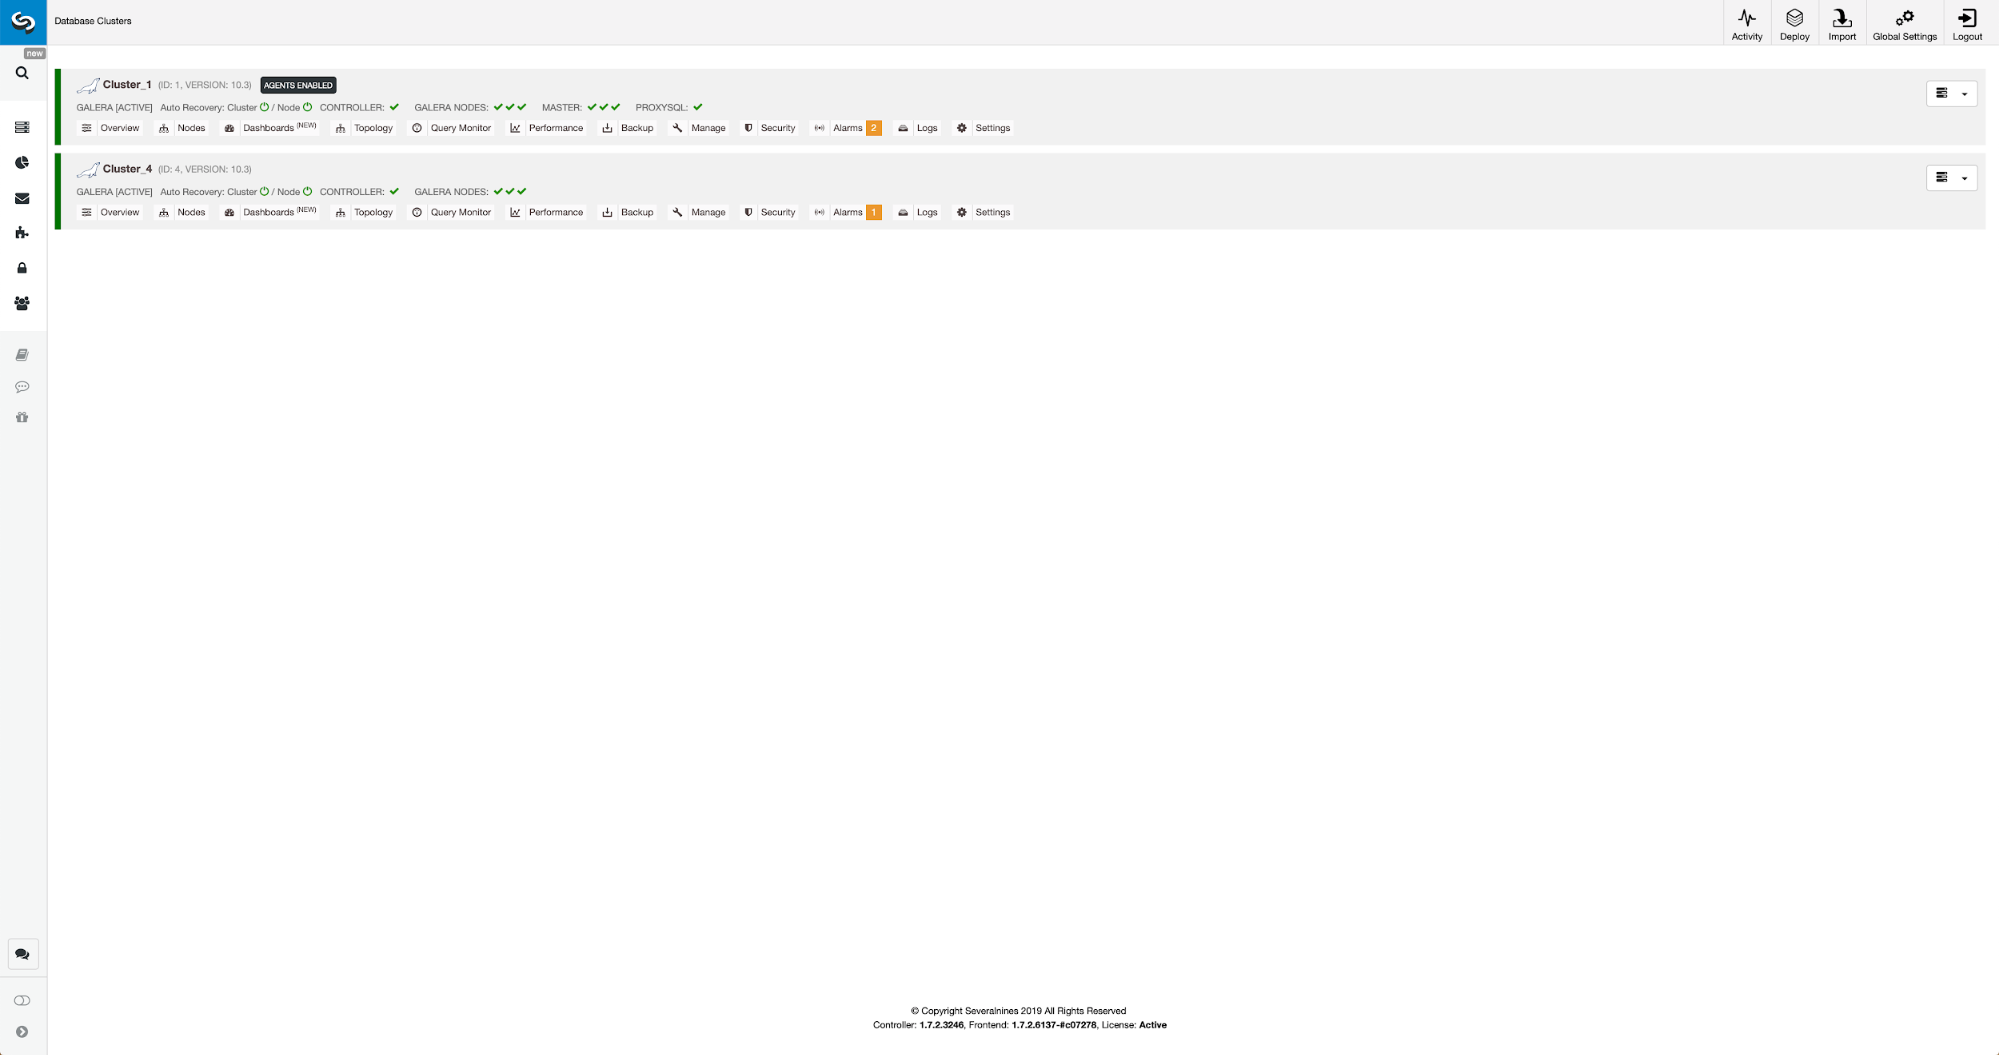
We can monitor the progress in the activity tab. Once completed, second cluster will show up on the cluster list in ClusterControl.
Reconfiguration of the New Cluster Using ClusterControl
Now, we have to reconfigure the cluster – we will enable binary logs. In the manual process we had to make changes in the wsrep_sst_auth config and also configuration entries in [mysqldump] and [xtrabackup] sections of the config. Those settings can be found in secrets-backup.cnf file. This time it is not needed as ClusterControl generated new passwords for the cluster and configured the files correctly. What is important to keep in mind, though, should you change the password of the ‘backupuser’@’127.0.0.1’ user in the original cluster, you will have to make configuration changes in the second cluster too to reflect that as changes in the first cluster will replicate to the second cluster.
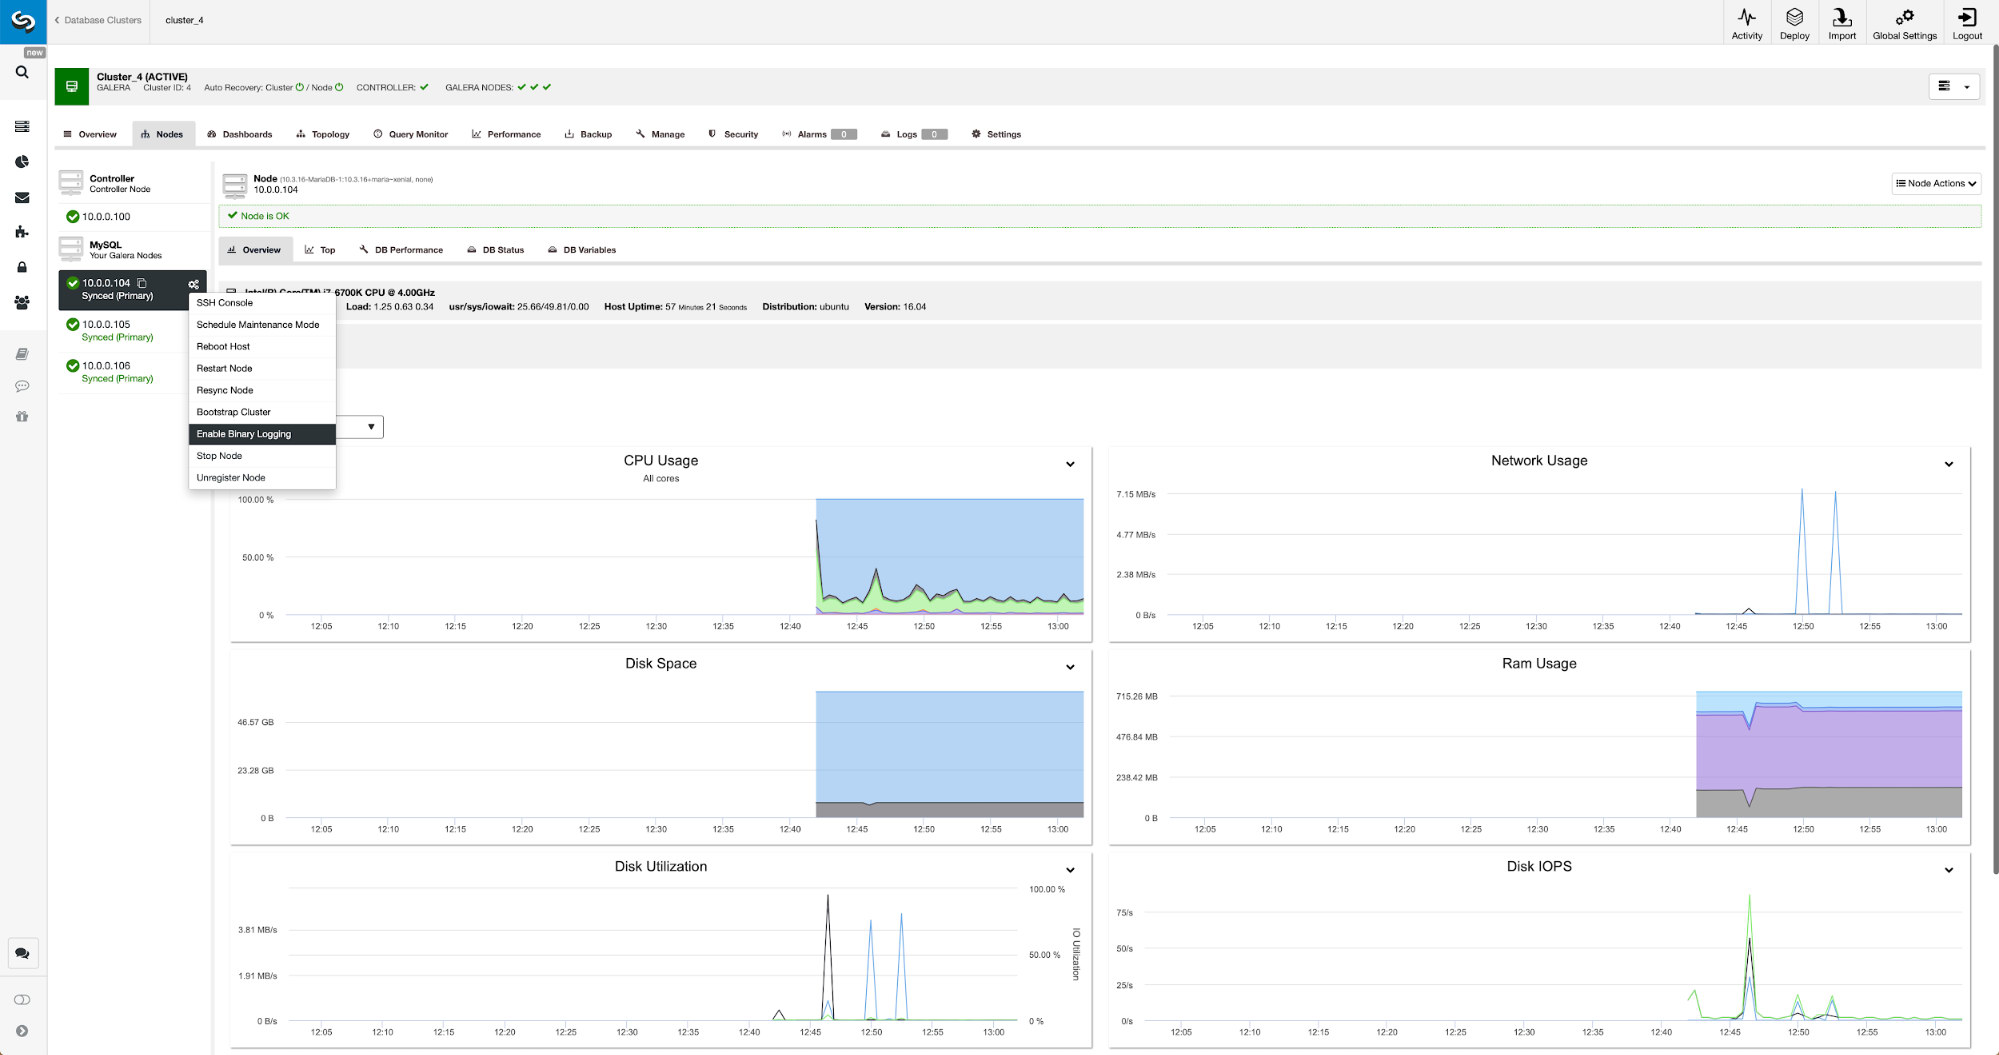
Binary logs can be enabled from the Nodes section. You have to pick node by node and run “Enable Binary Logging” job. You will be presented with a dialog:
Here you can define how long you would like to keep the logs, where they should be stored and if ClusterControl should restart the node for you to apply changes – binary log configuration is not dynamic and MariaDB has to be restarted to apply those changes.
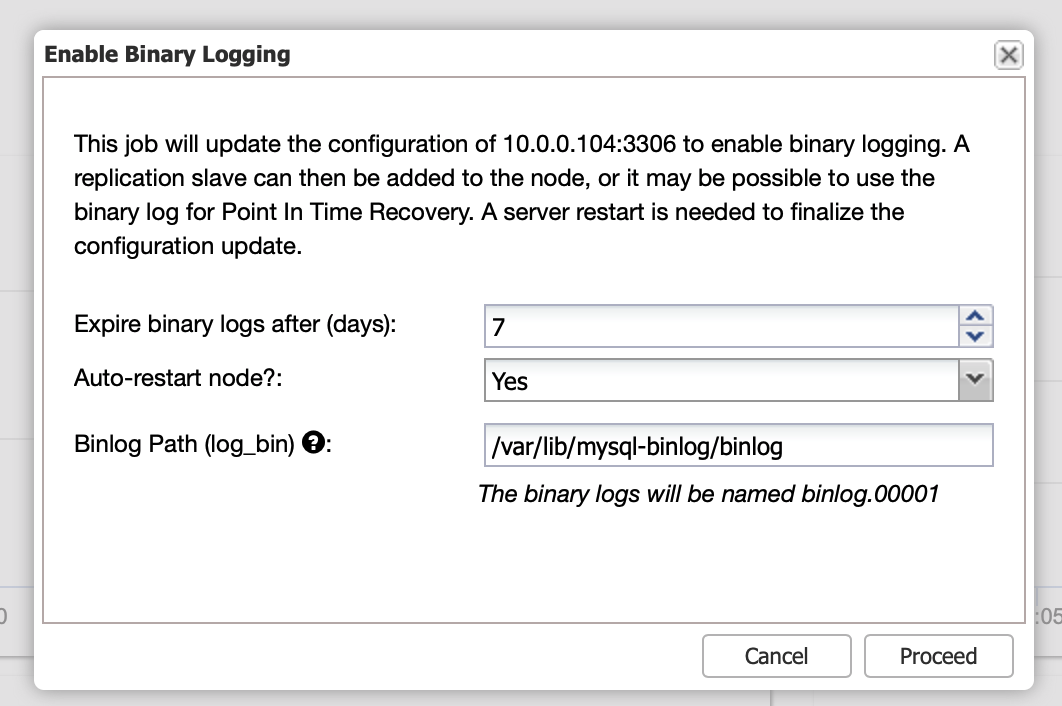
When the changes will complete you will see all nodes marked as “master”, which means that those nodes have binary log enabled and can act as master.
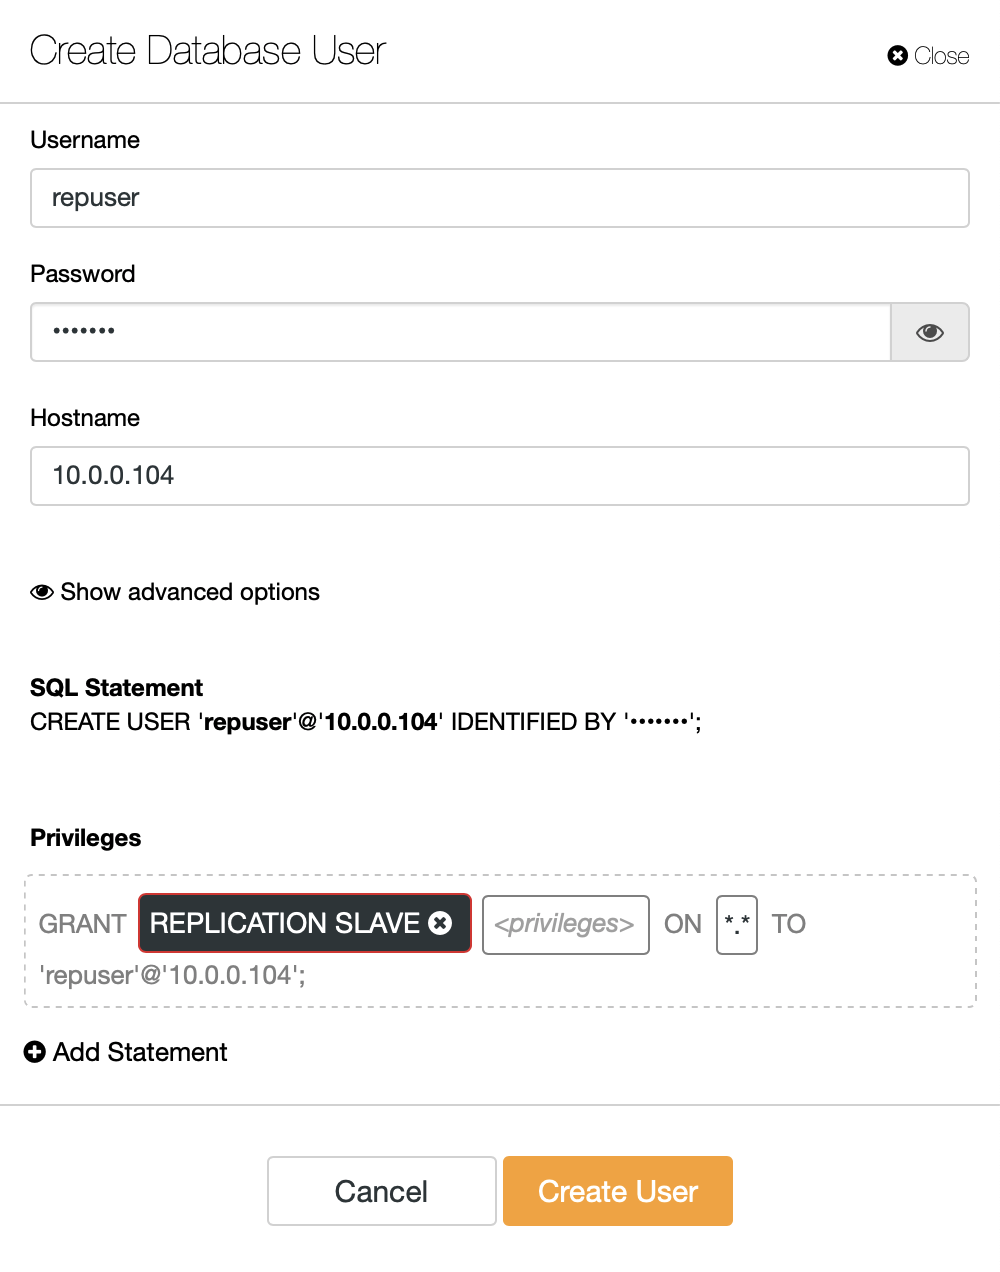
If we do not have replication user created already, we have to do that. In the first cluster we have to go to Manage -> Schemas and Users:
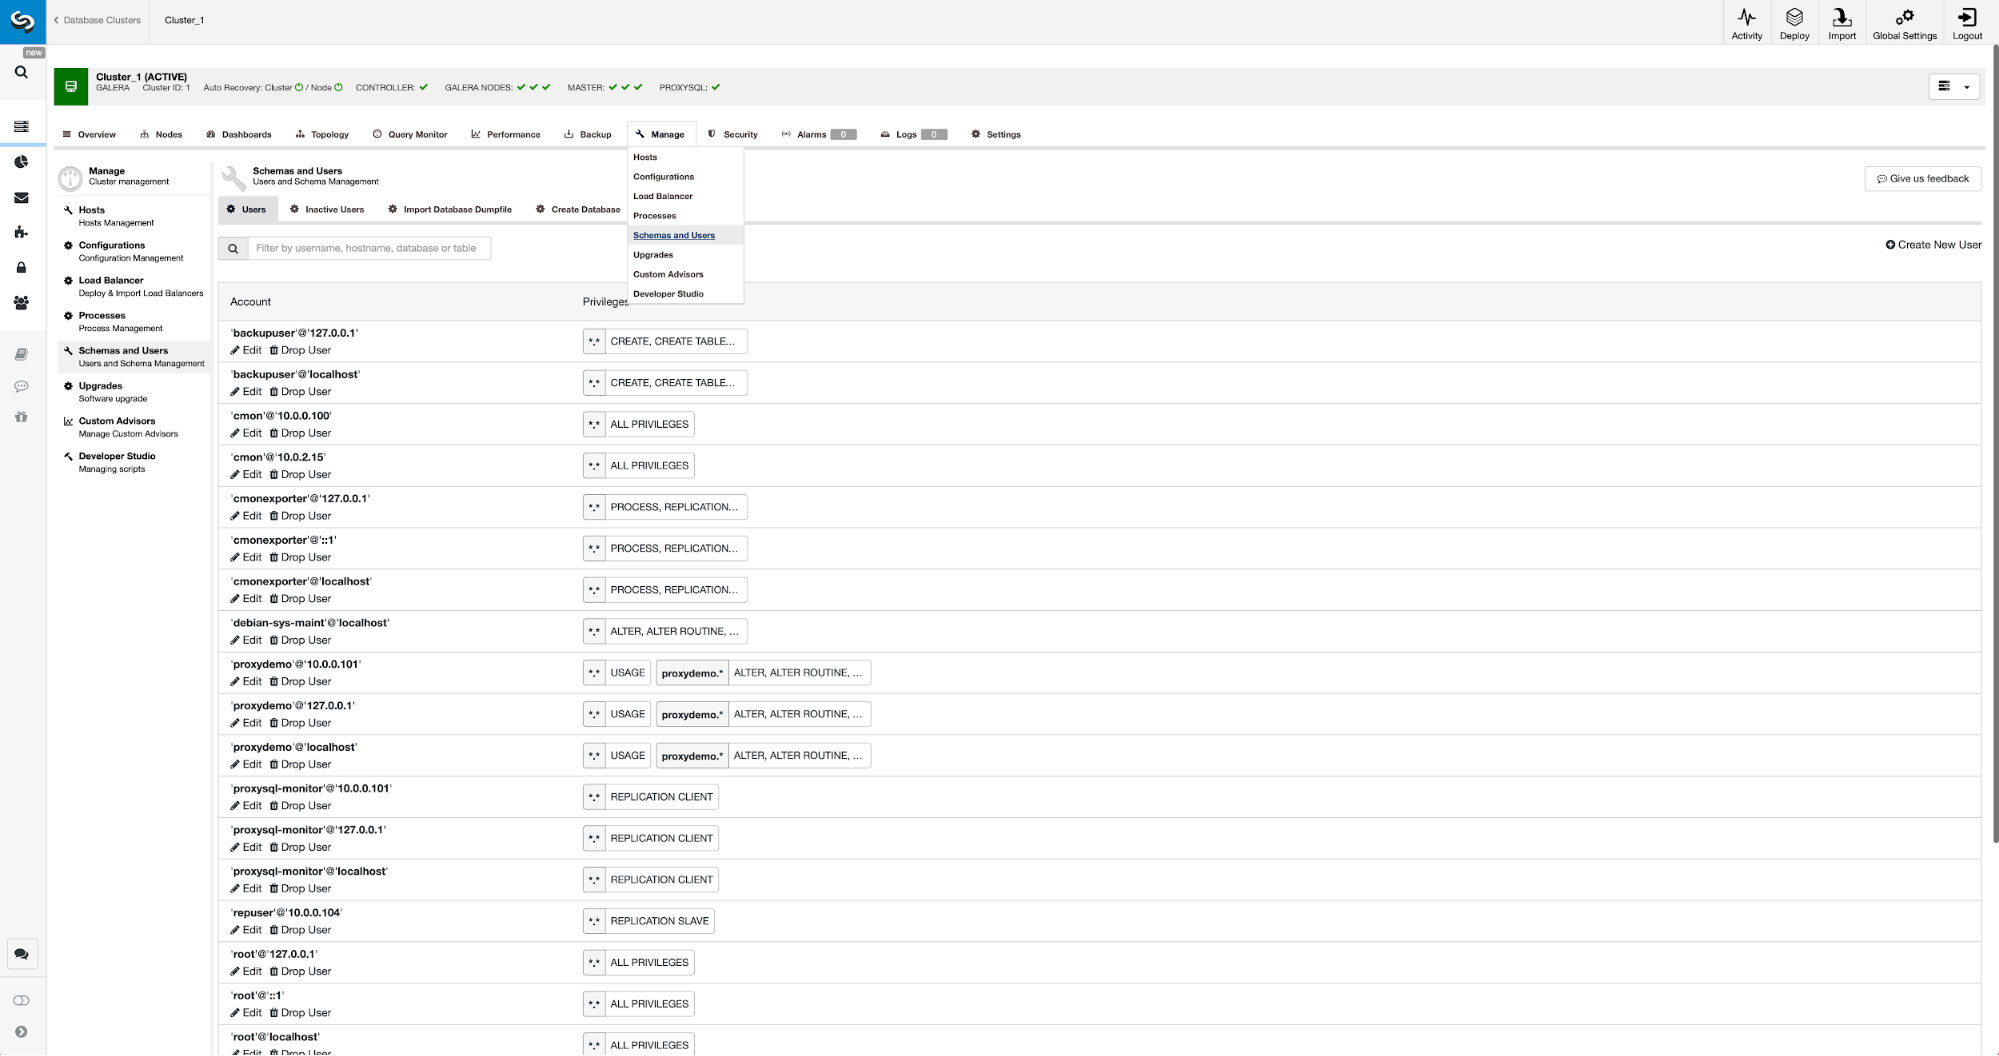
On the right hand side we have an option to create a new user:
This concludes the configuration required to set up the replication.
Setting up replication between clusters using ClusterControl
As we stated, we are working on automating this part. Currently it has to be done manually. As you may remember, we need GITD position of our backup and then run couple commands using MySQL CLI. GTID data is available in the backup. ClusterControl creates backup using xbstream/mbstream and it compresses it afterwards. Our backup is stored on the ClusterControl host where we don’t have access to mbstream binary. You can try to install it or you can copy the backup file to the location, where such binary is available:
scp /root/backups/BACKUP-2/ backup-full-2019-06-24_144329.xbstream.gz 10.0.0.104:/root/mariabackup/Once that’s done, on 10.0.0.104 we want to check the contents of xtrabackup_info file:
cd /root/mariabackup
zcat backup-full-2019-06-24_144329.xbstream.gz | mbstream -x
root@vagrant:~/mariabackup# cat /root/mariabackup/xtrabackup_info | grep binlog_pos
binlog_pos = filename 'binlog.000007', position '379', GTID of the last change '9999-1002-846116'
Finally, we configure the replication and start it:
MariaDB [(none)]> SET GLOBAL gtid_slave_pos ='9999-1002-846116';
Query OK, 0 rows affected (0.024 sec)
MariaDB [(none)]> CHANGE MASTER TO MASTER_HOST='10.0.0.101', MASTER_PORT=3306, MASTER_USER='repuser', MASTER_PASSWORD='reppass', MASTER_USE_GTID=slave_pos;
Query OK, 0 rows affected (0.024 sec)MariaDB [(none)]> START SLAVE;
Query OK, 0 rows affected (0.010 sec)This is it – we just configured asynchronous replication between two MariaDB Galera clusters using ClusterControl. As you could have seen, ClusterControl was able to automate the majority of the steps we had to take in order to set up this environment.


