blog
How to Deploy and Manage MySQL Multi-Master Replication Setups With ClusterControl 1.4

MySQL replication setups can take different shapes. The main topology is probably a simple master-slave setup. But it is also possible to construct more elaborate setups with multiple masters and chained setups. ClusterControl 1.4 takes advantage of this flexibility and gives you possibility to deploy multimaster setups. In this blog post, we will look at a couple of different setups and how they would be used in real-life situations.
New Deployment Wizard
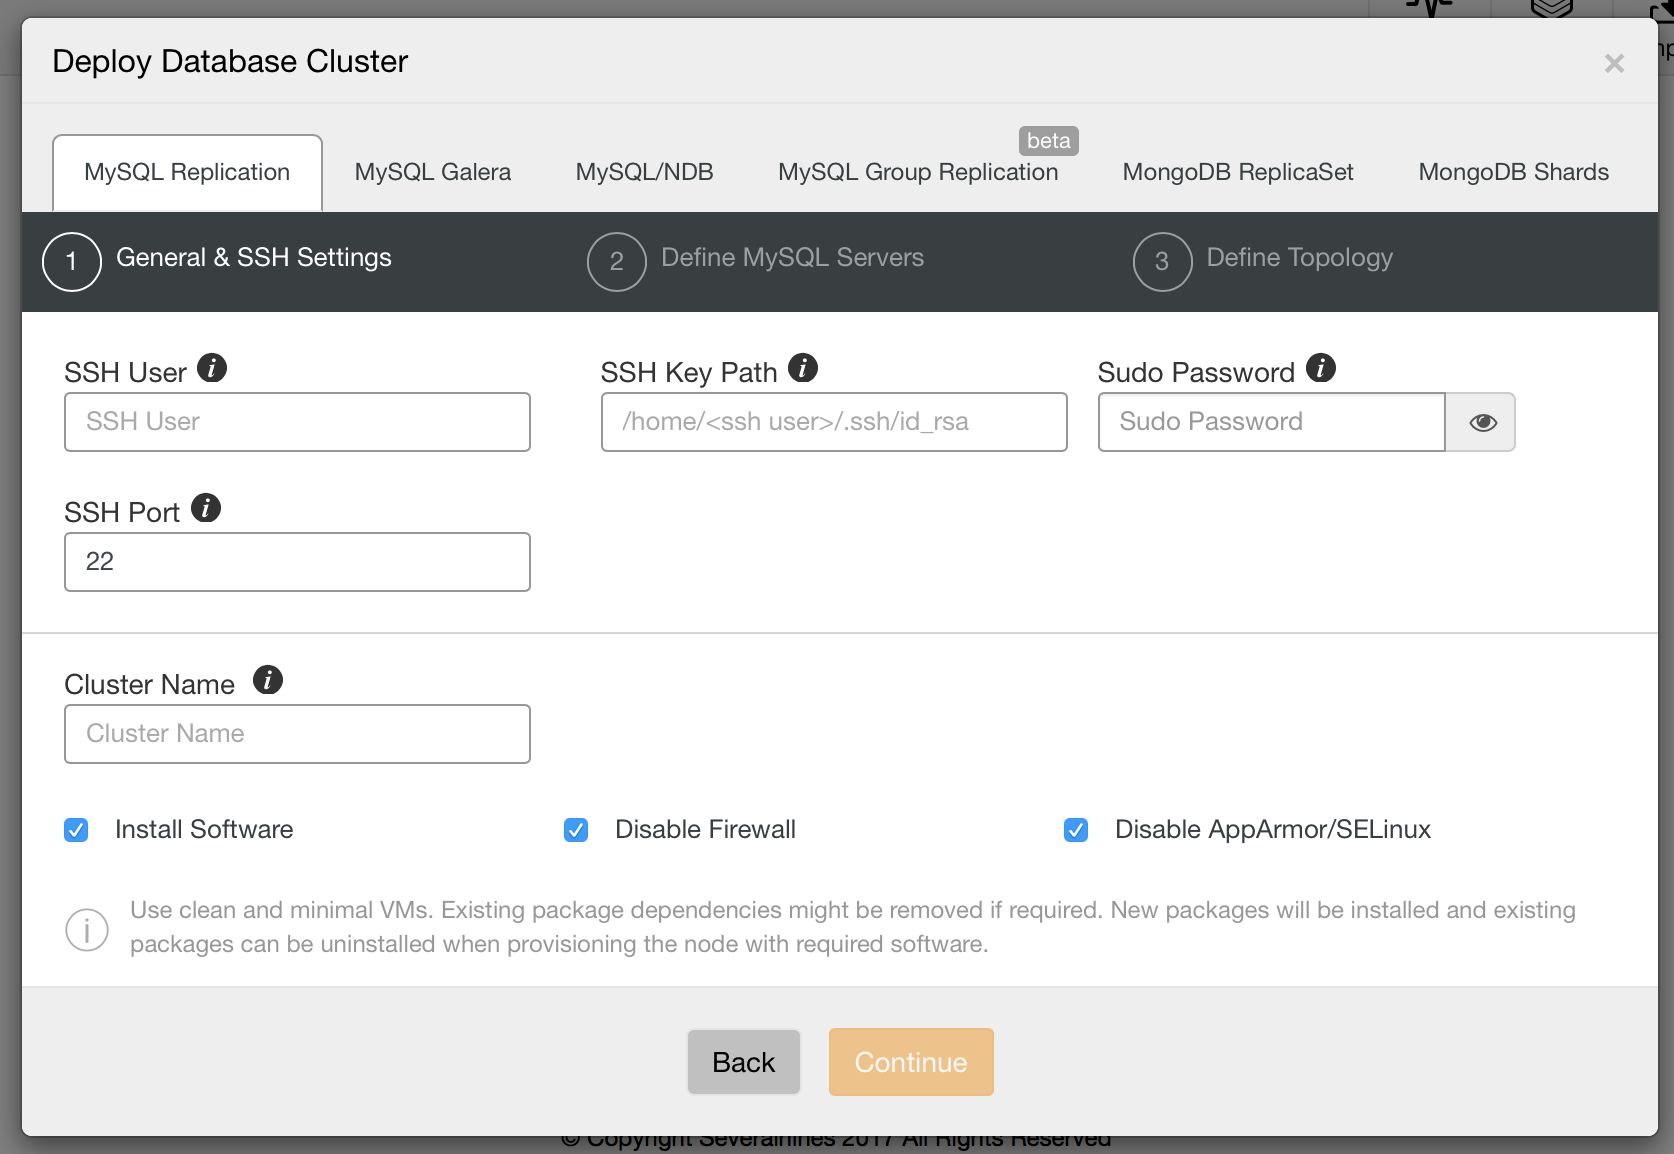
First of all, let’s take a look at the new deployment wizard in ClusterControl 1.4. It starts with SSH configuration: user, path to ssh key and whether you use sudo or not.
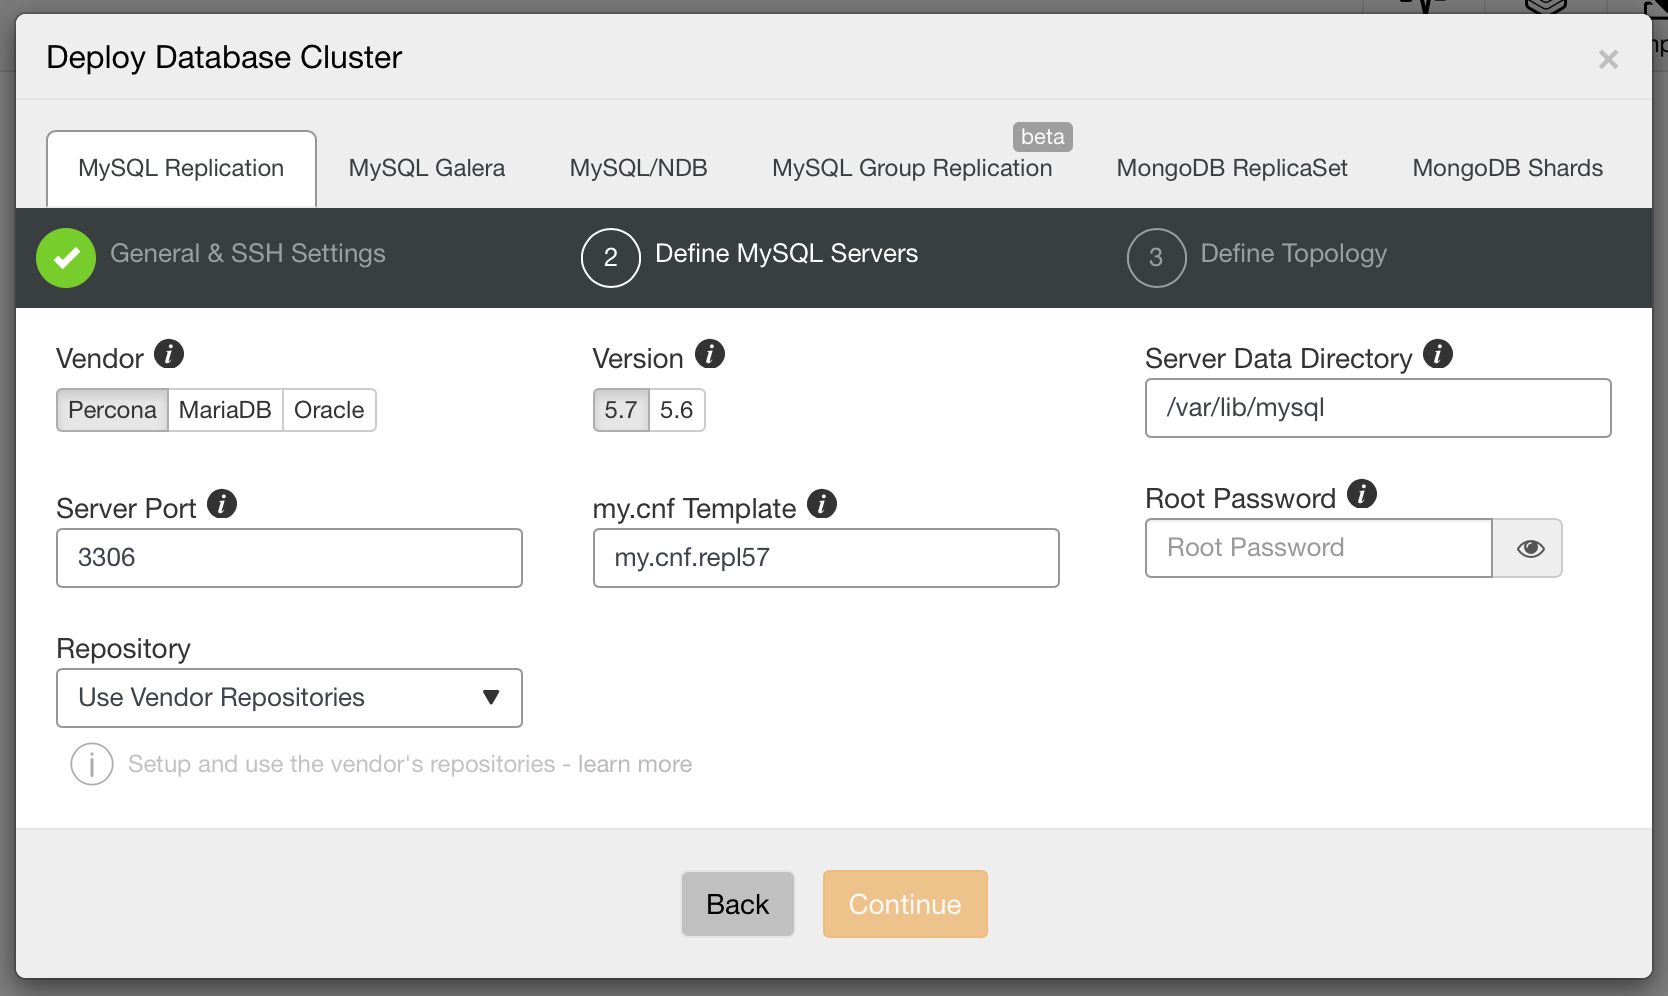
Next, we pick a vendor and version, data directory, port, configuration template, password for root user and, finally, from which repository ClusterControl should install the software.
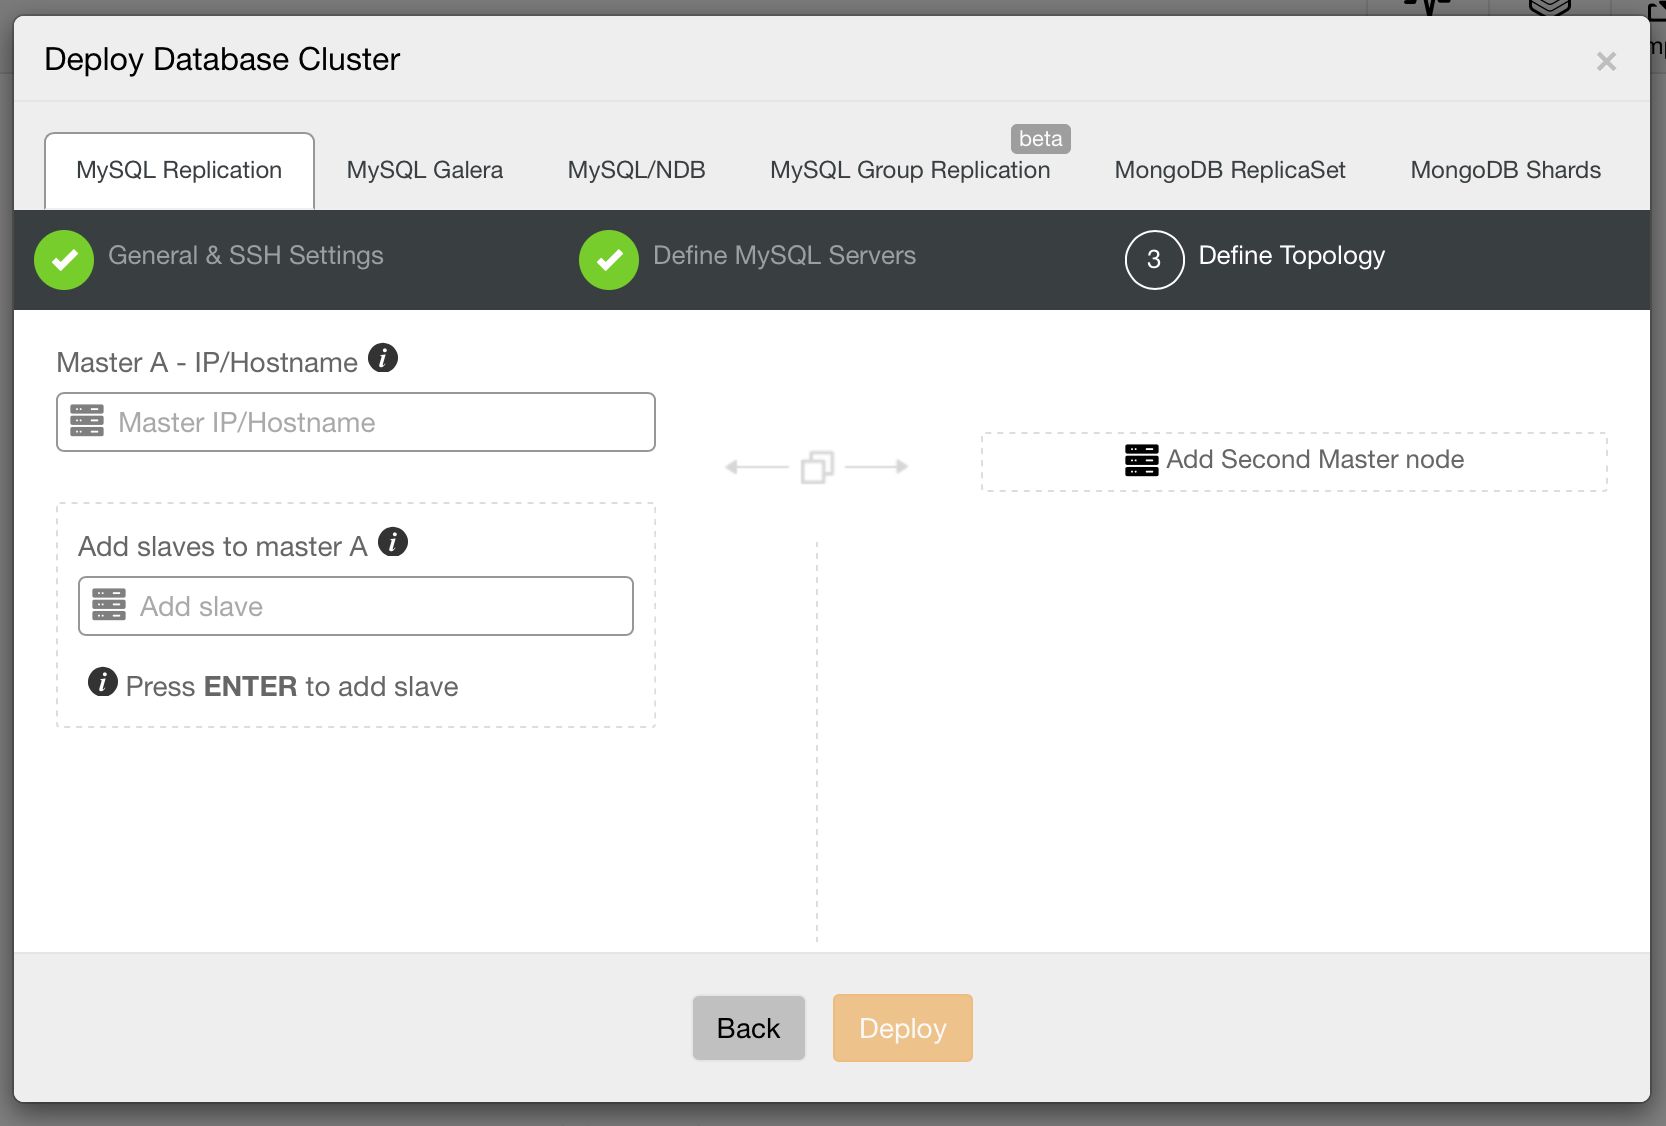
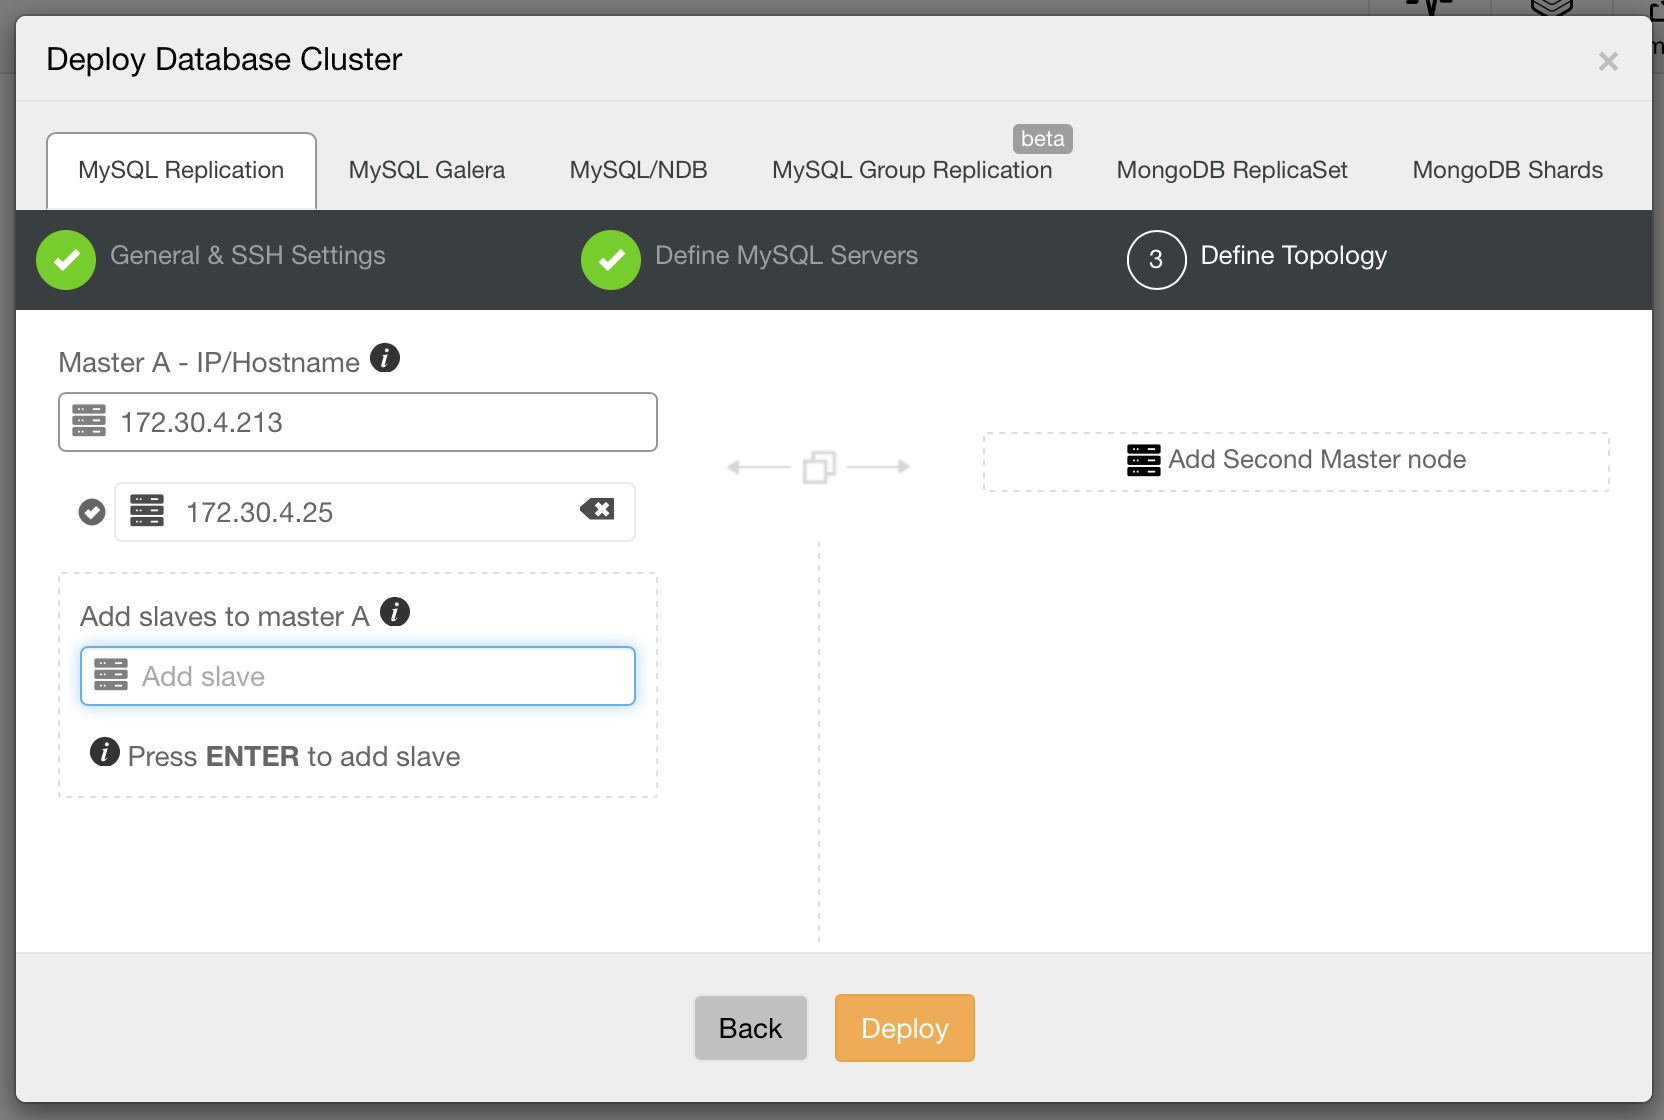
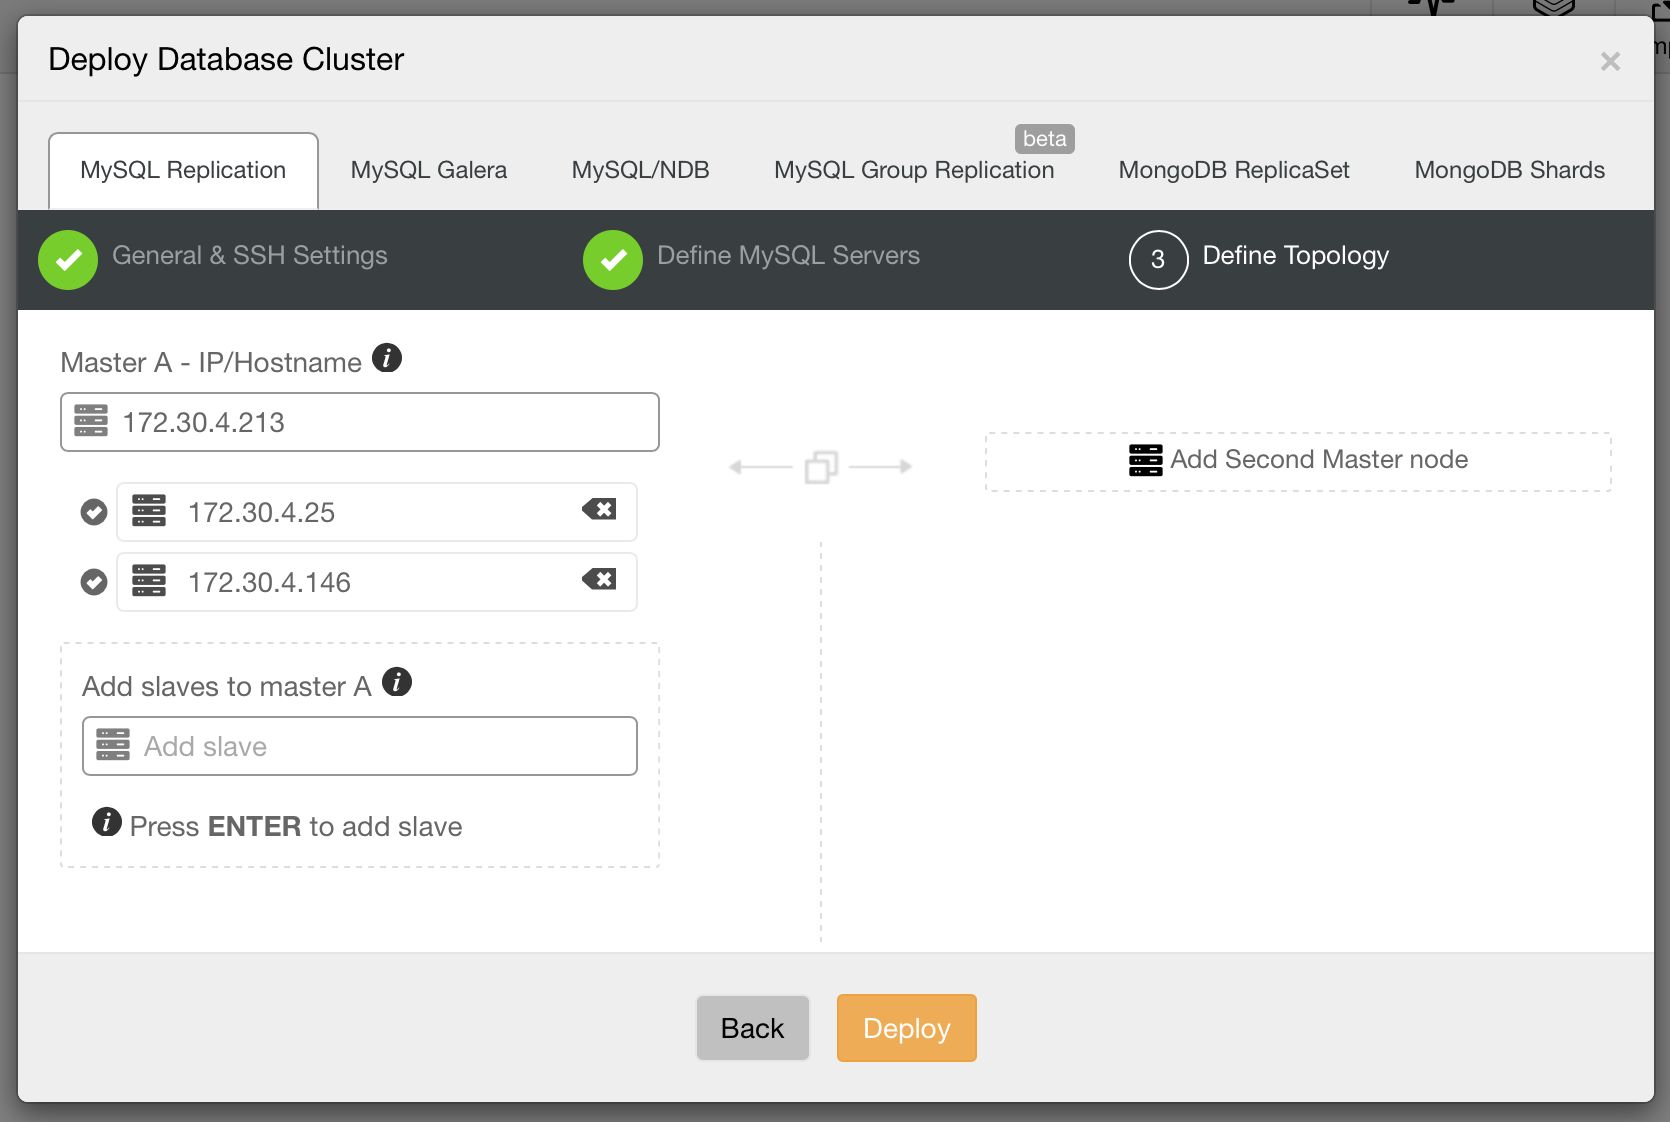
Then, the third and final step to define the topology.
Let’s go through some of these topologies in more detail.
Master – Slave Topology
This is the most basic setup you can create with MySQL replication – one master and one or more slaves.
Such configuration gives you scale-out for reads as you can utilize your slaves to handle read-only queries and transactions. It also adds some degree of high availability in your setup – one of slaves can be promoted to master in case the current master becomes unavailable. We introduced an automatic failover mechanism in ClusterControl 1.4.
The master – slave topology is widely used to reduce load on the master by moving reads to slaves. Slaves can also be used to handle specific types of heavy traffic – for instance, backups or analytics/reporting servers. This topology can also be used to distribute data across different datacenters.
When it comes to multiple datacenters, this might be useful if users are spread across different regions. By moving data closer to the users, you will reduce network latency.
Master – Master, Active – Standby
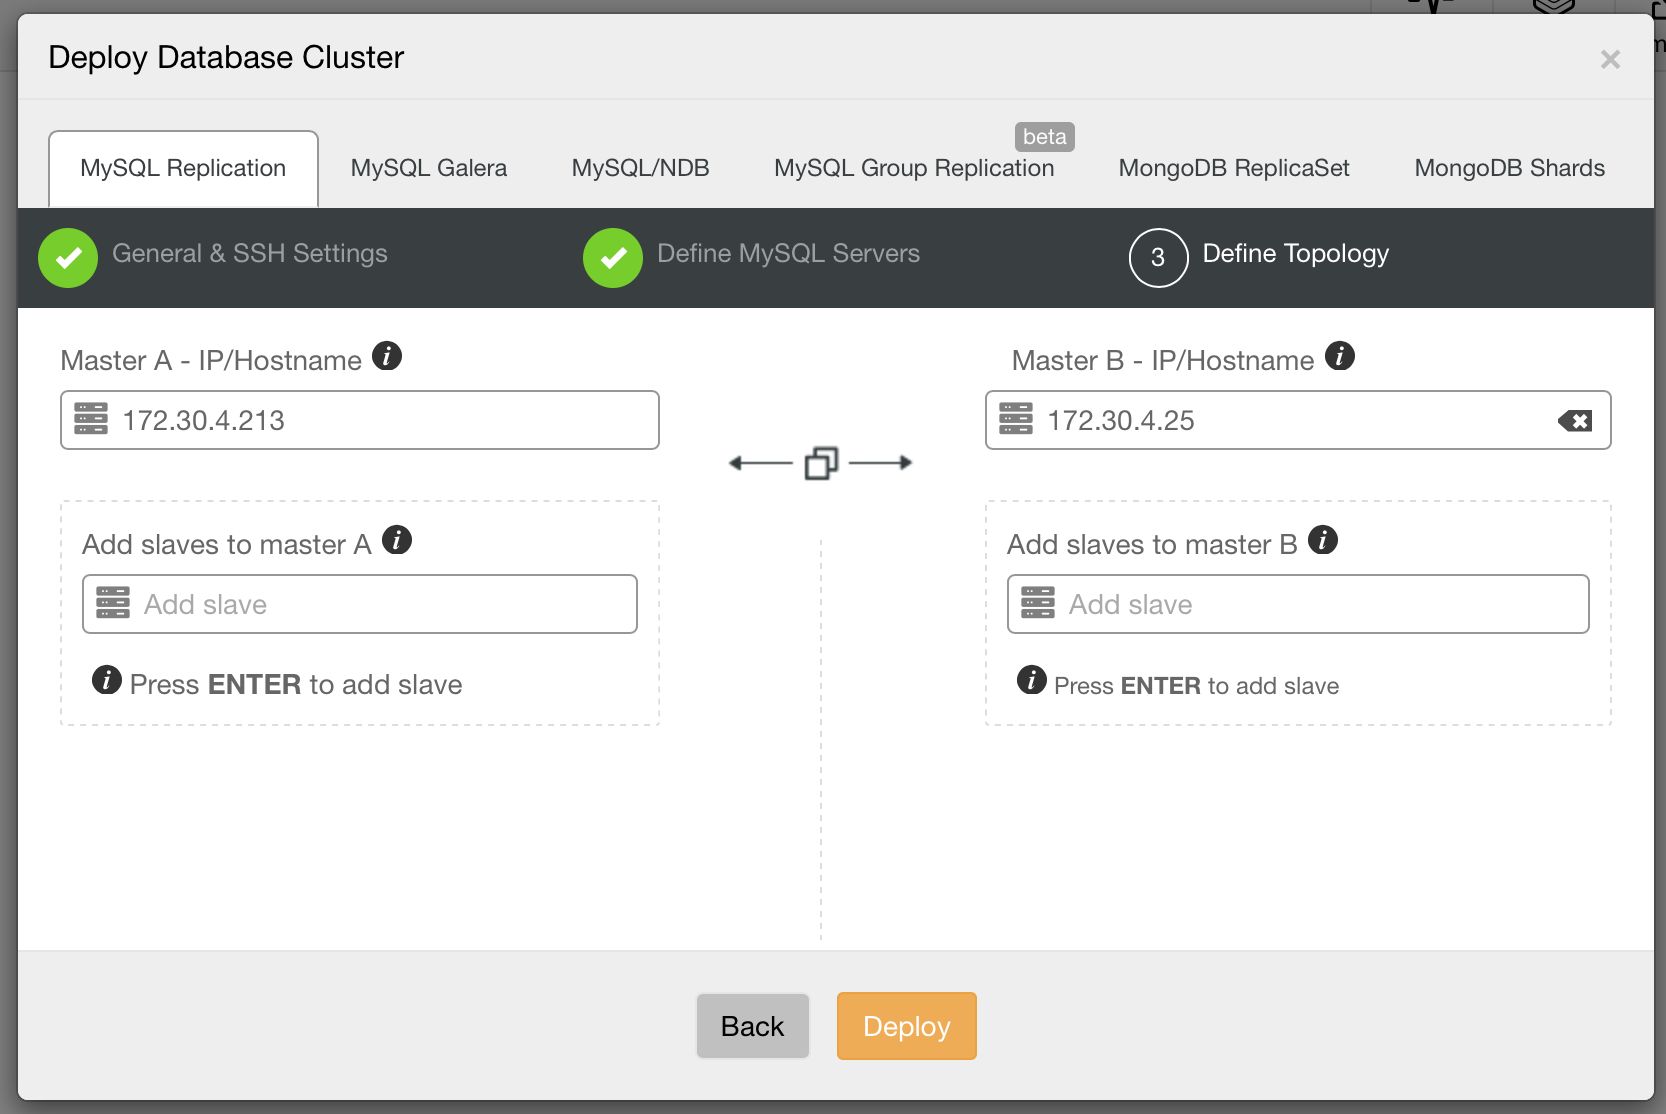
This is another common deployment pattern – two MySQL instances replicating to each other. One of them is taking writes, the second one is in standby mode. This setup can be used for scale-out, where we use the standby node for reads. But this is not where its strength lies. The most common use case of this setup is to deliver high availability. When the active master dies, the standby master takes over its role and starts accepting writes. When deploying this setup, you have to keep in mind that two nodes may not be enough to avoid split brain. Ideally you’d use a third node, for example a ClusterControl host, to detect the state of the cluster. A proxy, collocated with ClusterControl, should be used to direct traffic. Colocation ensures that both ClusterControl (which performs the failover) and proxy (which routes traffic) see the topology in the same way.
You may ask – what is the difference between this setup and master-slave? One way or the other, a failover has to be performed when the active master is down. There is one important difference – replication goes both ways. This can be used to self-heal the old master after failover. As soon as you determine that the old master is safe to take a “standby” role, you can just start it and, when using GTID, all missing transactions should be replicated to it without need for any action from user.
This feature is commonly used to simplify site switchover. Let’s say that you have two site locations – active and standby/disaster recovery (DR). The DR site is designed to take over the workload when something is not right with the main location. Imagine that some issue hit your main datacenter, something not necessarily related to the database – for instance, a problem with block storage on your web tier. As long as your backup site is not affected, you can easily (or not – it depends on how your app works) switch your traffic to the backup site. From the database perspective, this is fairly simple process. Especially if you use proxies like ProxySQL which can perform a failover that is transparent to the application. After such failover, your writes hit the old standby master which now acts as active. Everything is replicated back to the primary datacenter. So when the problem is solved, you can switch the traffic back without much issues. The data in both datacenters are up-to-date.
It is worth noting that ClusterControl also supports active – active type of master – master setups. It does not deploy such topology as we strongly discourage users from writing simultaneously on multiple masters. It does not help you to scale writes, and is potentially very tricky to maintain. Still, as long as you know what you are doing, ClusterControl will detect that both masters have read_only=off and will treat the topology accordingly.
Master – Master With Slaves
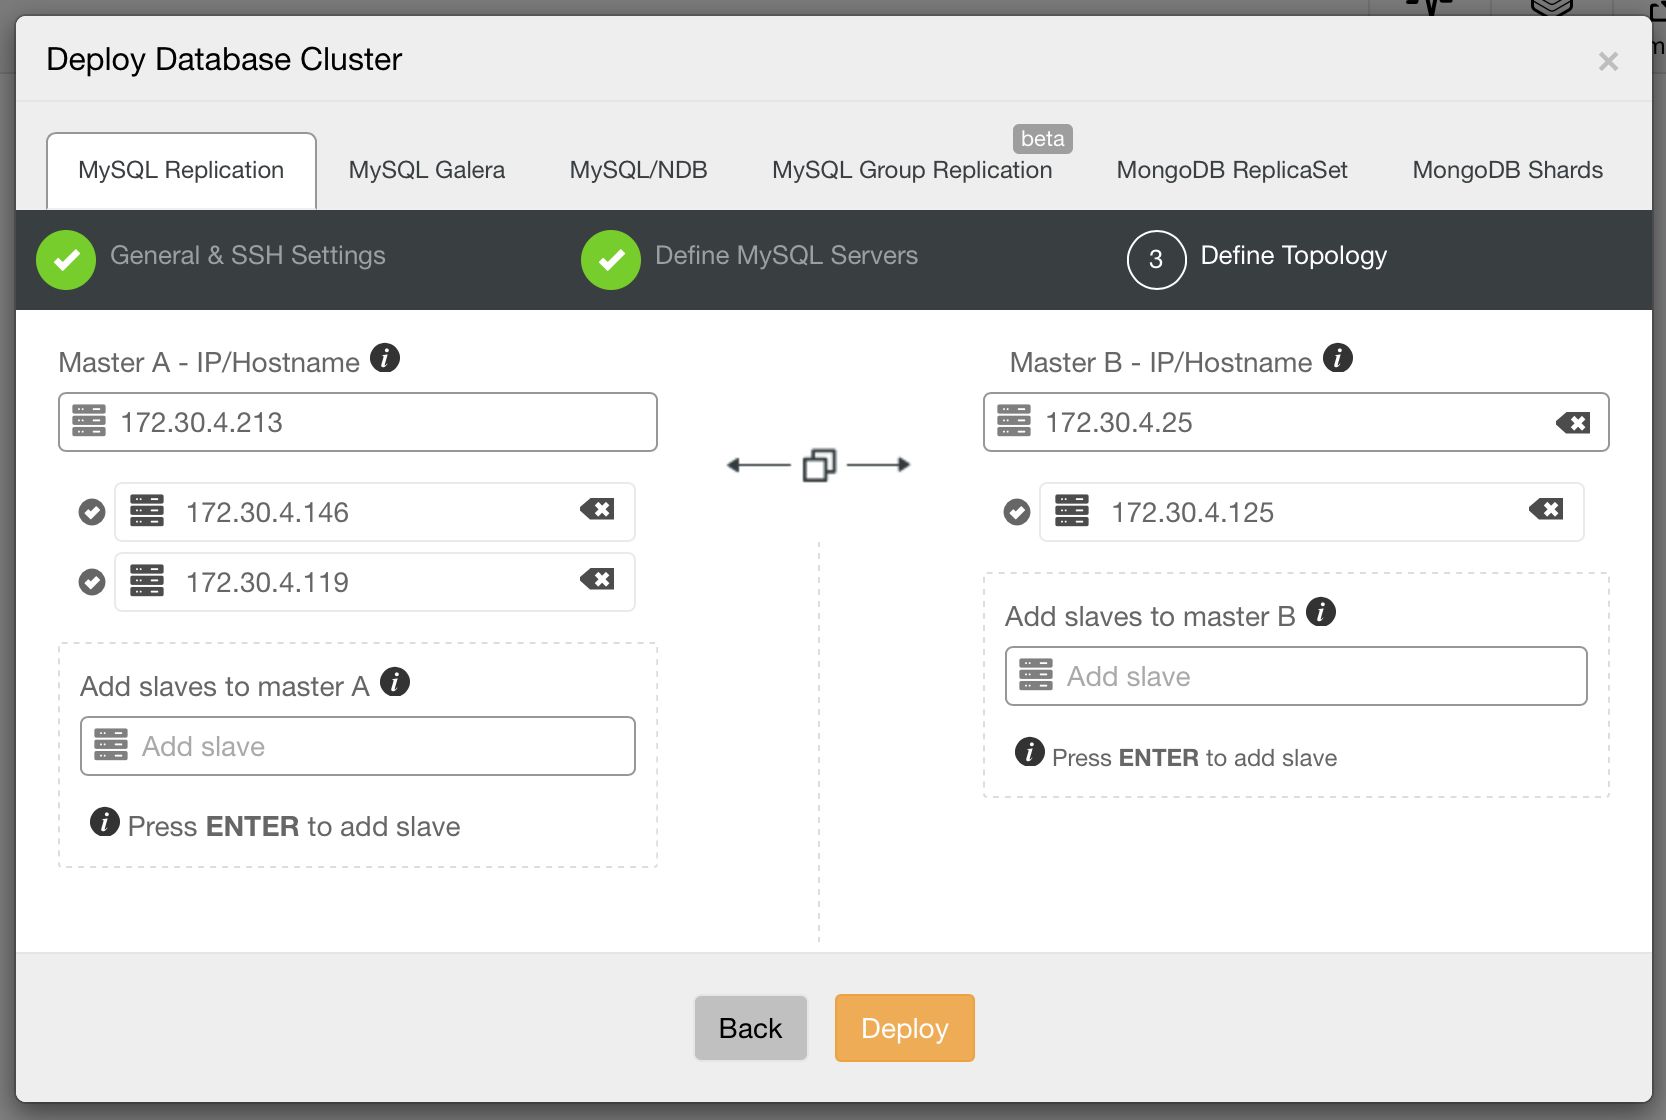
This is an extended version of the previous topology, it combines scale-out of master – slave(s) setup with easy of failover of master – master setup. Such complex setups are commonly used across datacenters, either forming a backup environment or being actively used for scale-out, keeping data close to the rest of the application.
Topology Changes
Replication topologies are not static, they evolve with time. A slave can be promoted to master, different slaves can be slaving off different masters or intermediate masters. New slaves can be added. As you can see, deploying a replication topology is one thing. Maintaining it is something different. In ClusterControl 1.4, we added the ability to modify your topology.
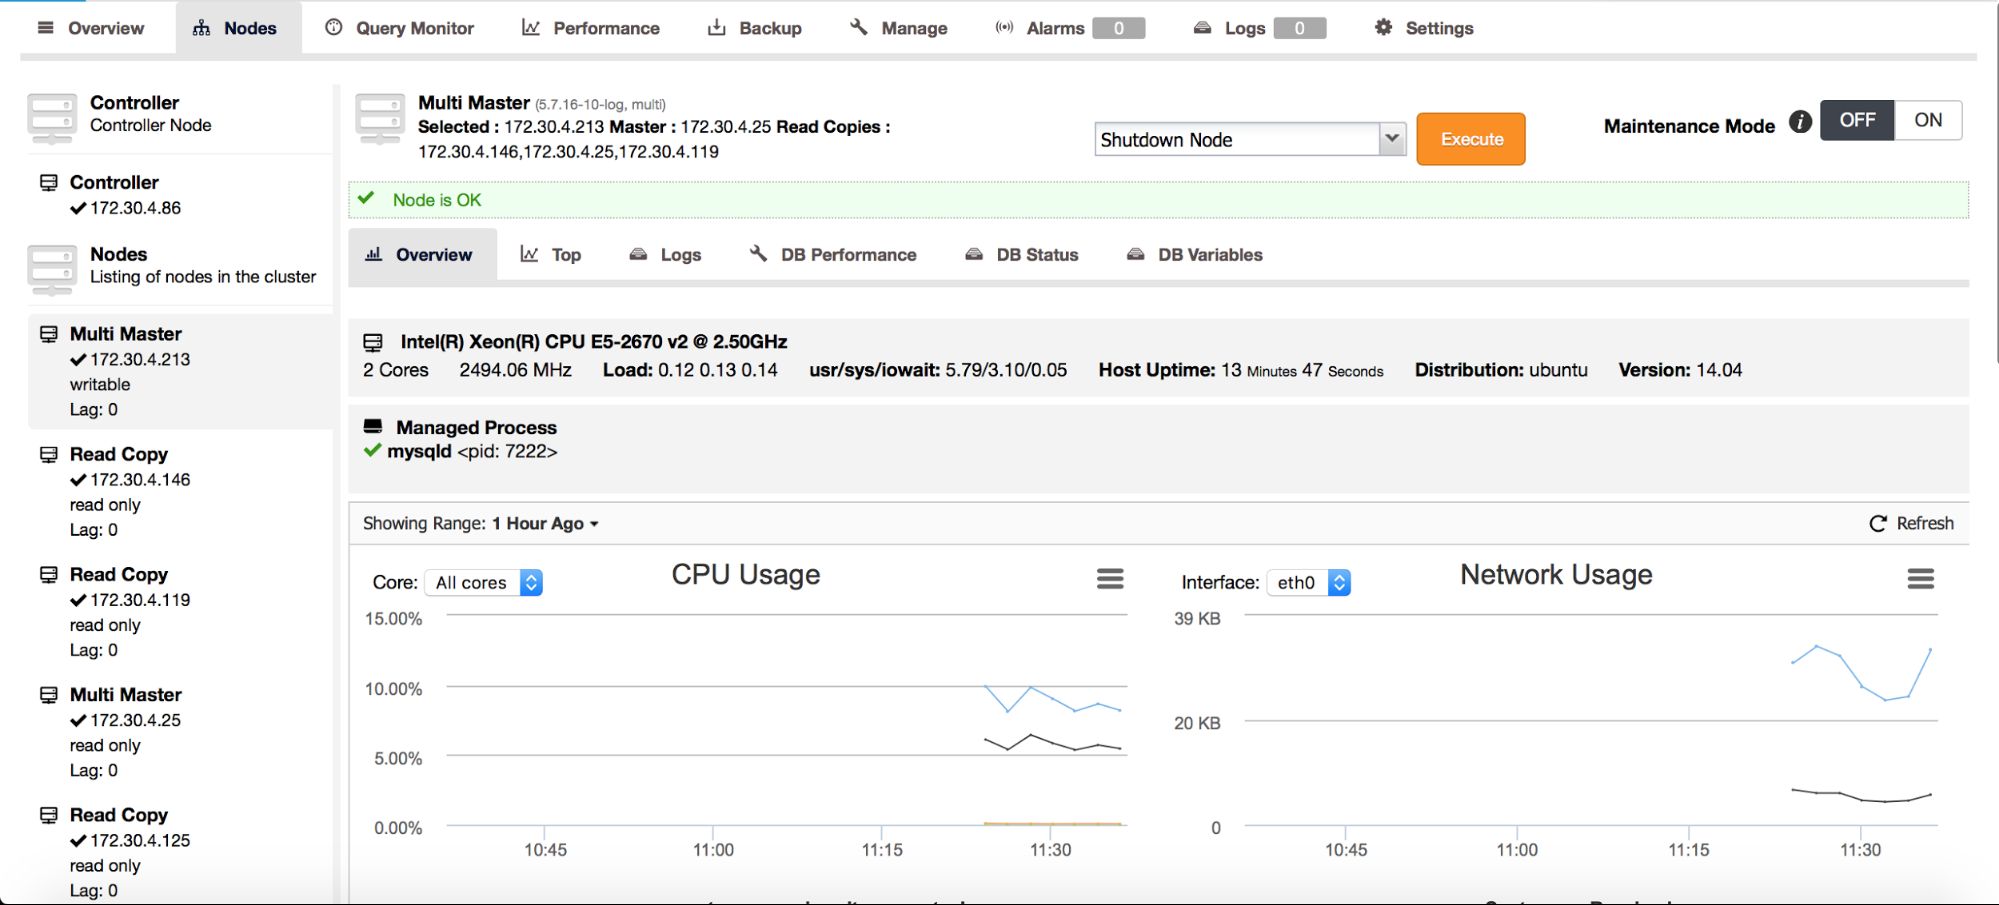
On the above screenshot, you can see how ClusterControl sees a master – master topology with a few slaves. On the left panel, you can see list of nodes and their roles. We can see two multi-master nodes out of which one is writable (our active master). We can also see list of slaves (read copies). On the main panel, you can see a summary for the highlighted host: its IP, IP of its master and IPs of its slaves.
As we mentioned in our previous blog post, ClusterControl handles failover for you – it checks errant transactions, it lets slaves to catch up if needed. We still need a way to move our slaves around – you can find those options in the node’s drop-down list of actions:
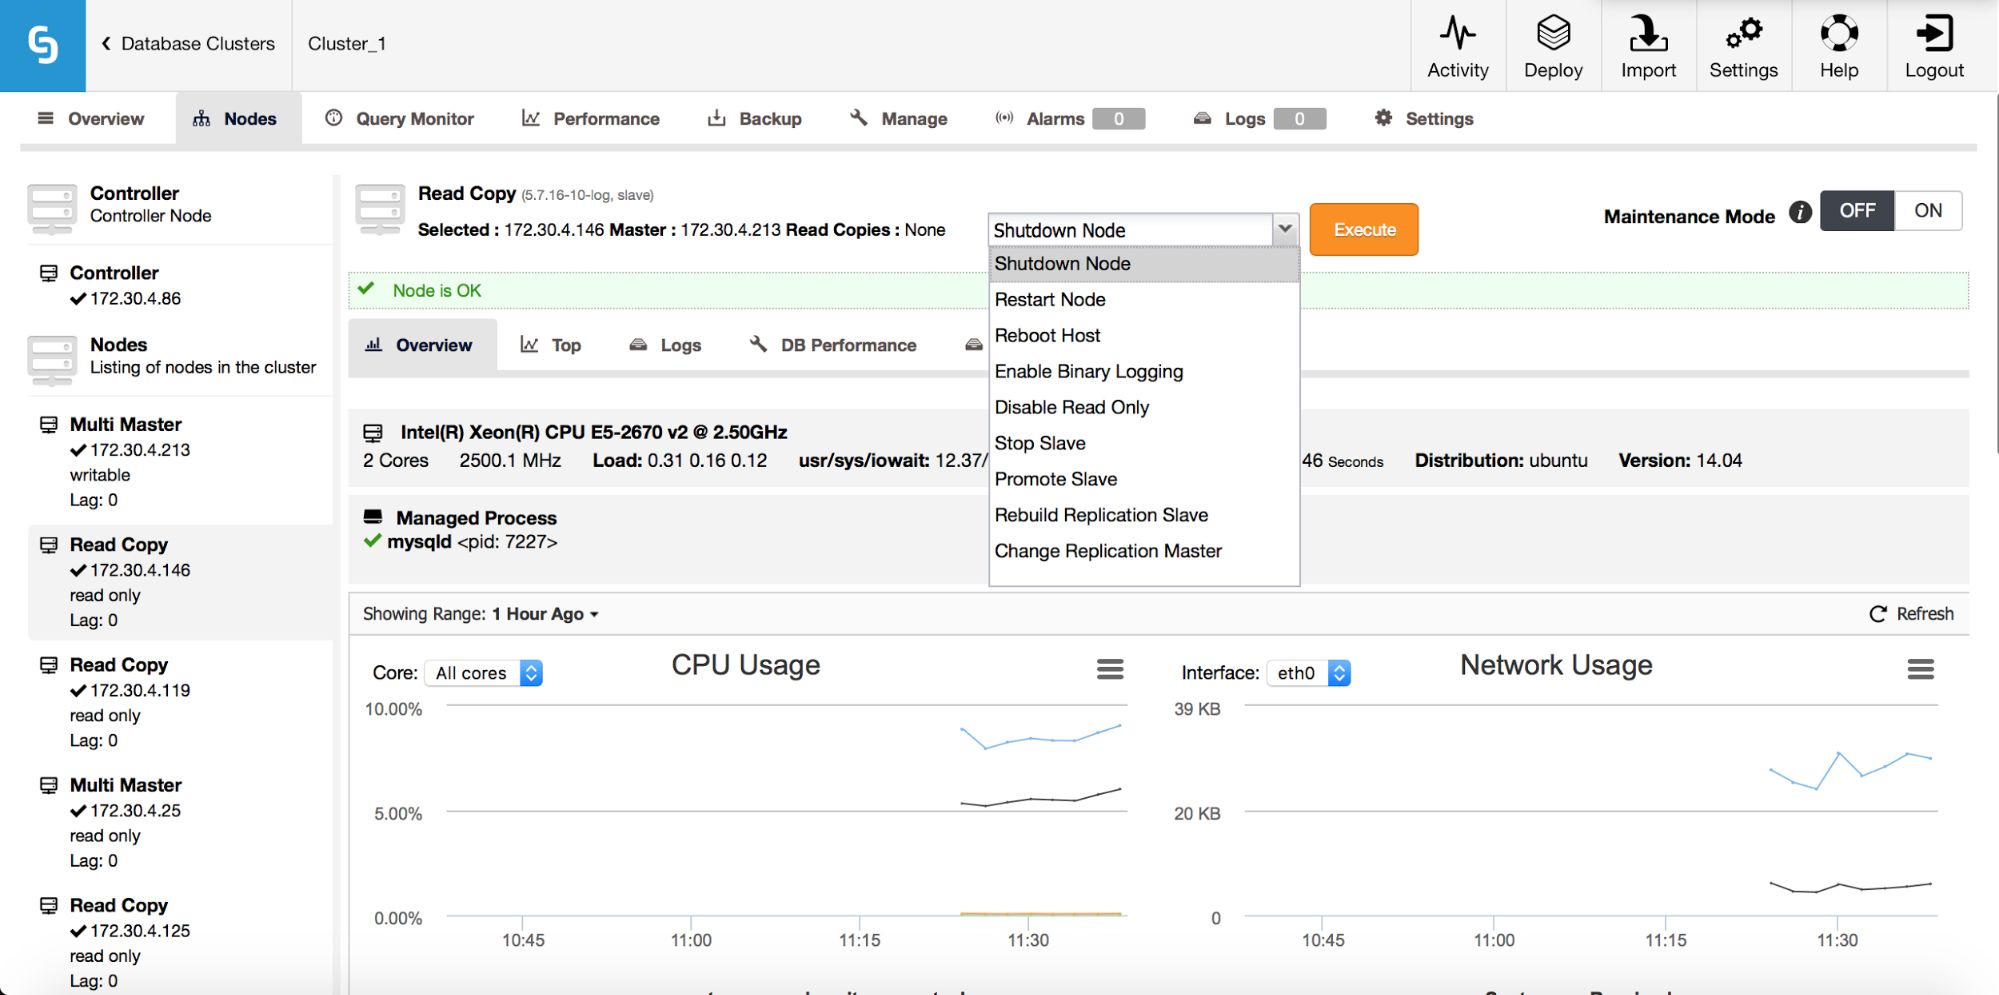
What we are looking for are: “Promote Slave”, which does what it says – the chosen slave will become a master (as long as there is nothing which would prevent it from happening) and the remaining hosts will slave off it. More commonly used will be “Change Replication Master”, which gives you a way to slave the chosen node off another MySQL master. Once you pick this job and “Execute” it, you’ll be presented with following dialog box:
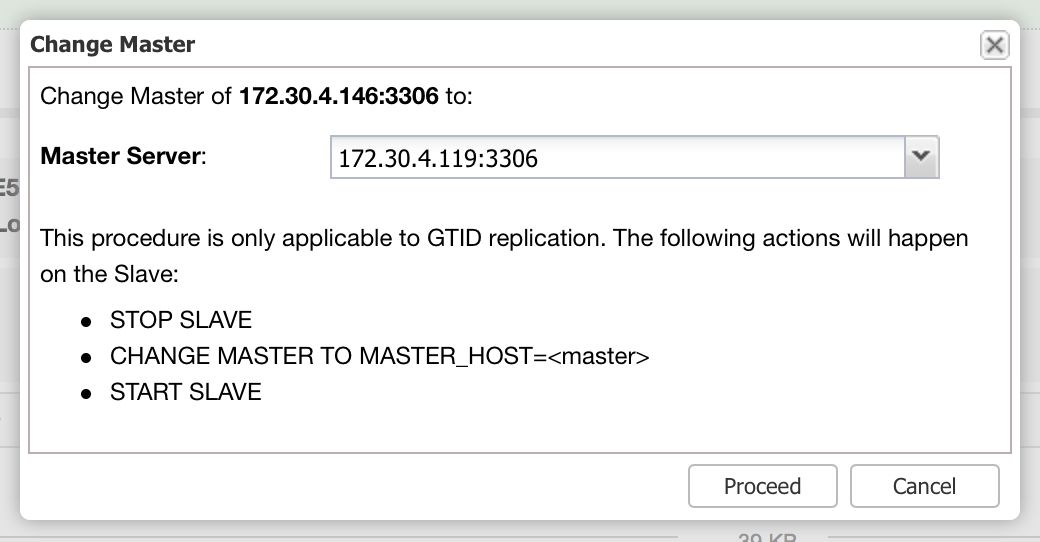
Here you need to pick a new master host for your node. Once that’s done, click “Proceed”. In our case, we picked the IP of one of the slaves which will end up as an intermediate master. Below you can see the status of our replication setup after reslaving finished. Please note that node 172.30.4.119 is marked as “Intermediate”. It’s worth noting that ClusterControl performs sanity checks when reslaving happens – it checks for errant transactions and ensures that the master switch won’t impact replication. You can read more about those safety measures in our blog post which covers failover and switchover process.
As you can see, deploying and managing replication setups is easy with ClusterControl 1.4. We encourage you to give it a try and see how efficiently you can handle your setups. If you have any feedback on it, let us know as we’d love to hear from you.


