blog
ClusterControl – Advanced Backup Management – MongoDB

Disaster recovery does not complete without a proper backup system. When something bad happens, the data could be restored by using the backup preferably with the latest one. We might want to avoid restoring the data that is not updated. Probably there might be some information that is missing with the old backup. That is the reason why having a good backup practice is crucial for most systems nowadays.
MongoDB has become more popular year over year. There are a lot of companies started to use MongoDB as one of their databases. One of the features and probably the reason why MongoDB is popular is due to its speed and MongoDB is easy to scale. MongoDB is one of the supported databases in ClusterControl. You could deploy, import, scale and even perform the backup with ClusterControl. In this blog post, we will go through the Advanced Backup feature for the MongoDB replica set and sharded cluster.
MongoDB Backup Types
MongoDB supports both logical and physical backup. In addition to that, MongoDB also supports Point In Time Recovery (PITR). Let’s see what is the difference between all 3 types of backup.
|
Logical backup |
mongodump |
This utility will create a binary export of the contents of a database. Not only that, mongodump could export data from either mongod or mongos instances, can export data from standalone, replica set, and sharded cluster deployments |
|
Physical backup |
NA |
Physical backup in MongoDB only could be done at the system level. At this time, there is no physical backup available in ClusterControl. The way physical backup works is by creating a snapshot on LVM or storage appliance. |
|
PITR |
Percona Backup for MongoDB |
Percona Backup for MongoDB inherited from and replaces mongodb_consistent_backup, which is already deprecated. It is a distributed, low-impact solution for achieving consistent backups for both MongoDB sharded clusters and replica sets. This type of backup is logical but at the same time could act as a PITR backup. |
Now that we know what is the difference between the backup type.
MongoDB Backup Management
ClusterControl allows you to create the backup in realtime as well as schedule it at your desired schedule. One thing worth mentioning, in case you would like to schedule, ClusterControl will use UTC timezone. So you need to choose the right time that suits your timezone so that the schedule will run on the less busy time.
Let’s go ahead and try to use the backup function in ClusterControl. In addition to that, we also will review one of the advanced features which is to upload the backup to the cloud. Starting with ClusterControl 1.9.0, MongoDB supports cloud upload that allows you to upload the backup to your preferred cloud storage provider.
MongoDB Logical Backup
Let’s started with logical backup. Before the feature upload the backup to the cloud could be used, you need to integrate it with your preferred cloud provider. For our case, we will integrate it with AWS cloud. To do the complete AWS integration, you may follow the following steps:
-
Use your AWS account email address and password to sign in to the AWS Management Console as the AWS account root user.
-
On the IAM Dashboard page, choose your account name in the navigation bar, and then choose My Security Credentials.
-
If you see a warning about accessing the security credentials for your AWS account, choose to Continue to Security Credentials.
-
Expand the Access keys (access key ID and secret access key) section.
-
Choose Create New Access Key. Then choose Download Key File to save the access key ID and secret access key to a file on your computer. After you close the dialog box, you can’t retrieve this secret access key again.
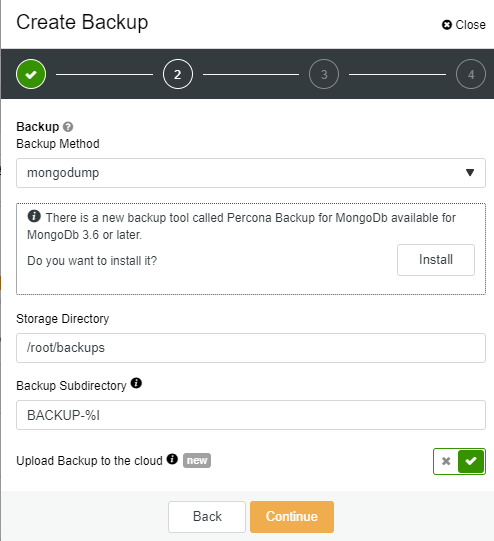
Assuming that you already have the MongoDB cluster ready, we will start our backup process. First, go to MongoDB cluster -> Backup -> Create Backup
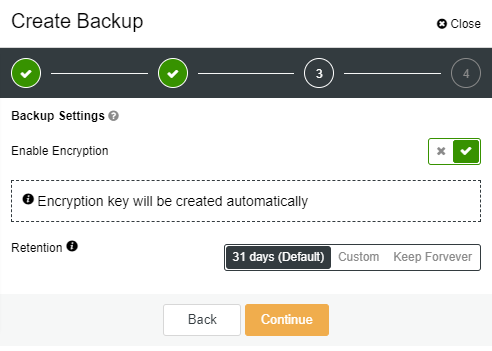
On the next page, you could specify either want to enable the encryption or not. For encryption, ClusterControl will use OpenSSL to encrypt the backup using the AES-256 CBC algorithm. Encryption happens on the backup node. If you choose to store the backup on the controller node, the backup files are streamed over in encrypted format through socat or netcat. Encryption is considered as one of the advanced backup features that could be utilized, so in our case, we will enable this option. You also could define the retention period of your backup on this page. For our case, we will use the default setting of 31 days.
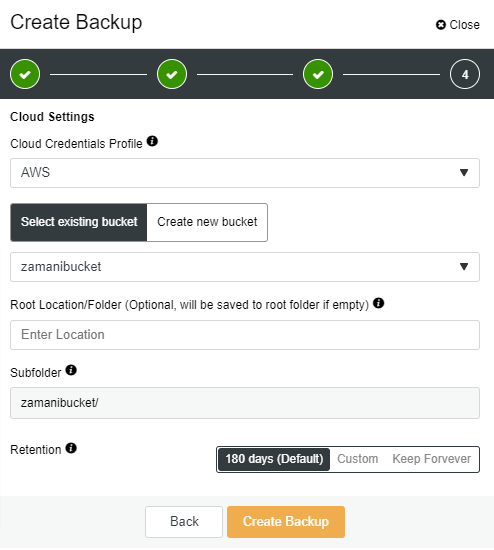
On the third page, you need to specify the login for the cloud provider, choose/create the bucket. You also could specify the retention for your cloud backup, the default setting is 180 days.
Once you click on the Create Backup button, the job will instantly be started and will take a while depending on your database size. At the same time, the backup will be uploaded to the cloud storage (AWS). You might notice the “key” and “cloud” icons are highlighted after the backup is completed like following:

Now that you have the backup ready, to restore the backup the step is very simple. All you have to do is by clicking on the “Restore” link and click on “Finish” button on the restore page like the following:

MongoDB PITR Backup
As mentioned earlier, Percona Backup for MongoDB is a PITR backup type. Before you could use this backup type, you need to install the agent (pbm-agent) on all of the MongoDB nodes/instances. Prior to that, you need to mount a shared directory on all nodes as well. Let’s get started!
First, you need to configure the NFS server. To install an NFS server, you need to choose or deploy any virtual machine, for our case we will install the NFS server in the ClusterControl node (Centos):
[root@ccnode ~]# dnf install nfs-utils
Once the NFS utility is installed, you may start the service and enable it at system boot:
[root@ccnode ~]# # systemctl start nfs-server.service
[root@ccnode ~]# # systemctl enable nfs-server.service
[root@ccnode ~]# # systemctl status nfs-server.service
The next step is to configure /etc/exports file so that the directory is accessible by the NFS clients:
[root@ccnode ~]# vi /etc/exports
/mnt/backups 10.10.80.10(rw,sync,no_root_squash,no_subtree_check)
In the clients node which is our database nodes, we need to install necessary the NFS packages as well:
[root@n4 ~]# dnf install nfs-utils nfs4-acl-tools
Once the packages are installed, we may create the directory and mount it:
[root@n4 ~]# mkdir -p /mnt/backups
[root@n4 ~]# mount -t nfs 10.10.80.10:/mnt/backups /mnt/backups
Make sure to mount on all database nodes in order for us to install the pbm-agent. Considering all nodes already have the NFS mounted directory, we shall proceed to install the agent now. Go to MongoDB cluster -> Backup -> Settings -> Percona Backup
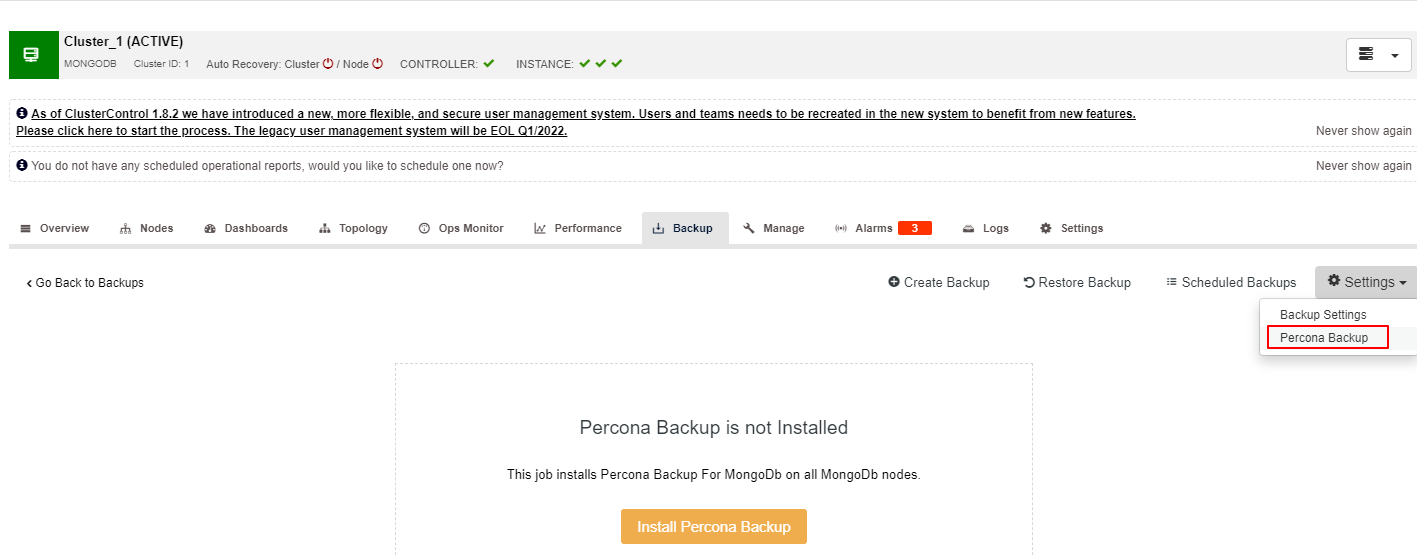
Once you click on the Install Percona Backup button, the following screen will appear. Here, you need to specify the shared directory. Again, please make sure that the directory has been mounted in all of your MongoDB nodes. Once the Backup Directory has been specified, you may click on the Install button and wait for the installation to complete.

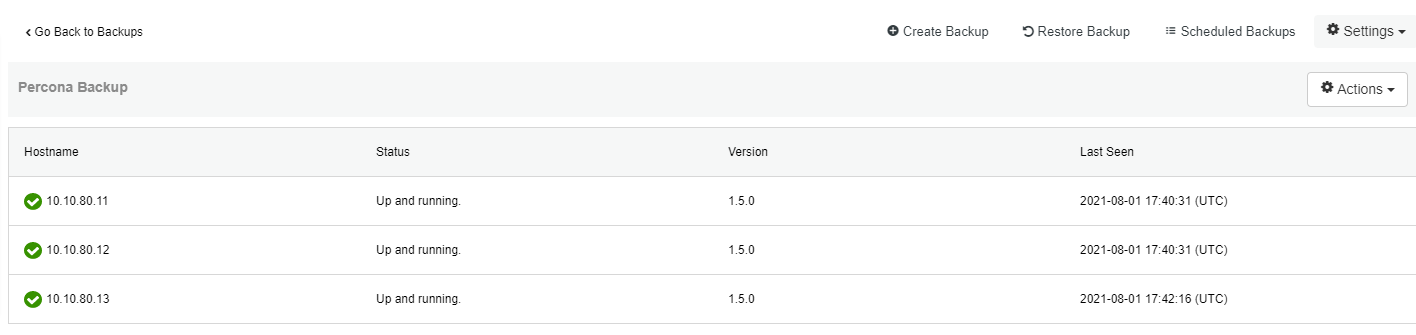
The successful installation should be like the following screenshot. Now we could proceed with the backup process:
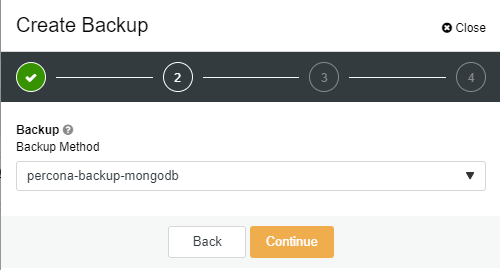
To create the backup using Percona Backup, the steps is simple. Unfortunately, you could not use the option to encrypt the backup using this method. In order to use the feature to upload to the cloud, you need to enable the option before choosing the backup type else your backup will be not uploaded. You will notice the upload feature will disappear once you choose “percona-backup-mongodb”.
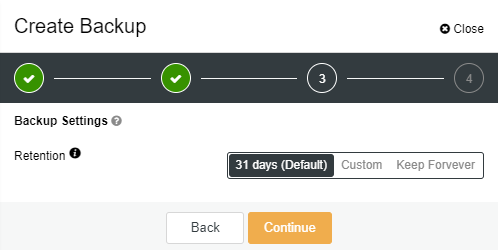
On the second page you could specify the local retention:
As for the last page, you may specify the cloud details and retention like in the previous example. The restore process is the same as the previous example, all you need to do is to click on the “Restore” link and follow the steps on the restore page:

Conclusion
With ClusterControl, you could create and upload your MongoDB backup to the cloud. Uploading to the cloud is one of the new and advanced features for MongoDB that has been introduced starting with ClusterControl 1.9.0 providing the integration to cloud provider has been done successfully. You could also encrypt your backup using ClusterControl if you like to protect your backup.


