blog
Installing SQL Server 2019 on RedHat Linux

In a previous article, SQL Server On Linux Installation and Configuration, we walked through how to install SQL Server Linux on Ubuntu 20.04. SQL Server Linux 2017 and 2019 support Red Hat Enterprise Linux versions 7.7-7.9 and 8.0-8.3 as well.
As we explained earlier, there is no graphical interface available for Linux SQL. You need to be familiar with the command lines for installation and configurations. Before proceeding with this article, I recommend you be familiar with SQL Server Linux. To do so, please read the following articles:
Let’s begin our journey with SQL Server on Linux on RedHat. To get started, you will need the following minimum system requirements:
-
Virtual machine or system with supported RedHat Linux version. In this article, I use RedHat Enterprise Linux release 8.4.

-
Operating system memory: 2 GB or higher
-
Free disk space: 6 GB or higher
-
Processor: 2 cores with 2 GHz (x-64 compatible only)
-
File system: XFS or EXT4
Steps to install SQL Server on Linux on RedHat
You can use the following steps to install SQL Server on Linux on Redhat Linux:
Step 1: Choose the Python interpreter
SQL Server on Linux requires a Python interpreter for its installation. Therefore, use the following script to set up the default interpreter:
sudo alternatives –config python
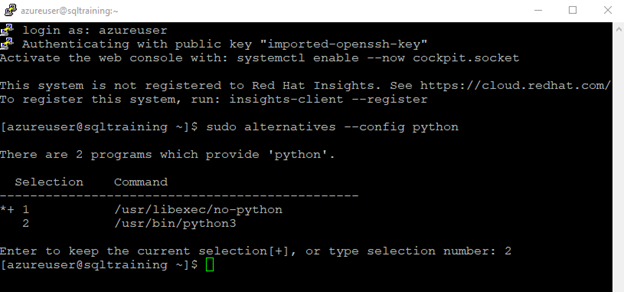
Choose option 2 to select /usr/bin/python3 from the given options.
Step 2: Download Microsoft SQL Server 2019 Red Hat repository configuration
Microsoft stores the package repository configuration in the URL https://packages.microsoft.com. It has a separate repository for the SQL Server Linux 2019 version on RHEL 7 and 8.
The following CURL command is for the RHEL8 repository:
sudo curl -o /etc/yum.repos.d/mssql-server.repo https://packages.microsoft.com/config/rhel/8/mssql-server-2019.repo

If you are working on RHEL7, you can use the following script:
sudo curl -o /etc/yum.repos.d/mssql-server.repo https://packages.microsoft.com/config/rhel/7/mssql-server-2019.repo
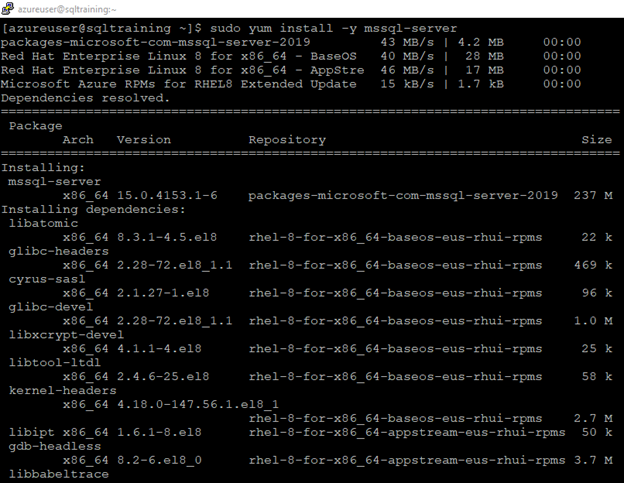
Step 3: Install SQL Server on Linux
To install SQL Server after the repository information is loaded, we use the yum utility. In the following command, the switch -y avoids manually entering “Yes” before downloading each component file.
sudo yum install -y mssql-server
It will then start downloading the SQL Server and its dependencies packages over the internet. You can view the downloaded packages in the setup logs.
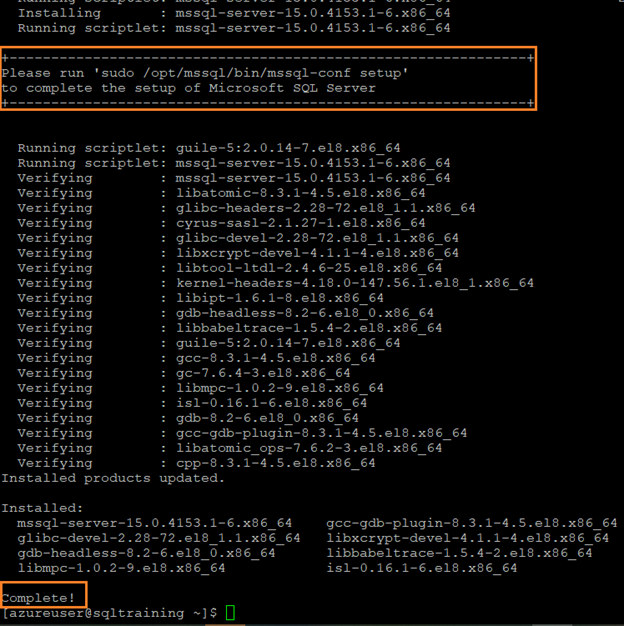
SQL Server on Windows requires specific inputs such as edition, SQL Server admin password, data, log, and backup directories.
SQL Server Linux installation does not have these inputs during initial setups, and it installs the SQL Server binaries. Later, you can use the mssql-conf utility for these configurations. As shown below, it prints a message to complete the setup using the /opt/mssql/bin/mssql-conf setup.
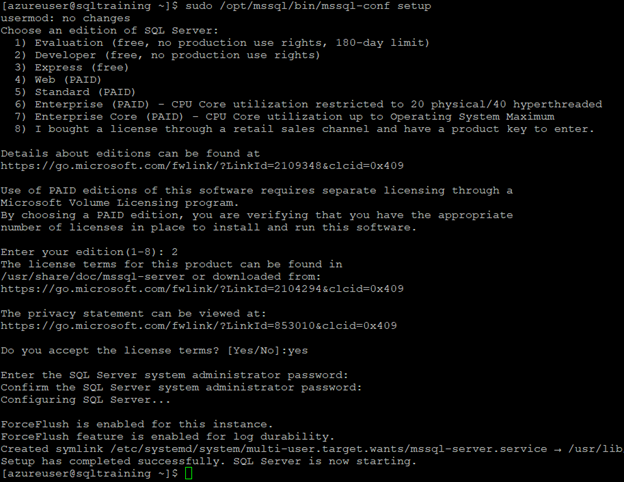
Step 4: Launch SQL Server Configuration Manager utility for SQL Server on Linux
In this step, launch the mssql-conf utility for the following configurations.
sudo /opt/mssql/bin/mssql-conf setup
1. Specify SQL Server on Linux edition
1. Evaluation
2. Developer
3. Express
4. Web
5. Standard
6. Enterprise
7. Enterprise Core
2. Accept Microsoft License terms and conditions
3. Configure the SA password
Once we provide the inputs, SQL Server configures the installation and enables ForceFlush for durability writes to block devices. It is available from SQL Server 2017 CU6.
Step 5: Verify SQL Server services status
SQL Server on Linux does not have a graphical service tool – SQL Server Configuration Manager similar to Windows. To check the service status, we can run the following script.
systemctl status mssql-server
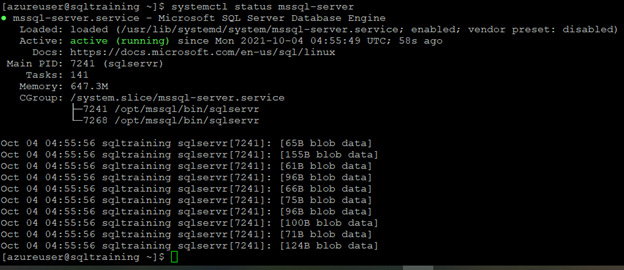
In a healthy environment, its status should be active (running). You can also note down the timestamp since when the SQL Server Linux service is running.
Install the SQL Server command-line tools
The SQL Server command-line tools are standard for each SQL Server. You can use SQLCMD, MSSQL-CLI, Azure Data Studio, SQL Server Management Studio for this purpose.
- SQLCMD: A command-line SQL Server connection utility.
- mssql-cli: Provides interactive features, in-line completion for writing T-SQL scripts.
- Azure Data Studio: You can use Azure Data Studio for connecting to local or remote SQL Servers. It is a cross-platform tool that you can install on RHEL and Ubuntu in graphical mode. It is suitable for development efforts.
- SQL Server Management Studio: This tool is suitable for both development and administration purposes. However, it can be installed on Windows, and Linux SQL can be accessed remotely.
This article installs SQL Server command-line utility, i.e., SQLCMD, for database connections. The first step is to download the RedHat repository configuration file.
sudo curl -o /etc/yum.repos.d/msprod.repo https://packages.microsoft.com/config/rhel/8/prod.repo
Remove older versions of mssql-tools and unixODBC packages.
sudo yum remove unixODBC-utf16 unixODBC-utf16-devel

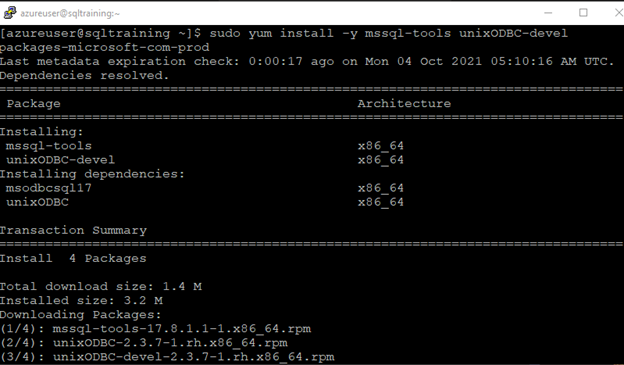
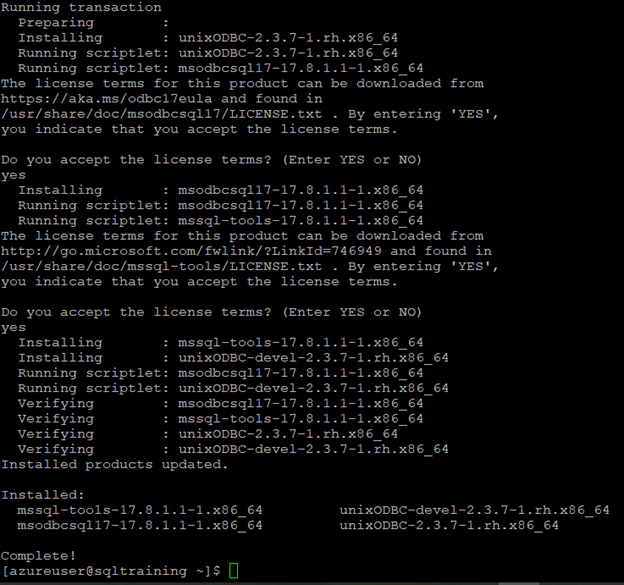
Now, we can install mssql-tools with the unixODBC developer package with the below script.
sudo yum install -y mssql-tools unixODBC-devel
We can add /opt/mssql-tools/bin/ to the PATH environment variable to run the tool without specifying the full path.
The following scripts modifies the PATH for both login sessions and interactive/non-login sessions:
echo 'export PATH="$PATH:/opt/mssql-tools/bin"' >> ~/.bash_profile

echo 'export PATH="$PATH:/opt/mssql-tools/bin"' >> ~/.bashrc

source ~/.bashrc

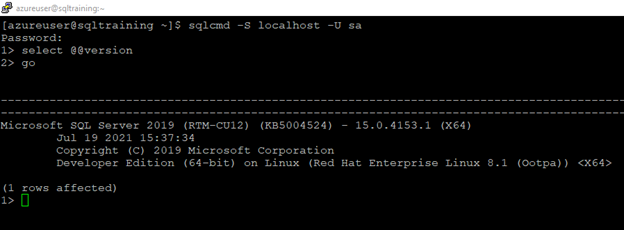
Connect to SQL Server and check its installed version. To connect, run the following script and enter your SA password manually.
$ sqlcmd -s localhost -U sa
As shown below, we installed Microsoft SQL Server 2019 RTM CU12 (Version 15.0.4153.1) developer edition on the RedHat Enterprise Linux 8.1.
By default, SQL Server Linux runs on port 1433. To connect remotely, you can allow port 1433 in the firewall with the following script.
sudo firewall-cmd --zone=public --add-port=1433/tcp --permanent

sudo firewall-cmd --reload
Conclusion
Now that you have all the information you need for installing SQL Server Linux, both on Ubuntu and RedHat, you’re free to choose your preferred OS. Support for SQL Server is now available in ClusterControl, so don’t forget to download your free trial and start exploring SQL Server on Linux today.
Want to stay up-to-date with SQL Server and other releases? Be sure to subscribe to the Severalnines RSS feed, follow us on Twitter and LinkedIn. Stay tuned!