blog
How to Migrate ClusterControl to a New Server

As your needs change, and you start managing more database instances or larger centralized backups with ClusterControl, you might find that your controller host is over-utilized. Or you might need to migrate your infrastructure to the cloud. If this is the case, you can migrate to another instance.
In this blog post, we’ll show you how to migrate ClusterControl to another server. Here is our architecture diagram:
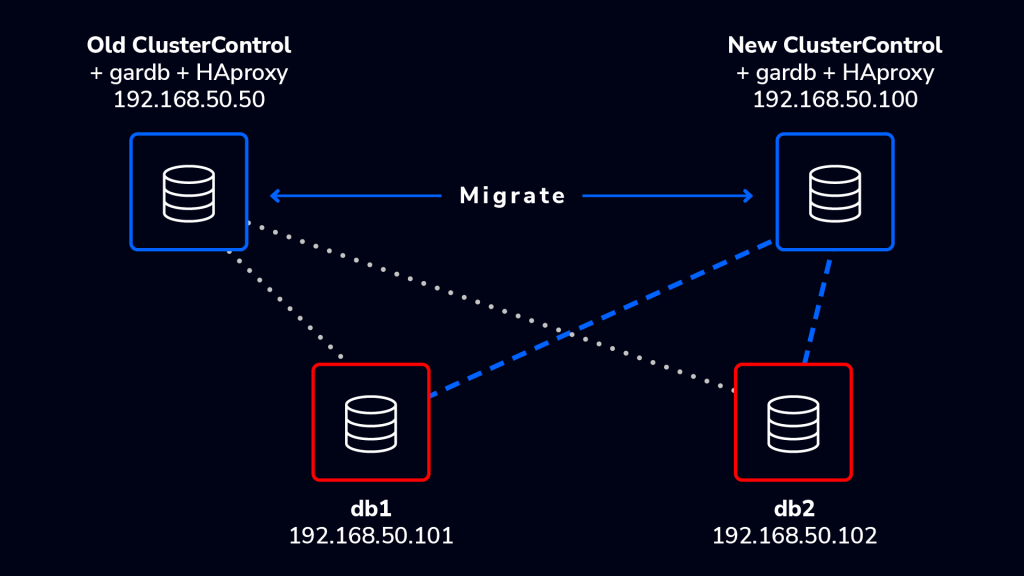
We would like to migrate an existing ClusterControl instance to another server with bigger disk space and RAM. The ClusterControl node currently monitors a two-node Galera cluster, stores centralized database backups under /root/backups directory, runs garbd (Galera arbitrator daemon) as well as an HAProxy instance to load balance connections to the Galera nodes.
ClusterControl Migration Notes
Migrating your ClusterControl instance should not have any detrimental effect on your database cluster. Note the list of things that need to be transferred to the new server:
- Backup of controller using s9s CLI
- MySQL grants for user cmon
- If you have garbd, HAproxy or Keepalived running on the ClusterControl node, you need to reinstall (explicitly remove and then install) them again in the new server by using Cluster Actions > Add Load Balancer.
- If you store your backups on ClusterControl node, you have to manually transfer them to the exact location on the new ClusterControl server
ClusterControl requires the new server to run on the same operating system family (Redhat-based or Debian-based). Further tweaking on the MySQL server running on ClusterControl host can help to improve the overall performance of ClusterControl after migration is completed.
Install new version of ClusterControl and merge data from the old server
This is the recommended way to migrate, as it installs the latest version of ClusterControl and loads your settings and historical data. The steps include:
- Install ClusterControl on the new server by using install-cc.sh script
- Backup all the cluster using s9s CLI
- Restore the cluster in new ClusterControl using s9s CLI
- Re-enable Agent Based Monitoring
- Setup passwordless SSH by copying the SSH key to all nodes
- Setup grant for cmon user on all MySQL nodes
- Restart the CMON service
ClusterControl Migration in Detail
1. Install ClusterControl on the new server by using the installation script. This will install and configure all dependencies like MySQL, PHP and Apache web server:
root@newserver$ wget https://severalnines.com/downloads/cmon/install-cc.sh
root@newserver$ chmod u+x install-cc.sh
root@newserver$ ./install-cc.sh
** In the installation wizard, specify the same password for MySQL root and cmon password with the old server.
2. Backup the the cluster using s9s CLI command:
root@oldserver$ s9s backup \
    --save-controller \
    --backup-directory=$HOME/ccbackup \
    --output-file=controller.tar.gz \
    --log
s9s backup \
   --save-controller \
   --backup-directory=$HOME/ccbackup \
   --output-file=controller.tar.gz \
   --log
3. Restore the cluster in new ClusterControl using s9s CLI:
root@newserver$ s9s backup \
--restore-controller \
--input-file=$HOME/controller.tar.gz \
--debug \
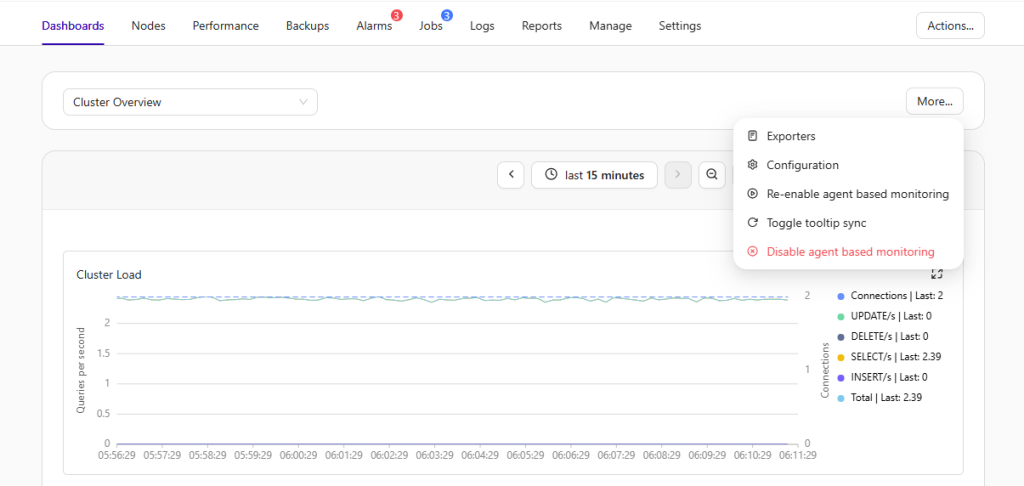
--log4. Re-enable agent based monitoring; go to the cluster Dashboard tab and expand the menu on the right side and click Re-enable agent based monitoring as shown below:
5. Set up passwordless SSH to all nodes (including the ClusterControl node) on the new server:
root@newserver$ ssh-keygen -t rsa # Press enter on all prompts
root@newserver$ ssh-copy-id -i ~/.ssh/id_rsa 192.168.50.100
root@newserver$ ssh-copy-id -i ~/.ssh/id_rsa 192.168.50.101
root@newserver$ ssh-copy-id -i ~/.ssh/id_rsa 192.168.50.102
N.B. If you are running ClusterControl as sudoer, ensure you enter the sudo user’s environment before running the above steps. The -i option should take the same key location as used in the old server.
6. Grant the new ClusterControl IP address on all MySQL database nodes:
db1> UPDATE mysql.user SET Host = '192.168.50.100' WHERE Host = '192.168.50.50';
db1> FLUSH PRIVILEGES;

db2> UPDATE mysql.user SET Host = '192.168.50.100' WHERE Host = '192.168.50.50';
db2> FLUSH PRIVILEGES;
7. Restart the CMON service:
root@newserver$ systemctl restart cmonN.B. If you have garbd, HAproxy or Keepalived running on the ClusterControl node, go to Cluster Actions > Add Load Balancer to explicitly remove and install them again. If you store backups on the ClusterControl node, do not forget to copy them over to the new server and keep the same path.
Migration is now completed.
Verifying ClusterControl on the new server
Ensure you are able to login to ClusterControl on the new server using the same username and password, and verify the cluster configuration. Things to look at:
- Nodes tab
- Backups > Schedules and Reports
- Manage > Hosts
- Manage > Processes
- Everything under Settings tab
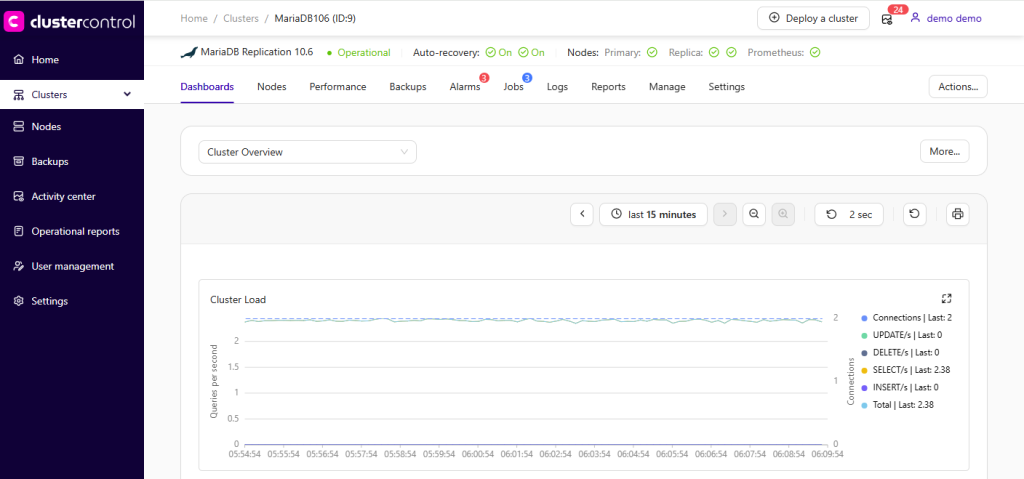
If you look into the Cluster Load graph, you should notice a slight gap in monitoring data due to the ClusterControl downtime during the migration. This indicates the previous monitoring data in the old server is correctly transferred to the new server:
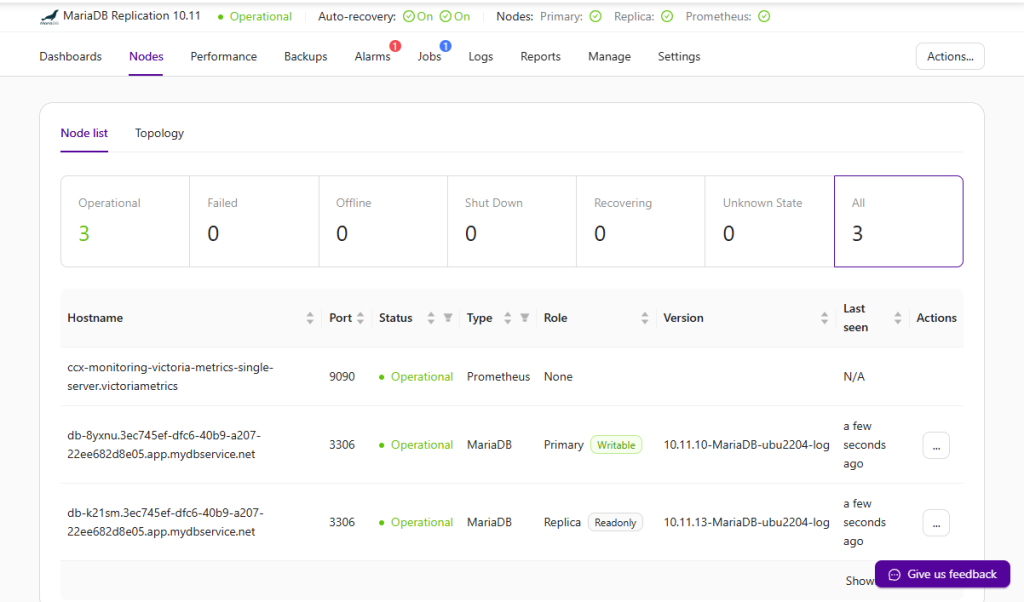
Examine the status of each database nodes and other services:
Need help? Don’t hesitate to contact us via our support portal. Happy migration!