blog
Deploying Cloud Databases with ClusterControl 1.6

ClusterControl 1.6 comes with tighter integration with AWS, Azure and Google Cloud, so it is now possible to launch new instances and deploy MySQL, MariaDB, MongoDB and PostgreSQL directly from the ClusterControl user interface. In this blog, we will show you how to deploy a cluster on Amazon Web Services.
Note that this new feature requires two modules called clustercontrol-cloud and clustercontrol-clud. The former is a helper daemon which extends CMON capability of cloud communication, while the latter is a file manager client to upload and download files on cloud instances. Both packages are dependencies of the clustercontrol UI package, which will be installed automatically if they do not exist. See the Components documentation page for details.
Cloud Credentials
ClusterControl allows you to store and manage your cloud credentials under Integrations (side menu) -> Cloud Providers:
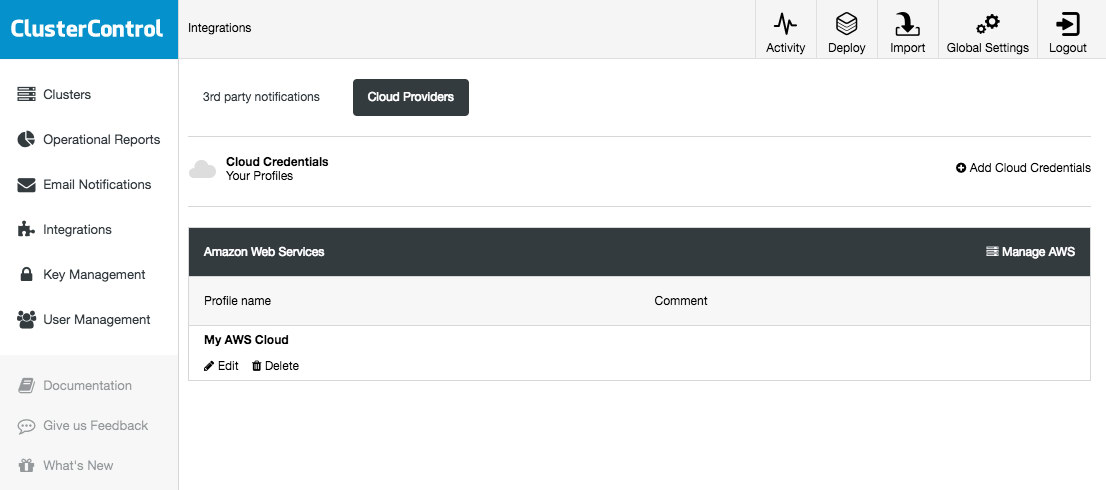
The supported cloud platforms in this release are Amazon Web Services, Google Cloud Platform and Microsoft Azure. On this page, you can add new cloud credentials, manage existing ones and also connect to your cloud platform to manage resources.
The credentials that have been set up here can be used to:
- Manage cloud resources
- Deploy databases in the cloud
- Upload backup to cloud storage
The following is what you would see if you clicked on “Manage AWS” button:
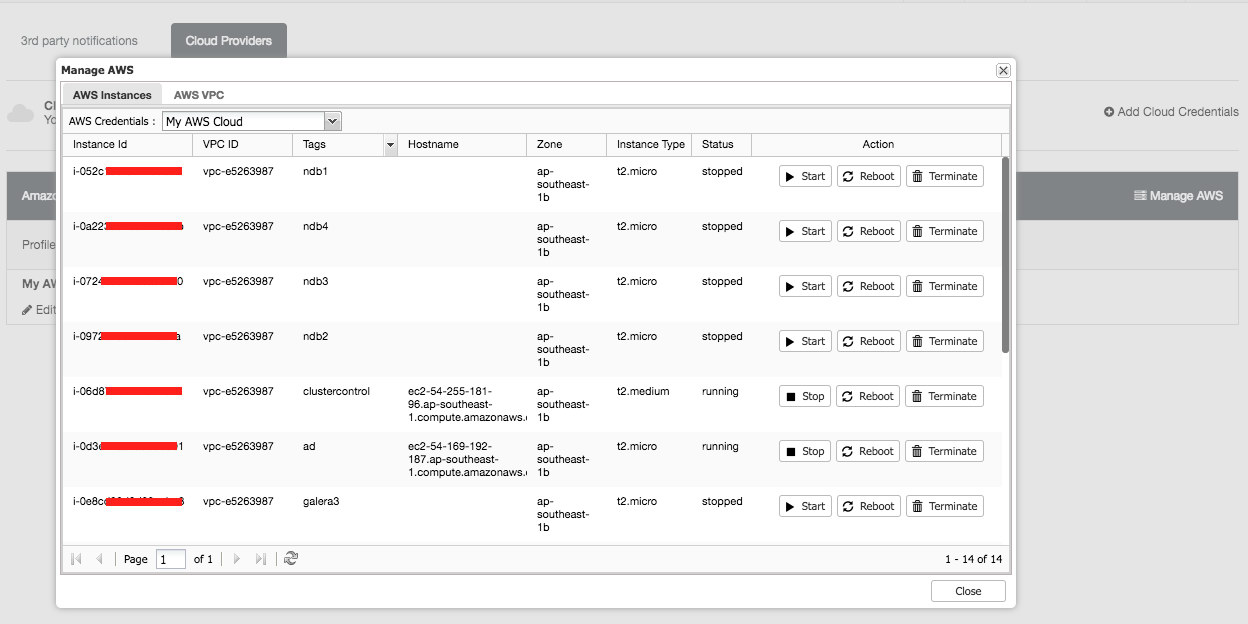
You can perform simple management tasks on your cloud instances. You can also check the VPC settings under “AWS VPC” tab, as shown in the following screenshot:
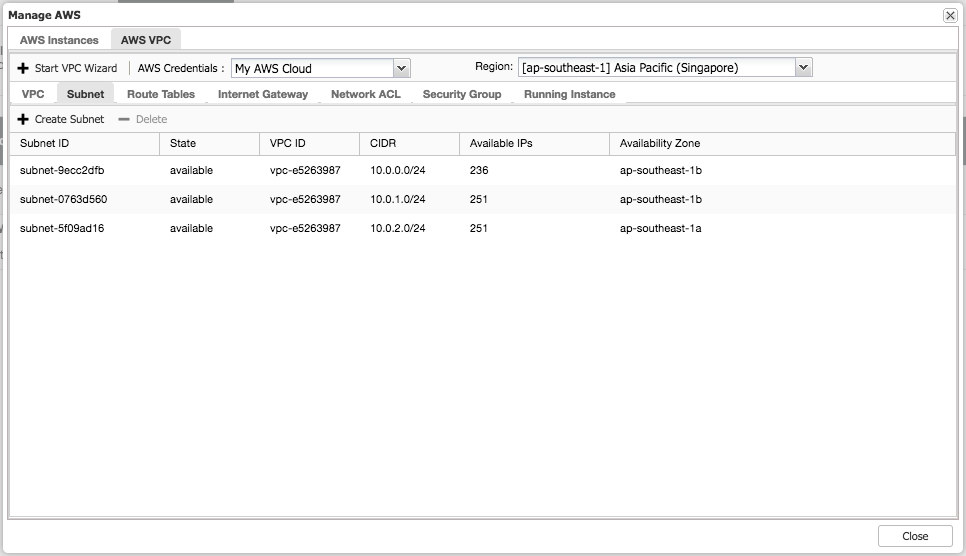
The above features are useful as reference, especially when preparing your cloud instances before you start the database deployments.
Database Deployment on Cloud
In previous versions of ClusterControl, database deployment on cloud would be treated similarly to deployment on standard hosts, where you had to create the cloud instances beforehand and then supply the instance details and credentials in the “Deploy Database Cluster” wizard. The deployment procedure was unaware of any extra functionality and flexibility in the cloud environment, like dynamic IP and hostname allocation, NAT-ed public IP address, storage elasticity, virtual private cloud network configuration and so on.
With version 1.6, you just need to supply the cloud credentials, which can be managed via the “Cloud Providers” interface and follow the “Deploy in the Cloud” deployment wizard. From ClusterControl UI, click Deploy and you will be presented with the following options:
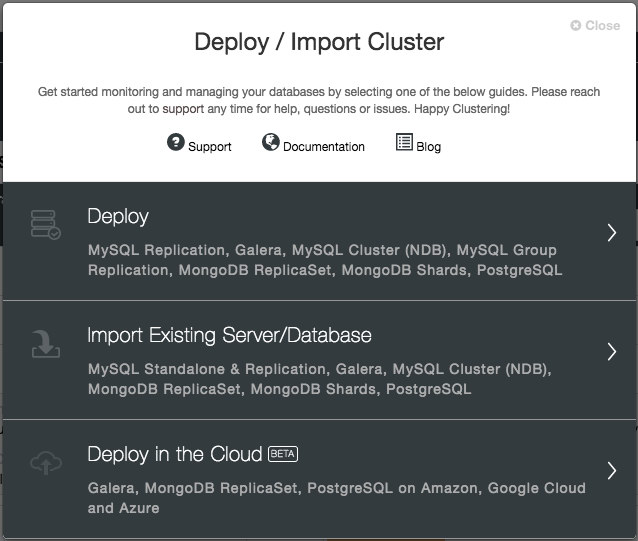
At the moment, the supported cloud providers are the three big players – Amazon Web Service (AWS), Google Cloud and Microsoft Azure. We are going to integrate more providers in the future release.
In the first page, you will be presented with the Cluster Details options:
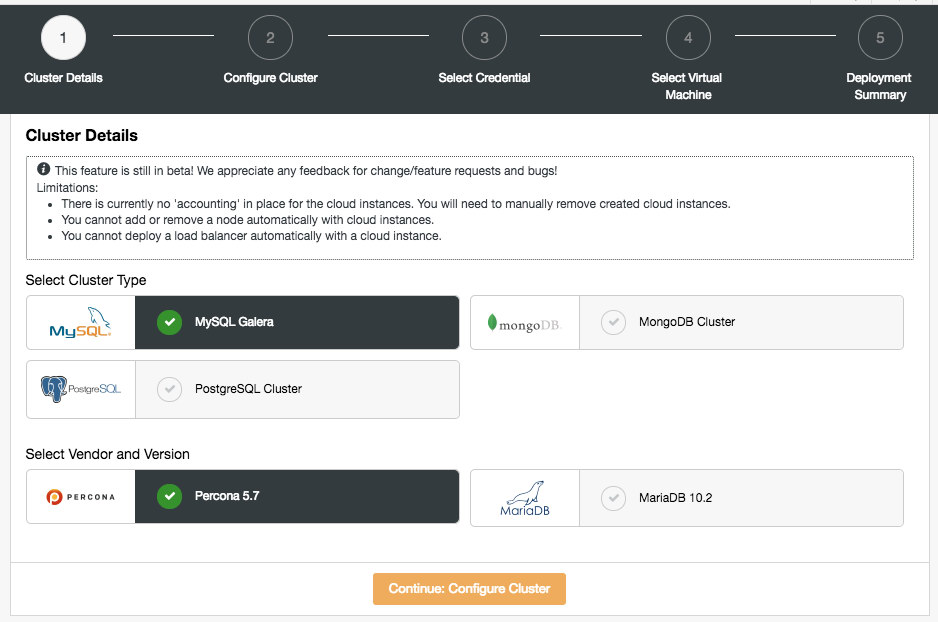
In this section, you would need to select the supported cluster type, MySQL Galera Cluster, MongoDB Replica Set or PostgreSQL Streaming Replication. The next step is to choose the supported vendor for the selected cluster type. At the moment, the following vendors and versions are supported:
- MySQL Galera Cluster – Percona XtraDB Cluster 5.7, MariaDB 10.2
- MongoDB Cluster – MongoDB 3.4 by MongoDB, Inc and Percona Server for MongoDB 3.4 by Percona (replica set only).
- PostgreSQL Cluster – PostgreSQL 10.0 (streaming replication only).
In the next step, you will be presented with the following dialog:
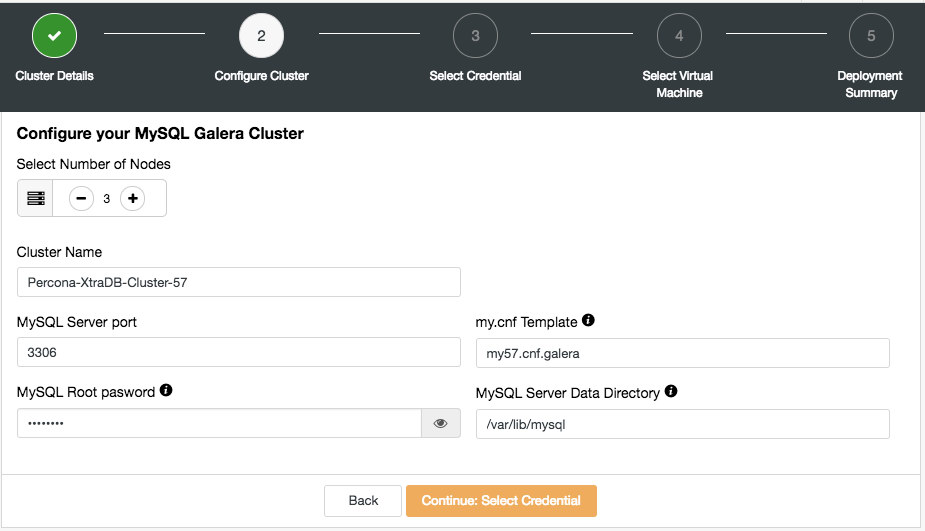
Here you can configure the selected cluster type accordingly. Pick the number of nodes. The Cluster Name will be used as the instance tag, so you can easily recognize this deployment in your cloud provider dashboard. No space is allowed in the cluster name. My.cnf Template is the template configuration file that ClusterControl will use to deploy the cluster. It must be located under /usr/share/cmon/templates on the ClusterControl host. The rest of the fields are pretty self-explanatory.
The next dialog is to select the cloud credentials:
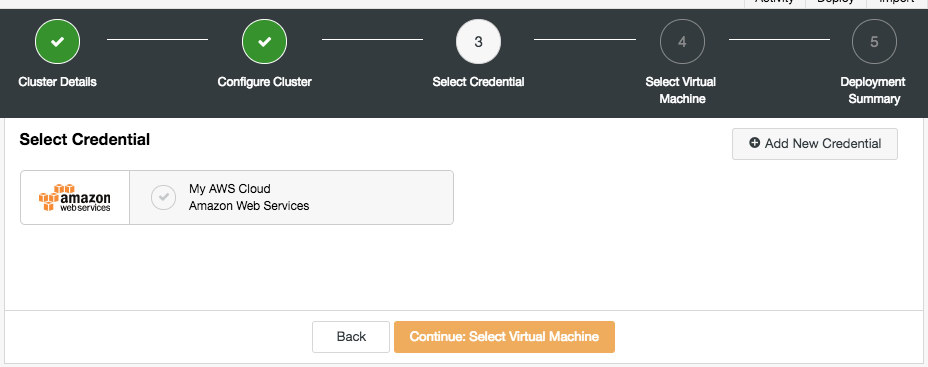
You can choose the existing cloud credentials or create a new one by clicking on the “Add New Credential” button. The next step is to choose the virtual machine configuration:
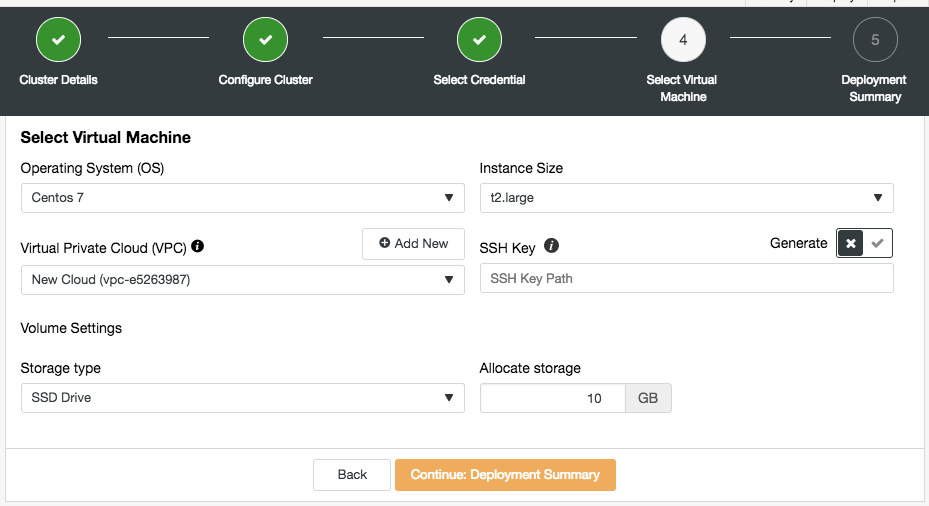
Most of the settings in this step are dynamically populated from the cloud provider by the chosen credentials. You can configure the operating system, instance size, VPC setting, storage type and size and also specify the SSH key location on the ClusterControl host. You can also let ClusterControl generate a new key specifically for these instances. When clicking on “Add New” button next to Virtual Private Cloud, you will be presented with a form to create a new VPC:
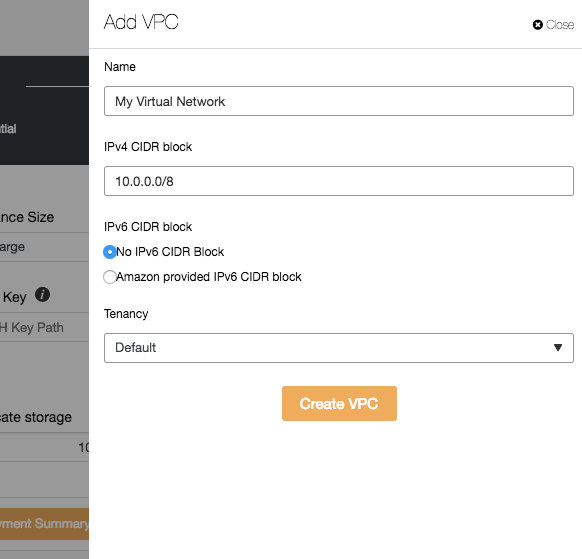
VPC is a logical network infrastructure you have within your cloud platform. You can configure your VPC by modifying its IP address range, create subnets, configure route tables, network gateways, and security settings. It’s recommended to deploy your database infrastructure in this network for isolation, security and routing control.
When creating a new VPC, specify the VPC name and IPv4 address block with subnet. Then, choose whether IPv6 should be part of the network and the tenancy option. You can then use this virtual network for your database infrastructure.
The last step is the deployment summary:
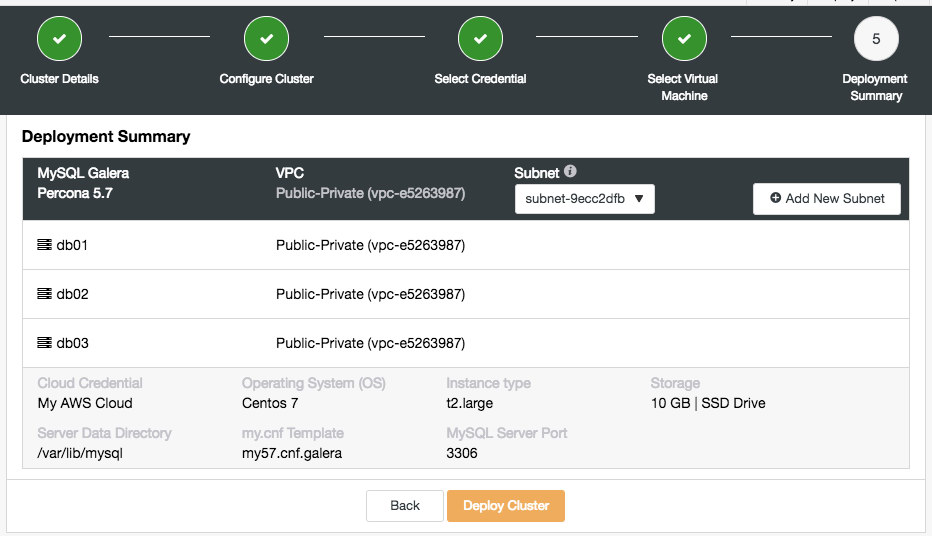
In this stage, you need to choose which subnet under the chosen virtual network that you want the database to be running on. Take note that the chosen subnet MUST have auto-assign public IPv4 address enabled. You can also create a new subnet under this VPC by clicking on “Add New Subnet” button. Verify if everything is correct and hit the “Deploy Cluster” button to start the deployment.
You can then monitor the progress by clicking on the Activity -> Jobs -> Create Cluster -> Full Job Details:
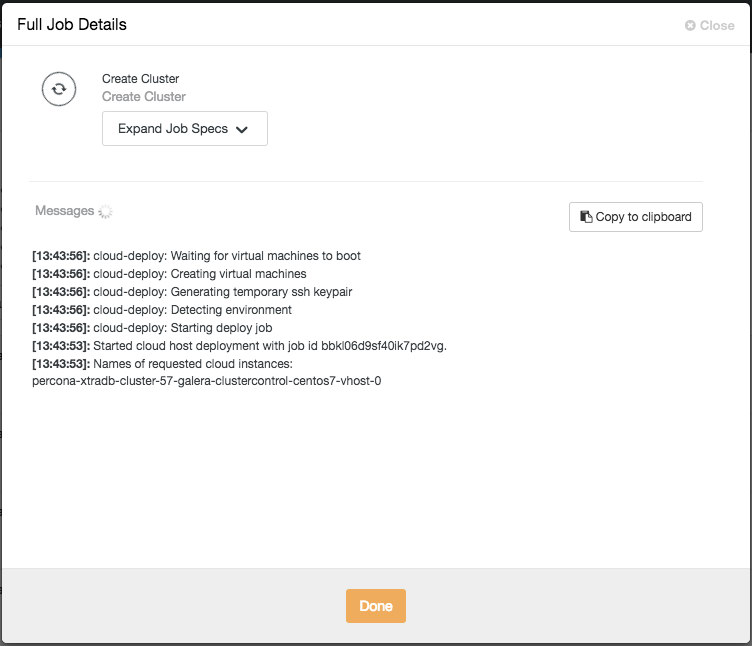
Depending on the connections, it could take 10 to 20 minutes to complete. Once done, you will see a new database cluster listed under the ClusterControl dashboard. For PostgreSQL streaming replication cluster, you might need to know the master and slave IP addresses once the deployment completes. Simply go to Nodes tab and you would see the public and private IP addresses on the node list on the left:
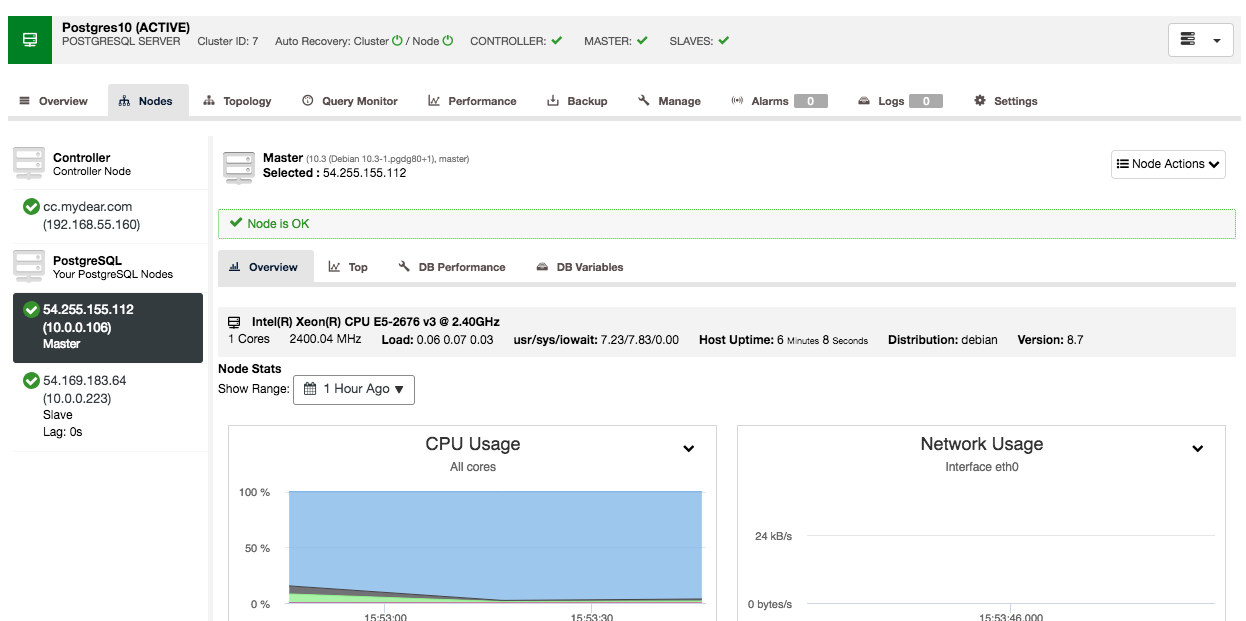
Your database cluster is now deployed and running on AWS.
At the moment, the scaling up works similar to the standard host, where you need to create a cloud instance manually beforehand and specify the host under ClusterControl -> pick the cluster -> Add Node.
Under the hood, the deployment process does the following:
- Create cloud instances
- Configure security groups and networking
- Verify the SSH connectivity from ClusterControl to all created instances
- Deploy database on every instance
- Configure the clustering or replication links
- Register the deployment into ClusterControl
Take note that this feature is still in beta. Nevertheless, you can use this feature to speed up your development and testing environment by controlling and managing the database cluster in different cloud providers from a single user interface.
Database Backup on Cloud
This feature has been around since ClusterControl 1.5.0, and now we added support for Azure Cloud Storage. This means that you can now upload and download the created backup on all three major cloud providers (AWS, GCP and Azure). The upload process happens right after the backup is successfully created (if you toggle “Upload Backup to the Cloud”) or you can manually click on the cloud icon button of the backup list:
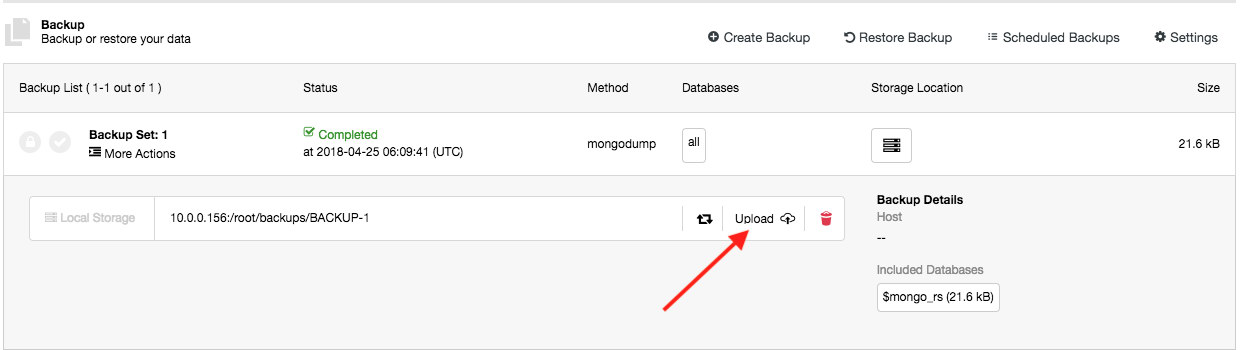
You can then download and restore backups from the cloud, in case you lost your local backup storage, or if you need to reduce local disk space usage for your backups.
Current Limitations
There are some known limitations for the cloud deployment feature, as stated below:
- There is currently no ‘accounting’ in place for the cloud instances. You will need to manually remove the cloud instances if you remove a database cluster.
- You cannot add or remove a node automatically with cloud instances.
- You cannot deploy a load balancer automatically with a cloud instance.
We have extensively tested the feature in many environments and setups but there are always corner cases that we might have missed out upon. For more information, please take a look at the change log.
Happy clustering in the cloud!


