blog
MySQL Replication with ProxySQL on WHM/cPanel Servers: Part Two

In the first part of the series, we showed you how to deploy a MySQL Replication setup with ProxySQL with WHM and cPanel. In this part, we are going to show some post-deployment operations for maintenance, management, failover as well as advantages over the standalone setup.
MySQL User Management
With this integration enabled, MySQL user management will have to be done from WHM or cPanel. Otherwise, ProxySQL mysql_users table would not sync with what is configured for our replication master. Suppose we already created a user called severaln_user1 (the MySQL username is automatically prefixed by cPanel to comply with MySQL limitation), and we would like to assign to database severaln_db1 like below:
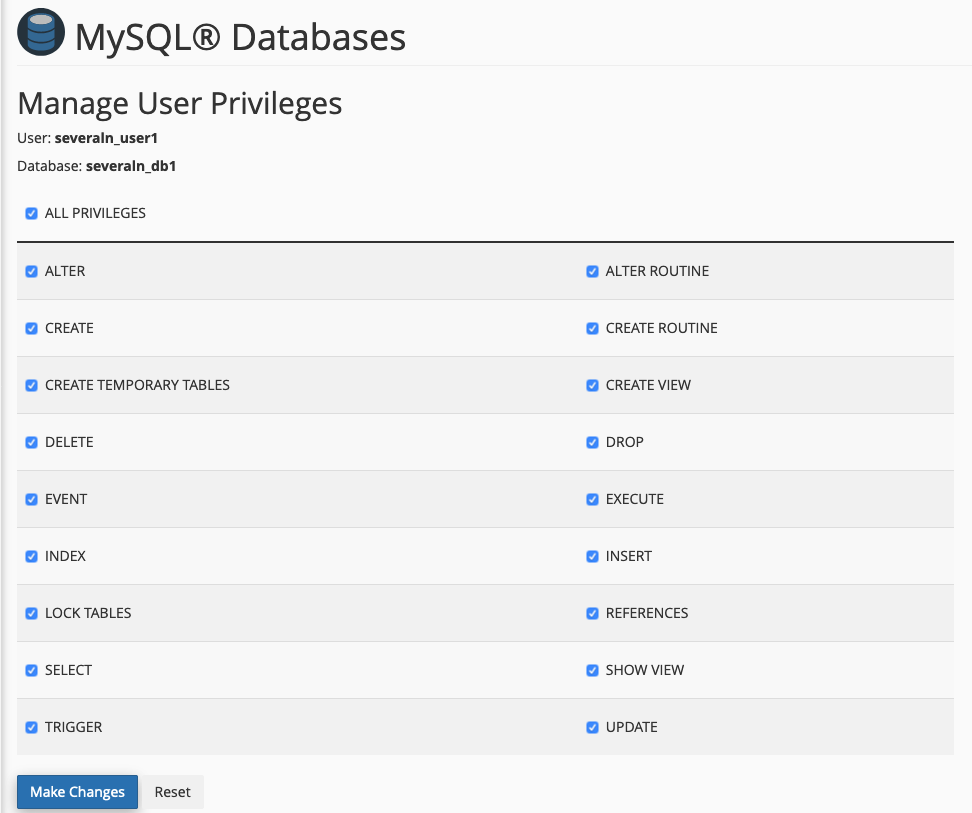
The above will result in the following mysql_users table output in ProxySQL:
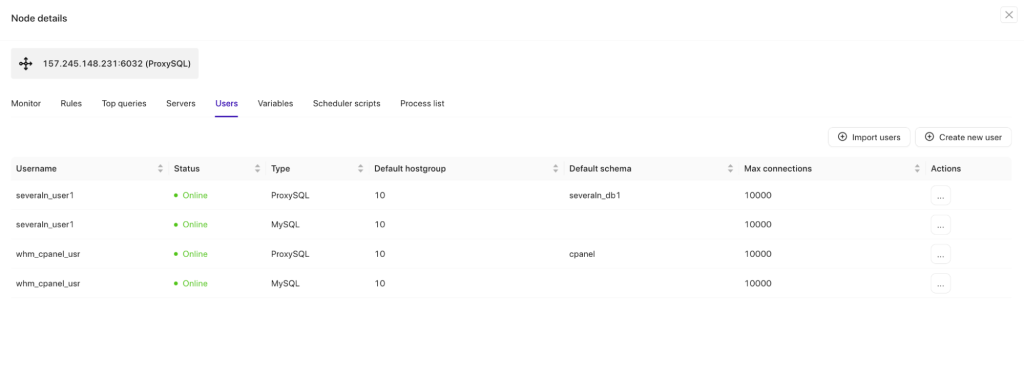
If you would like to create MySQL resources outside of cPanel, you can use ClusterControl -> Manage -> Schemas and Users feature and then import the database user into ProxySQL by going to ClusterControl -> Nodes -> pick the ProxySQL node -> Users -> Import Users.
The Proxysqlhook module that we use to sync up ProxySQL users sends the debugging logs into /usr/local/cpanel/logs/error_log. Use this file to inspect and understand what happens behind the scenes. The following lines would appear in the cPanel log file if we installed a web application called Zikula using Softaculous:
[2019-07-08 11:53:41 +0800] info [mysql] Creating MySQL database severaln_ziku703 for user severalnines
[2019-07-08 11:53:41 +0800] info [mysql] Creating MySQL virtual user severaln_ziku703 for user severalnines
[2019-07-08 11:53:41 +0800] info [cpanel] **** Reading ProxySQL information: Host: 192.168.0.16, Port: 6032, User: proxysql-admin *****
[2019-07-08 11:53:41 +0800] info [cpanel] **** Checking if severaln_ziku703 exists inside ProxySQL mysql_users table *****
[2019-07-08 11:53:41 +0800] info [cpanel] **** Inserting severaln_ziku703 into ProxySQL mysql_users table *****
[2019-07-08 11:53:41 +0800] info [cpanel] **** Save and load user into ProxySQL runtime *****
[2019-07-08 11:53:41 +0800] info [cpanel] **** Checking if severaln_ziku703 exists inside ProxySQL mysql_users table *****
[2019-07-08 11:53:41 +0800] info [cpanel] **** Checking if severaln_ziku703 exists inside ProxySQL mysql_users table *****
[2019-07-08 11:53:41 +0800] info [cpanel] **** Updating severaln_ziku703 default schema in ProxySQL mysql_users table *****
[2019-07-08 11:53:41 +0800] info [cpanel] **** Save and load user into ProxySQL runtime *****
You would see some repeated lines like “Checking if {DB user} exists” because WHM creates multiple MySQL user/host for every create database user request. In our example, WHM would create these 3 users:
- severaln_ziku703@localhost
- severaln_ziku703@”
- severaln_ziku703@”
ProxySQL only needs the username, password and default hostgroup information when adding a user. Therefore, the checking lines are there to avoid multiple inserts from the same user.
If you would like to modify the module and make some improvements into it, don’t forget to re-register the module by running the following command on the WHM server:
(whm)$ /usr/local/cpanel/bin/manage_hooks add module ProxysqlHookQuery Monitoring and Caching
With ProxySQL, you can monitor all queries coming from the application that have been passed or are passing through it. The standard WHM does not provide this level of detail in MySQL query monitoring. The following shows all MySQL queries that have been captured by ProxySQL:
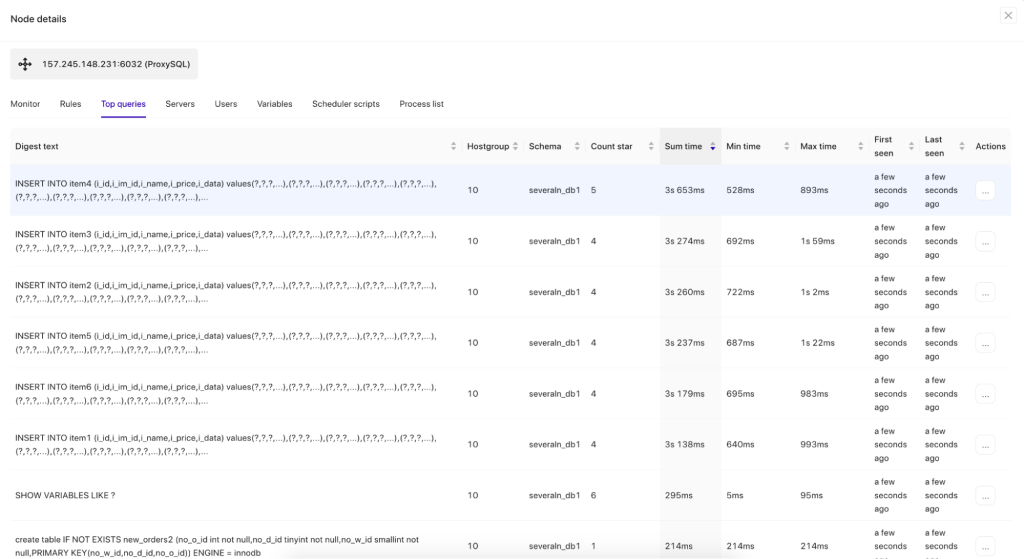
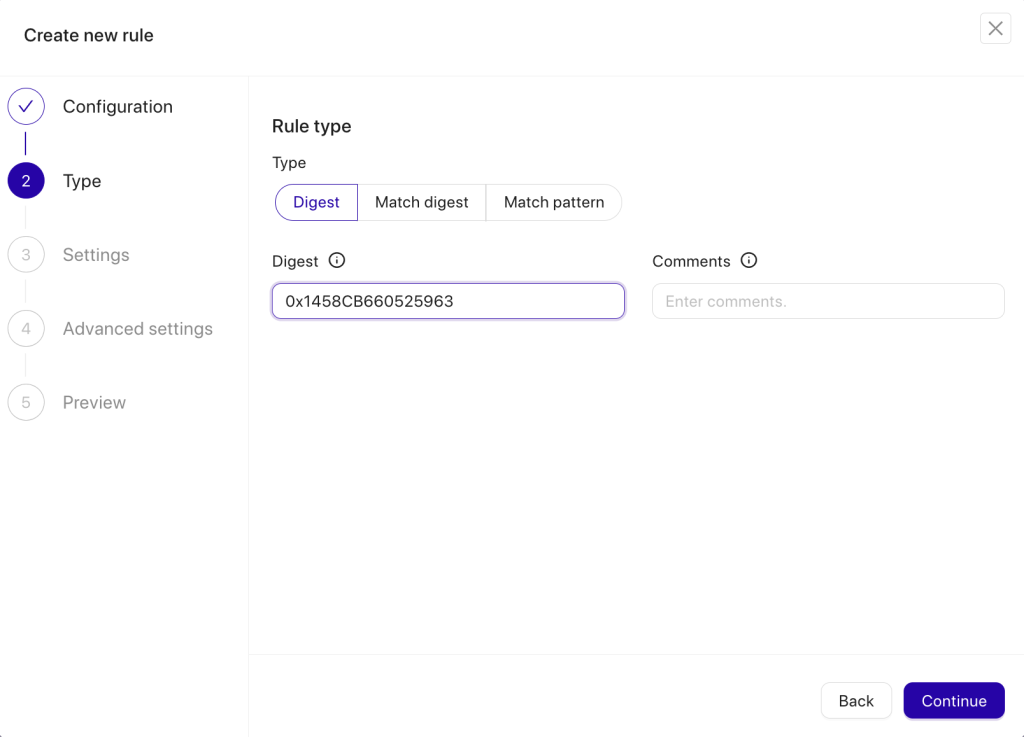
With ClusterControl, you can easily look up the most repeated queries and cache them via ProxySQL query cache feature. Use the “Order By” dropdown to sort the queries by “Count Star”, rollover to the query that you want to cache and click the “Cache Query” button underneath it. The following dialog will appear:
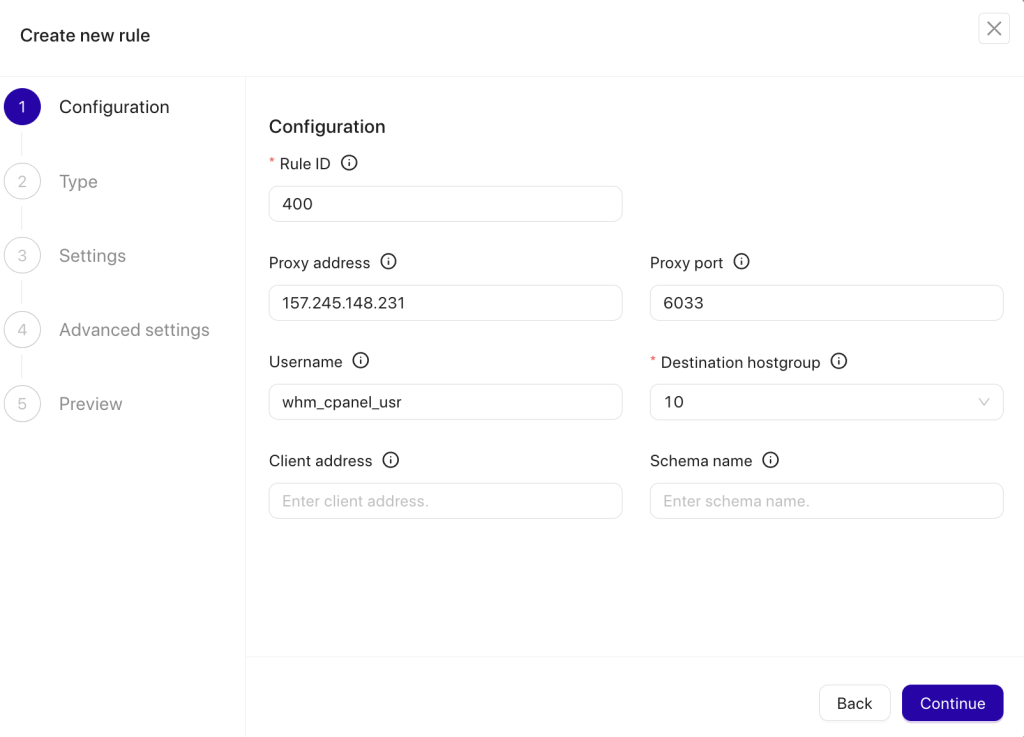
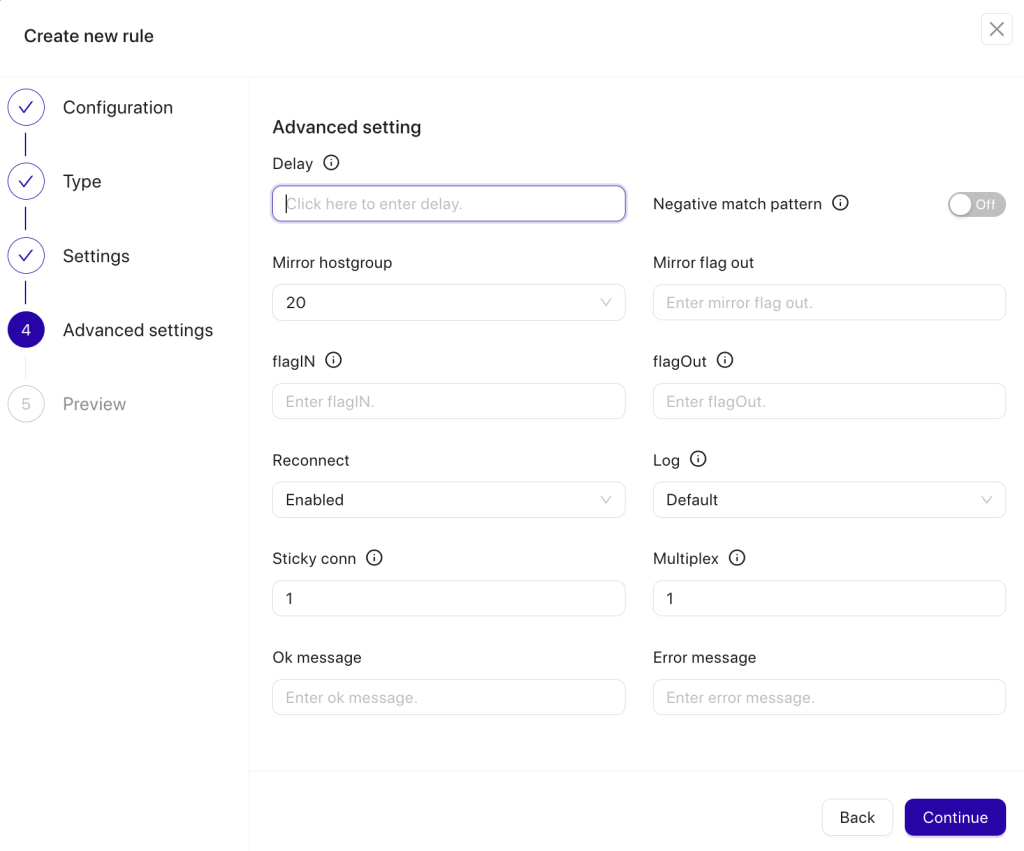
The resultset of cached queries will be stored and served by the ProxySQL itself, reducing the number of hits to the backend, which will offload your MySQL replication cluster as a whole. ProxySQL query cache implementation is fundamentally different from MySQL query cache. It’s time-based cache and will be expired after a timeout called “Cache TTL”. In this configuration, we would like to cache the above query for 5 seconds (5000 ms) from hitting the reader group where the destination hostgroup is 20.
Read/Write Splitting and Balancing
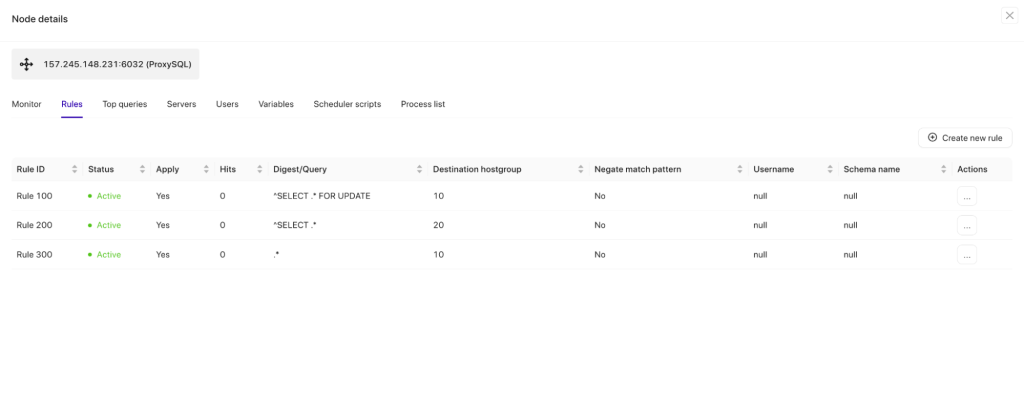
By listening to MySQL default port 3306, ProxySQL is kind of acting like the MySQL server itself. It speaks MySQL protocols on both frontend and backend. The query rules defined by ClusterControl when setting up the ProxySQL will automatically split all reads (^SELECT .* in Regex language) to hostgroup 20 which is the reader group, and the rest will be forwarded to the writer hostgroup 10, as shown in the following query rules section:
With this architecture, you don’t have to worry about splitting up read/write queries as ProxySQL will do the job for you. The users have minimal to none changes to the code, allowing the hosting users to use all the applications and features provided by WHM and cPanel natively, similar to connecting to a standalone MySQL setup.
In terms of connection balancing, if you have more than one active node in a particular hostgroup (like reader hostgroup 20 in this example), ProxySQL will automatically spread the load between them based on a number of criteria – weights, replication lag, connections used, overall load and latency. ProxySQL is known to be very good in high concurrency environment by implementing an advanced connection pooling mechanism. Quoted from ProxySQL blog post, ProxySQL doesn’t just implement Persistent Connection, but also Connection Multiplexing. In fact, ProxySQL can handle hundreds of thousands of clients, yet forward all their traffic to a few connections to the backend. So, ProxySQL can handle N client connections and M backend connections, where N > M (even N is thousands of times bigger than M).
MySQL Failover and Recovery
With ClusterControl managing the replication cluster, failover is performed automatically if automatic recovery is enabled. In case of a master failure:
- ClusterControl will detect and verify the master failure via MySQL client, SSH and ping.
- ClusterControl will wait for 3 seconds before commencing a failover procedure.
- ClusterControl will promote the most up-to-date slave to become the next master.
- If the old master comes back online, it will be started as a read-only, without participating in the active replication.
- It’s up to users to decide what will happen to the old master. It could be introduced back to the replication chain by using “Rebuild Replication Slave” functionality in ClusterControl.
- ClusterControl will only attempt to perform the master failover once. If it fails, user intervention is required.
You can monitor the whole failover process under the cluster, choose Jobs -> Failover to a new primary as shown below:
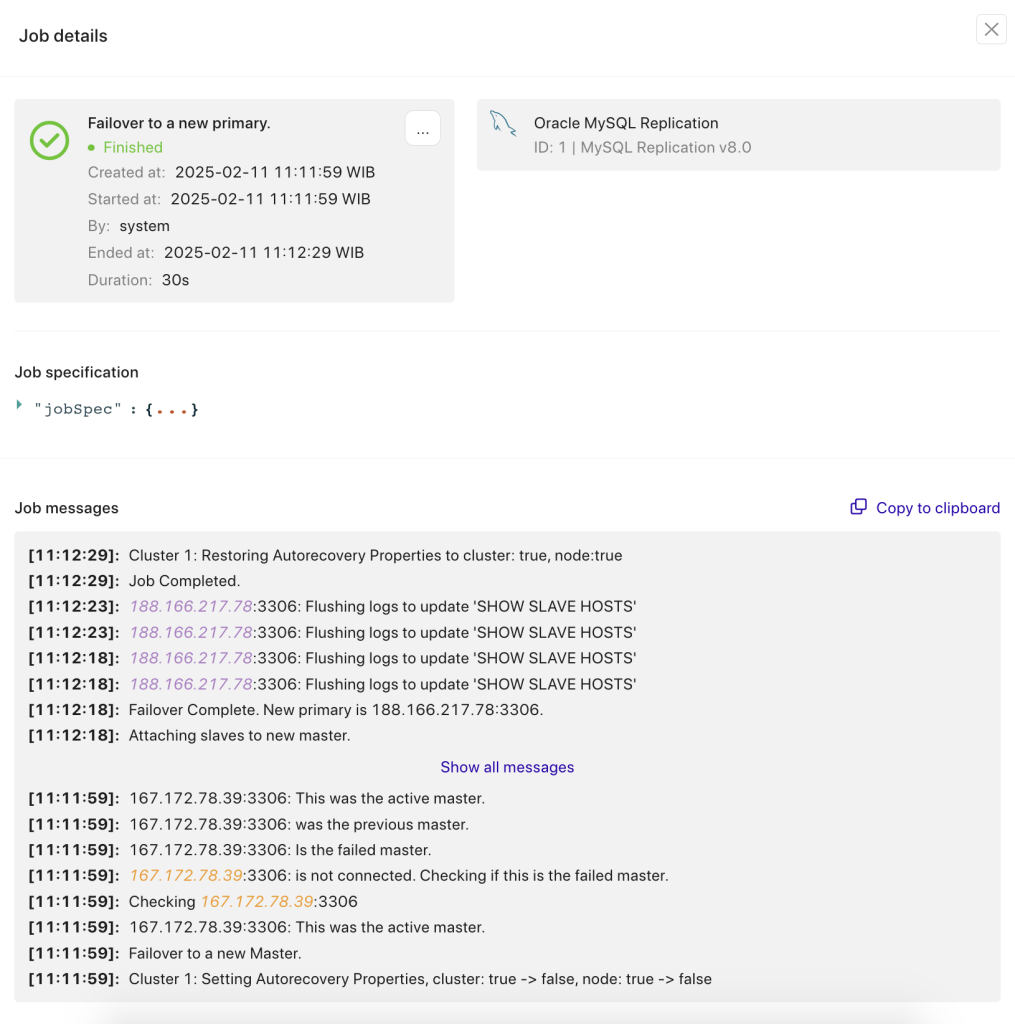
During the failover, all connections to the database servers will be queued up in ProxySQL. They won’t get terminated until timeout, controlled by mysql-default_query_timeout variable which is 86400000 milliseconds or 24 hours. The applications would most likely not see errors or failures to the database at this point, but the tradeoff is increased latency, within a configurable threshold.
At this point, ClusterControl will present the topology as below:
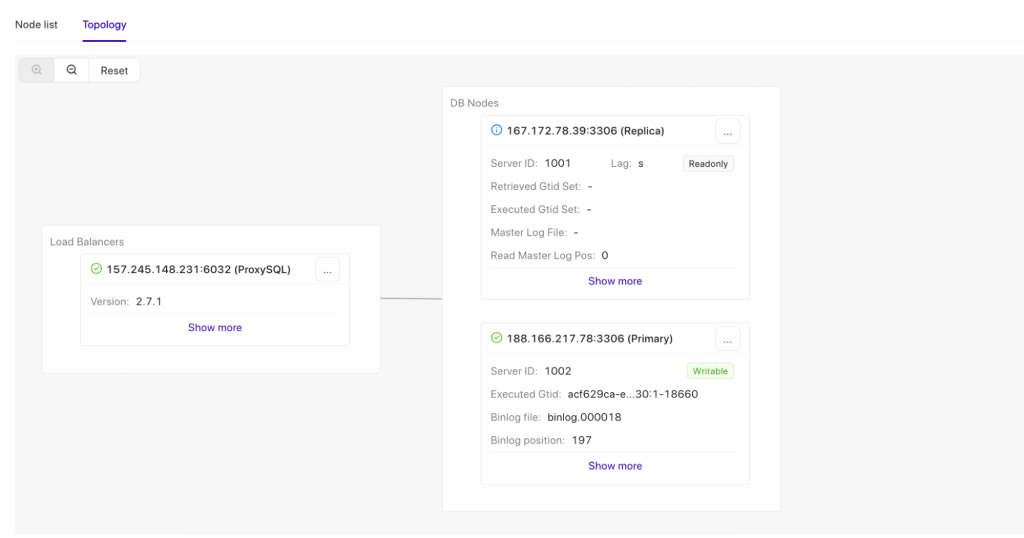
If we would like to allow the old primary join back into the replication after it is up and available, we would need to rebuild it as a replica by going to the MySQL Replication cluster, Nodes -> pick the old primary -> Replication -> Rebuild Replication Replica -> pick the new Primary -> Proceed. Once the rebuilding is complete, you should get the following topology (notice 188.166.217.78 is the master now):

Server Consolidation and Database Scaling
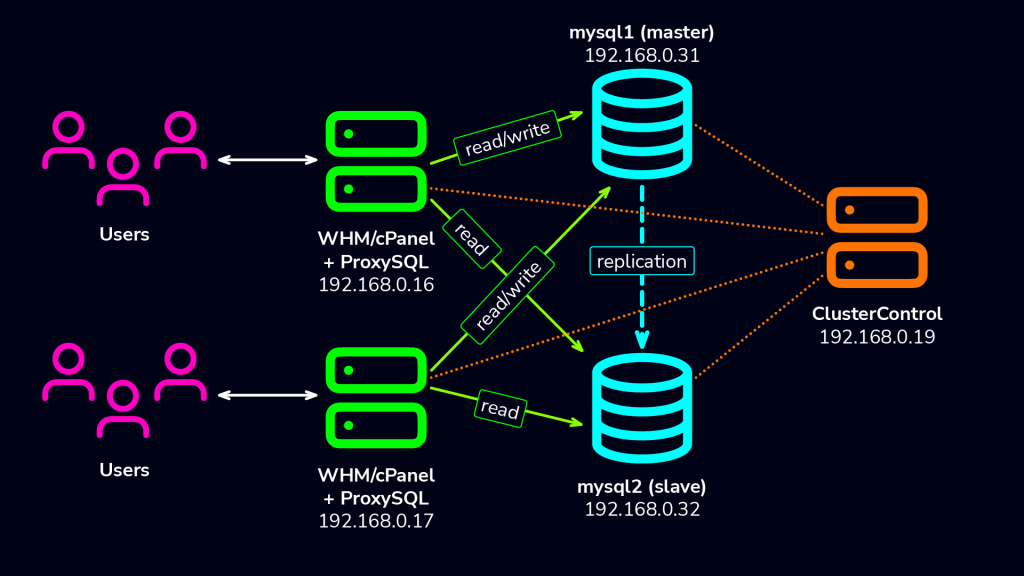
With this architecture, we can consolidate many MySQL servers that reside on every WHM server into one single replication setup. You can scale more database nodes as you grow, or have multiple replication clusters to support all of them and managed by a single ClusterControl server. The following architecture diagram illustrates if we have two WHM servers connected to one single MySQL replication cluster via ProxySQL socket file:
The above allows us to separate the two most important tiers in our hosting system – application (front-end) and database (back-end). As you might know, co-locating MySQL in the WHM server commonly results in resource exhaustion as MySQL needs a huge upfront RAM allocation to start up and perform well (mostly depending on the innodb_buffer_pool_size variable). Considering the disk space is sufficient, with the above setup, you can have more hosting accounts hosted per server, where all the server resources can be utilized by the front-end tier applications.
Scaling up the MySQL replication cluster will be much simpler with a separate tier architecture. If let’s say the master requires a scale up (upgrading RAM, hard disk, RAID, NIC) maintenance, we can switch over the master role to another replica (ClusterControl, choose Nodes -> Node list -> pick a replica -> Promote Replica) and then perform the maintenance task without affecting the MySQL service as a whole. For scale out operation (adding more slaves), you can perform that without even affecting the master by performing the staging directly from any active replica. With ClusterControl, you can even stage a new replica from an existing MySQL backup (PITR-compatible only):
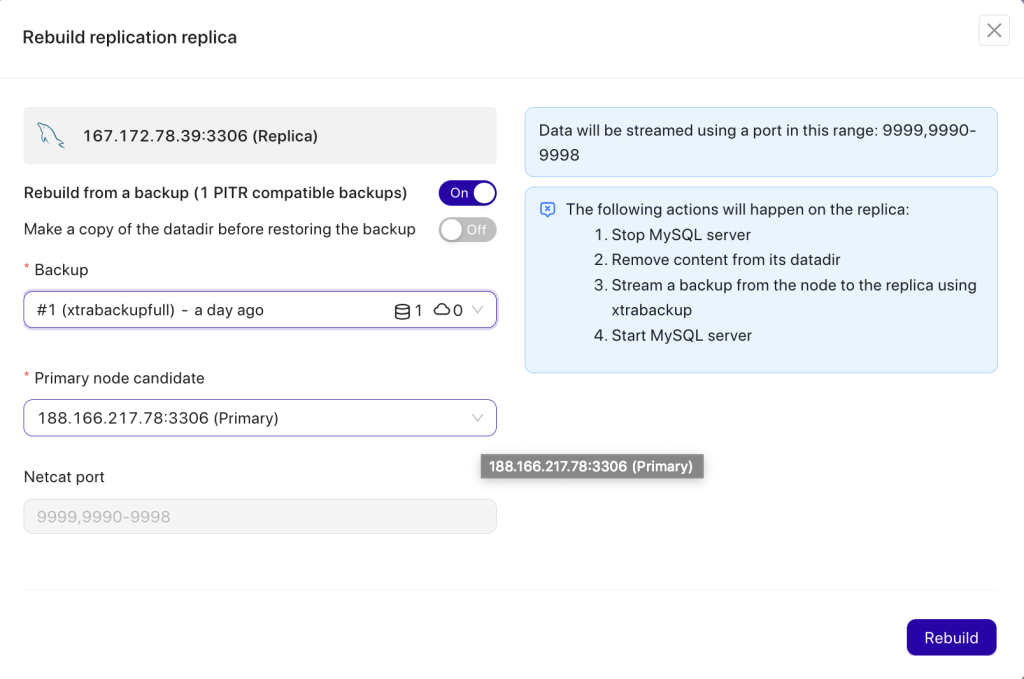
Rebuilding a slave from backup will not bring additional burden to the master. ClusterControl will copy the selected backup file from the ClusterControl server to the target node and perform the restoration there. Once done, the node will be connecting to the master and starts retrieving all the missing transactions since the restore time and catch up with the master. When it’s lagging, ProxySQL will not include the node in the load balancing set until the replication lag is less than 10 seconds (configurable when adding a mysql_servers table via ProxySQL admin interface).
Final Thoughts
ProxySQL extends WHM cPanel’s capabilities in managing MySQL Replication. With ClusterControl managing your replication cluster, all the complex tasks involved are now easier than ever before.
Try out ClusterControl now for free.


