blog
Meet Our New ClusterControl v1.2

ClusterControl
Severalnines ClusterControl v1.2 introduces support for MongoDB sharded clusters, as well as a new simple and user-friendly interface, with ability to provision clusters directly from the ClusterControl interface.

MongoDB is a scalable, high-performance, open source NoSQL database. MongoDB features:
- Document-oriented storage – JSON-style documents with dynamic schemas.
- Full index support – Index on any attribute.
- Replication & high availability – Mirror across LANs and WANs.
- Auto-sharding – Scale horizontally.
- Querying – Rich, document-based queries.
- Fast in-place updates – Atomic modifiers.
- Map/Reduce – Flexible aggregation and data processing.
- GridFS – Store files of any size.
By the way, we will cover MongoDB in a separate post.
This release also introduces support for a new web GUI. It has grown out of the old GUI, but is a complete rewrite and goes way beyond. The new features include:
- Deployment and Monitoring of MongoDB sharded clusters
- A dynamic and interactive look and feel with AJAX components and zoomable graphs
- A REST API exposing all the monitoring and management functionality of ClusterControl
- Support for distributed monitoring and management
- Web authentication is enabled by default, as well as SSL for secure communication
- User management module to provision and manage users. This allows Administrators to grant access to the ClusterControl application to departmental users or other organizations.
The basic idea behind using the new UI for distributed monitoring is that you do not pump all monitoring data produced by your clusters into one centralized monitoring database, but rather leave it in each ClusterControl server’s monitoring database. What is centralized is the visualization. The UI retrieves live data from the individual clusters on-demand via a REST API and merges it into one logical view.
This scheme has various advantages, amongst which are:
- It scales very well to a large number of clusters. No inter-site network traffic is generated at all during the actual monitoring. No central storage is needed.
- New or existing clusters can easily be added or removed from the setup
- You are not restricted to one central ClusterControl UI
- You can control multiple clusters via one interface
We believe this new release will increase the efficiency in managing and monitoring your database clusters.
What is ClusterControl anyway?
Need to deploy a database cluster but don’t want to spend hours typing in commands? Looking for an easy way to manage and monitor your cluster? Welcome to ClusterControl – it will help you deploy, manage, monitor and scale your cluster.
The following clusters are supported:
- MySQL Galera Cluster/Percona XtraDB Cluster
- MySQL Cluster
- MySQL Replication
- MongoDB Sharded Cluster
How to deploy Galera Cluster for MySQL and ClusterControl v1.2
The major steps will be as below:
- Create deployment script
- Download the deployment script
- Run the deployment script in the server
- Configure ClusterControl API (alt. Register your cluster with the UI)
For this example, we are using 3 MySQL Galera Cluster nodes with 1 ClusterControl node. All nodes are connected to each other using LAN IP 192.168.0.0/24 with internet connection and we are using CentOS 6.3 64bit, as the operating system. The architecture diagram will be as below:
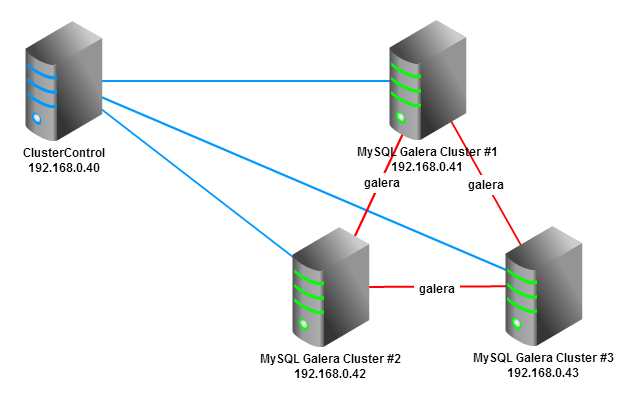
The installation steps might vary depending on the operating system you use.
Create deployment script
Step 1: Go to our website, https://severalnines.com/resources/configurator and click Launch Configurator for Configurator for MySQL Galera
Step 2: On the configurator page, choose Codership (based on MySQL 5.5) as screenshot below and click Next. Codership is the developer for replication and clustering solution for MySQL. They release the MySQL Galera patches based on MySQL 5.5 by Oracle.

Step 3: On the General Settings page, enter required informations:
Cloud Provider : none/on-premise
Operating System : RHEL6 – Redhat 6.2/Fedora/Centos 6.2/OLN 6.2
Platform : Linux 64-bit (x86_64)
Number of Galera Servers : 3+1
MySQL PortNumber : 3306
Galera PortNumber : 4567
Galera SST PortNumber : 4444
SSH PortNumber : 22
OS User : root
MySQL Server password (root user): MyP4ss
CMON DB password (cmon user) : CmonP4ss
Firewall (iptables) : disable
Step 4: On the Configure Storage page, choose following information:
System Memory (MySQL Servers) : 512MB
WAN : no
Skip DNS Resolve : yes
Database Size : <8GB
MySQL Usage : Medium write/high read
Number of cores : 2
innodb_buffer_pool_size : (auto configured)
innodb_file_per_table : Checked
Step 5: On the Configure Directories page, choose following information:

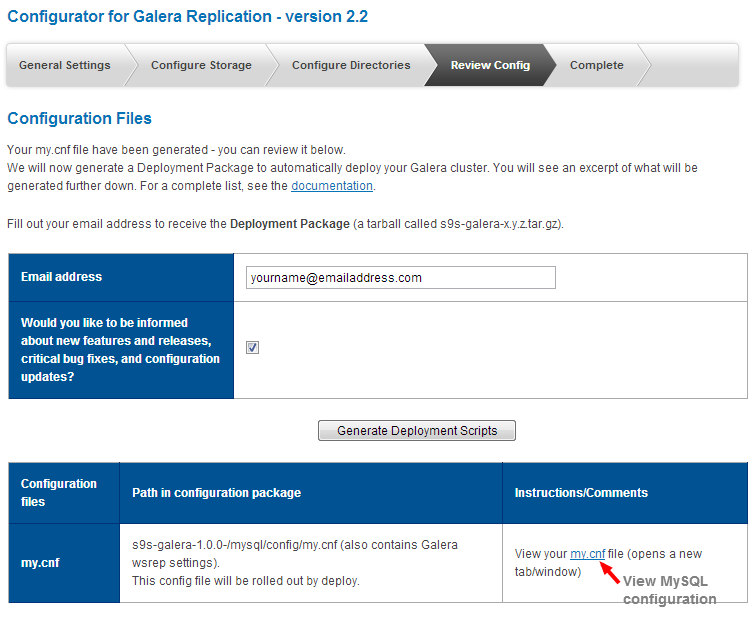
Step 6: On the Review Config page, you can review the MySQL configuration file (my.cnf) if needed. Specify your email address:
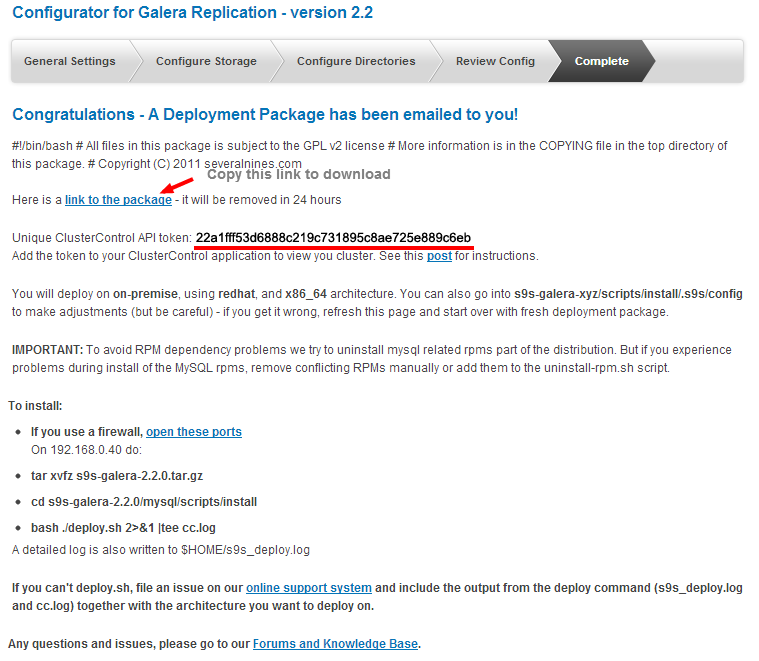
Step 7: On Complete page, take note the API key and the link to download the package. We are going to need it later:
Download the deployment script
Step 1: Login to ClusterControl node, in our case 192.168.0.40 using SSH as root user. Download the deployment script which is a compressed tar.gz file:
$ wget https://severalnines.com/galera-configurator/tmp/gi8i2cl22pffs15v7tou…
Step 2: Extract the deployment script:
$ tar -xzf s9s-galera-2.2.0-rpm.tar.gz
Step 3: Navigate to the installation directory to get ready for the installation process:
$ cd s9s-galera-2.2.0-rpm/mysql/scripts/install/
Run the deployment script
Step 1: We will start the installation process by using this command:
$ bash ./deploy.sh 2>&1 | tee cc.log
Notes: tee command is used to send the output displayed to a log file called cc.log
Step 2: You will see following prompt. Just choose ‘y’ so it will disable SElinux during installation:
Redhat/Centos/Fedora detected – do you want to set SELinux to Permissive mode.
** IF YOU HAVE SELinux == disabled ON ALL HOSTS PRESS ‘n’ AND IGNORE THE WARNING. **
(you can set SELinux to Enforcing again later if you want) – ‘y’ is recommended (y/n): y
Notes: You may need to enter the root password for prompted host because at this moment, passwordless SSH not being setup yet.
Step 3: On this prompt, choose ‘n’ and the deployment script will setup a RSA key to allow passwordless SSH between nodes:
Can you SSH from this host to all other hosts without password?
Choosing ‘n’ will allow you to setup shared keys. (y/n): n
Step 4: The deployment will start automatically. Grab a cup of coffee and get back to the server later. It should be ready within 10 minutes to 30 minutes depending on the host performance and internet connection.
Once completed, you should see notes as follow. Take note on the API key. We will need that later:
*******************************************************************************
* *
* CONGRATULATIONS *
* *
*******************************************************************************
You have now installed one of the most advanced db infrastructures available.
Also, have a look at ClusterControl, our monitoring and management tool.
Open your browser to http://hostname_of_this_computer/cmonapi to register you cluster.
Logon with your email address and password ‘admin’.
Enter this ClusterControl API token: 22a1fff53d6888c219c731895c8ae725e889c6eb when prompted.
If you still prefer the classic/legacy CMON GUI then open your browser to http:///cmon
Don’t hesitate to contact us if you have any problems or inquiries. Good luck,
Severalnines AB
Configure ClusterControl API
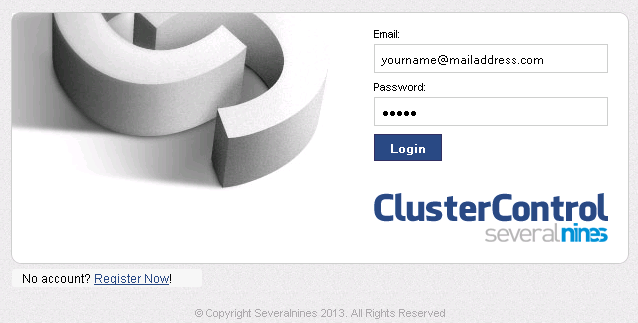
Step 1: Lets open ClusterControl at https://192.168.0.40/clustercontrol. Login using your registered email address during the configuration of deployment script with default password “admin”.
Step 2: Once you are logged in, you will need to register your cluster with the UI. Click Cluster Registrations to register the cluster:

Step 3: You will be redirected to a page which requires you to insert your API key and the address to the ClusterControl API. ClusterControl API address will be https://[ip_address]/cmonapi.
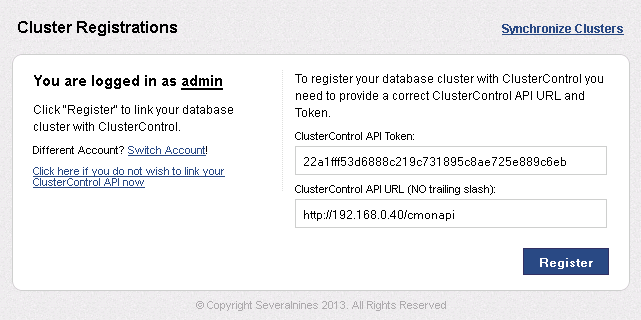
Notes: If you forgot your API key, you can retrieve it using following command inside the installation folder:
$ cat cc.log | grep API | awk {‘print $6’}
Step 4: At this point, we have registered our Galera cluster with the UI.

Step 5: Click on the cluster name to view it in details. The Overview page of your cluster should look something like this:
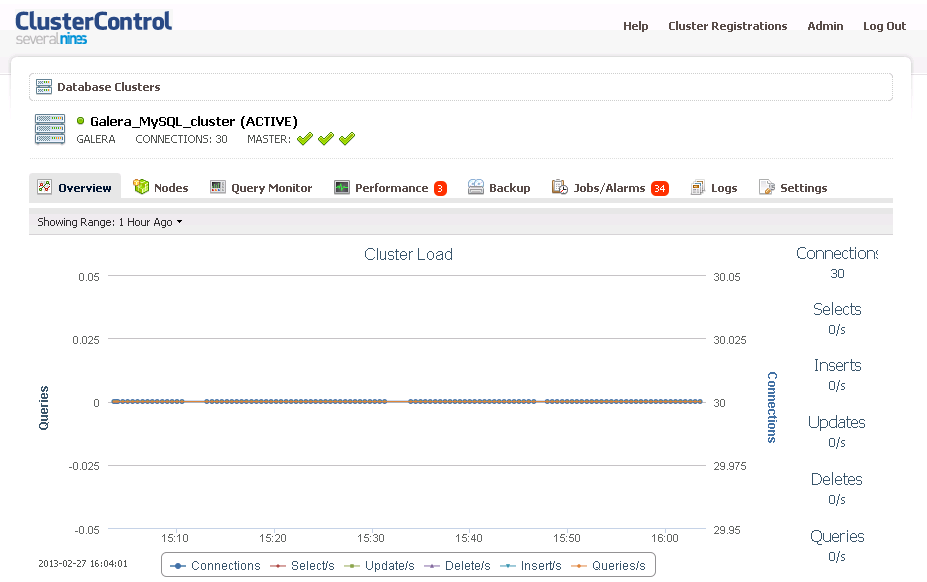
You are done! You have now deployed a production-ready Galera Cluster for MySQL together with its management and monitoring tools.