blog
How to Deploy Percona Server for MongoDB for High Availability

High availability can be achieved by eliminating all single points of failures, including the database tier. So you can imagine our surprise every time we bump into setups with multiple web servers/applications all hitting one single database instance.
High availability (HA) can be achieved in MongoDB through replication. The term replica set describes a setup where multiple MongoDB processes run and maintain the same data. In this post, we will discuss how to deploy Percona Server for MongoDB to achieve HA.
How to manually deploy Percona Server for MongoDB
We need at least 3 nodes for high availability; a replica set will consist of 1 Primary node, and 2 Secondary nodes. You can use 2 nodes, 1 Primary and 1 Secondary, but you still need an arbiter as a third node. An arbiter node that does not copy and store data, but is involved in the election process of the new Primary when failover happens.
In this example, we are running 3 virtual environments with Rocky Linux release 9.5 as the operating system and will use Percona Server for MongoDB version 6.0 for the installation. The IP Address is as follows:
- mongo-node8: 10.10.10.17
- mongo-node9: 10.10.10.18
- mongo-node10: 10.10.10.19
Before we jump into the installation, please make sure that all nodes are already configured in /etc/hosts file on each node.
[root@mongo-node9 ~]# cat /etc/hosts
127.0.0.1	mongo-node9	mongo-node9
127.0.0.1   localhost localhost.localdomain localhost4 localhost4.localdomain4
::1         localhost localhost.localdomain localhost6 localhost6.localdomain6
10.10.10.17 mongo-node8
10.10.10.18 mongo-node9
10.10.10.19 mongo-node10
Then, we need to install and configure the Percona Repository on each of the nodes. After that, enable the repository for psmdb42 as shown below:
[root@mongo-node8 ~]#yum install Running transaction
                                                                      31 kB/s | 3.3 kB     00:00
percona-release-latest.noarch.rpm                                                                                                                                                  319 kB/s |  28 kB     00:00
Dependencies resolved.
===================================================================================================================================================================================================================
 Package                                                 Architecture                                   Version                                         Repository                                            Size
===================================================================================================================================================================================================================
Installing:
 percona-release                                         noarch                                         1.0-30                                          @commandline                                          28 k

Transaction Summary
===================================================================================================================================================================================================================
Install  1 Package

Total size: 28 k
Installed size: 49 k
Is this ok [y/N]: y
Downloading Packages:
Running transaction check
Transaction check succeeded.
Running transaction test
Transaction test succeeded.
Running transaction
  Preparing        :
  Installing       : percona-release-1.0-30.noarch
  Running scriptlet: percona-release-1.0-30.noarch
* Enabling the Percona Release repository
<*> All done!
* Enabling the Percona Telemetry repository
<*> All done!
* Enabling the PMM2 Client repository
<*> All done!
The percona-release package now contains a percona-release script that can enable additional repositories for our newer products.
Note: Currently, there are no repositories that contain Percona products or distributions enabled. We recommend you enable Percona Distribution repositories instead of individual product repositories because with the Distribution, you will get not only the database itself but also a set of other components that will help you work with your database.
For example, to enable the Percona Distribution for MySQL 8.0 repository, use: percona-release setup pdps8.0
Note: To avoid conflicts with older product versions, the percona-release setup command may disable our original repository for some products.
For more information, please visit:
https://docs.percona.com/percona-software-repositories/percona-release.html
Verifying : percona-release-1.0-30.noarch
Installed:
percona-release-1.0-30.noarch
Complete!
[root@mongo-node8 ~]# sudo percona-release enable psmdb-60 release
Enabling the Percona Server for MongoDB 6.0 repository
<*> All done!Then, continue to install the Percona Server for MongoDB package :
[root@mongo-node8 ~]# yum install percona-server-mongodb*
Dependencies resolved.
=============================================================================================================== Package                              Architecture  Version              Repository                       Size
===============================================================================================================
Installing:
 percona-server-mongodb               x86_64        6.0.20-17.el9        psmdb-60-release-x86_64         8.2 k
Upgrading:
 numactl-libs                         x86_64        2.0.18-2.el9         baseos                           31 k
Installing dependencies:
 cyrus-sasl-gssapi                    x86_64        2.1.27-21.el9        baseos                           26 k
 numactl                              x86_64        2.0.18-2.el9         baseos                           68 k
 percona-mongodb-mongosh              x86_64        2.3.2-1.el9          psmdb-60-release-x86_64          30 M
 percona-server-mongodb-mongos        x86_64        6.0.20-17.el9        psmdb-60-release-x86_64          20 M
 percona-server-mongodb-server        x86_64        6.0.20-17.el9        psmdb-60-release-x86_64          46 M
 percona-server-mongodb-tools         x86_64        6.0.20-17.el9        psmdb-60-release-x86_64          25 M percona-telemetry-agent              x86_64        1.0.3-3.el9          telemetry-release-x86_64        4.4 M
Transaction Summary
===============================================================================================================Install  8 Packages
Upgrade  1 Package

Total download size: 126 M
Is this ok [y/N]: y
Downloading Packages:
(1/9): percona-server-mongodb-6.0.20-17.el9.x86_64.rpm                         454 kB/s | 8.2 kB     00:00
(2/9): percona-server-mongodb-mongos-6.0.20-17.el9.x86_64.rpm                   27 MB/s |  20 MB     00:00    (3/9): percona-server-mongodb-server-6.0.20-17.el9.x86_64.rpm                   37 MB/s |  46 MB     00:01
(4/9): percona-telemetry-agent-1.0.3-3.el9.x86_64.rpm                           37 MB/s | 4.4 MB     00:00
(5/9): percona-mongodb-mongosh-2.3.2.el9.x86_64.rpm                             18 MB/s |  30 MB     00:01    (6/9): percona-server-mongodb-tools-6.0.20-17.el9.x86_64.rpm                    20 MB/s |  25 MB     00:01    (7/9): numactl-2.0.18-2.el9.x86_64.rpm                                          60 kB/s |  68 kB     00:01    (8/9): cyrus-sasl-gssapi-2.1.27-21.el9.x86_64.rpm                               24 kB/s |  26 kB     00:01
(9/9): numactl-libs-2.0.18-2.el9.x86_64.rpm                                     36 kB/s |  31 kB     00:00
---------------------------------------------------------------------------------------------------------------
Total                                                                           42 MB/s | 126 MB     00:02
Percona Server for MongoDB 6.0 release/x86_64 YUM repository                   4.5 MB/s | 4.7 kB     00:00
Importing GPG key 0x8507EFA5:
 Userid     : "Percona Development Team (Packaging key) <[email protected]>"
 Fingerprint: 4D1B B29D 63D9 8E42 2B21 13B1 9334 A25F 8507 EFA5
 From       : /etc/pki/rpm-gpg/PERCONA-PACKAGING-KEY
Is this ok [y/N]: y
Key imported successfully
Running transaction check
Transaction check succeeded.
Running transaction test
Transaction test succeeded.
Running transaction
  Preparing        :                                                                                       1/1
  Running scriptlet: percona-telemetry-agent-1.0.3-3.el9.x86_64                                           1/10
  Installing       : percona-telemetry-agent-1.0.3-3.el9.x86_64                                           1/10
  Running scriptlet: percona-telemetry-agent-1.0.3-3.el9.x86_64                                           1/10
  Installing       : percona-mongodb-mongosh-2.3.2-1.el9.x86_64                                           2/10
  Running scriptlet: percona-server-mongodb-server-6.0.20-17.el9.x86_64                                   3/10
  Installing       : percona-server-mongodb-server-6.0.20-17.el9.x86_64                                   3/10
  Running scriptlet: percona-server-mongodb-server-6.0.20-17.el9.x86_64                                   3/10
 * To start the service, configure your engine and start mongod
 ** WARNING: Access control is not enabled for the database.
 ** Read and write access to data and configuration is unrestricted.
 ** To fix this please use /usr/bin/percona-server-mongodb-enable-auth.sh

  Running scriptlet: percona-server-mongodb-mongos-6.0.20-17.el9.x86_64                                   4/10
  Installing       : percona-server-mongodb-mongos-6.0.20-17.el9.x86_64                                   4/10
  Running scriptlet: percona-server-mongodb-mongos-6.0.20-17.el9.x86_64                                   4/10
  Upgrading        : numactl-libs-2.0.18-2.el9.x86_64                                                     5/10
  Installing       : numactl-2.0.18-2.el9.x86_64                                                          6/10
  Installing       : cyrus-sasl-gssapi-2.1.27-21.el9.x86_64                                               7/10
  Installing       : percona-server-mongodb-tools-6.0.20-17.el9.x86_64                                    8/10
  Installing       : percona-server-mongodb-6.0.20-17.el9.x86_64                                          9/10
  Cleanup          : numactl-libs-2.0.14-9.el9.x86_64                                                    10/10
  Running scriptlet: percona-telemetry-agent-1.0.3-3.el9.x86_64                                          10/10
percona-telemetry:x:1000:daemon

  Running scriptlet: numactl-libs-2.0.14-9.el9.x86_64                                                    10/10
  Verifying        : percona-mongodb-mongosh-2.3.2-1.el9.x86_64                                           1/10
  Verifying        : percona-server-mongodb-6.0.20-17.el9.x86_64                                          2/10
  Verifying        : percona-server-mongodb-mongos-6.0.20-17.el9.x86_64                                   3/10
  Verifying        : percona-server-mongodb-server-6.0.20-17.el9.x86_64                                   4/10
  Verifying        : percona-server-mongodb-tools-6.0.20-17.el9.x86_64                                    5/10
  Verifying        : percona-telemetry-agent-1.0.3-3.el9.x86_64                                           6/10
  Verifying        : numactl-2.0.18-2.el9.x86_64                                                          7/10
  Verifying        : cyrus-sasl-gssapi-2.1.27-21.el9.x86_64                                               8/10
  Verifying        : numactl-libs-2.0.18-2.el9.x86_64                                                     9/10
  Verifying        : numactl-libs-2.0.14-9.el9.x86_64                                                    10/10

Upgraded:
  numactl-libs-2.0.18-2.el9.x86_64
Installed:
  cyrus-sasl-gssapi-2.1.27-21.el9.x86_64                 numactl-2.0.18-2.el9.x86_64
  percona-mongodb-mongosh-2.3.2-1.el9.x86_64             percona-server-mongodb-6.0.20-17.el9.x86_64
  percona-server-mongodb-mongos-6.0.20-17.el9.x86_64     percona-server-mongodb-server-6.0.20-17.el9.x86_64
  percona-server-mongodb-tools-6.0.20-17.el9.x86_64      percona-telemetry-agent-1.0.3-3.el9.x86_64

Complete!
Repeat the installation on the other nodes. After installation completed, please change the bindIP configuration on /etc/mongod.conf from localhost IP Address to all of private IP Addresses as shown below:
# network interfaces
net:
  port: 27017
  bindIp: 0.0.0.0
You can also restrict the IP Address on the bindIP parameter for security reasons; just add the IP address with a semicolon as a separator.
Percona Server for MongoDB is not started automatically after installation, we need to start it manually:
[root@mongo-node8 ~]# systemctl start mongodEnsure we can connect to MongoDB instance between the three nodes as shown in the example below:
[root@mongo-node8 ~]# mongosh --host 10.10.10.19 --port 27017
Current Mongosh Log ID: 67bc8f30377eec48705ddddf
Connecting to:          mongodb://10.10.10.19:27017/?directConnection=true&appName=mongosh+2.3.2
Using MongoDB:          6.0.20-17
Using Mongosh:          2.3.2

For mongosh info see: https://www.mongodb.com/docs/mongodb-shell/


To help improve our products, anonymous usage data is collected and sent to MongoDB periodically (https://www.mongodb.com/legal/privacy-policy).
You can opt-out by running the disableTelemetry() command.

------
   The server generated these startup warnings when booting
   2025-02-24T15:22:43.969+00:00: Access control is not enabled for the database. Read and write access to data and configuration is unrestricted. You can use percona-server-mongodb-enable-auth.sh to fix it
   2025-02-24T15:22:43.969+00:00: vm.max_map_count is too low
------
The next step is to configure the replicaset in MongoDB. We need to edit the file /etc/mongod.conf and uncomment the replication section and add parameter replSetName as shown below:
replication:
  replSetName: "my-mongodb-rs"
We use the replicaset name my-mongodb-rs in this installation. After the replication configuration is added, then restart the We use the replicaset name my-mongodb-rs in this installation. After the replication configuration is added, then restart the mongodb service.
$ service mongod restartRepeat the configuration on the other nodes.
Once done, we need to initialize the replication in one of the nodes. Connect to mongodb and run rs.initiate() command as shown below:
> rs.initiate()
{
        "info2" : "no configuration specified. Using a default configuration for the set",
        "me" : "mongo-node8:27017",
        "ok" : 1,
        "$clusterTime" : {
                "clusterTime" : Timestamp(1740411567, 1),
                "signature" : {
                        "hash" : BinData(0,"AAAAAAAAAAAAAAAAAAAAAAAAAAA="),
                        "keyId" : NumberLong(0)
                }
        },
        "operationTime" : Timestamp(1740411567, 1)
}
my-mongodb-rs:SECONDARY>
As we can see in the nodes, the first node where we initiate the replication will become a PRIMARY node. We need to add the rest of the nodes to join the replication.
Add the other nodes using rs.add() command on PRIMARY nodes as below:
my-mongodb-rs:PRIMARY> rs.add("mongo-node9:27017");
{
        "ok" : 1,
        "$clusterTime" : {
                "clusterTime" : Timestamp(1740411828, 2),
                "signature" : {
                        "hash" : BinData(0,"AAAAAAAAAAAAAAAAAAAAAAAAAAA="),
                        "keyId" : NumberLong(0)
                }
        },
        "operationTime" : Timestamp(1740411828, 2)
}
my-mongodb-rs:PRIMARY> rs.add("mongo-node10:27017");
{
        "ok" : 1,
        "$clusterTime" : {
                "clusterTime" : Timestamp(1740411852, 1),
                "signature" : {
                        "hash" : BinData(0,"AAAAAAAAAAAAAAAAAAAAAAAAAAA="),
                        "keyId" : NumberLong(0)
                }
        },
        "operationTime" : Timestamp(1740411852, 1)
}
Another option to initiate the Replica Set using initiate() command is to pass the node’s IP address information for all nodes as shown below:
rs.initiate( {
       _id: "my-mongodb-rs",
       members: [
       { _id: 0, host: "mongo-node8:27017" },
       { _id: 1, host: "mongo-node9:27017" },
       { _id: 2, host: "mongo-node10:27017" }
       ] })
We can check the current replica set cluster using rs.status() command on any cluster nodes:
my-mongodb-rs:PRIMARY> rs.status()
{
        "set" : "my-mongodb-rs",
        "date" : ISODate("2025-02-24T15:46:14.362Z"),
        "myState" : 1,
        "term" : NumberLong(1),
        "syncSourceHost" : "",
        "syncSourceId" : -1,
        "heartbeatIntervalMillis" : NumberLong(2000),
        "majorityVoteCount" : 2,
        "writeMajorityCount" : 2,
        "votingMembersCount" : 3,
        "writableVotingMembersCount" : 3,
        "optimes" : {
                "lastCommittedOpTime" : {
                        "ts" : Timestamp(1740411968, 1),
                        "t" : NumberLong(1)
                },
                "lastCommittedWallTime" : ISODate("2025-02-24T15:46:08.125Z"),
                "readConcernMajorityOpTime" : {
                        "ts" : Timestamp(1740411968, 1),
                        "t" : NumberLong(1)
                },
                "appliedOpTime" : {
                        "ts" : Timestamp(1740411968, 1),
                        "t" : NumberLong(1)
                },
                "durableOpTime" : {
                        "ts" : Timestamp(1740411968, 1),
                        "t" : NumberLong(1)
                },
                "lastAppliedWallTime" : ISODate("2025-02-24T15:46:08.125Z"),
                "lastDurableWallTime" : ISODate("2025-02-24T15:46:08.125Z")
        },
        "lastStableRecoveryTimestamp" : Timestamp(1740411918, 1),
        "electionCandidateMetrics" : {
                "lastElectionReason" : "electionTimeout",
                "lastElectionDate" : ISODate("2025-02-24T15:39:28.021Z"),
                "electionTerm" : NumberLong(1),
                "lastCommittedOpTimeAtElection" : {
                        "ts" : Timestamp(1740411567, 1),
                        "t" : NumberLong(-1)
                },
                "lastSeenOpTimeAtElection" : {
                        "ts" : Timestamp(1740411567, 1),
                        "t" : NumberLong(-1)
                },
                "numVotesNeeded" : 1,
                "priorityAtElection" : 1,
                "electionTimeoutMillis" : NumberLong(10000),
                "newTermStartDate" : ISODate("2025-02-24T15:39:28.083Z"),
                "wMajorityWriteAvailabilityDate" : ISODate("2025-02-24T15:39:28.114Z")
        },
        "members" : [
                {
                        "_id" : 0,
                        "name" : "mongo-node8:27017",
                        "health" : 1,
                        "state" : 1,
                        "stateStr" : "PRIMARY",
                        "uptime" : 682,
                        "optime" : {
                                "ts" : Timestamp(1740411968, 1),
                                "t" : NumberLong(1)
                        },
                        "optimeDate" : ISODate("2025-02-24T15:46:08Z"),
                        "lastAppliedWallTime" : ISODate("2025-02-24T15:46:08.125Z"),
                        "lastDurableWallTime" : ISODate("2025-02-24T15:46:08.125Z"),
                        "syncSourceHost" : "",
                        "syncSourceId" : -1,
                        "infoMessage" : "",
                        "electionTime" : Timestamp(1740411568, 1),
                        "electionDate" : ISODate("2025-02-24T15:39:28Z"),
                        "configVersion" : 5,
                        "configTerm" : 1,
                        "self" : true,
                        "lastHeartbeatMessage" : ""
                },
                {
                        "_id" : 1,
                        "name" : "mongo-node9:27017",
                        "health" : 1,
                        "state" : 2,
                        "stateStr" : "SECONDARY",
                        "uptime" : 146,
                        "optime" : {
                                "ts" : Timestamp(1740411968, 1),
                                "t" : NumberLong(1)
                        },
                        "optimeDurable" : {
                                "ts" : Timestamp(1740411968, 1),
                                "t" : NumberLong(1)
                        },
                        "optimeDate" : ISODate("2025-02-24T15:46:08Z"),
                        "optimeDurableDate" : ISODate("2025-02-24T15:46:08Z"),
                        "lastAppliedWallTime" : ISODate("2025-02-24T15:46:08.125Z"),
                        "lastDurableWallTime" : ISODate("2025-02-24T15:46:08.125Z"),
                        "lastHeartbeat" : ISODate("2025-02-24T15:46:12.619Z"),
                        "lastHeartbeatRecv" : ISODate("2025-02-24T15:46:12.624Z"),
                        "pingMs" : NumberLong(0),
                        "lastHeartbeatMessage" : "",
                        "syncSourceHost" : "mongo-node8:27017",
                        "syncSourceId" : 0,
                        "infoMessage" : "",
                        "configVersion" : 5,
                        "configTerm" : 1
                },
                {
                        "_id" : 2,
                        "name" : "mongo-node10:27017",
                        "health" : 1,
                        "state" : 2,
                        "stateStr" : "SECONDARY",
                        "uptime" : 121,
                        "optime" : {
                                "ts" : Timestamp(1740411968, 1),
                                "t" : NumberLong(1)
                        },
                        "optimeDurable" : {
                                "ts" : Timestamp(1740411968, 1),
                                "t" : NumberLong(1)
                        },
                        "optimeDate" : ISODate("2025-02-24T15:46:08Z"),
                        "optimeDurableDate" : ISODate("2025-02-24T15:46:08Z"),
                        "lastAppliedWallTime" : ISODate("2025-02-24T15:46:08.125Z"),
                        "lastDurableWallTime" : ISODate("2025-02-24T15:46:08.125Z"),
                        "lastHeartbeat" : ISODate("2025-02-24T15:46:12.612Z"),
                        "lastHeartbeatRecv" : ISODate("2025-02-24T15:46:13.626Z"),
                        "pingMs" : NumberLong(0),
                        "lastHeartbeatMessage" : "",
                        "syncSourceHost" : "mongo-node9:27017",
                        "syncSourceId" : 1,
                        "infoMessage" : "",
                        "configVersion" : 5,
                        "configTerm" : 1
                }
        ],
        "ok" : 1,
        "$clusterTime" : {
                "clusterTime" : Timestamp(1740411968, 1),
                "signature" : {
                        "hash" : BinData(0,"AAAAAAAAAAAAAAAAAAAAAAAAAAA="),
                        "keyId" : NumberLong(0)
                }
        },
        "operationTime" : Timestamp(1740411968, 1)
}
How to use ClusterControl to deploy Percona Server for MongoDB
ClusterControl supports deployment for Percona Server for MongoDB versions 4.4, 5.0, 6.0, and 7.0. The deployment is straightforward, you just need to go to Deploy, and choose the MongoDB Replicaset tab as shown below:

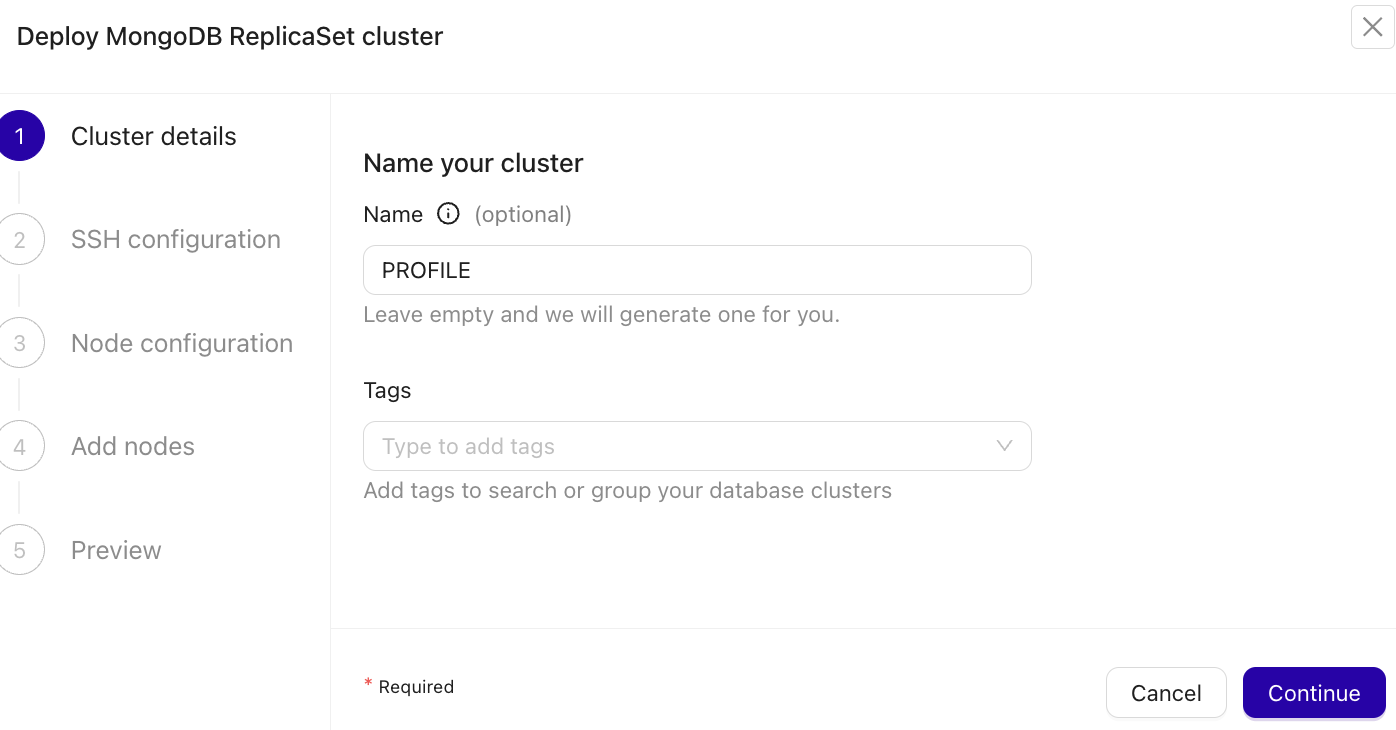
Next, fill in the cluster name and add any tags to make it easier to find your cluster.
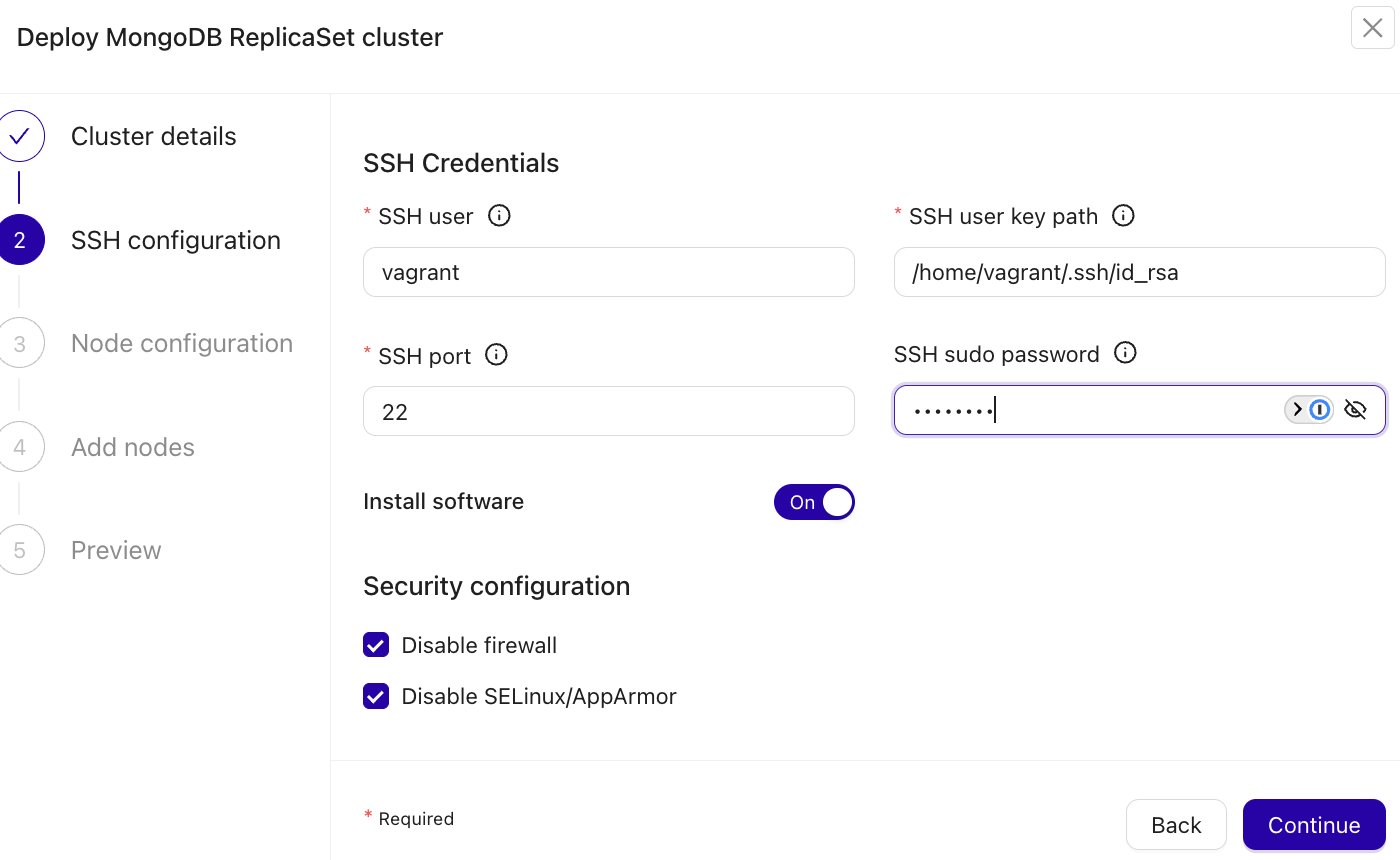
Fill in the SSH user, password, and port. ClusterControl requires you to set up passwordless SSH between the controller node and target database node before installation.
After clicking “Continue”, you will configure your nodes:
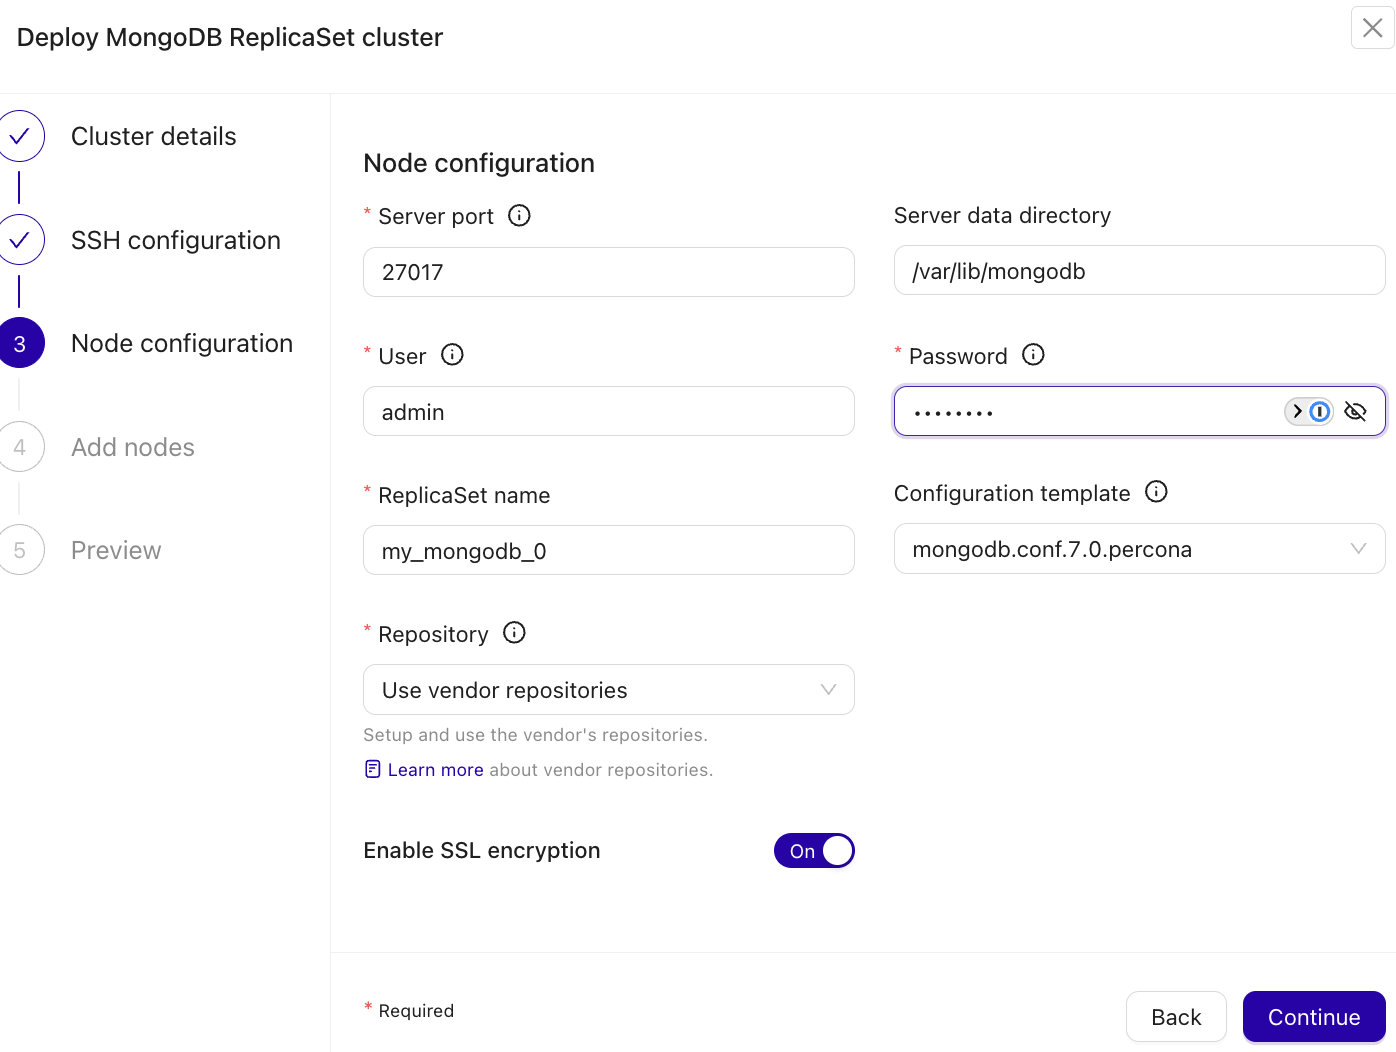
Choose Percona as a Vendor, and select the Version you want to install. If you have a custom MongoDB data directory, you need to specify it. Set the admin user and password for your MongoDB. If you want to use another port instead of the default (re. 27017), you can change it to another port number. Your last step will be to input the IP addresses of your target database nodes:
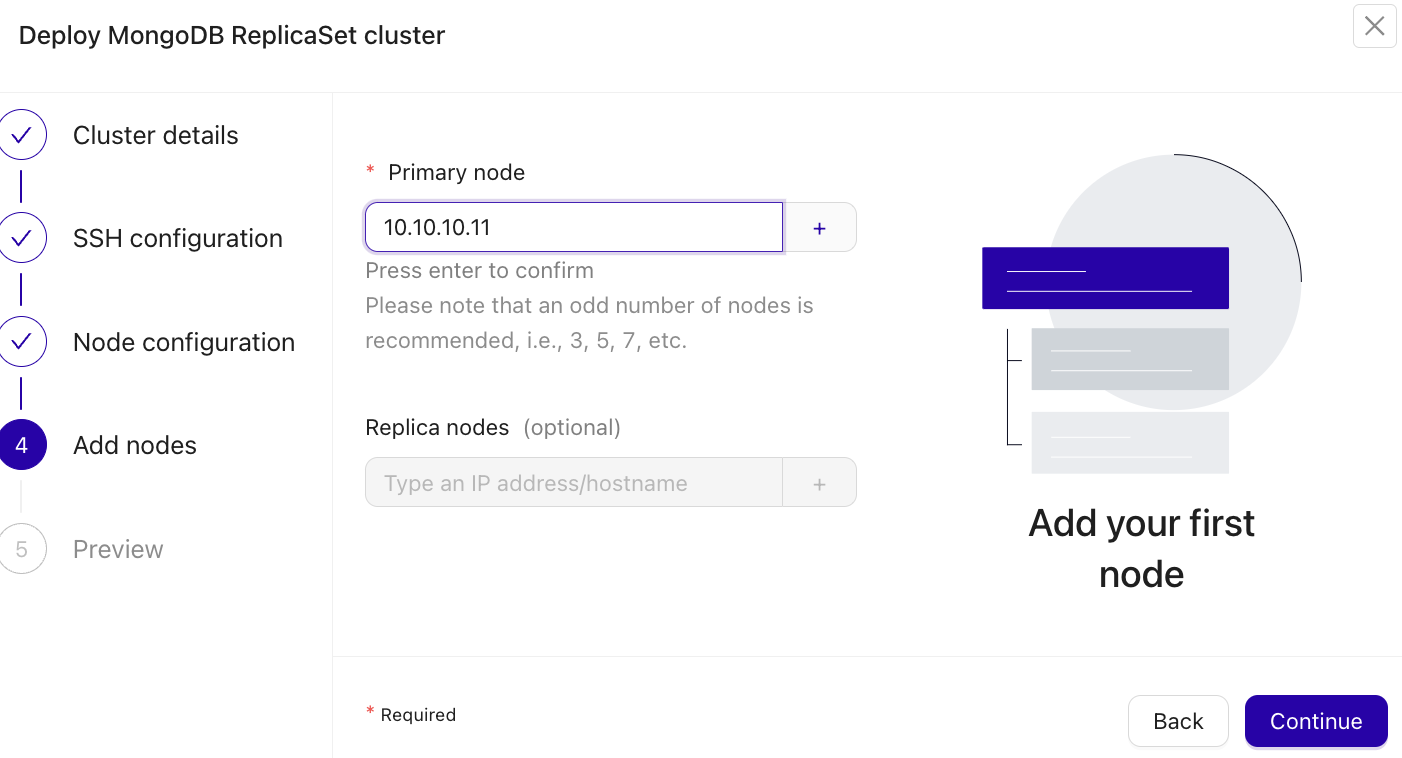
Once all IPs are added, you can preview and deploy your cluster. After deployment finished, you can view cluster metrics in the Dashboards panel, view its topology and perform node-specific operations in the Nodes panel and set up other operations from their respective panels.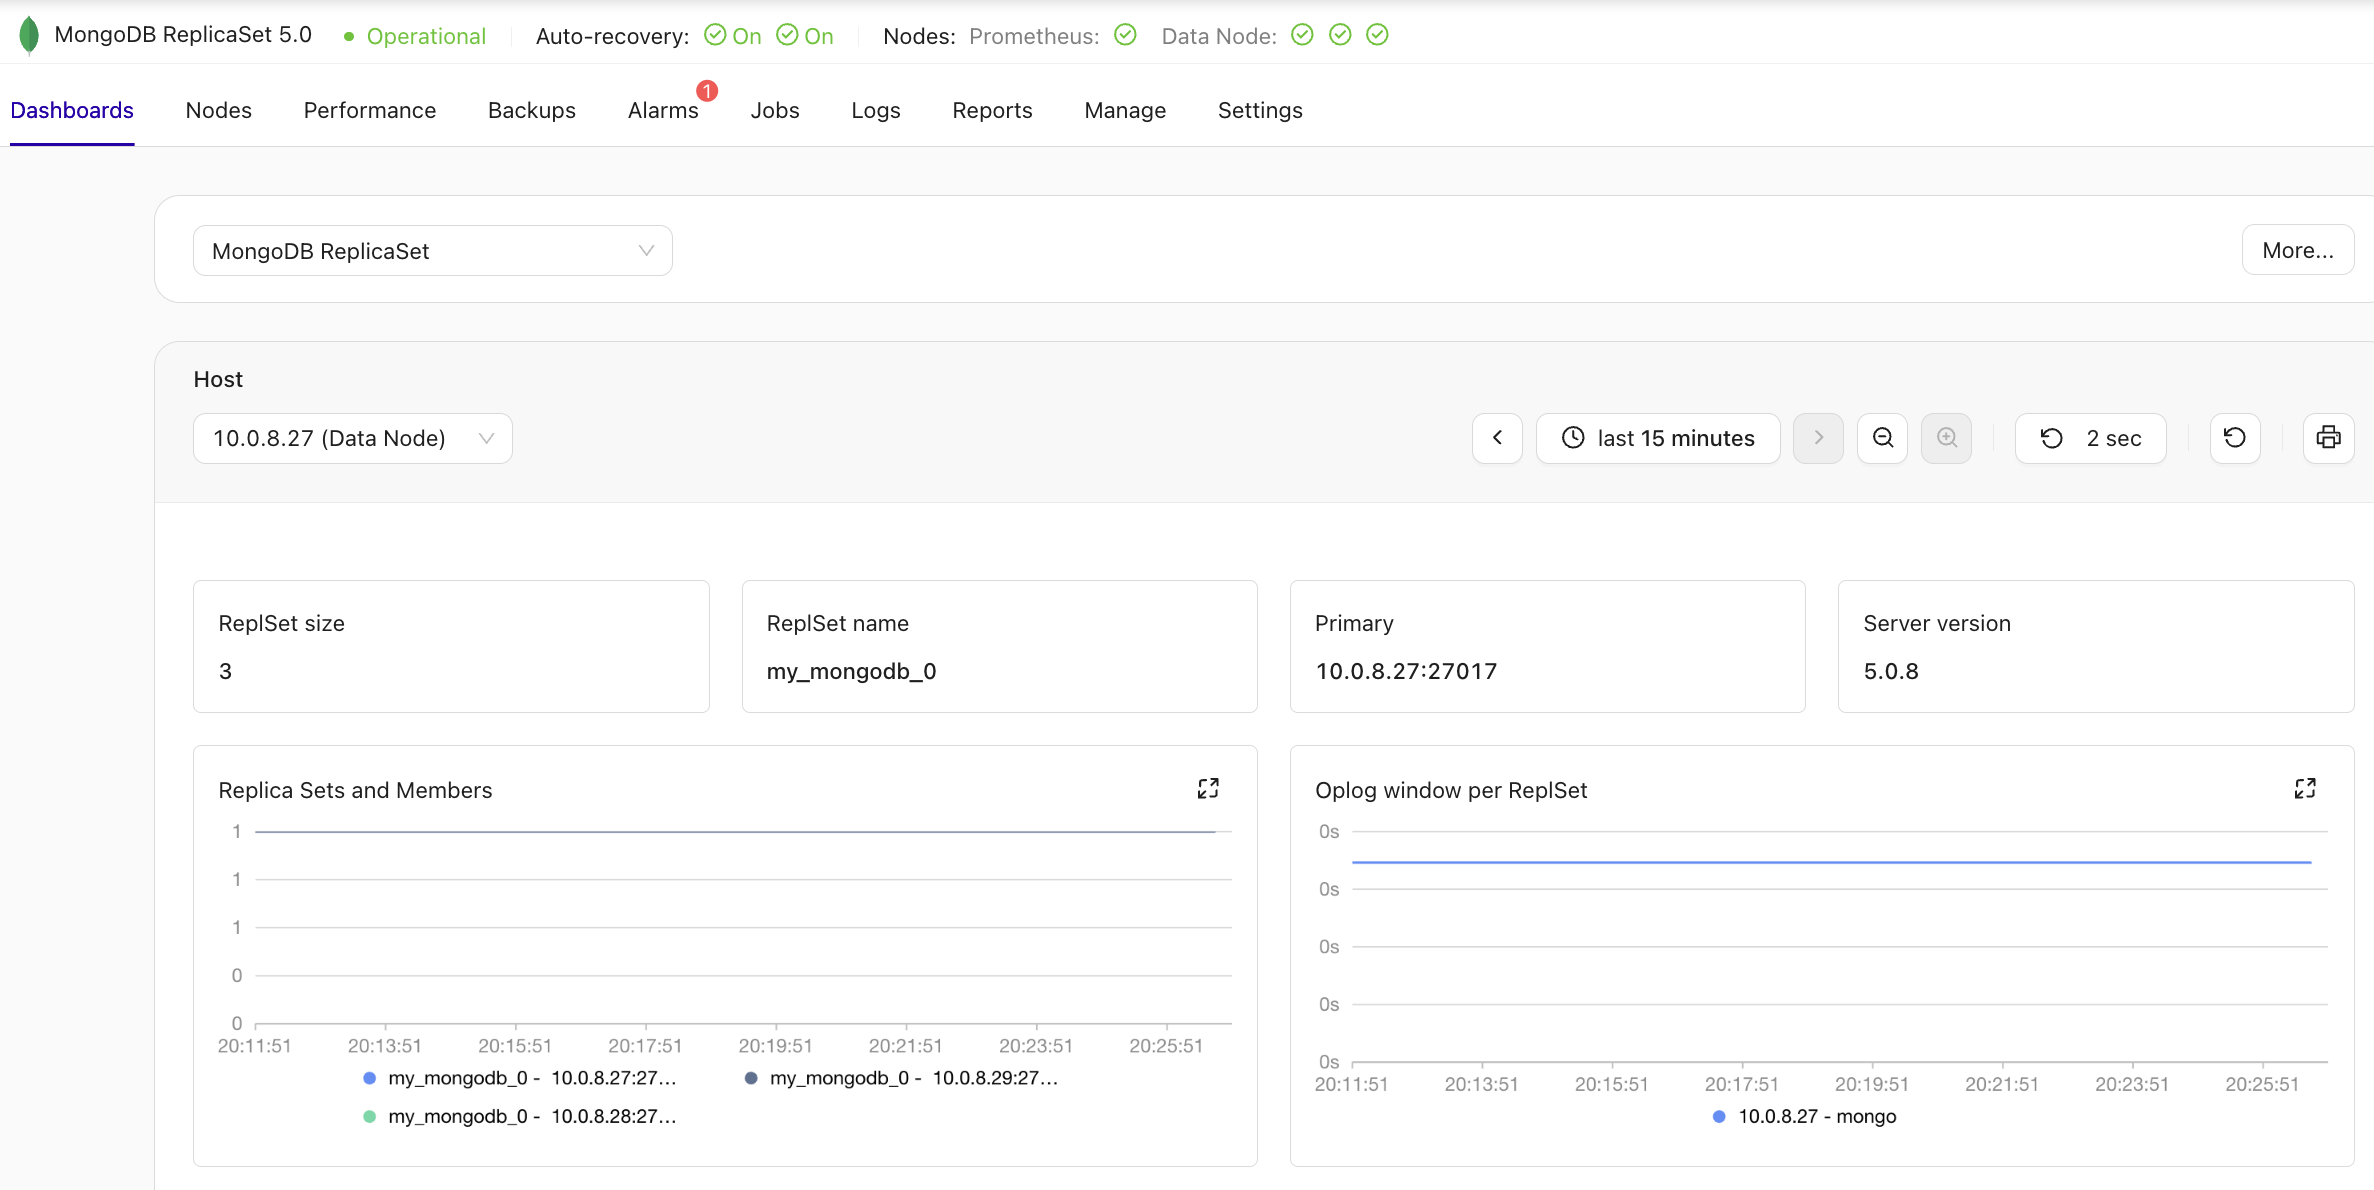
Wrapping up
In this post, we showed you how to deploy a Percona Server for MongoDB ReplicaSet HA cluster manually and through ClusterControl. As you see, it is a pretty straightforward affair; however, it’s the day-2 ops that become a headache.
Failover, backup and restore, and even upgrades can pose significant challenges in production environments. This is why you may want to use a platform such as ClusterControl to help you reliably manage your operations at scale.
See for yourself; try it for free for 30-days in the environment of your choice. Not ready? Sign up for our newsletter in the right-hand panel or follow us on X or LinkedIn to stay up-to-date on everything database ops!