blog
How to Deploy ClusterControl on AWS to Manage Your Cloud Database

ClusterControl is infrastructure-agnostic – it can be used in your own datacenter on physical hosts, as well as in virtualized cloud environments. All you need is ssh access from the ClusterControl host to the database nodes, and you can then deploy standalone/replicated/clustered MySQL/MariaDB, MongoDB (replica sets or sharded clusters) or PostgreSQL (streaming replication). In this blog post, we will walk you through the steps to deploy ClusterControl on EC2.
Setting up Instances in EC2
The hardware requirements for ClusterControl are described here. Those are meant to create a performant platform for the ClusterControl server. Having said that, we will use a small instance for our testing purposes (t2.micro) – it should be enough for us.
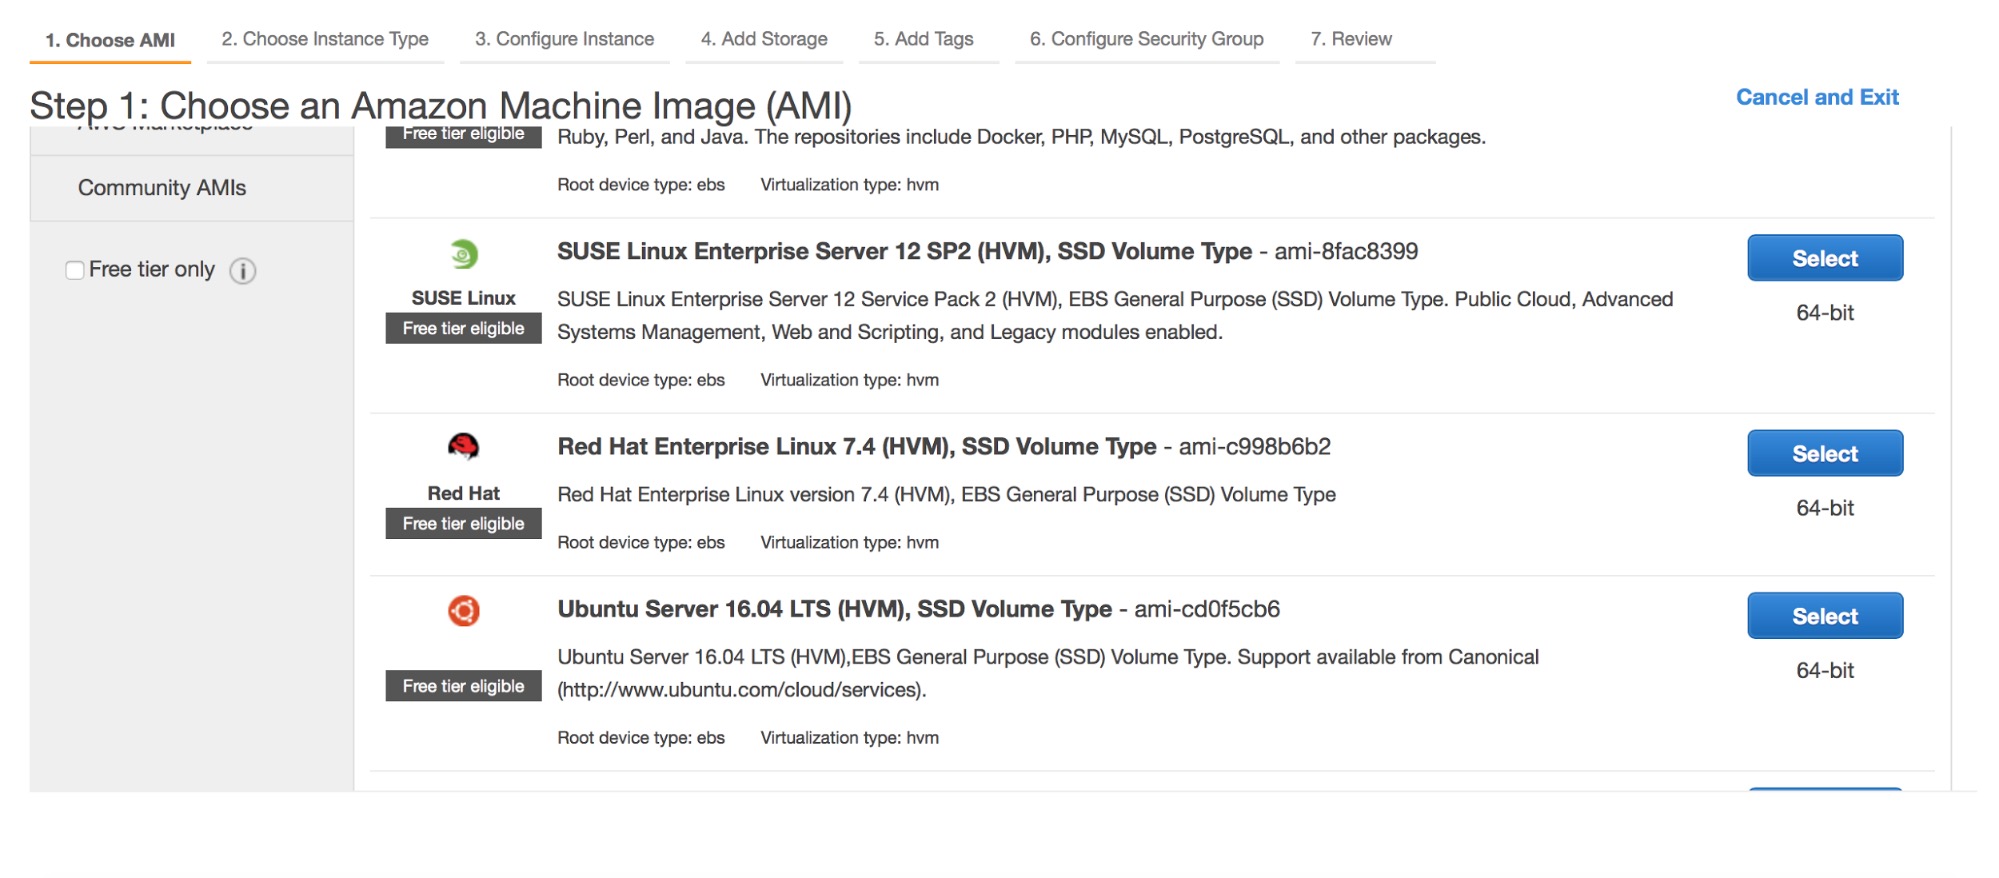
First, we need to pick an AMI. ClusterControl supports:
- Redhat/CentOS/Oracle Linux 6 and later
- Ubuntu 12.04/14.04/16.04 LTS
- Debian 7.0 and later
We are going to use Ubuntu 16.04.
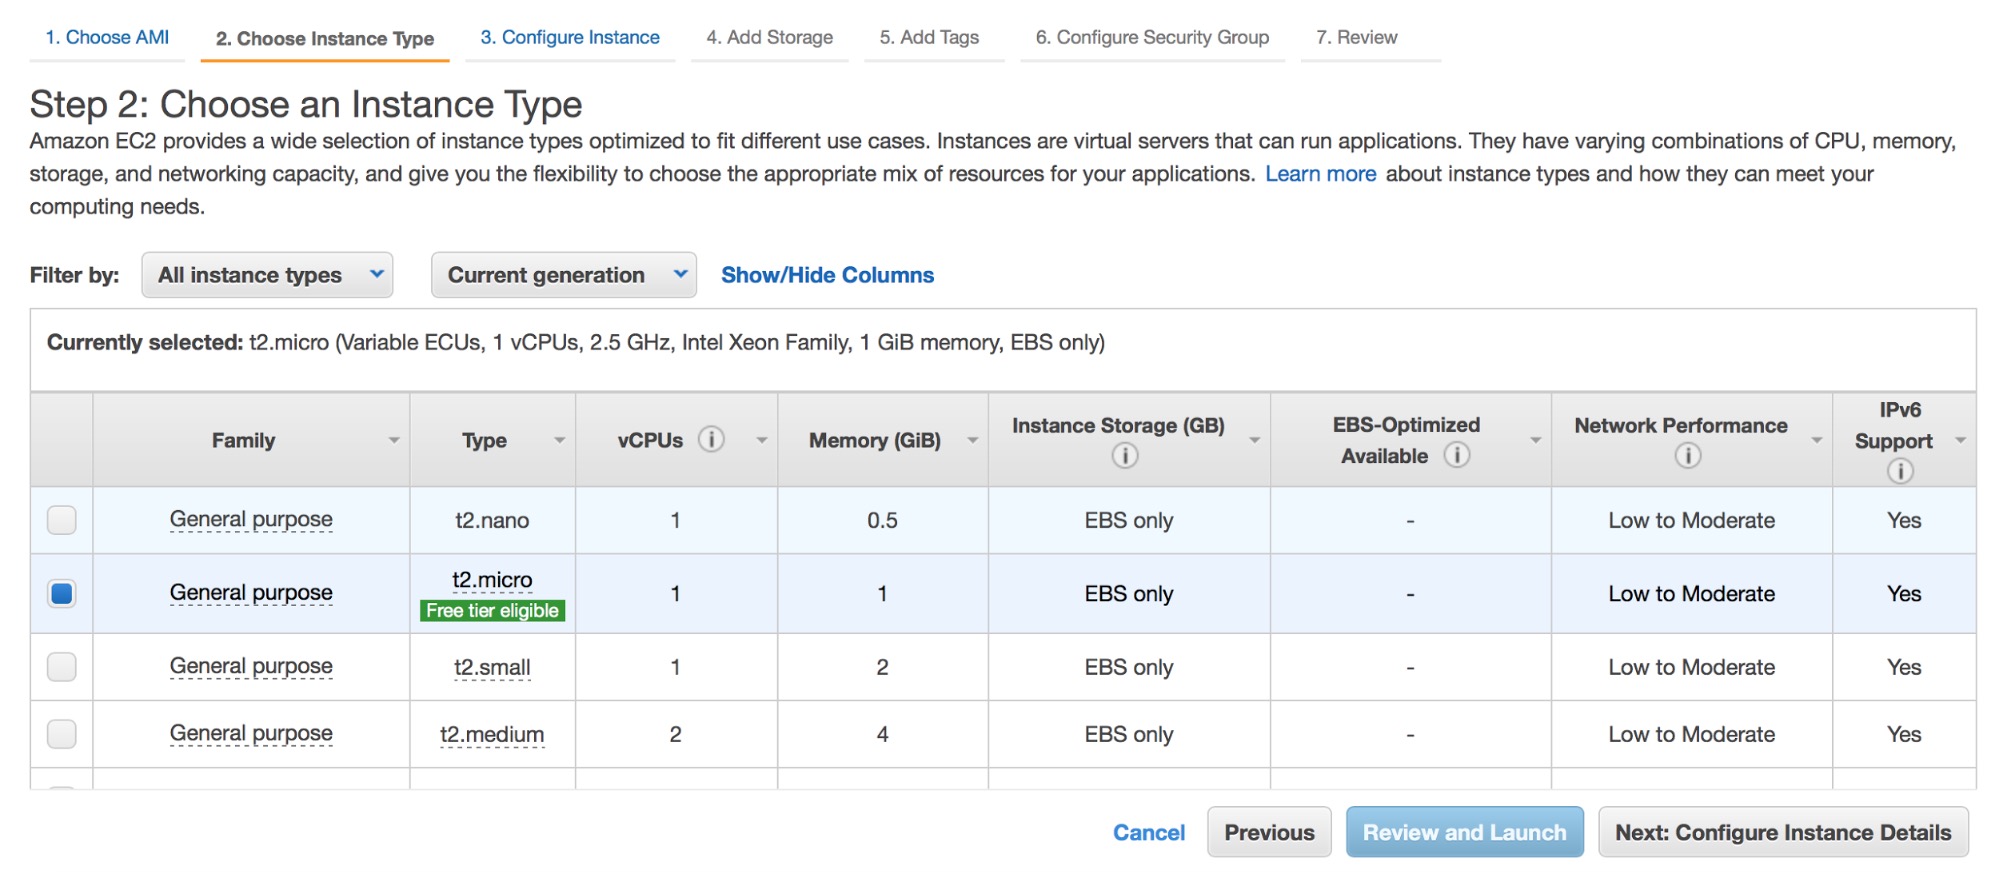
Next step – instance type. We will pick t2.micro for now, although you will want to use larger instances for production setups. For other cloud providers, pick instances with at least 1 GB of memory.
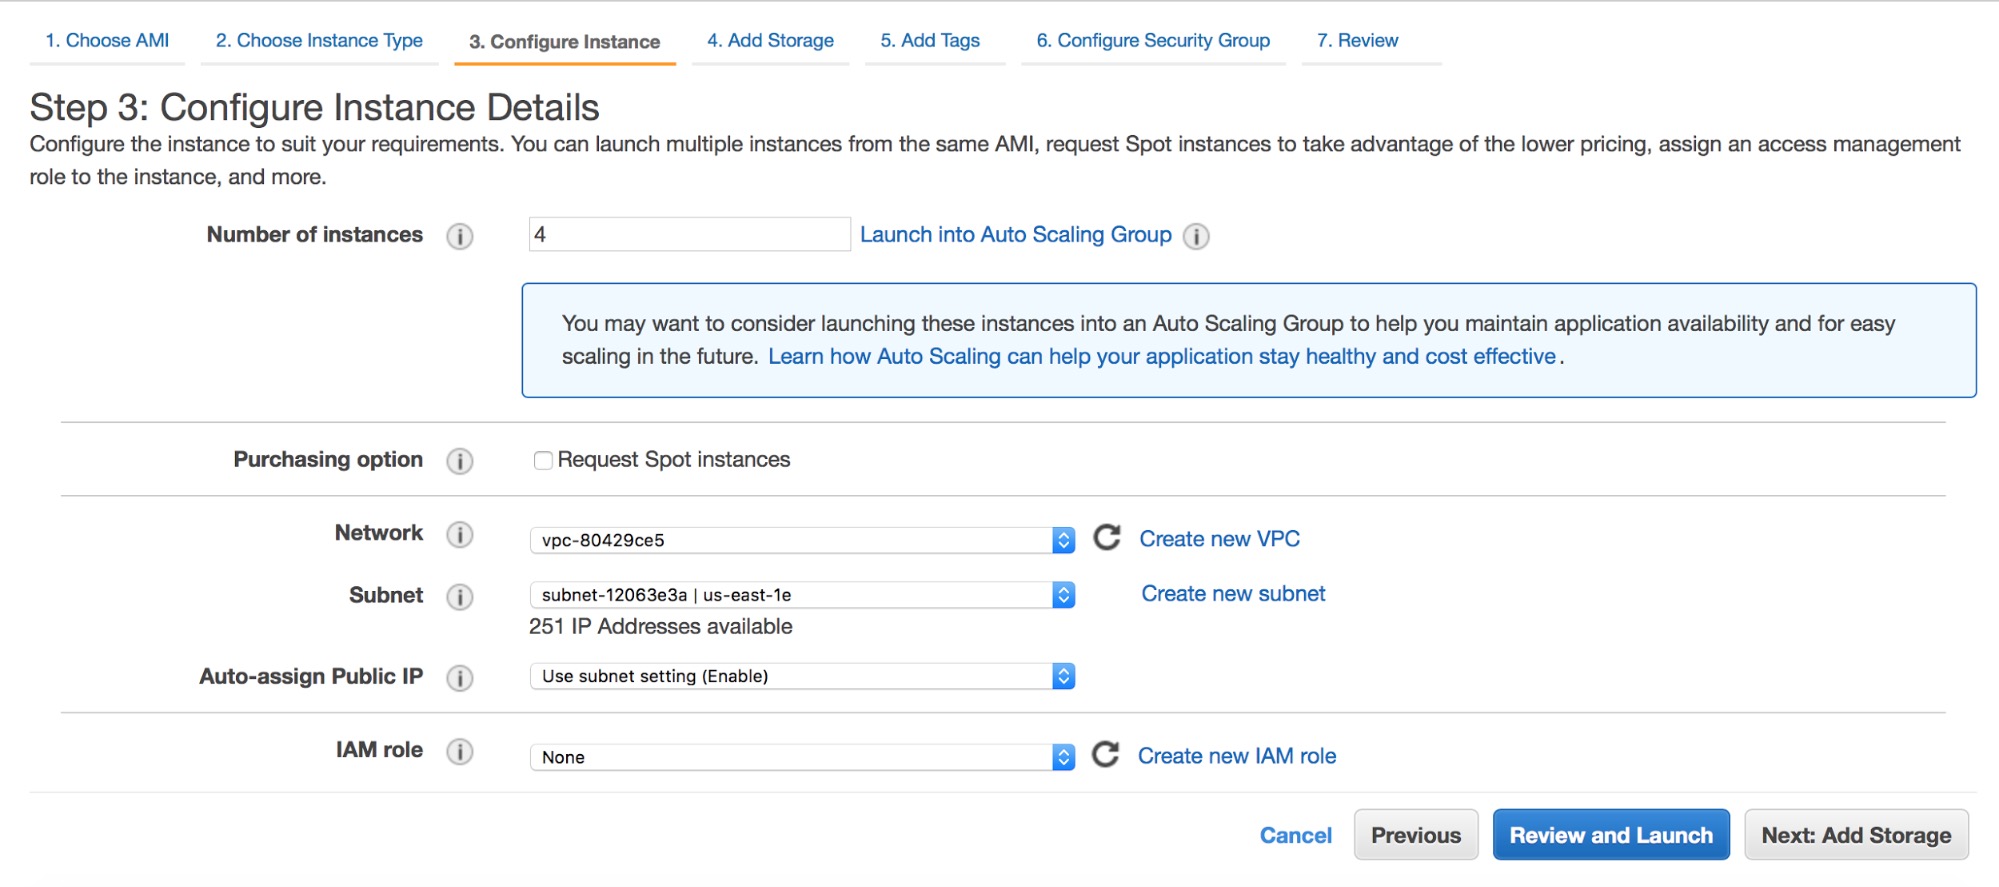
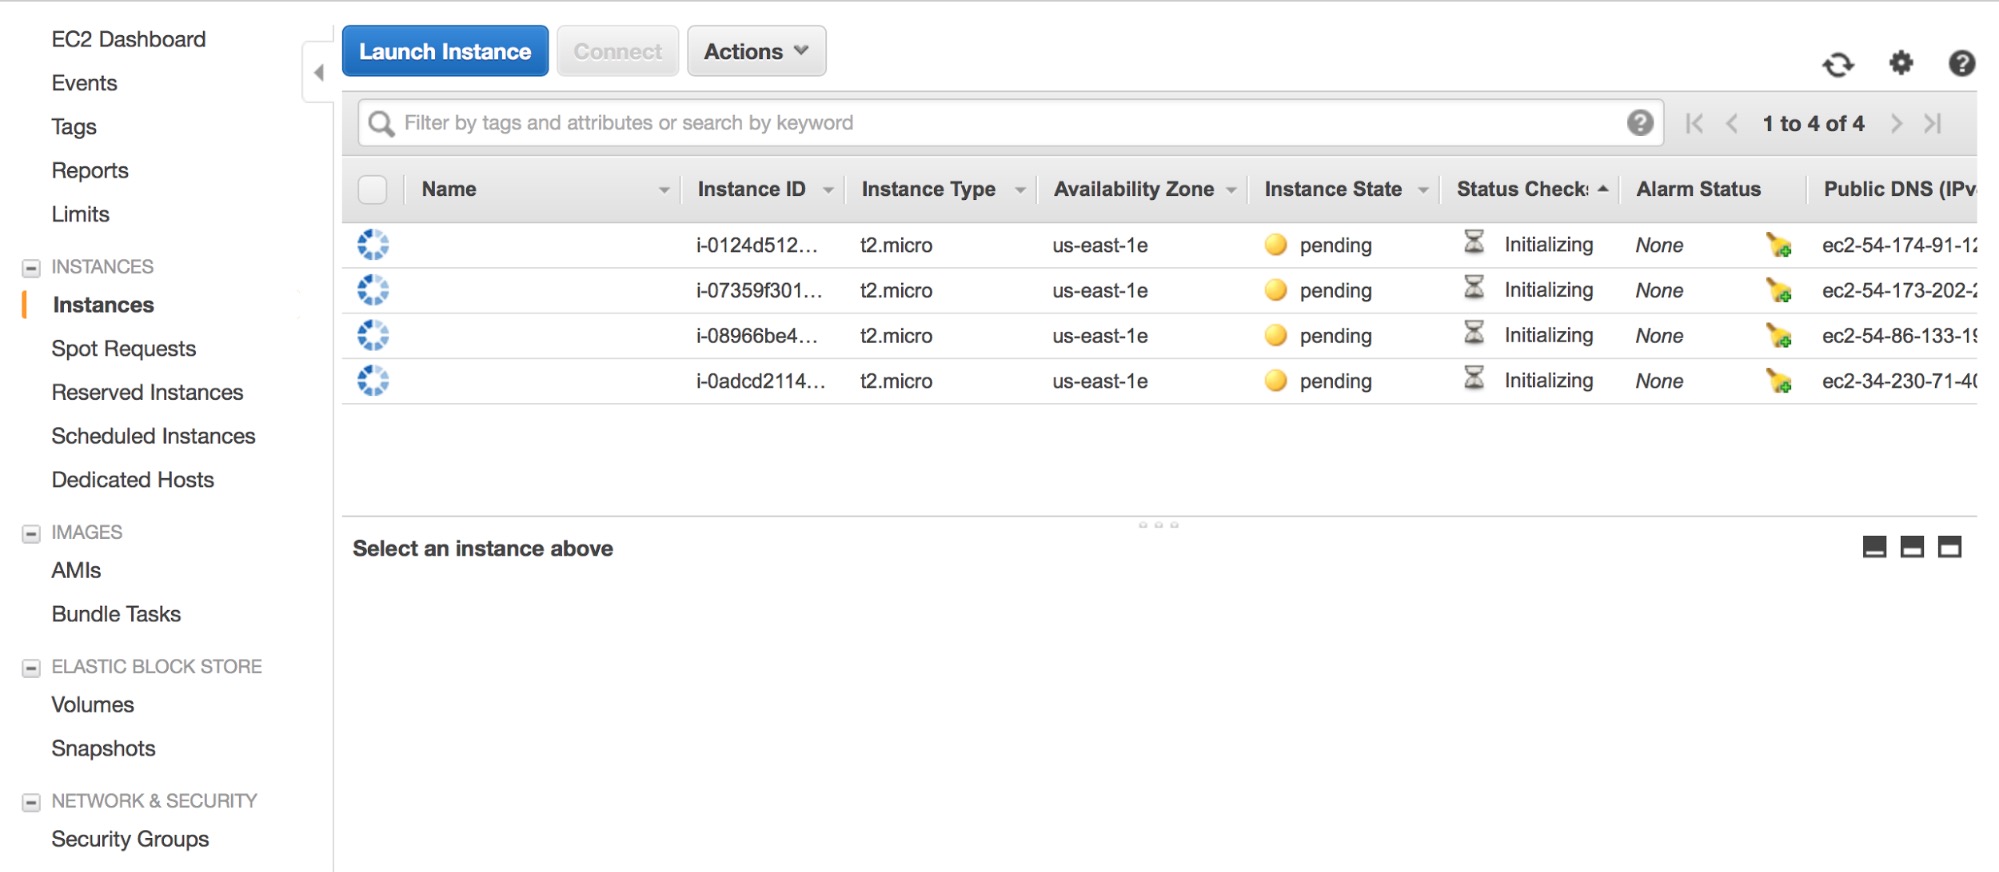
We are going to deploy four instances at once, one for ClusterControl and three for Percona XtraDB Cluster. You need to decide where those instances should be deployed (VPC or not, which subnet etc). For our testing purposes, we are going to use a VPC and a single subnet. Of course, deploying nodes across the subnets (Availability Zones) makes your setup more likely to survive if one of the AZ’s would become unavailable.
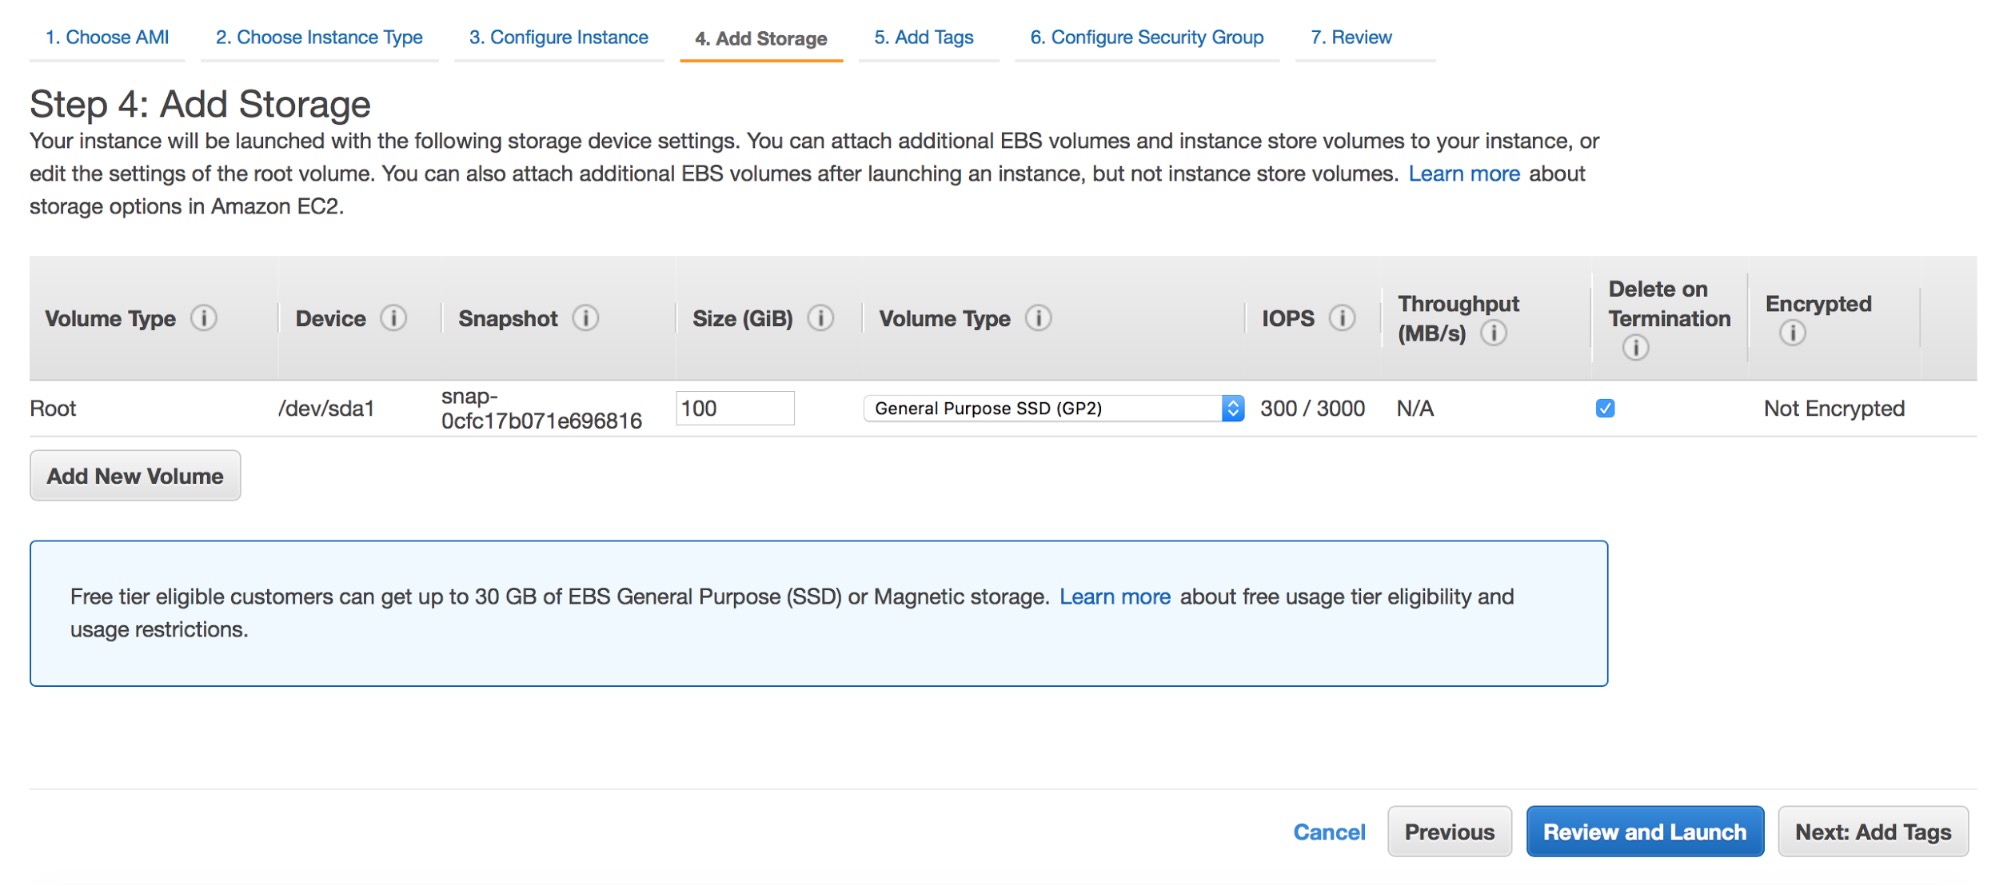
For storage we’ll use 100GB of general purpose SSD volume (GP2). This should be enough to perform some tests with a reasonable volume of data.
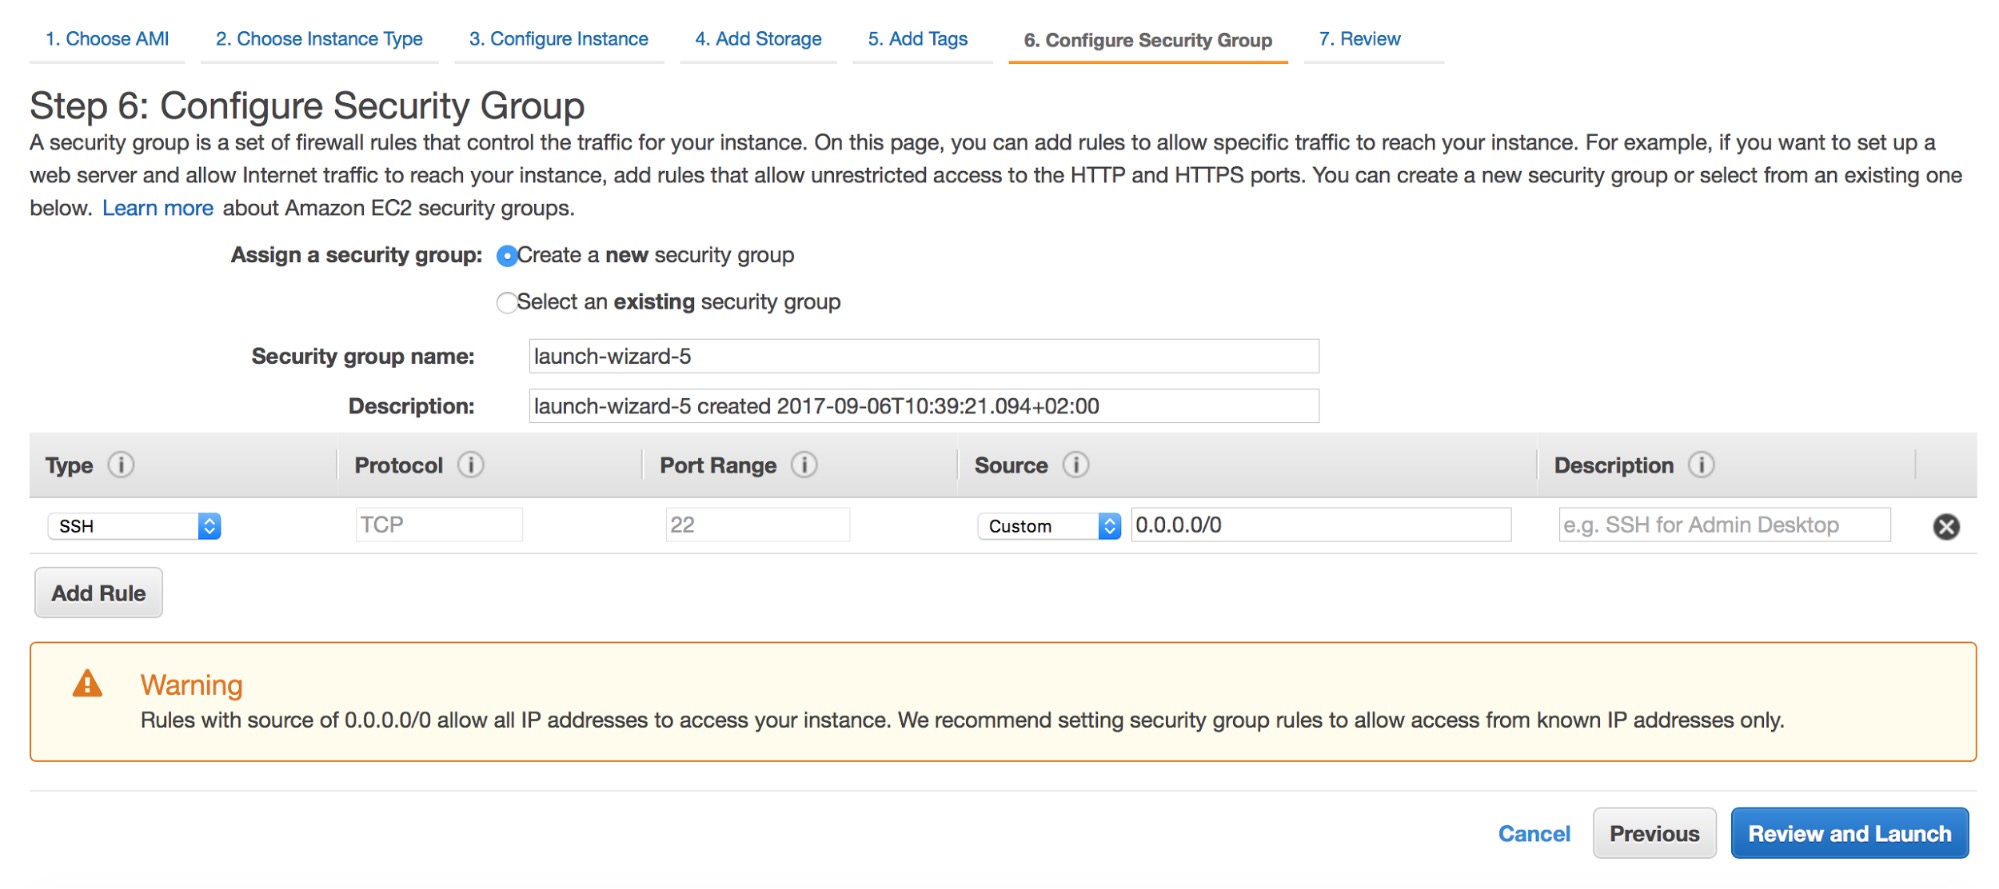
Next – security groups. SSH access is a requirement. Other than that, you need to open ports required by the database you plan to deploy. You can find more information on which ports are required in our support portal.
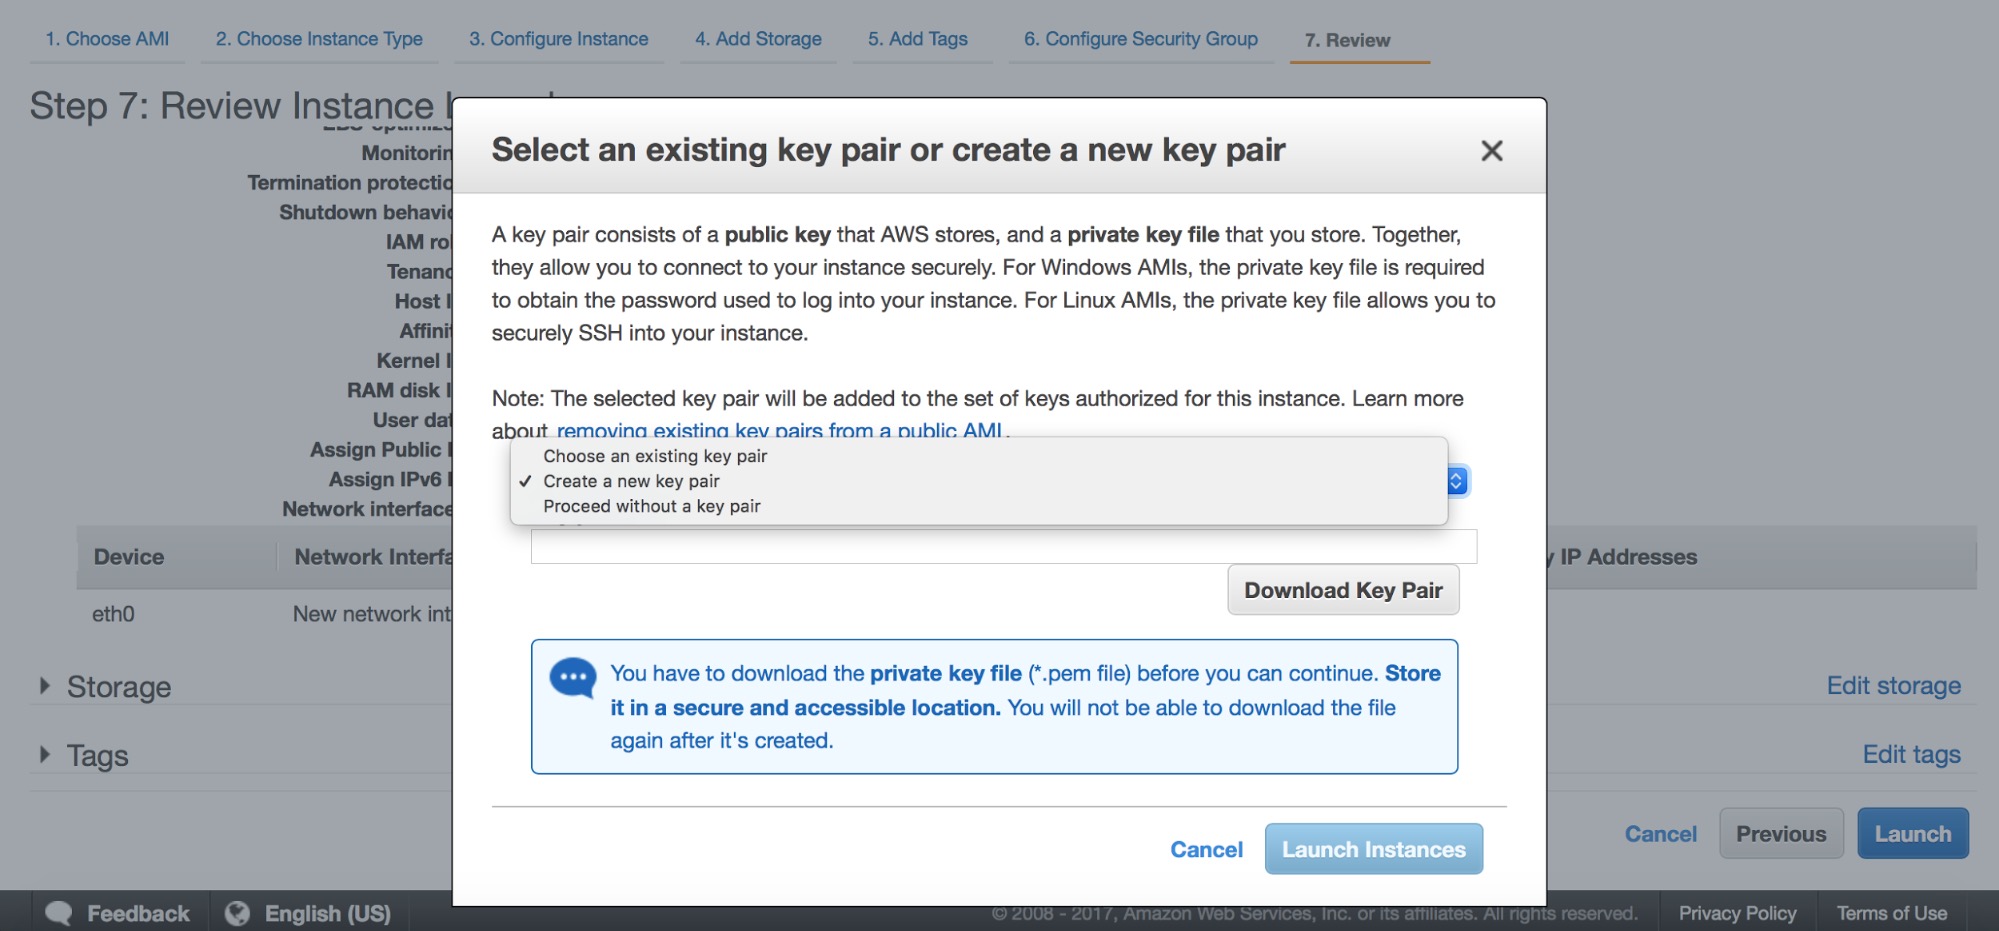
Finally, you need to either pick one of the existing key pairs or you can create a new one. After this step your instances will be launched.
Once the instances are up and running, it’s time to install ClusterControl. For that, log into one of the instances and download the ClusterControl installation script, install-cc:
ubuntu@ip-172-30-4-20:~$ wget https://severalnines.com/downloads/cmon/install-cc
--2017-09-06 11:13:10--  https://severalnines.com/downloads/cmon/install-cc
Resolving www.severalnines.com (www.severalnines.com)... 107.154.146.155
Connecting to www.severalnines.com (www.severalnines.com)|107.154.146.155|:80... connected.
HTTP request sent, awaiting response... 301 Moved Permanently
Location: https://severalnines.com/downloads/cmon/install-cc [following]
--2017-09-06 11:13:10--  https://severalnines.com/downloads/cmon/install-cc
Connecting to www.severalnines.com (www.severalnines.com)|107.154.146.155|:443... connected.
HTTP request sent, awaiting response... 301 Moved Permanently
Location: https://severalnines.com/downloads/cmon/install-cc [following]
--2017-09-06 11:13:11--  https://severalnines.com/downloads/cmon/install-cc
Resolving severalnines.com (severalnines.com)... 107.154.238.155, 107.154.148.155
Connecting to severalnines.com (severalnines.com)|107.154.238.155|:443... connected.
HTTP request sent, awaiting response... 200 OK
Length: 56913 (56K) [text/plain]
Saving to: ‘install-cc’

install-cc                                           100%[=====================================================================================================================>]  55.58K   289KB/s    in 0.2s

2017-09-06 11:13:12 (289 KB/s) - ‘install-cc’ saved [56913/56913]
Then, make sure it can be executed before running it:
ubuntu@ip-172-30-4-20:~$ chmod +x install-cc
ubuntu@ip-172-30-4-20:~$ sudo ./install-cc
At the beginning, you’ll get some information about the requirements on supported Linux distributions:
!!
Only RHEL/Centos 6.x|7.x, Debian 7.x|8.x, Ubuntu 12.04.x|14.04.x|16.04.x LTS versions are supported
Minimum system requirements: 2GB+ RAM, 2+ CPU cores
Server Memory: 990M total, 622M free
MySQL innodb_buffer_pool_size set to 512M

Severalnines would like your help improving our installation process.
Information such as OS, memory and install success helps us improve how we onboard our users.
None of the collected information identifies you personally.
!!
=> Would you like to help us by sending diagnostics data for the installation? (Y/n):

This script will add Severalnines repository server for deb and rpm packages and
install the ClusterControl Web Applicaiton and Controller.
An Apache and MySQL server will also be installed. An existing MySQL Server on this host can be used.
At some point you will have to answer some questions about hostnames, ports and passwords.
=> The Controller hostname will be set to 172.30.4.20. Do you want to change it? (y/N):
=> Creating temporary staging dir s9s_tmp

=> Setting up the ClusterControl Web Application ...
=> Using web document root /var/www/html
=> No running MySQL server detected
=> Installing the default distro MySQL Server ...
=> Assuming default MySQL port is 3306. Do you want to change it? (y/N):

=> Enter the MySQL root password:
=> Enter the MySQL root password again:
=> Importing the Web Application DB schema and creating the cmon user.

=> Importing /var/www/html/clustercontrol/sql/dc-schema.sql
mysql: [Warning] Using a password on the command line interface can be insecure.
=> Set a password for ClusterControl's MySQL user (cmon) [cmon]
=> Enter a CMON user password:
=> Enter the CMON user password again: => Creating the MySQL cmon user ...
mysql: [Warning] Using a password on the command line interface can be insecure.
=> Creating UI configuration ...
Finally, you’ll get the confirmation that ClusterControl has been installed. Install script will also attempt to detect your public IP and print out a link that can be used in your browser to access ClusterControl.
=> ClusterControl installation completed!
Open your web browser to http://172.30.4.20/clustercontrol and
enter an email address and new password for the default Admin User.

Determining network interfaces. This may take a couple of minutes. Do NOT press any key.
Public/external IP => http://34.230.71.40/clustercontrol
Installation successful. If you want to uninstall ClusterControl then run install-cc --uninstall.
Once the installation is done, there’s still one thing to take care of – SSH access from ClusterControl to the remaining hosts. Unless you already have SSH access between nodes (and you can use ssh-copy-id), this will be a manual process. First and the foremost, we need to generate a new ssh key:
root@ip-172-30-4-20:~# ssh-keygen -C 'galera_cluster' -f id_rsa_galera -t rsa -b 4096
Generating public/private rsa key pair.
Enter passphrase (empty for no passphrase):
Enter same passphrase again:
Your identification has been saved in id_rsa_galera.
Your public key has been saved in id_rsa_galera.pub.
The key fingerprint is:
SHA256:2tWOGXbrtc0Qh45NhNPzUSVdDzE9ANV1TJ0QBE5QrQY galera_cluster
The key's randomart image is:
+---[RSA 4096]----+
|         .o=**X*&|
|         Eo  + BO|
|          ..+ +.o|
|           + o +.|
|        S = o + o|
|       o o * * o |
|      . . o + =  |
|           . . = |
|            . . o|
+----[SHA256]-----+
root@ip-172-30-4-20:~#
We can verify it has been created correctly. You will also want to copy the contents of the public key – we will use it to create its copies on remaining nodes.
root@ip-172-30-4-20:~# cat id_rsa_galera.pub
ssh-rsa AAAAB3NzaC1yc2EAAAADAQABAAACAQDYKil17MzTrNc70GIQlVoK6xLop9acfT3W6kBUGO4ybsvIA5Fss+WvT/DLsYMtukq2Eih93eO4amLRYQIeyWSjJ/bBwIF/LXL4v04GF8+wbDgCyiV/t9dSuXna9qFeawkUVcPjnmWnZqUoaP5QeovXTluxl54xEwbFm1oLT+fgWbaim5w9vVUK4+hAHaZ7wVvTPVsIt1B3nJgWJF0Sz+TJN87vSUg7xdshgzhapUotXlguFGVzmNKWLnEFDCK7RT41oh4y4rkKP7YLc+wFfRHYTnKyMIcf0/0VMyL+2AdwQp8RThbBommf2HGimF1hSyA9/fc+tLi7FVTg1bKKeXj4hwexeFAJZwoy3HyD3wQ/NwadpDVk5Pg7YYzdN2aCZfvo27qp3gdQQ2H+LF6LvDyQEkgRpFN+pHoWQvPjJJasjfIcfdaC9WmDiL4s5fXyCTQz/x0NaTXVkLBS9ibfOUw8AGdd36FvdqnNOFOlMLKLa359JhdpqXnH7ksiThcotQuFmV5Dc8M66vTDz9rvVZhNC0nME478RNBP0Bgj1BM26XdQlzozeaRmHGoZXcSQVJTXBC93+QN4+bRmWmxhhj5G5M7bFiQyal1VtugoUt8ZV4NiiG+KDd6yj5um8+CffD/BASGrv3vffH+AK7xtjchIv5su40+unecfSOtO98TiQw== galera_cluster
Now, on every remaining node, you need to add this public key into the authorized_keys file. For ubuntu, you may want to clean its contents first if you want to use a root login. By default, only ubuntu user can be used to connect through SSH. Such setup (regular user and sudo) is also possible to use with ClusterControl but here we’ll go for a root user.
root@ip-172-30-4-198:~# vim ~/.ssh/authorized_keysOnce authorized_keys files on all nodes contain our public key, we will copy our public key to .ssh directory and make necessary changes in access rights:
root@ip-172-30-4-20:~# cp id_rsa_galera /root/.ssh/
root@ip-172-30-4-20:~# chmod 600 /root/.ssh/id_rsa_galera
Now we can test if SSH access works as expected:
root@ip-172-30-4-20:~# ssh -i /root/.ssh/id_rsa_galera 172.30.4.46
Welcome to Ubuntu 16.04.2 LTS (GNU/Linux 4.4.0-1022-aws x86_64)

 * Documentation:  https://help.ubuntu.com
 * Management:     https://landscape.canonical.com
 * Support:        https://ubuntu.com/advantage

  Get cloud support with Ubuntu Advantage Cloud Guest:
    http://www.ubuntu.com/business/services/cloud

0 packages can be updated.
0 updates are security updates.


root@ip-172-30-4-46:~# logout
Connection to 172.30.4.46 closed.
All’s good. It’s time to configure ClusterControl.
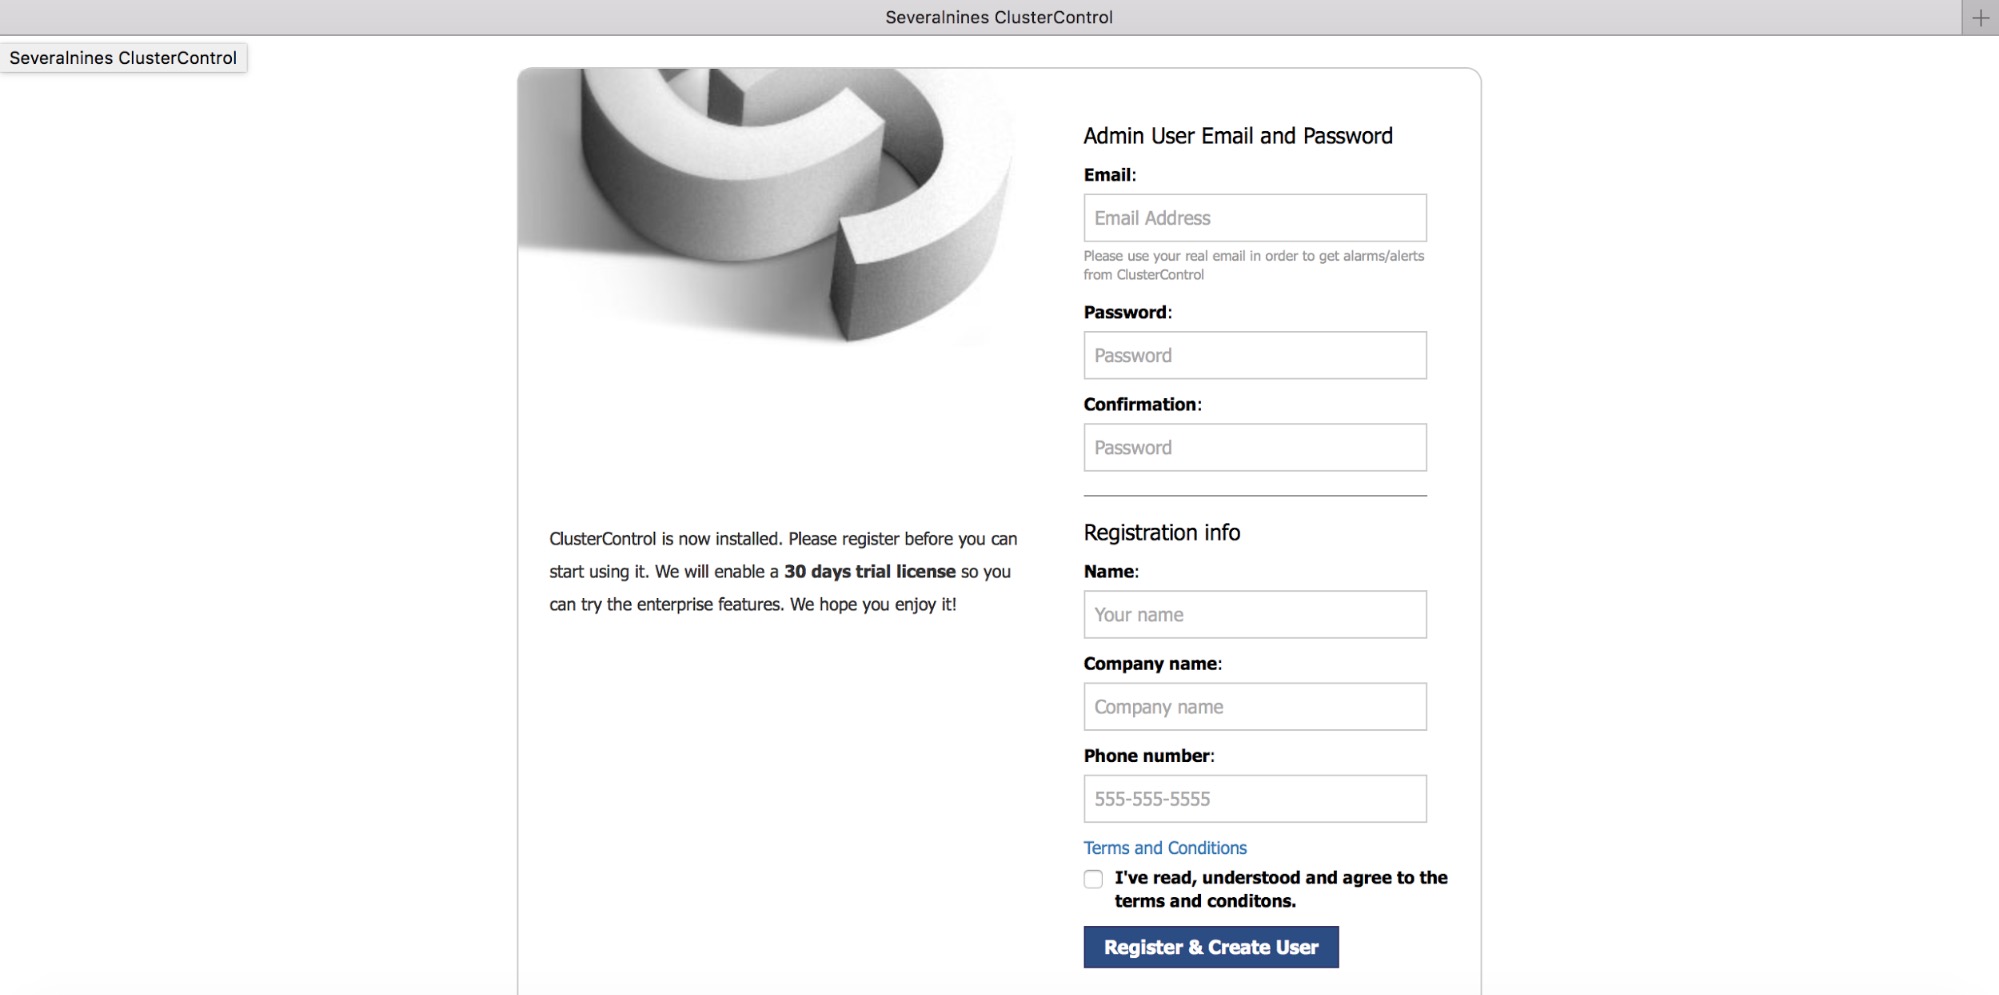
Fill in some registration details.
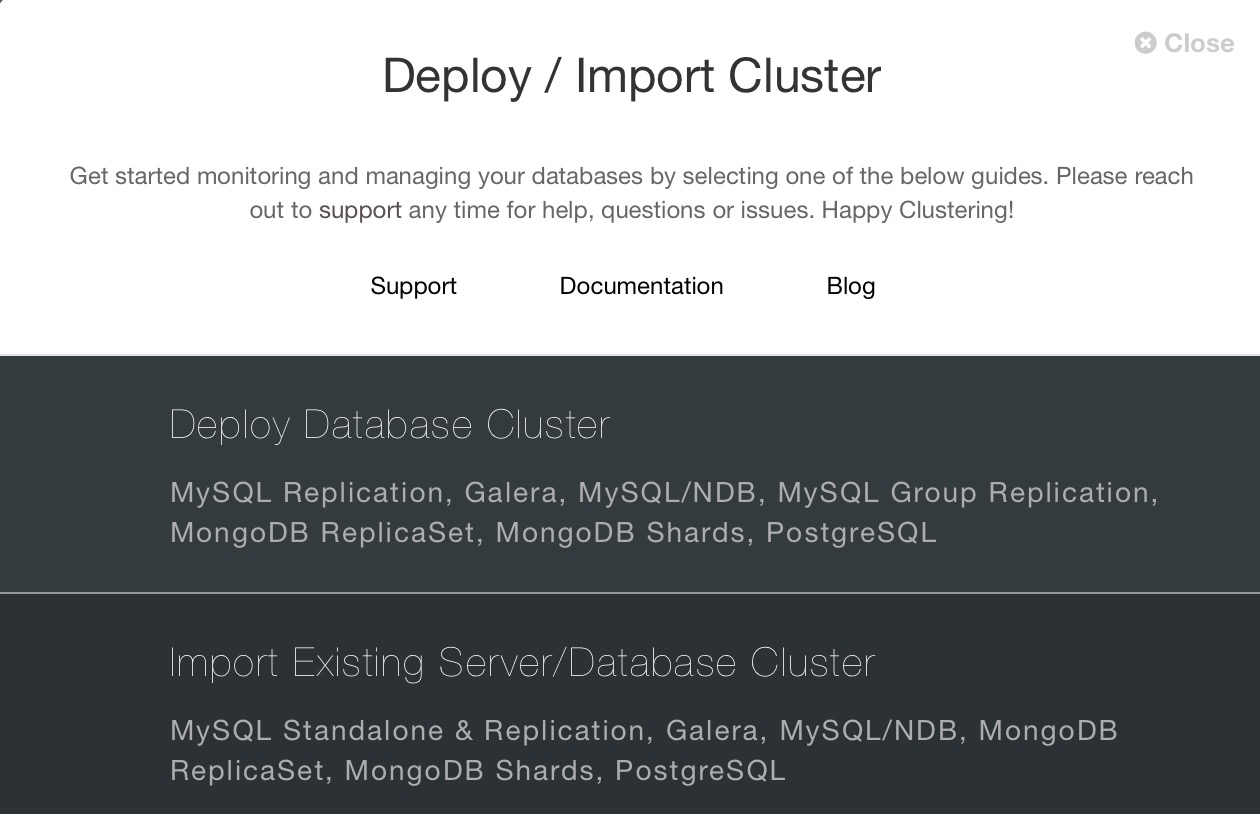
Once you have logged in, a wizard will appear with an option to either deploy new cluster or import an existing one.

We want to deploy Percona XtraDB Cluster so we’ll go for “Deploy Database Cluster” and pick the “MySQL Galera” tab. Here we have to fill in access details required for SSH connectivity. We’ll set SSH User to root and we will fill in the path to our SSH key.
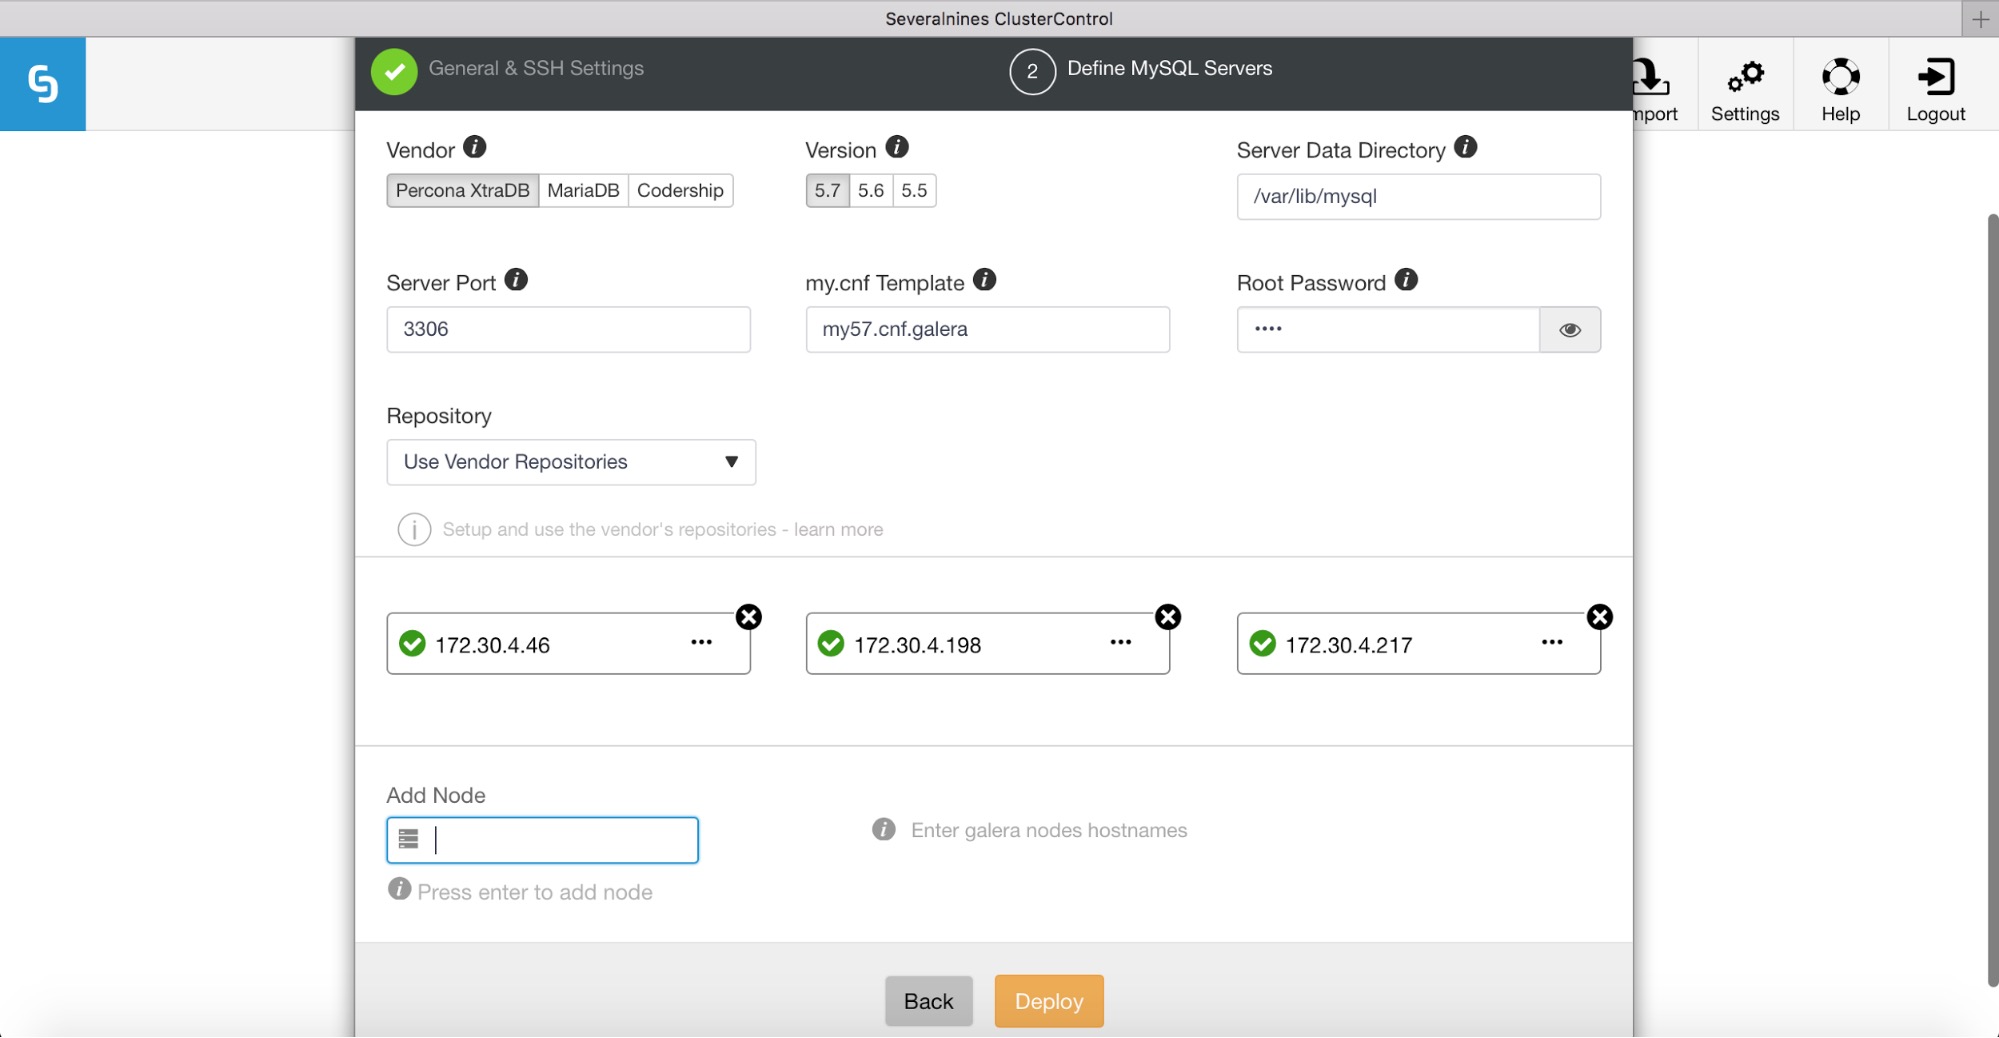
Next, we’ll define a vendor, version, password and IP addresses for our database hosts. Please keep in mind that ClusterControl will check SSH connectivity to the target database hosts. If everything works ok, you’ll see green ticks. If you see that SSH authentication failed, then you will need to investigate as the ClusterControl server is not able to access your database hosts.

Then, click on Deploy to start the deployment process.
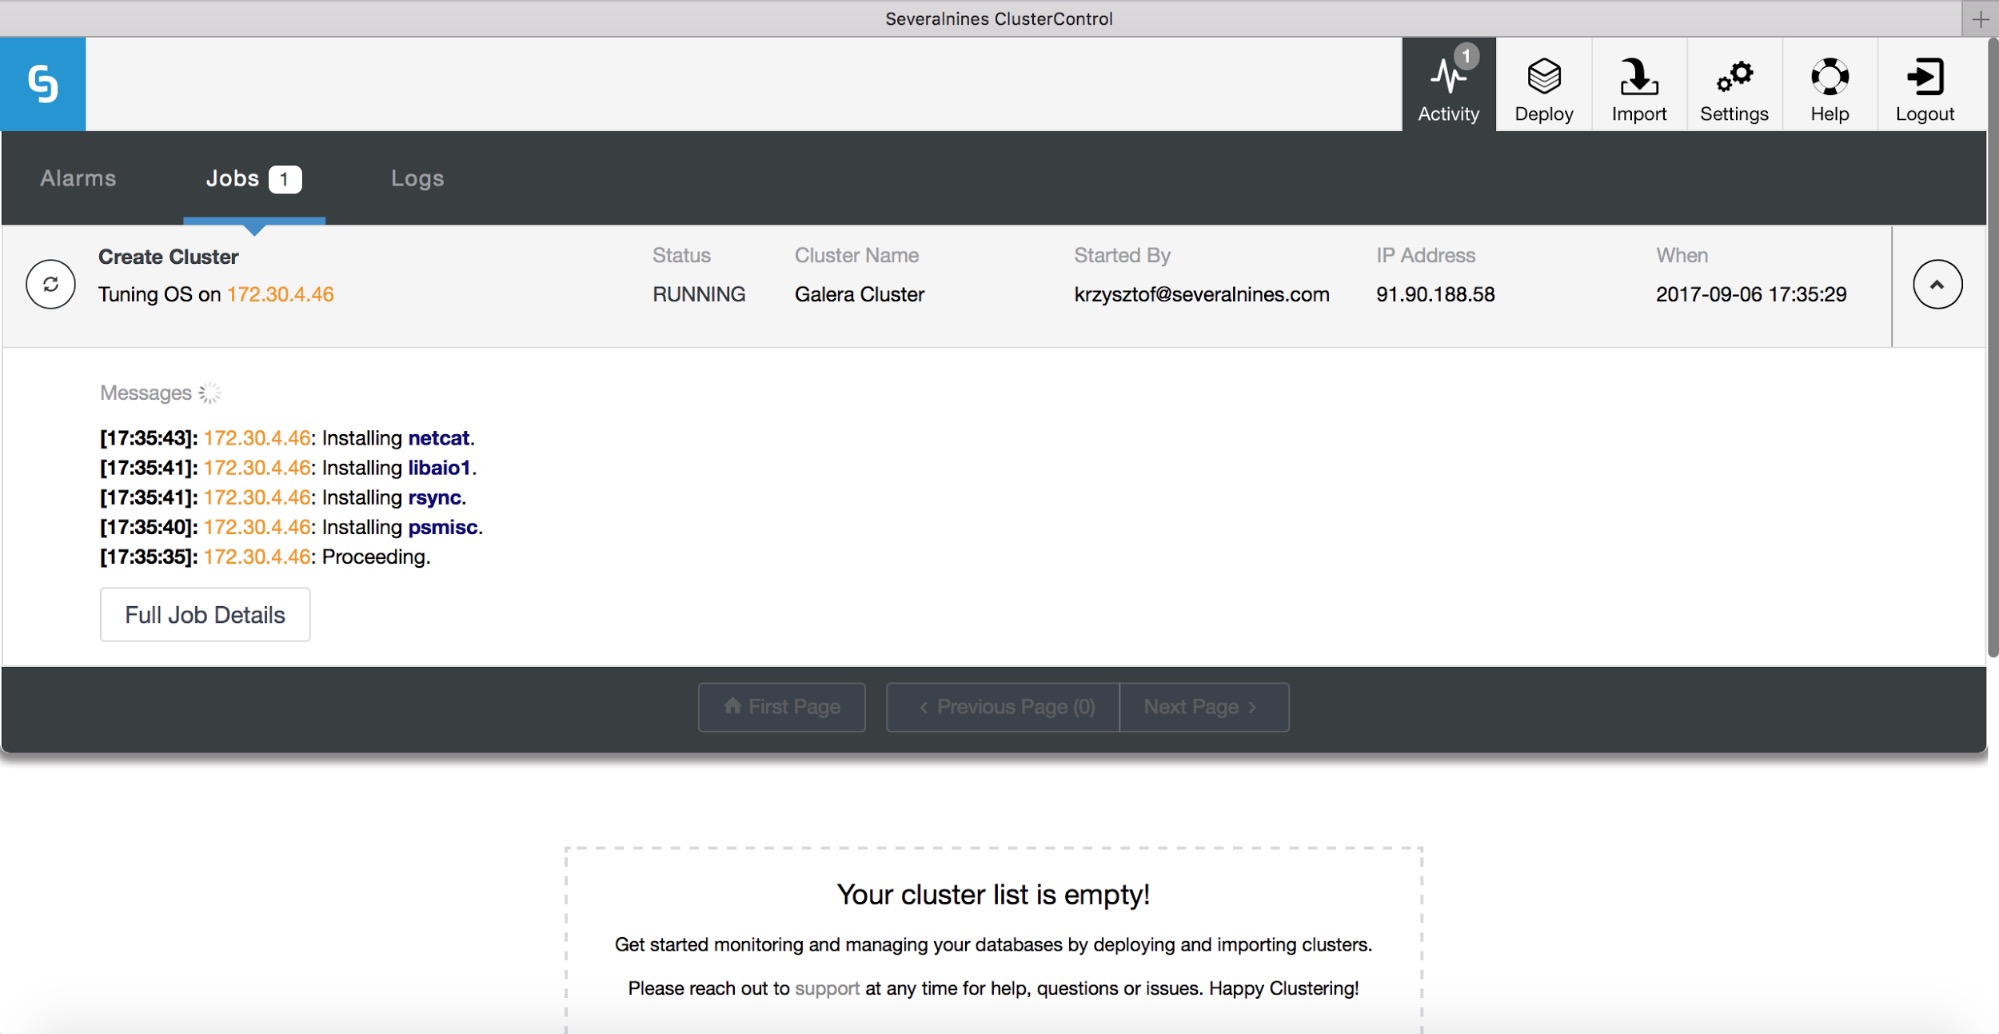
You can track the deployment progress in the activity monitor.
Remember that deployment is only the first step. Operating a database requires you to monitor performance of your hosts, database instances, queries, and manage backups, fix failures and other anomalies, manage proxies, upgrades, etc. ClusterControl can manage all these aspects for you, so do give it a try and let us know how you get on.


