blog
MySQL in the Cloud – Online Migration From Amazon RDS to EC2 Instance: Part One

In our previous blog, we saw how easy it is to get started with RDS for MySQL. It is a convenient way to deploy and use MySQL, without worrying about operational overhead. The tradeoff though is reduced control, as users are entirely reliant on Amazon staff in case of poor performance or operational anomalies. No access to the data directory or physical backups makes it hard to move data out of RDS. This can be a major problem if your database outgrows RDS, and you decide to migrate to another platform. This two-part blog shows you how to do an online migration from RDS to your own MySQL server.
We’ll be using EC2 to run our own MySQL Server. It can be a first step for more complex migrations to your own private datacenters. EC2 gives you access to your data so xtrabackup can be used. EC2 also allows you to setup SSH tunnels and it removes requirement of setting up hardware VPN connections between your on-premises infrastructure and VPC.
Assumptions
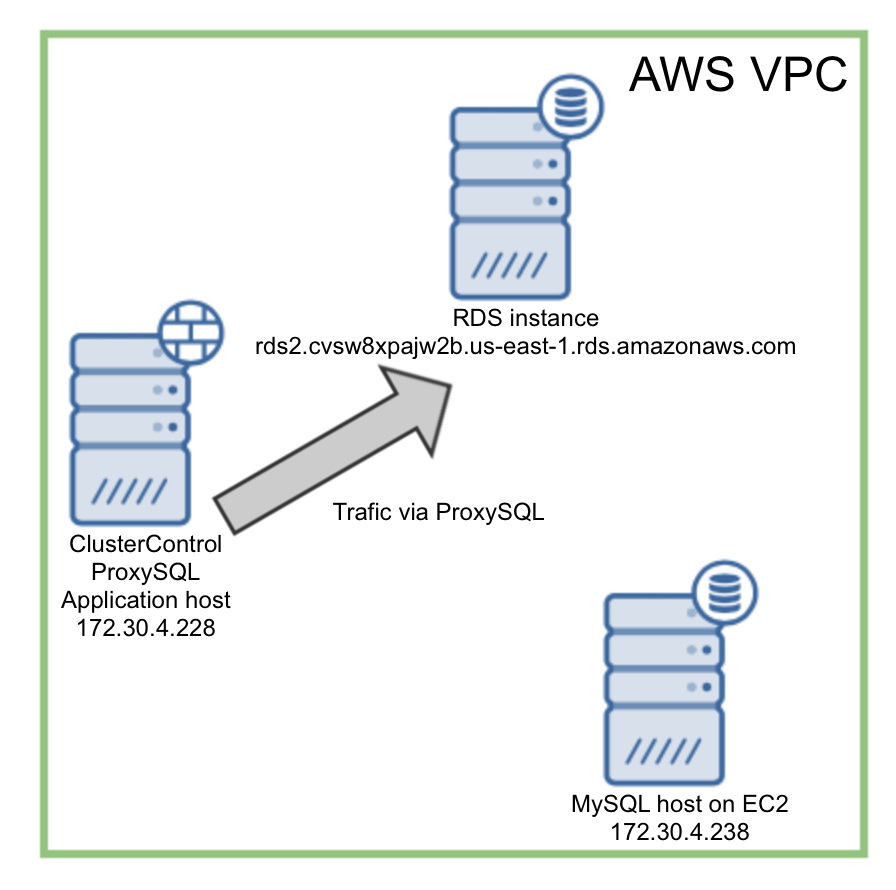
Before we start, we need to make couple of assumptions – especially around security. First and foremost, we assume that RDS instance is not accessible from outside of AWS. We also assume that you have an application in EC2. This implies that either the RDS instance and the rest of your infrastructure shares a VPC or there is access configured between them, one way or the other. In short, we assume that you can create a new EC2 instance and it will have access (or it can be configured to have the access) to your MySQL RDS instance.
We have configured ClusterControl on the application host. We’ll use it to manage our EC2 MySQL instance.
Initial Setup
In our case, the RDS instance shares the same VPC with our “application” (EC2 instance with IP 172.30.4.228) and host which will be a target for the migration process (EC2 instance with IP 172.30.4.238). As the application we are going to use tpcc-MySQL benchmark executed in the following way:
./tpcc_start -h rds2.cvsw8xpajw2b.us-east-1.rds.amazonaws.com -d tpcc1000 -u tpcc -p tpccpass -w 20 -r 60 -l 600 -i 10 -c 4Initial Plan
We are going to perform a migration using the following steps:
- Setup our target environment using ClusterControl – install MySQL on 172.30.4.238
- Then, install ProxySQL, which we will use to manage our traffic at the time of failover
- Dump the data from the RDS instance
- Load the data into our target host
- Set up replication between RDS instance and target host
- Switchover traffic from RDS to target host
Prepare Environment Using ClusterControl
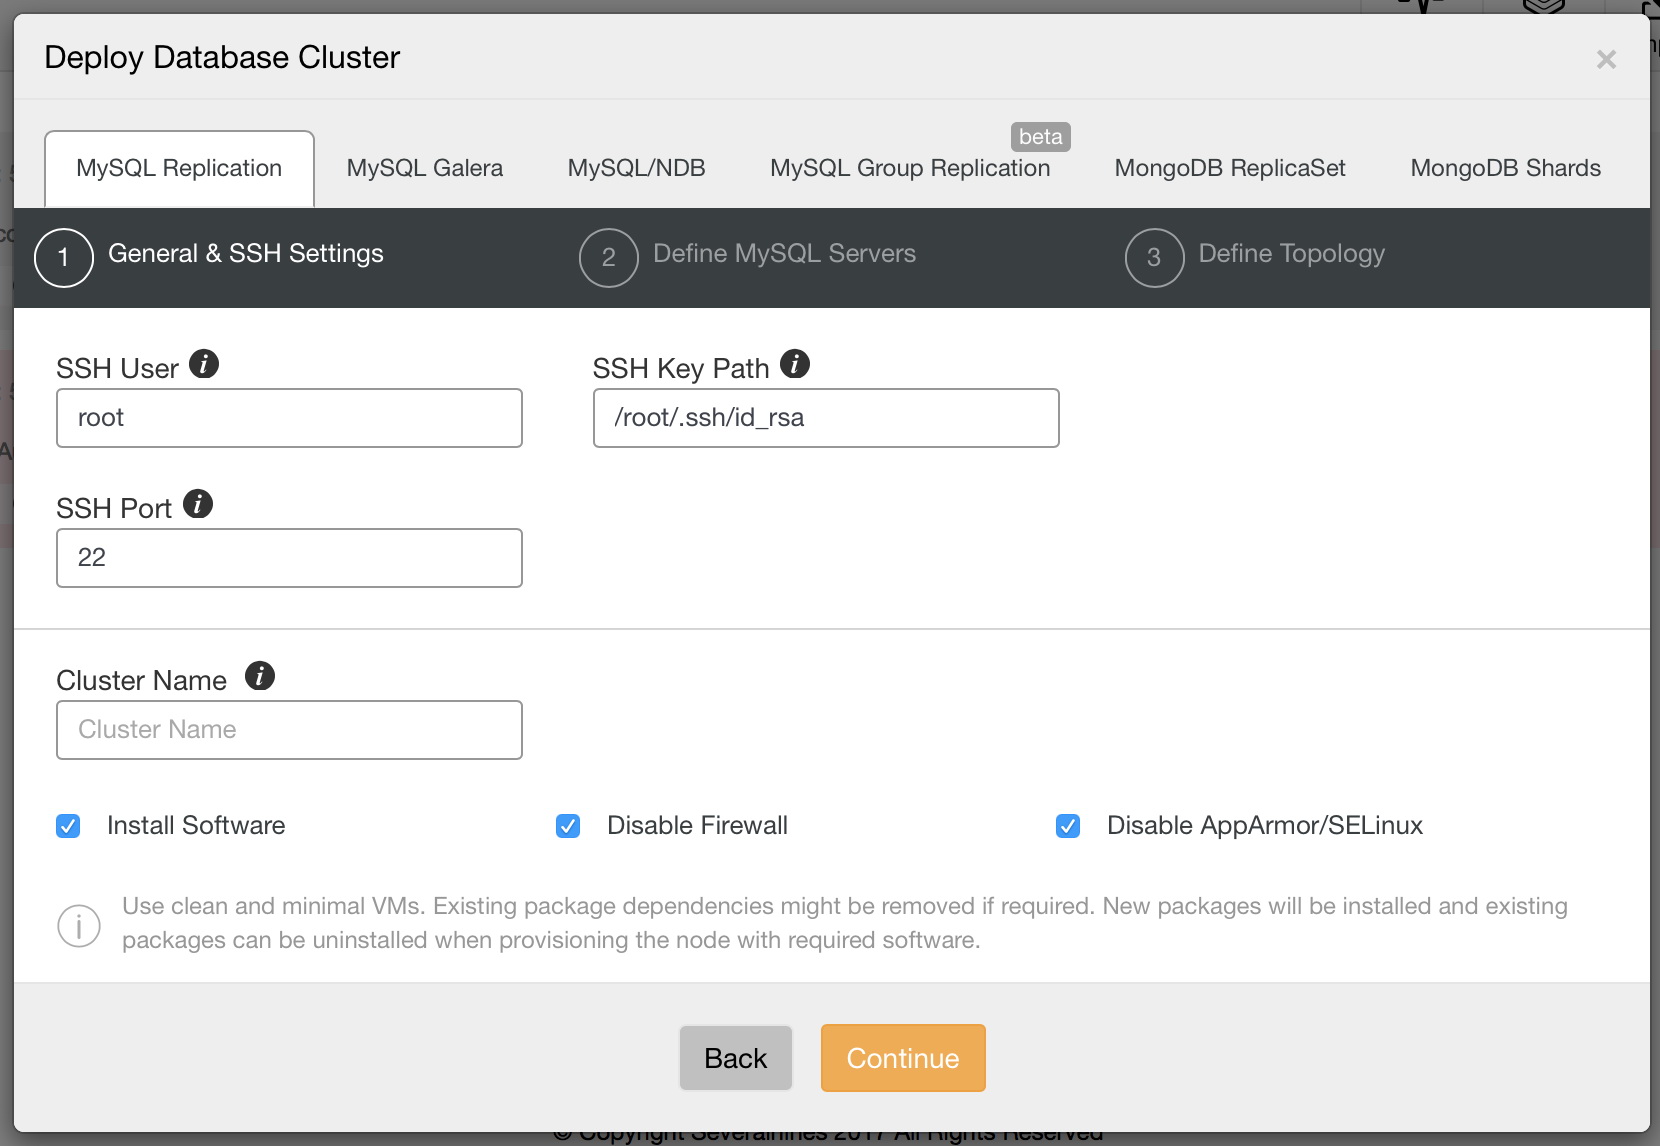
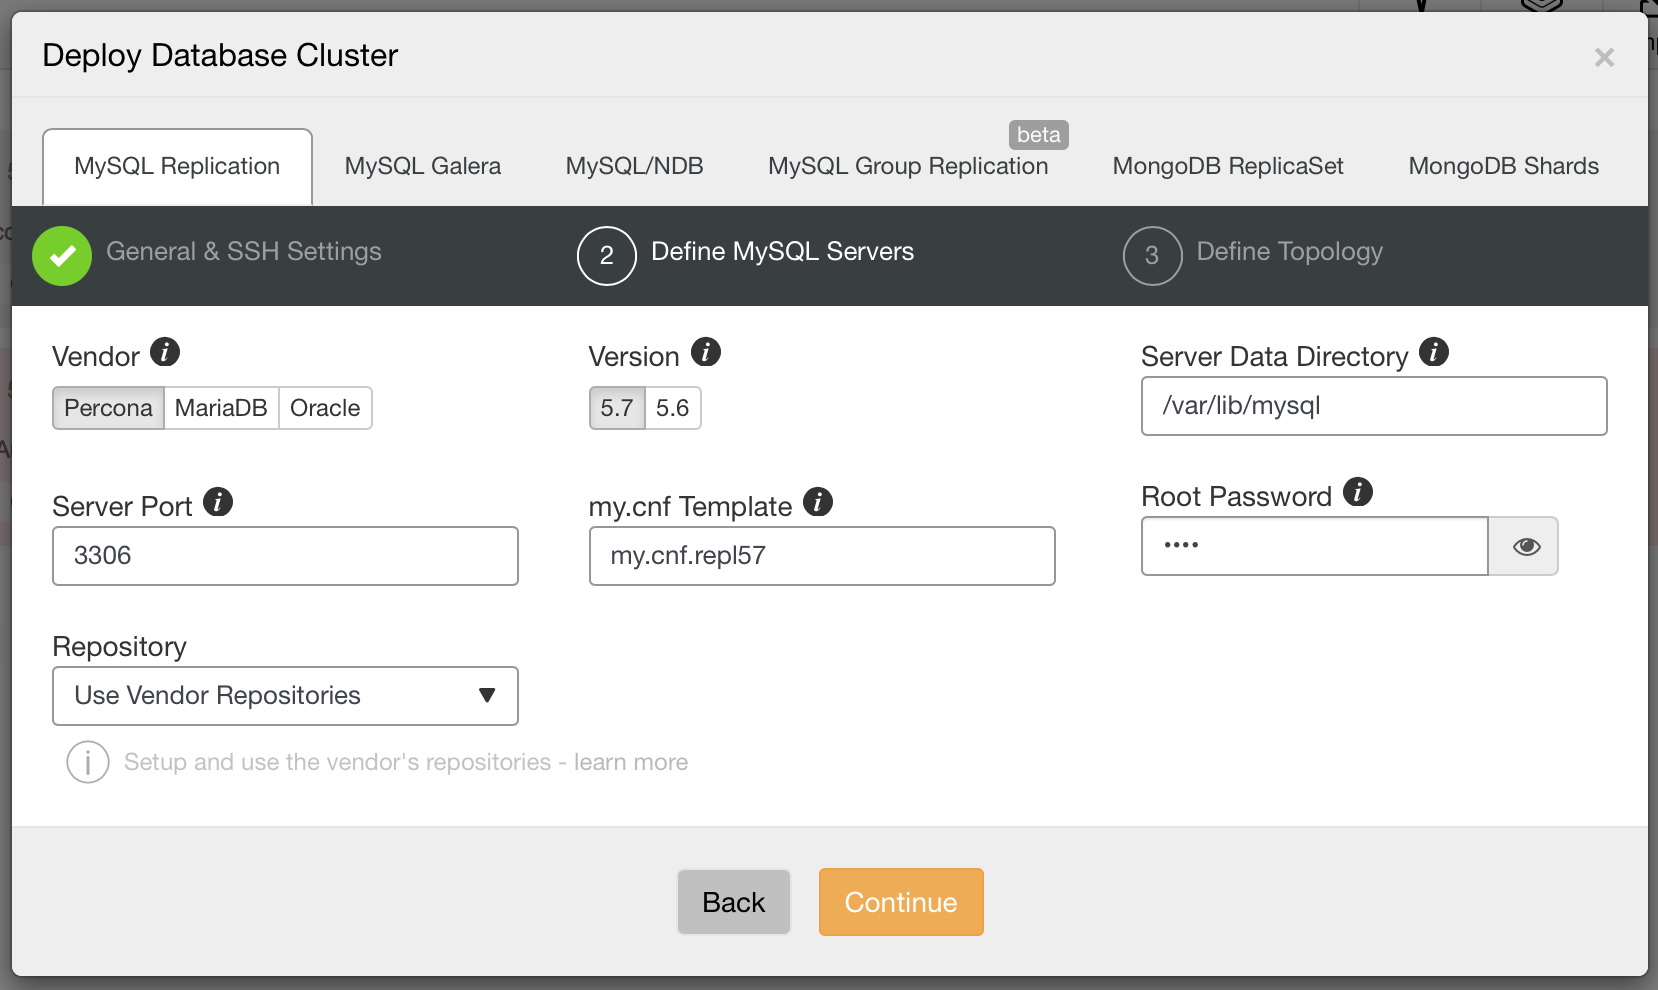
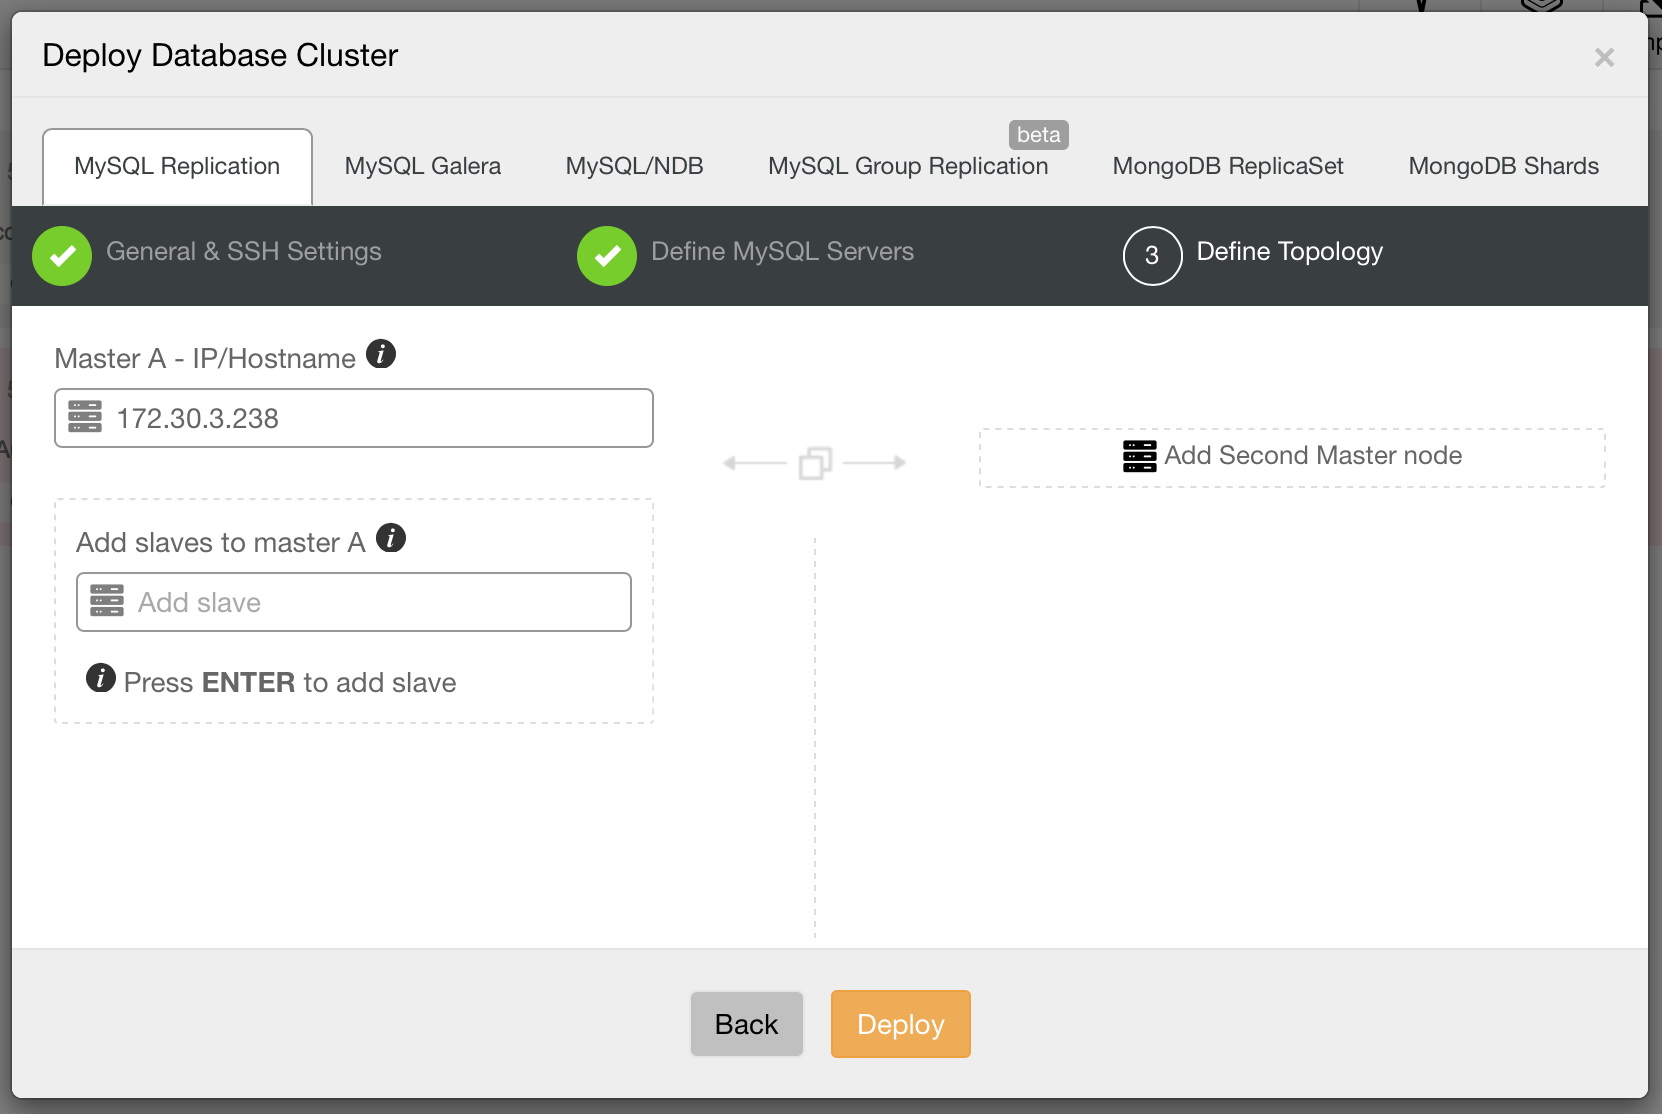
Assuming we have ClusterControl installed (if you don’t you can grab it from: https://severalnines.com/download-clustercontrol-database-management-system), we need to setup our target host. We will use the deployment wizard from ClusterControl for that:
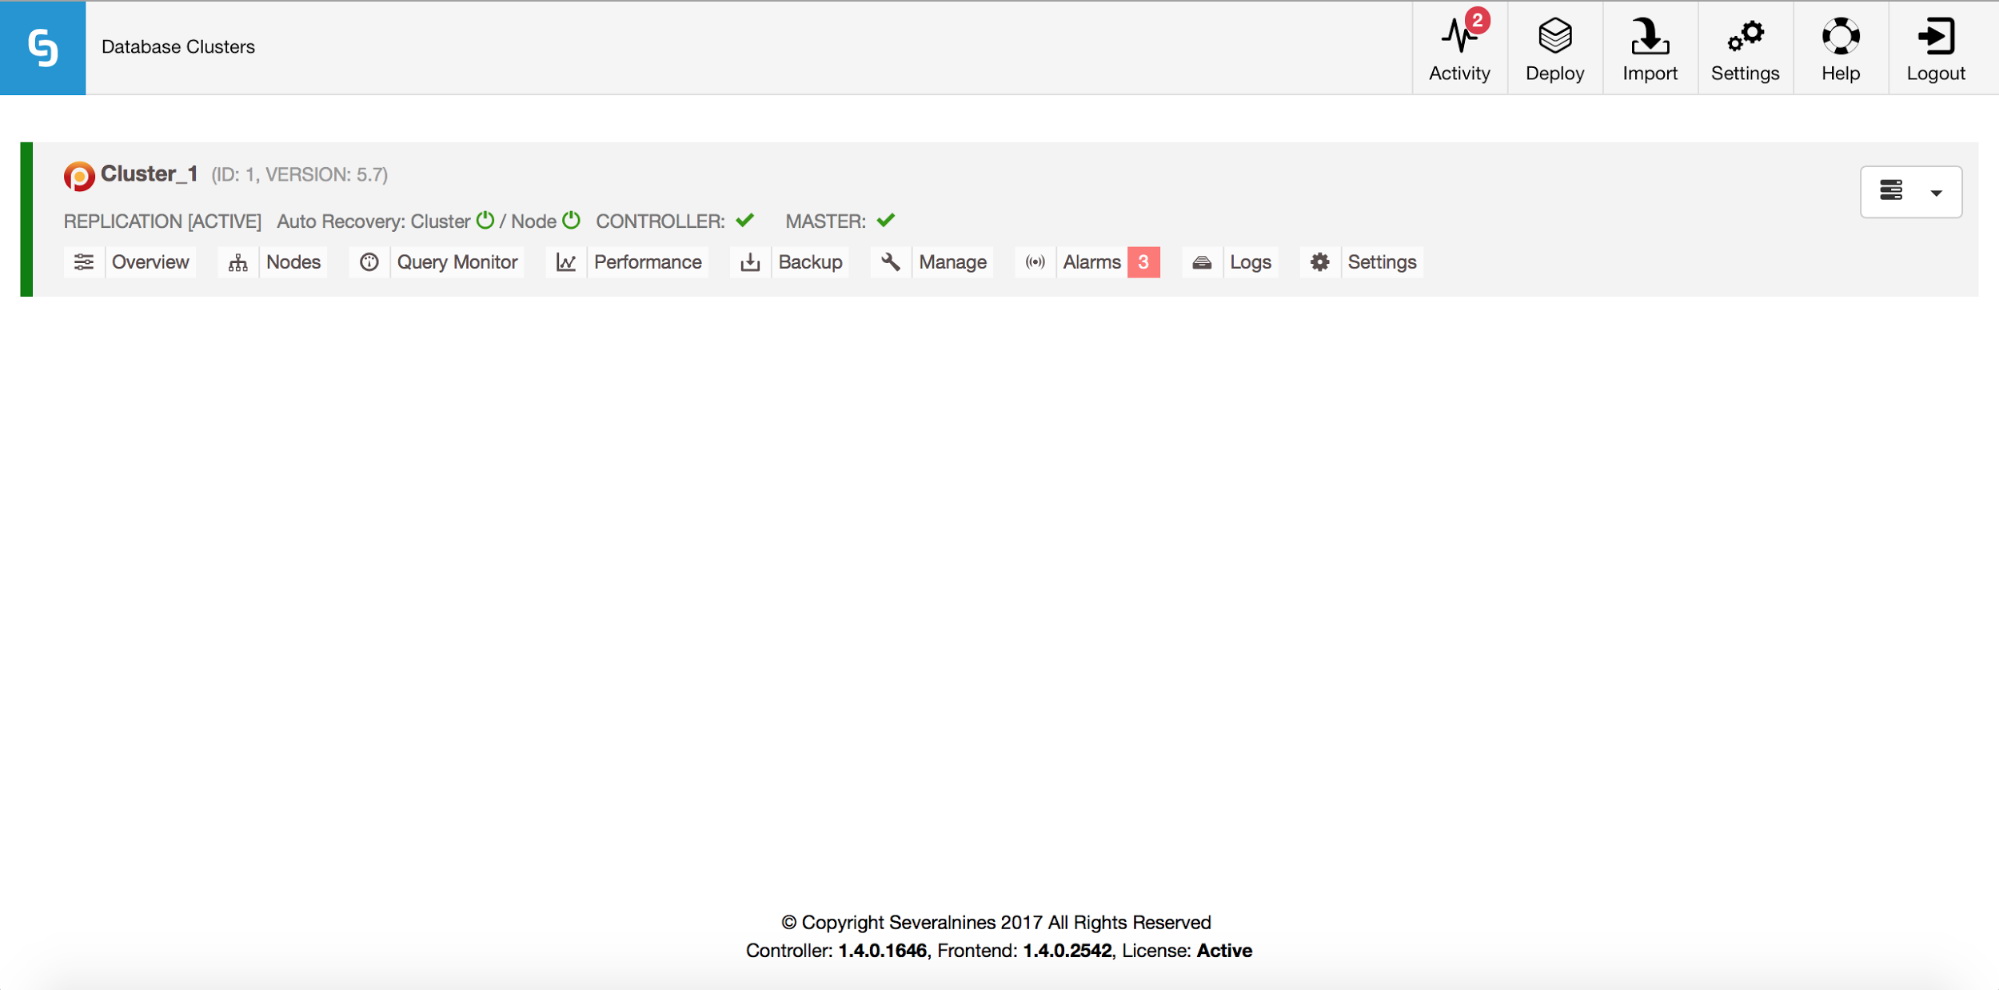
Once this is done, you will see a new cluster (in this case, just your single server) in the cluster list:
Next step will be to install ProxySQL – starting from ClusterControl 1.4 you can do it easily from the UI. We covered this process in details in this blog post. When installing it, we picked our application host (172.30.4.228) as the host to install ProxySQL to. When installing, you also have to pick a host to route your traffic to. As we have only our “destination” host in the cluster, you can include it but then couple of changes are needed to redirect traffic to the RDS instance.
If you have chosen to include destination host (in our case it was 172.30.4.238) in the ProxySQL setup, you’ll see following entries in the mysql_servers table:
mysql> select * from mysql_serversG
*************************** 1. row ***************************
       hostgroup_id: 20
           hostname: 172.30.4.238
               port: 3306
             status: ONLINE
             weight: 1
        compression: 0
    max_connections: 100
max_replication_lag: 10
            use_ssl: 0
     max_latency_ms: 0
            comment: read server
*************************** 2. row ***************************
       hostgroup_id: 10
           hostname: 172.30.4.238
               port: 3306
             status: ONLINE
             weight: 1
        compression: 0
    max_connections: 100
max_replication_lag: 10
            use_ssl: 0
     max_latency_ms: 0
            comment: read and write server
2 rows in set (0.00 sec)
ClusterControl configured ProxySQL to use hostgroups 10 and 20 to route writes and reads to the backend servers. We will have to remove the currently configured host from those hostgroups and add the RDS instance there. First, though, we have to ensure that ProxySQL’s monitor user can access the RDS instance.
mysql> SHOW VARIABLES LIKE 'mysql-monitor_username';
+------------------------+------------------+
| Variable_name          | Value            |
+------------------------+------------------+
| mysql-monitor_username | proxysql-monitor |
+------------------------+------------------+
1 row in set (0.00 sec)
mysql> SHOW VARIABLES LIKE 'mysql-monitor_password';
+------------------------+---------+
| Variable_name | Value |
+------------------------+---------+
| mysql-monitor_password | monpass |
+------------------------+---------+
1 row in set (0.00 sec)We need to grant this user access to RDS. If we need it to track replication lag, the user would have to have then‘REPLICATION CLIENT’ privilege. In our case it is not needed as we don’t have slave RDS instance – ‘USAGE’ will be enough.
root@ip-172-30-4-228:~# mysql -ppassword -h rds2.cvsw8xpajw2b.us-east-1.rds.amazonaws.com
Welcome to the MySQL monitor.  Commands end with ; or g.
Your MySQL connection id is 210
Server version: 5.7.16-log MySQL Community Server (GPL)

Copyright (c) 2000, 2016, Oracle and/or its affiliates. All rights reserved.

Oracle is a registered trademark of Oracle Corporation and/or its
affiliates. Other names may be trademarks of their respective
owners.

Type 'help;' or 'h' for help. Type 'c' to clear the current input statement.
mysql> CREATE USER 'proxysql-monitor'@172.30.4.228 IDENTIFIED BY 'monpass';
Query OK, 0 rows affected (0.06 sec)Now it’s time to reconfigure ProxySQL. We are going to add the RDS instance to both writer (10) and reader (20) hostgroups. We will also remove 172.30.4.238 from those hostgroups – we’ll just edit them and add 100 to each hostgroup.
mysql> INSERT INTO mysql_servers (hostgroup_id, hostname, max_connections, max_replication_lag) VALUES (10, 'rds2.cvsw8xpajw2b.us-east-1.rds.amazonaws.com', 100, 10);
Query OK, 1 row affected (0.00 sec)
mysql> INSERT INTO mysql_servers (hostgroup_id, hostname, max_connections, max_replication_lag) VALUES (20, 'rds2.cvsw8xpajw2b.us-east-1.rds.amazonaws.com', 100, 10);
Query OK, 1 row affected (0.00 sec)mysql> UPDATE mysql_servers SET hostgroup_id=110 WHERE hostname='172.30.4.238' AND hostgroup_id=10;
Query OK, 1 row affected (0.00 sec)mysql> UPDATE mysql_servers SET hostgroup_id=120 WHERE hostname='172.30.4.238' AND hostgroup_id=20;
Query OK, 1 row affected (0.00 sec)mysql> LOAD MYSQL SERVERS TO RUNTIME;
Query OK, 0 rows affected (0.01 sec)mysql> SAVE MYSQL SERVERS TO DISK;
Query OK, 0 rows affected (0.07 sec)Last step required before we can use ProxySQL to redirect our traffic is to add our application user to ProxySQL.
mysql> INSERT INTO mysql_users (username, password, active, default_hostgroup) VALUES ('tpcc', 'tpccpass', 1, 10);
Query OK, 1 row affected (0.00 sec)
mysql> LOAD MYSQL USERS TO RUNTIME; SAVE MYSQL USERS TO DISK; SAVE MYSQL USERS TO MEMORY;
Query OK, 0 rows affected (0.00 sec)
Query OK, 0 rows affected (0.05 sec)
Query OK, 0 rows affected (0.00 sec)mysql> SELECT username, password FROM mysql_users WHERE username='tpcc';
+----------+-------------------------------------------+
| username | password |
+----------+-------------------------------------------+
| tpcc | *8C446904FFE784865DF49B29DABEF3B2A6D232FC |
+----------+-------------------------------------------+
1 row in set (0.00 sec)Quick note – we executed “SAVE MYSQL USERS TO MEMORY;” only to have password hashed not only in RUNTIME but also in working memory buffer. You can find more details about ProxySQL’s password hashing mechanism in their documentation.
We can now redirect our traffic to ProxySQL. How to do it depends on your setup, we just restarted tpcc and pointed it to ProxySQL.
At this point, we have built a target environment to which we will migrate. We also prepared ProxySQL and configured it for our application to use. We now have a good foundation for the next step, which is the actual data migration. In the next post, we will show you how to copy the data out of RDS into our own MySQL instance (running on EC2). We will also show you how to switch traffic to your own instance while applications continue to serve users, without downtime.